Week 3: Computer Controlled Cutting
Group assignment:
- Characterize your lasercutter's focus, power, speed, rate, kerf, joint clearance and types.
- Document your work to the group work page and reflect on your individual page what you learned.
For this week's group assignment, we were tasked with thoroughly understanding and characterizing various aspects of laser cutters. Our main focus was on parameters like focus, power, speed, rate, kerf, and joint clearance.
Laser Cutter:
Techical Specifications:
Work area: 24″ x 12″ (610 x 305mm)
Material thickness: 7″ (178 mm)
Camera system: 1 overhead
Wire connectivity: Included
Resolution: Fully-flexible & user-controlled from 75 – 1200 dpi
Maximum engraving speed: 120 IPS (3.05 m/s) with 5G acceleration. Computer-controlled in .001 increments up to 100%. Color mapping feature links Speed, Power, Frequency, and Raster/Vector mode.
Internal memory: Store multiple files up to 1 GB. Engrave any file size.
Operating modes: Optimized Raster, Vector, and Combined mode.
Auto focus: Included
Ventilation: 350-400 CFM (595-680 m3/hr) external exhaust to outside or internal filtration unit required. One output port, 4″ (102 mm) diameter
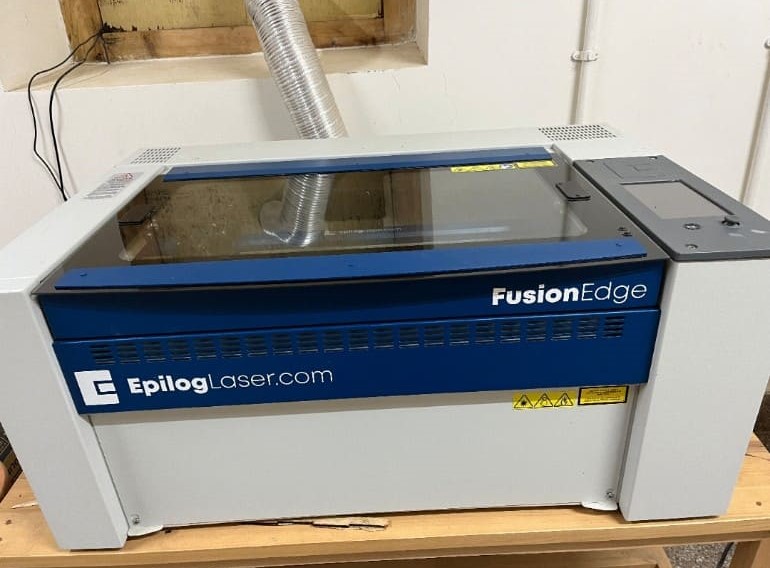
This is the laser cutter that we have in our lab
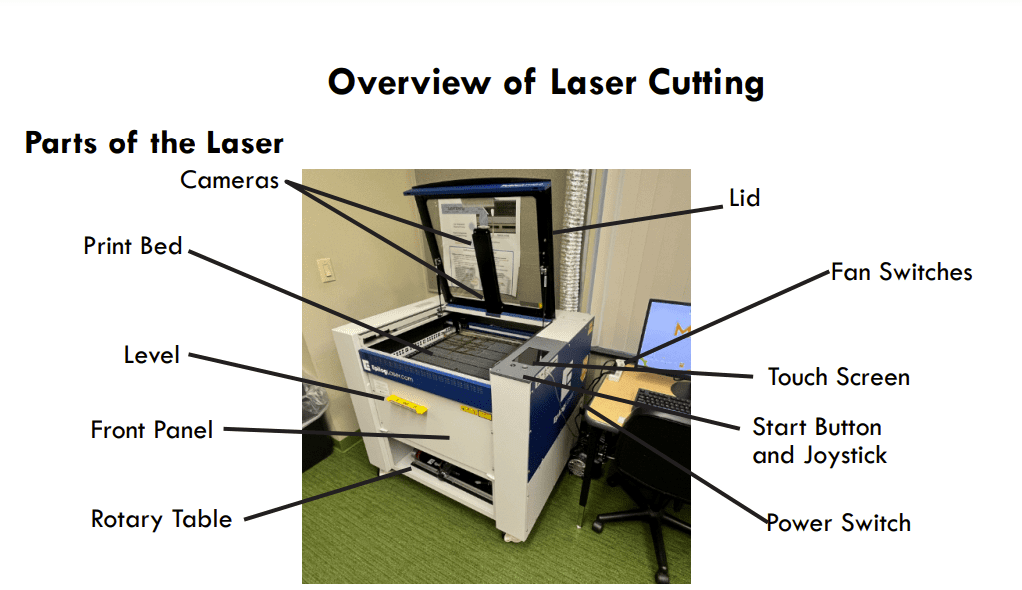
Here is an overview of the laser cutter that I got from google:
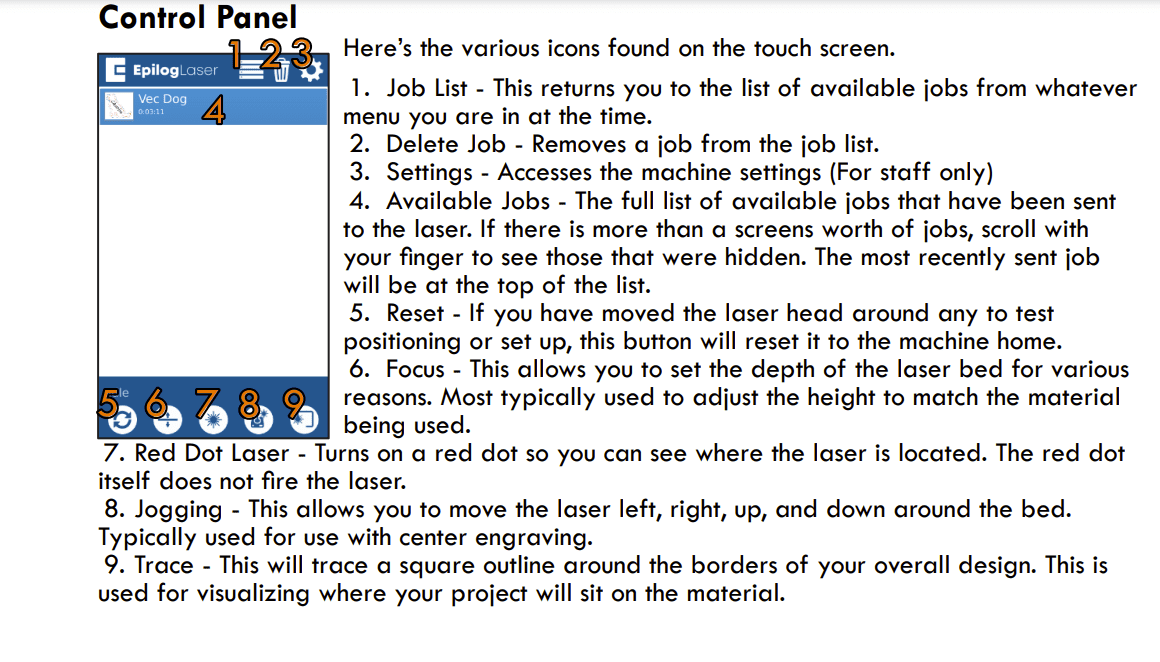
These are all the functionalities of the touch screen control panel that I got from google:
Characterizing Laser Cutter's Speed and Power!!
Power
Laser power can be defined as the "rate at which energy is emitted from a laser." Put plainly, it indicates how quickly a laser releases energy.
Power is a crucial parameter in laser systems and plays a significant role in determining the cutting, engraving, or marking capabilities of a cutting or engraving machine.
Speed
Laser cutting speed refers to how quickly material is cut using a laser, expressed as length per unit time (e.g., inches/minute or millimeters/second). This speed varies based on factors such as material type, thickness, cut width, and laser power.
Speed is another critical factor when operating a laser cutter. If the cutting speed is excessively high, the laser may fail to cut through the entire thickness of the material. On the other hand, if the speed is too slow, the laser may burn the edges of the cut, leading to an unsatisfactory outcome.
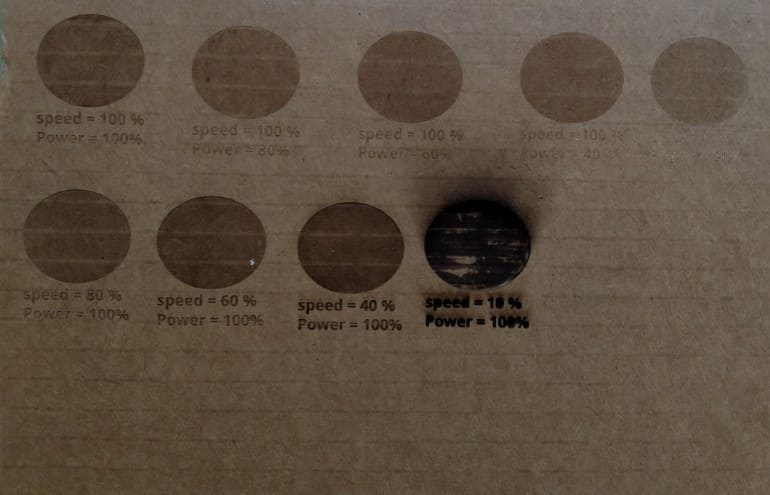
First, we started by analysing the laser cutter's speed and power by cutting the same design but with varying speed and power. Now, let's dive deeper into what the power and speed in laser cutting indicates.
In the first row we tried different powers while keeping the speed constant and we noticed that the cut got lighter and lighter as we decreased the power.
- As the power increases, the number of units produced per hour also increases. Thus, the cut gets lighter as we move across the row.
In the second row we tried different speed while keeping the power constant and we noticed that the carboard burned more and more as the speed decreased.
- Therefore, we concluded that the burn was caused because by decreasing the cutting speed, we increased the amount of time the laser interacted with the material.
KERF
Kerf is defined as the width of a cut or width of a material that is removed by a cutting process.
Did you know?
The word "kerf" gets it’s origins from Middle English “kerf, kirf, kyrf”, from Old English “cyrf” (“an act of cutting, a cutting off; a cutting instrument”)
Laser Cutter Kerf Measurement:
For this week, one of our assignments was to characerize the laser cutter's kerf. Now, measuring kerf size accurately is essential to ensuring your laser machine's performance for your desired outcome.
The best example to explain the importance of kerf would be while making pressfit designs. So, usually when we make pressfit designs, we make the slot width equal to the material thickness but little do we know that the laser cutter removes a small width of the material resulting in a loose joint.
This is where kerf comes into scene, so if we measure the kerf and perform the following calculation:
material_thickness - kerf = slot_width
we will be able to make our slot width equal to the material thickness resulting in a fitting joint.
How to Measure Kerf?
These are the steps that we followed to measure the laser kerf:
Design a piece with known dimensions. Keep it fairly small.
Cut it with the laser cutter.
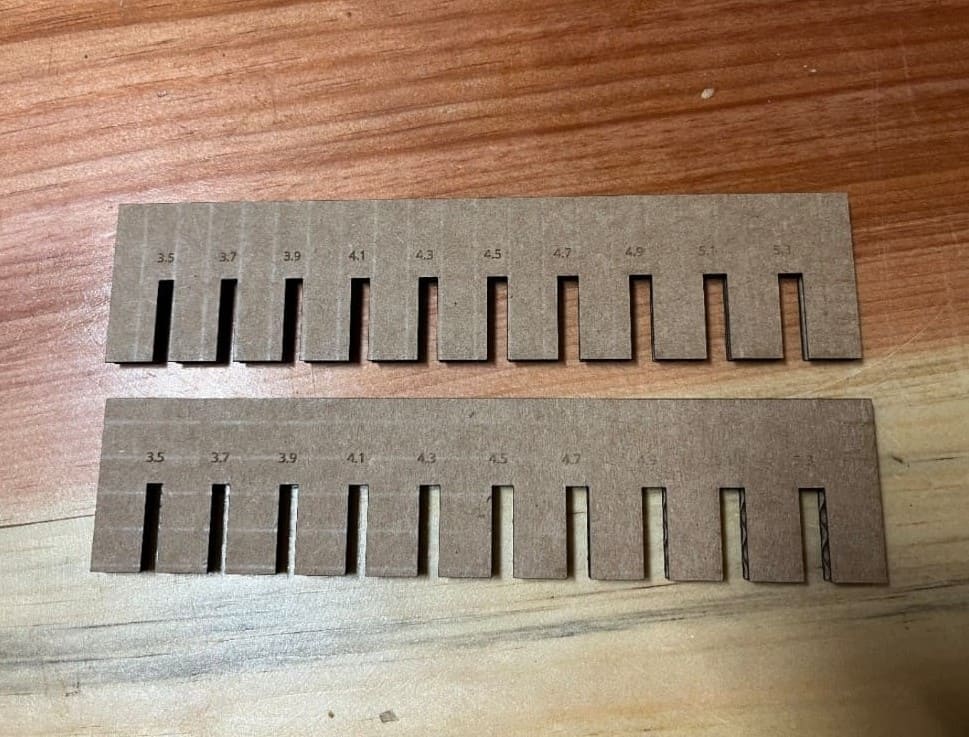
In our case we designed a simple shape with slots which differed in size by 0.2 mm
- Measure the slot width.
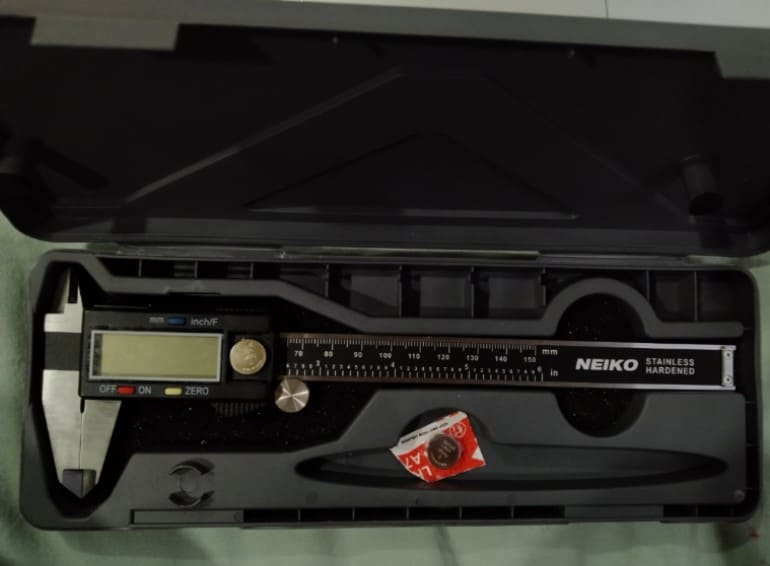
We used a digital caliper to measure the slots accurately
Compare this to the measurement that you had in your file and calculate the difference between them.
Divide the result from this calculation by two. (Since you have two lines that were cut, left and right or top and bottom).
Here is the basic equation for measuring the laser kerf:
(actual cut - intended cut)/2 = KERFHowever the calculation would be:
(intended cut - actual cut )/2 = KERFif you are measuring a shape cut by the machine and not the slot that is left after the shape is cut.
- For example: a square piece
These are the results that we got:
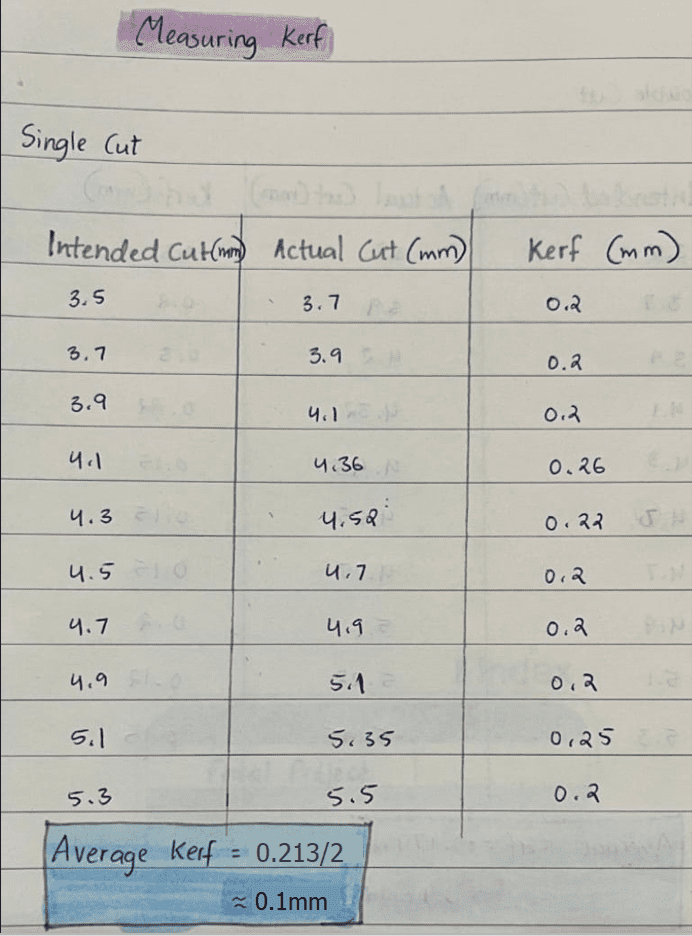
We got our average kerf as 0.1 mm!!