Moulding and Casting-Group Work
Group Assignment for Week 12
Group Assignment:
Review the safety data sheets for each of your molding and casting materials
Make and compare test casts with each of them
Compare printing vs milling molds
What is Moulding and Casting
 Molding:
Molding involves creating a hollow cavity (a mold) that matches the shape of the desired object. This mold is then filled with a material that can take its shape, such as liquid plastic or molten metal. Once the material inside the mold hardens or sets, it takes on the shape of the mold.
Casting:
Casting is the process of pouring a material, usually a liquid or molten substance, into a mold to create a copy of the original object. The material fills the mold and takes its shape, then solidifies or cools down to form the final product. This technique allows for the creation of multiple identical copies of the same object.
Molding creates the shape of the object's cavity (negative space), while casting fills that shape to create the final object (positive space).
Vocabulary

- Positive Mold A positive mold is a mold that replicates the shape and details of the original object. It's used to create exact copies of the object.
- Negative Mold A negative mold is a mold created as the inverse of the original object. It represents the space the original object occupied and can be used to create replicas.
- Pot lifePot life, also known as working time, is a term often used in the context of casting, molding, and other fabrication processes. It refers to the period during which a mixed material, such as resin or plaster, remains in a liquid state and is workable. After this time, the material begins to harden or cure, making it difficult or impossible to manipulate. The length of the pot life can vary depending on the specific material and environmental conditions such as temperature and humidity.
- Cure timeCure time refers to the period required for a material, such as resin or plaster, to fully harden or set after it has been mixed and applied. The length of the cure time can vary widely depending on the specific material, its formulation, the volume used, and environmental conditions such as temperature and humidity.
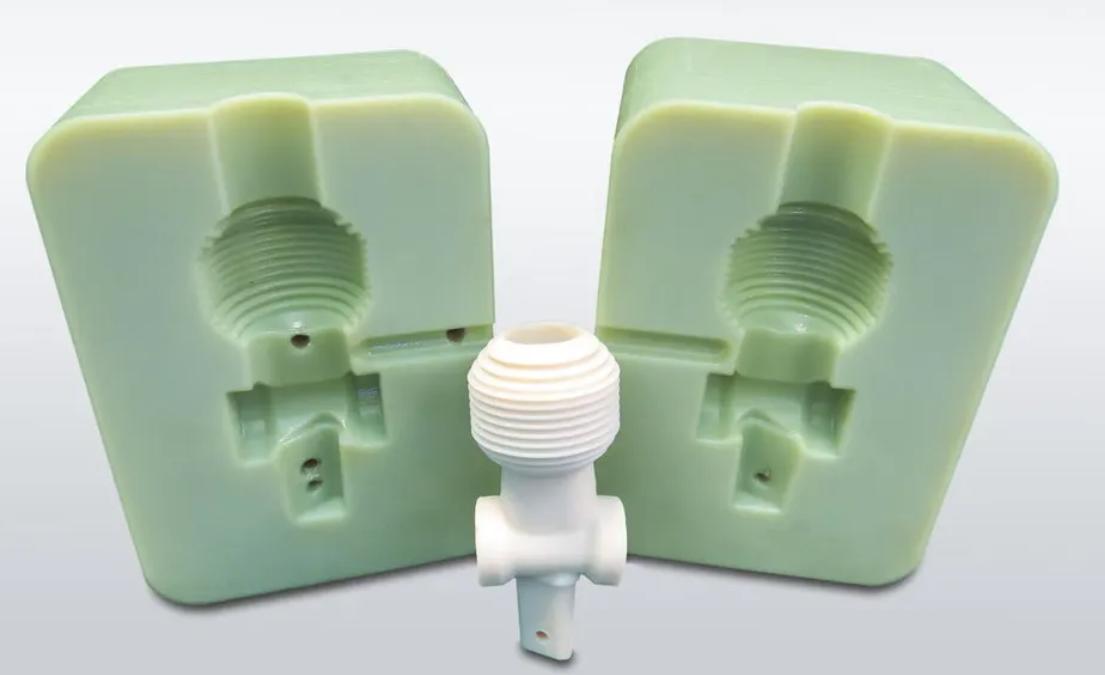
- Injection Molding: Heating up material until it's liquid, then shooting it into a mold at high pressure to shape it into things like plastic toys or parts for machines.
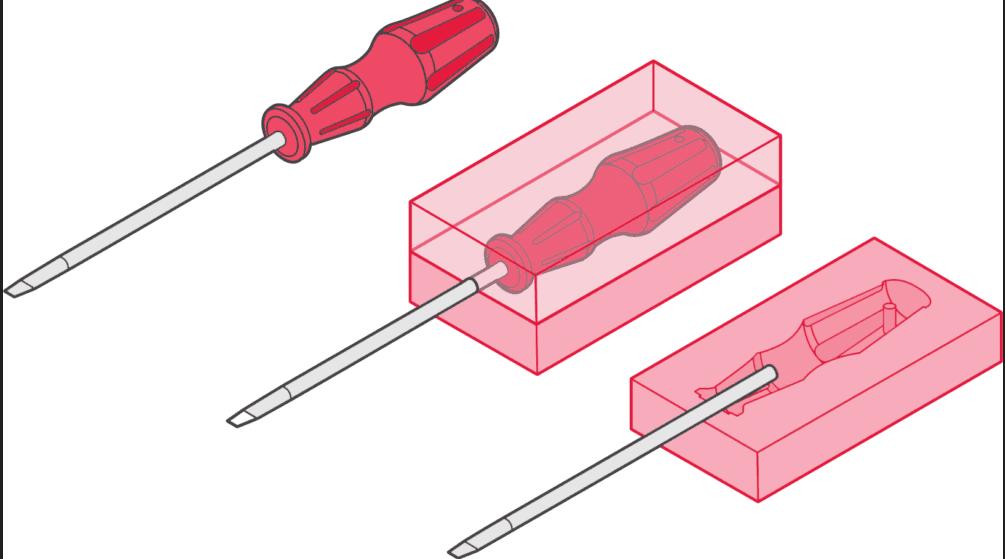
- Insert Molding: Placing metal or other materials into the mold before injecting the plastic, so they become part of the finished product.
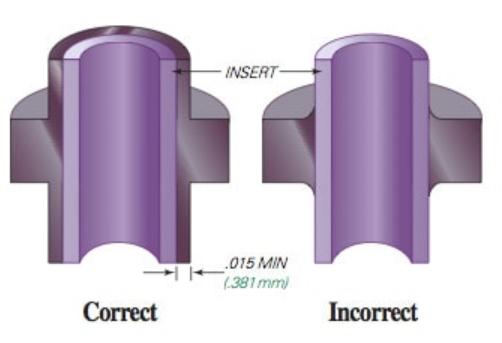
- Overmolding: Adding another layer of material onto an existing part to give it extra features or protection.
- Blow Molding: Inflating a heated plastic tube inside a mold, like blowing up a balloon, to create hollow objects such as bottles or containers.

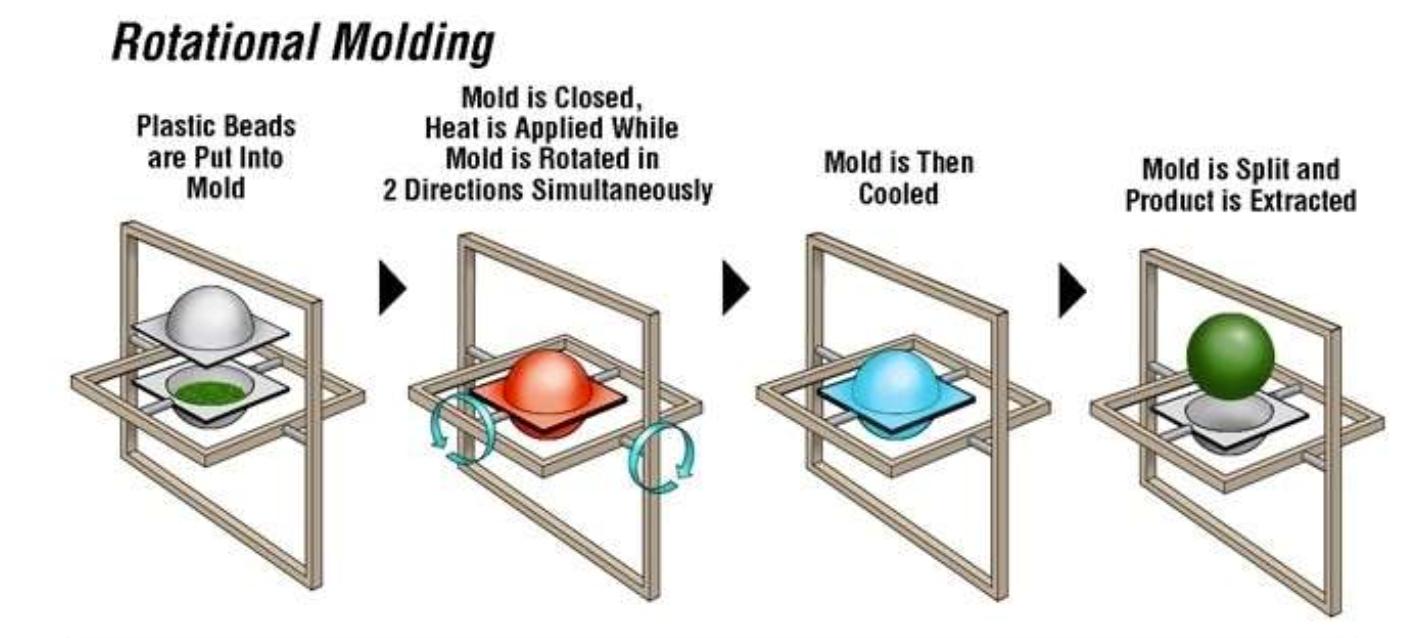
- Rotational Molding: Rotating the mold while heating it, allowing the material to evenly coat the inside and form hollow or large parts with consistent thickness.
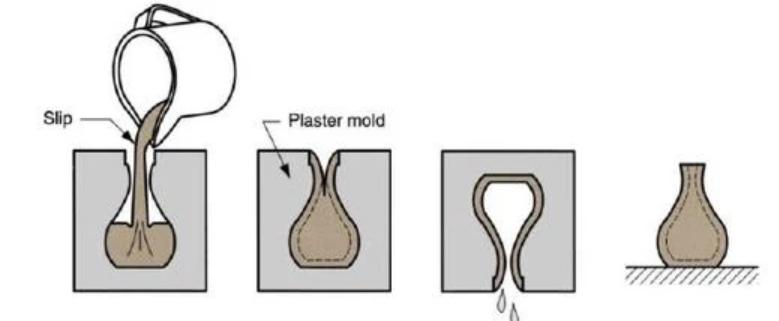
- Slip Casting: Pouring a slurry of liquid material (like clay) into a porous mold, where water is absorbed, leaving behind a solid object.
- Die Casting: Forcing molten metal into a mold cavity under high pressure, producing precise metal parts with fine details.

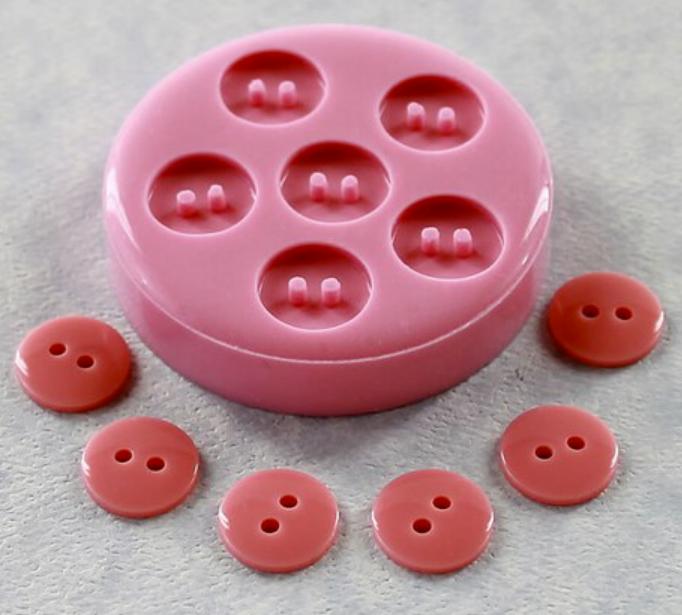
- Flexible Molds: Making molds from materials that can bend or stretch, allowing for easier removal of the casted object without damaging it.
- Materials: Various substances like foam, rubber, plastic, metal, or clay used as raw materials for casting different objects.

- Additives: Substances added to the base material to alter its properties, such as making it stronger, more flexible, or resistant to heat.
- Safety: Ensuring proper handling of materials, ventilation to avoid inhaling fumes, using protective gear, and disposing of waste responsibly.
- Machining: Using tools and machines to shape, cut, or smooth materials to achieve desired shapes and surface finishes.
- Software: Computer programs used for designing molds, simulating casting processes, and generating toolpaths for CNC machining, aiding in the manufacturing process.
Reviewing Datasheets
Molding
We have the Smooth On OOMOO 25 SILICONE RUBBER COMPOUND,SORTA CLEAR 37 TRANSLUCENT SILICONE RUBBER, BLUE WAX BLOCK,AMACO FLEXWAX and SILOCZEST LIQUID SILICONE RUBBER in our lab.
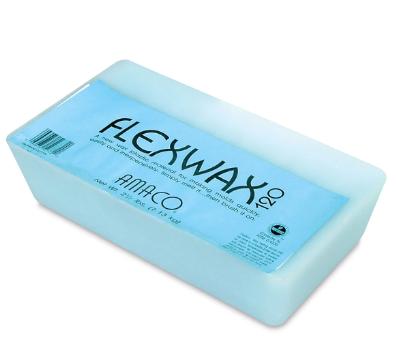
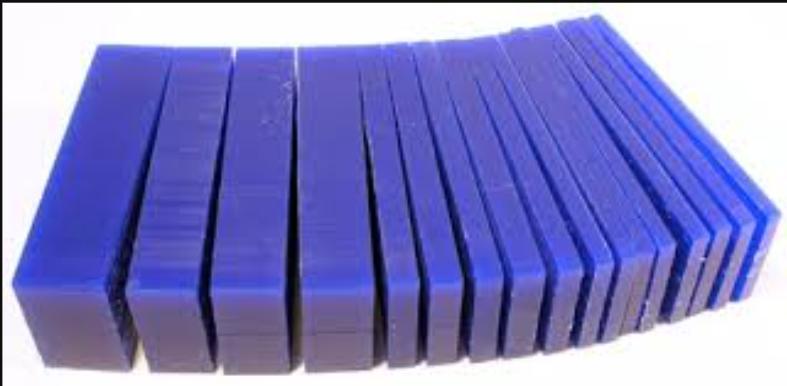
Wax Mold Blocks
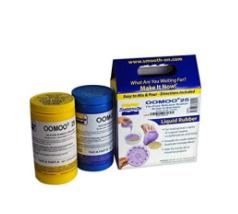
We visited the official site of smooth on for the following datasheets on Smooth On OOMOO 25 and the first datasheet below is already provided in the box.
Smooth-On OOMOO™ 25 SILICONE RUBBER COMPOUND Product Information Technical Bullitin Safety Datasheet
Product Overview
- OOMOO™ 25 is an easy-to-use tin-cure silicone rubber compound designed for novice mold makers and professionals alike. It features a convenient one-to-one by volume mix ratio, eliminating the need for a scale. With its low viscosity, OOMOO™ 25 is effortless to mix and pour, and vacuum degassing is not required. This product cures at room temperature with minimal shrinkage, making it suitable for various art-related and industrial applications, including making one and two-piece block molds, prototype reproduction, and electrical potting.
Technical Data
- Mix Ratio By Volume: 1A:1B
- Mix Ratio By Weight: 100A:130B
- Pot Life: 15 minutes
- Cure Time: 75 minutes
Usage Directions
- Safety First: Use in a properly ventilated area. Wear safety glasses, long sleeves, and rubber gloves to minimize contamination risk. Use vinyl gloves only, as latex gloves may inhibit the cure of the rubber.
- Store and use material at room temperature (73°F/23°C). Warmer temperatures reduce shelf life. Premix Parts A and B thoroughly before use.
- Cure Inhibition: Silicone rubber may be inhibited by certain contaminants, such as sulfur-based modeling clays and latex rubber. Apply a sealing agent if compatibility is a concern.
- Measuring & Mixing: Pre-mix Parts A and B thoroughly. Mix equal amounts of Parts A and B for 3 minutes until a uniform color is achieved.
- Pouring: Pour the mixture in a single spot at the lowest point of the containment field to minimize entrapped air. Ensure the liquid rubber levels off at least 1/2” over the highest point of the model surface.
- Curing: Allow to cure for 75 minutes at room temperature. Post-curing at 150°F for 4 hours eliminates residual moisture and alcohol.
Safety Precautions
- Always work in a well-ventilated area.
- Wear safety glasses, long sleeves, and rubber gloves.
- Use vinyl gloves, not latex, to avoid inhibiting the cure.
- In case of skin or eye contact, flush with water and seek medical attention.
- Keep out of reach of children.
Handling and Storage
- Store and use material at room temperature (73°F/23°C).
- Thoroughly mix Parts A and B before use.
- Avoid contamination with sulfur-based modeling clays and latex rubber.
- Seal containers tightly after use.
- Keep away from heat sources and direct sunlight.
- Use all safety precautions outlined in the safety data sheet.
Personal Protective Equipment (PPE)
- Safety glasses
- Long sleeves
- Rubber gloves (vinyl, not latex)
Technical Data
- First-Aid Measures:
- Inhalation: Remove to fresh air, seek medical attention if symptoms persist.
- Skin Contact: Wash affected area with soap and water. Remove contaminated clothing.
- Eye Contact: Rinse cautiously with water for several minutes. Remove contact lenses if present.
- Ingestion: Rinse mouth. Do NOT induce vomiting. Seek medical attention.
- Handling and Storage:
- Handling: Use in well-ventilated areas. Avoid contact with eyes, skin, and clothing.
- Storage: Keep containers tightly closed in a dry, cool, and well-ventilated place.
We visited the official site of smooth on for the following datasheets on Smooth On SORTA CLEAR 37 and the first datasheet below is already provided in the package.
SORTA-Clear™ 37 TRANSLUCENT SILICONE RUBBER Product Information Technical Bullitin

Product Overview:
Smooth-On's SORTA-Clear™ Series rubbers are premium water-clear translucent silicone rubbers that cure at room temperature with minimal shrinkage. Available in Shore 12A, 18A, 37A, and 40A hardness, these rubbers offer high tensile and tear strength. SORTA-Clear™ 12 and SORTA-Clear™ 37 feature a convenient 1A:1B mix ratio by volume, while SORTA-Clear™ 18 and SORTA-Clear™ 40 require a gram scale for precise measurement. These silicones are ideal for making prototypes, jewelry, and other molds where model visibility is crucial. They can be used with various casting materials such as urethane, epoxy, polyester resins, wax, and low-melt metal alloys. SORTA-Clear™ 18, SORTA-Clear™ 37, and SORTA-Clear™ 40 are food-safe and suitable for culinary applications like casting chocolate and confections.
Technical Overview:
- Mix Ratio By Volume: 1A:1B
- Pot Life: 25 minutes
- Cure Time: 4 hours
Usage Directions:
- Safety Precautions:
- Use in a properly ventilated area.
- Avoid inhaling fumes.
- Wear appropriate safety gear, including safety glasses, long sleeves, and rubber gloves.
- Keep out of reach of children.
- Dispose of properly.
- Preparation:
- Store and use material at room temperature (73°F/23°C).
- Pre-mix Part B thoroughly before use.
- Ensure the pattern surface is free of contaminants that may inhibit cure.
- Consider applying a clear acrylic lacquer or release agent to prevent inhibition.
- Measuring & Mixing:
- Mix Parts A and B thoroughly for 3 minutes, scraping the sides and bottom of the mixing container.
- Pouring, Curing & Mold Performance:
- Pour mixture uniformly over the model surface and let it level off.
- Allow material to cure fully at room temperature before demolding.
- Consider post-curing the mold for maximum properties.
we visited the official datasheet for all the Siloczest liquid silicone rubbers and an amazon site where a brief information of the mold was given
Siloczest Liquid Silicone Rubber-LSR 225 (Fast)
 Product overview
- Liquid Silicone Rubber (LSR) is a flexible material that starts as a liquid and cures to a rubbery solid when heated. It's durable, heat-resistant, and used in various industries for making parts, seals, and other components.
Technical Data:
- MIX RATIO: 3-5% of catalyst, For instant setting use 5% . For medium fast setting use 3%.
- BY WEIGHT: Easy to use silicone rubber compound features a convenient mixing ratio by weight. Use weighing machine for proper measurement and to avoid mistakes.
- SHORE A HARDNESS: 25ᵒA - This scale measures the hardness of flexible rubber molds. A 25ᵒA hardness is in the medium soft range in molding grade.
- LOW VISCOSITY: You can easily mix and pour this rubber compound, creating one-block or two-block pieces or replicas with no vacuum degassing required.
- Fast curing. Cures at room temperature within 8-12 hours.
- liquid silicone curing at room temperature is generally around 25-60 degrees.
Casting
For Casting, we have the Smooth-Cast 305 and USG ultimate drystone casting media in our lab
Smooth-Cast™ 305 Product Information Datasheet
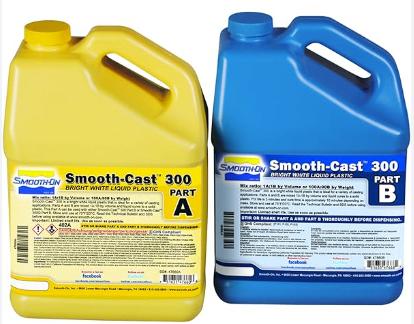
Smooth-Cast™ 305 belongs to the esteemed Smooth-Cast™ 300 Series of liquid plastics, renowned for their ability to produce bright white castings with minimal bubbles, eliminating the need for vacuum degassing.
These resins offer the convenience of a 1A:1B mix ratio by volume or 100A:90B mix ratio by weight, ensuring ease of use and precise measurements.
Within the series, there are various options available, each with differences in pot life and demold time, allowing users to select the most suitable resin for their specific application requirements.
Technical Data
- Mix Ratio By Volume: 1A:1B
- Mix Ratio By Weight: 100A:90B
- Pot Life: 7 minutes
- Cure Time: 30 minutes
USG Ultimate Drystone™ Casting Media datasheet
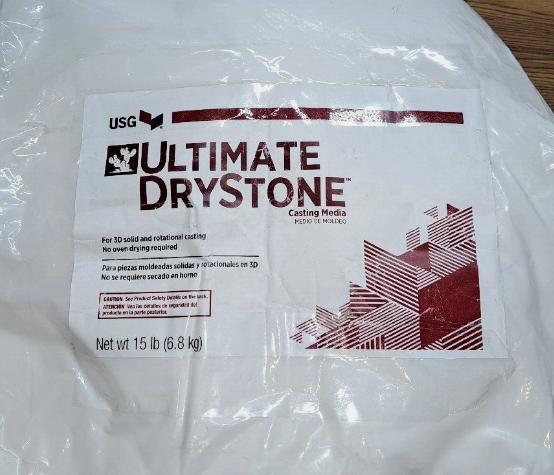
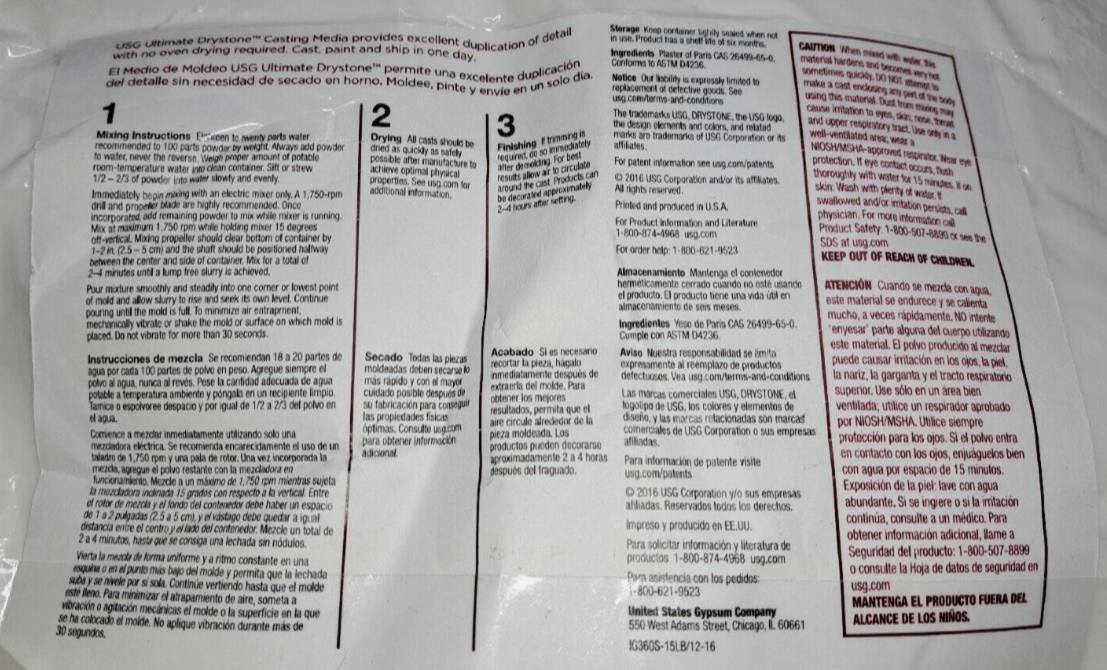
The usage indtructions were behind the package
 Product overview
-
USG Ultimate Drystone™ Casting Media is a fast-curing material that allows for quick casting and processing without the need for oven drying.
Mixing Instructions
- Eighteen to twenty parts water recommended to 100 parts powder by weight. Always add powder to water, never the reverse. Weigh proper amounts of room temperature water into clean container. Sift or strew 1/2-2/3 of powder into water slowly and evenly.Mix for a total of 2-4 minutes until a lump free slurry is achieved. Pour mixture smoothly and allow slurry to rise and seek its own level. Continue pouring until the mold is full. To minimize air entrapment mechanically vibrate or shake the mold or surface on which the mold is placed. Do not vibrate for more than 30 seconds.
Drying
- All casts should be dried as quickly as safely as possible after manufacture to achieve optimal physical properties.
Finishing
- If trimming is required, do so immediately after demolding. For best results, allow air to circulate around the cast. Products can be decorated approximately 2-4 hours after setting.
Making and Comparing test casts
We had 2 cast materials in our lab, USG Ultimate Drystone™ Casting Media and Smooth-Cast™ 305.

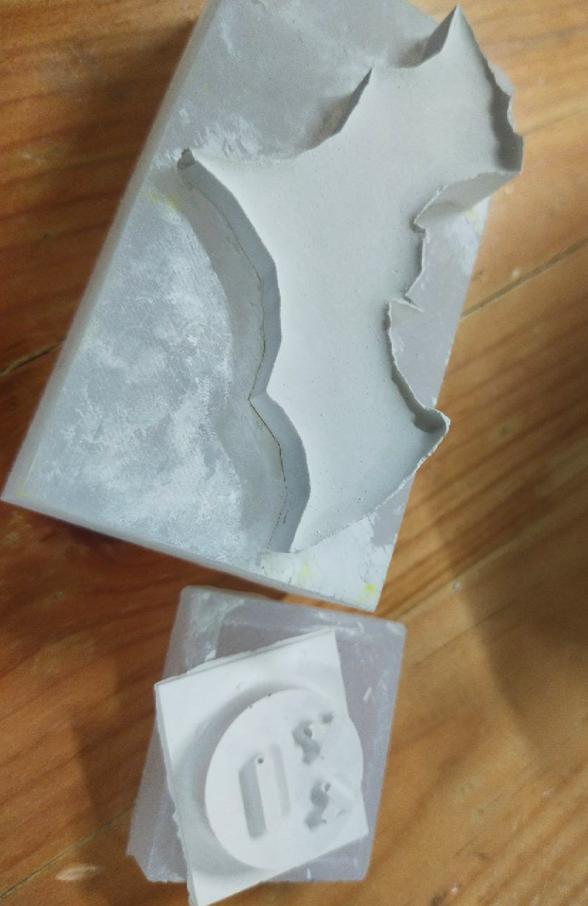
These are the casts of the USG Ultimate Drystone™ Casting Media

These are the casts of the Smooth-Cast™ 305
The casts of the SG Ultimate Drystone™ Casting Media were more rigid and hard with a cement texture but the casts of the Smooth-Cast™ 305 were more smooth and softer with a plastic texture. The USG Ultimate Drystone™ Casting Media had more potential to break than the cast made with Smooth-Cast™ 305..
Printing VS Milling molds
We did the group assignments on some of the molds that we did in our individual assignment
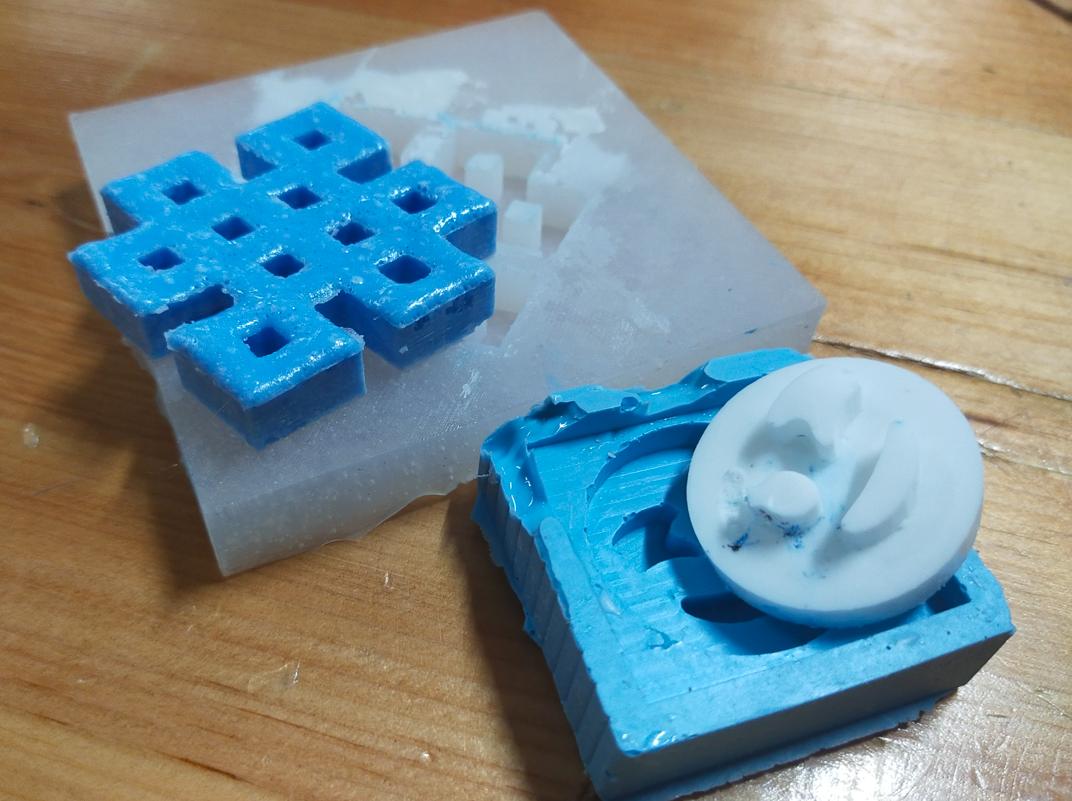
This is the test using many different molding materials in the lab, the blue cast with the white mold is made by 3D printing the Negative Mold and making the Positive mold with the Smooth On Sorta Clear 37. The white cast with the blue mold is made by milling the Negative Mold and making the Positive mold with the Smooth-On Oomoo 25.
The mold made by 3D printing has the marks of the filament on both the Negative and Positive mold, creating a texture in the cast
The mold made by milling has slightly visible lines of the drilling bit but has more smoother outcome
Things to consider when designing molds to mill is keep in mind the size of the drill bit. It wont be able to mill detailed designs that have spaces between them smaller than the size of the drill bit. Therefore, a disadvantage for the milled molds is the inability to drill designs and patterns smaller than the dril bit's size (if printing small detailed designs). But an advantage for somewhat smooth circular designs.


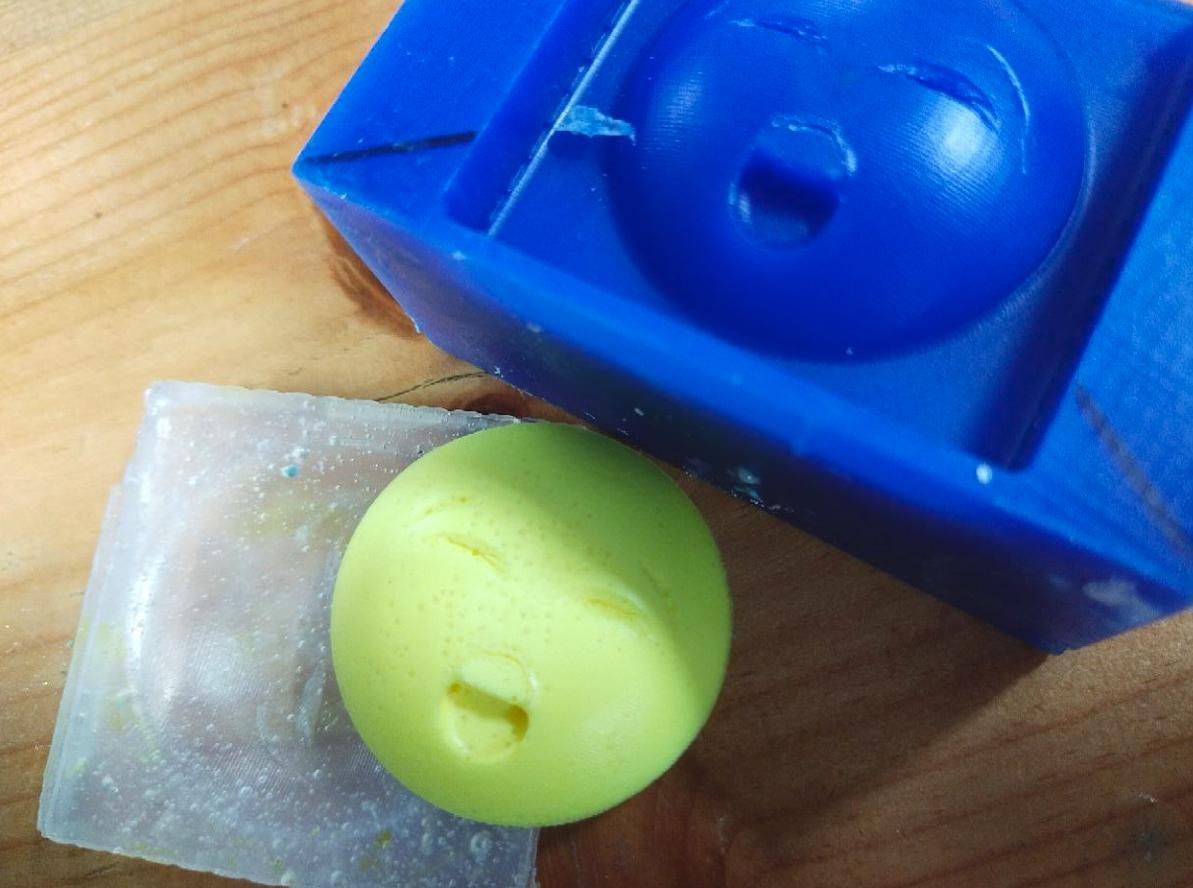
This positve mold is made using the Smooth-On Oomoo 25. The Oomoo 25 material in our lab was not cooperating with us. It was very hard to work with, with a very thick texture while mixing. We figured it might be because it might be expired(We thought the expiry date was 9 months after manufacture)

These two designs negative molds are made by milling and the positive molds is made using the Smooth-On Sorta Clear 37. It has some textures of the drilling bit if you look closely but overall very smooth outcome and very detailed outcome. The molds were both very easy to remove from the wax block. And the outcome on the wax block is very smooth with a well finishing.
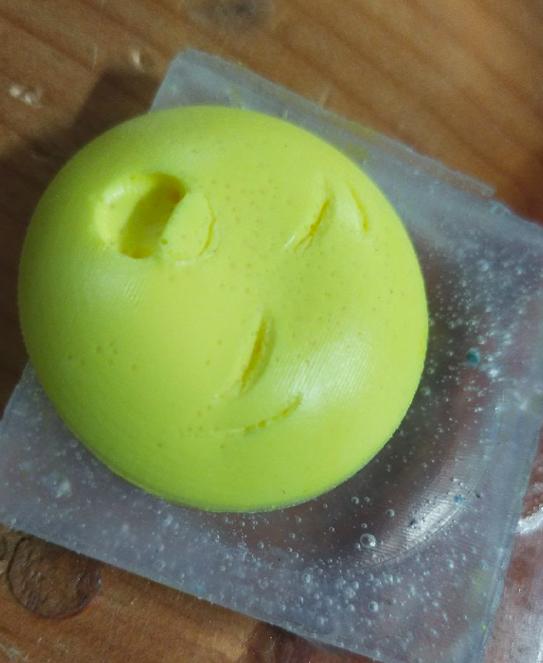
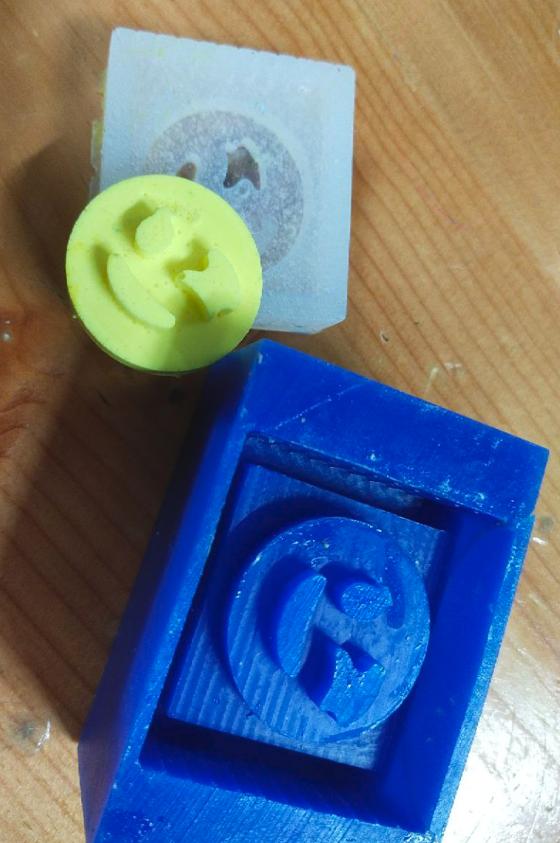
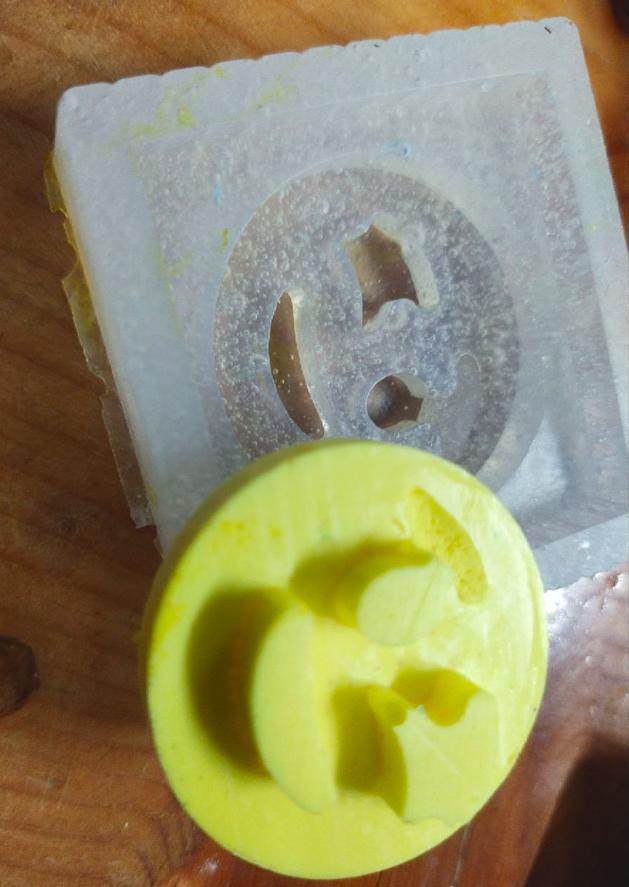
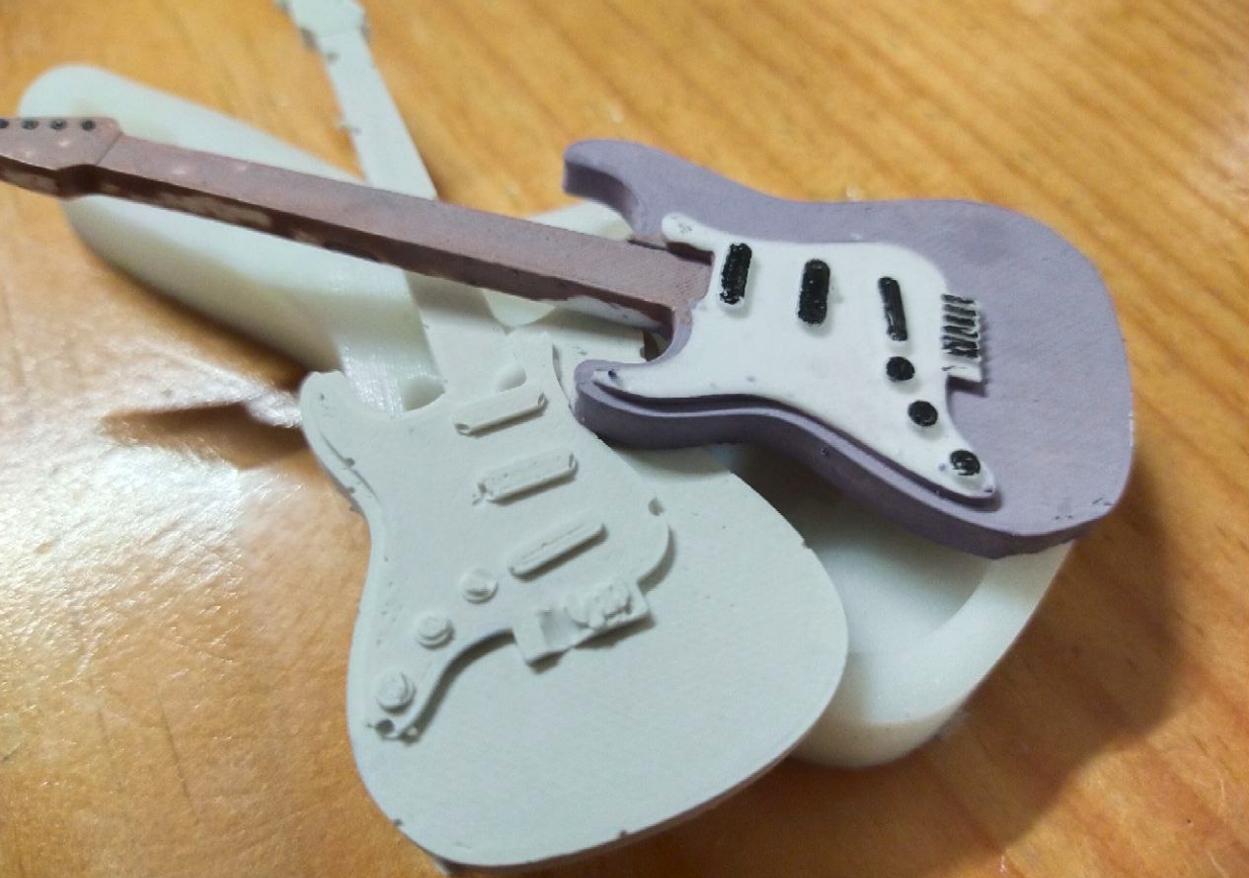
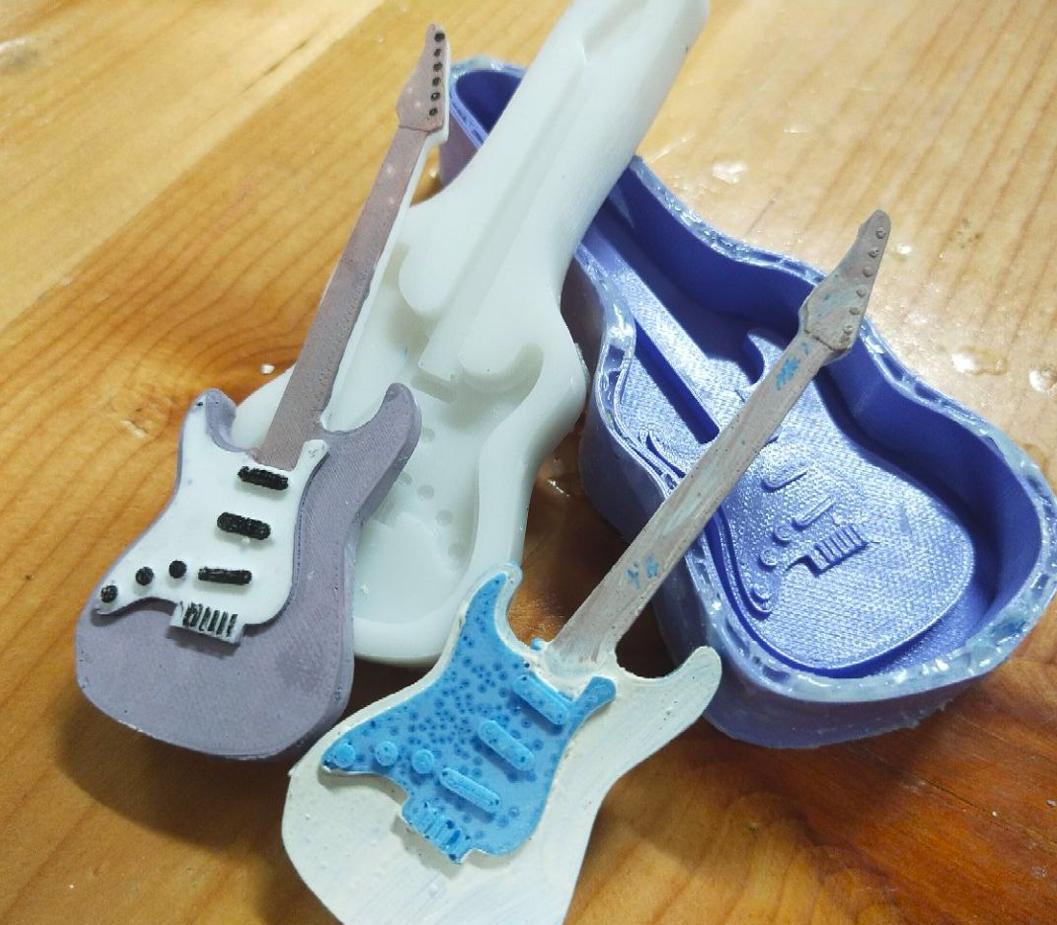
The negative mold here is 3D Printed and the positive mold is made using the Smooth On Sorta Clear 37. The process of taking out the positive mold out of the negative mold is same like the milled positive and negative mold.There are textures in the molds but for the design we tried the mold for the texture was a good addition.(The guitar looks nice with the texture.)
And a good thing about 3D printing the negative mold is the advantage in making molds with detailed and inrticate patterns. The design below is not posible to mill it becuase of the size of the drill bit and the space between the strings and the other places with spaces smaller than the size of the drill bit. If we had to mill this deisgn we would have to make the spaces larger. Therefore, 3D printed mold has good attention to detail and advantage when printing intricate and detailed mold designs.


Conclusion
Based on the experiments conducted with different molding materials and methods, it's apparent that both milling and 3D printing molds offer distinct advantages and drawbacks. The molds created through 3D printing, such as the ones made with OOMOO 25 Silicone Rubber Compound, exhibit filament marks, resulting in a textured finish. Conversely, molds produced via milling, like those with Sorta Clear 37 Translucent Silicone Rubber, display faint lines from the drilling bit but generally yield smoother outcomes.
In terms of mold design, it's crucial to consider the limitations of each technique. Milling is restricted by the size of the drill bit, making it challenging to replicate intricate details smaller than the bit's diameter accurately. On the other hand, 3D printing excels in capturing intricate and detailed patterns due to its layer-by-layer construction method.
Despite these differences, both methods offer viable options for mold creation. Users must weigh their design requirements carefully to determine whether 3D printing's capability for intricate designs outweighs milling's smoother finish. Ultimately, the choice between milling and 3D printing hinges on the specific needs of the project and the desired level of detail in the final product.