This week the topic was embedded programming, so I programmed an MCU to learn about its characteristics and ways to program it.

My project
1. The datasheet
When I read the datasheet, I found interesting the following concepts:
It’s a dual core MCU.
This is really interesting for me because for my final project I would like to run a task of getting some values from sensors and updating the values for some motors independently of the communication and interaction and these gives me that opportunity.
The package is tiny.
I found this feature to be good and bad. Its good because it’s a great way to add the board to any project, but it’s bad because the MCU RP2040 has 30 GPIO and we can only access 11 of them in this format.
It has an embedded temperature sensor.
I found it interesting to have access to the internal temperature and maybe I could incorporate its value in some way to my final project.
2. Hands on!
I tried two ways of programming to se which one fit me the most. First, I tried Python, the steps that I followed to test the MCU can be found here
It was pretty straight forward but when I started to try different stuff like turn on other LED’s I found it hard to search for the documentation on how to call each pin and how are they mapped so I switched to try the other way of programming the MCU.
When I tried to program the MCU with C I used the IDE from Arduino, first of all I’m more confutable working with C and also I found the integration that Arduino has with the Open Source community and Different Libraries developed to be as good as it gets.
For this case, I started by programming a program to change colors on the onboard NEOPIXEL led. This routine just cycles through all the range of colors by changing the value for red, green and blue on a for cycle.
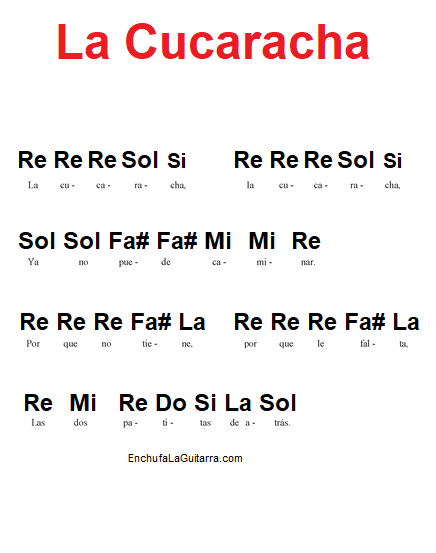
Then I wanted the program to be more interactive so I added a buzzer and searched for an example on how to generate sounds using the PWM function. Based on the example “toneMelody” located on the examples->digital library of Arduino I generated the song “La cucaracha” on the MCU and programmed it to be played at the end of the setup function.
3. My stoppers
First, I bumped into a problem trying to know which port correspond to the LEDs and to the pins, but then I found the schematic diagram of how is the Xiao RP2040 built and that was the key to set the correct pin numbers. Some interesting things that I discovered is that the embedded RGB LED is wired to work inverse, so a 0 turns it on and a 1 turns it off.

Also I needed to find the partiture for the song I wanted to play to read the notes and then programm the values. I settled with "La Cucaracha" and found its tab here

4. The final result