Week 12. moulding and casting
Group assignment:
Review the safety data sheets for each of your molding and casting materials
Make and compare test casts with each of them
Compare printing vs milling molds
Individual assignment:
Design a mold around the process you’ll be using, produce it with a smooth surface finish, and use it to cast parts
Group assignment:
REVIEW THE MATERIAL SAFETY DATA SHEETS
The materials to work with are: gloves, wax, scale, lenses, disposable cups, and sorta clear 37 silicone.
Safety: Use in an adequately ventilated area (room-sized ventilation. Wear safety glasses, long sleeves, and rubber gloves to minimize risk of contamination. Use only vinyl gloves. Latex gloves will inhibit rubber curing. Store and use the material at room temperature (73°F/23°C). Warmer temperatures will dramatically reduce working and curing time.
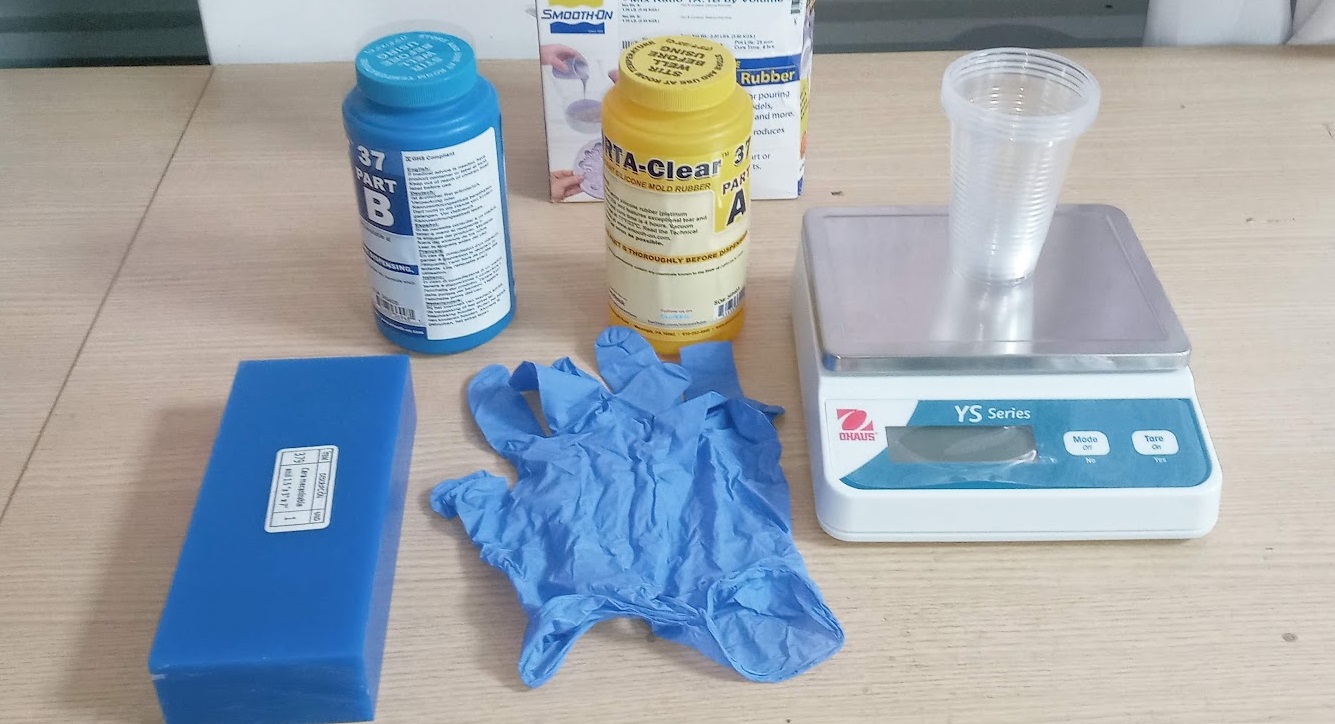 The materials we have at the Fab Lab Pasco are Sorta Clear 37 Silicone. We look at the technical sheet of the product

 We begin to make the combinations of each pot, approximately 2,245 grams.
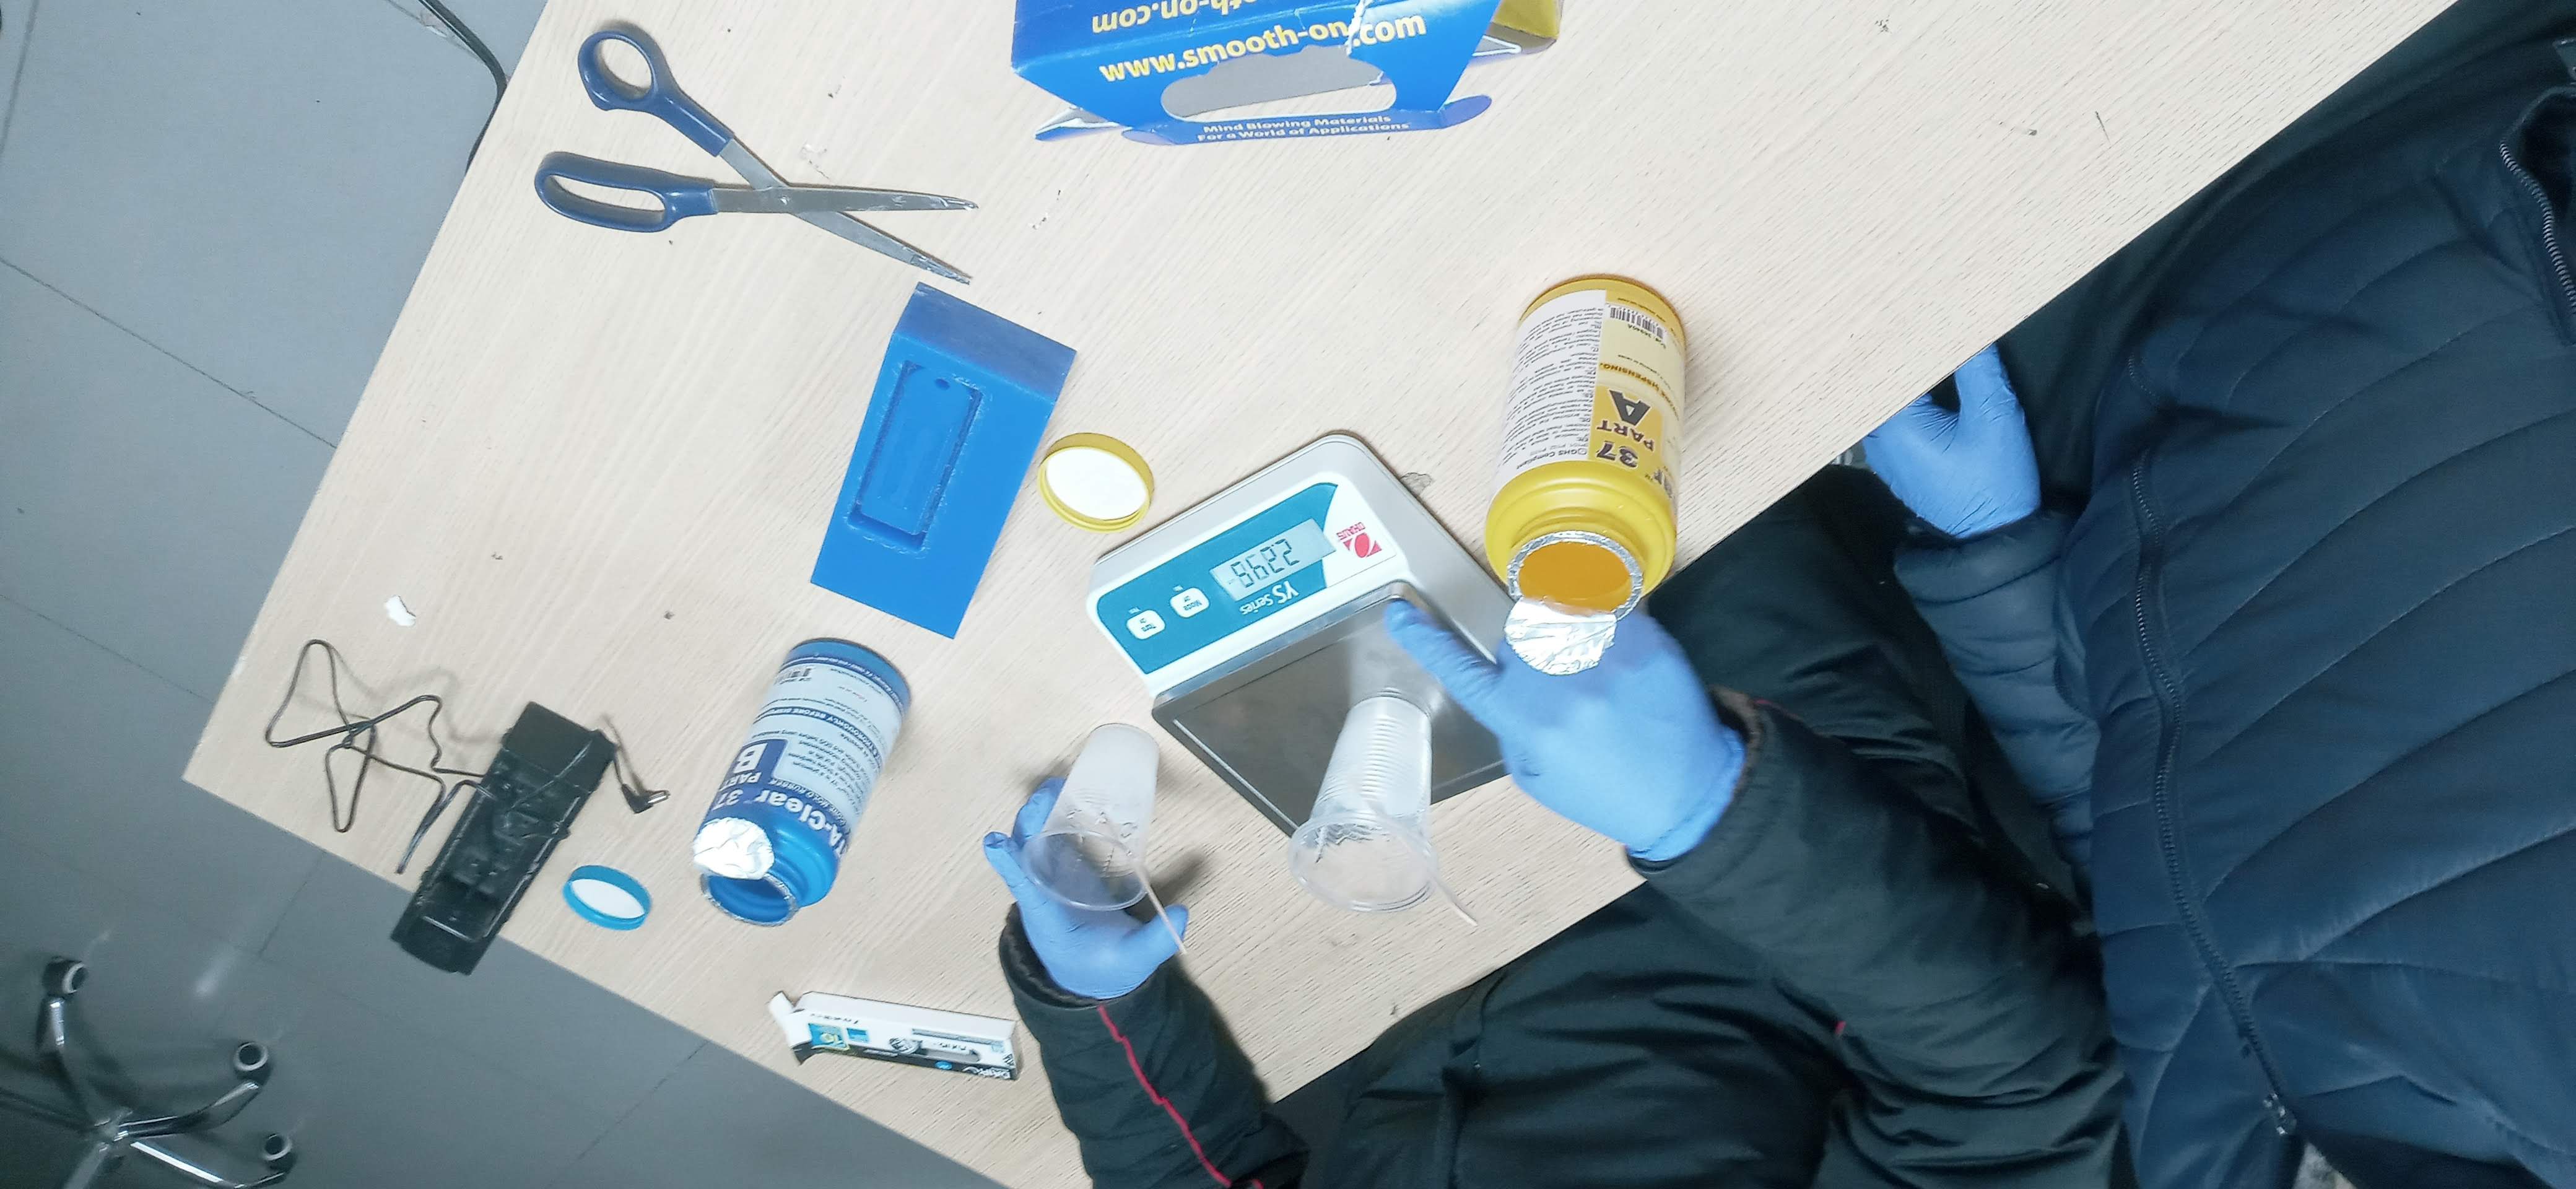 We measure on the scale with the disposable cups once the combinations have been made.
Cure Inhibition: Addition cured silicone rubber can be inhibited by certain contaminants in or on the pattern to be molded, resulting in stickiness at the pattern interface or a complete lack of cure throughout the mold. . Latex, tin-cured silicone, sulfur clays, certain wood surfaces, newly molded polyester, epoxy, or urethane rubber may cause inhibition. If you are concerned about the compatibility between the rubber and the surface, a small scale test is recommended. Apply a small amount of gum to a non-critical area of the pattern. Inhibition has occurred if the rubber is gummy or not cured after the recommended cure time has passed.
Because no two applications are the same, a small test application is recommended to determine suitability for your project.
Curado: permita que el material se cure completamente a temperatura ambiente (73 °F/23 °C) antes desmoldar SORTA-Clear™ 37 cura en 4 horas
We measure on the scale with the disposable cups once the combinations have been made.
Cure Inhibition: Addition cured silicone rubber can be inhibited by certain contaminants in or on the pattern to be molded, resulting in stickiness at the pattern interface or a complete lack of cure throughout the mold. . Latex, tin-cured silicone, sulfur clays, certain wood surfaces, newly molded polyester, epoxy, or urethane rubber may cause inhibition. If you are concerned about the compatibility between the rubber and the surface, a small scale test is recommended. Apply a small amount of gum to a non-critical area of the pattern. Inhibition has occurred if the rubber is gummy or not cured after the recommended cure time has passed.
Because no two applications are the same, a small test application is recommended to determine suitability for your project.
Curado: permita que el material se cure completamente a temperatura ambiente (73 °F/23 °C) antes desmoldar SORTA-Clear™ 37 cura en 4 horas
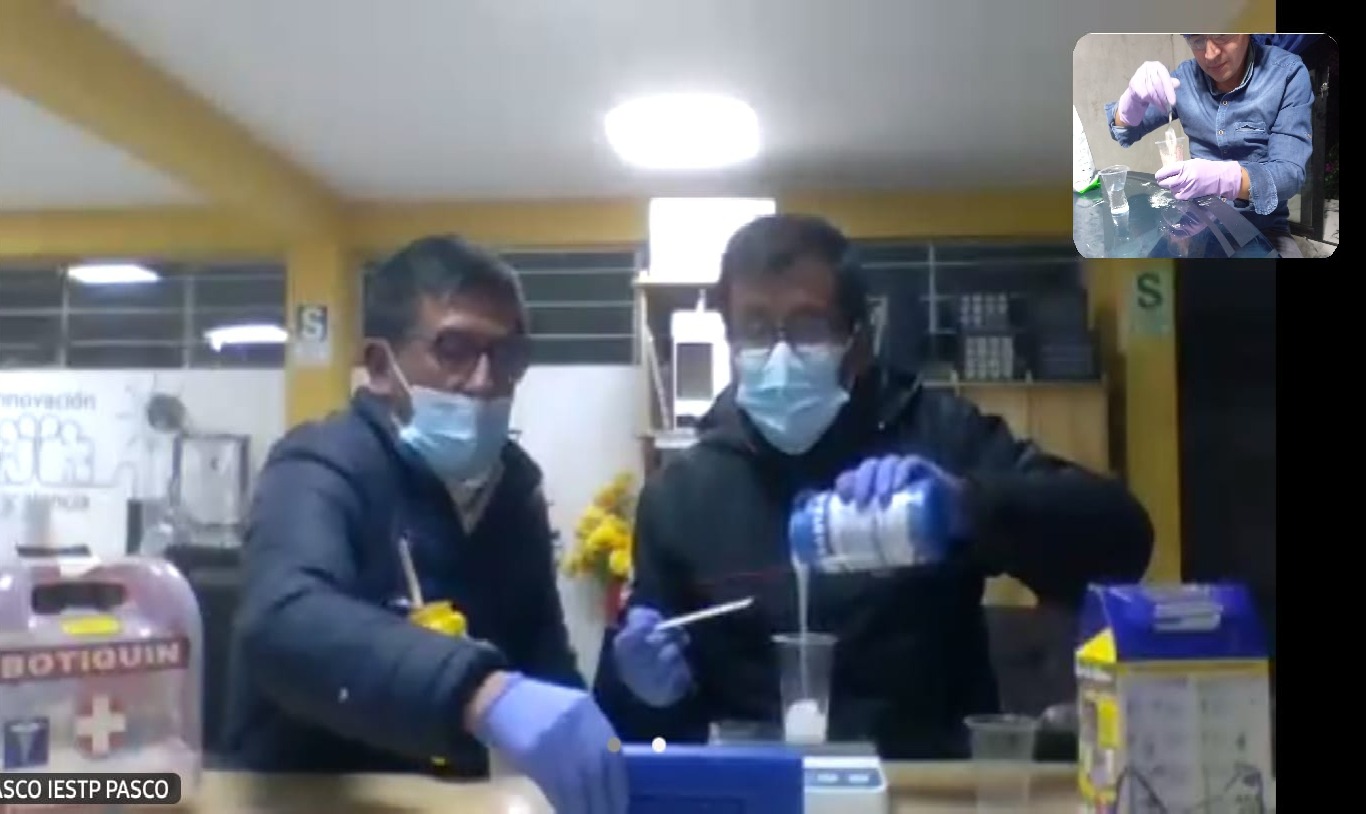
 We carried out the group work with the Ronal colleague from Huanuco
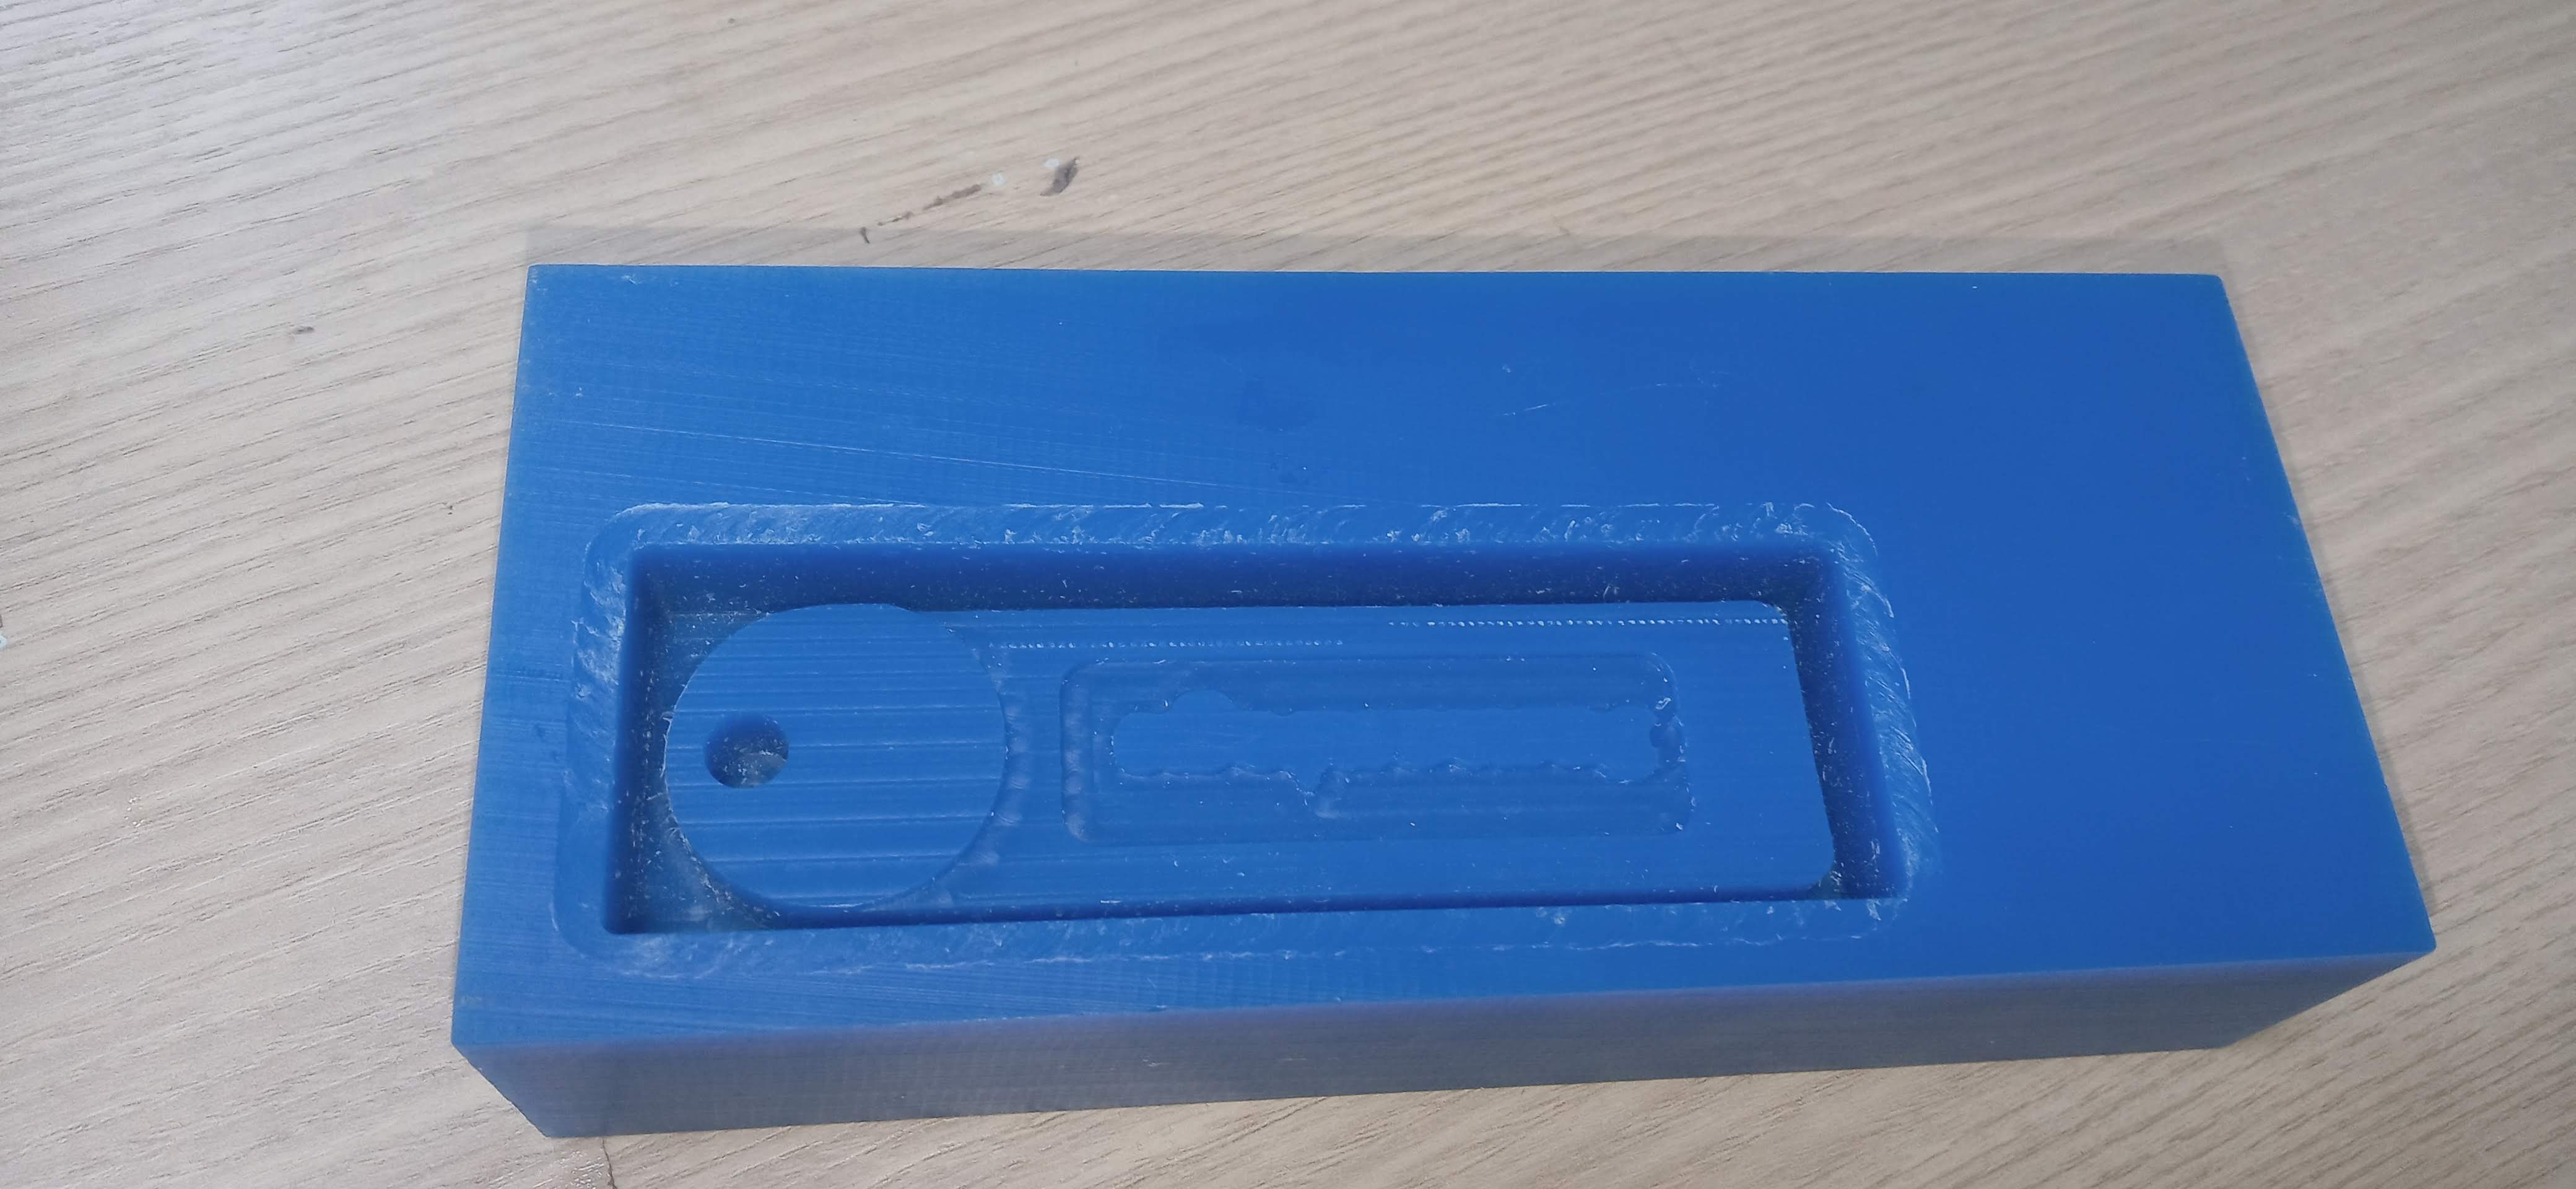
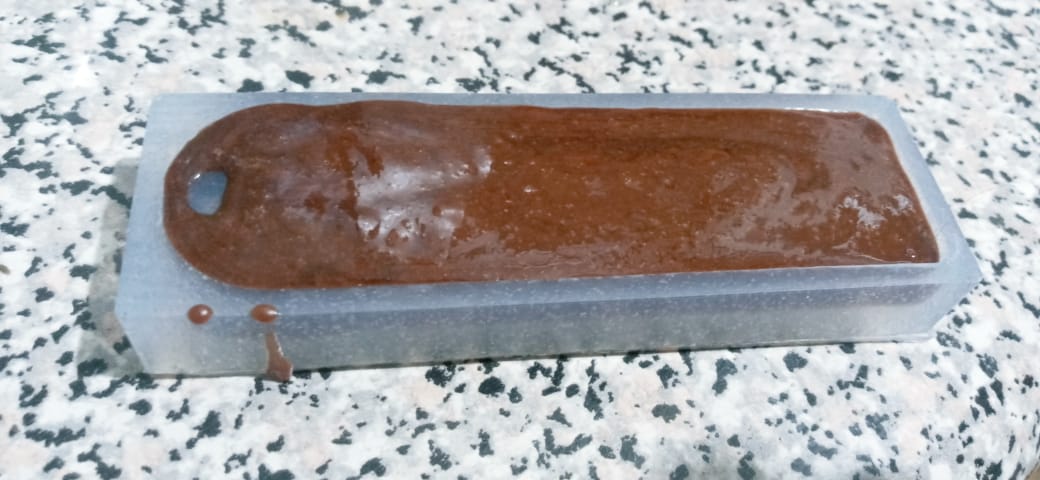
 We have made a keychain with the srm 20 that shows the manufacturing process later and here we will mix the silicone
 We begin to make the mixture, stirring at all times.

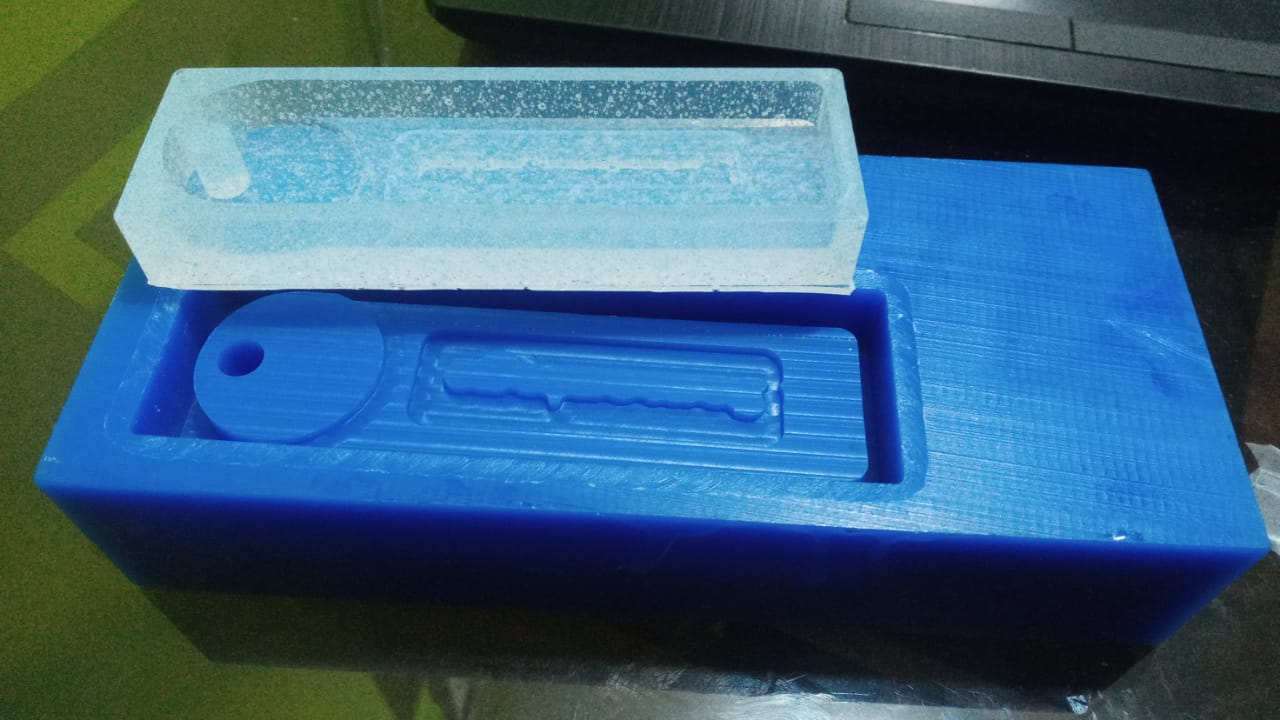
 We begin to remove the silicone from the wax after 4 hours according to the technical sheet
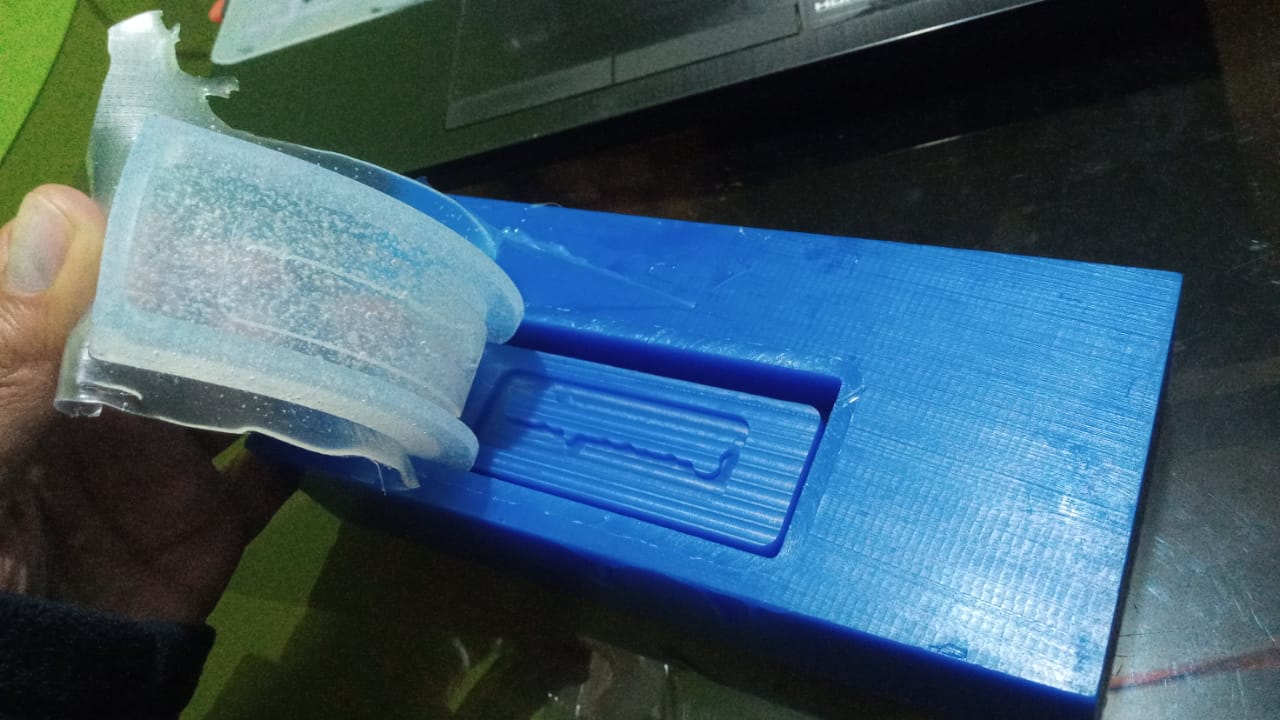
 We cut the excess parts with scissors

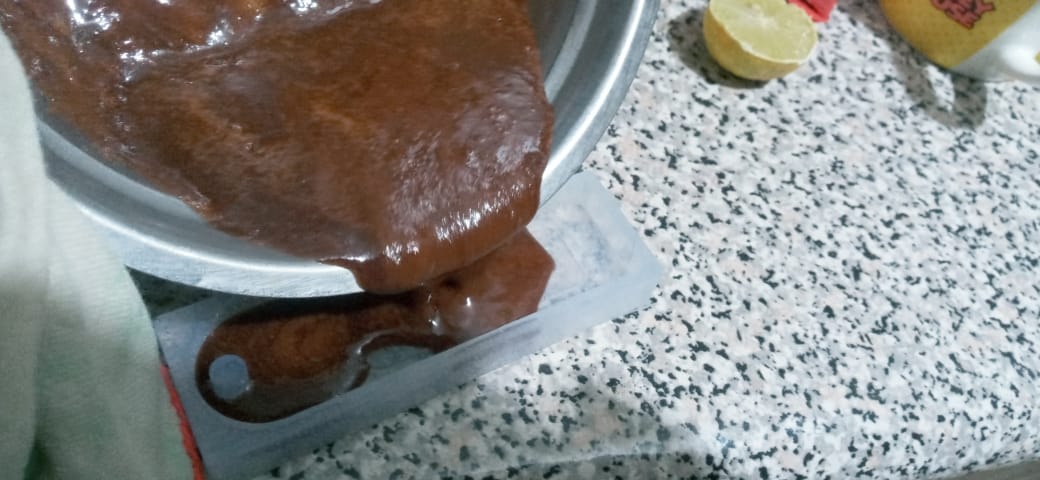
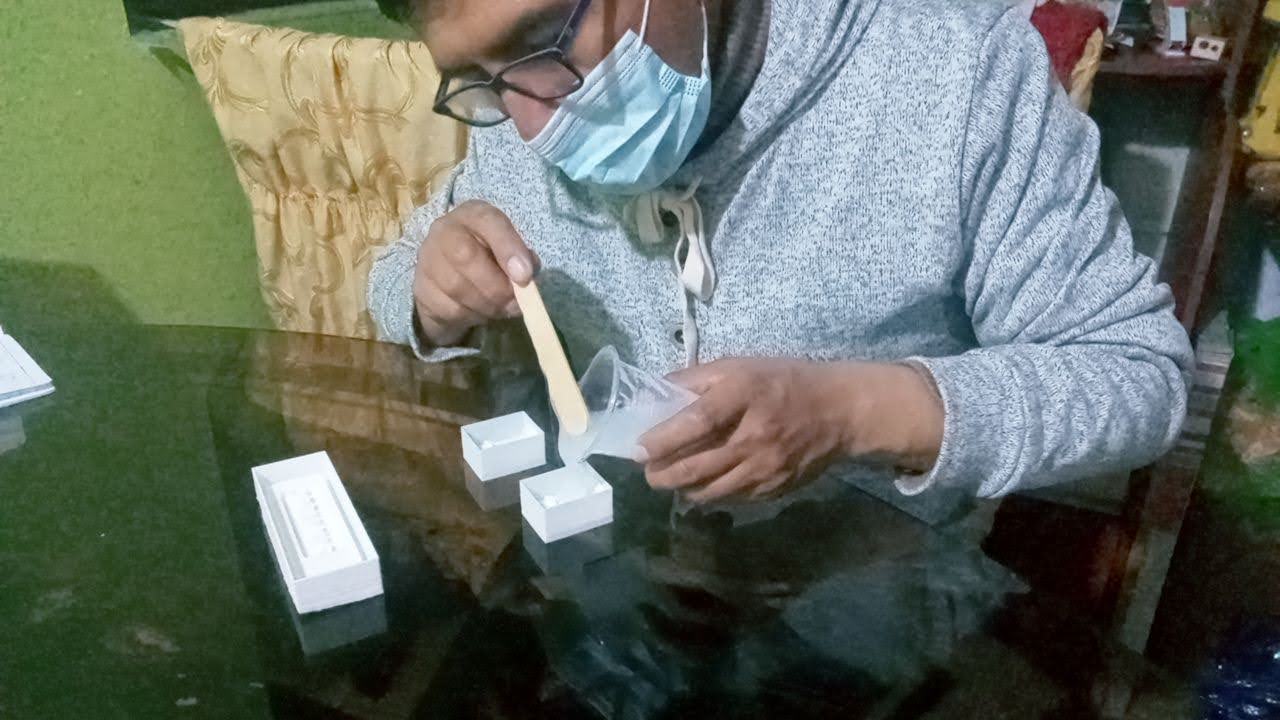
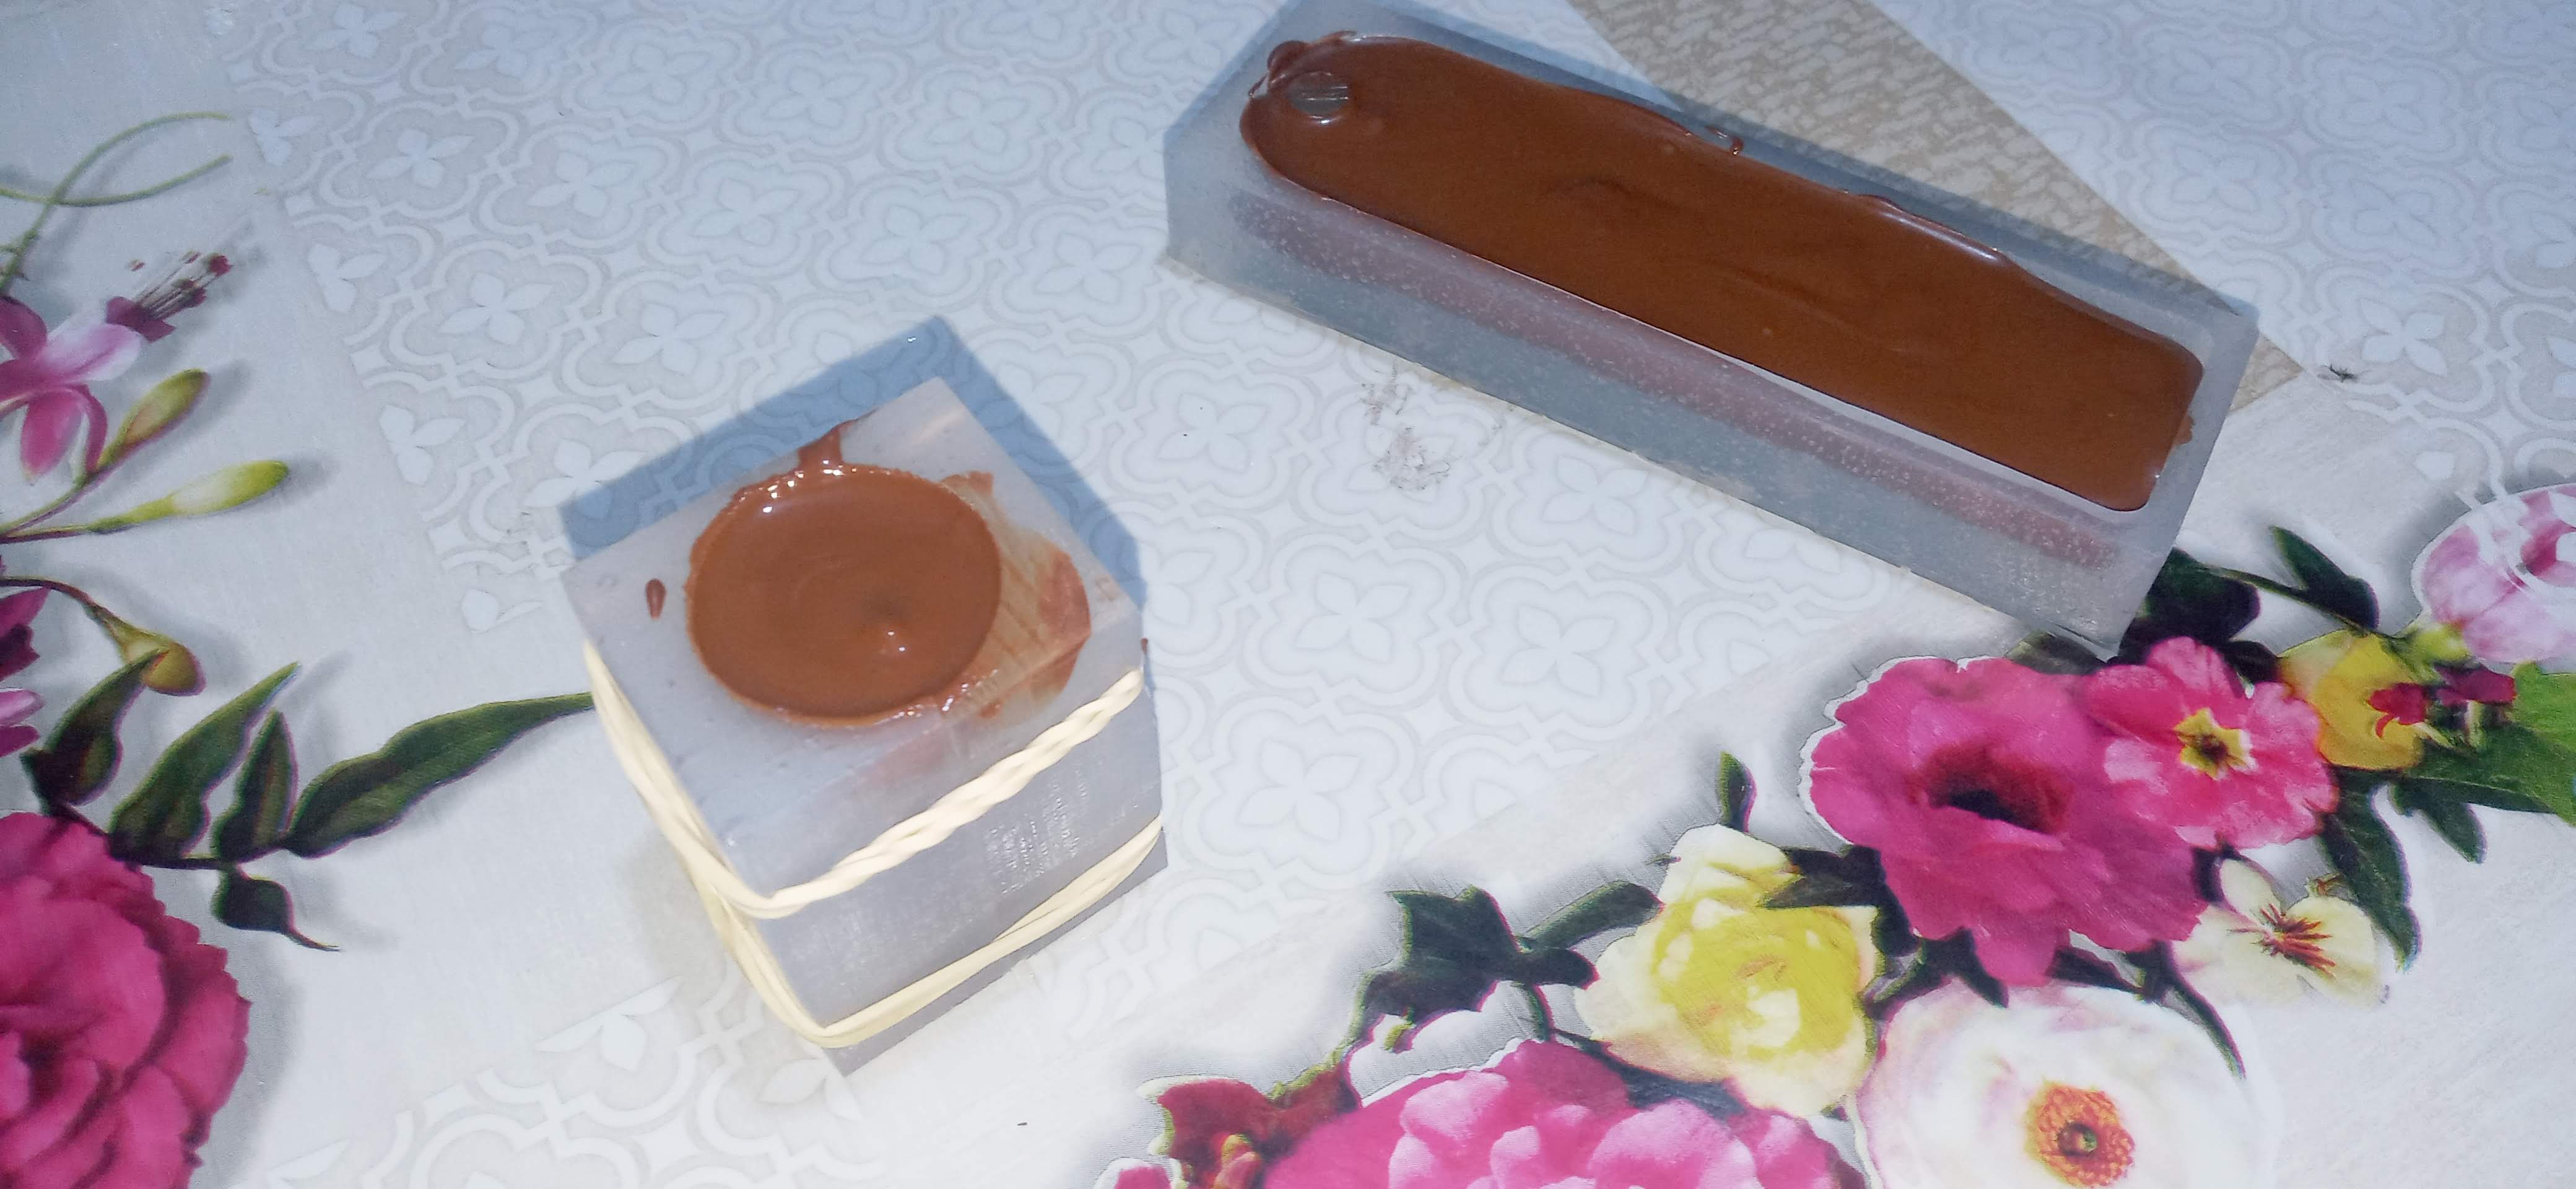
 We make the chocolate to see the consistency and leave it for 2 hours to solidify.
CREATION OF THE PART FOR MOLDING
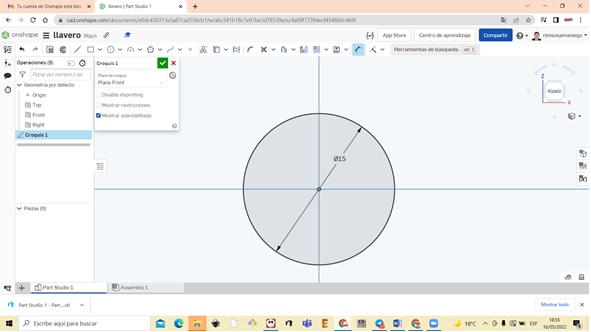
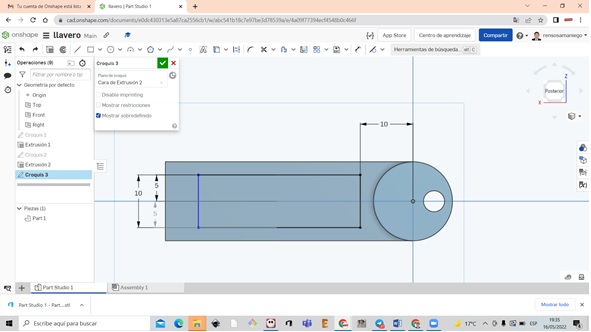
We create a keychain in Onshape for which we put the diameter of 15 mm
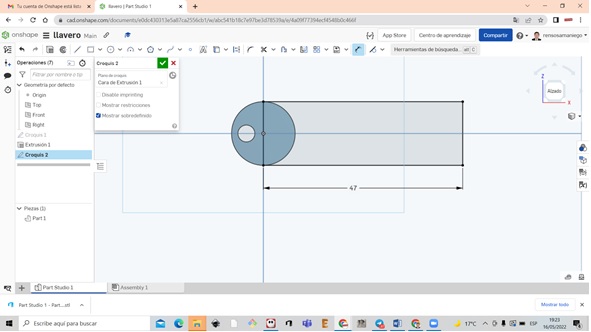
Now we continue to make the hole for the 4 mm keychain

Now we have extruded the keychain 5mm and increased the size of the keychain in a rectangular shape

We put tangent with the circle and define the size of 47 mm
We extrude the rectangular part to 4mm
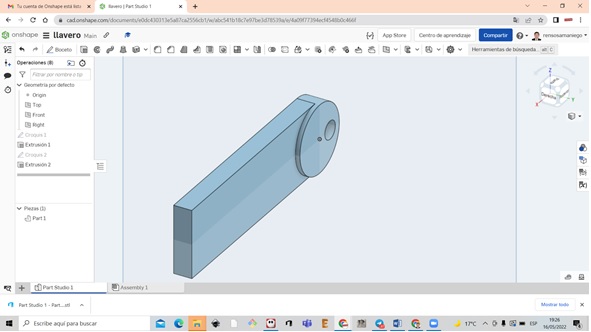
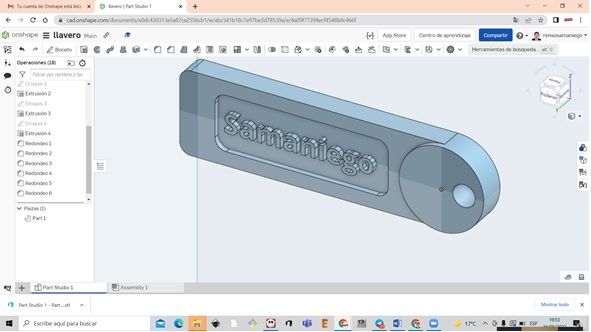
We make the rectangle the measurements to write the name inside
Then we extrude inside 1mm

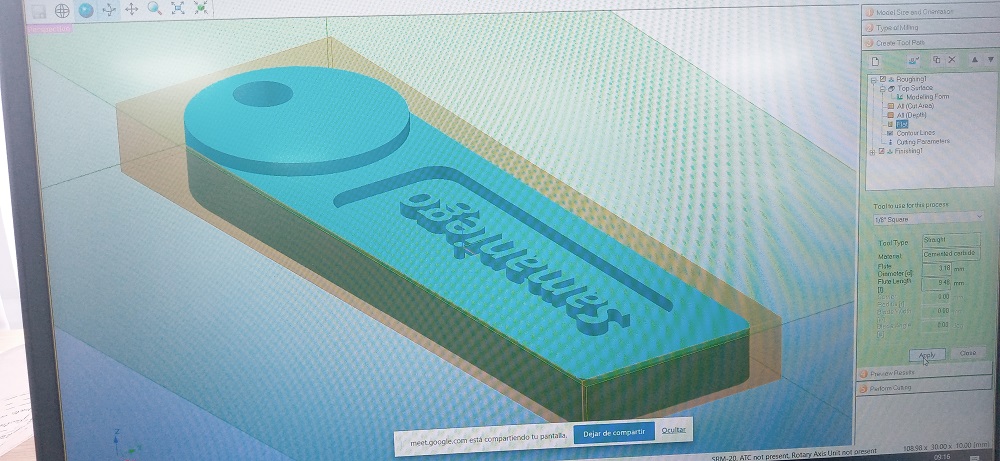
We enter the Samaniego text and then extrude it and Make the 2mm curved edge
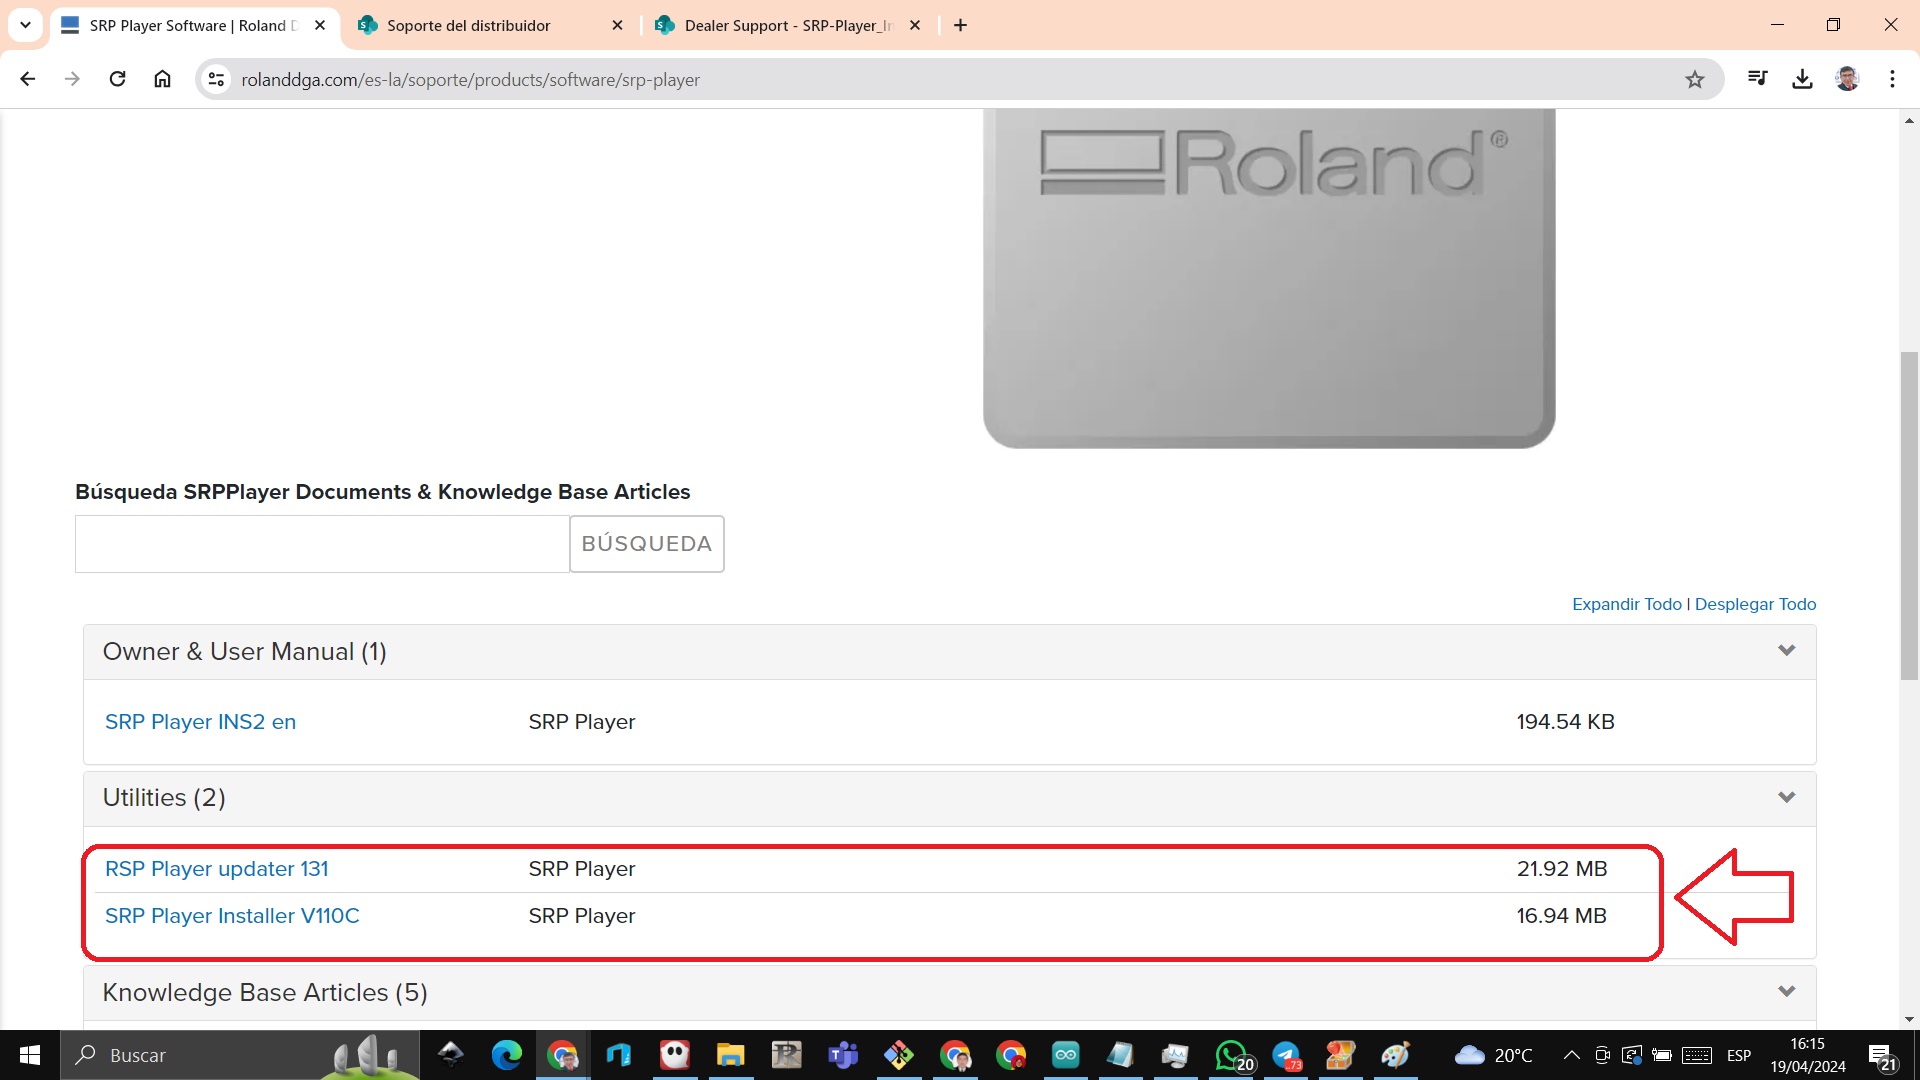
 Download the Srp Player software, the link is: https://www.rolanddga.com/es-la/soporte/products/software/srp-player
From there we download the 2 software and install them
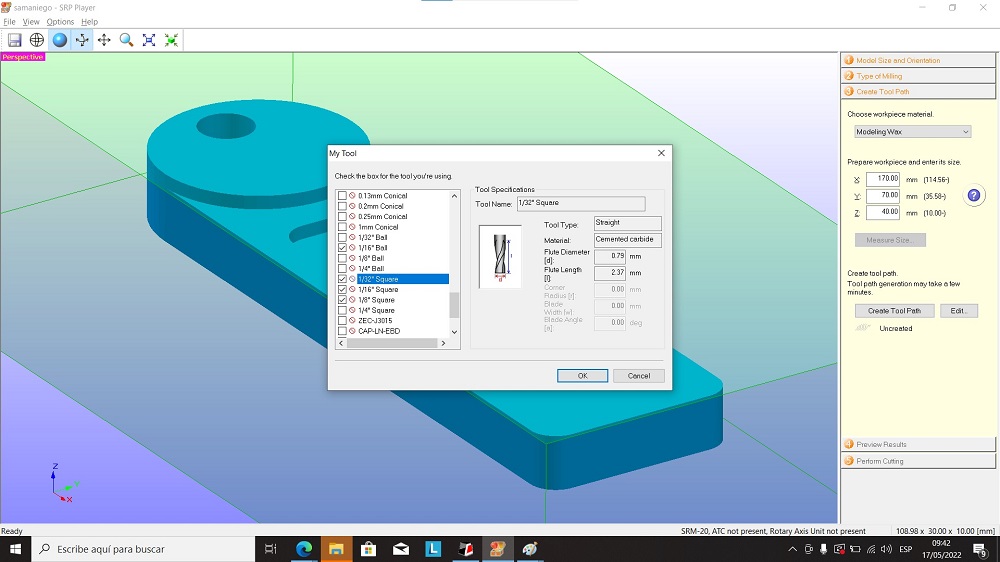
 We choose the 1/64 milling cutter
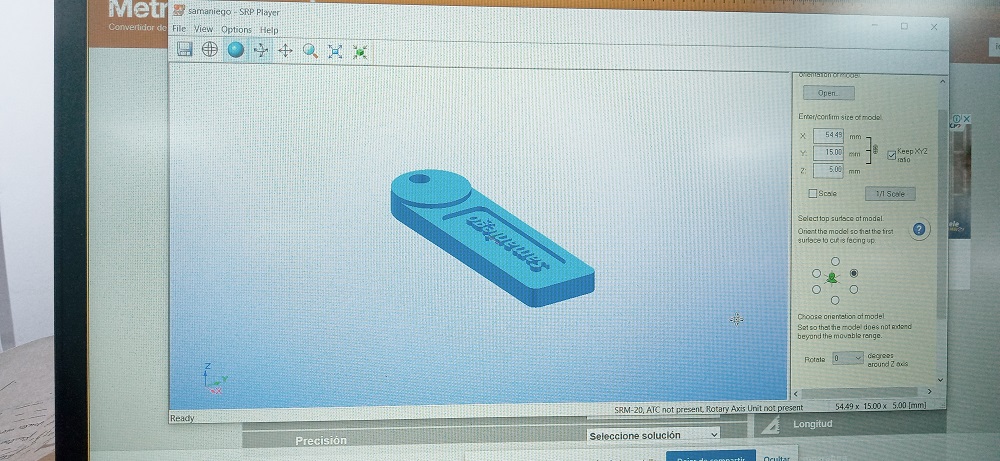
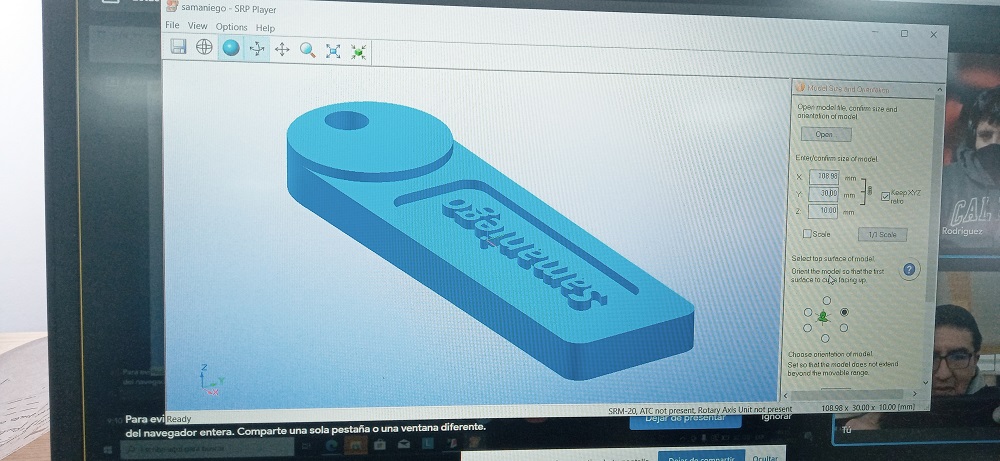
 We import the keychain in stl file and verify the measurements
 We check if it has oval parts and we enable it
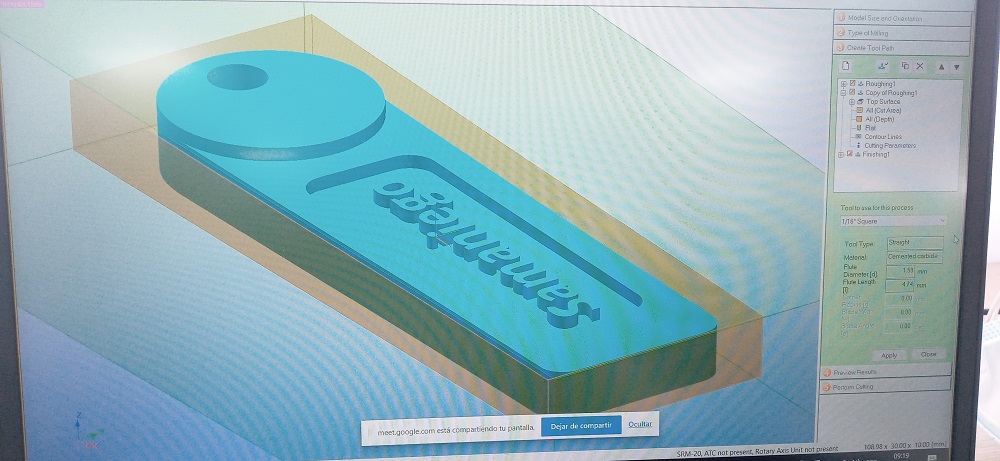
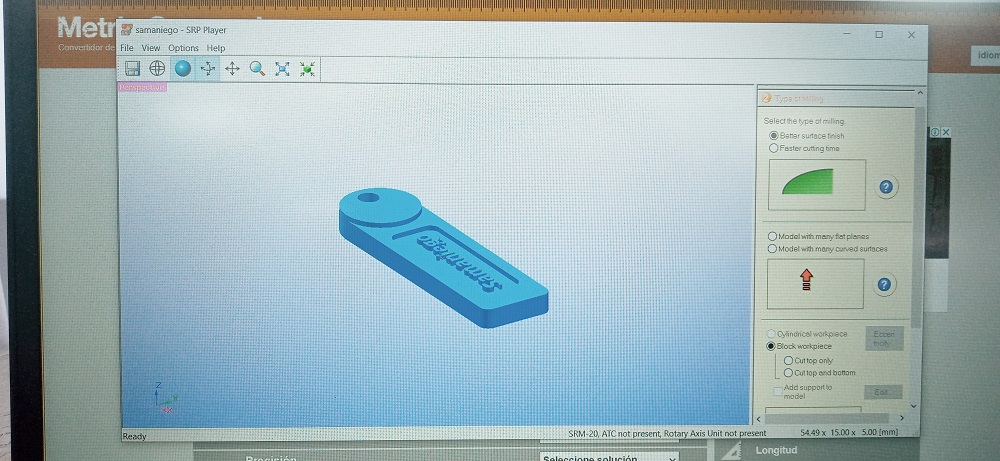 We choose which area to cut
 We modify the size so that it can be seen and we change the length to 108 millimeters
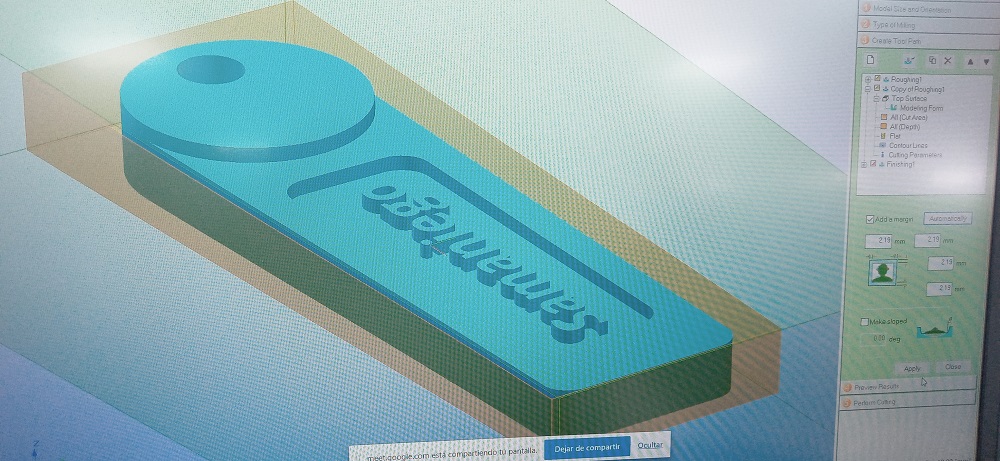
 We enable the size of the wax area or where the keychain will fit
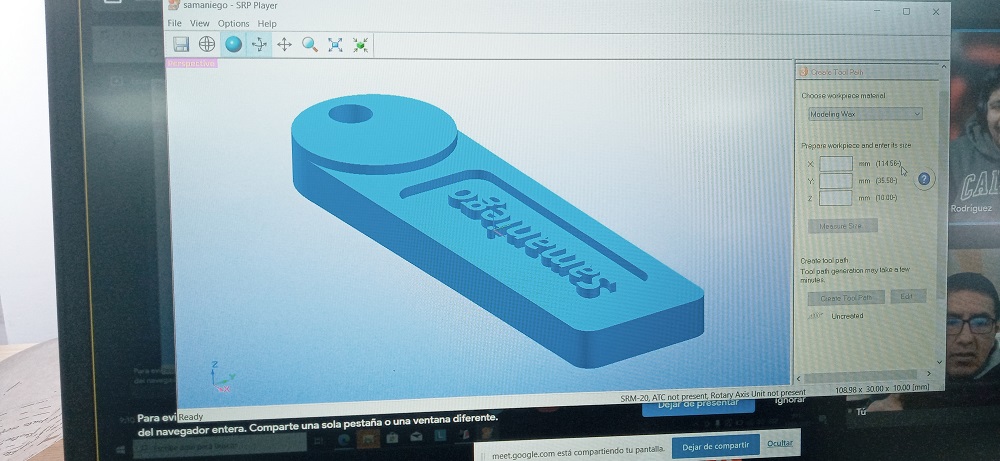 We enable the size of the wax area or where the keychain will fit, the length is 170 millimeters, the width is 70 millimeters and the depth is 40 millimeters.
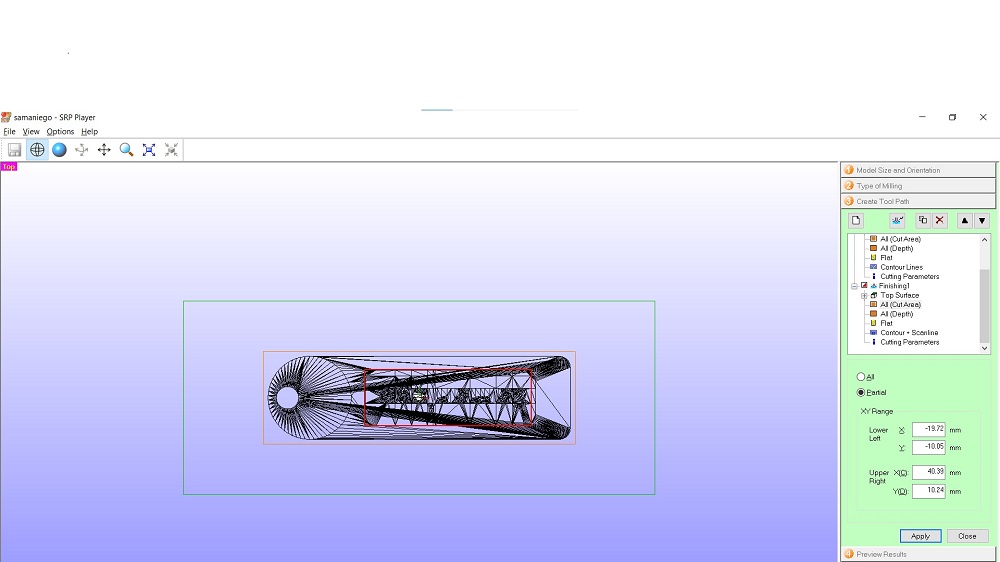
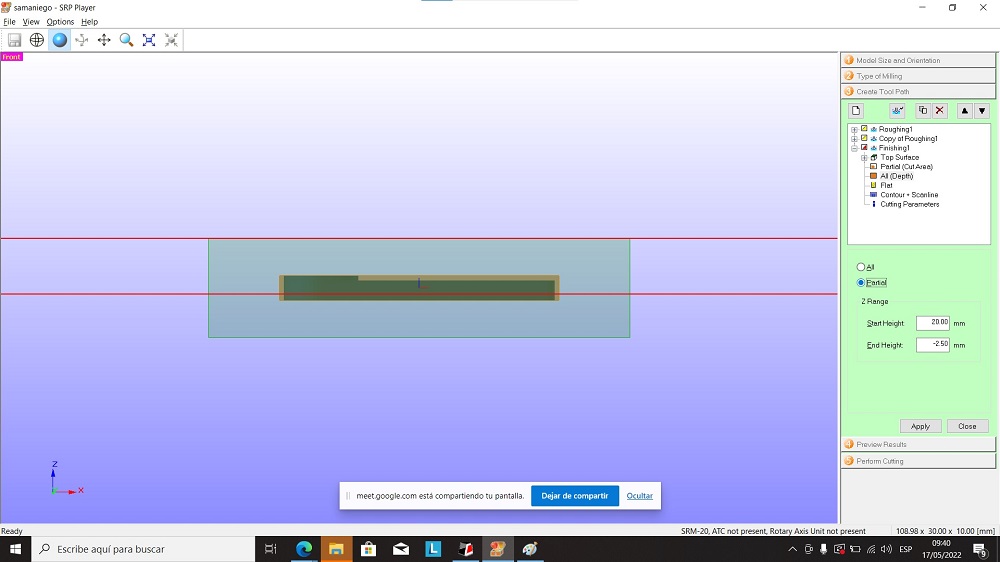
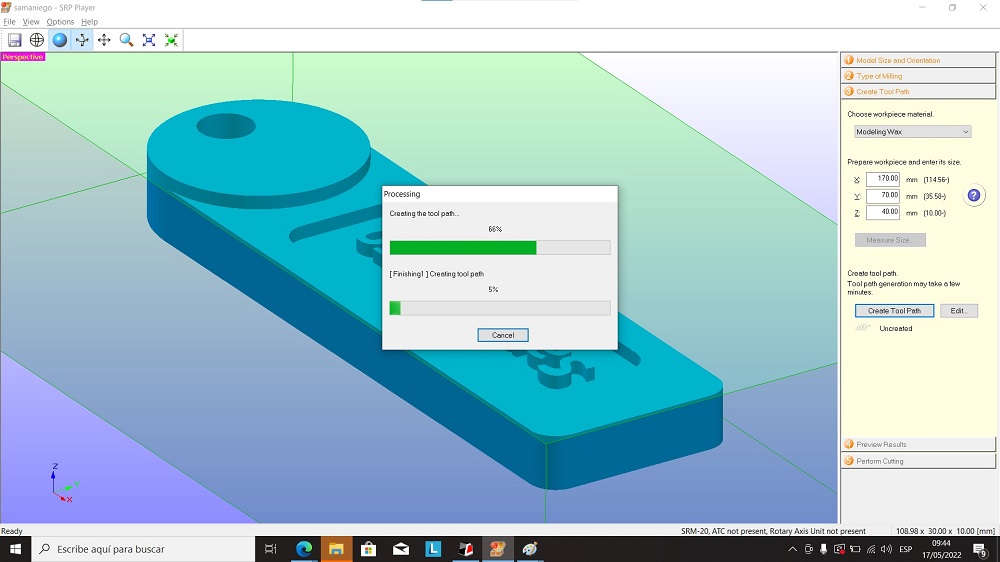
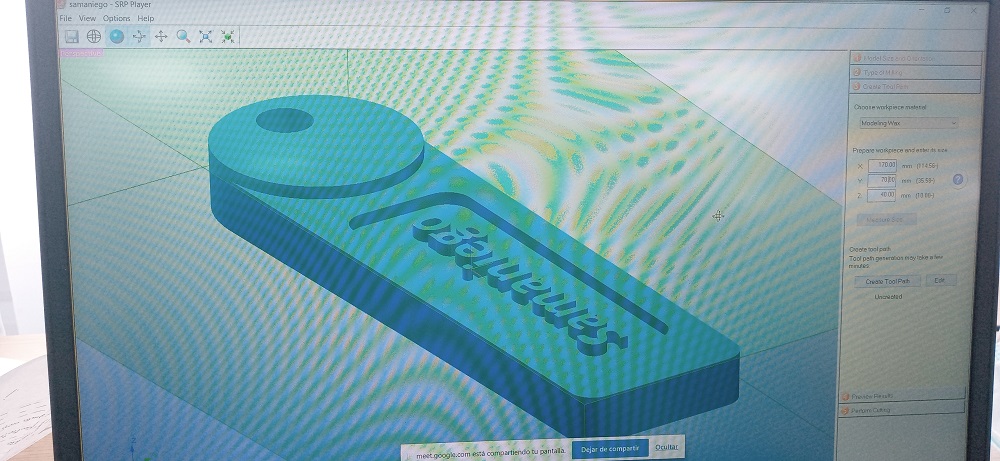 We adjust the parameters so that it cuts

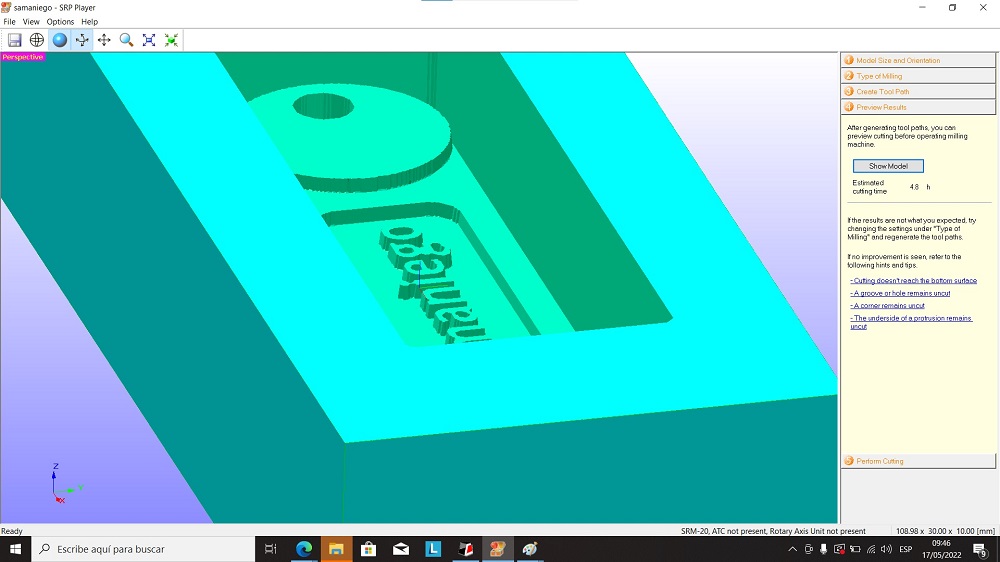
 We verify the lines where it begins and ends
 We check if it is in the middle of the wax
 We verify the size of the strawberry to use
 We start making the cut with the srm20 mini milling machine
INDIVIDUAL ASSIGNMENT
We will make a pawn with onshape then we will mill it with the srm 20
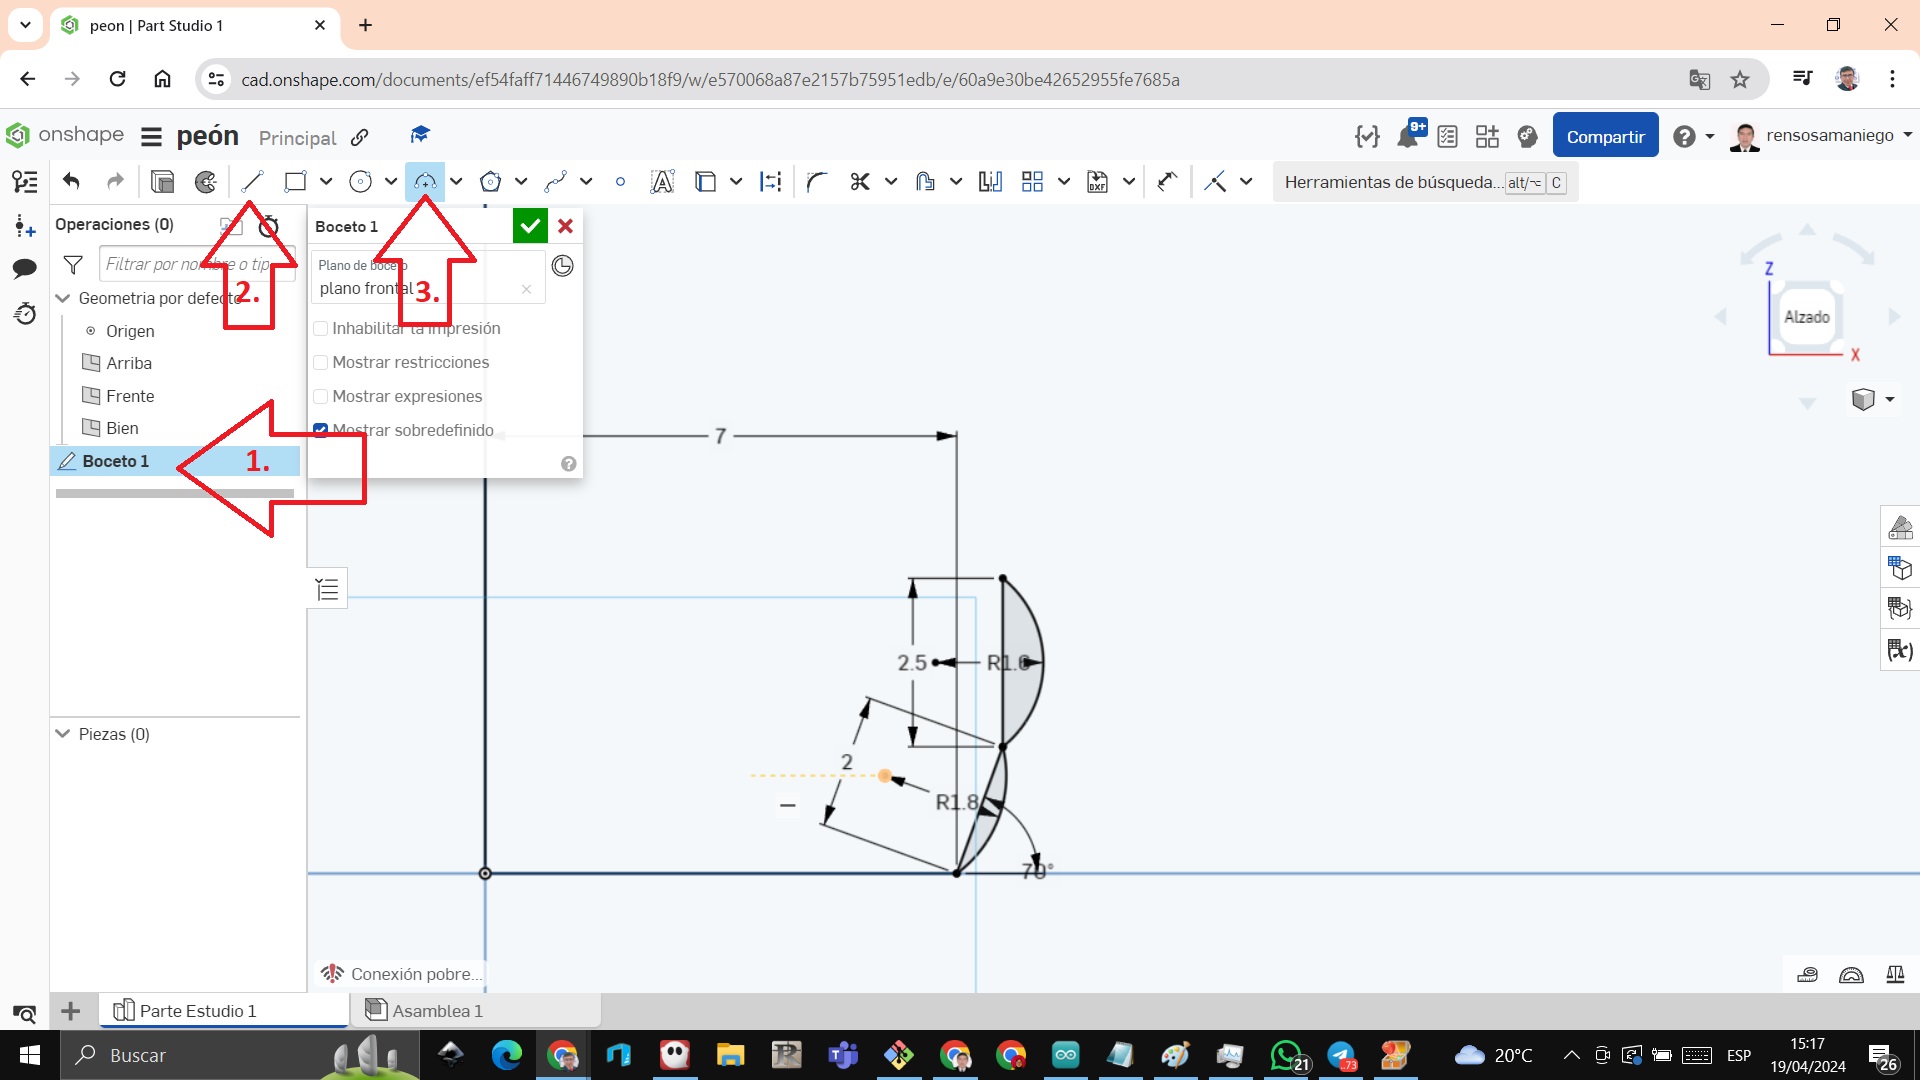
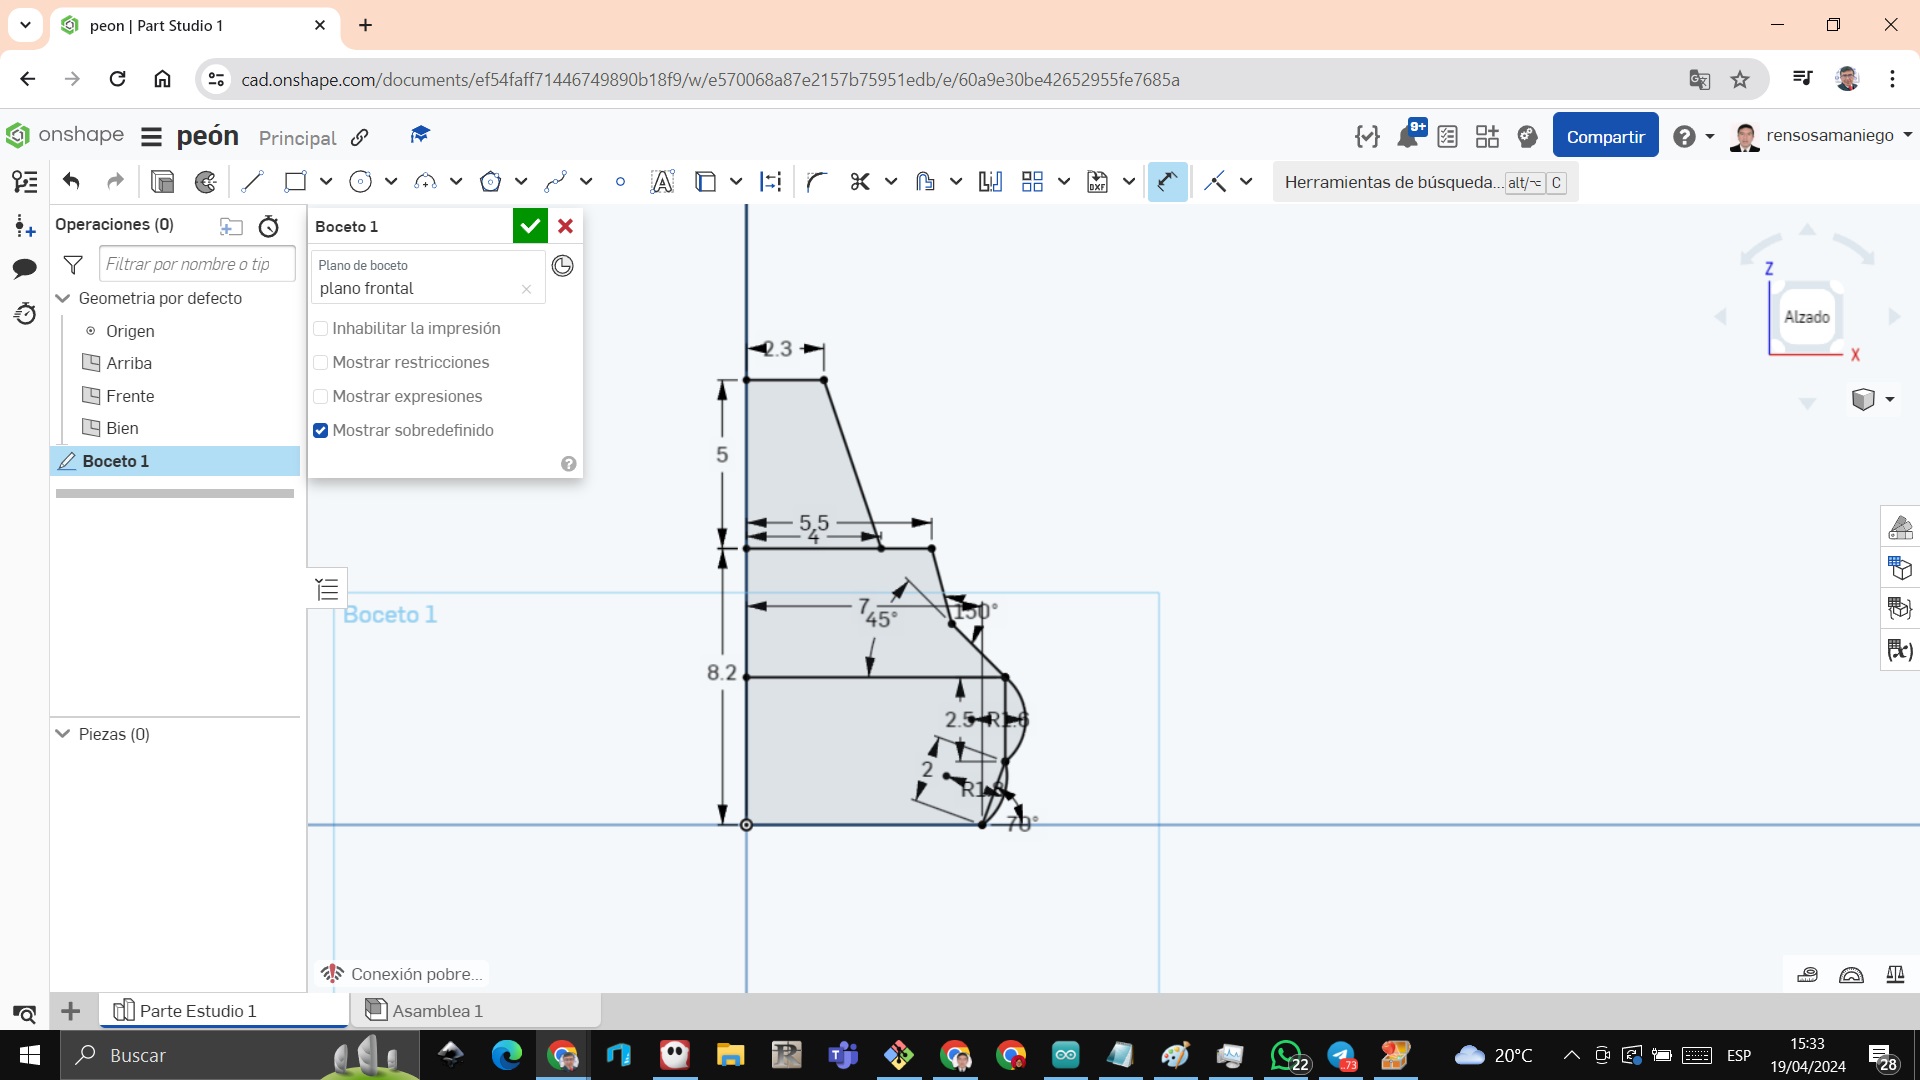
STEP 1: We look at the pawn plans to design it
 STEP 2: We begin to shape the pawn, we work from the half bone, since the width is 14 millimeters, we give it only 7 millimeters
Arrow_1: We create a sketch.
Arrow_2: We work with the line to make the border.
Arrow_3: We create the arcs
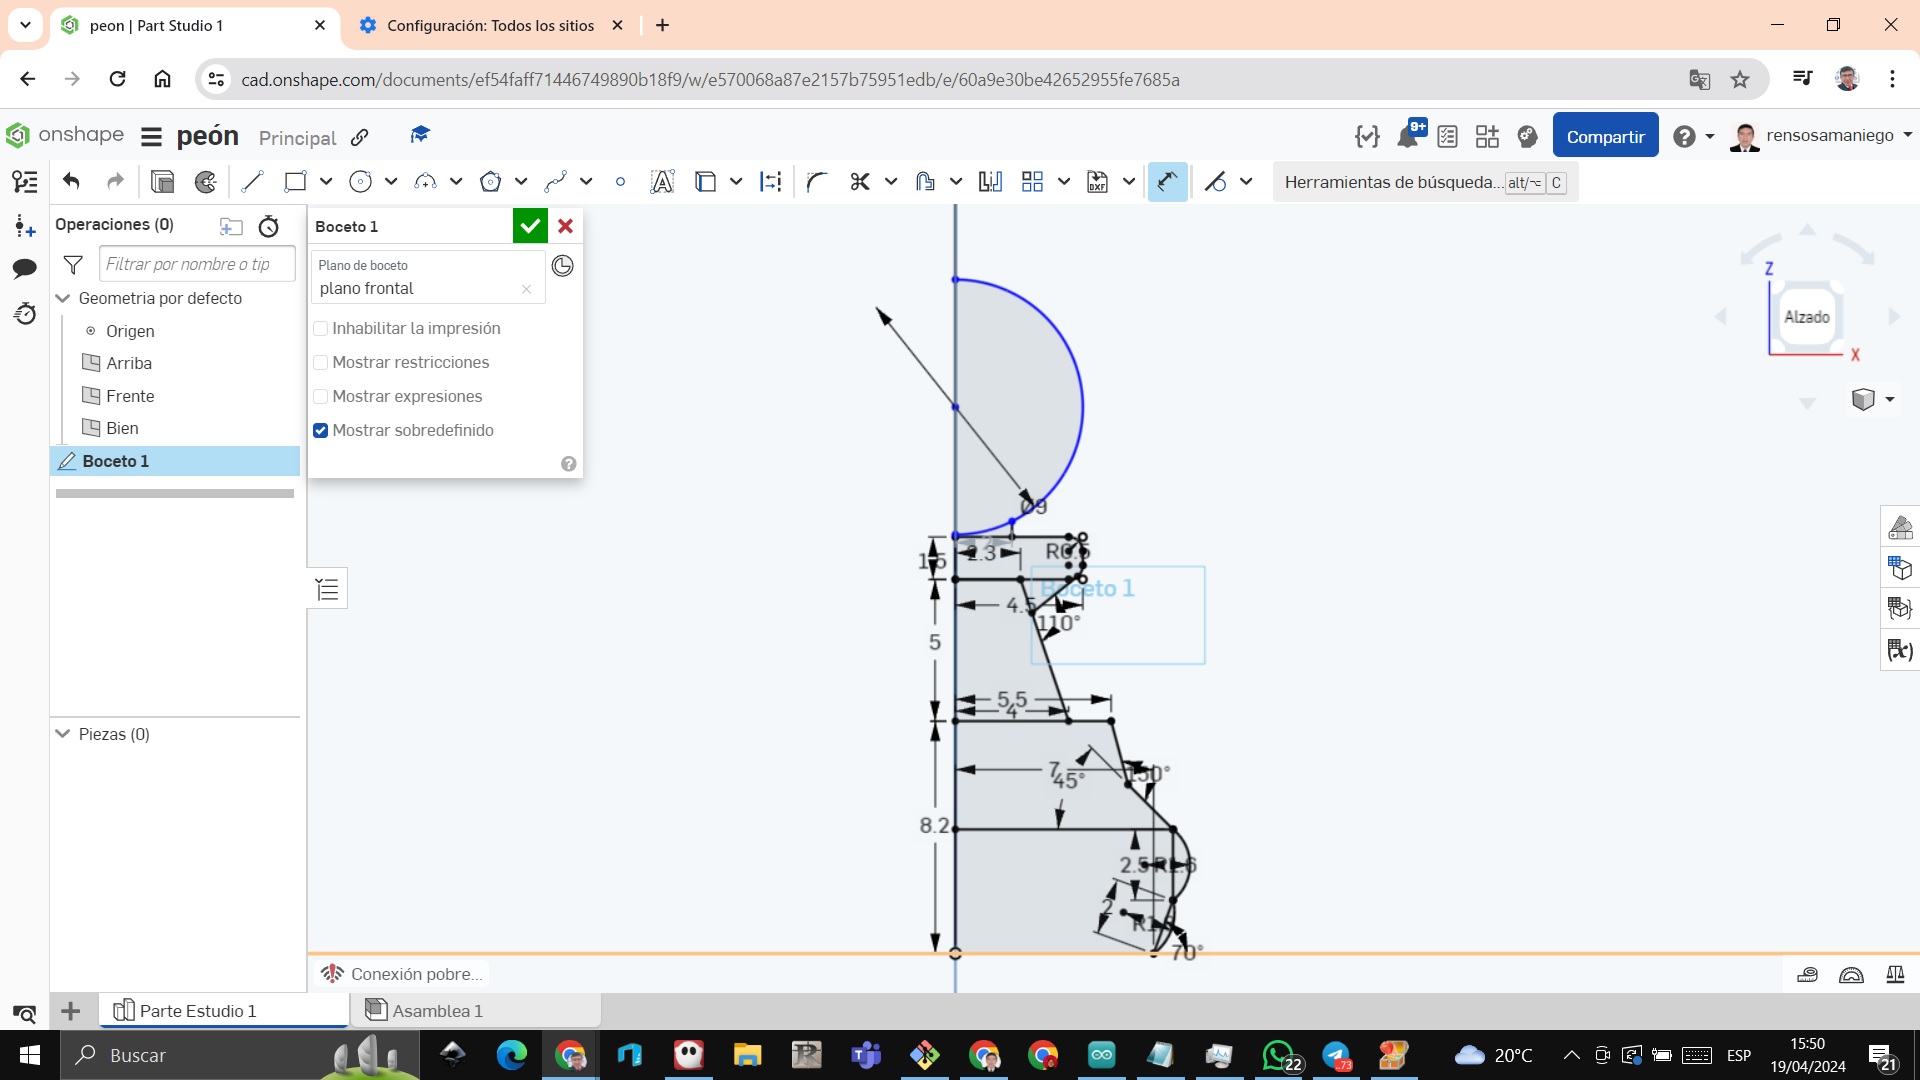 STEP 3:
Arrow_1: Click on the make revolution command.
STEP 3:
Arrow_1: Click on the make revolution command.
Arrow_2: Click on the axis of revolution.
Arrow_3: Click on the middle line that we did when starting our work and we see that the pawn appears

 STEP 4:We create another sketch and put the measurements of 32 millimeters x 45 millimeters and from the base of the pawn to the base of the box a distance of 0.5 millimeters
 Step 5: We move on to extrude the box and change direction so we can make the first half
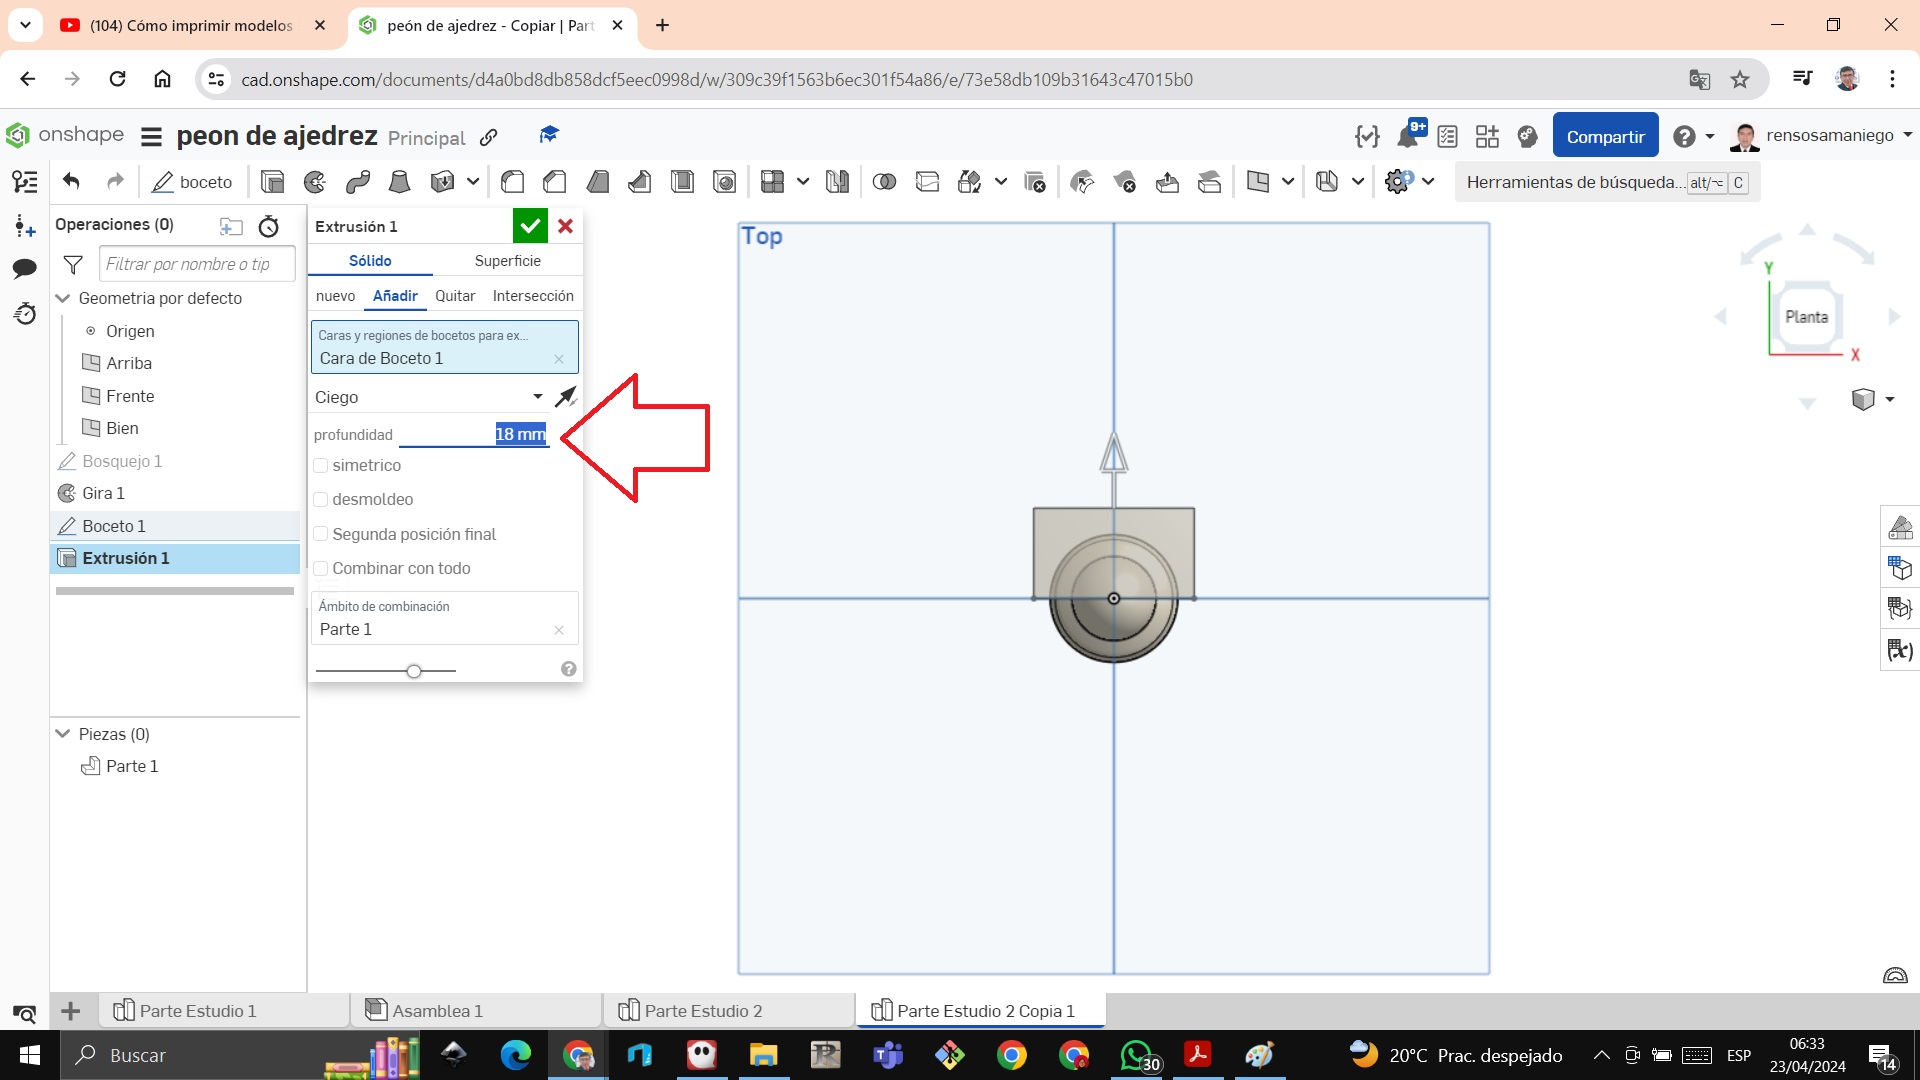
 Step 6: From 25 millimeters we change to 18 millimeters to fit the pawn well
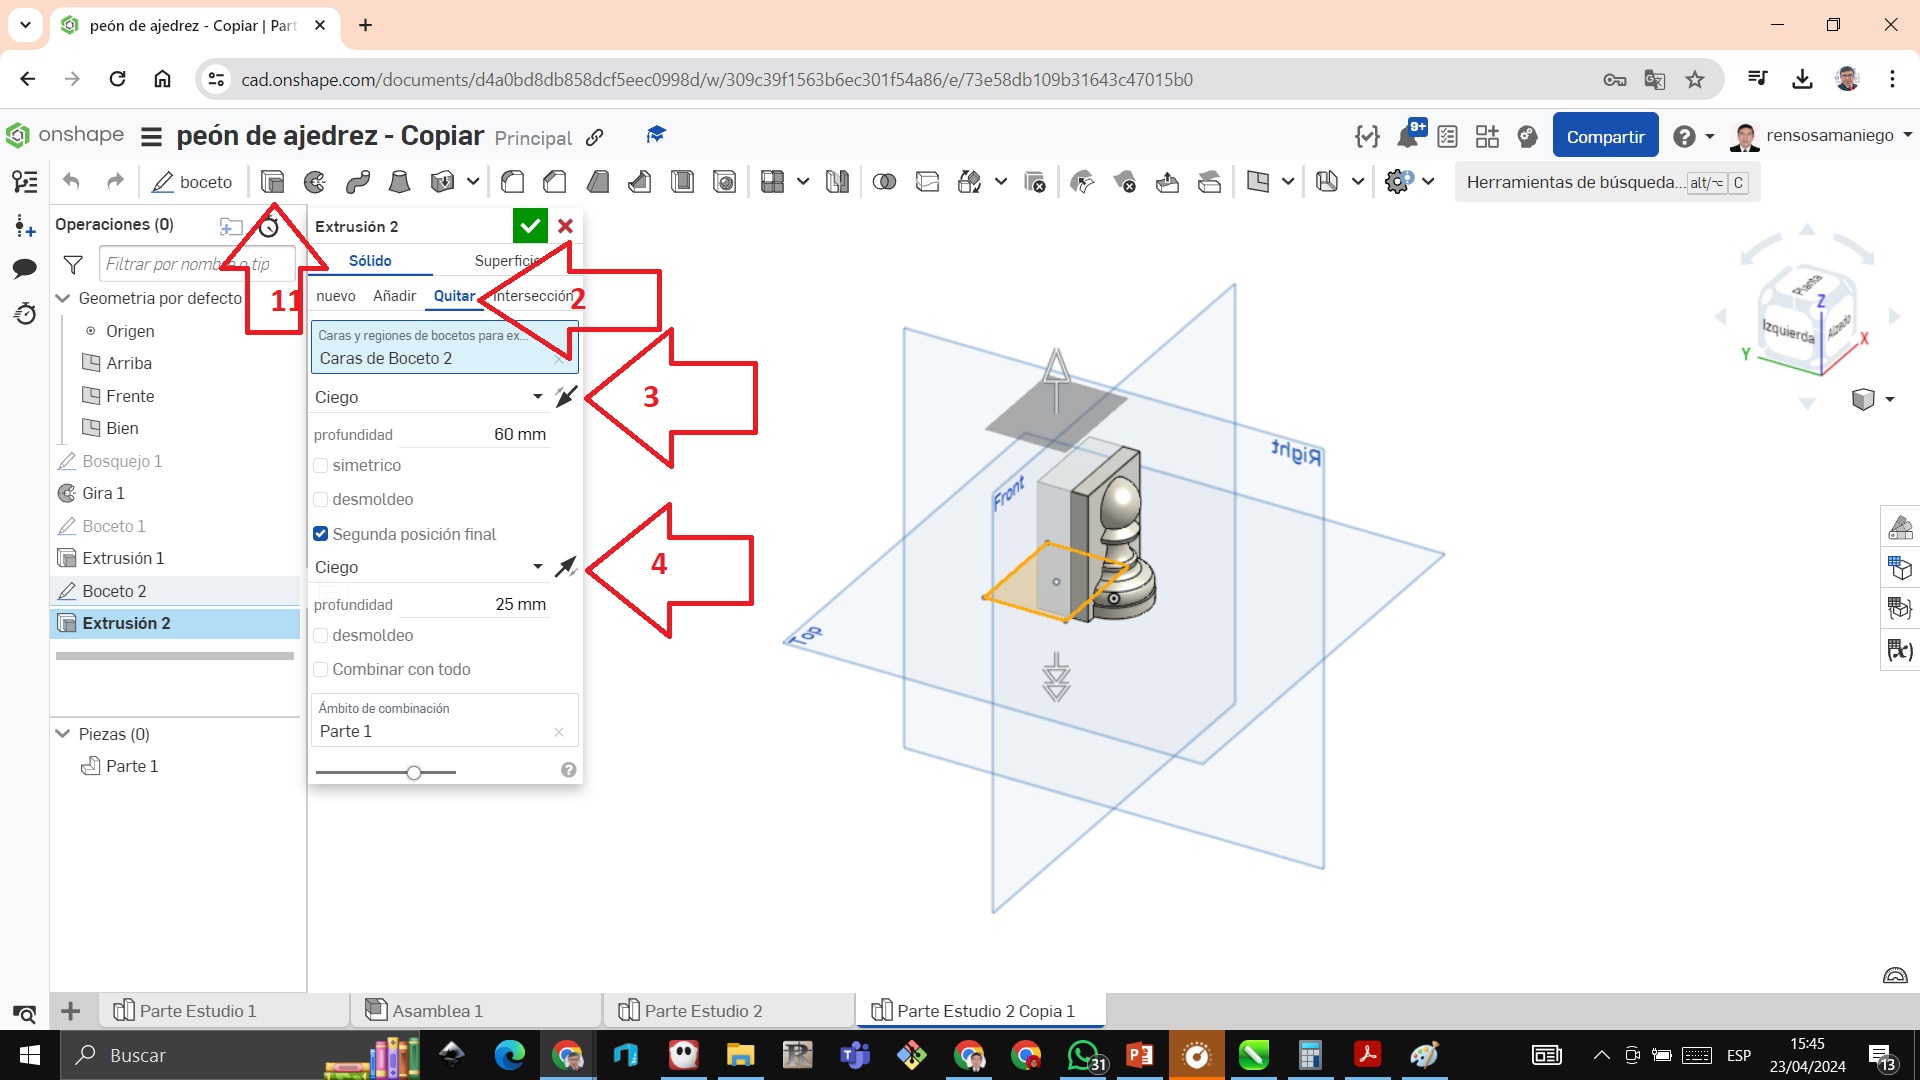
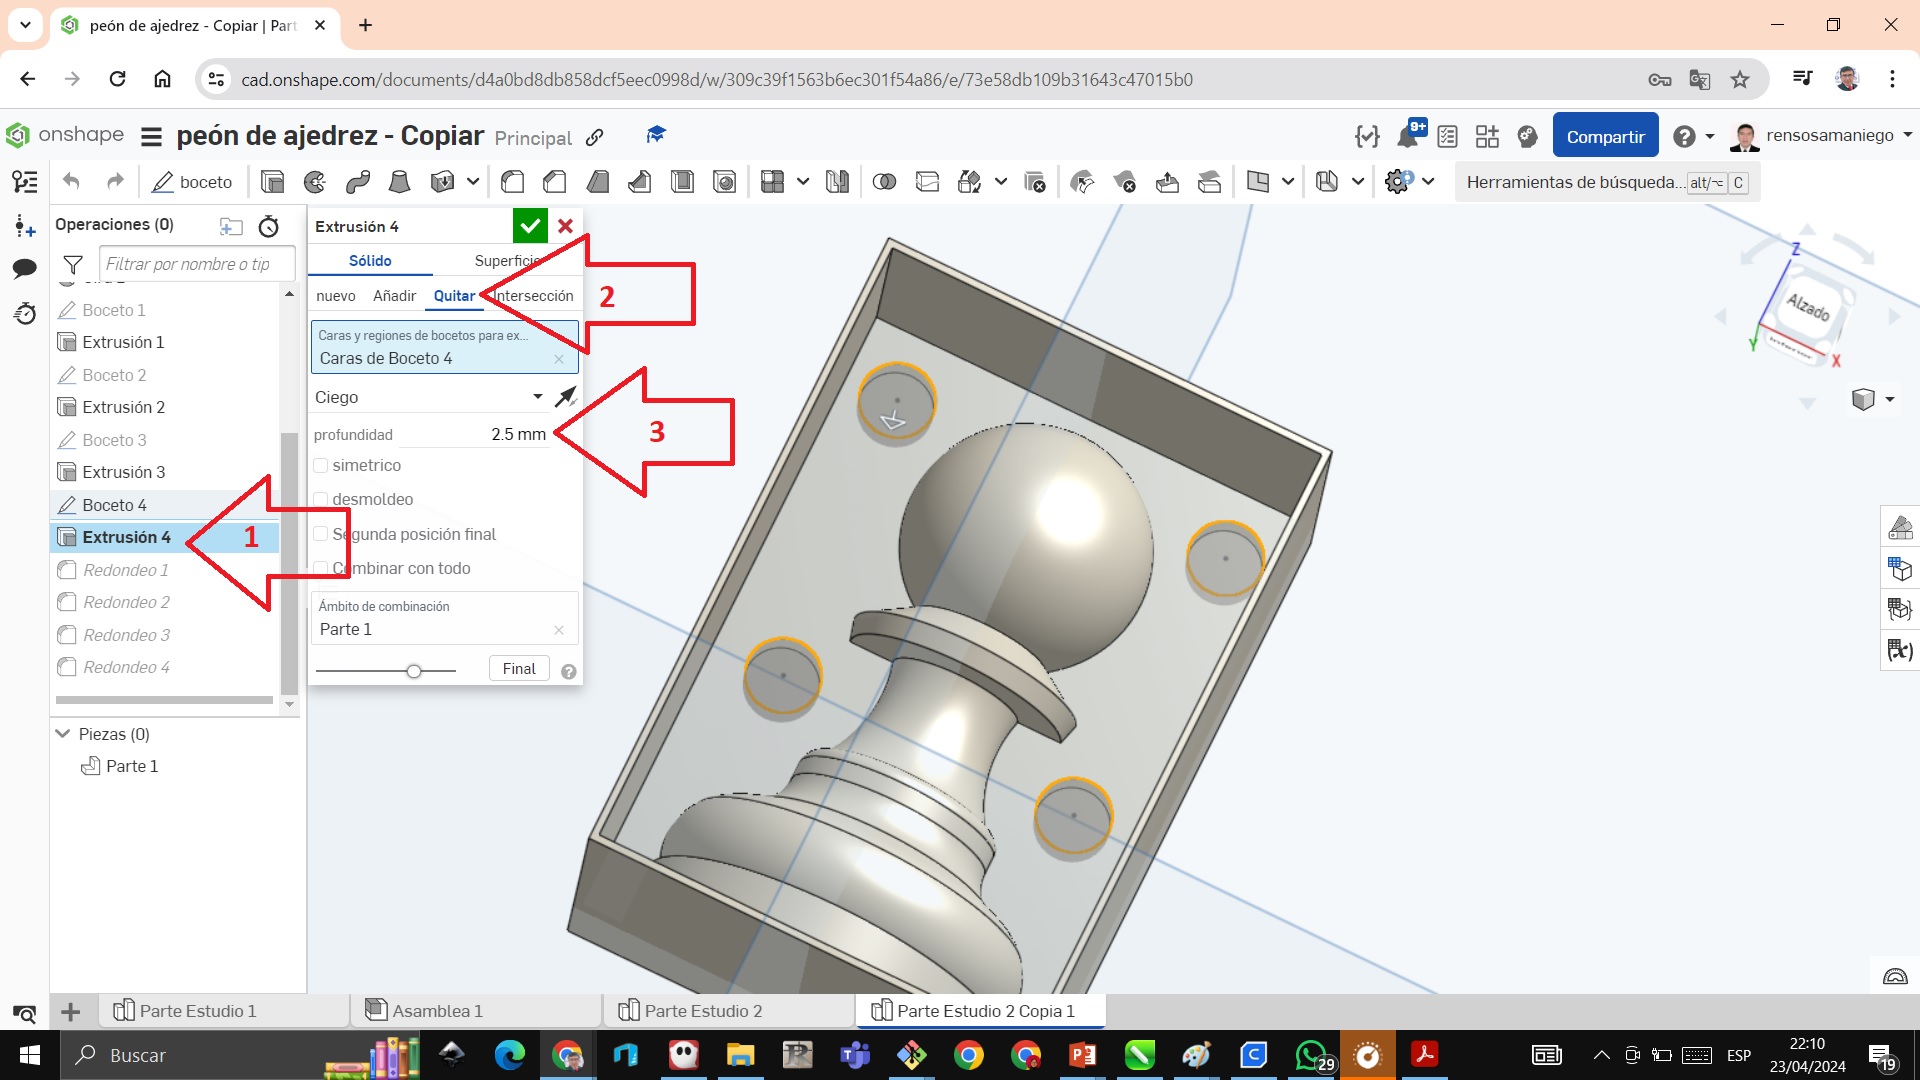
 STEP 7: Extrude, click on remove and change the direction of the blind spot.
 STEP 8: We click on use and equidistance to make the base of the pawn mold
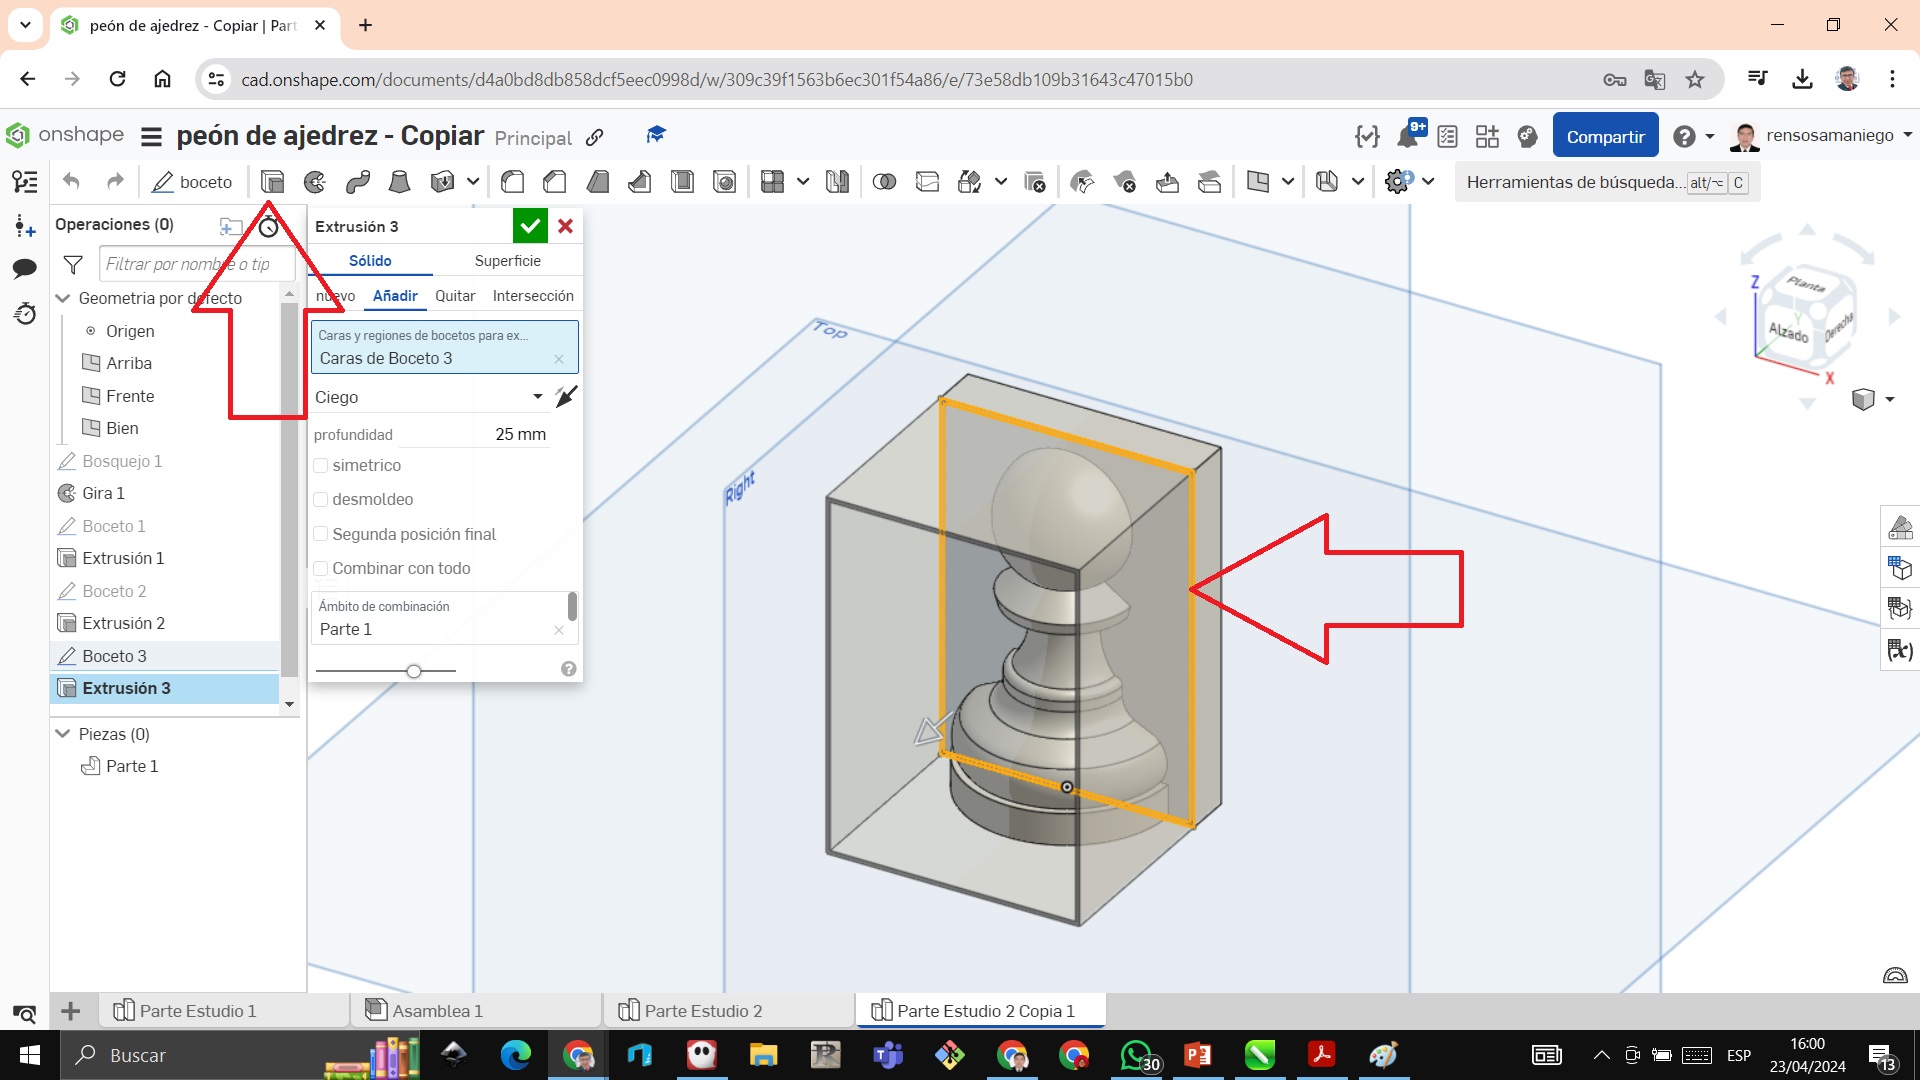
 STEP 9: We extrude the drawer
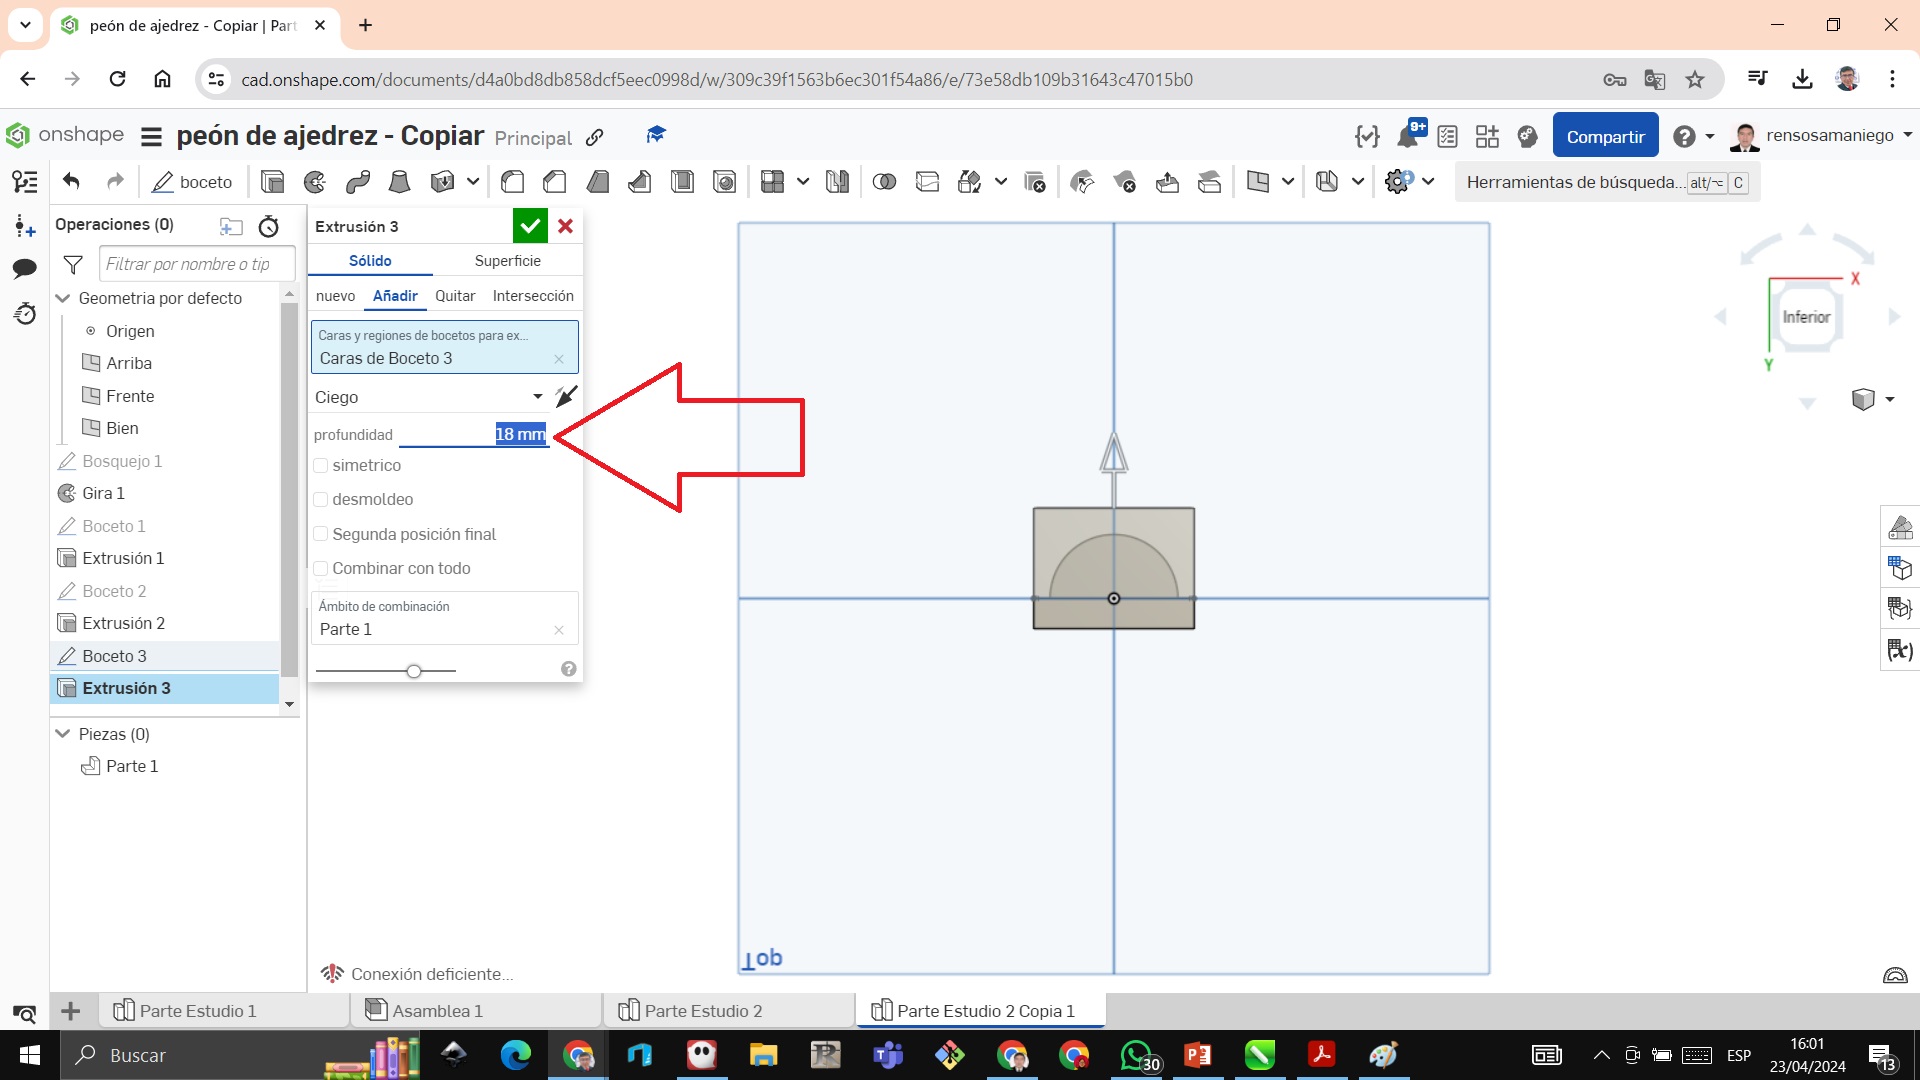
 STEP 10: We change the width to 18 millimeters, the thickness of the middle of the pawn
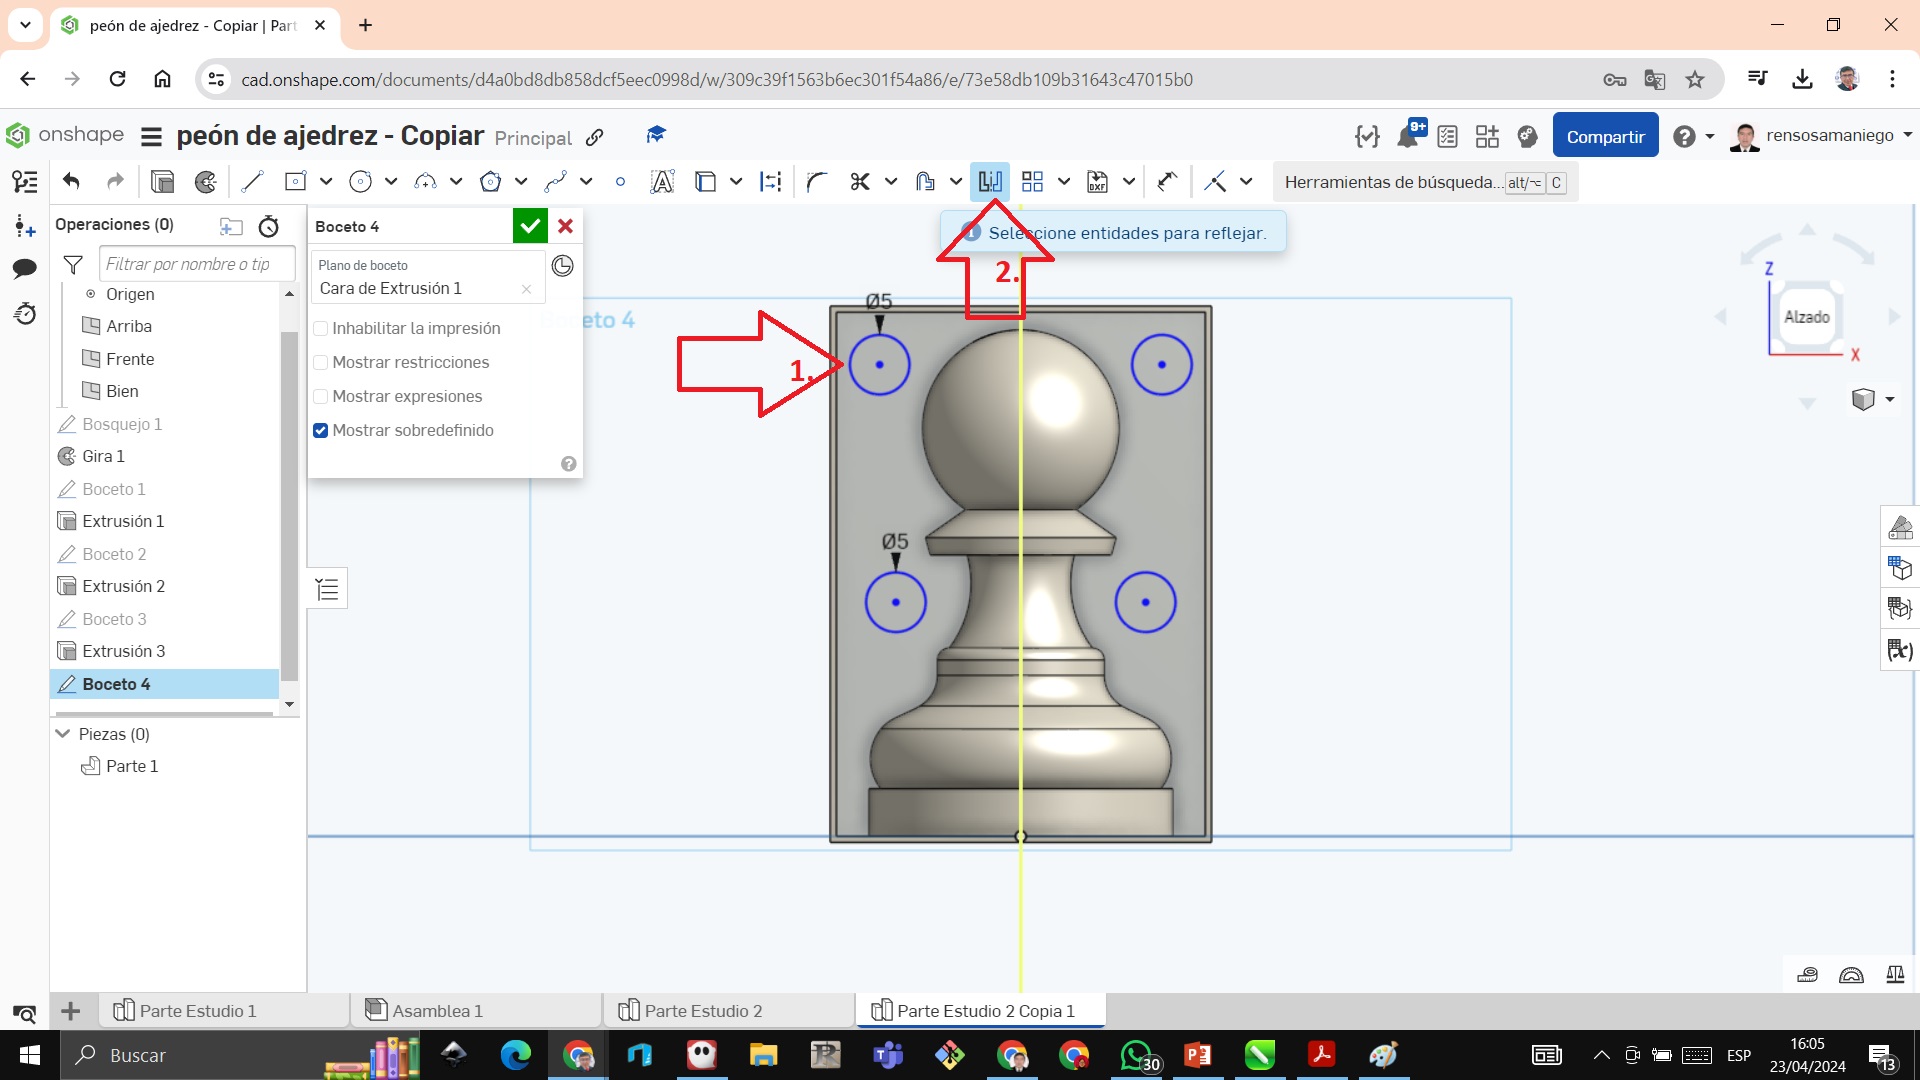
 STEP 11: We make 2 circles with a radius of 0.5 millimeters, then with the symmetry tool we mirror and click in the middle and we see that the image is copied
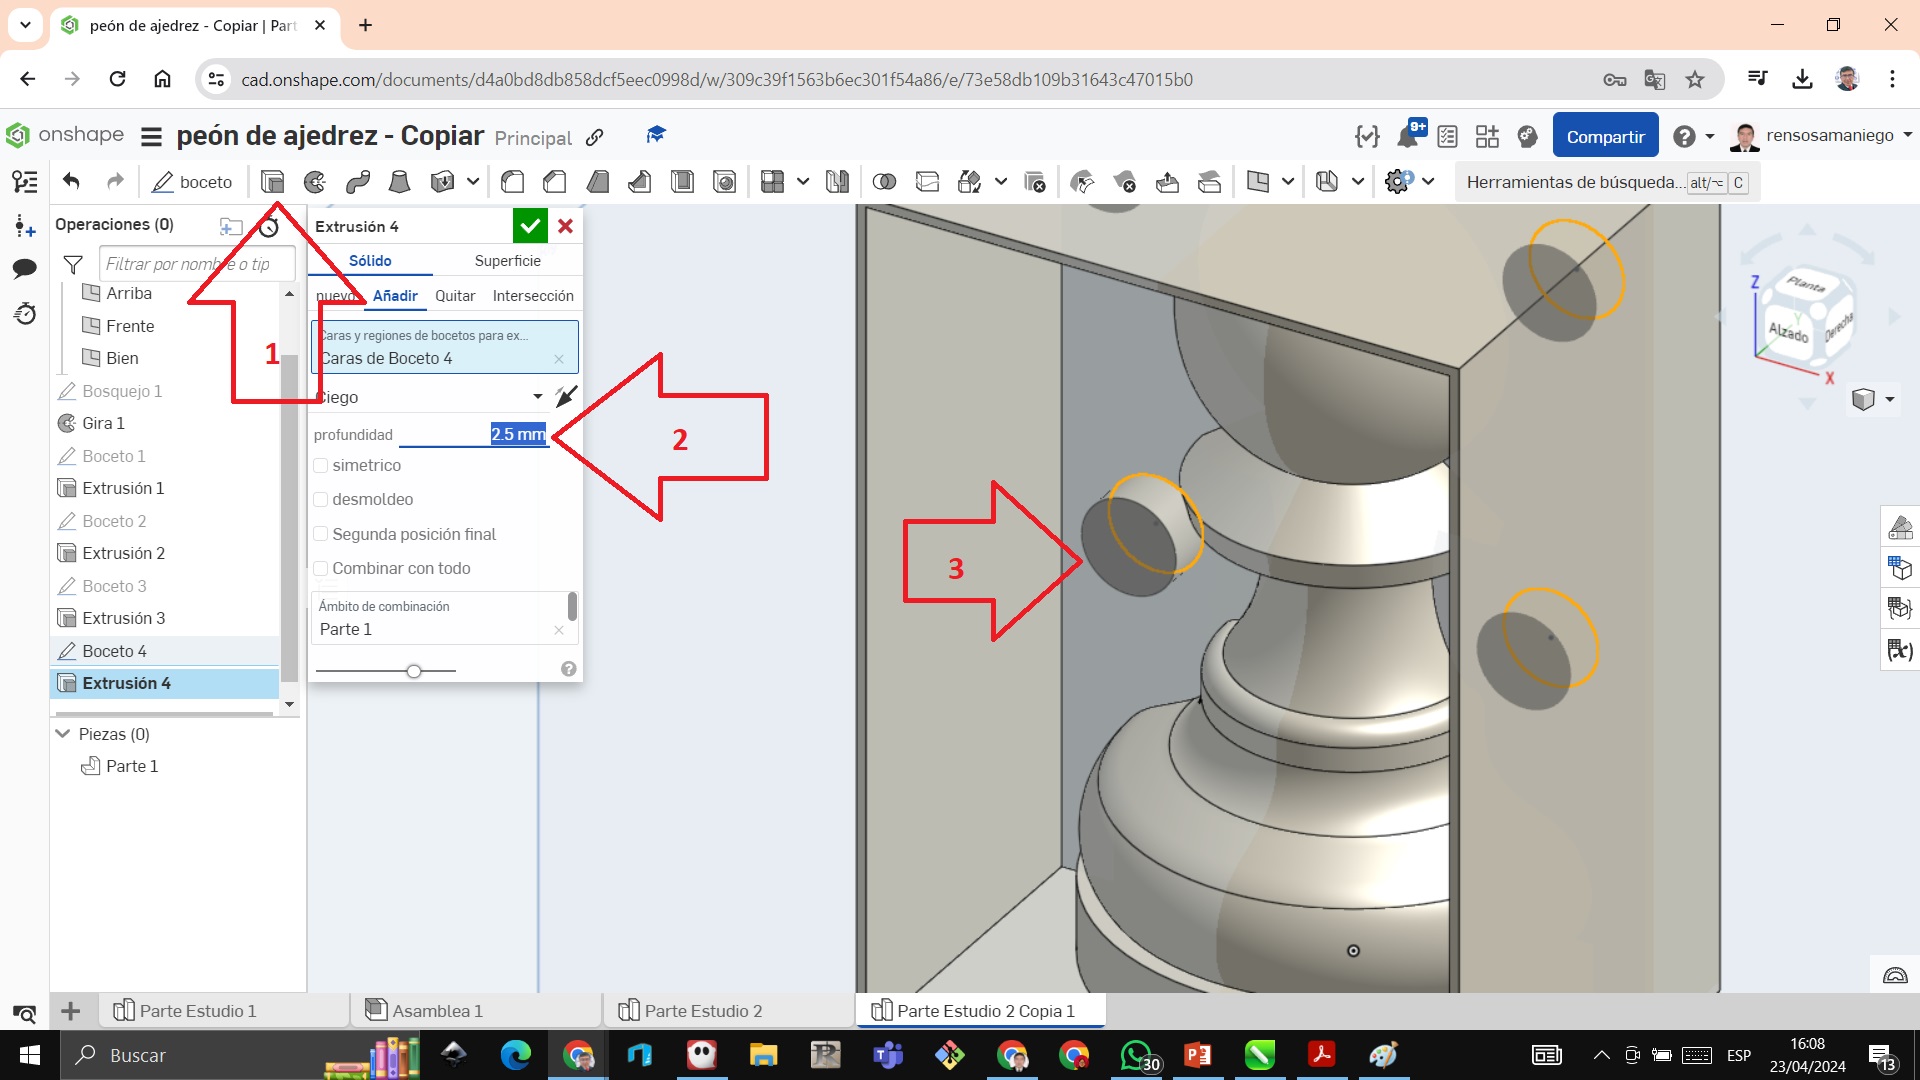
 STEP 12: We extrude the small circles and change the radius to 2.5 millimeters
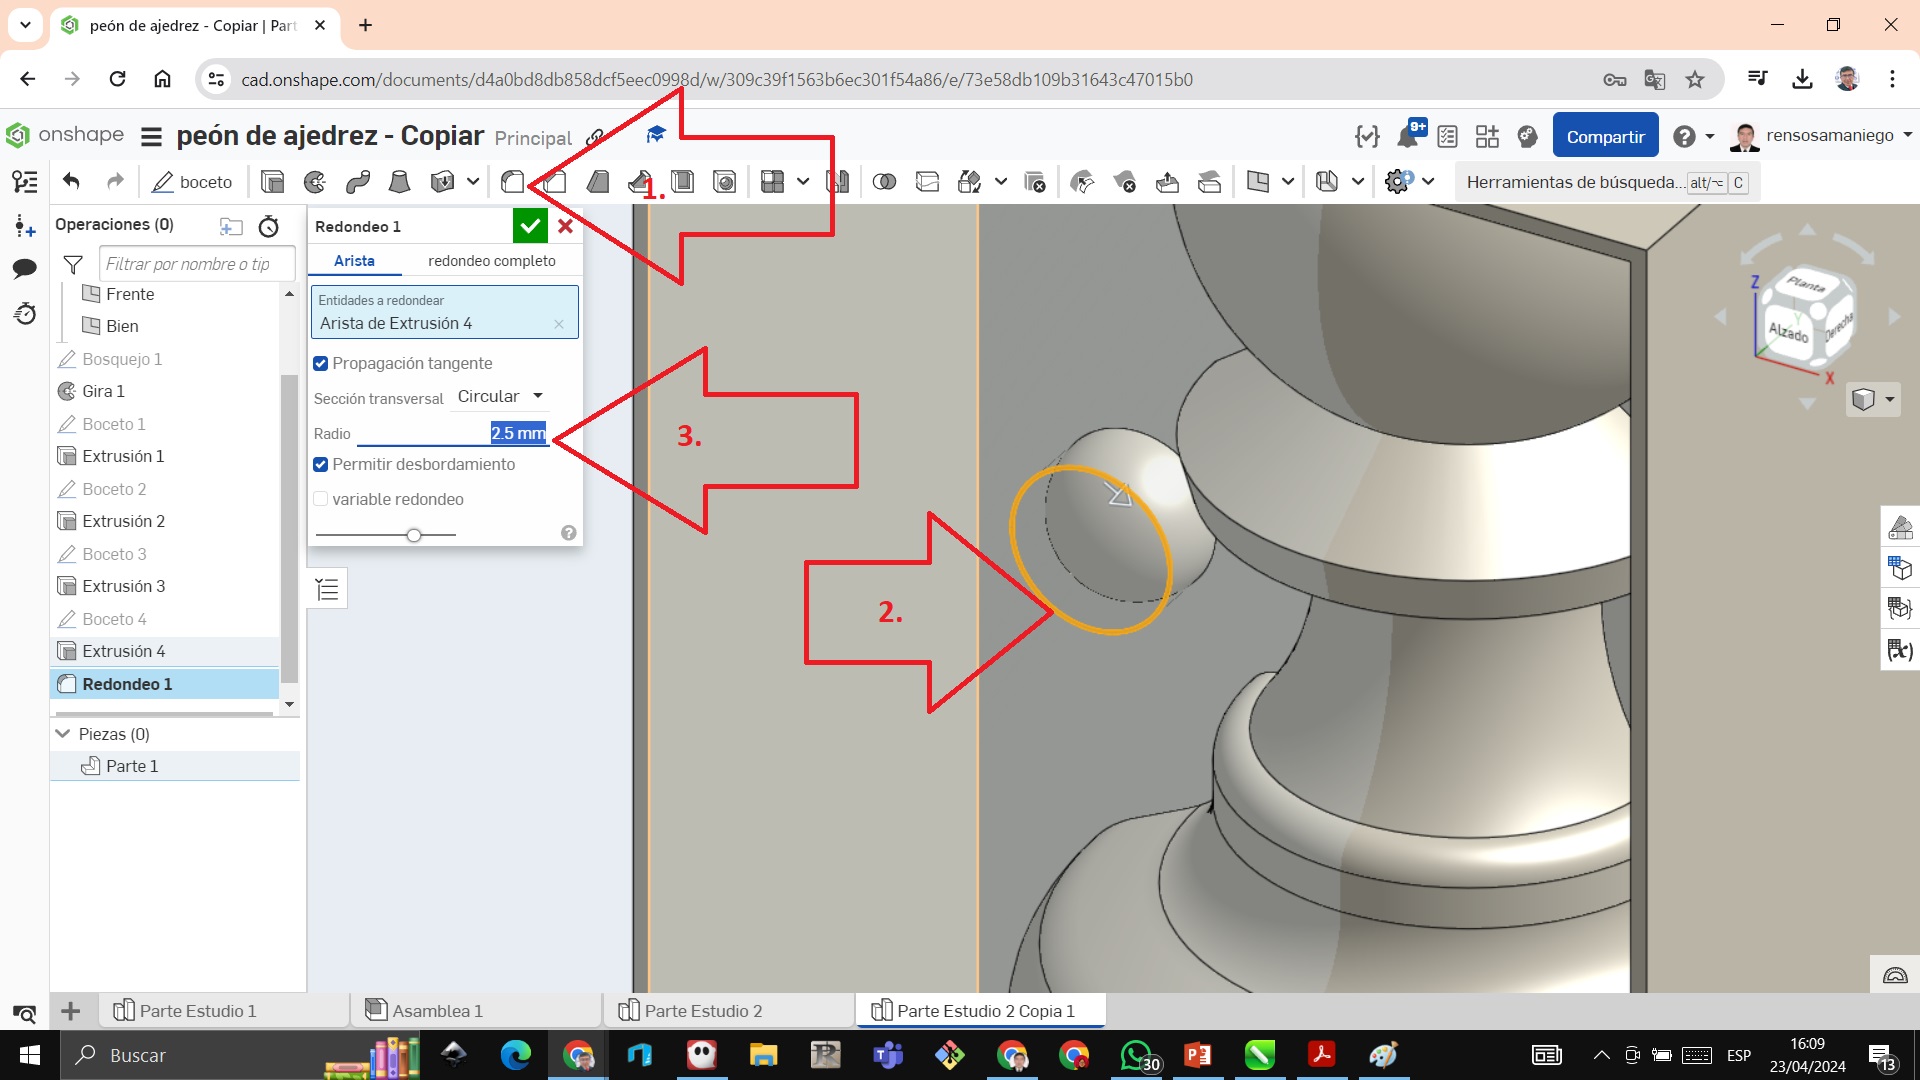
 STEP 13: We click on the rounding tool and we place ourselves on the edge of the circle and we observe that it transforms into an oval
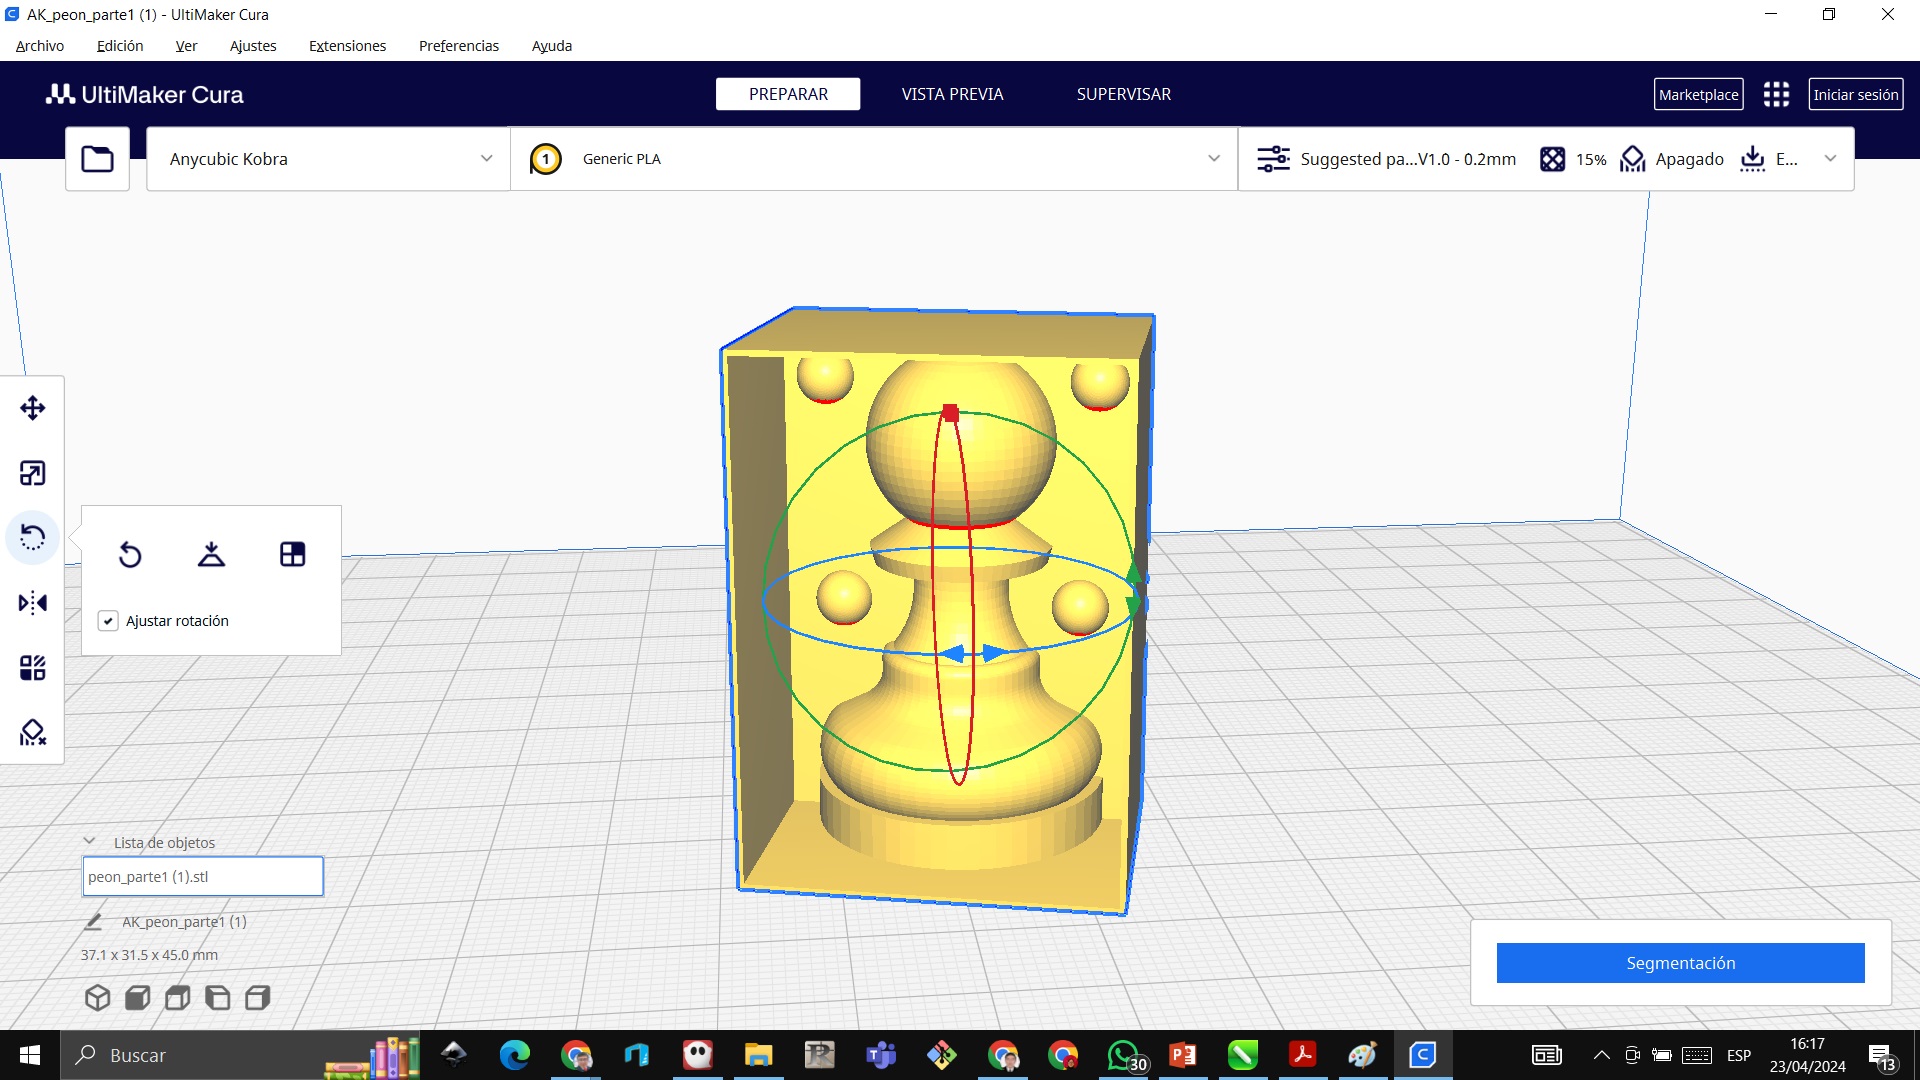
 STEP 14: We export to Ultimaker Cura ready to print
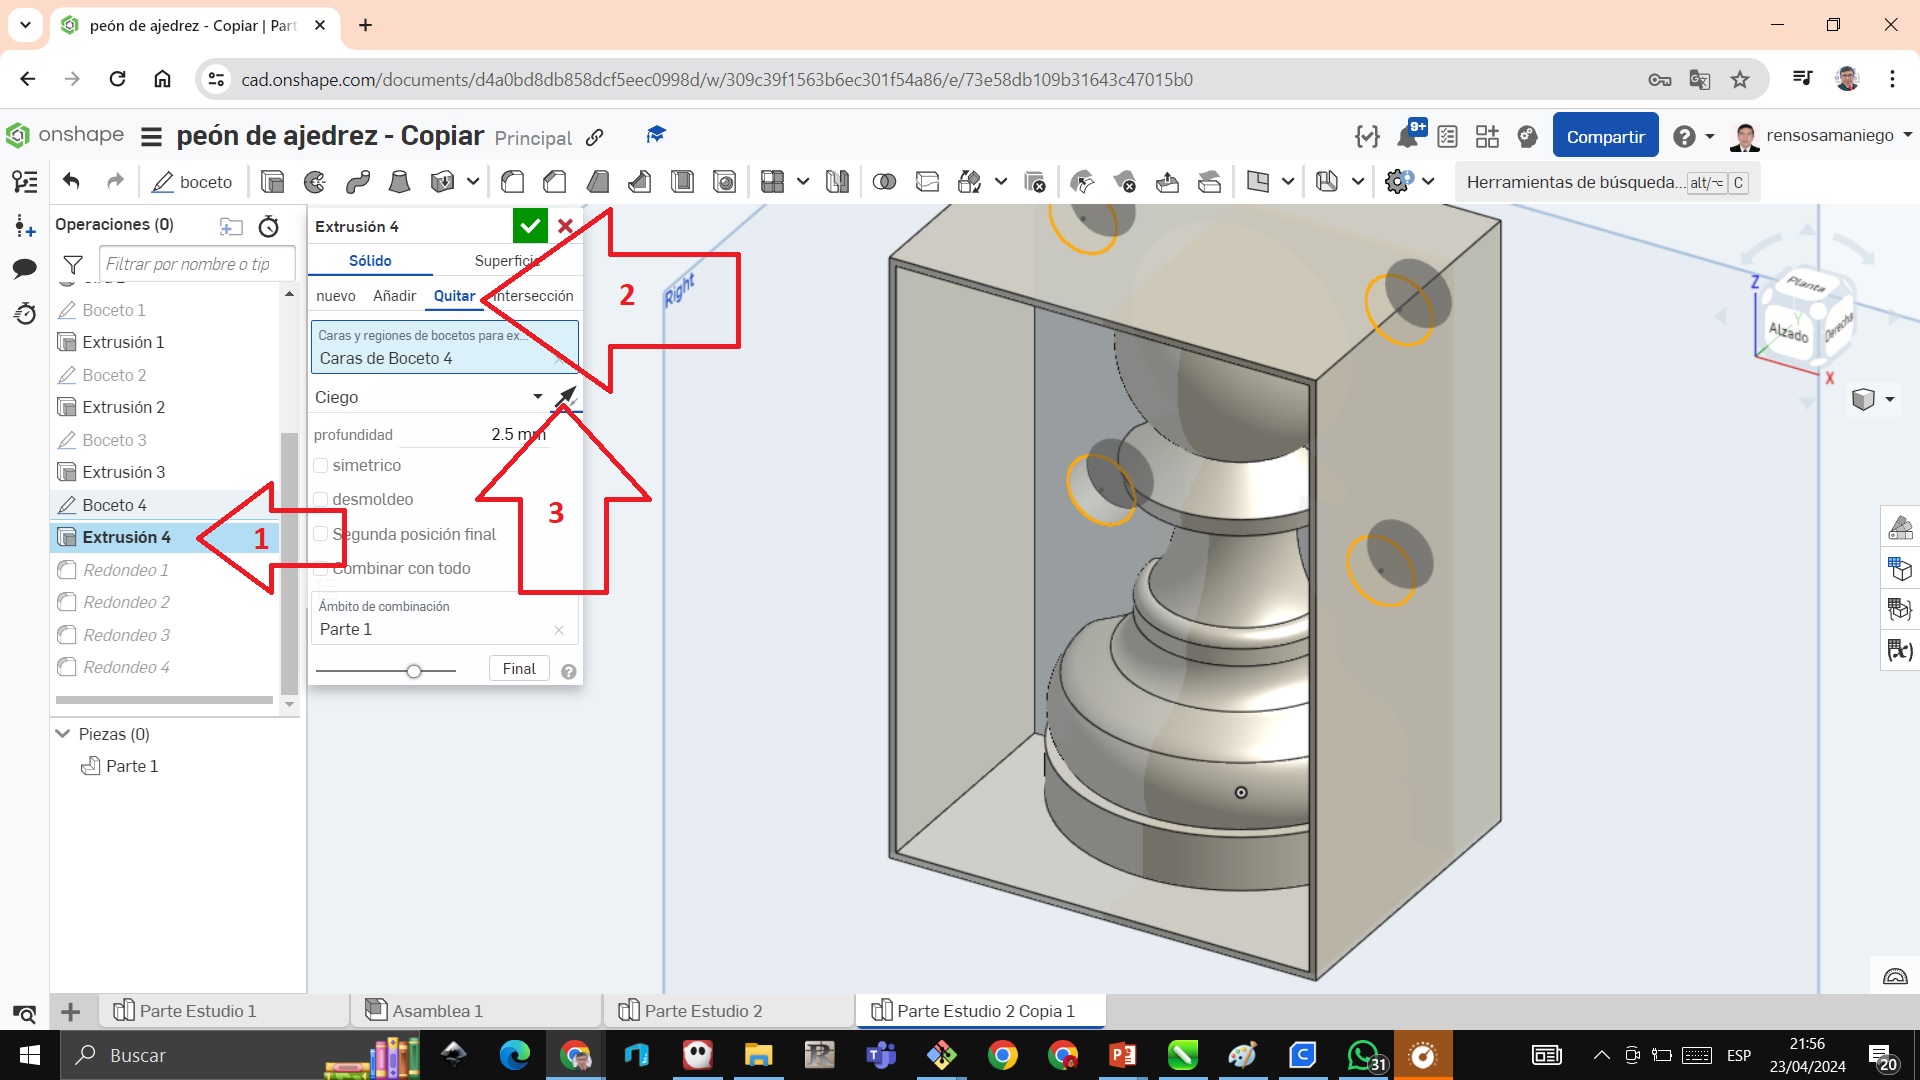
 STEP 15: Now we have to change the shape of the 4 circles, if the previous ones left the circles, these have to be entered, for which we go to the extrusion of the circles, then we click on the remove tool and change the direction of the blind spot, We export the file and send it to print
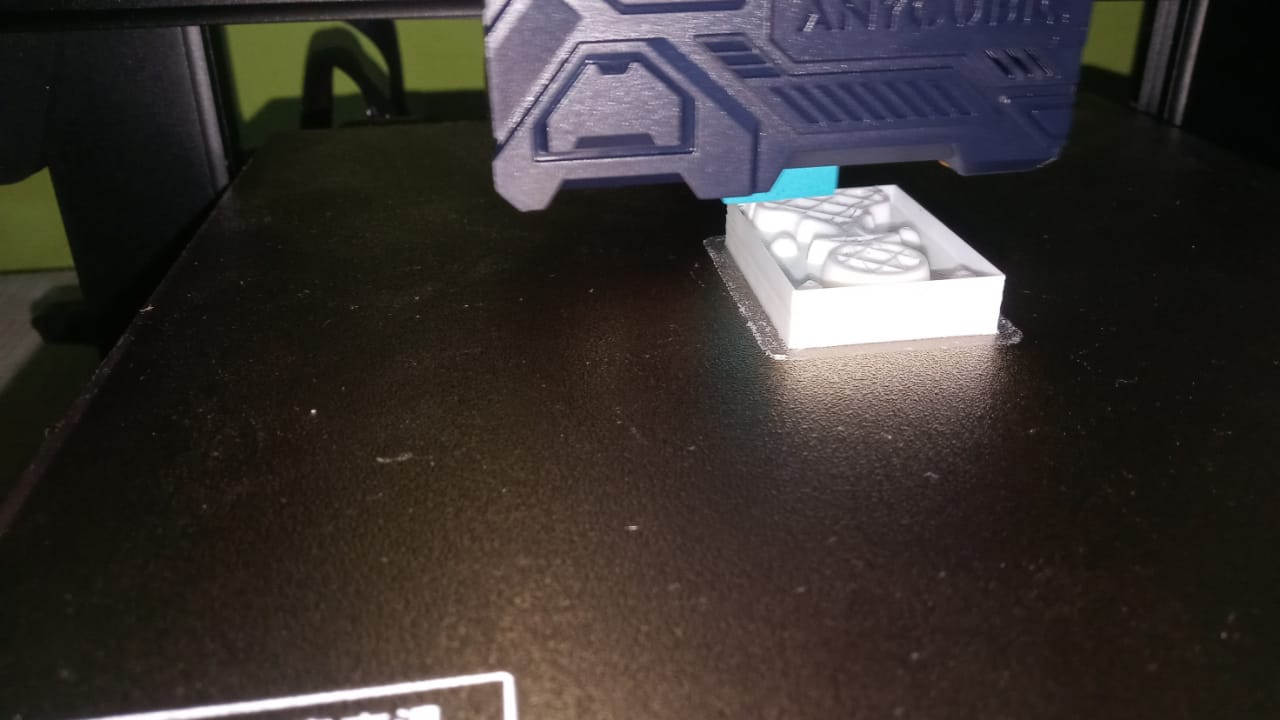
 STEP 16: We observe how it is printing
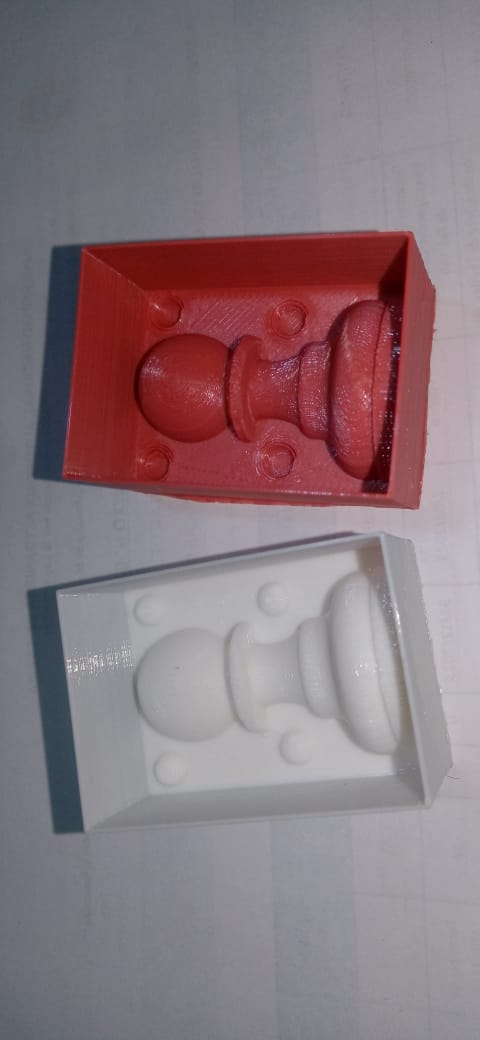
 STEP 17: We got the following impression
 STEP 18: We use silicone A and silicone B and mix it in equal proportions
STEP 19: We make the bases of the impressions silicone
STEP 18: We use silicone A and silicone B and mix it in equal proportions
STEP 19: We make the bases of the impressions silicone
 STEP 20: We let it dry until the next day.
 STEP 21: We glue the 2 silicones and make the chocolate and let it dry until the next day
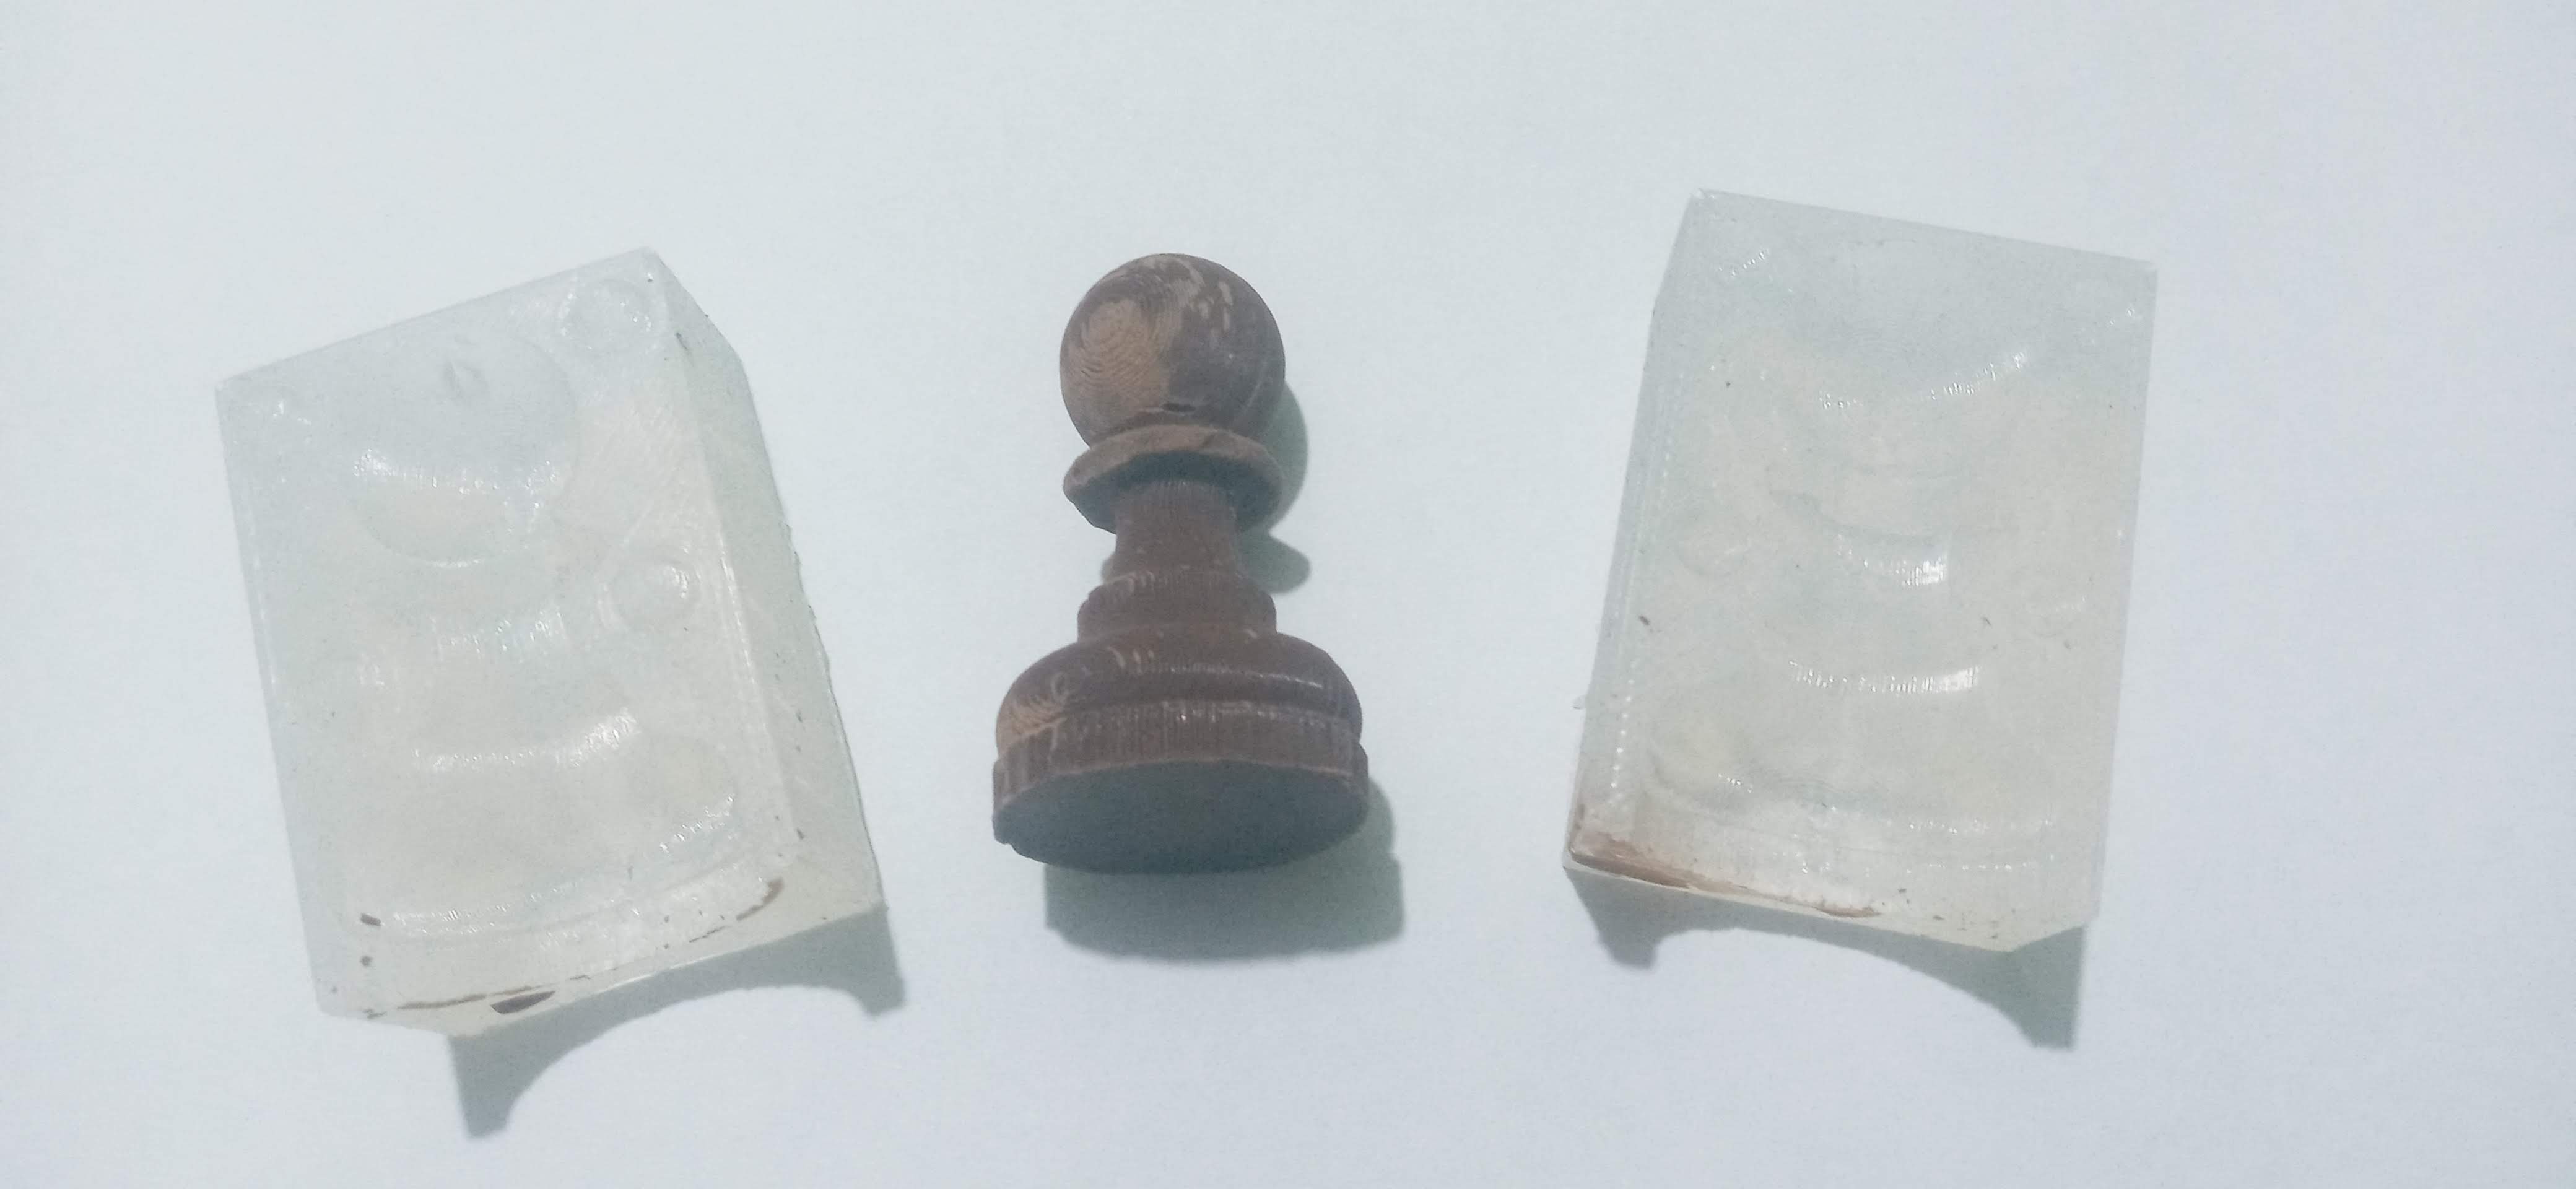
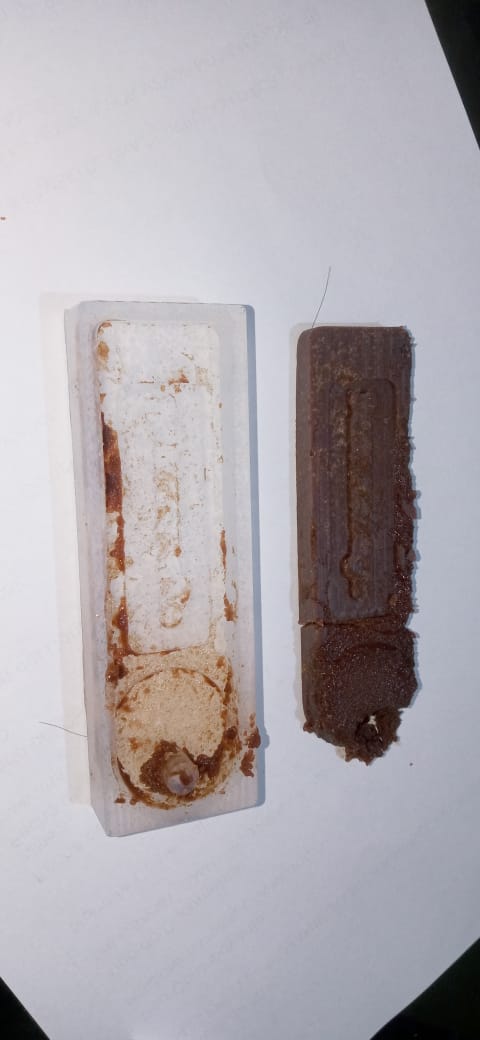
 STEP 22: We open the mold and see that we have the chocolate pawn ready to eat.