Week 6: Embedded Programming
Group assignment:
- Browse through the datasheet for your microcontroller
- Compare the performance and development workflows for other architectures
- Document your work to the group work page and reflect on your individual page what you learned
Individual assignment:
- Write a program for a microcontroller development board to interact (with local input &/or output devices) and communicate (with remote wired or wireless devices)
Group assignment:
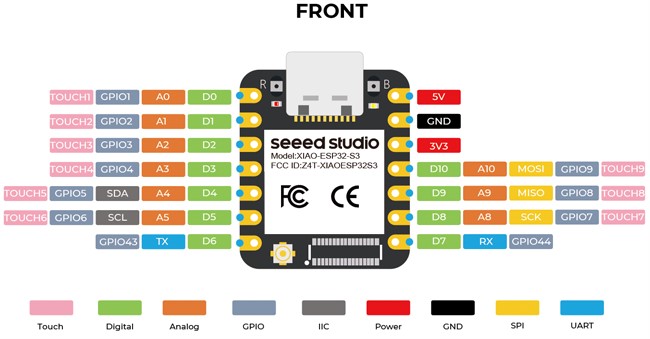
XIAO ESP32 C3 MICROCONTROLLER
It is a small module, equipped with a powerful ESP32-S3 chip with a 240 MHz dual-core Xtensa 32-bit LX7 processor. It allows 2.4 GHz WiFi and Bluetooth 5.0 wireless communication, in deep sleep mode it consumes only 14 μA of current, while managing the battery charge. Perfect for IoT applications.
FEATURES XIAO ESP32 C3
- Efficient System: The board is based on Xtensa’s ESP32-S3 system with a clock speed of up to 240 MHz, equipped with many communication ports, compatible with the Arduino IDE and CircuitPython.
- Wireless Communication: Built-in 2.4GHz WiFi and Bluetooth Low Energy 5.0 communication system, the maximum data transmission distance is 100m with the U.FL antenna mounted.
- Low consumption: provides 4 operating modes, in deep sleep mode it consumes only 14 μA. It also allows you to charge lithium batteries.
- Thumb-sized design: the dimensions of the plate are only 21 x 17.5 mm, the classic case of the Seeed Xiao series
Seeed Xiao ESP32S3 Board Specifications
- ESP32-S3R8 32-bit Xtensa LX7 240 MHz chip
- Wireless communication: WiFi 2.4 GHz and Bluetooth 5.0 / Mesh
- Flash Memory: 8MB
- PSRAM: 8MB
- Interfaces:
- 1x UART, 1x I2C, 1x I2S, 11x GPIO (PWM), 9x ADC
- 1 reset button, 1 start button
- 1x Load LED, 1x User LED
- Input voltage (USB type C) 5V
- Input voltage (BAT) 4.2V
- Charging current: 50mA
- Standby power consumption:
- USB type C: 5V / 19mA
- BAT: 3.8V/22mA
- Low consumption model:
- Modem-sleep: approx. 22mA
- Light-sleep: approx. 2mA
- Deep Sleep: approx. 14 μA
- WiFi power consumption
- Active: approx. 100mA
- BLE power consumption:
- Active: approx. 85mA
- Operating temperature: -40°C to 65°C
- Dimensions: 21 x 17.5 mm
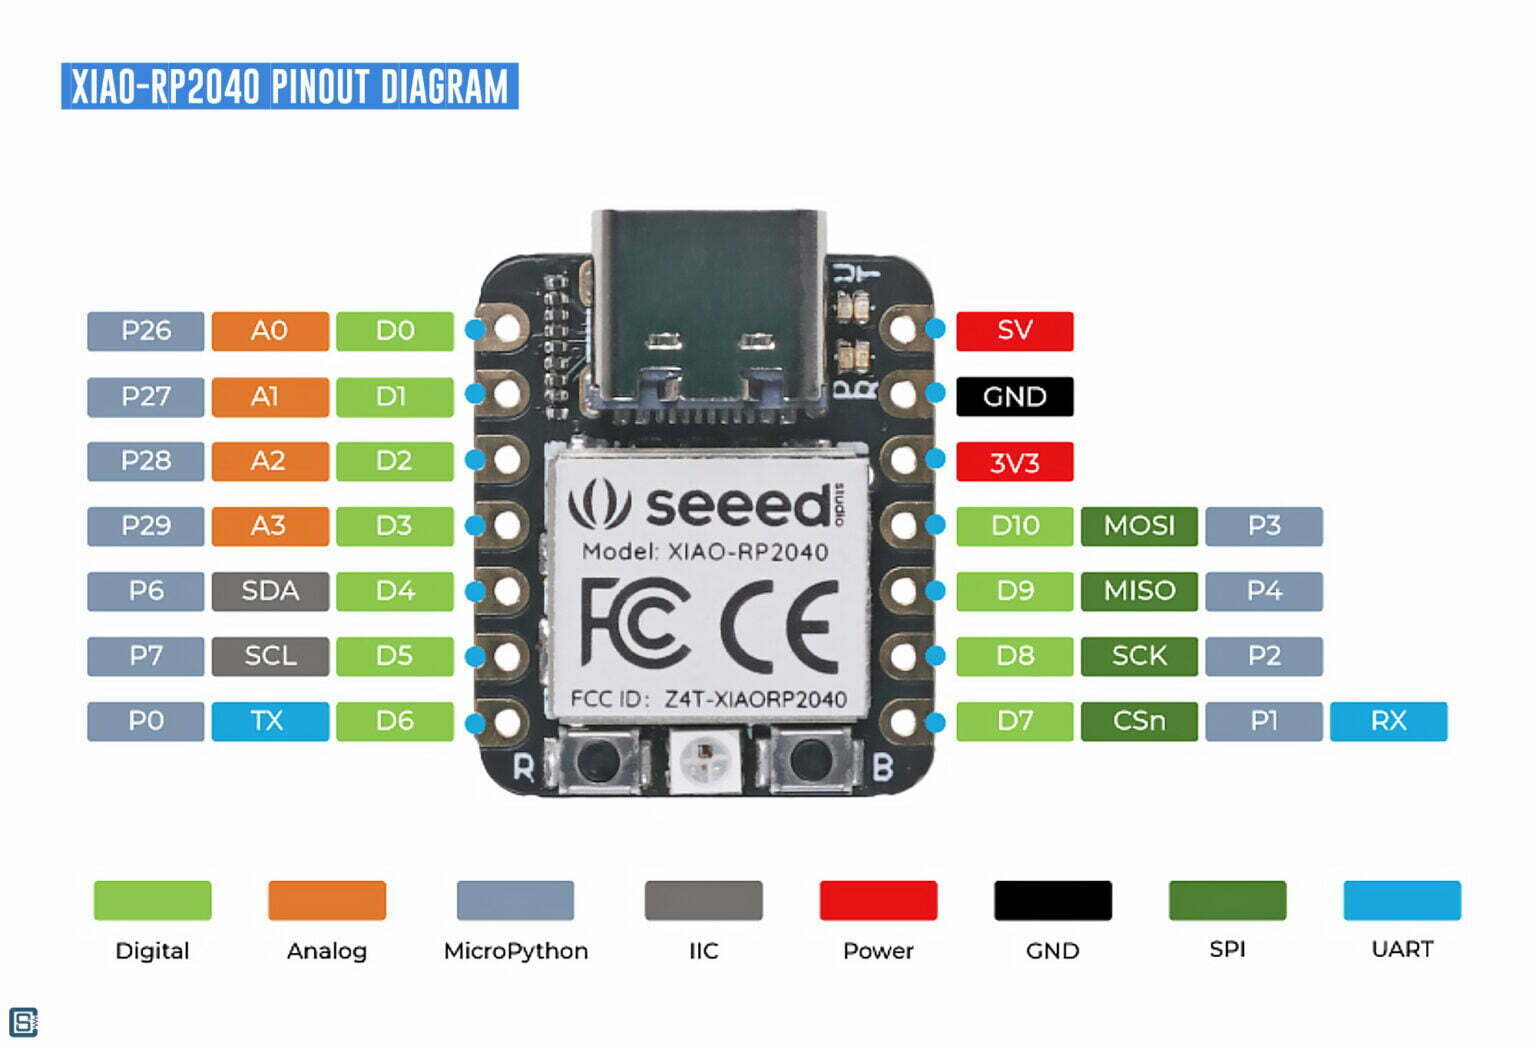
XIAO RP2040 MICROCONTROLLER
It is a Seeeduino XIAO series development board. It is a compact board with a wide range of interfaces, it is equipped with the Raspberry RP2040 chip (Dual-core ARM Cortex M0+ @133MHz), ideal for your projects that require high performance, low power consumption and small dimensions.
CARACTERISTICAS XIAO RP2040
It does not require an external programmer and is fully compatible with Arduino, MicroPython and CircuitPython - RP2040 ARM Cortex M0+ dual-core microcontroller, flexible clock running up to 133MHz, 264kB of SRAM and 2MB of integrated flash memory. - 11 x GPIO, 4 x 12-bit ADC, 11 x PWM, 1 x I2C, 1 x UART, 1 x SPI and 1 x SWD. - USB type C port. - 1 user LED, 1 power LED, 2 serial port download LEDs and 1 RGB LED. - 2 RESET and BOOT buttons. - Pads for battery power. - Software Compatibility: Supports Micropython/Arduino/CircuitPython. - Dimensions: 21x17.5mm
XIAO RP2040 Specifications
- CPU: RP2040 dual-core ARM Cortex M0+ processor, flexible clock running up to 133 MHz
- Storage: 264 KB of SRAM and 2 MB of integrated Flash memory
- I/O PIN: 11 digital pins, 4 analog pins, 11 PWM pins
- Interface: 1 x I2C interface, 1 x UART interface, 1 x SPI interface, 1 x SWD bonding pad interface
- Power supply and discharge interface: USB Type C interface
- LEDs: 1 x User LED, 1 x Power LED, two serial port download LEDs, 1 RGB LED
- Buttons: 1 RESET button, 1 BOOT button
- Power Pads: For battery power supply
- Software Compatibility: Supports C/C++, Micropython, Arduino and CircuitPython
- FCC Certified: Yes, with metal protective cover
- Number of PCB layers: 5
- Dimensions: 20×17.5×3.5
 With our colleagues we began to compare the different architectures and draw a comparison and conclusions.
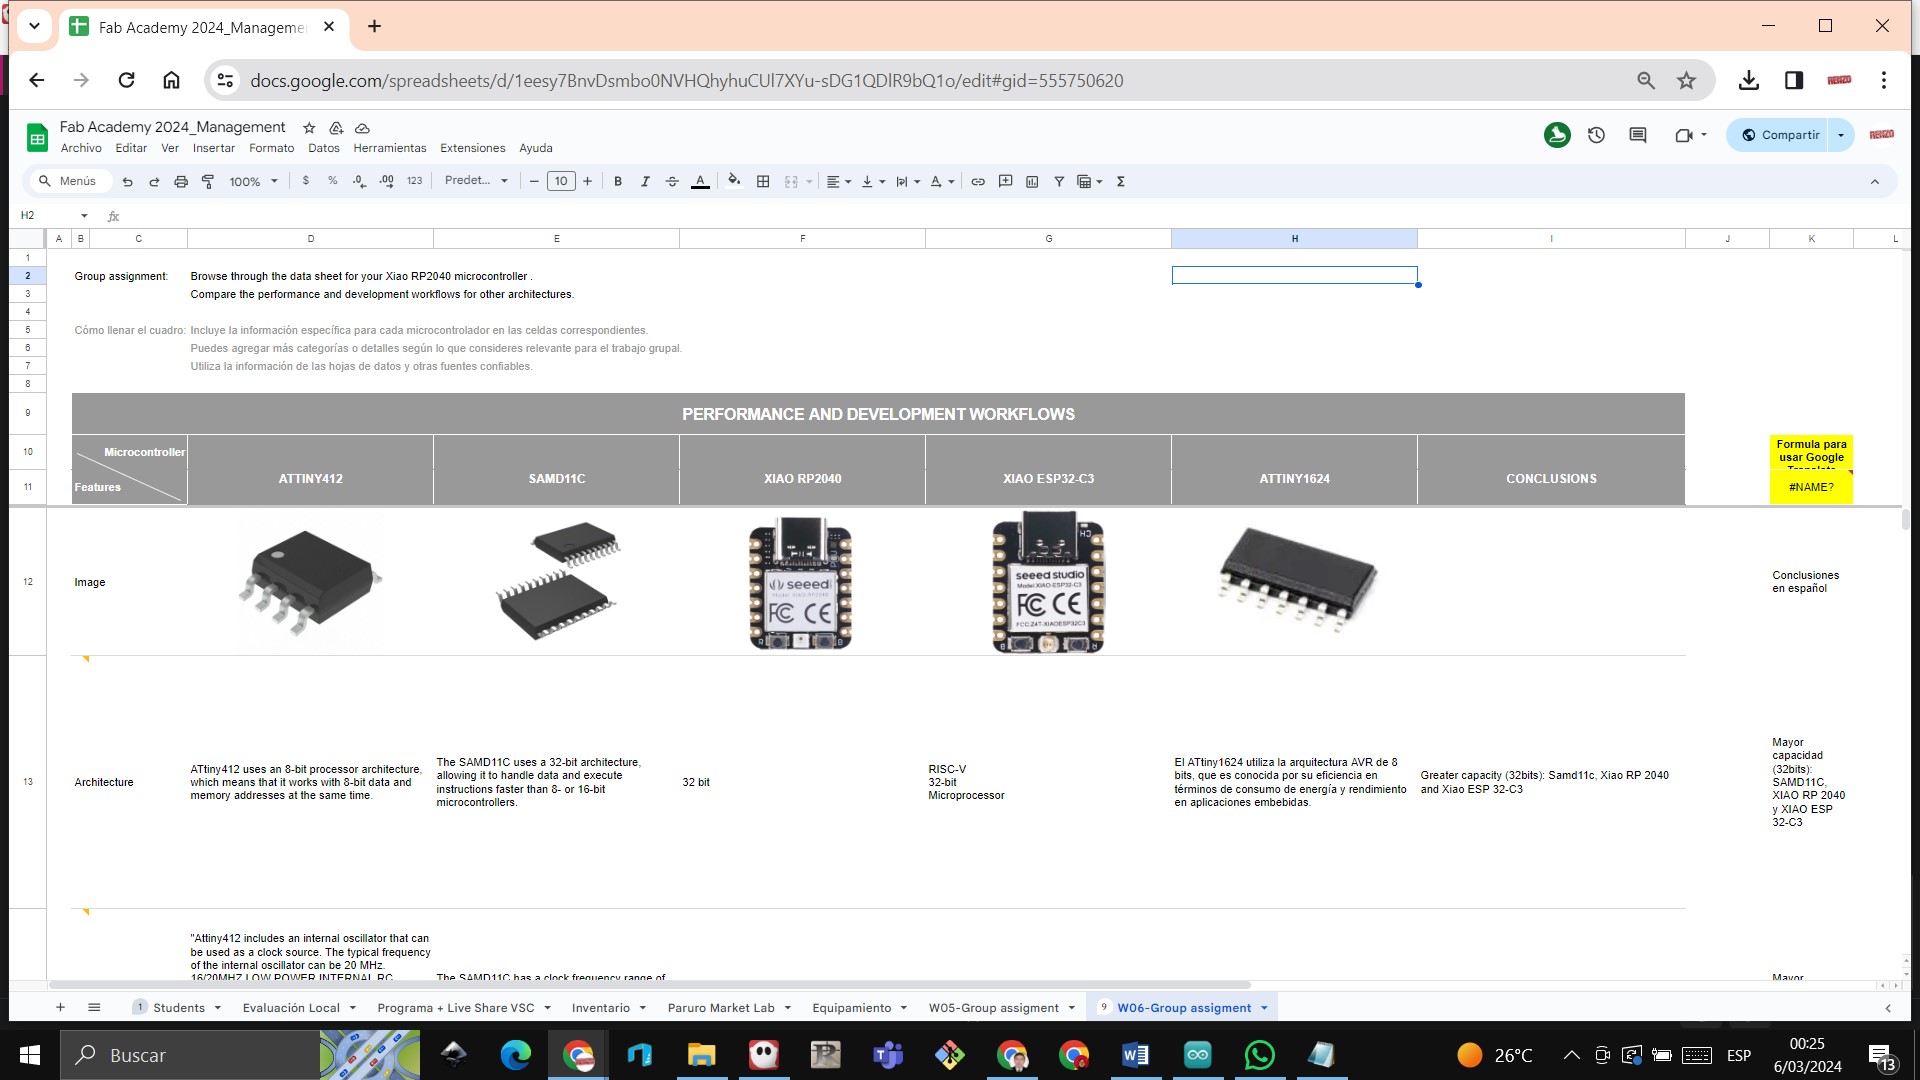
conclusions
When comparing the XIAO ESP 32 3C and the XIAO RP2040 architectures, they offer us greater memory capacities, what increases the most is the energy consumption.
If we analyze the ATTINY412 it has a larger flash memory and the clock frequency is high.
Thanks to the joint work of our colleagues, we were able to realize the characteristics of the other components and in this way expand our knowledge.
Individual assignment:
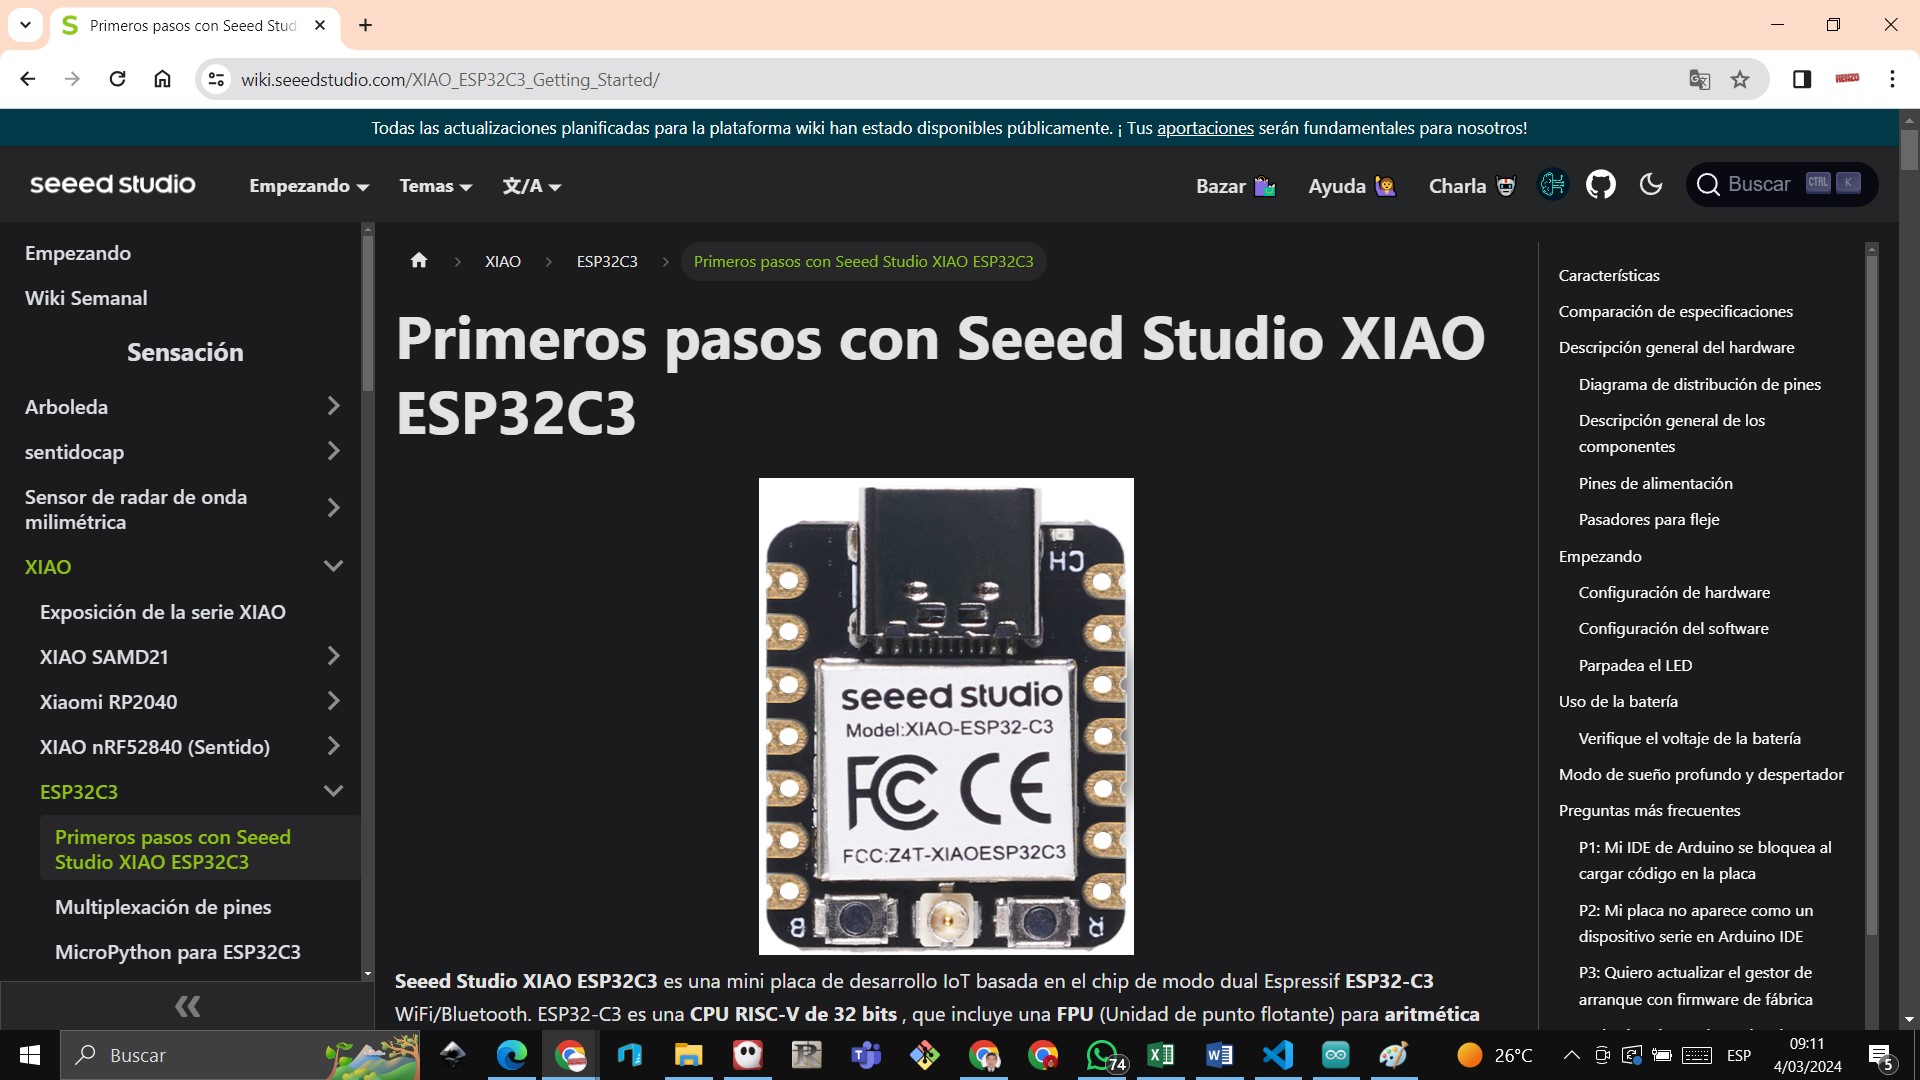
ARDUINO PROGRAMMING WITH XIAO ESP32 C3
Starting to use the microcontroller
Step 1: We install the Arduino IDE on our laptop then proceed to open it.
STEP 1: We enter the official page of the XIAO ESP32 C3 at the URL https://wiki.seeedstudio.com/XIAO_ESP32C3_Getting_Started/
 STEP 2: We proceed to load the link of the XIAO ESP32 C3 by clicking on the File/Preferences too
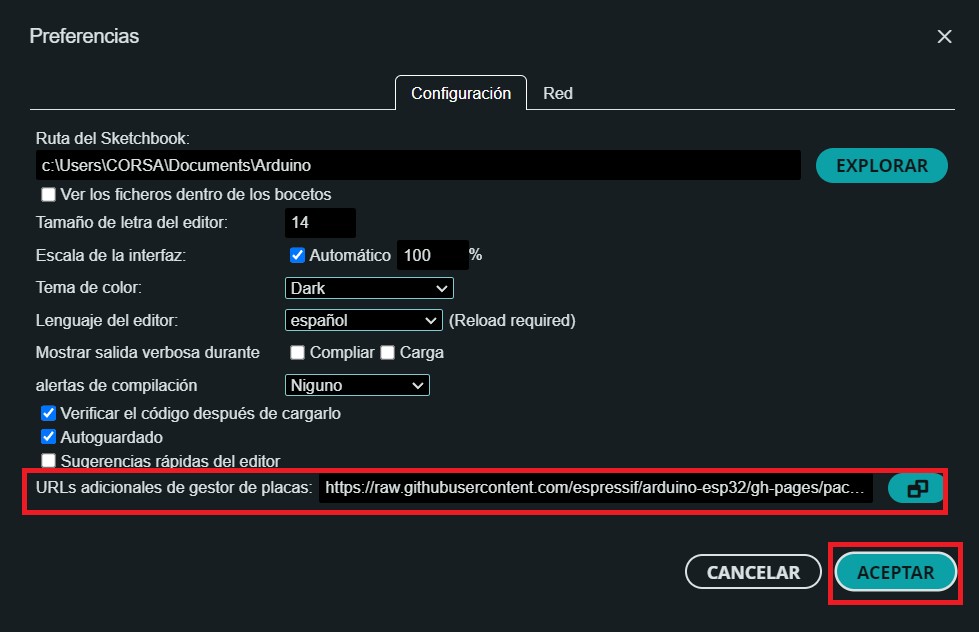
 STEP 3: The following window will open where we place the link of the XIAO ESP32 C3 where it says additional URLs for the board manager
 STEP 4: We look in the tools for the XIAO ESP32 3C and select it and we are ready to use with the Arduino program
 STEP 5: We enter the code into the arduino and load it
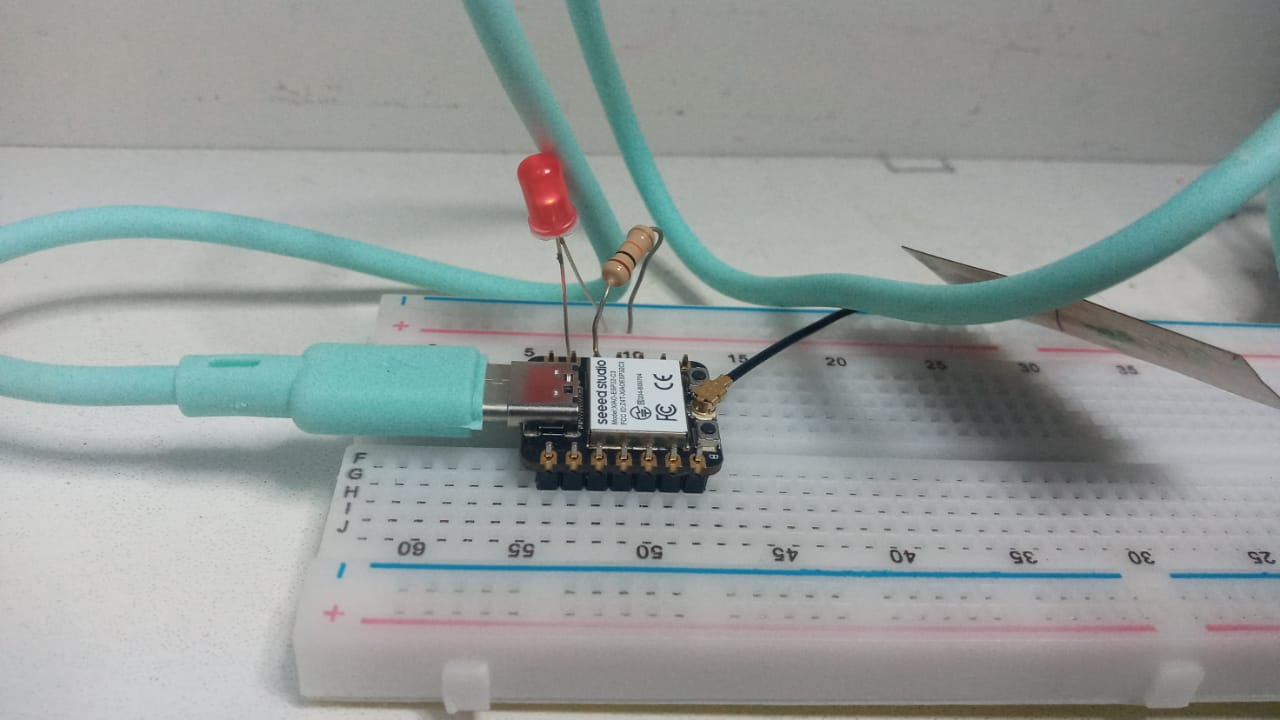
 STEP 6: We observe that the LED turns off and on
Electronics design and production
We begin by designing the board with the Kicad 8.0 software, that is where we enter the XIAO RP2040 to be able to design and make the connections with the other components.
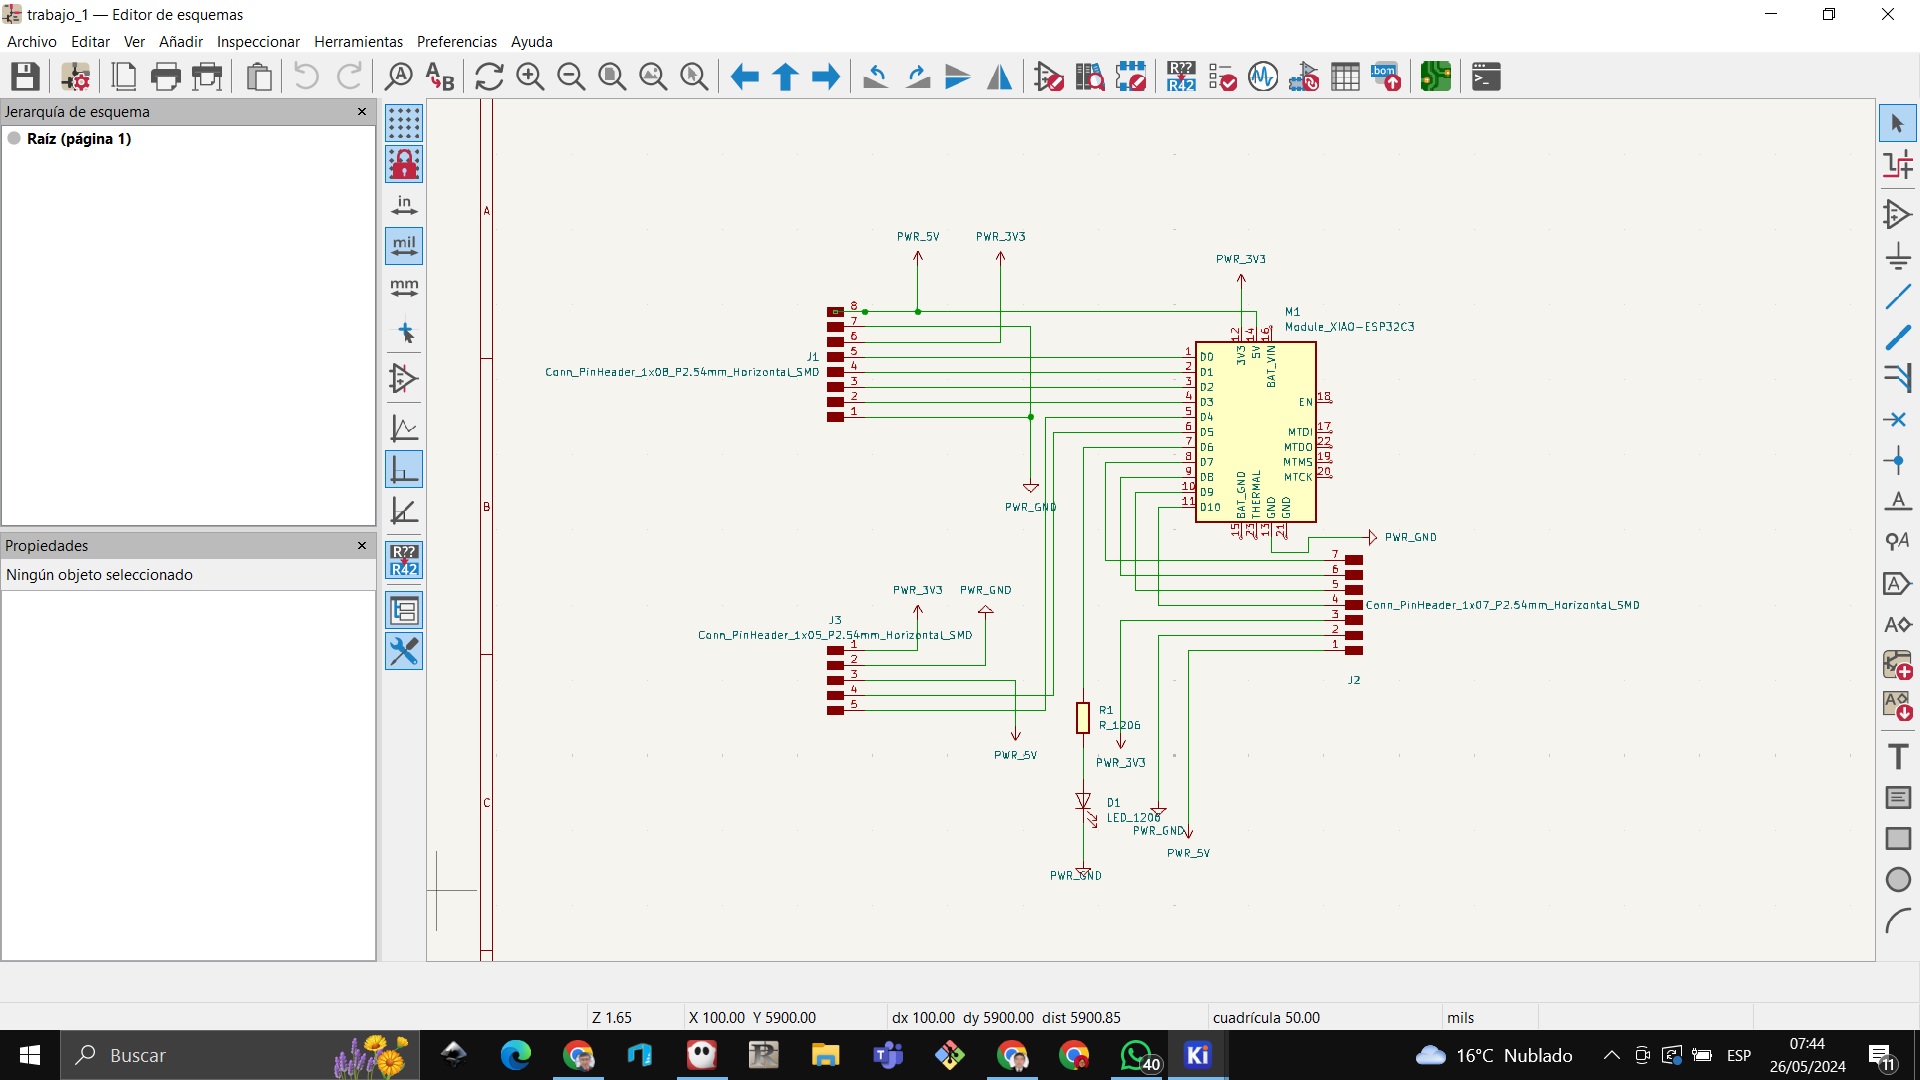 We make the design of the flame of the Huayllay Stone Forest and then we make the unions of the components and the renso logo for our plate
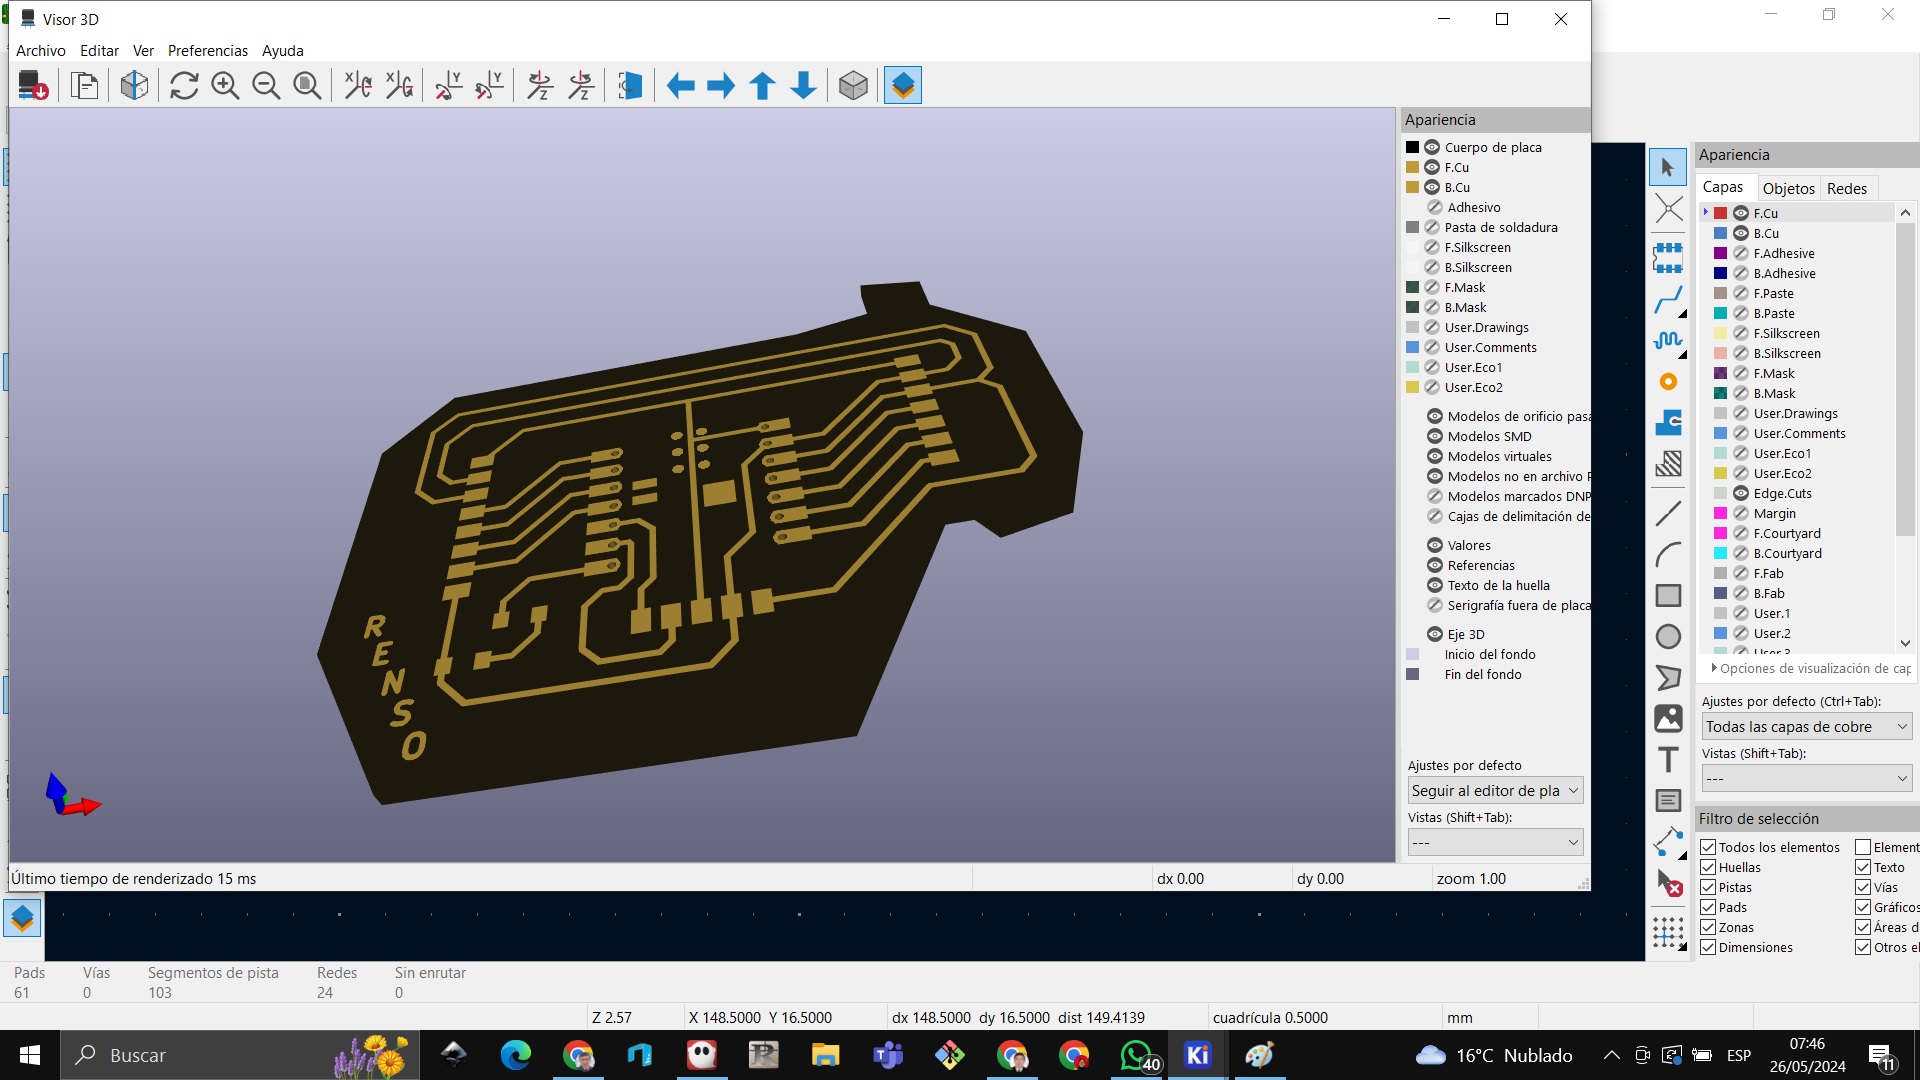
 We preview how our plate will look
We take it to mods and give it the parameters for cutting the plate and the edge
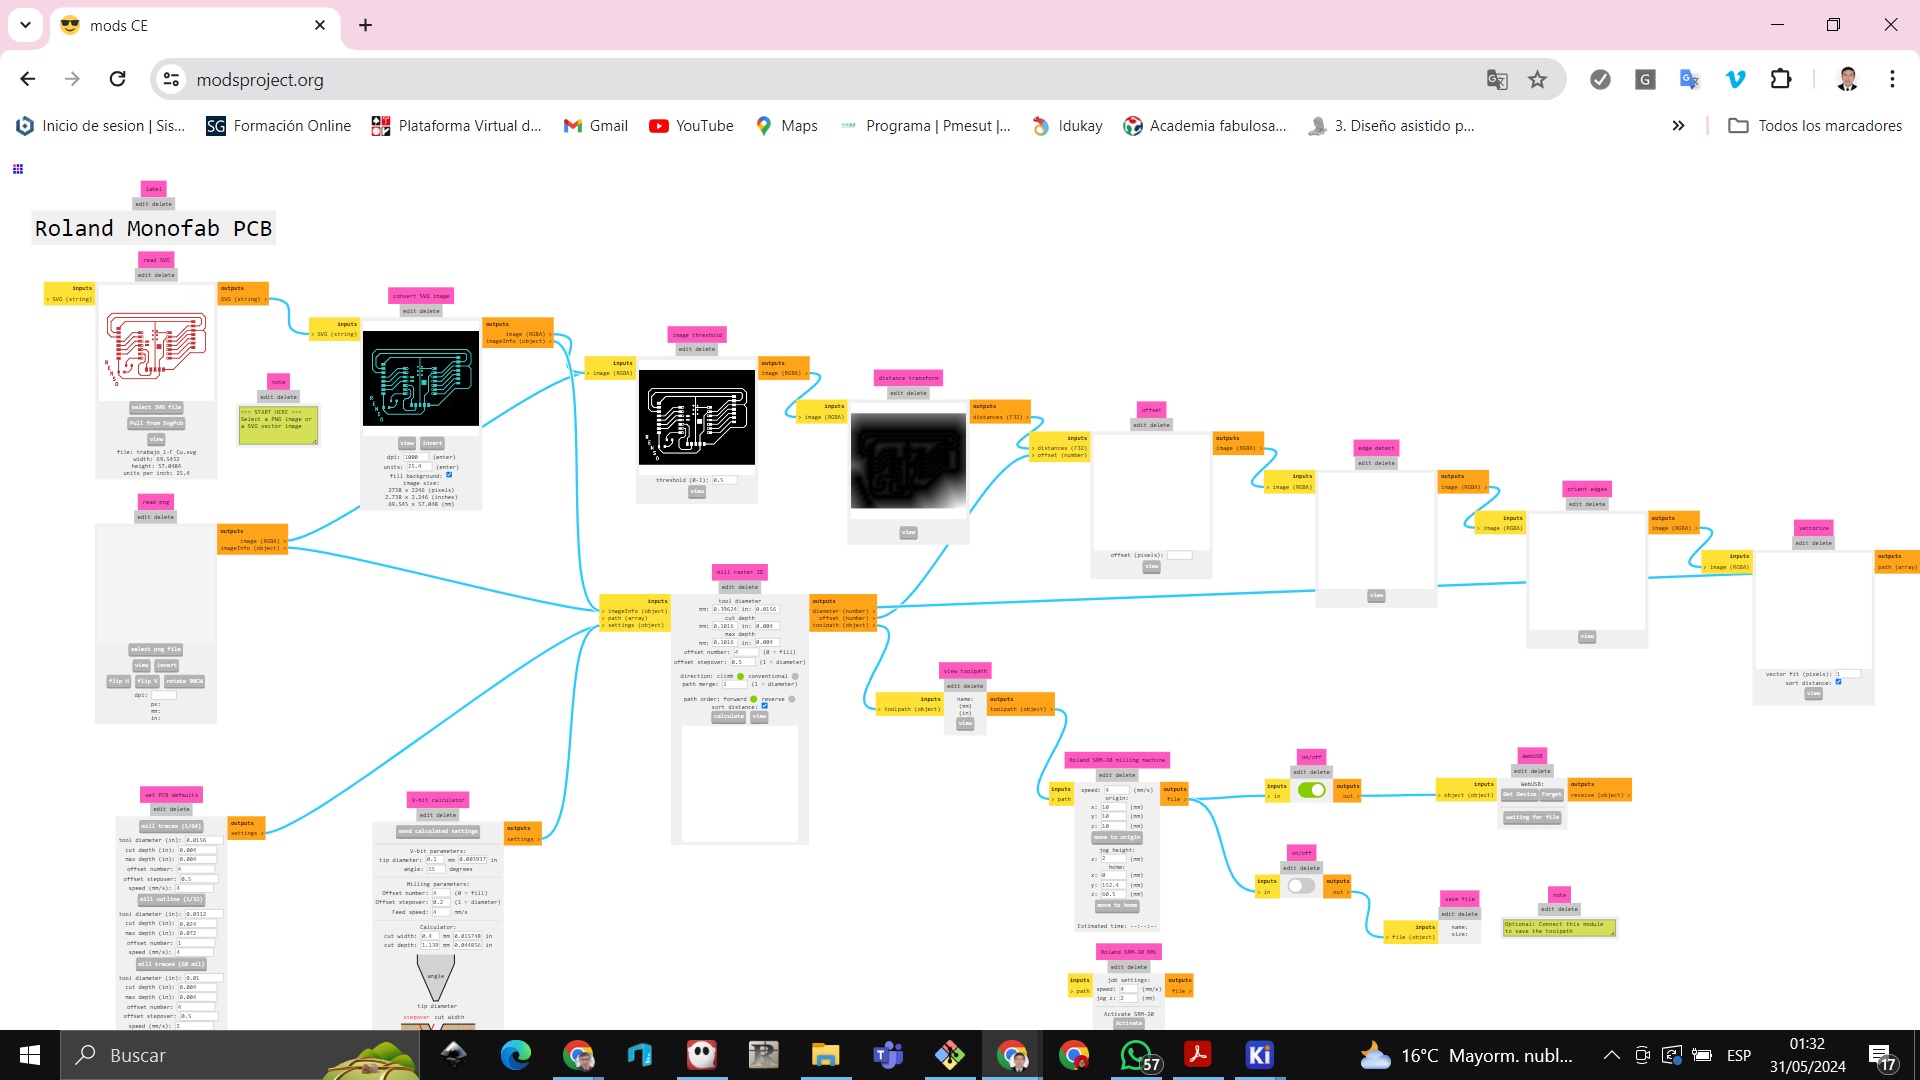 We started milling the plate on the Roland SRM 20 machine where milling took approximately 10 minutes.
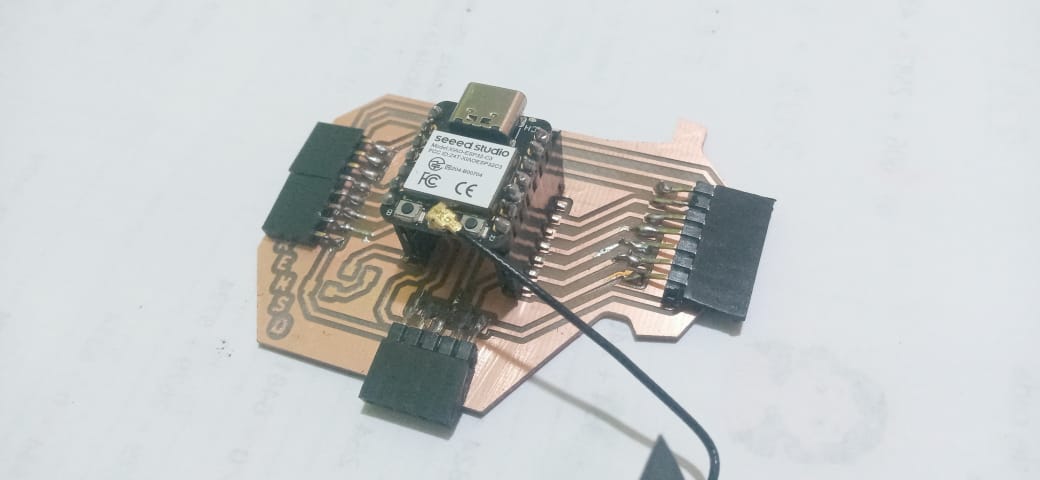
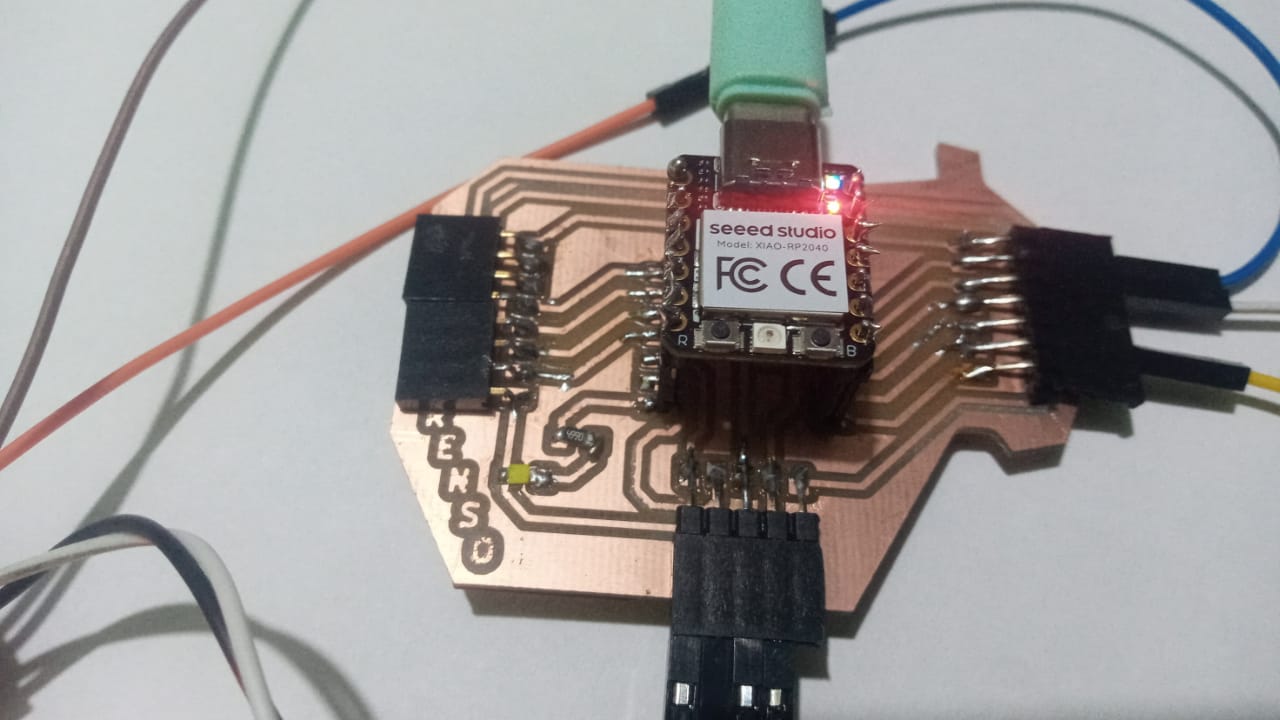
Then we proceed to solder the plate and this is how it looks.
Embedded microcontroller interfacing and programming
We open Arduino, look for the RP2040 board and write the programming where the potentiometer moves three times a day, applying to my project that it moves three times a day so that it dispenses the food and each time it does so there will be 3 times so that like this the dispensing of food is regular and small animals cannot satisfy their hunger
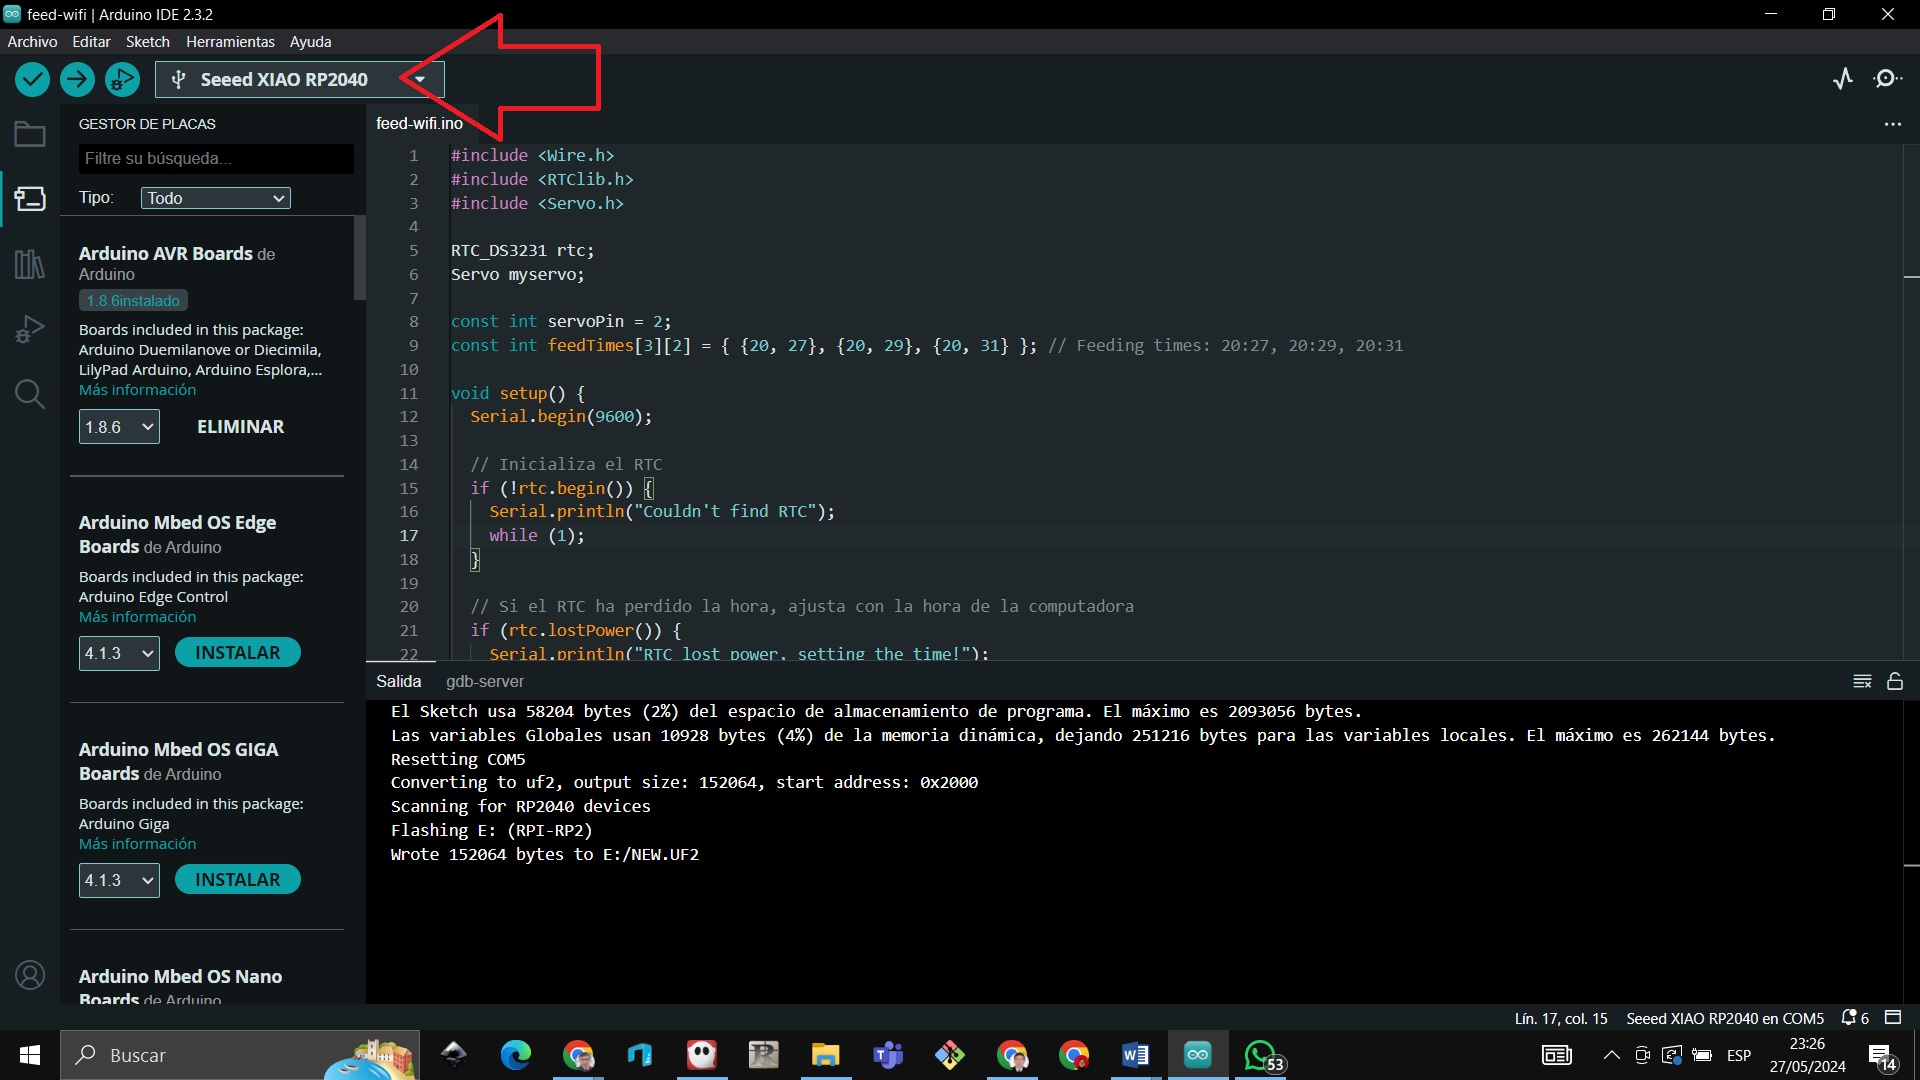 For that we had to add a clock module so that it can be updated with the real time and can open the servomotor 3 times a day and thus dispense the food.

Working with Python
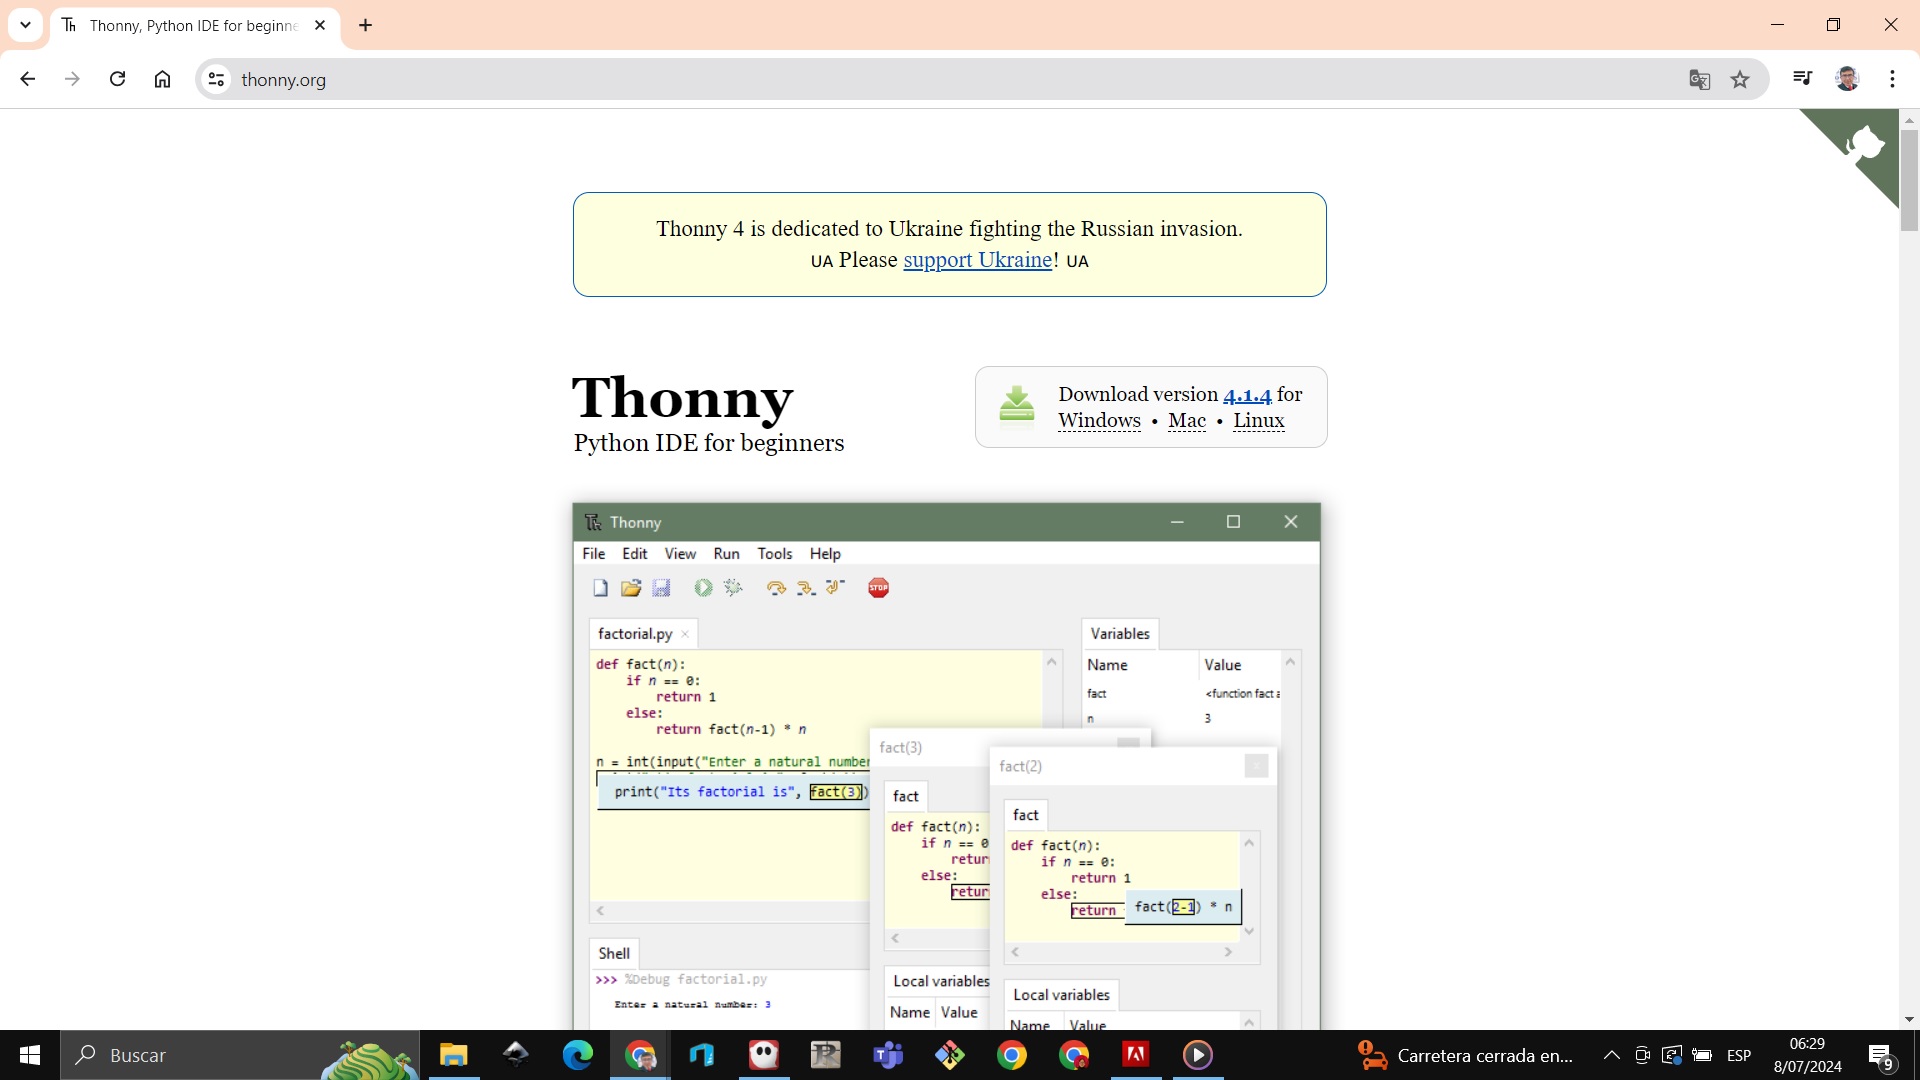
We enter the thonny.org page and download the ID
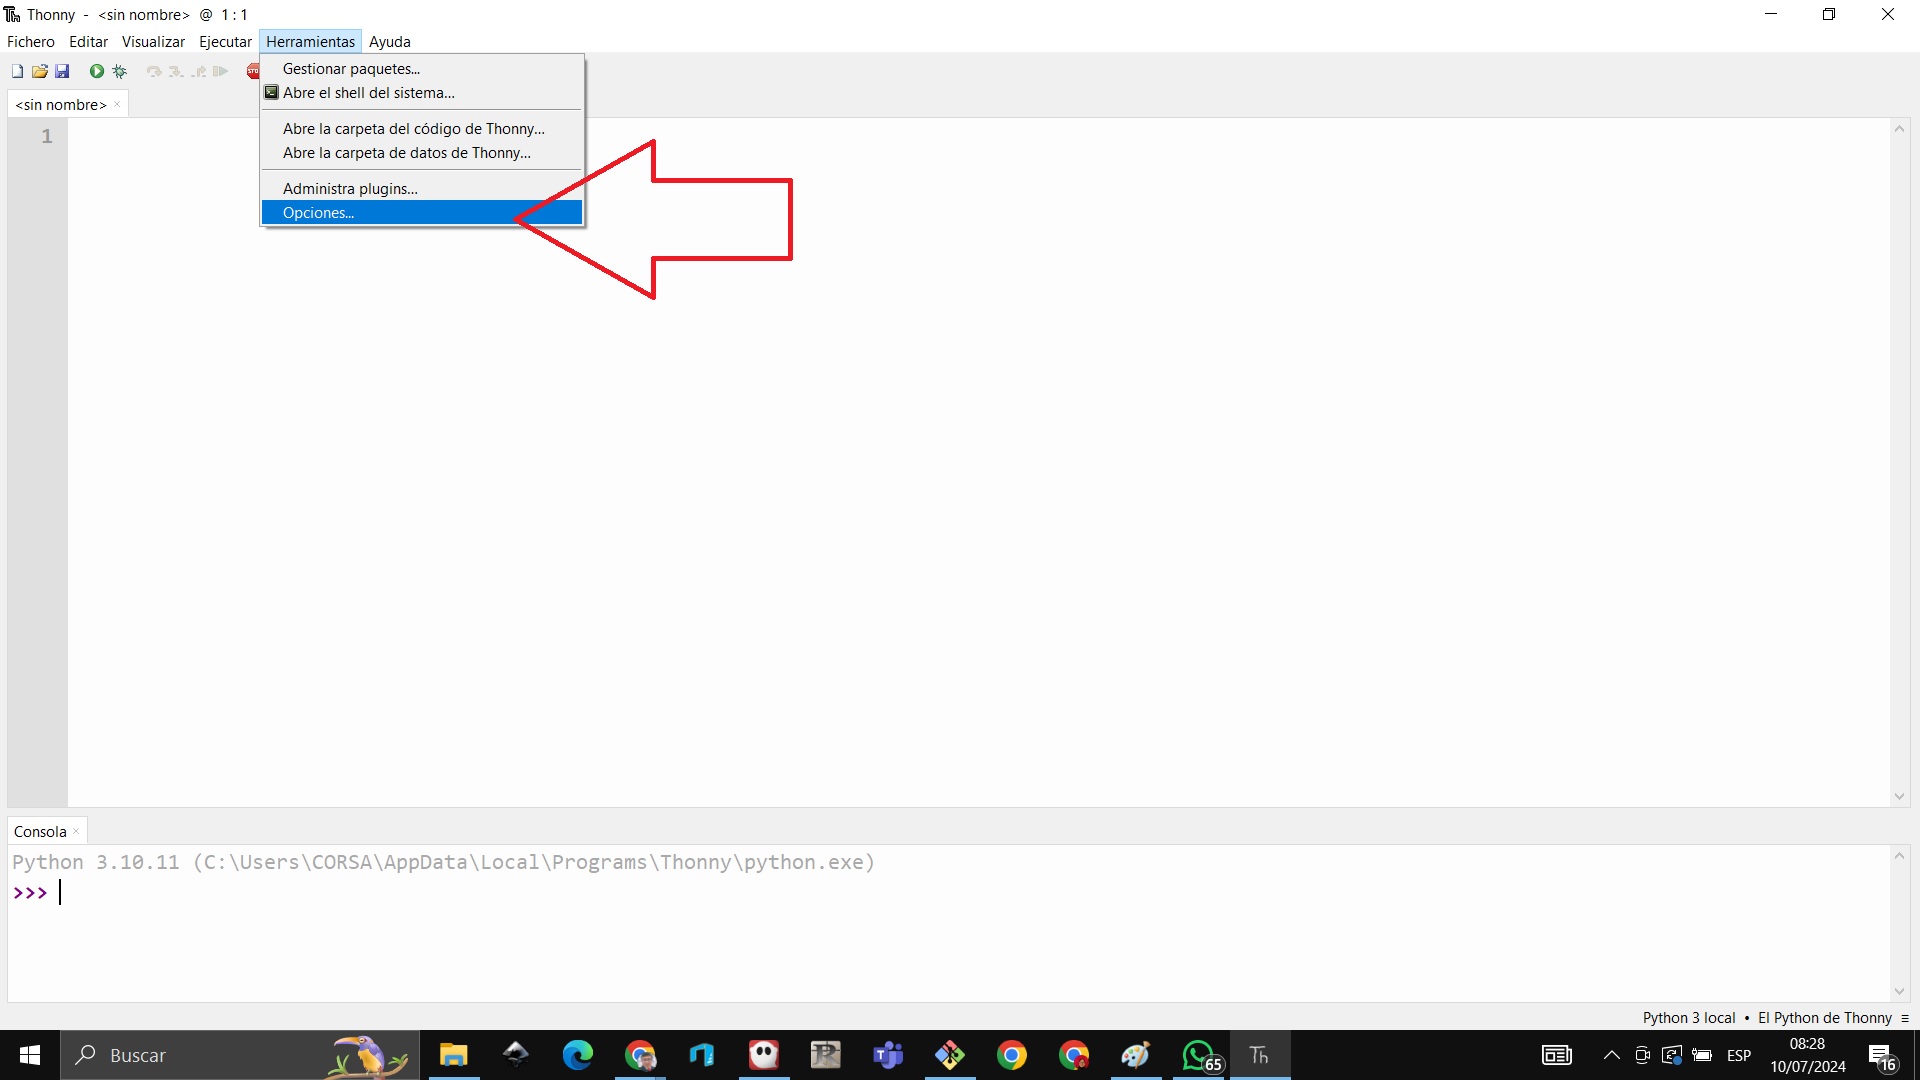
 In order to work with our microcontrollers we have to connect them then we go to options.
 Then we go to interpret
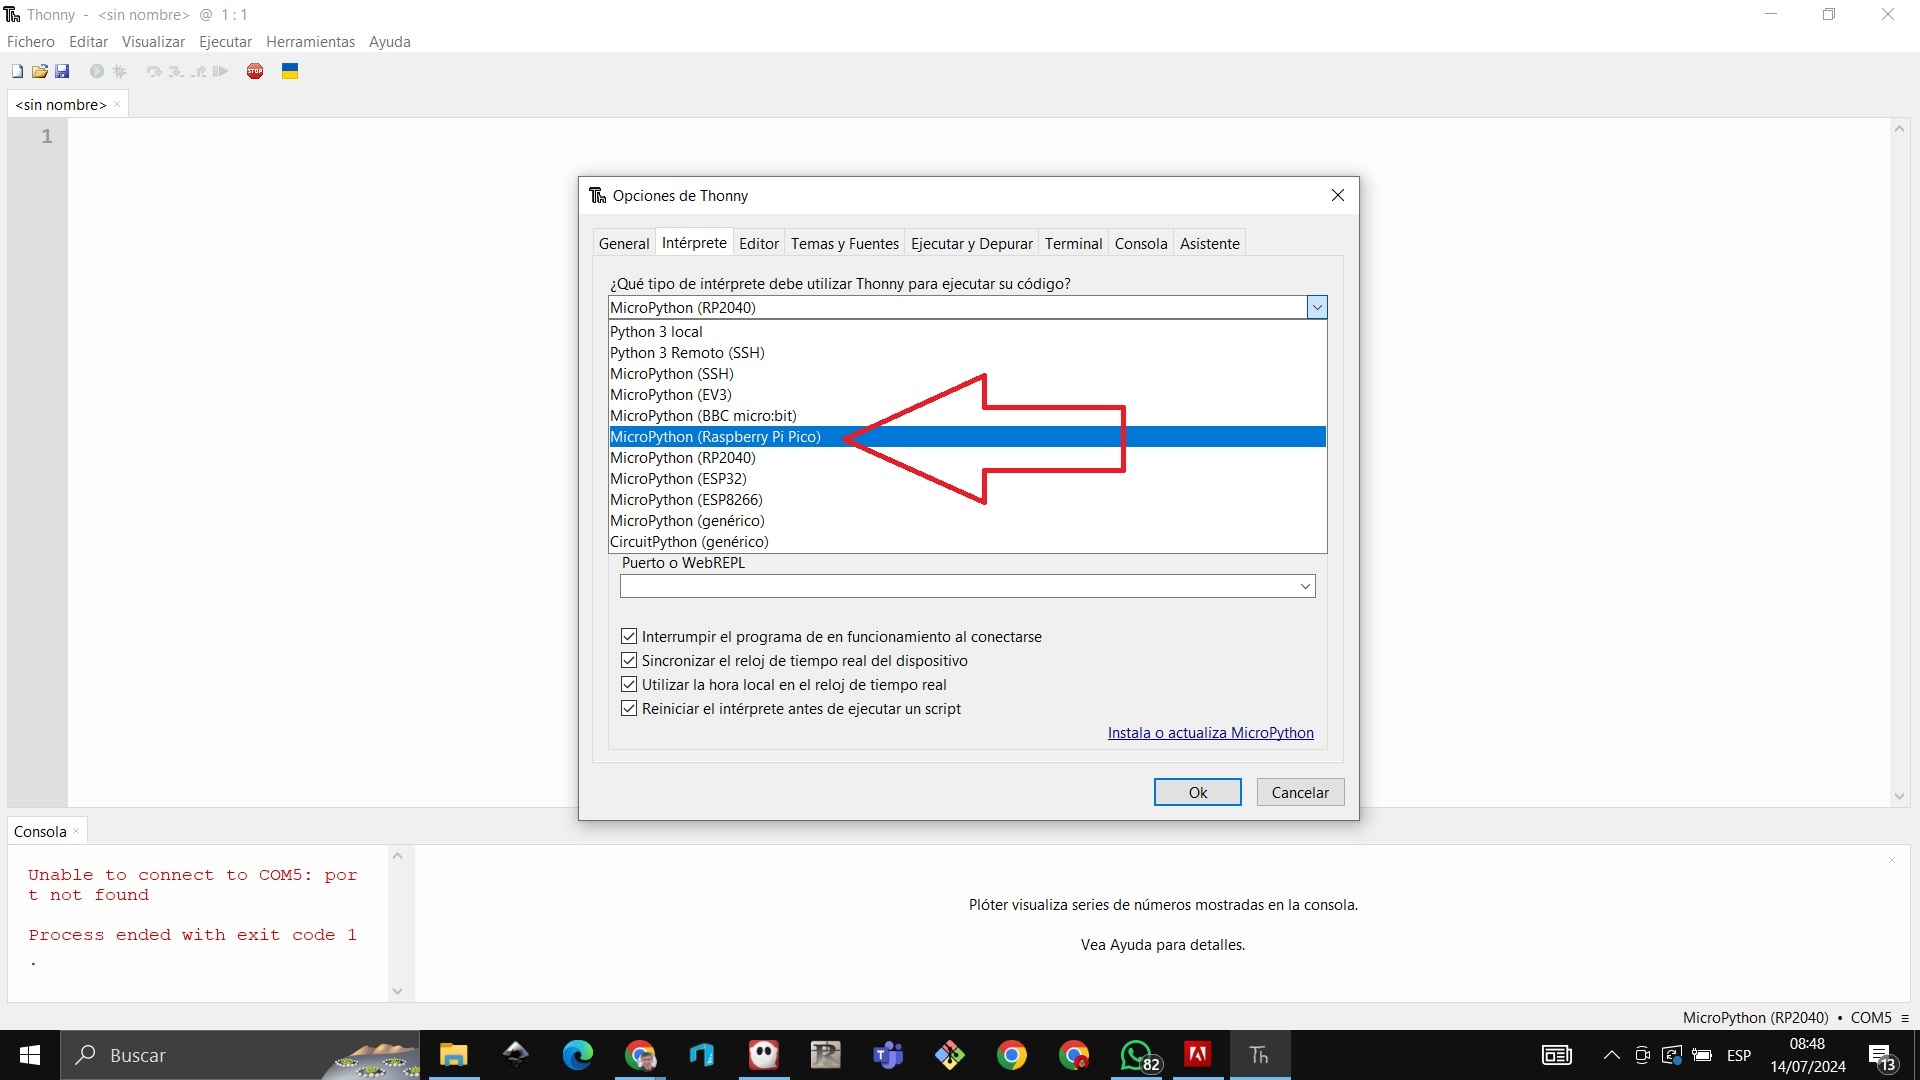 We observe that when we connect the RP2040 it detects it on port 5

He found the XIAO RP2040 and connected it to the potentiometer with the instructions in the image below

We enter the code with phyton in the Thonny program then we click play on arrow A and when we start to move the potentiometer we verify that it begins to read on arrows A and B where we have the ranges from 0 to 1023

FILES
Files svg - plate