Week Sixteen
Wild Card week
This week we needed to use a machine that we had never used before.
I decided this week that I would use my lab embroidery machine. We will be using Tajima and wilcomEmbroidery software. I upload an image for my Logo then with paint I transform it into a bitmap (bmp) file. Before sending it to the software.
I.Wilcom embroidery
Wilcom embroidery is one of the most used software in the field of industrial embroidery. It contains settings and tools similar to Corel Draw. The software was already installed on the PC. And with some tutorials I was able to familiarize myself with the different tools. I decided to use the photo of a panda as an emblem and then I will sign with my name below.
A.Creation of the Logo
After uploading my image to Google and transforming it into a Bitmap 24 file. I send it to the WilcomEmbroidery software where I reduce the number of colors to have just 3 colors black, yellow and white the color of the back.

The next step happens in the chart window. There where I run bitmap paths, this process consists of eliminating the white background and only showing the traces of my drawing it is always advisable to keep the original model for the final touch-up so I do not check the part or we ask to delete the original model after that I click on convert and which brings me back to my first window and by transforming my plot into lines of embroidery files, this automatic sewing tool detects the colors and trajectories of the threads embroidery immediately we can already see the final model, this automatic mode has made the task much easier if not I (was going to have to use a lot of tools to arrive at the. Then I use the selection arrow I touch the reasons that I I don't want to make them appear and I delete them, then I go back to graphics where I use the text tool to write my mark and by editing the text I select the font that suits me and the size of my let's be. After that I go out and I click on convert and I get my letters already embroidered, then with the selection arrow I move it and position it below my drawing finally I select the whole set that I resize with the dimensions located in the bar at the very bottom and not to distort my logo I lock with the padlock located just behind the dimensions in 100mm and gives us a height of 97.38mm. You can see all this in the video I made with the link just below.
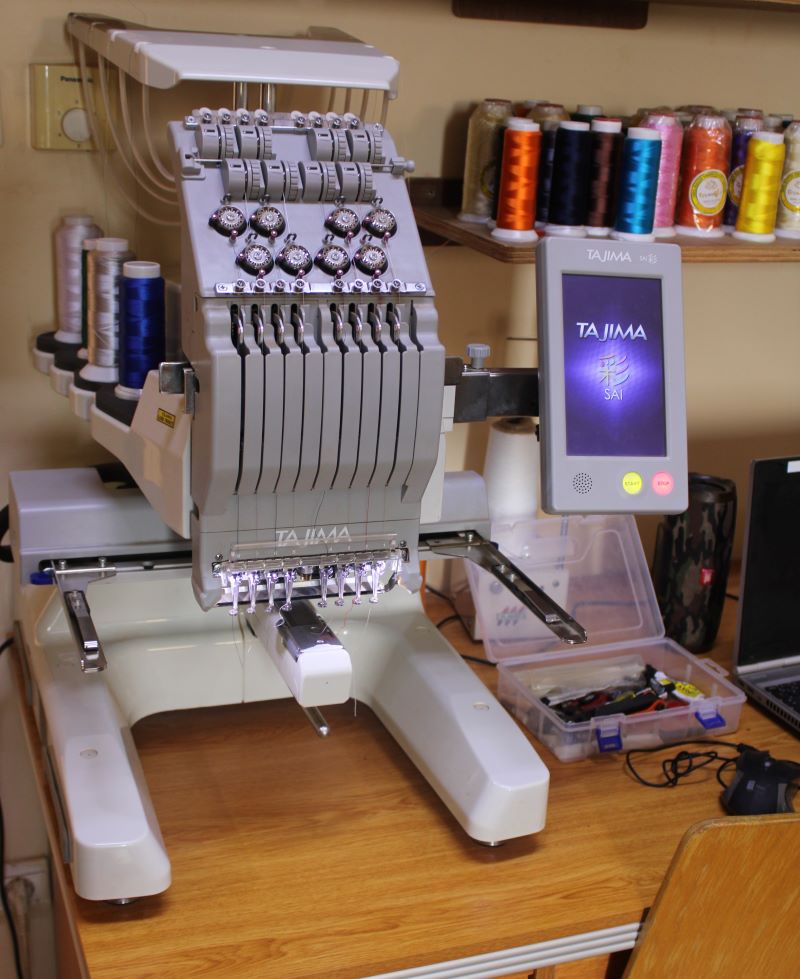
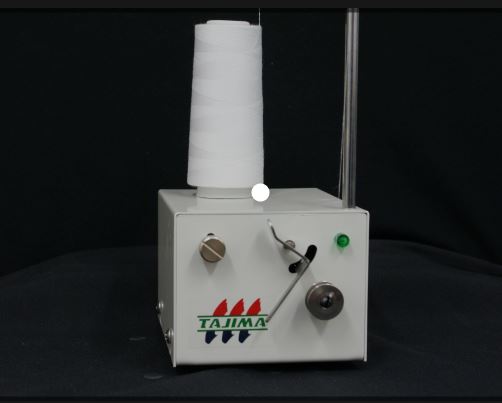
II.Embroidery with Tajima
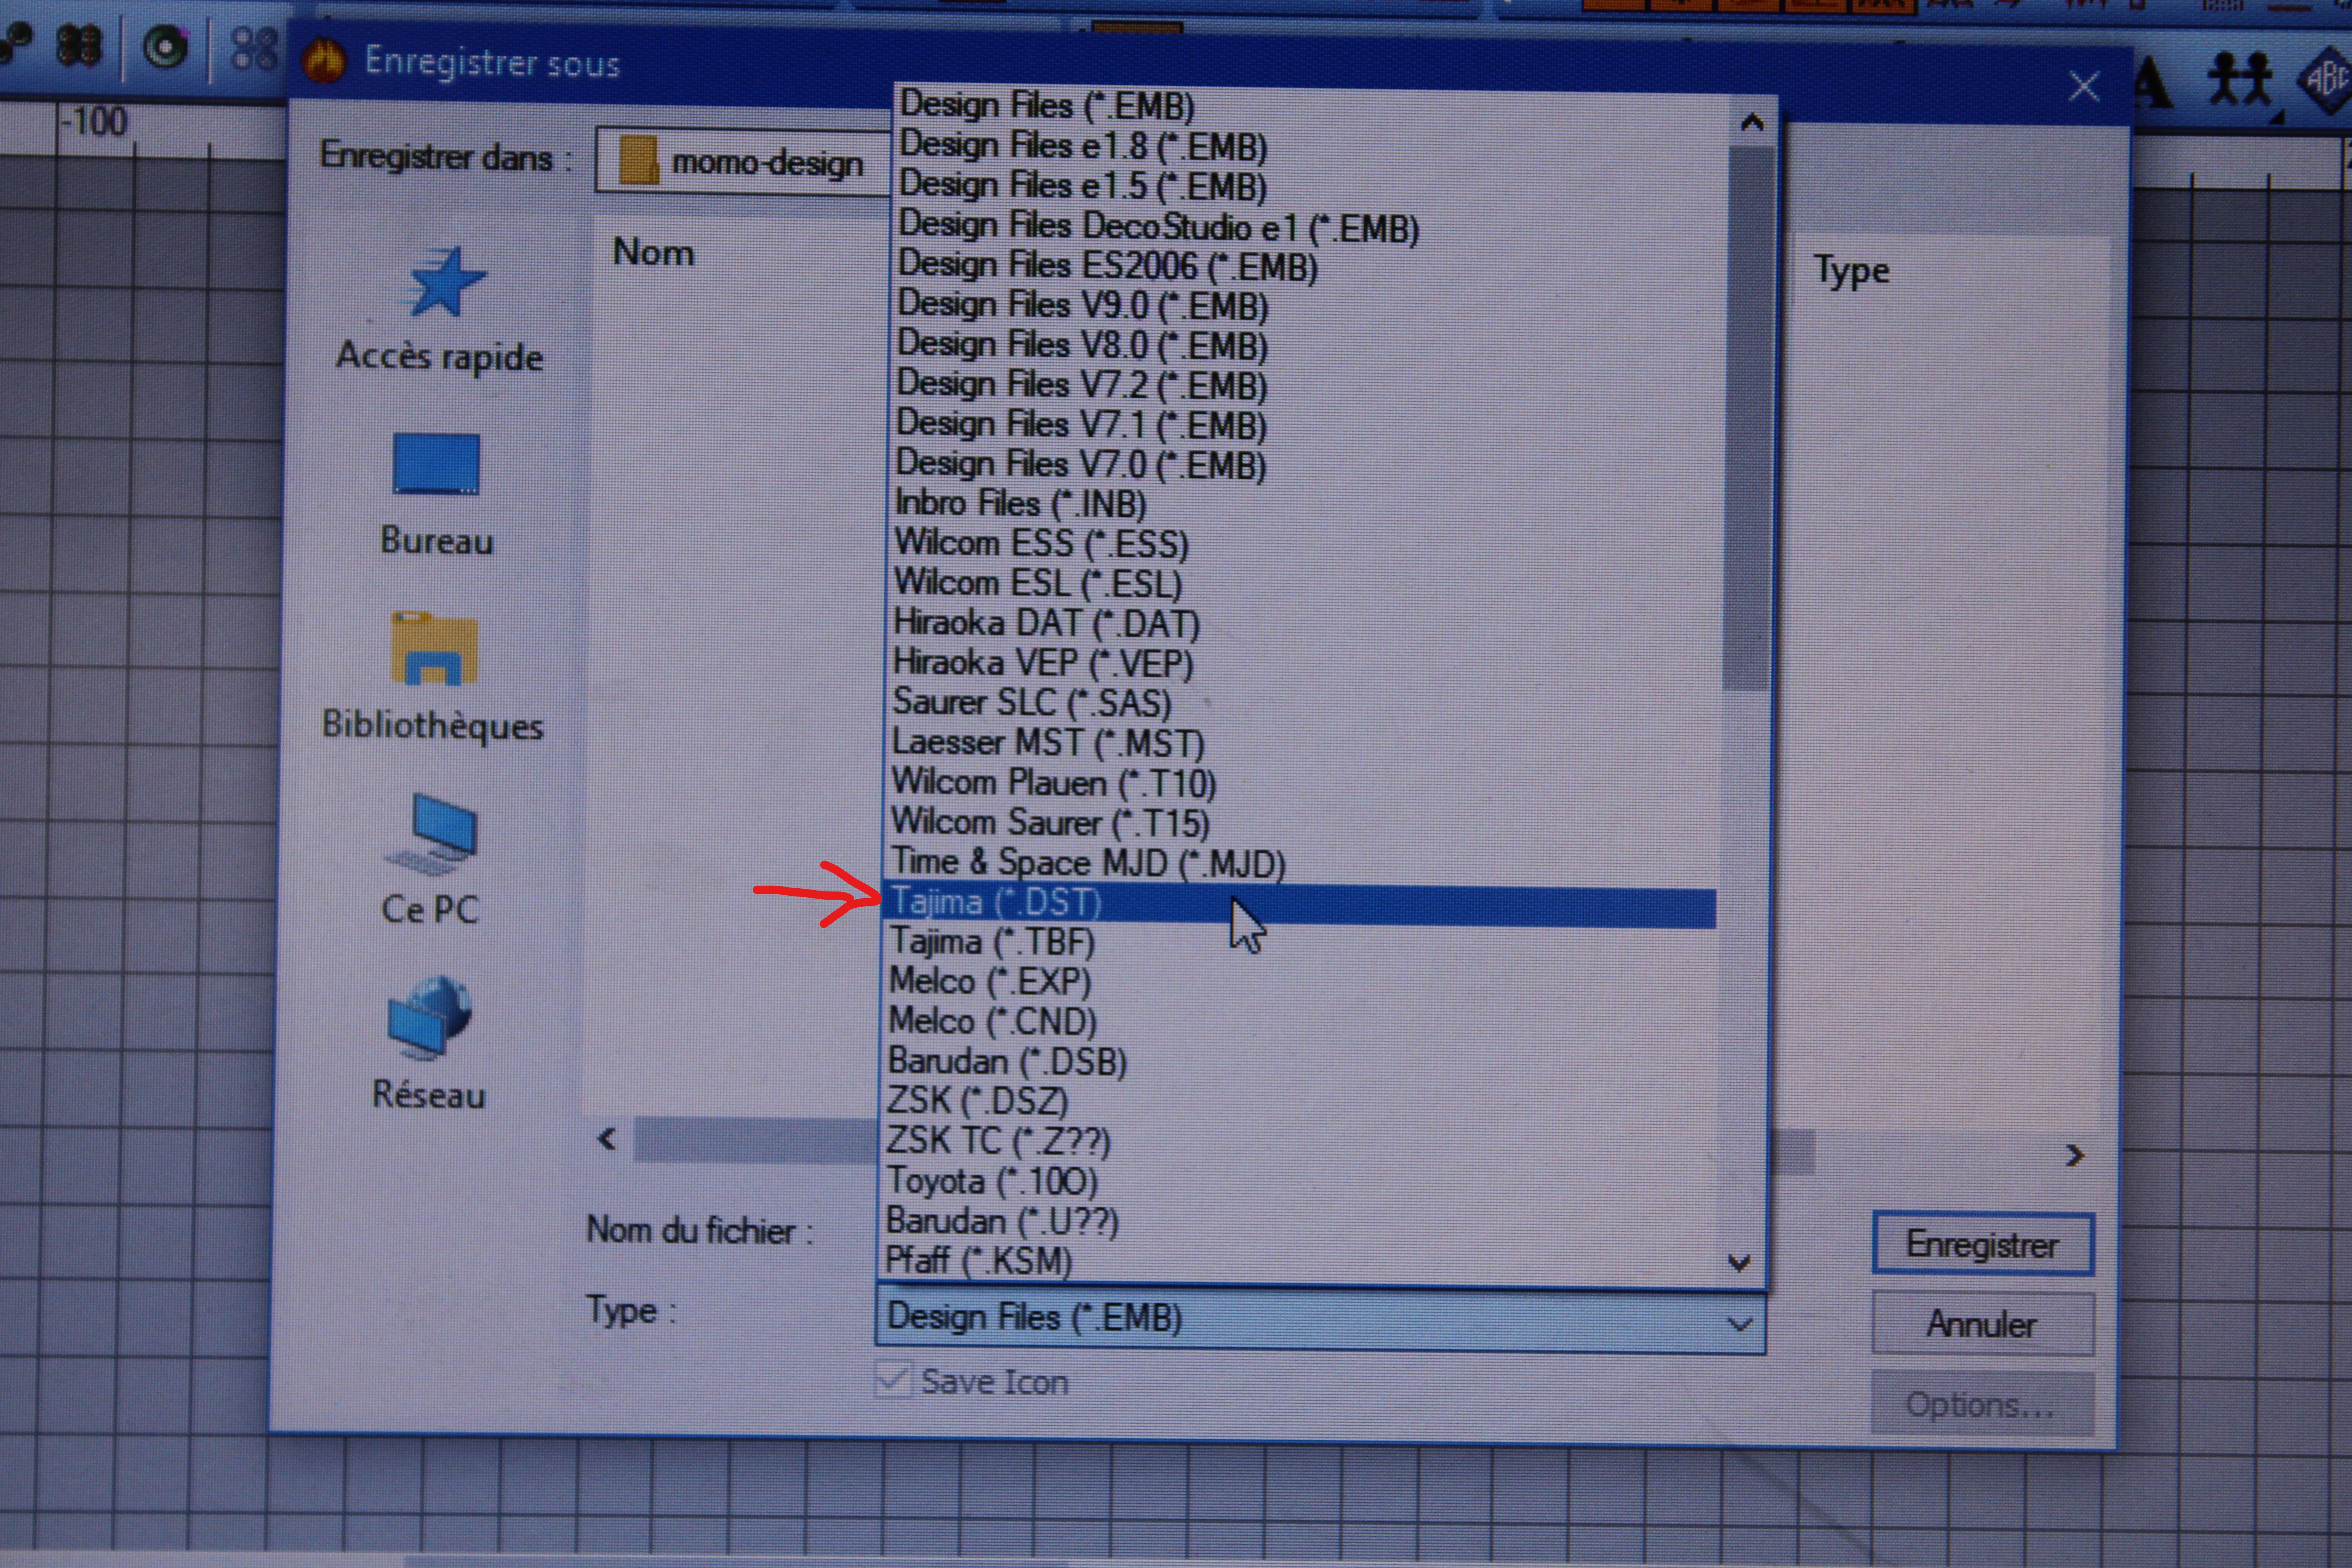
The next step is to export my file from the computer to the USB drive. So I save my file in DST format (You can even see Tajima written just in front of the format).
Then with the 4x4 embroidery frame I frame my space to embroider then I hang the metal parts on the mobile arms of the Tajima. I check that it is well fitted before continuing if it risks spoiling my embroidery, knowing that it is a machine that works with a lot of vibration, in case it is badly connected it will be difficult to resume if the movements of the machine makes him deviate from the trajectory.
A.Thread loading
The next step is to check that the thread is loaded correctly and identify the position of the different colors, these parts are really very important for the machine. To help the user, Tajima has marked arrows for each yarn path of the different bobbins placed on the machine.
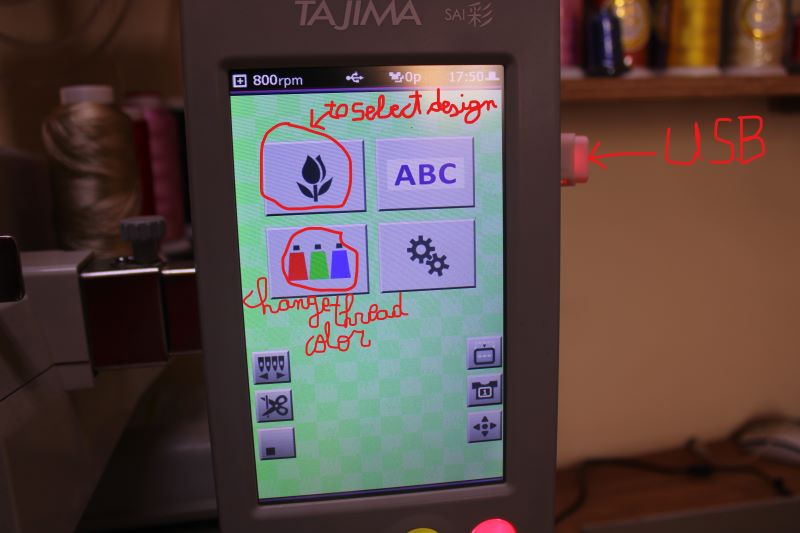
Loading the file is done as follows, first plug in the USB, then click on the USB key icon and then open the folder in which you saved your file. Click on the file choose the corresponding colors according to the corresponding layout numbers then center your using the arrows to position it, notice when the middle button turns green the displacement is 5mm and when it is not activate the displacements is 1mm. After having centered your space to be embroidered, click on the enter arrow and once again and the machine will ask you to make a move to show you the space that your embroidery will occupy, if the travel is suitable then we press the d arrow. enter if not, move it again until it suits you, the red cross which will run through your embroidery space must not move your embroidery frame if you do not risk damaging the frame and even breaking your embroidery needle. embroidery. Because even if from the start, we already have the possibility of defining the size of our embroidery frame. It can act on an unsuitable part especially when it comes to large size embroidery so to have the best precision it is better to go through it.
B.Final product
Make sure that the thread is loaded correctly before use, then with the start button we start the embroidery and with the stop button we can put it on pose in case of an incident.
MOMO DESIGNE
III.Embroidery Test with Brother SE1900
I wanted to do the same embroidery with Brother SE1900 and compare the result with that of Tajima. It was my first time handling this machine.
A.Thread loading
First of all I wound the bobbin with the Tajima winding device, then I opened the small cover located at the bottom of the embroidery needle where I placed my small bobbin following the arrows then, then I opened the top cover and I placed my large spool, then I followed the arrows to indicate to pass the embroidery thread. Then I turn on the embroidery machine I touch the touch screen and a reset message appears asking me to keep my hands away from the embroidery area because the embroidery unit carriage was going to move, which I I did and I click ok then it does its reset run, after that on the screen I select a letter to do some embroidery test.
Bobbin winder.
And for this I first click on the letters of the simple alphabet then I select some letters then on Place then a menu of tools is displayed allowing me to resize and move my letter to the place where I would like to do my embroidery. For a test I resize my letter by clicking on the resize tool and a new menu appears with the different ways to resize, I select the one that decreases the size on all sides then I click OK, back to my previous menu I select the move tool and with the arrows I position my letter then OK then END EDITING.
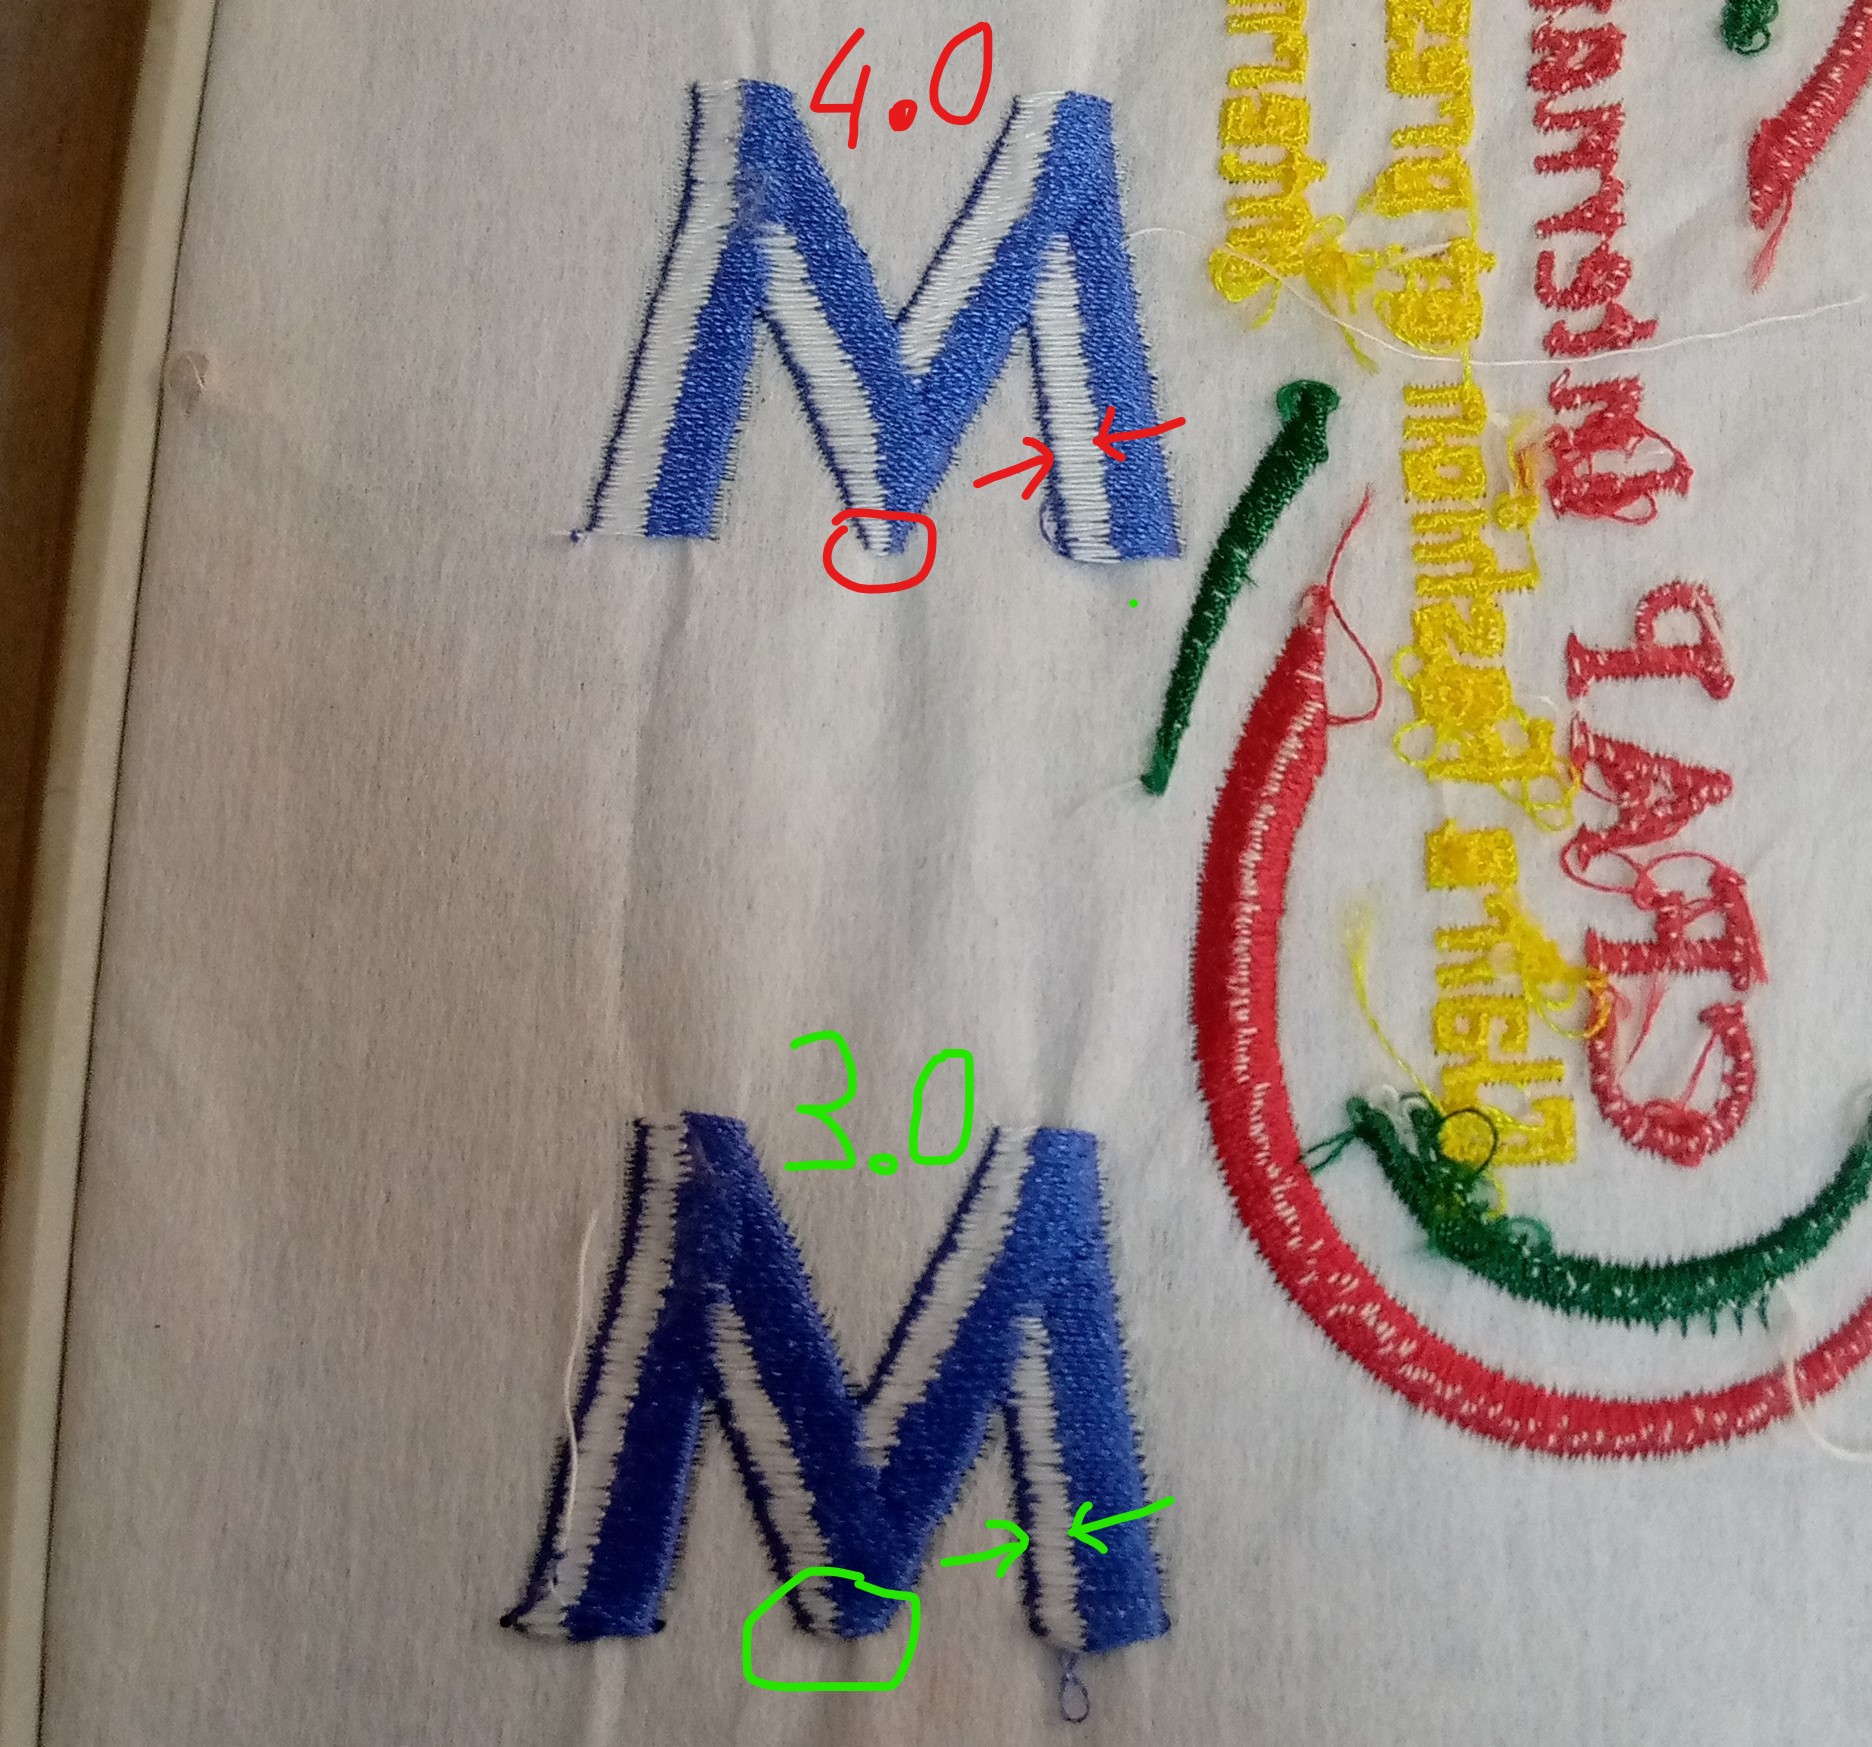
A new menu appears with arrows that allow you to move the embroidery needle on its edited embroidery space. I then click on Embroidery. A new menu appears there I use the thread tension tool, it was at 4.0 I decrease to 3.0. Then I lower the presser foot and the embroidery button changes from red to green then I press this button to start my embroidery.
My first try was not successful because of the presser foot which crumpled the fabric and the threads got tangled in the needle. The machine blocked in full operation, a message then appeared asking me to raise the needle with the back button (it took me more than 10 minutes to find this famous button) this button which was located just at the top of the screen with others, I touch it and raise the needle. After that I decided to remove the crowbar and start another test.

B. Test
The next test came out rather well but the white thread of the small spool appeared on the surface, I continue trying to vary the embroidery tension but it does not change much. I then changed fabrics and resumed my tests this time the letter was better to come out without the appearance of white thread on the surface.
I started the embroidery of my logo but, but unfortunately that's stopped in the meantime, the threads are still tangled in the needle I told myself that it was still due to my design so I decided to retouch the model and after retouching my logo by removing some small detail and after more than n tries finally I could not embroider my logo with this machine, it still needed some revision on the mechanical side because I noticed a noise of shock not normal during embroidery.
IV.Problems encountered
This week was a fun week where we were allowed to do something we thought would be interesting. But it was not at all easy with the threads that broke due to needle wear and you had to be ready all the time to replace the threads in the needle hole, bring the print back to better resume or he had stopped. It was not easy for me anyway but interesting to see the final product as always and also to see how fast I could embroider something on a T-shirt, shirt or even caps. I had trouble familiarizing myself with the Wilcom software, but after a few days of tutorials I was able to better assimilate the procedures for creating a model, it worked. These are the problems I had this week. And with Brother S1900, I had trouble printing my logo due to some mechanical problem, and the thread that kept getting tangled in the needle.