9. Embedded programming
This week we had a group and an individual assignment.
On one hand, The group assignment was to compare the performance and development workflows for other architectures On the other hand, the individual assignment was to read aour microcontroller datasheet, use our programmer to program our board to do domething
Group Assignment
“Compare the performance and development workflows for other architectures”
In order to fullfil the group assignment, we tried workflows in pairs, I tried the Rasperry PI Zero W. and here are the full steps and findings.
Conclusions and findings
Raspberry Pi is a Microprocessor (usually an ARM Cortex A Series) based board that acts as a computer. It can run an Operating System. The Raspberry Pi Foundation provides a Debian based Linux Distribution called the Raspberry Pi OS (previously known as the Raspbian OS). You can develop software using several Programming Languages like C, C++, Python, Java, HTML, etc. This board gives you enough flexibility in terms of programming languages. It is also powerful enough to deploy complex applications, including web applications. However since it is ARM based, there are some packages that are not supported yet.
About main differences between Arduino and Rasperry Pi I could mention that
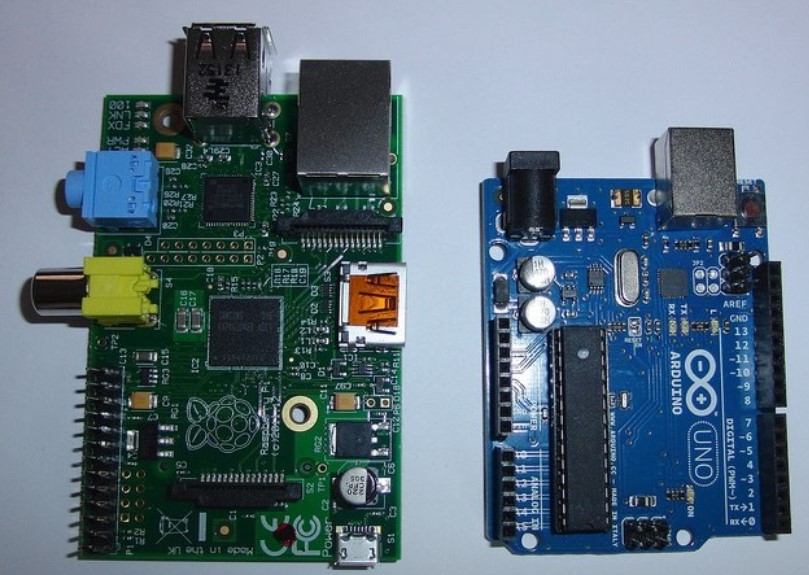
- Rasperry Pi is more like a computer, you can run linux and connect it to a monitor, keyboard and mouse, exactly like a computer but on a board. on the other hand, ardunio is more a micro-controller and has a lot of support and extensions you can use.
- Rasperry Pi seems to be more for dummies than Arduino. I say so because on Rasperry you have an user interface but on Arduino you need to go on bare metal and pure code. So if you are a programmer and you want the flexibility to use your own code without interfearance, go for the arduino, if you are a dummie like me, rasperry pi might be a better option.
- If you want to use sensors, hardware applications arduino is for you, if you want to connect with internet, rasperry Pi could be a better option
At the end of the day, the differences between Raspberry Pi and Arduino are subtle but important. You can liken Arduino to your spinal cord making a local, small-scale decisions with the Pi more akin to your brain. You might well find you’ll want to take advantage of both of these great little pieces of kit for your project
Extracted from interesting engeneering
Compare workflows = DONE
Individual Assignment
 Document what you learned from reading a microcontroller datasheet.
Program your board.
Describe the programming processes you used.
Include your source code.
Include a short ‘hero video’ of your board
Learnings and fidings from reading the data sheet
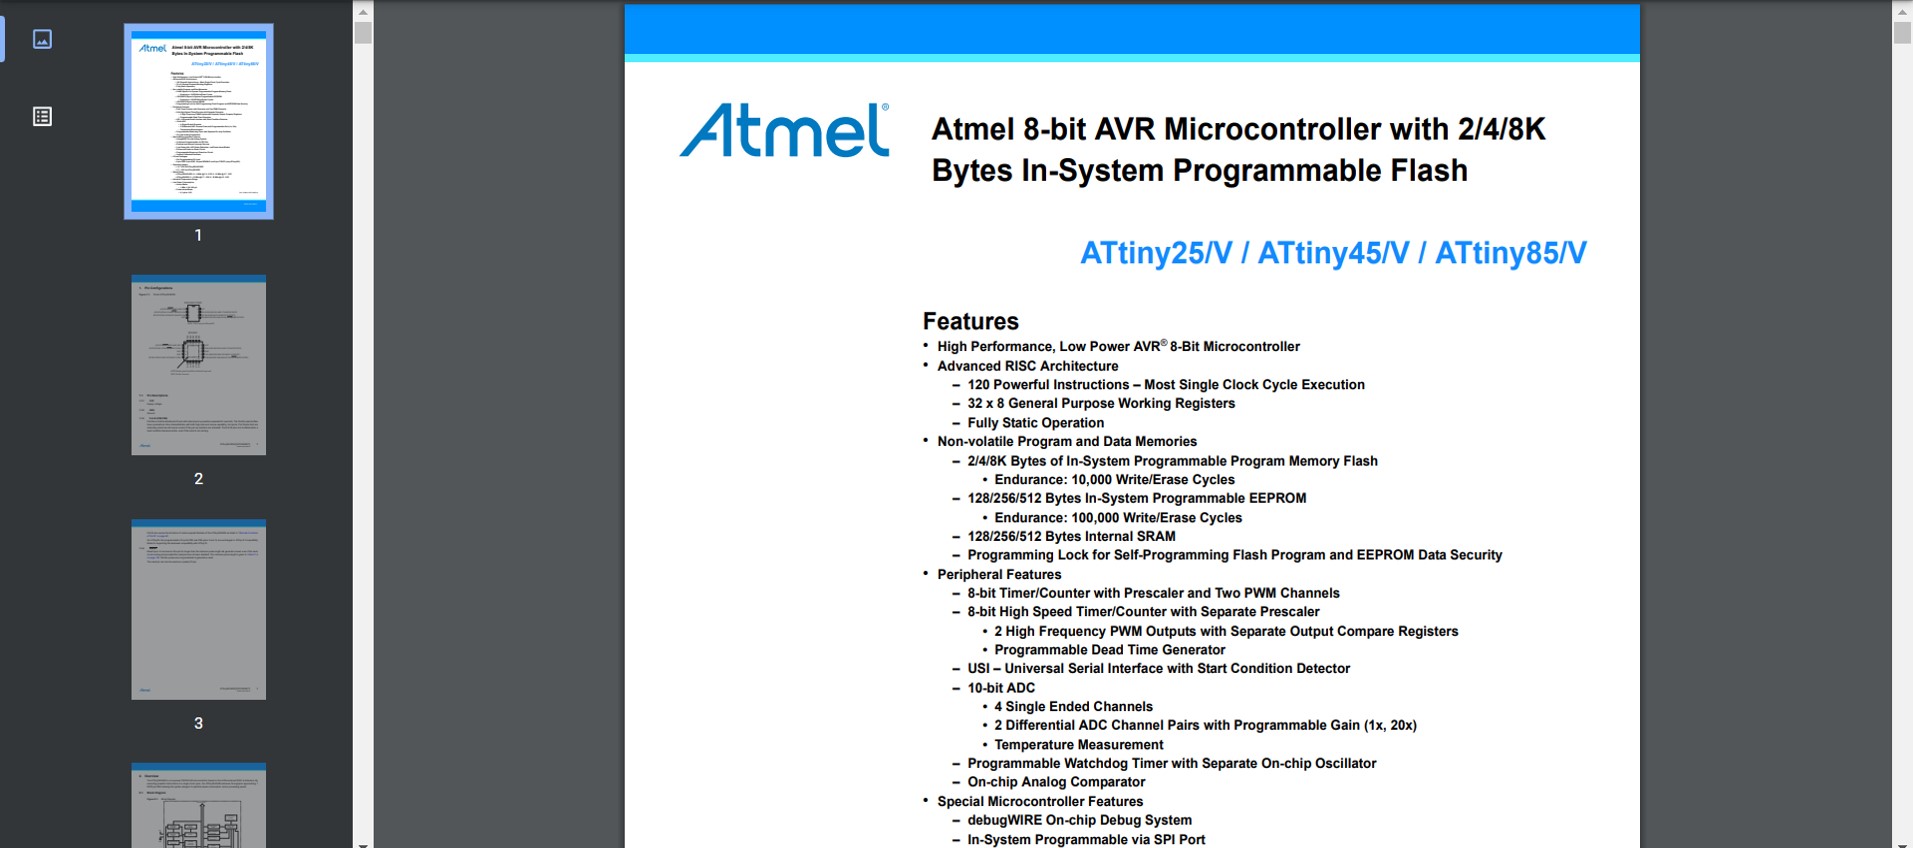
- Low-power CMOS 8-bit microcontroller based on the AVR enhanced RISC architecture
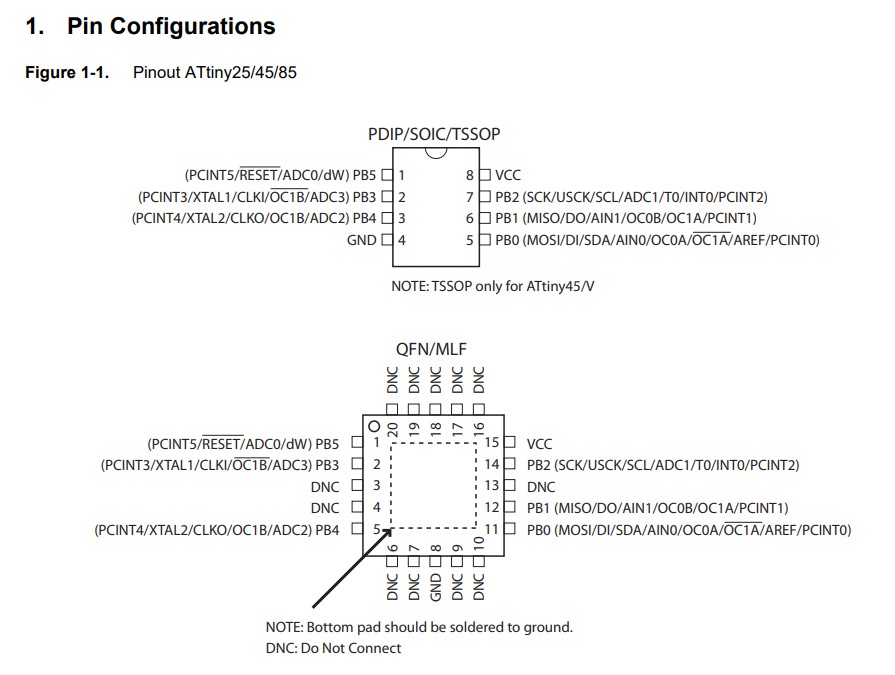
- Six programmable lines (8 pin)
- Operating voltage from 1,8V - 5,5V
- Low power consumption
- 1 MIPS per MHz allowing the system designer to optimize power consumption versus processing speed.
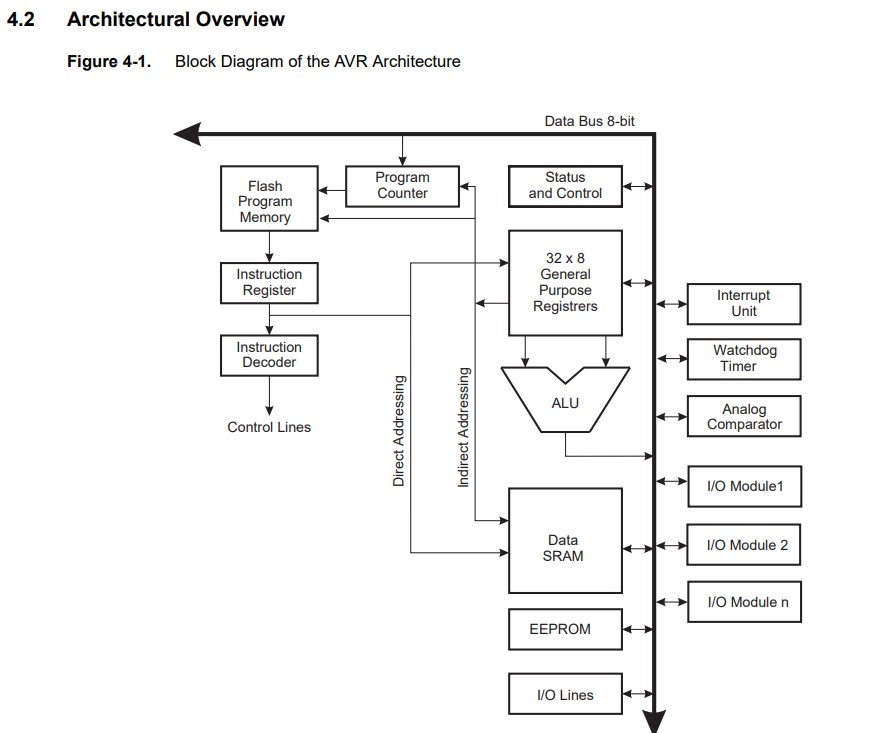 - 2 memories spaces, data and programming. in Addition, an EEPROM memory for data storage. all 3 memories are linear and regular
- The Flash memory has an endurance of at least 10,000 write/erase cycles
- During periods of low VCC, the EEPROM data can be corrupted because the supply voltage is too low for the CPU and the EEPROM to operate properly.
- 2 memories spaces, data and programming. in Addition, an EEPROM memory for data storage. all 3 memories are linear and regular
- The Flash memory has an endurance of at least 10,000 write/erase cycles
- During periods of low VCC, the EEPROM data can be corrupted because the supply voltage is too low for the CPU and the EEPROM to operate properly.

learn from the data sheet = DONE
Program my board
I used the programmer I made on first electronics week.
The difference is that now, my programmer is yellow  because I isolated it.

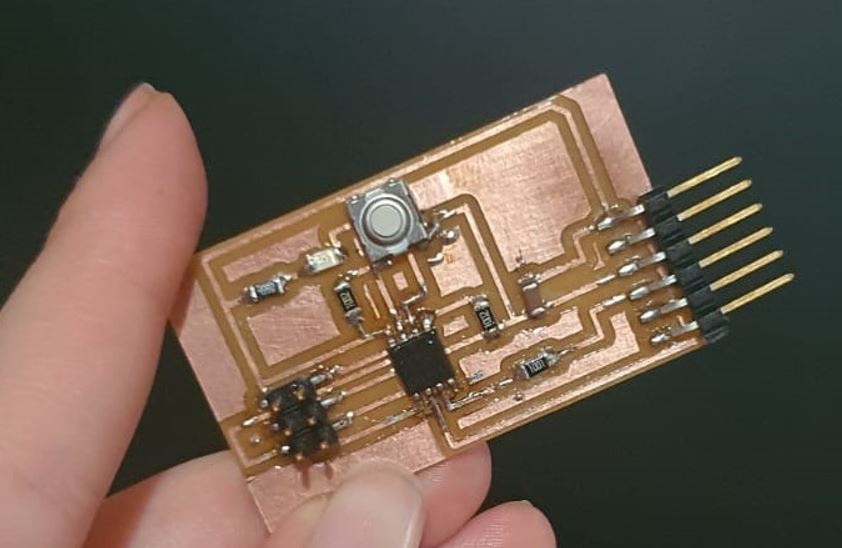
Also I decided to use the board I already designed in the second week of electronics design.
It is a really simple board, since it basically consists in:
- An Attiny 45 microcontroller
- A led
- A Button
- A FTDI connector
I wanted to use the button on that board to make the led blinks depending on the number I write on my computer through the serial connection. I checked the hello.ftdi.45.echo code programmed by Neil and it seemed too complex for me first. I though I could use Serial command in arduino but I got the following error:
error: ‘Serial’ was not declared in this scope
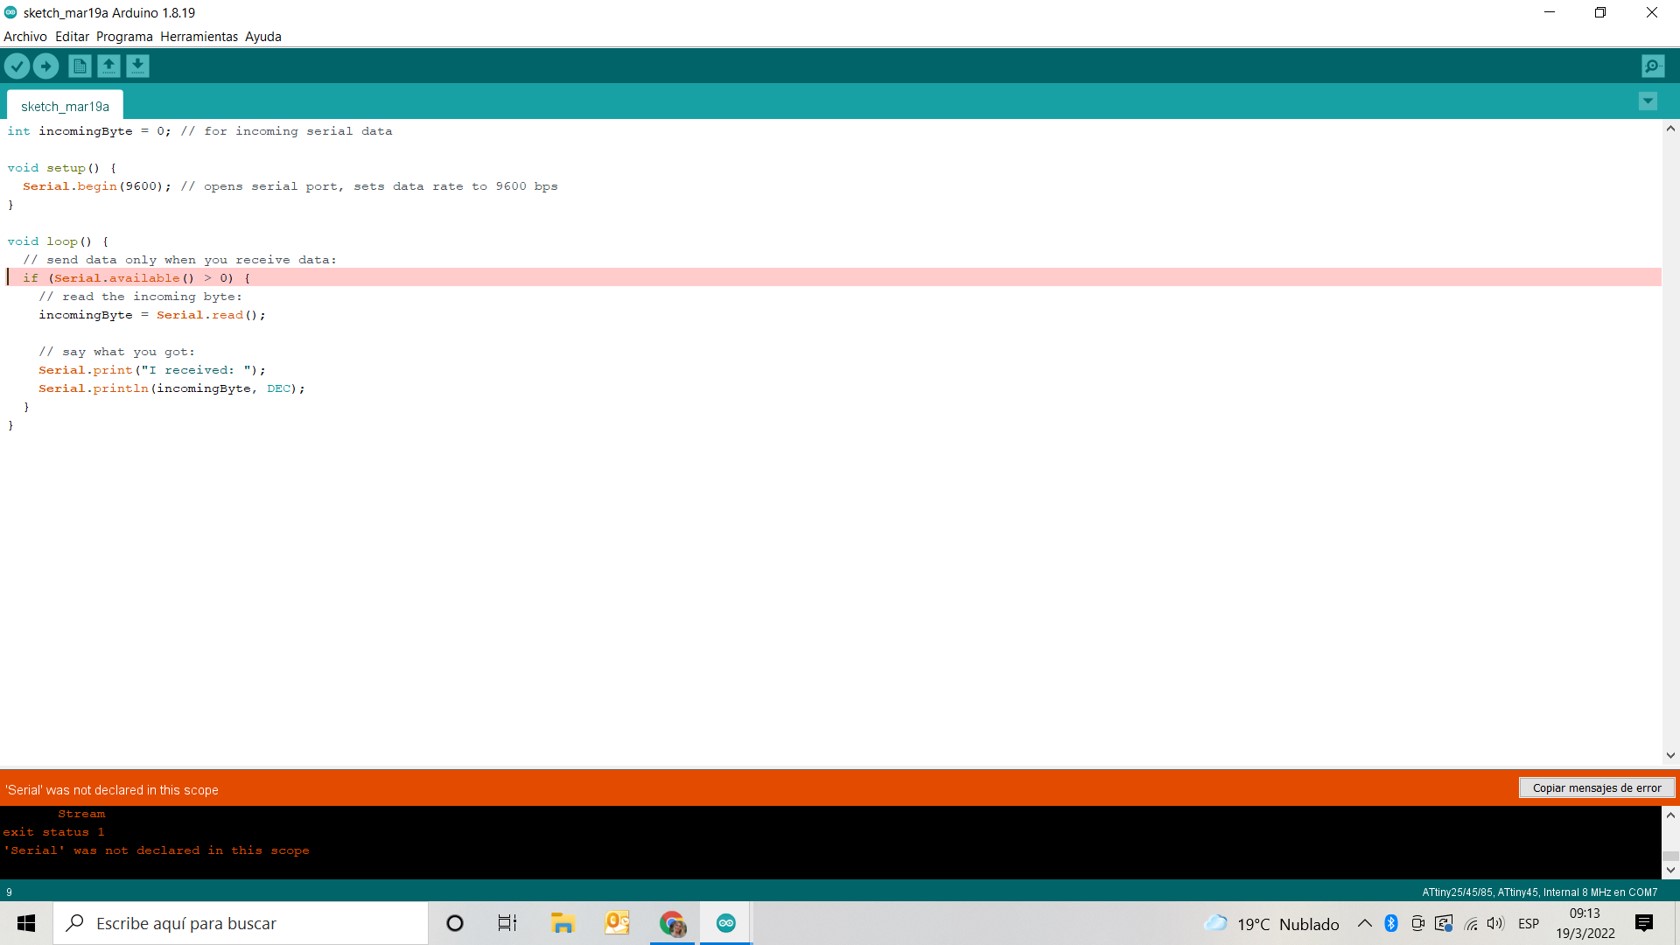
It turns out that our attiny microcontroller do not have direct support for hardware based serial and therefore the Serial object was unavailable in our code, however, it could be solved by including SoftwareSerial.h just like Neil did in hello.ftdi.45.echo.serial. The only downside of this method is that it consumes a lot of memory on the microcontroller, for that reason I decided to continue using parts of the hello.ftdi.45.echo code.
I ended up combining Neil’s hello.ftdi.45.echo with the blink code I used a few weeks ago and combine it in order to make the led blinks when I give the order to do so from the computer (not from the button as it was in my original code)
This is the code I added to the original hello.ftdi.45.echo
set(serial_port, serial_pin_out);
output(serial_direction, serial_pin_out);
pinMode(3, OUTPUT);

}

static int index = 0;
static char chr;
char buffer[max_buffer] = {
0
};

void loop() {
//
// main loop
//

// Get character from serial monitor
get_char(&serial_pins,serial_pin_in,&chr);

// Transform character into integer
int value = chr  - '0';

// If the character is not '0'
if(chr != '0'){

int counter;

// Blink 'value' times
for(counter = 0; counter < value; ++counter){
  put_string(&serial_port,serial_pin_out,chr);
  digitalWrite(3, HIGH);
  delay(500);
  digitalWrite(3, LOW);
  delay(500);
    }
  }
}
Here you can see the results:
Then, I advanced on making a little more complex programming, because my original idea was not only to send the order to the led to blink but also was to send the amount of blinks depending on the number I determine. So I did this in my code in order to achieve it:
static int index = 0;
static char chr;
char buffer[max_buffer] = {
   0
};

void loop() {
   //
   // main loop
   //

   // Get character from serial monitor
   get_char( & serial_pins, serial_pin_in, & chr);

   // If the character is 'a'
   if (chr == 'a') {

      // Transform characters in buffer into an integer
      // and store it in 'value'
      int value = atoi(buffer);
      int counter;
      char str1[25];

      if (value > 1) {
         sprintf(str1, "Blinking %d times...", value);
      } else if (value == 1) {
         sprintf(str1, "Blinking once...");
      }

      put_string( & serial_port, serial_pin_out, str1);
      put_char( & serial_port, serial_pin_out, 10);

      // Blink the led 'value' times
      for (counter = 0; counter < value; ++counter) {
         char str[25];
         sprintf(str, "%d", counter + 1);
         put_string( & serial_port, serial_pin_out, str);
         put_char( & serial_port, serial_pin_out, 10); // new line
         digitalWrite(3, HIGH);
         delay(100);
         digitalWrite(3, LOW);
         delay(100);
      }

      // Clean the bugger
      for (counter = 0; counter <= index; ++counter) {
         buffer[counter] = '\0';
      }

      index = 0;
      put_string( & serial_port, serial_pin_out, "DONE!");
      put_char( & serial_port, serial_pin_out, 10); // new line
      put_string( & serial_port, serial_pin_out, "Please, enter a number digit by digit. Then enter a to continue: \n");
   }
   // If the character is not 'a'
   else {
      // Insert the character into the buffer
      buffer[index++] = chr;
   }

   if (index != 0) {
      put_string( & serial_port, serial_pin_out, "You typed \"");

      if (index == (max_buffer - 1)) {
         index = 0;
      }

      put_string( & serial_port, serial_pin_out, buffer);
      put_char( & serial_port, serial_pin_out, '\"');
      put_char( & serial_port, serial_pin_out, 10); // new line
   }

}
It worked partially well, I realized that there must be a problem either with my board or with something related to the concetion between the board and the computer because in this 2 videos you can see the code working, when I pressed a number, the led light blinked that amount of times, but sometimes, due to “comunication” problems the instructions didn’t get well.
Results with my board:
Results with a different board: