6. 3D Scanning and printing
Group Assignment:
Test the design rules for your 3D printers
Individual Assignment:
- Design and 3d print and object (small, few cm3, limited by printer time) that could not be made substractively
- 3D scan an object (and optionally print it)
Group Assignment
Important information about the machine and used material:
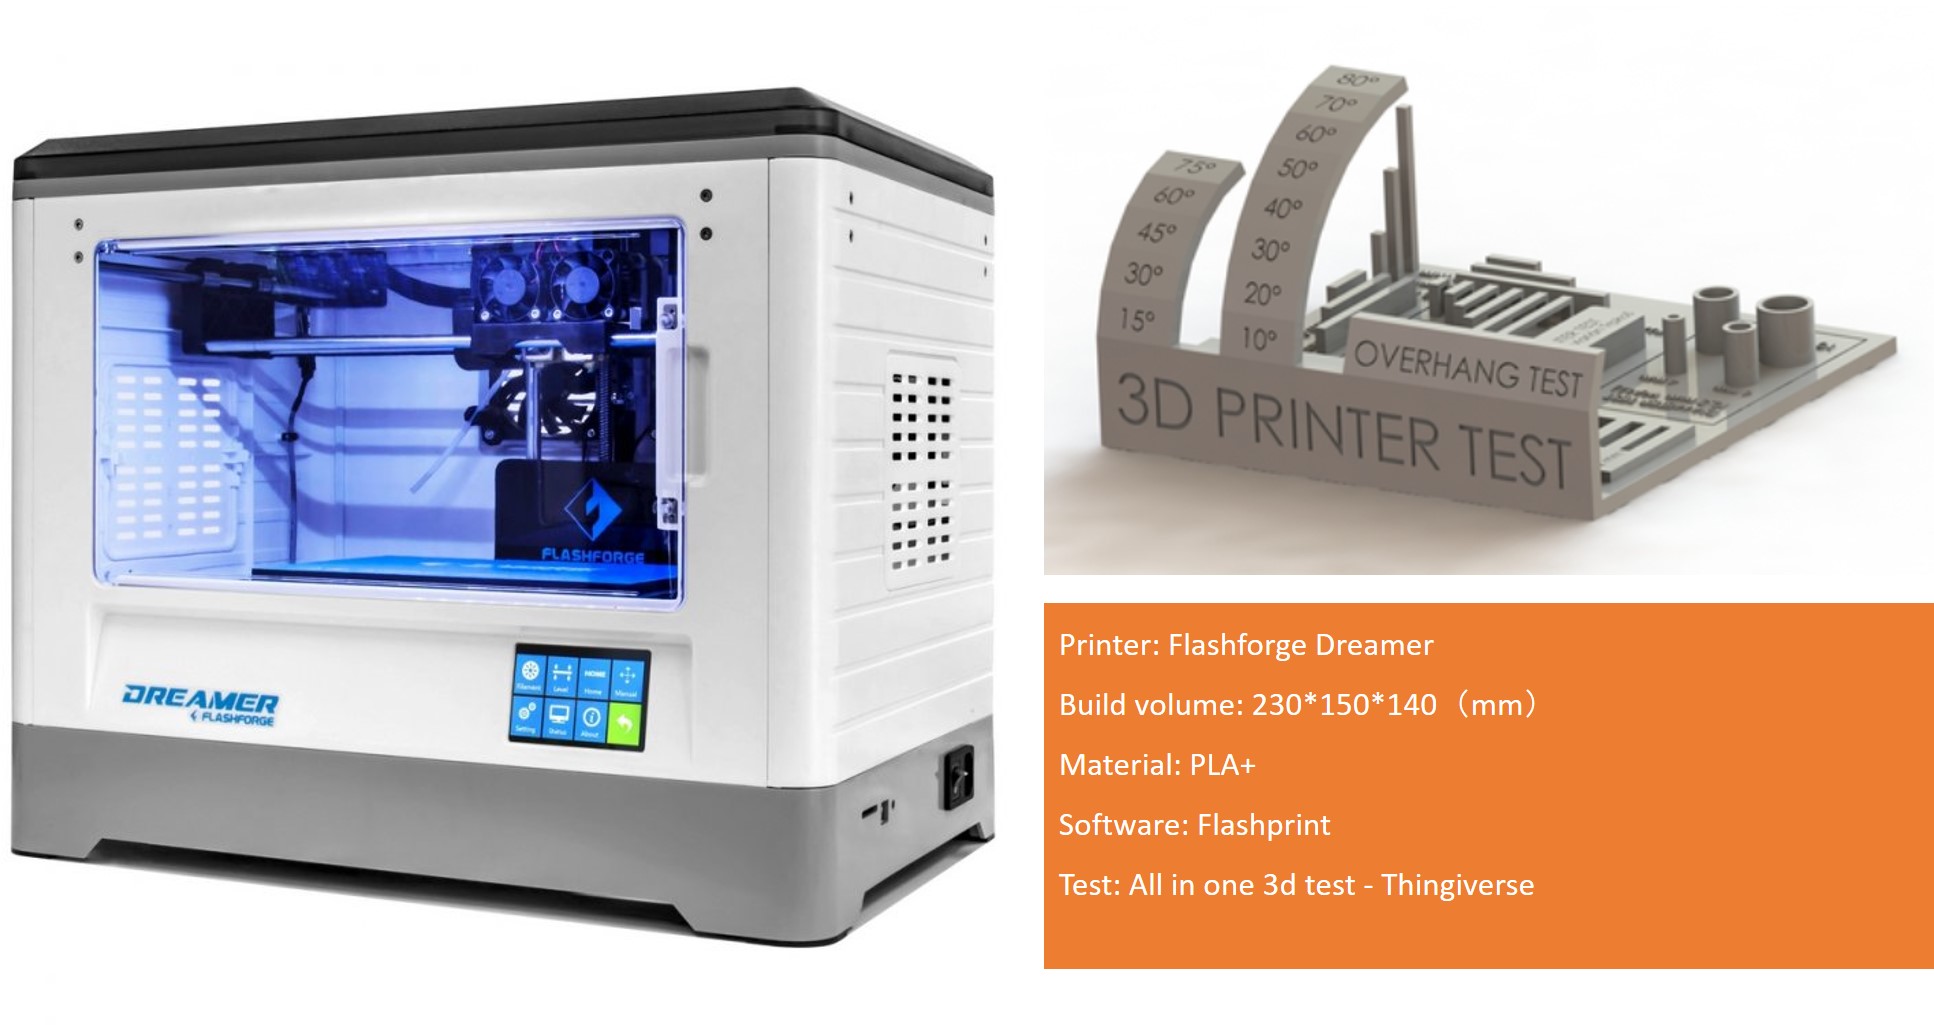
In order to test the design rules for our 3D printer and material we: 1. Downloaded a 3d printing test from thingiverse 2. Opened the stl file with flashprint: 3. We used this parameters:
1. Extruder: left

2. material: PVA (Equals to PLA+)

3. layer height: 0.18

4. minimum speed: 60mm/s

5. extruder temperature: 210°C

6. platform temp.: 50°C

7. infill: 25%

8. raft: No

9. Supports: No
- Saved file as gx in a SD card
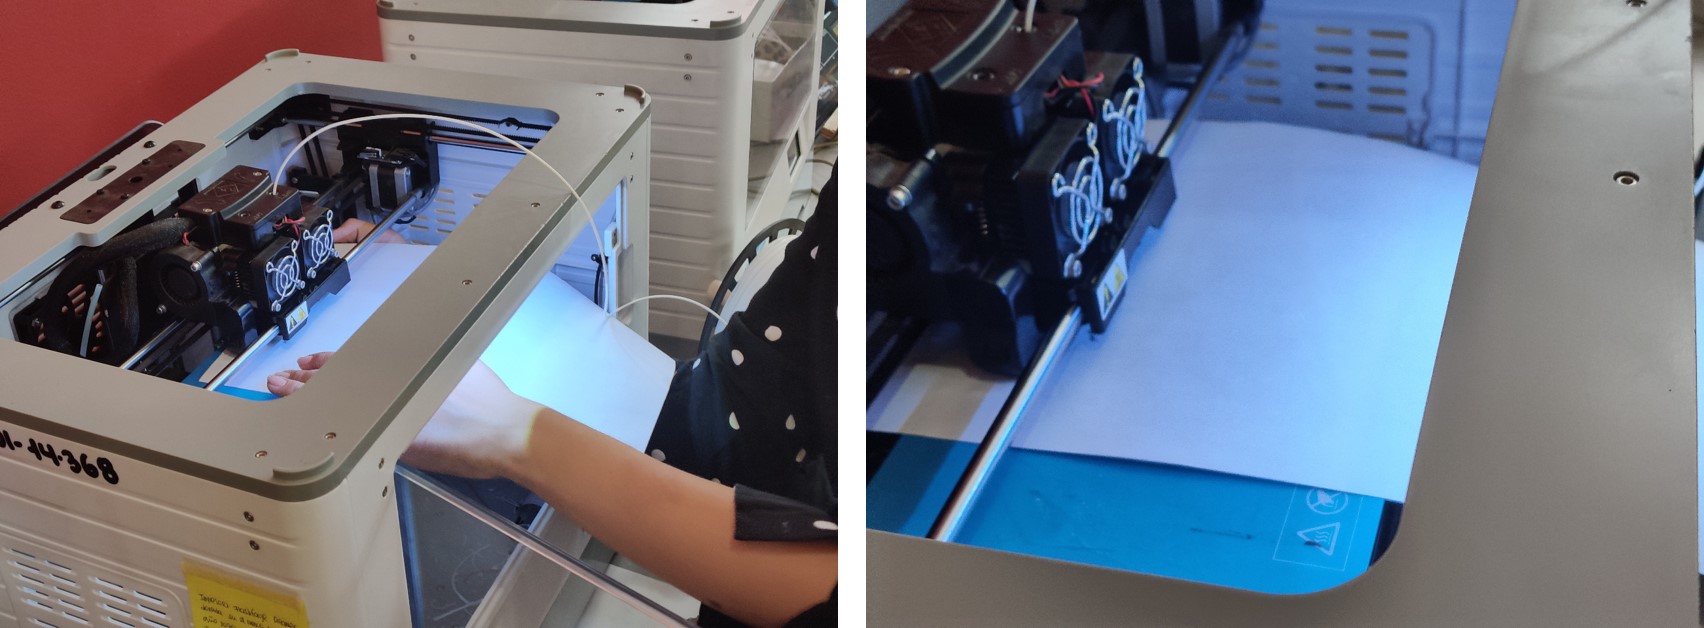
- Leveling Z: We used a paper to define the right offset for the extruder point. Placed a paper over the platform, press the “level” button on the dreamer screen. when the extruders move, test the friction between the extruder point and the paper, It should be tight but allow paper’s movement. Do this 3 times in each part of the platform.
- Plug the SD in
- press print and wait
Leveling Z:
Main learnings of the process
Due to tehnical problems with the printer’s left extruder we learned how to clean it 


Test results
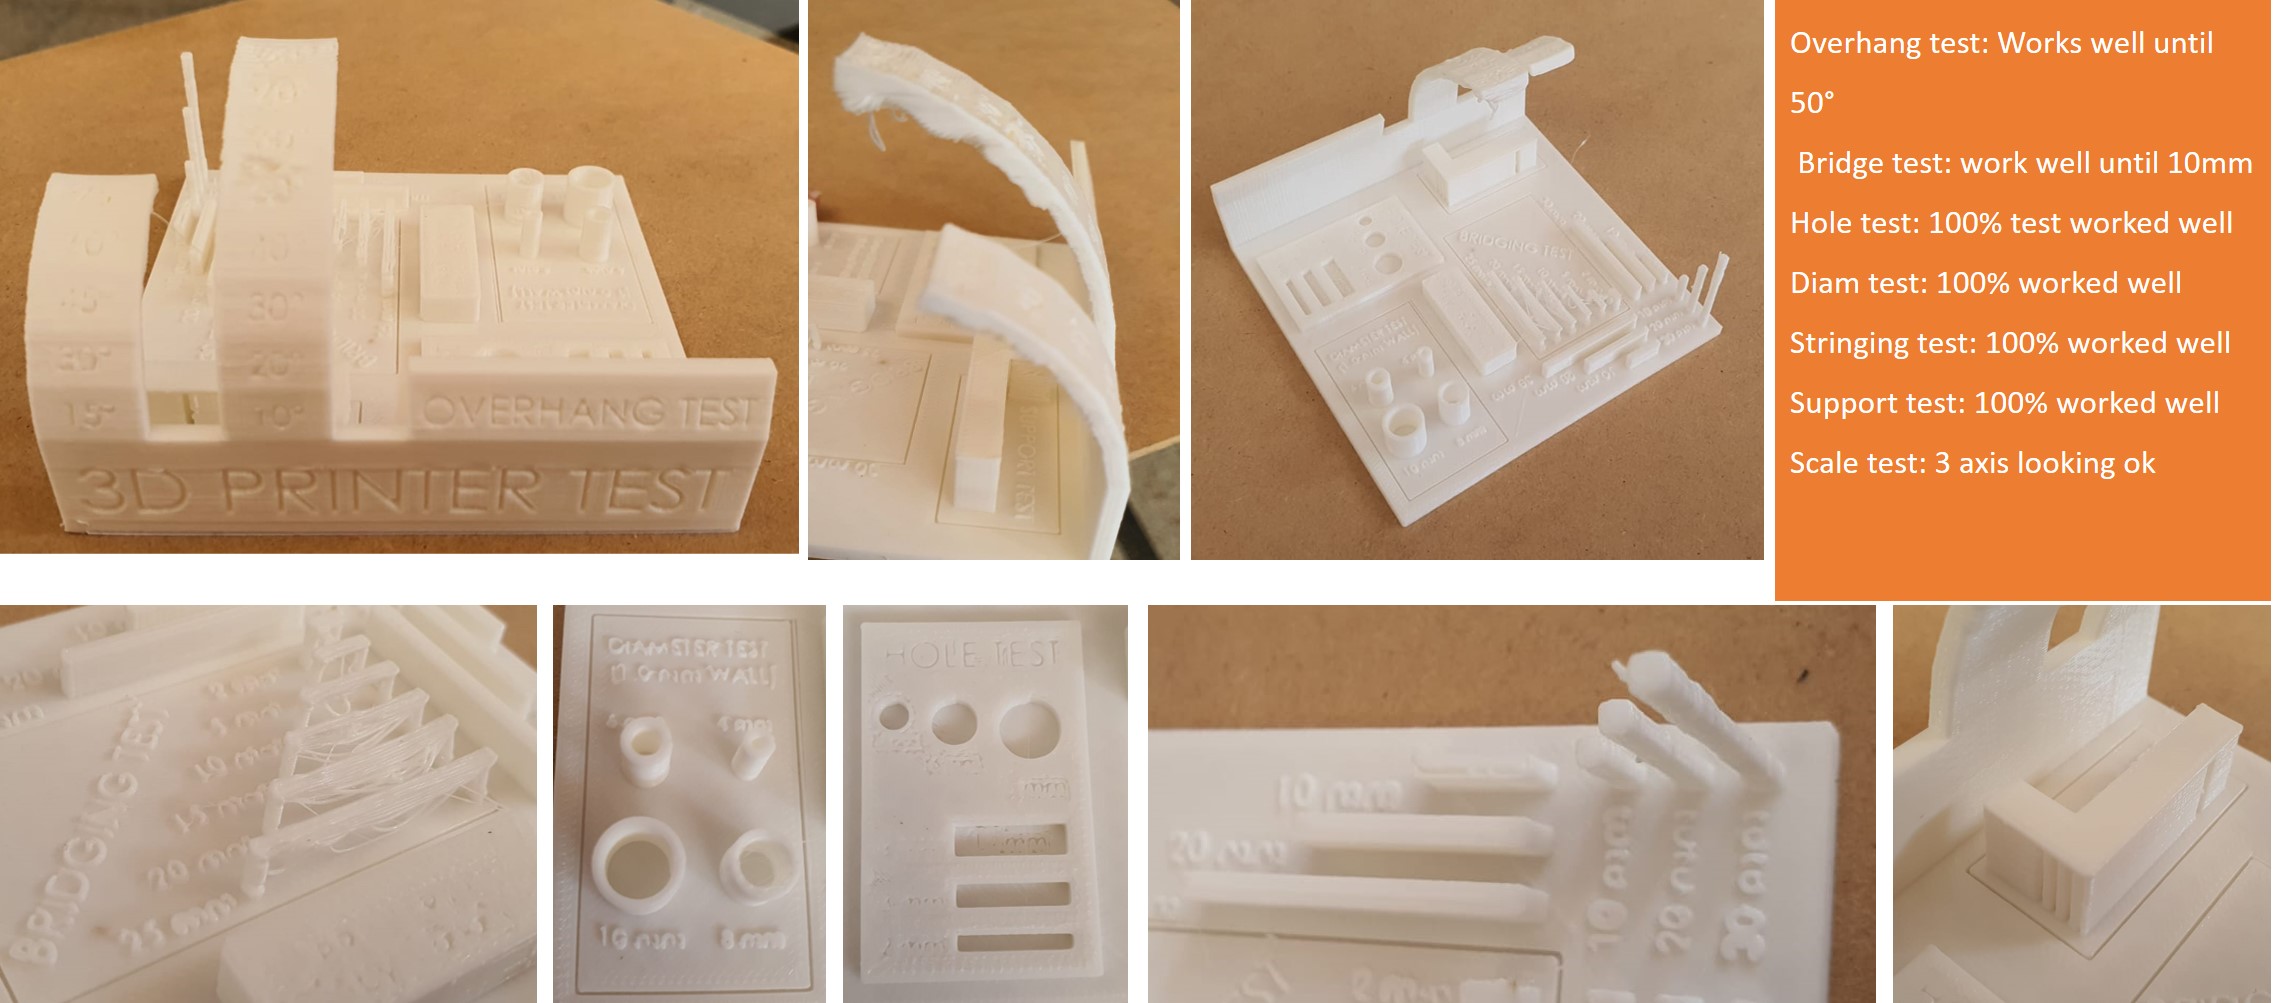
Conclusion: PLA+ is a very good material in terms of conserving the original shapes and regarding complex and small designs, but its mechanical properties of bridging are not too good. If you need to print horizontal non-supported designs it is a good idea to use supports generated in Flashprint directly.
Final parameters for PLA+ in a Dreamer
- Extruder: left, right or combined
- material: PVA (Equals to PLA+)
- layer height: 0.18
- minimum speed: 60mm/s
- extruder temperature: 210°C
- platform temp.: 50°C
- infill: 25% (it could be less, 25% is for a very strong designs)
- raft: as needed
- Supports: as needed
Test the design rules for your 3D printer = DONE
Individual Assignment
1. Design and Print a small object
Design
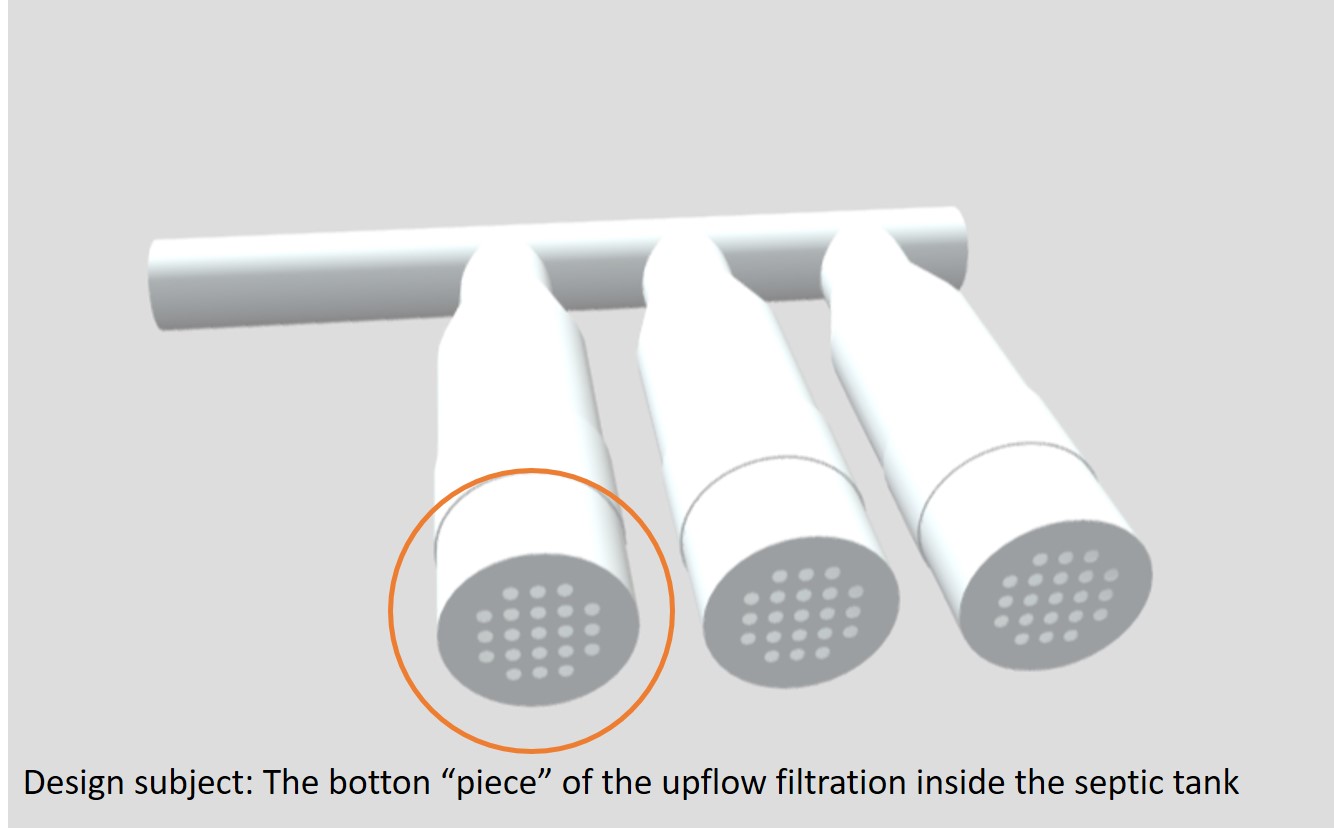
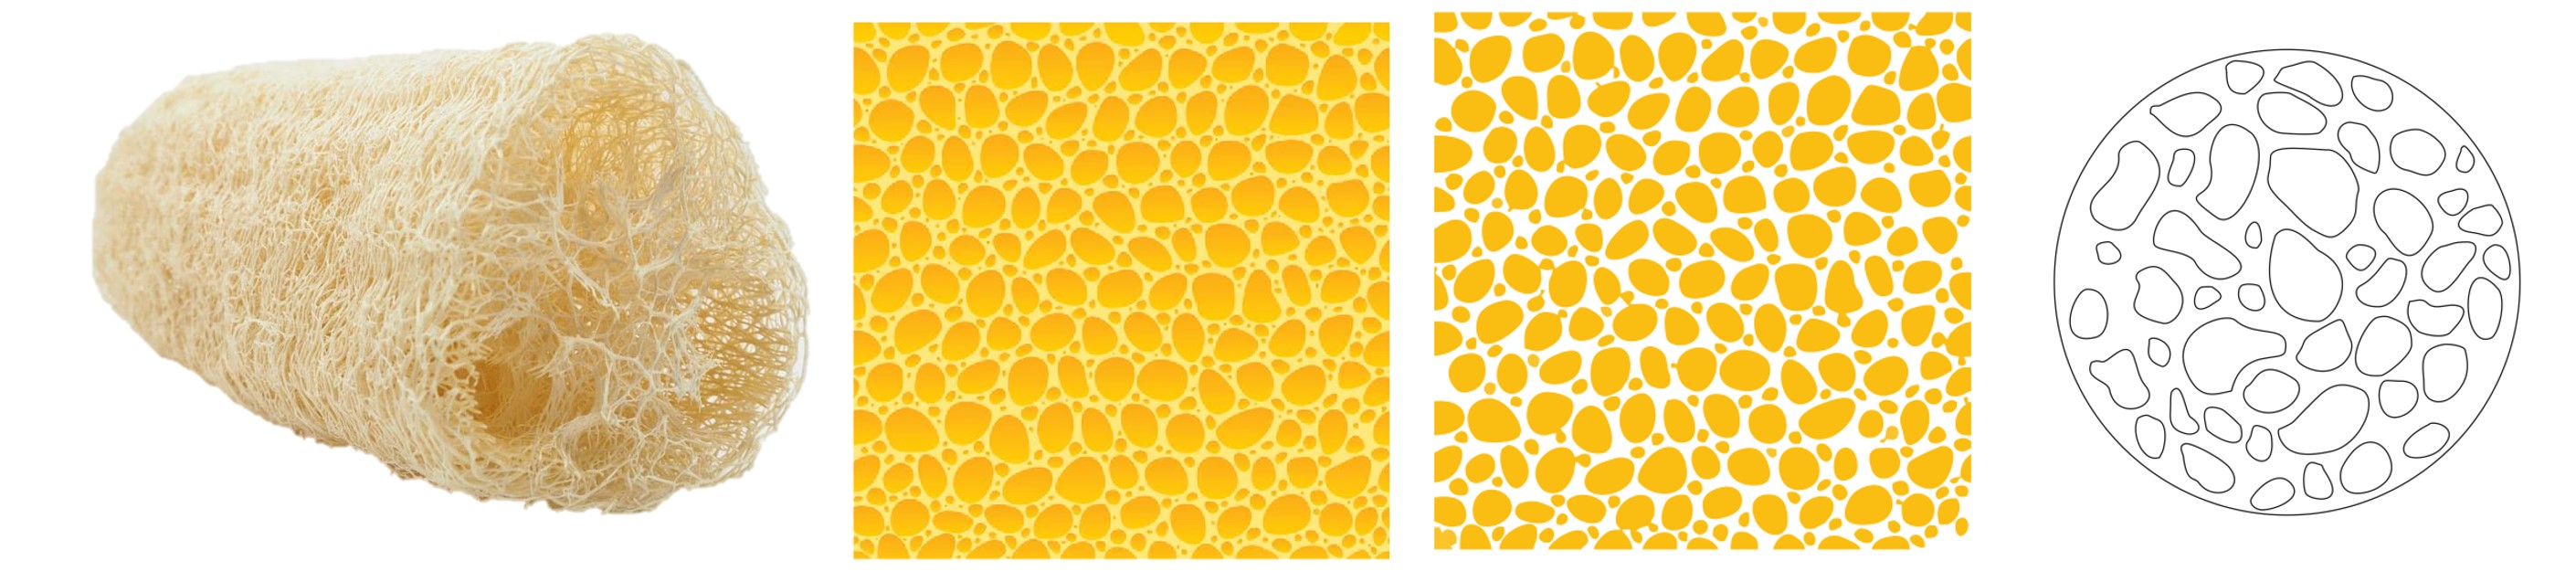
I got inspired with a natural sponge and its filtration properties. My final project is to improve residentials sewer systems, and one part of the improvement would be to have an upflow filtration system inside the traditional septic tanks.
In order to achieve the upflow filtration system with the minimum volume of filtration materials (rocks and sand) I decided to try filters inside 3 columns of plumbing. In the bottom of each would be a “piece” I want to design in order to allow water enter to the filter-plumbs and flow up until the exit of the system outside of the septic tank.
So in this assignment I decided to start thinking about that bottom “piece”
First I started to vectorize the patterns of the natural sponge using inkscape and exported the result as a dxf file.
I opened the dxf using fusion 3d and created 3 diferent circled bases that I rotated in 3 diferent angles to achieve a base with layers as in the natural sponge.
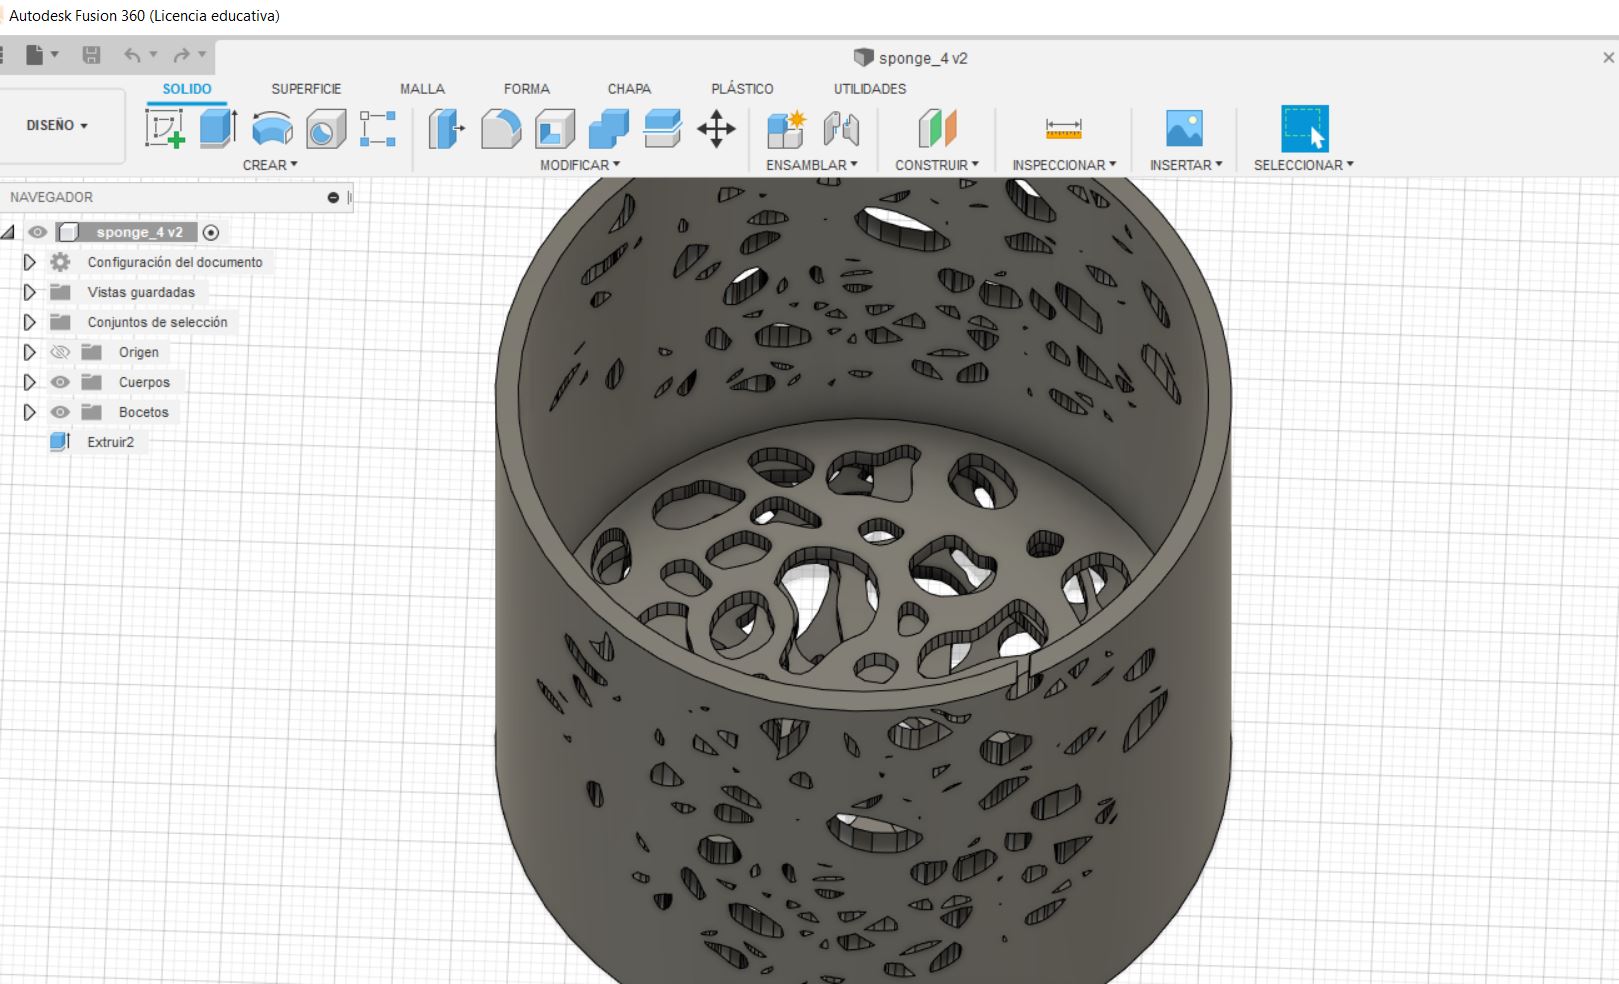
Then, I draw a cilinder around the 3-layers-base and used the same pattern to make holes in the wall of the cilinder, to do so, I used proyections on the original cilinder.
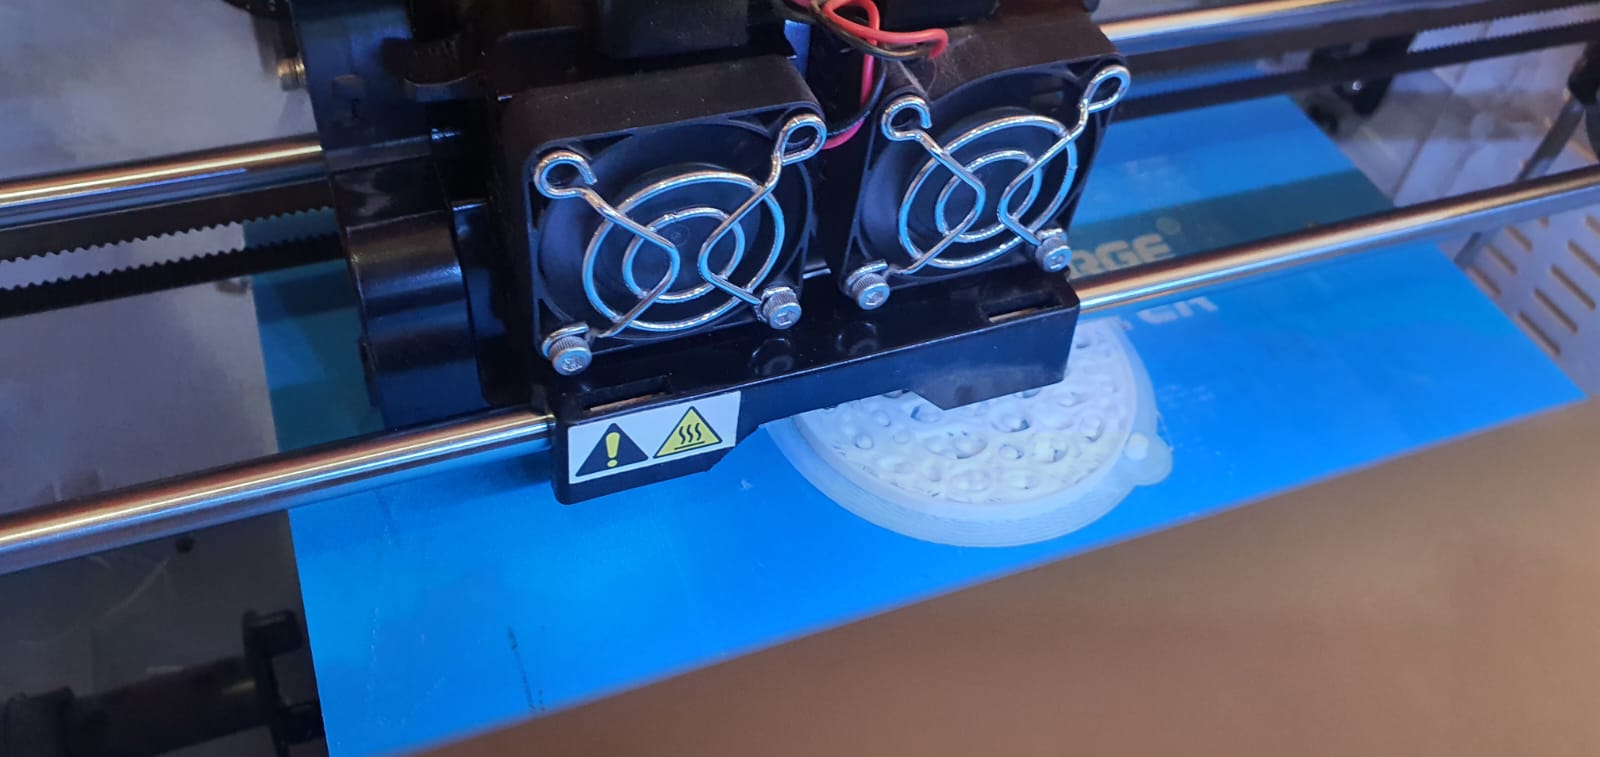
Finally I got a 3d model of my design to print it. So I opened it using flashprint. In the image below you can see the parameters I used. I used a less infill proportion (15%) and I needed to use supports generated automaticly by flashprint. I decided to try the “tree” supports. It took more than 6 hours to print 

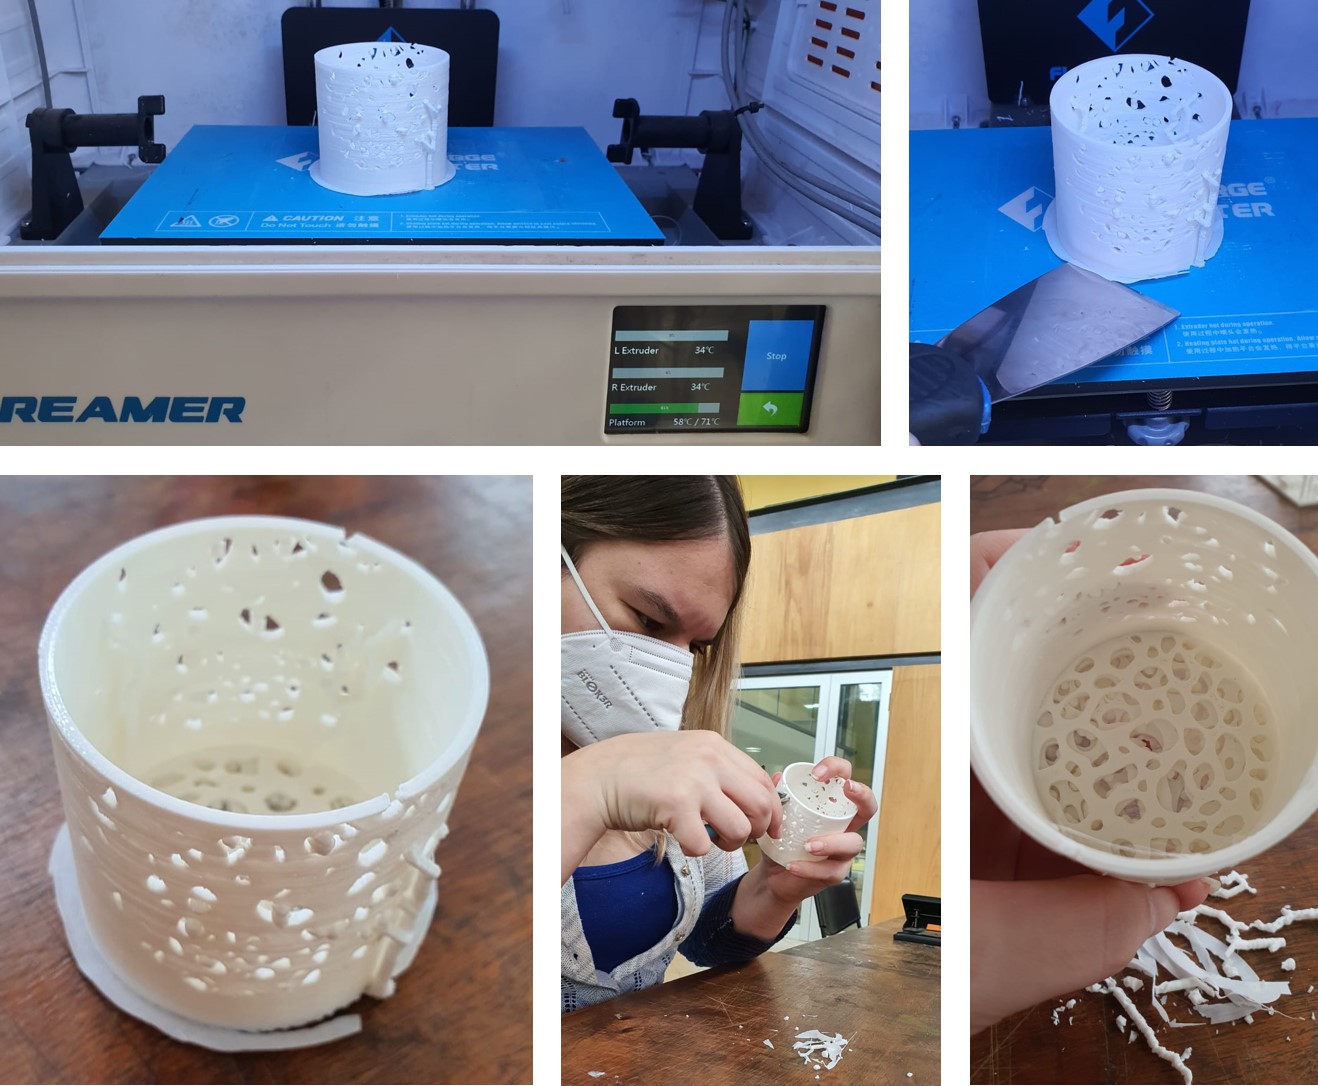
Final result
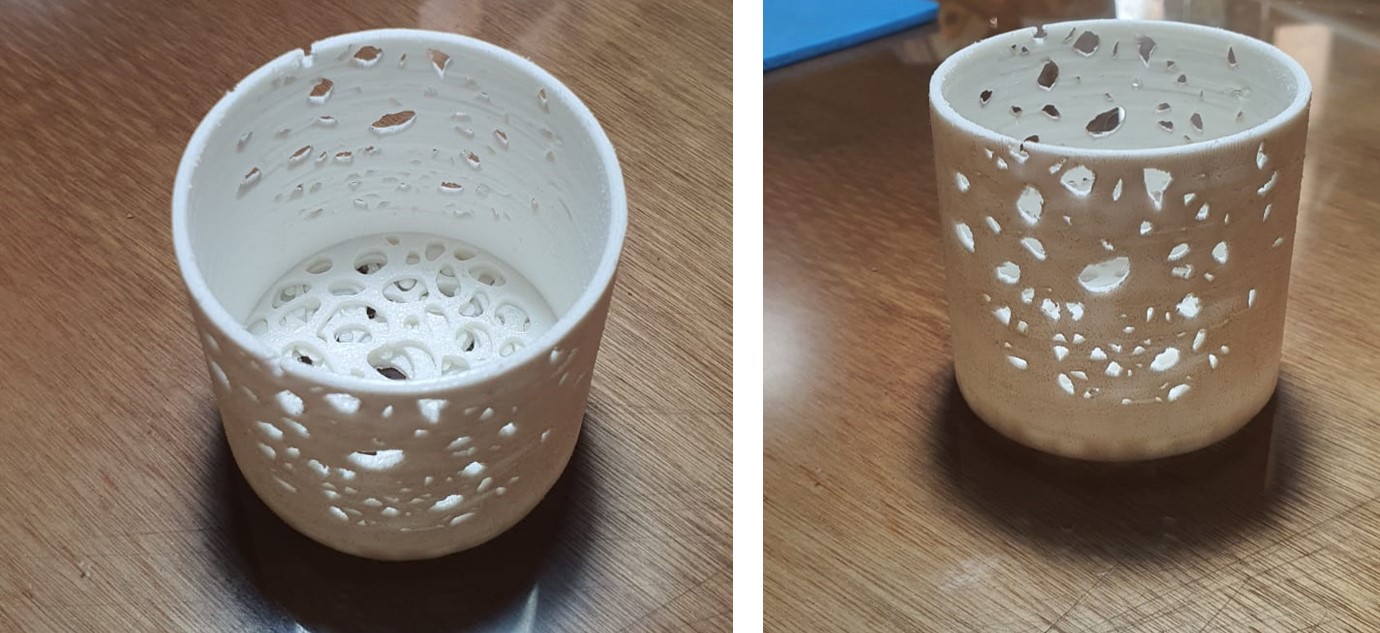
Conclusion
I did a potential piece for the upflow system inside the septic tank. It can’t make substractively because of the complexity of the base and walls. I learned that in this case, the amount of supports created was unnecessary, next time I could try print without them and see what happends.
Design and print a small object = DONE
2. Scan an object and optionally print it
I tried to test 4 different methods to scan an object, Unfortunately I wasn’t able to test 2 of them due to technical issues with the sacnning devices:
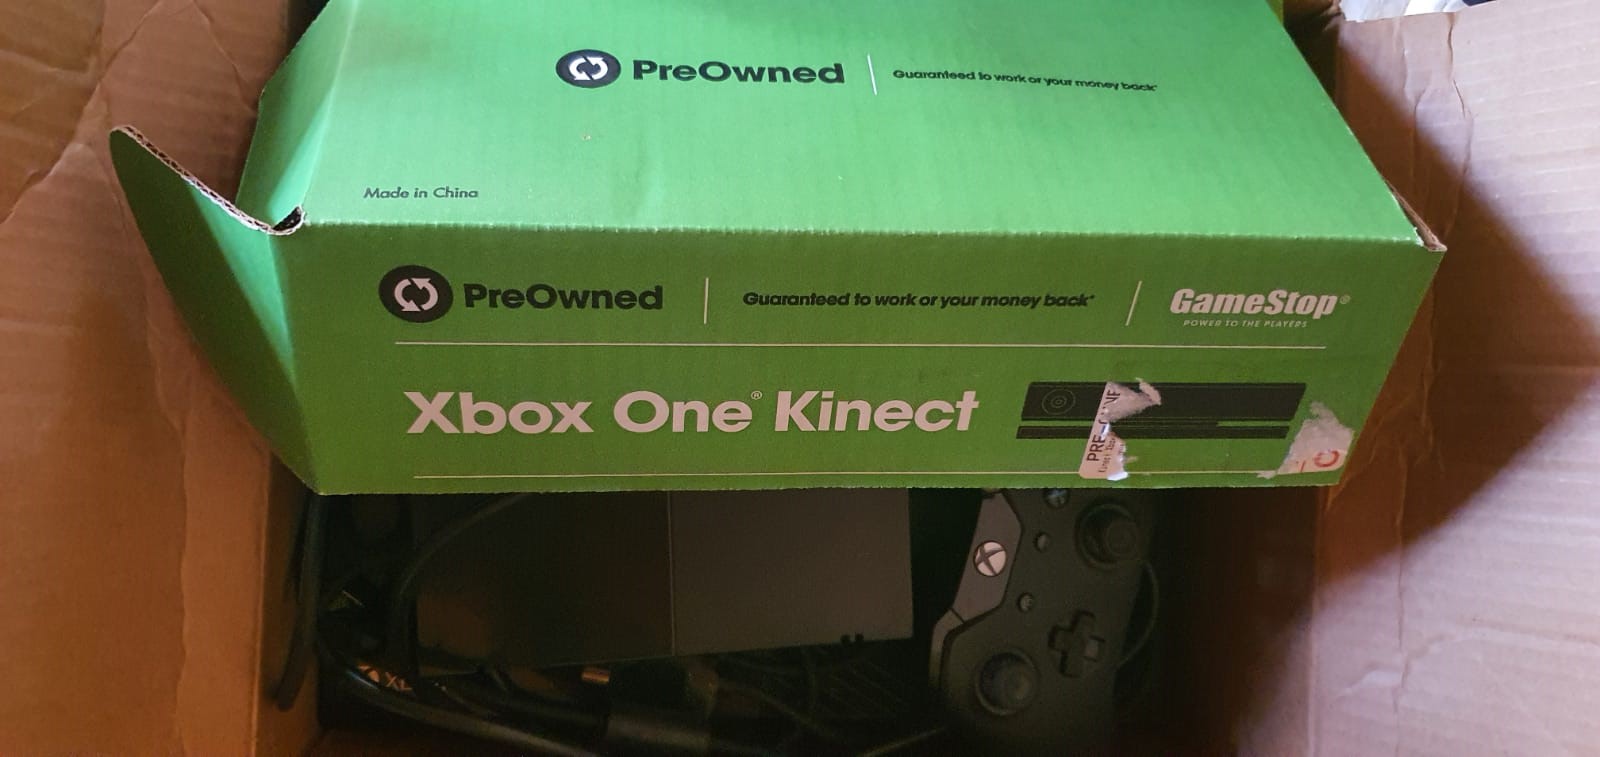
- Kinect with scanect : I have an Xbox one with its kinect camera, I try to conect the camera directly with my computer but I realize that this camere doesn’t have a power conection, so the only way to power it is trough the xbos console. So I tried connecting the entire xbox to my computer but I realized I need another cable to make the xbos be recognizable for the computer. I connected to it just using the hdmi port as the coputer would be the monitor for the xbox but it didn’t work. I tried to scan the object using scanect but nothing happend with I played start scanning.
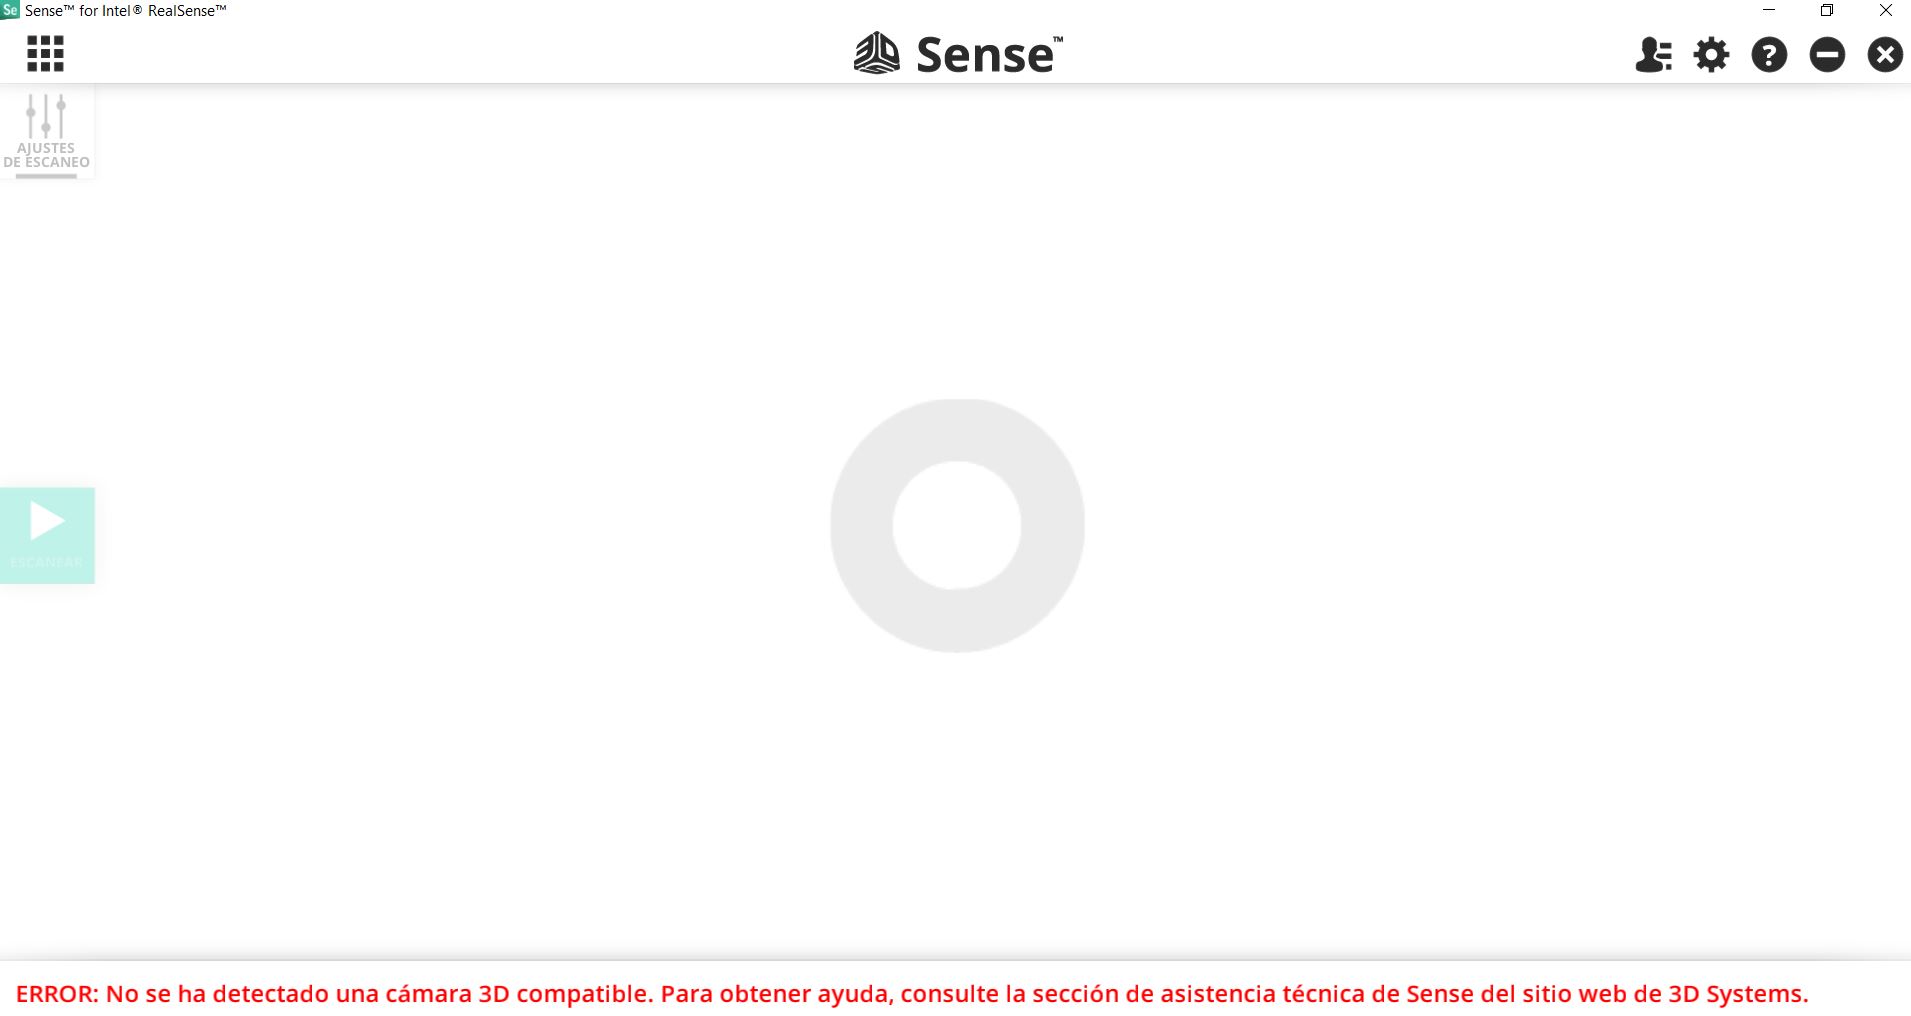
- Sense scanner: My lab has a sense scanner device. So I download the 3d systems software for using it. But once again was impossible for the computer to detect the device. I tried it with 2 different computers and it didn’t work. We think ir is an issue with the software and windows 10. Because the computer detected the device but the software didn’t recognize and marked it as an error.
Now.. Enough of failures! 
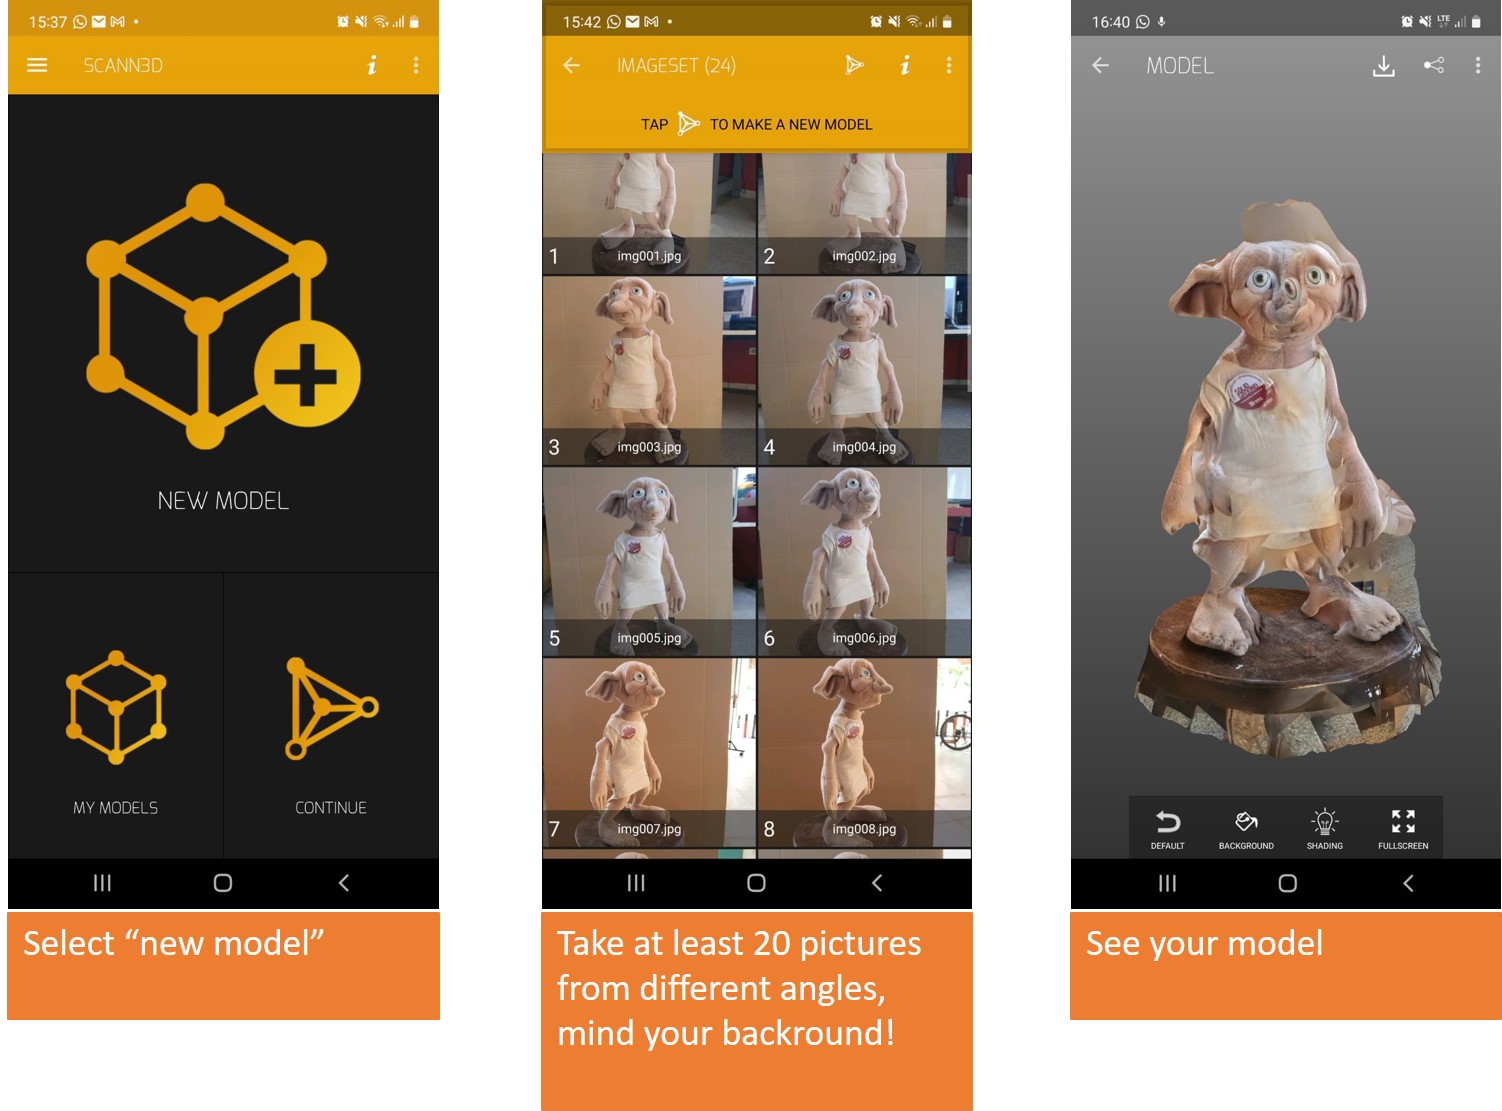
- SCANN3D: I used this app from my phone, it is easy to use:
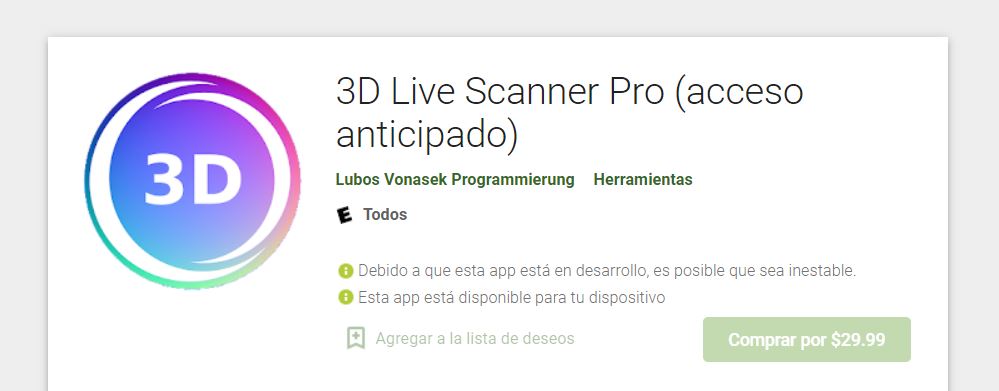
- 3D live scanning: I also used this app from my phone, it is easy to use but it seems to be a beta version only full available for some phones because we tried with 2 phones and just works in mine (both androids) and when you go to the download website on the computer browser you can see this advice:
Here you can see the process
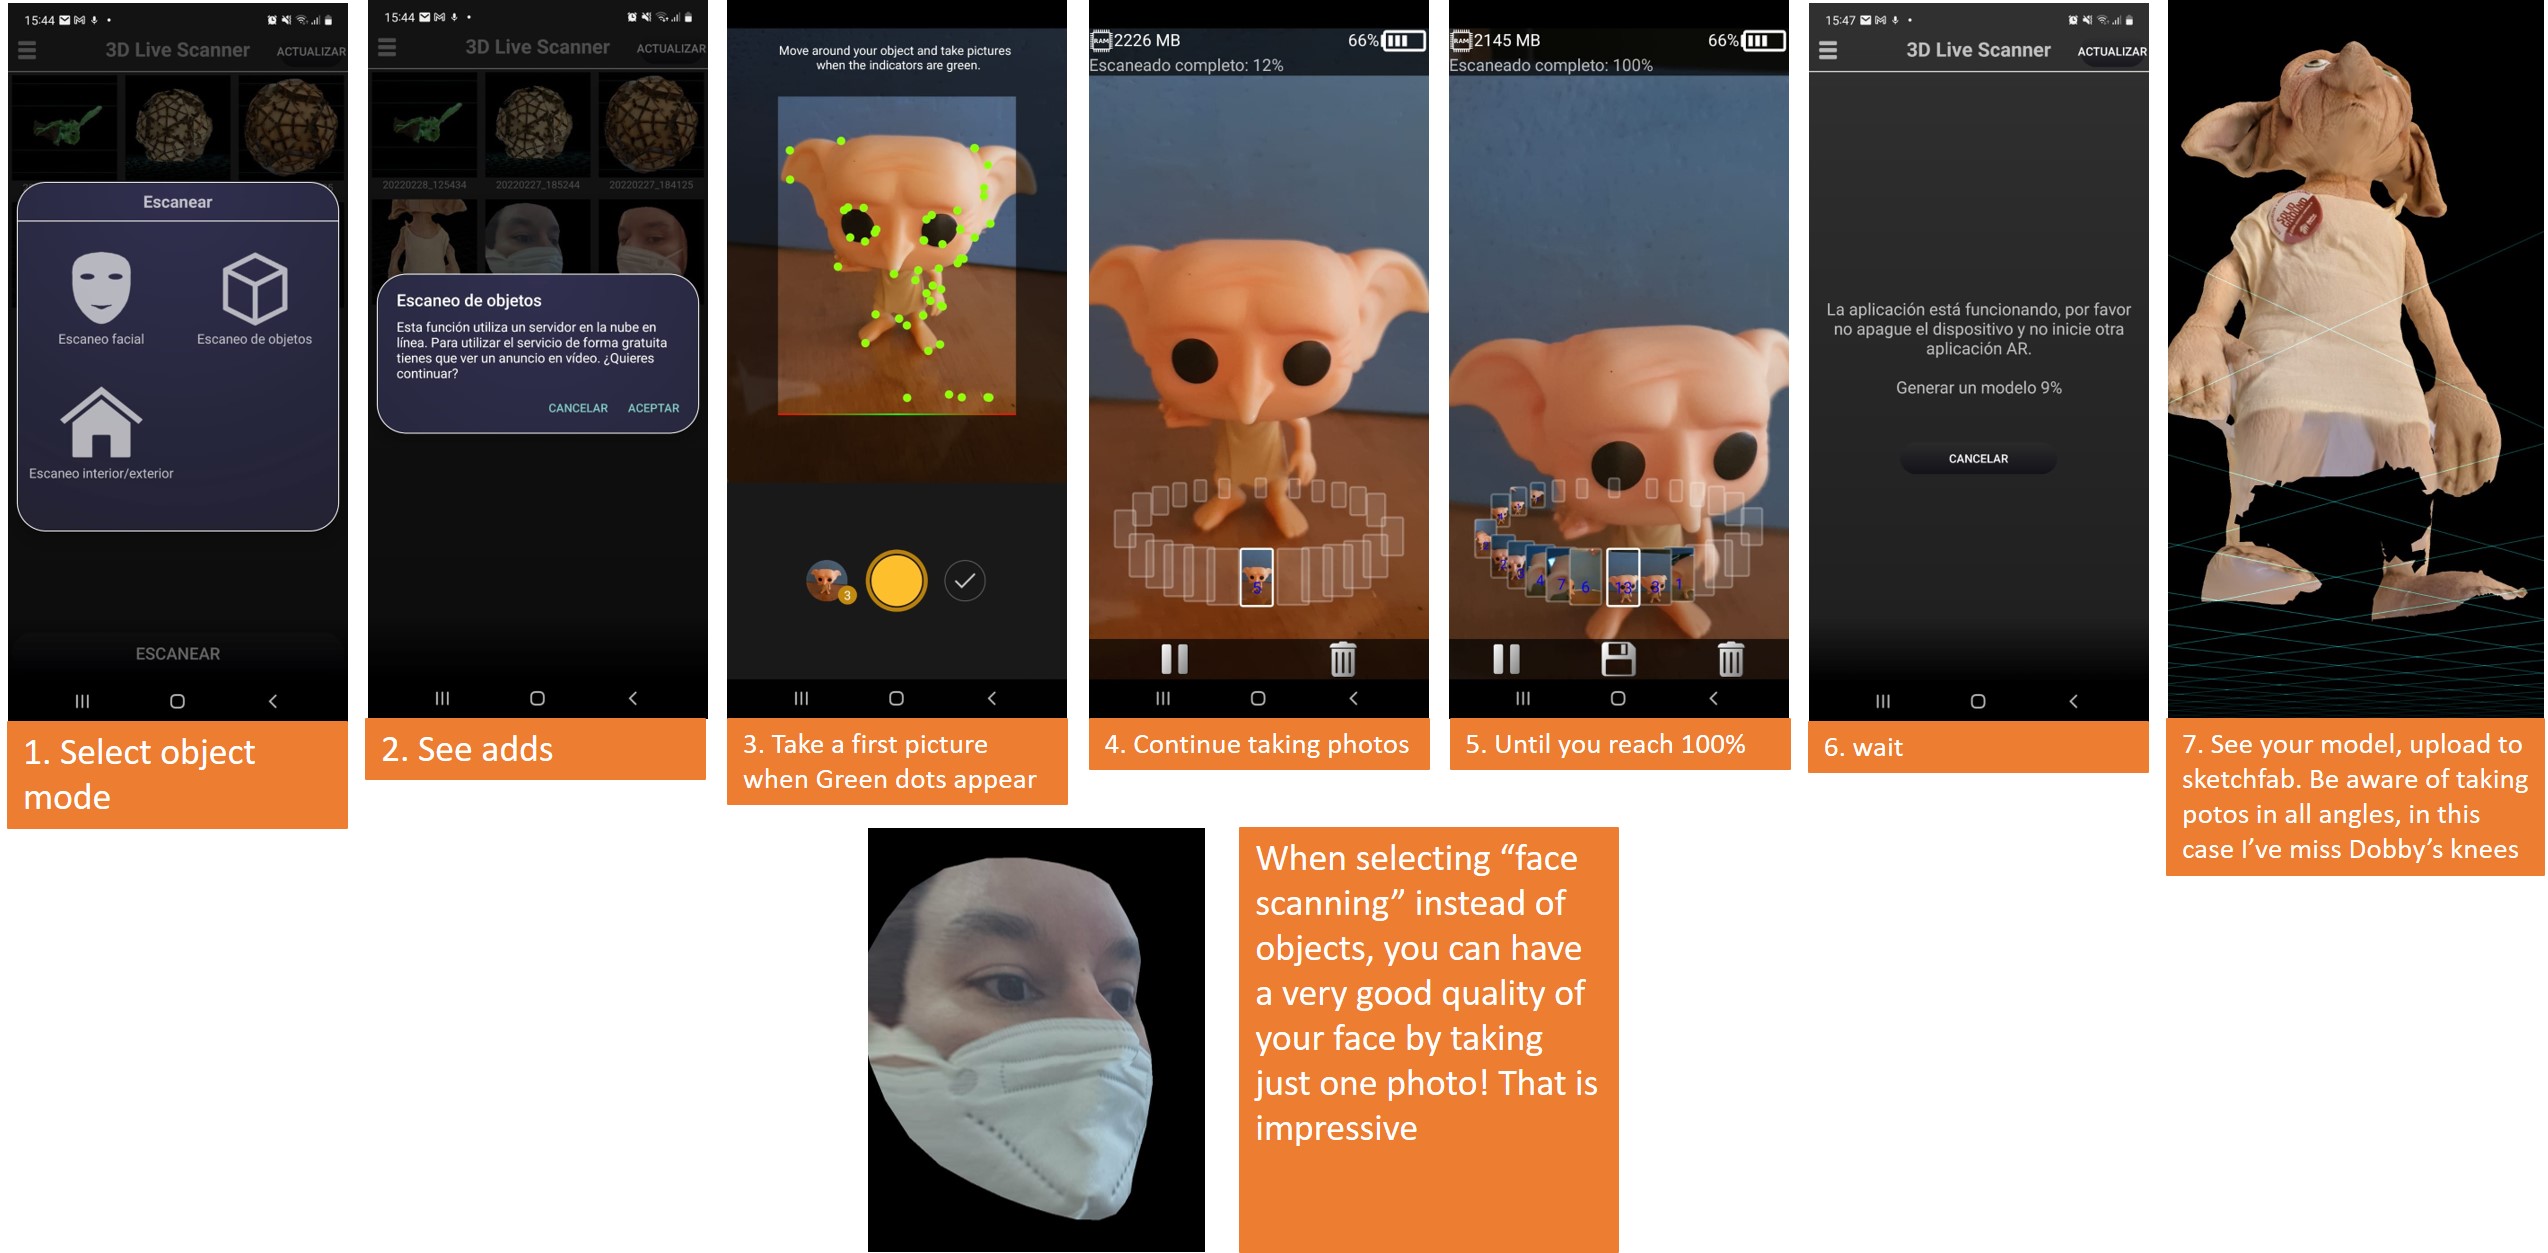
And the final results
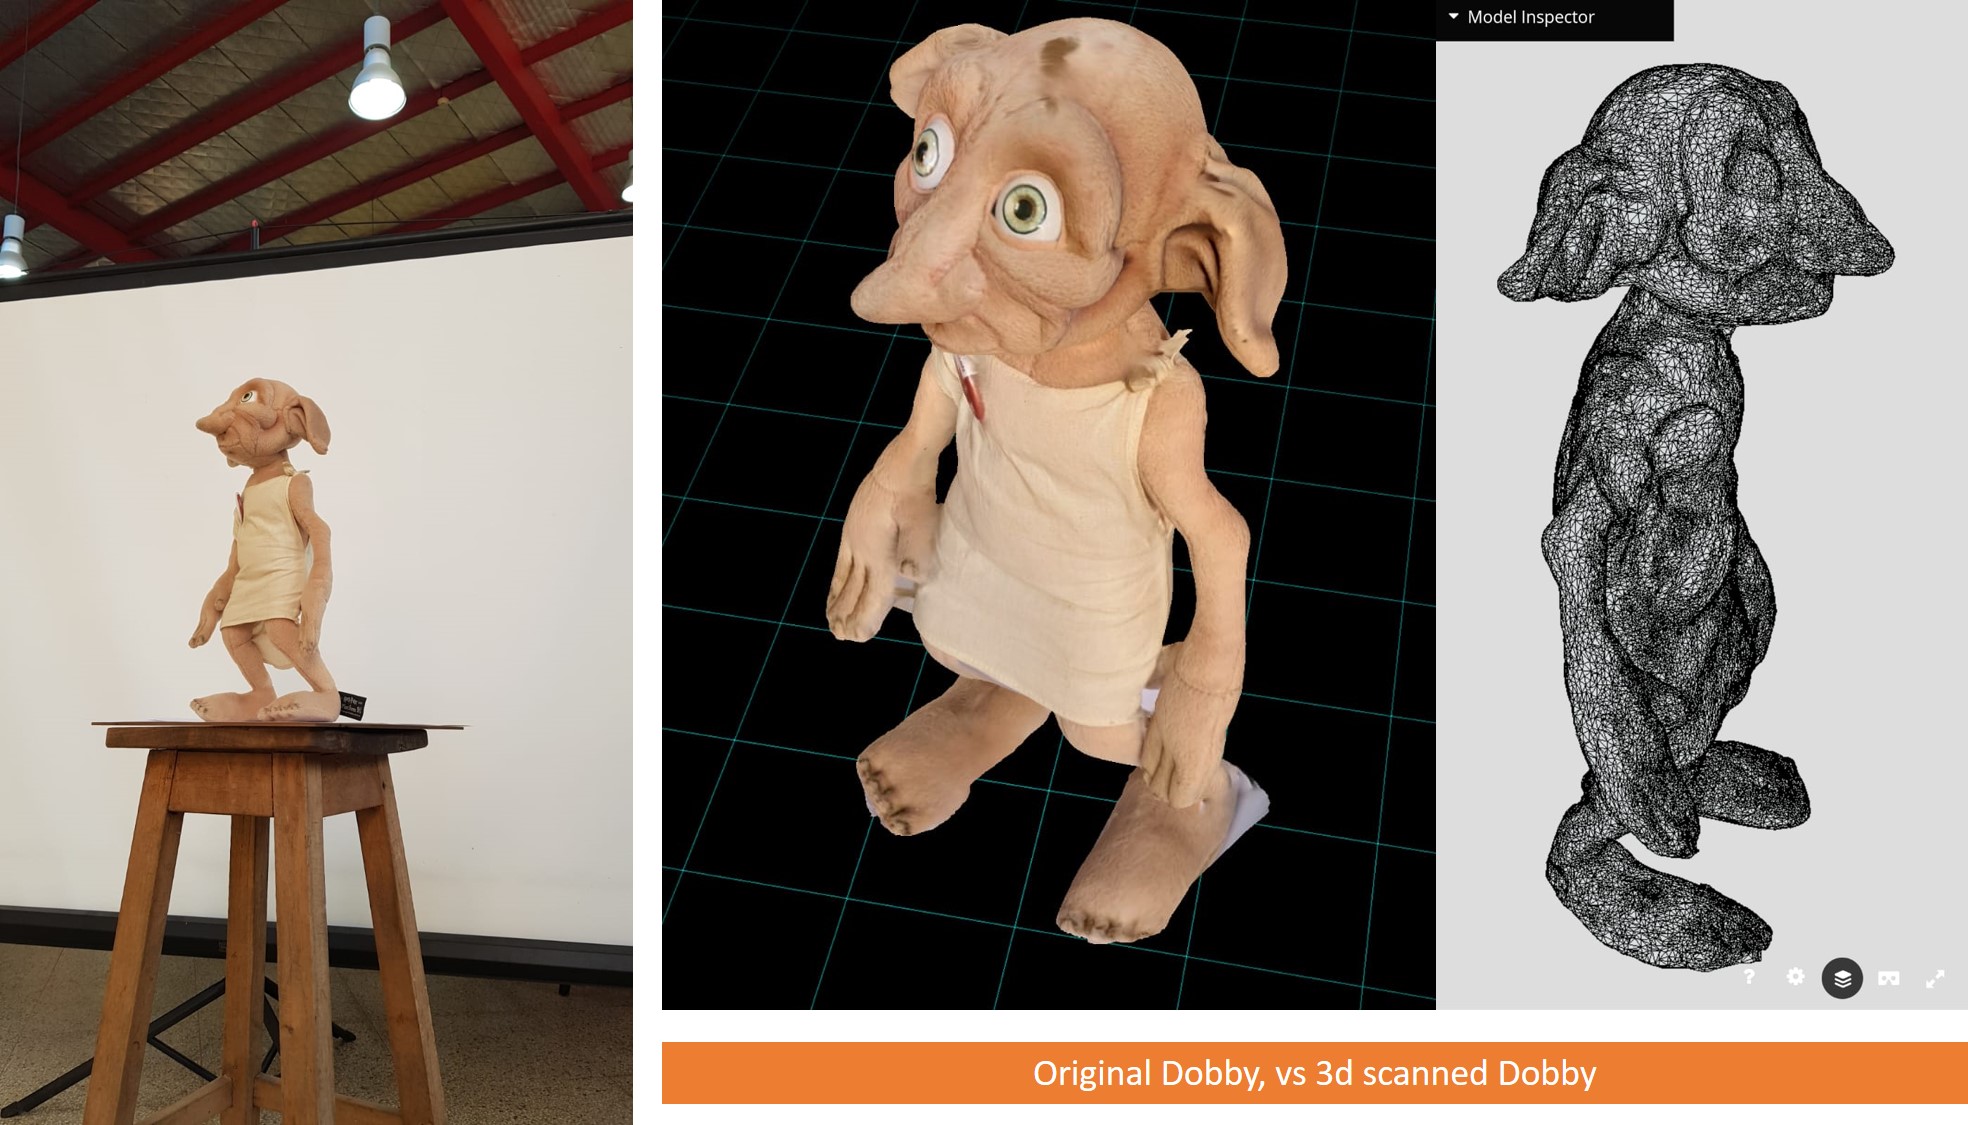
Conclusion
3D live scanning has a lot way better results than SCANN3D. I could had printed at least Dobby’s Face but I didn’t plan to do so in the first place so I didn’t have enough time to try it.
Scan an object and optionally print it = DONE
Files
Useful links:
- Flashprint tutorial
- Ultimaker cura tutorial
- Non Planar 3d printing
- Nozzelboss
- 3d test from thingiverse