Final
Project
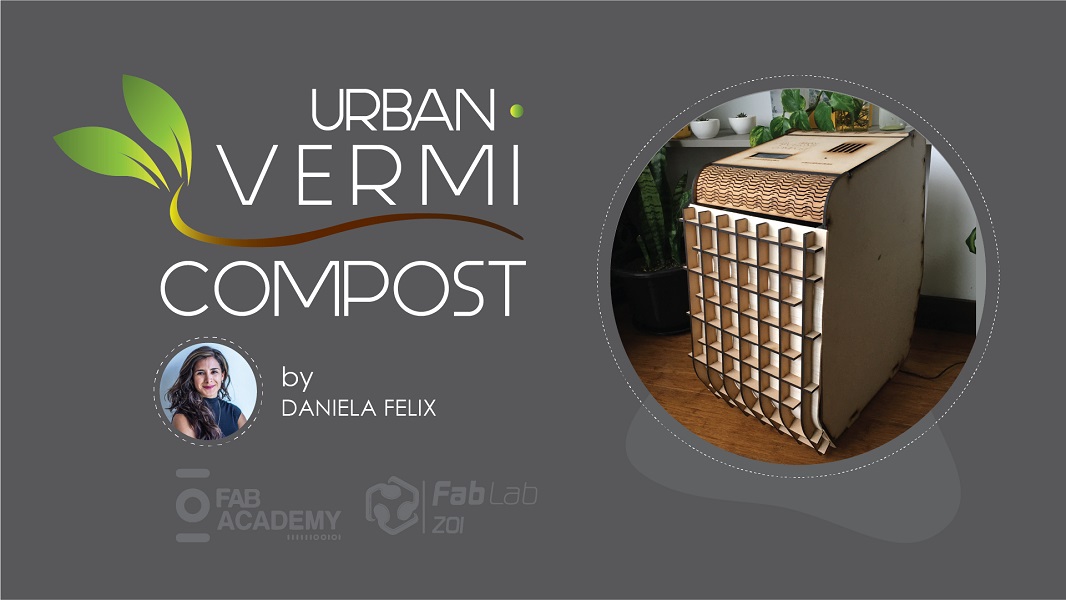
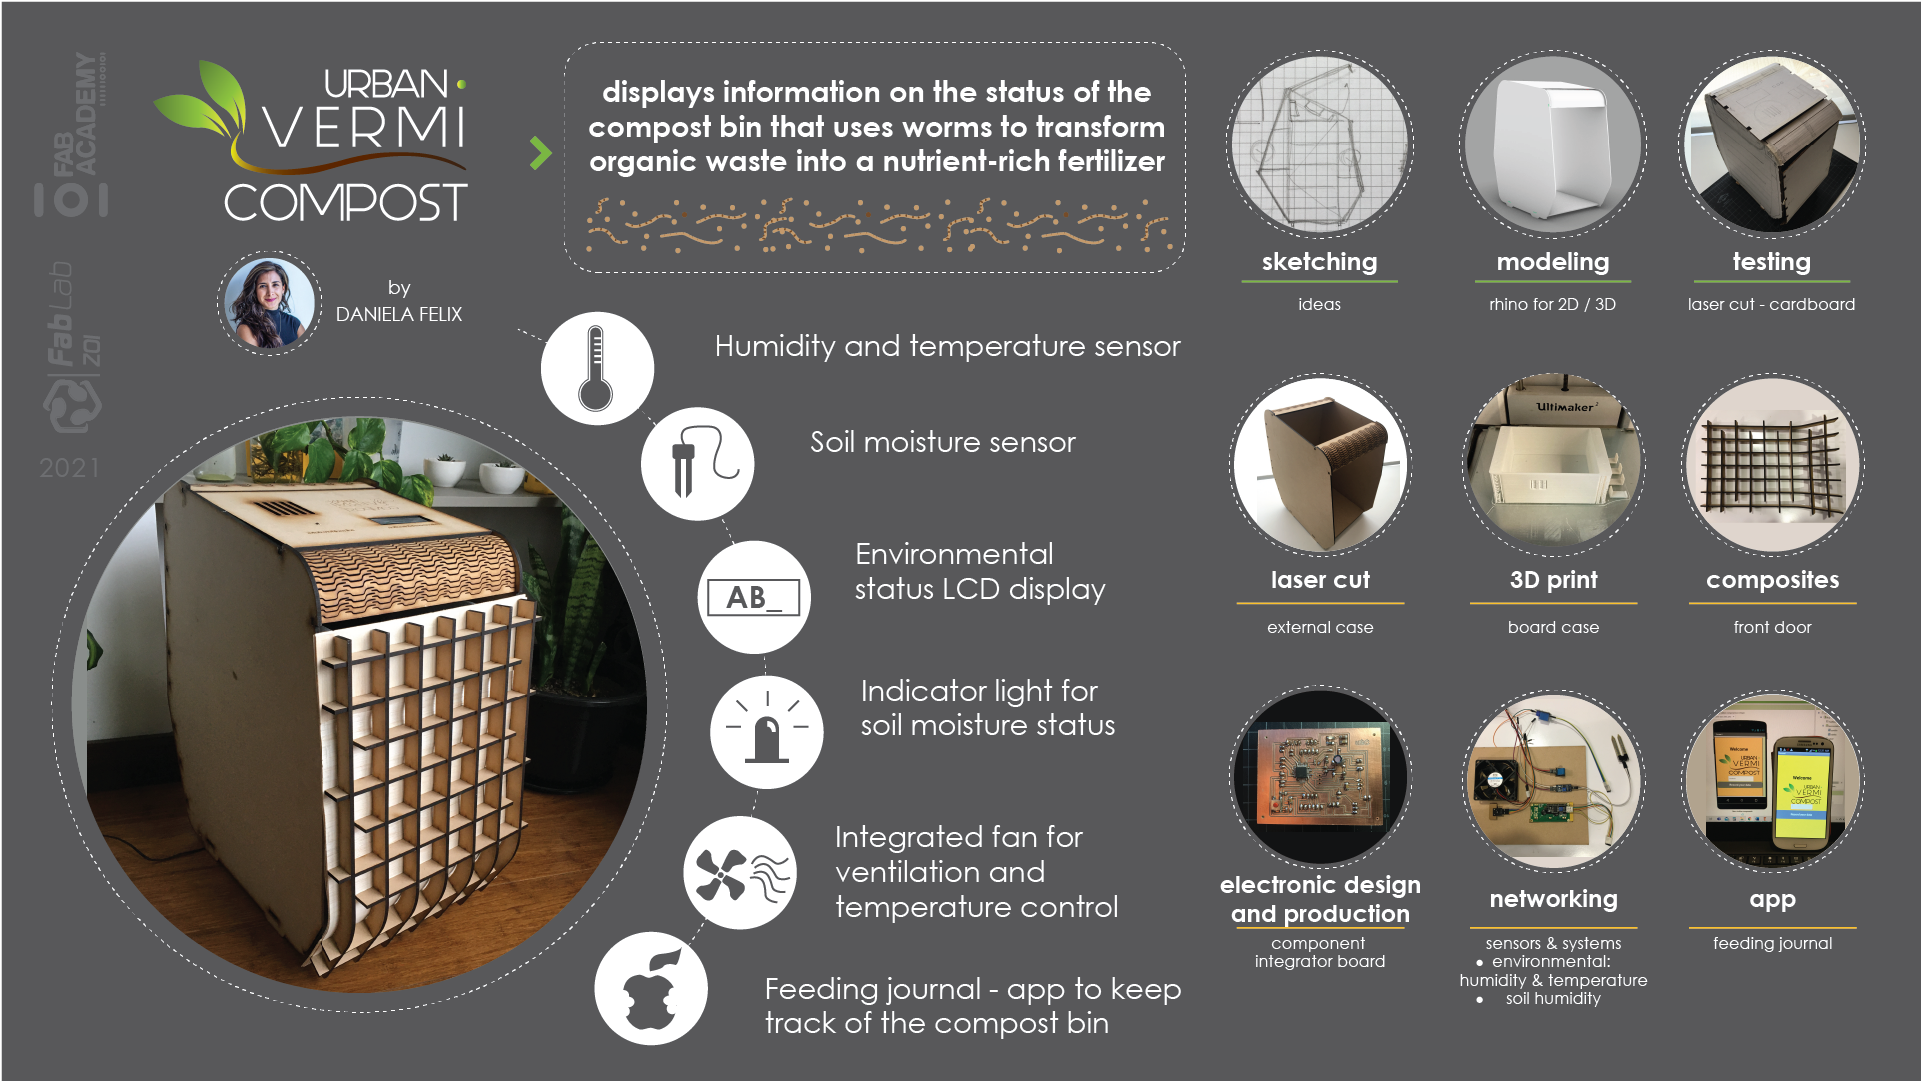
urban vermi composter
First, let's understand the context. According to World Bank data, in developing countries only 4% of organic waste manages to be composted, unlike more developed countries where up to 1/3 of waste can be processed.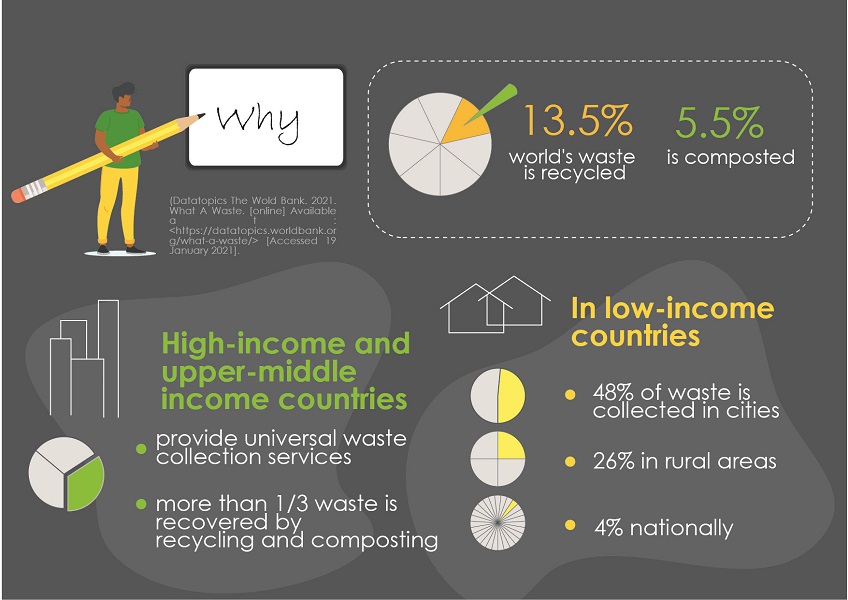
We can contribute to a change by using compost bins in our own home. Classifying and treating the organic waste we produce, which is around 1kg per person per day.
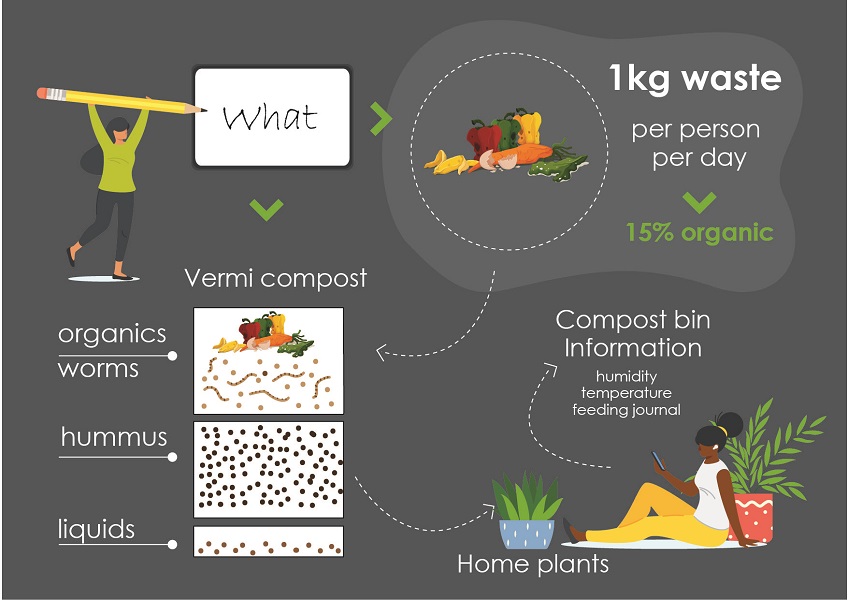
Vermicomposting is the product of the decomposition process using various species of worms to create a mixture of decomposing vegetable or food waste, bedding materials, and vermicast. It provides way to treat organic wastes more quickly, compared to conventional composting, it is rich in nutrients and loaded with microorganisms that create and maintain healthy soil.
This nutrient-filled soil is known as humus and can be used to grow other plants indoors such as vegetables or decorative plants. The next slide show us some inportant facts to the care of it:
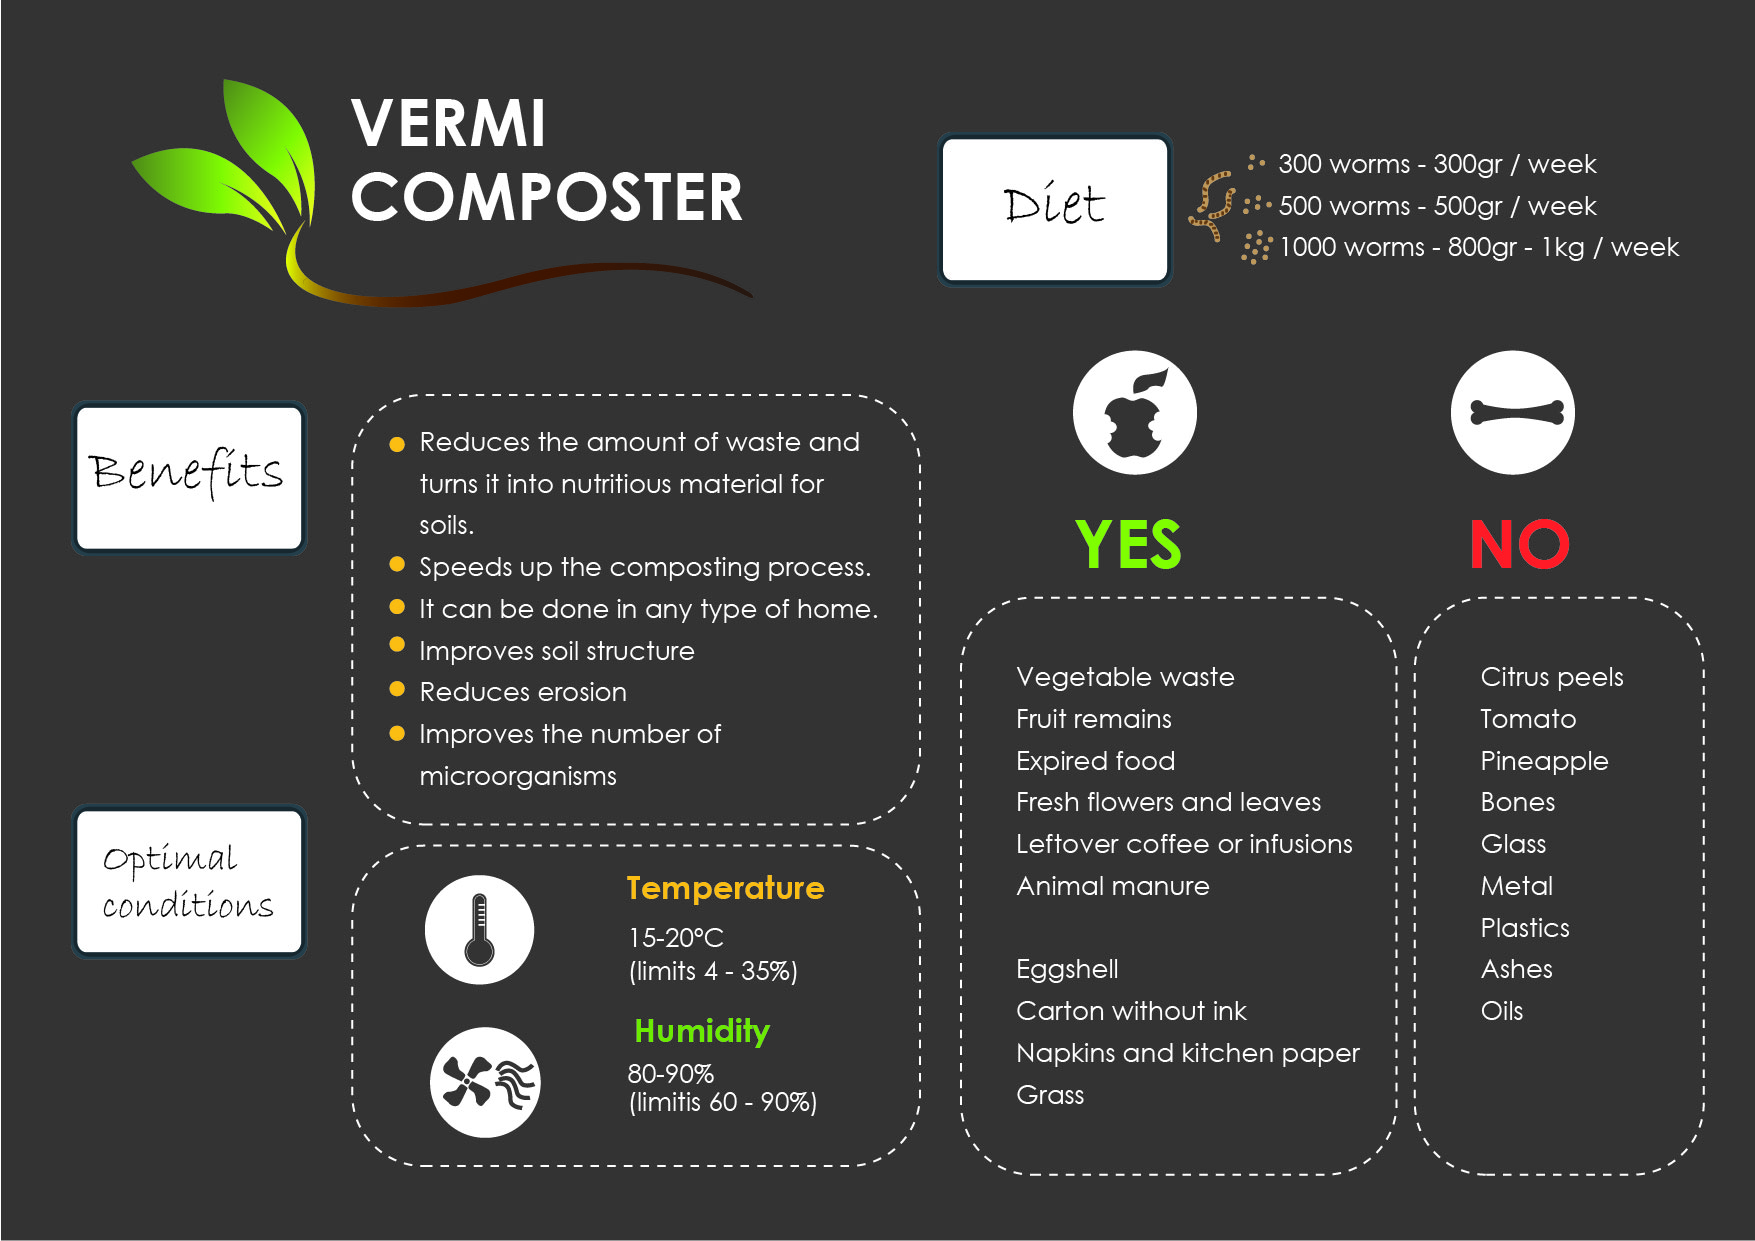 When having worms in a container, the living environment must have the right conditions for their development.
But among all the day-to-day activities it is often difficult to have a notion of the care of our plants and other living elements.
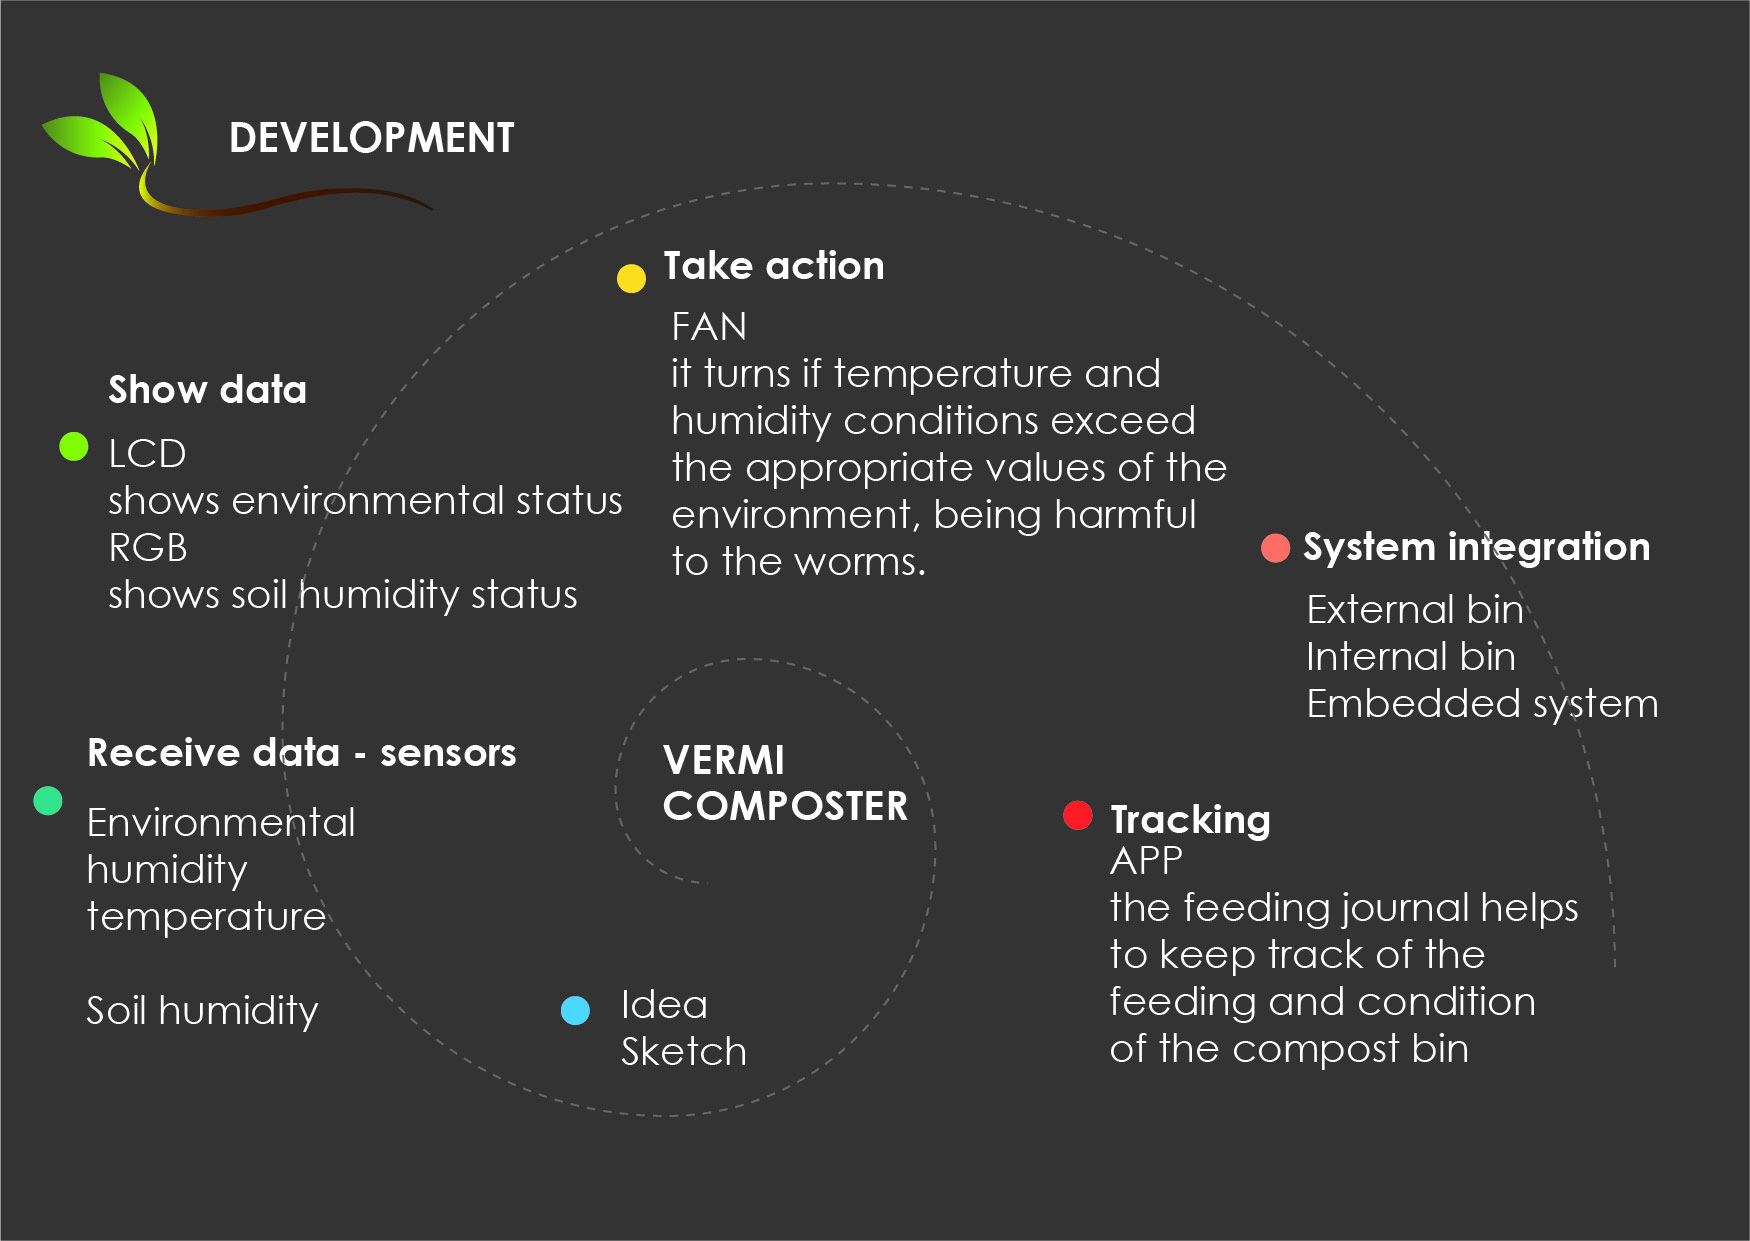
This is why this project proposes a system that alerts us to the state of our compost bin. Humidity and temperature are key elements
for the quality of the environment and the durability of the worms. This is why I have created this system that incorporates the following features:
When having worms in a container, the living environment must have the right conditions for their development.
But among all the day-to-day activities it is often difficult to have a notion of the care of our plants and other living elements.
This is why this project proposes a system that alerts us to the state of our compost bin. Humidity and temperature are key elements
for the quality of the environment and the durability of the worms. This is why I have created this system that incorporates the following features: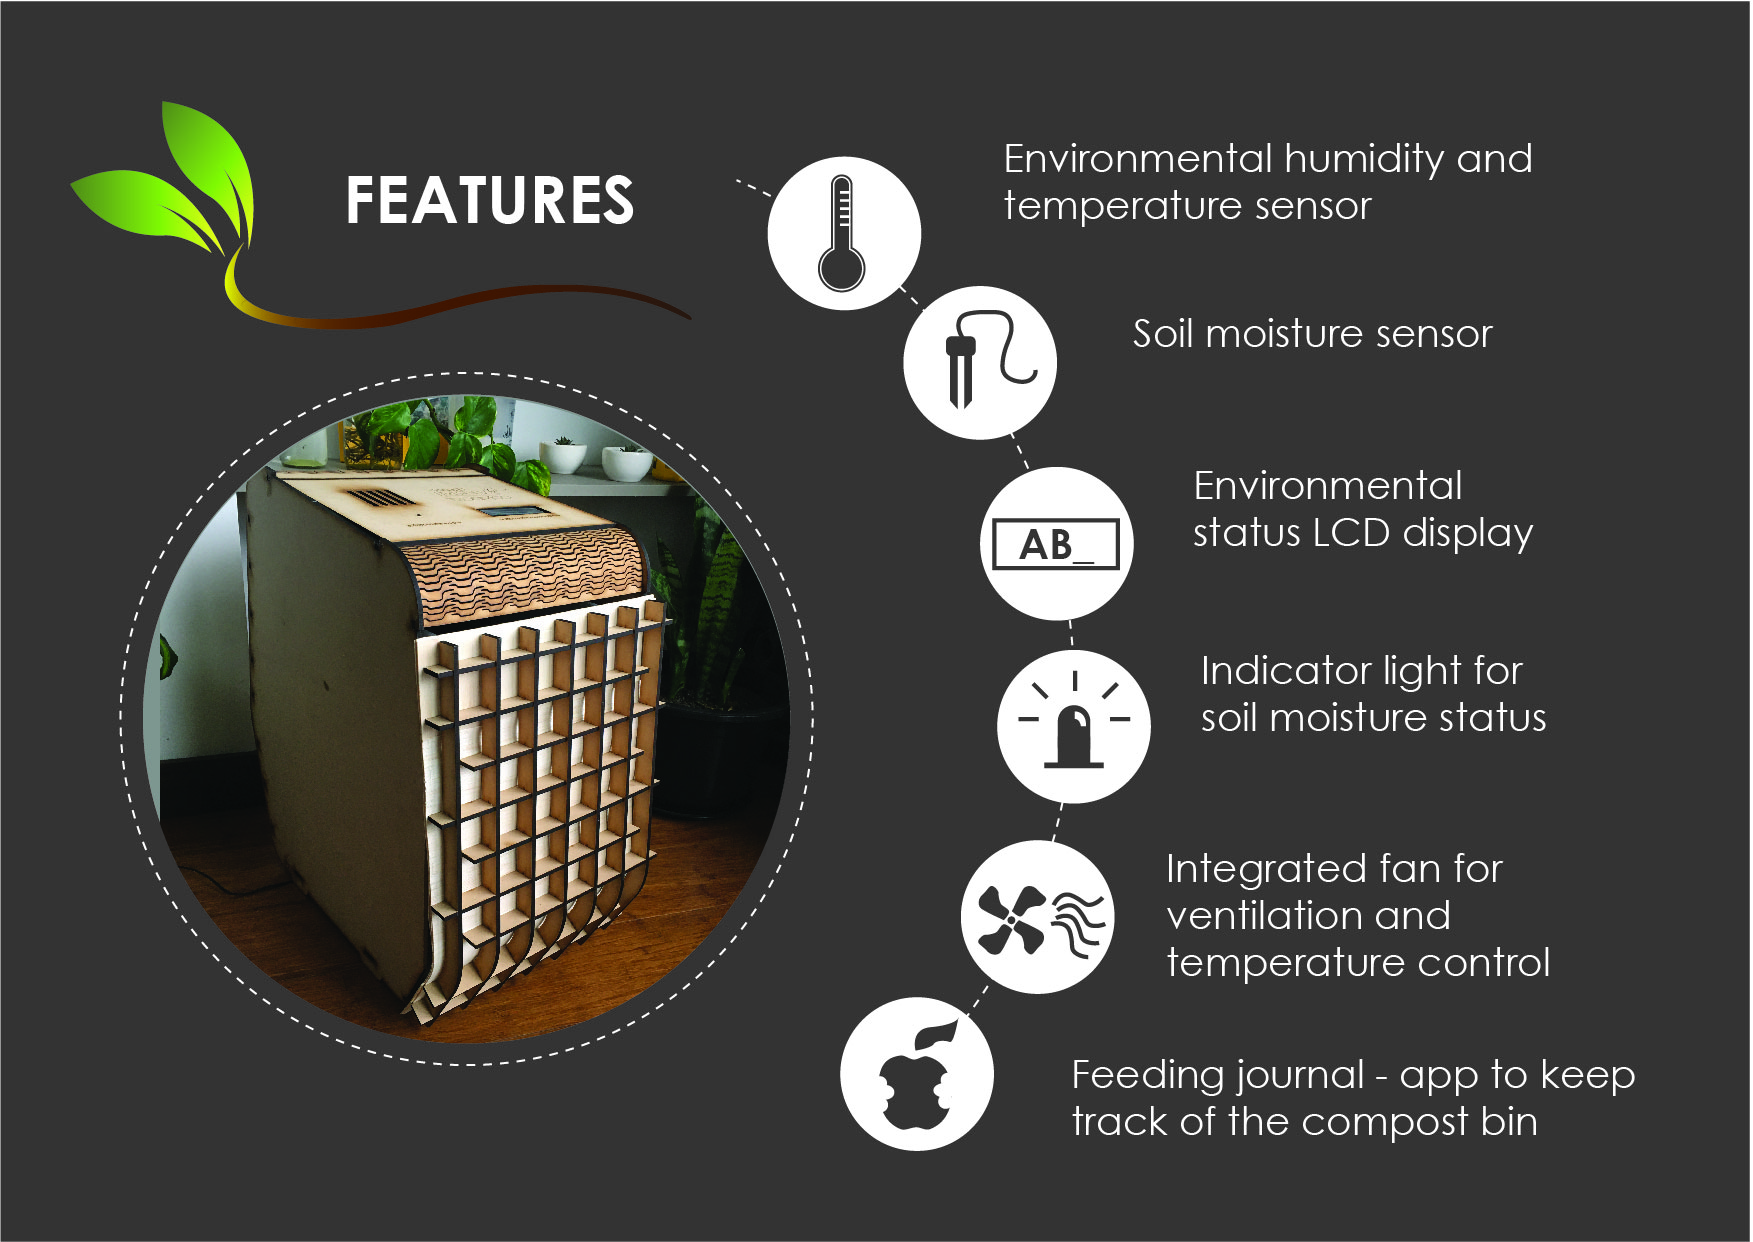
Several subjects have been involved in the development of this project, which you can visit to learn more information, details,
processes and experiences throughout this trip.
WEEKS I WORKED ON MY FINAL PROJECT
In the previous weeks, I developed very little of my final project (now I relized I should have done more to save some time for the final project,
however, part of my objectives was to develop other objects aligned with my personal projects, for which the past weeks were very useful.)
I invite you to visit the pages that show processes that I use for my composting bin.
- Week2: Computer Aided Design, to generate 2D and 3Ds, very usefull in the design process
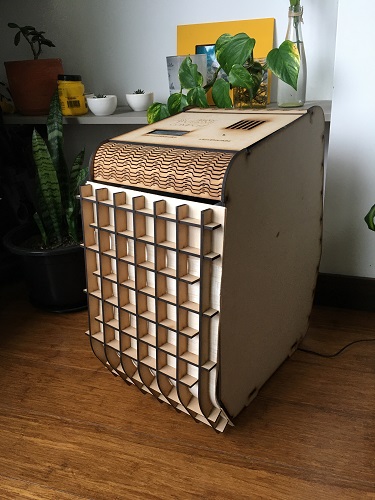
- Week3: Computer Controlled Cutting, to create the external bin and previous models
- Week5: 3D printing, for the protection board case
- Week6: Electronics design, for the main electronic board
- Week8: Embedded programming, to incorporate all the systems
- Week10: Input devices, for the sensors to collect data
- Week12: Output devices, for a response to the sensors
- Week13: Networking, inputs and ouputs working together
- Week14: Interface, created and app to keep track of the bin behaviour and feeding journal
- Week15: Wild card week, composites for the front door
- Week16: Applications and implications, put in perspective the final project
- Week17: Intellectual property, slide and video drafts
- Week18: Project development, step by step of the development, what went right, what went wrong
The materials I used
| Item | Description | Units |
|---|---|---|
| MDF board | 4mm mdf board cut in 60x40cm | 4 |
| Metalic hinges | Used for the top lid | 1 |
| Polystyrene containers | Light, easy to handle, cheap, waterproof | 3 |
| Plastic mesh | Comes in 1x1m | 1m |
| Worms and soil | 100 worms and 5kg of soil | 1 |
| DTH11 - sensor | Environmental temperature and humidity sensor | 1 |
| Soil humidity sensor | Chinesse brand has no specific or additional description | 1 |
| Fan | 12V | 1 |
| RGD led | 1 | |
| LCD screen | With I2C module | 1 |
| Other consumables | Cables, tin, cpactiors... | 1 |
| Balsa wood sheets | Flexible and thin | 3 |
| White glue | Recommenden for carpentry work | 1 |
| Metalic hinge | For front door | 1 |
| Magnetic stop | Closes the door | 1 |
| PLA filament | For the board case | 1 |
- 1un - button
- 1un - Atmega 328P-AU
- 49un- Pinheads
- 1un - 100nF capacitor
- 1un - 1uF capacitor
- 2un - 10uF capacitor
- 2un - 22pF capacitor
- 1un - 0.1uF capacitor
- 1un - 0.33uF capacitor / * not avaliable at the local lab inventory
- 1un - 499 R
- 1un - 10k R
- 1un - green led
- 1un - 16Mhz crystal / * not avaliable at the local lab inventory
- 1un - Fan / * not avaliable at the local lab inventory
- 1un - RGB led / * not avaliable at the local lab inventory
- 1un - terminal block / * not avaliable at the local lab inventory
- 1un - bluetooth module / * not avaliable at the local lab inventory
- 1un - soil moisture sensor / * not avaliable at the local lab inventory
- 1un - DHT11 sensor / * not avaliable at the local lab inventory
- 1un - LCD screen I2C / * not avaliable at the local lab inventory
- 2un - 7805TV / * not avaliable at the local lab inventory
PRESENTATION SLIDE
PRESENTATION VIDEO
Based on Neil's recommendations on presentation day, T've updated my presentation video and I also leave this video to show the
system working and reacting to external conditions.
PROJECT DEVELOPMENT AND ORIGINAL FILES
I invite you to see the process of my final project and the original files in the following link:
AKNOWLEDGE WORK DONE BY OTHERS
I would like to thank three former students who have been a great guide throughout this process:
Adrián Torres who has a great docummentation,
and has been a guide troughout the weekly tasks.
Benjamin Lemay who has a similar project and
Nagi Abdelnour
who is a great inspiration, and whose project Im in love with.
CHECK LIST
Answer these questions
You can find a detailed answer of this questions
- What does it do?
- Who's done what beforehand?
- What did you design?
- What materials and components were used?
- Where did they come from?
- How much did they cost?
- What parts and systems were made?
- What processes were used?
- What questions were answered?
- What worked? What didn't?
- How was it evaluated?
- What are the implications?
Also, to do
Your project should incorporate:
- Made your slide> 1920 x 1080 pixels with your name, project name, Fab Lab name, a photo/render/sketch of your project, a brief description of what your project is/does
- Made a ~1 minute (10MB/1080p) video of you explaining your project
- Made a separate Final Project page that briefly summarises your project
- Included the BOM (Bill of Materials) for your project
- Linked from this page to any weeks that you worked on your final project
- Linked to your presentation.png and presentation.mp4
- Included all of your original design files in the archive (2D & 3D, board files & code). No external hosting of final project files - discuss file sizes with your instructor
- Included the license you chose
- Acknowledged work done by others
- 2D and 3D design ✅
- additive and subtractive fabrication processes ✅
- electronics design and production✅
- embedded microcontroller interfacing and programming✅
- system integration and packaging✅
- Where possible, you should make rather than buy the parts of your project✅