COMPUTER AIDED DESIGN
Computer-aided design (CAD) is the use of computers (or workstations) to aid
in the creation, modification, analysis, or optimization of a design.
CAD software is used to increase the productivity of the designer,
improve the quality of design, improve communications through documentation,
and to create a database for manufacturing.
CHECK LIST
- Model experimental objects/part of a possible project in 2D and 3D software.
- Show how I did it with words/images/screenshots.
- Include my original design files.
PREVIOUS THOUGHTS
My background in interior architecture and design led me to learn and
use daily several software in 2D and 3D.
Although I enjoy drawing by hand, they are important tools for
digitizing and building my ideas. I'll try some new software
during this week, I'll let you know how it goes.
I started installing (or trying to install) some software on mi PC.
It didn’t turn out as I expected since I was short on storage,
so short that I couldn’t even open Photoshop ;(.
I spent a lot of time uploading old files to the cloud,
uninstalling apps I haven’t used lately and so on. I felt confident
deleting and uninstalling stuff on mi computer and then I realized
I deleted some apps I shouldn’t have had, so now I can’t open
AutoCad and I had to reinstall some extensions to open other
programs like Sketchup and Rhino. I finally made it to download
Fusion 360, GIMP and FreeCad, I’ll start trying them.
2D Design
RASTER
PHOTOSHOP
Adobe Photoshop is a raster graphics editor developed by Adobe Inc.
It was created in 1988 by Thomas and John Knoll, since then,
the software has become the industry standard not only in raster
graphics editing, but in digital art as a whole.
I generally edit my photos on Photoshop, I learned how to use it
back in college and haven’t stopped using it since then.
It may not be too friendly at the beginning but when you get
used to Adobe software you love it. It has many editing options,
some of the I know and many I still must learn and practice.
Adobe Education Exchange has a nice learning platform available
for free professional development, courses, and educational
resources for different grade levels, I’ve use them in my classes
and I totally recommend it.
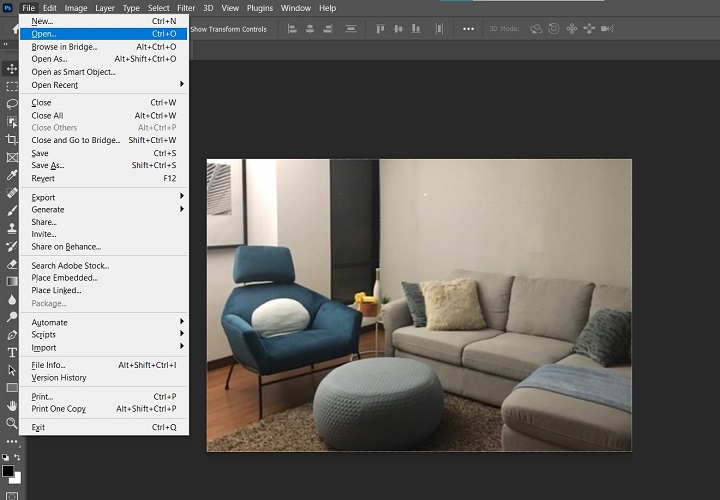
You can download PS for a free trial or access with an educational account.
In Adobe you can download many programs very usefull to work with raster
and vectors, like lightroom, indesign, and others.
I'll leave these links here:
Adobe Education exchange
Adobe Educa. Avaliable for the Spanish speaking community
Download PS and some other
programs
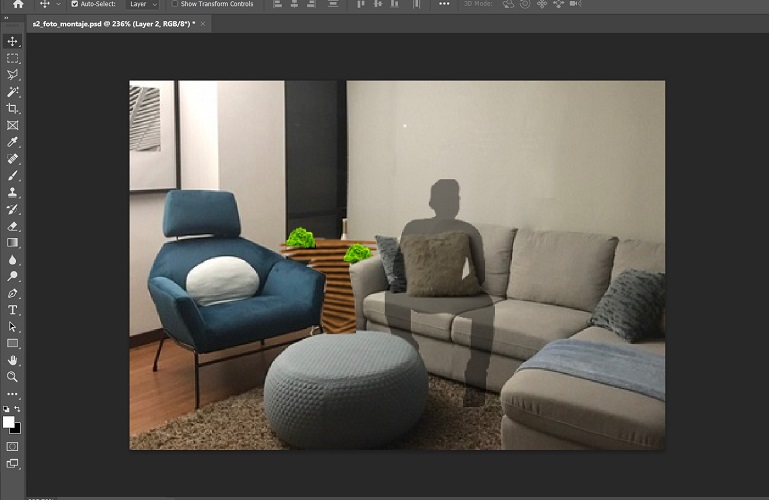
I used rhino to model a first idea of my project and used Ps to try a
photomontage to see how my compost bin would look in the interior space and understand its scale.
Process
The key when using photoshop is to use layers for each element you have on your model. For this exercise, these are the steps I followed to make a simple montage of my object in a real space:
- If you are starting a new work you can set the size of the artwork, you can choose from different options according to your needs for example, if you are
plannig to print it or just use it for screens you can use from many pre configured options. In this case I chose Print, A4, horizontal in cm
- Introduce a photograph of the space in which I want to make the montage. For this you can directly drag the photo to the artboard, or go to file> open.
I placed a photo I took from Rhino on perspective view, trying to fit ir according to the perspective you have on your photo.
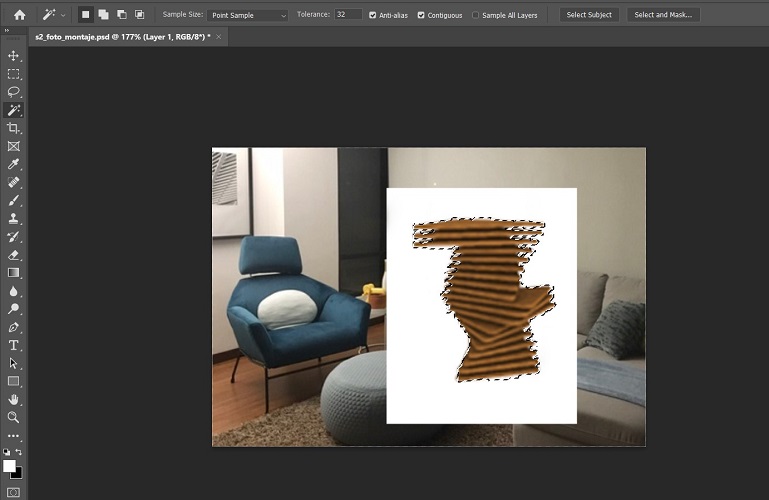
- Using the magic wand tool, select the contour of the shape you want to introduce in the space. Then you can press ctrl+x to cut anb ctrl+v to paste it with out the white part.
This action will create a new layer which contains only the 3D object.
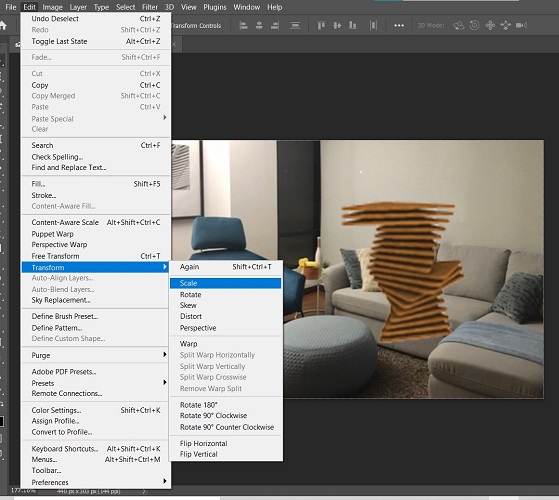
- Use the transform options to set the scale. Go to edit> transform> scale; use the squares on the corners of the objetc to addap it to fit the scale to the photo and locate it where needed.
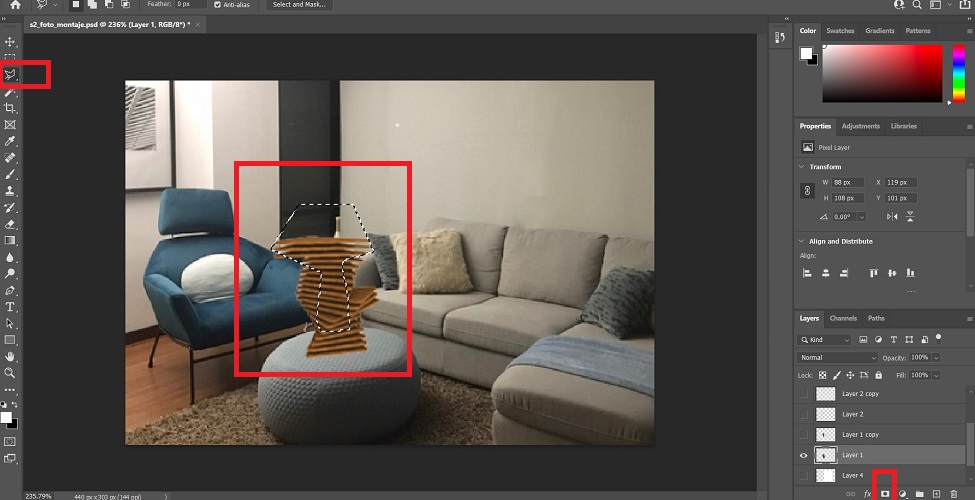
- It is going to be in front of the furniture original from the picture, so in order to edit it you can make two things: 1. create a mask or 2.errase the parts you don't need.
To use a mask you can select the wanted parts using a polygonal lasso tool around the object (located on the bar on the left) and click on mask )located on the bar at the bottom.
- To add plants and a person silhouette you have to download a png imagen which has no background. The scale an locate with the same method named above on step 4
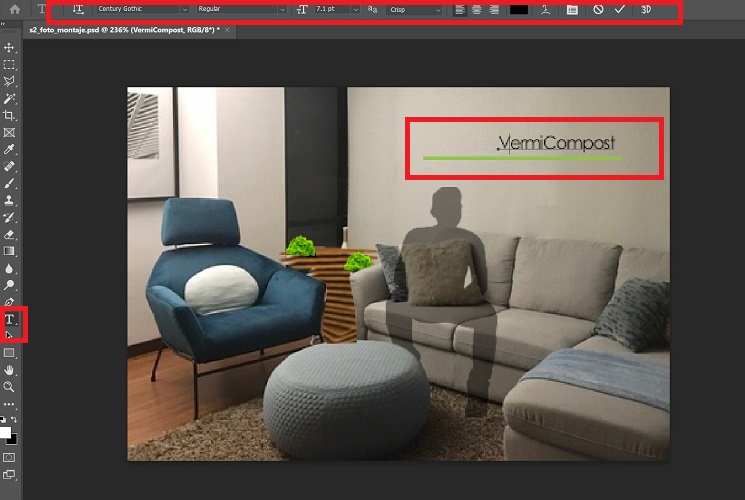
- Finally I added some text, located on the left bar and you can edit its parameters on the bar on the top.
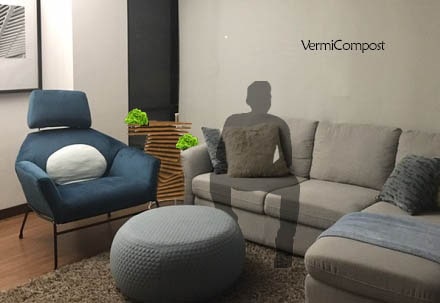
Result
GIMP
Downloaded and installed it. To start, I used it to downsize the photos for my repo. So far it seems easy to use,
it has similar tools and menus to Photoshop.
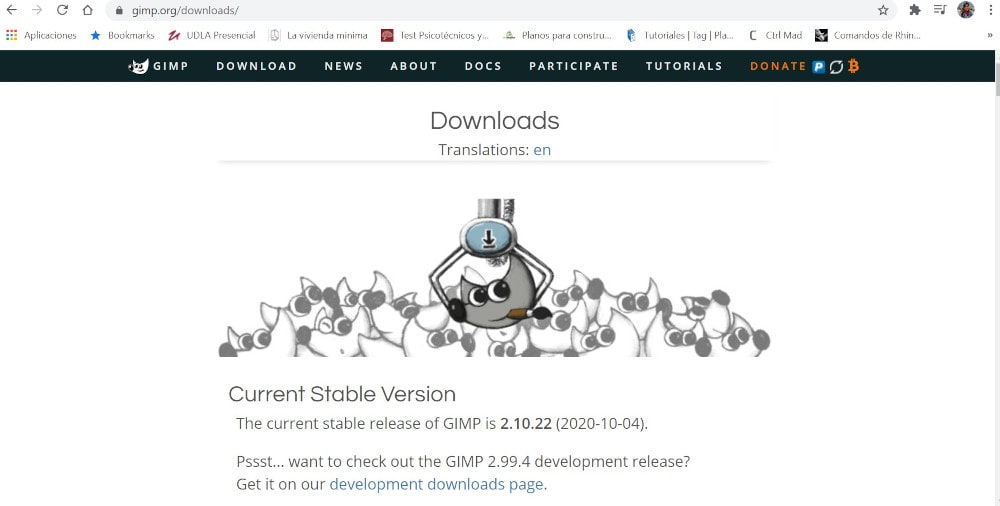
Download GIMP
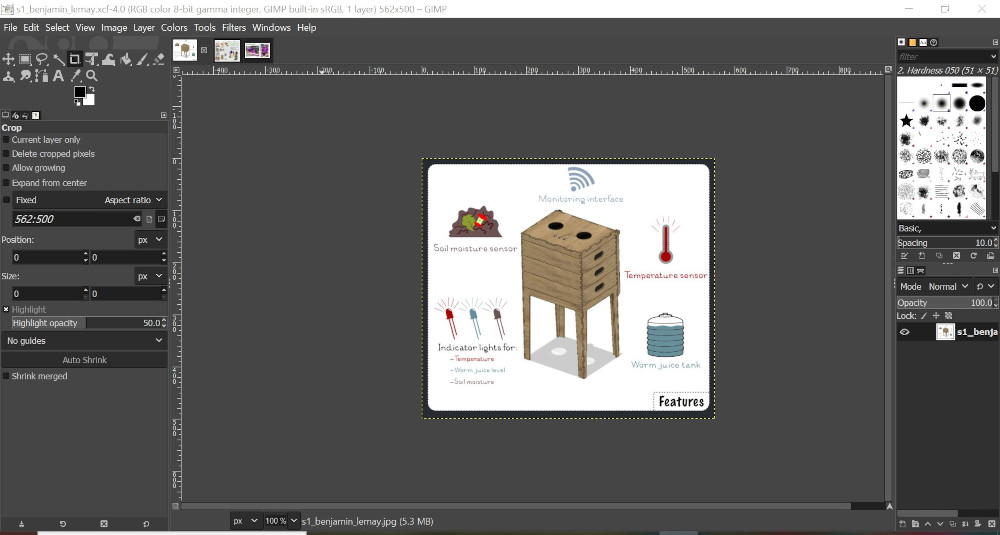
Found it usefull to change size and picture resolution.
To make this simple action you can follow the next steps:
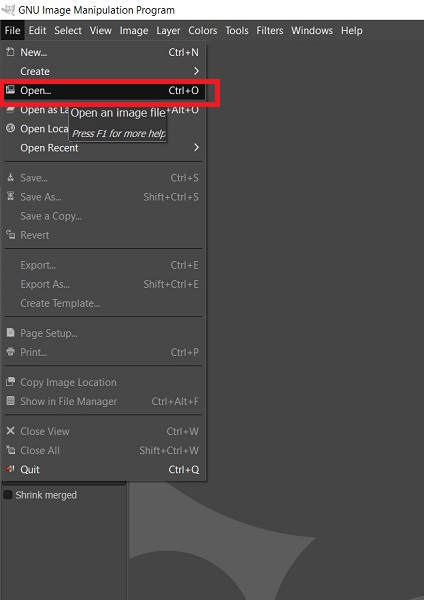
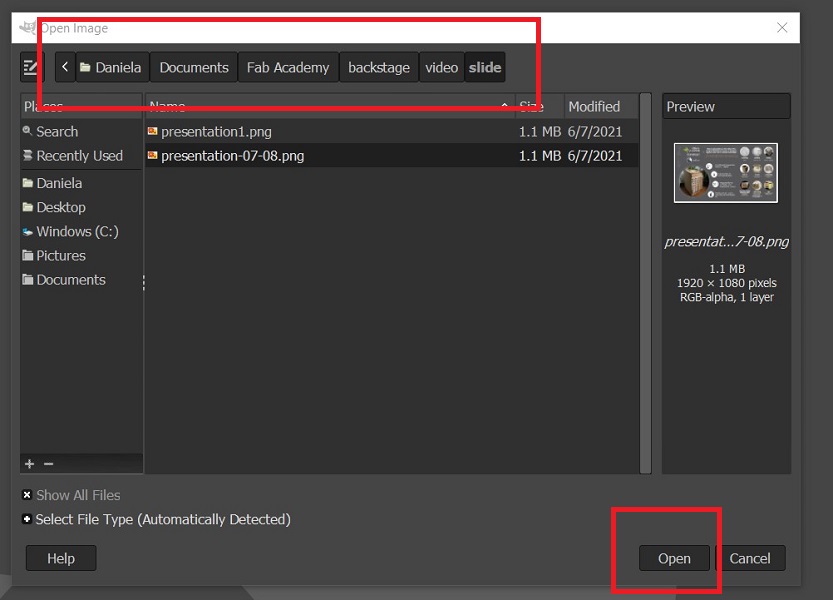
- Go to file >open > select your file> Open
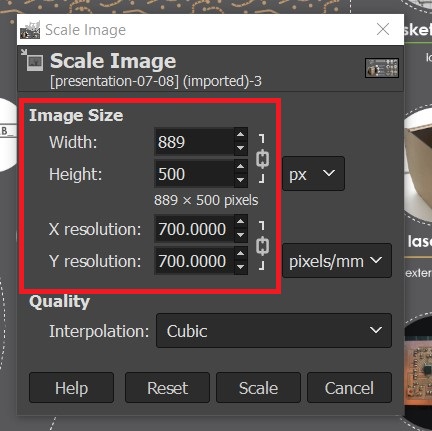
- Go to image> scale image and this tool will come up, here you can change the size and resolution of the image. For this image I set 500px height which is the regular height I use for my images and changed the resolution to 700x700 pixels/mm
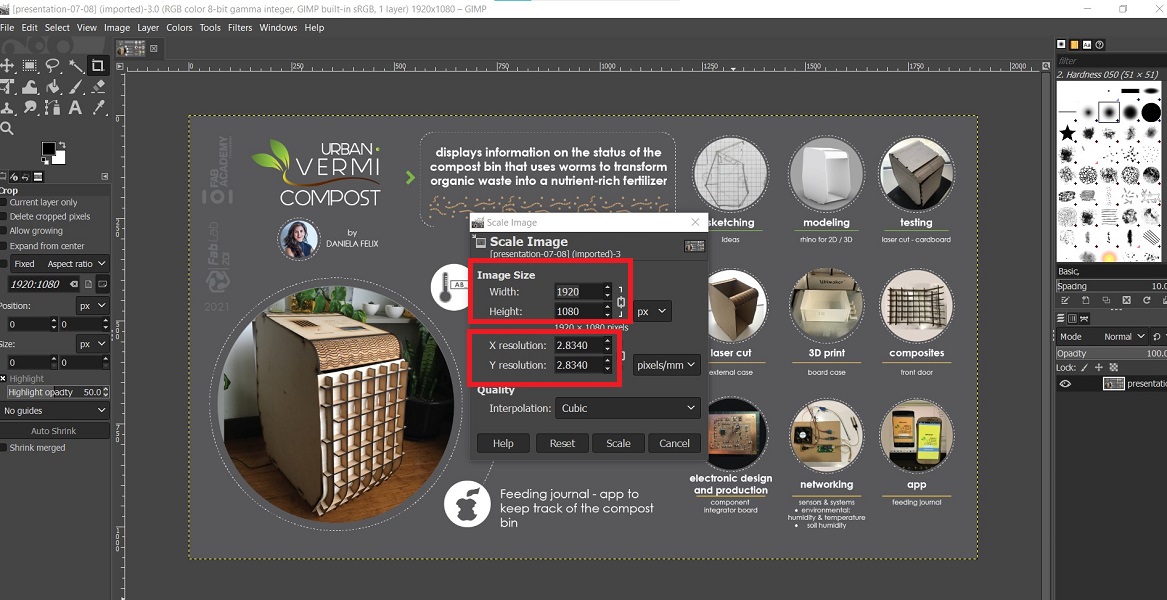
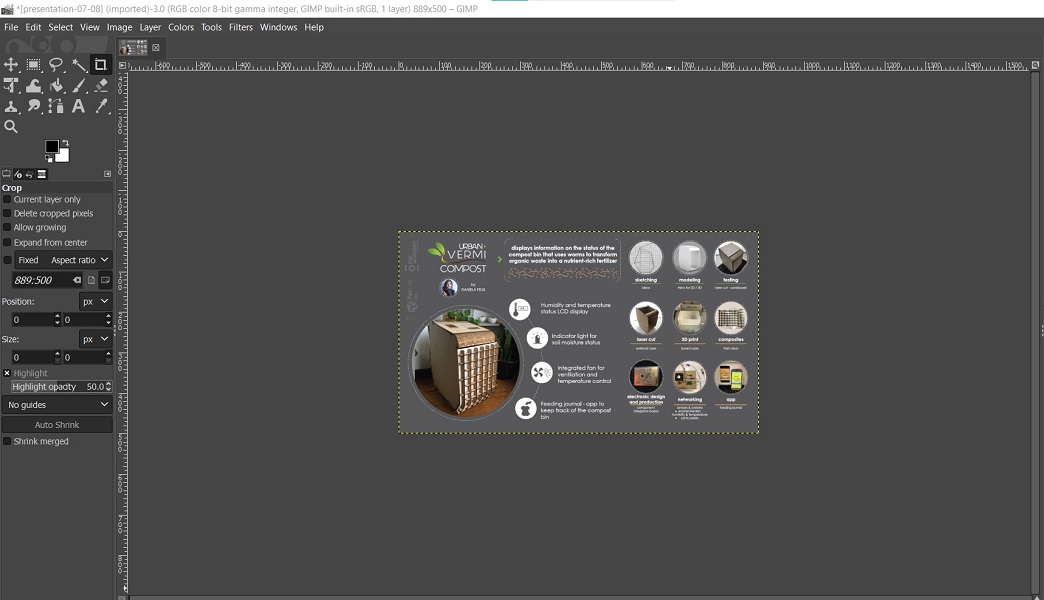
- This is the final result, my image in its new size and resolution
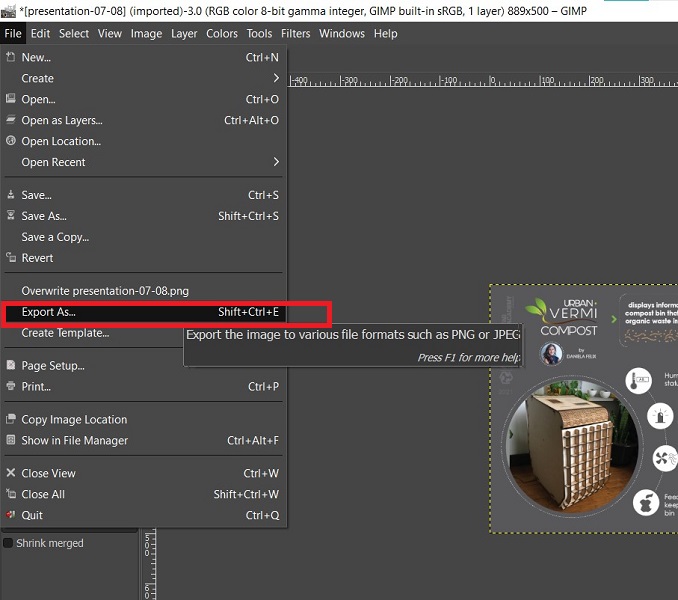
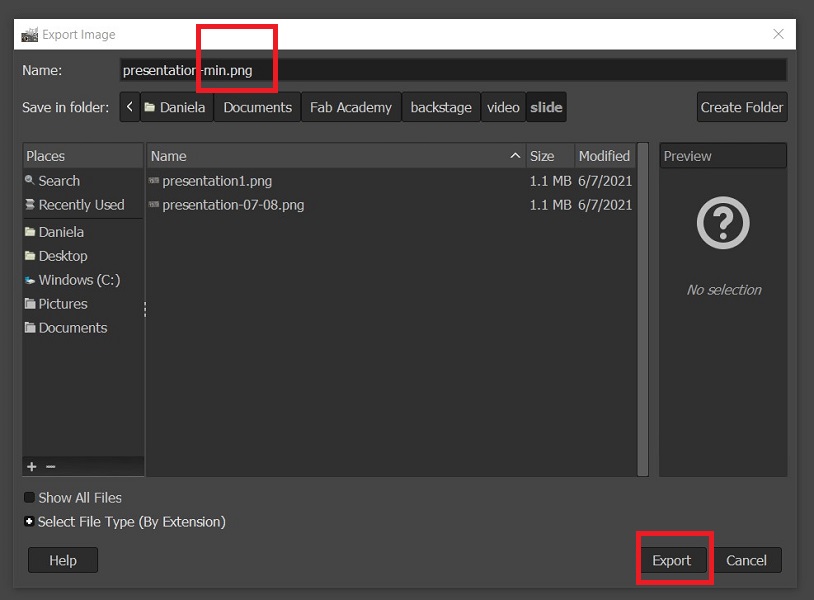
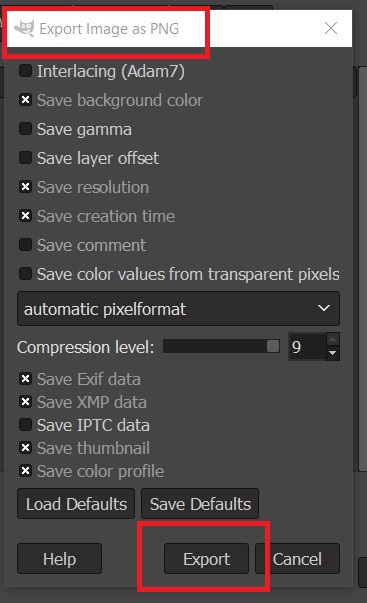
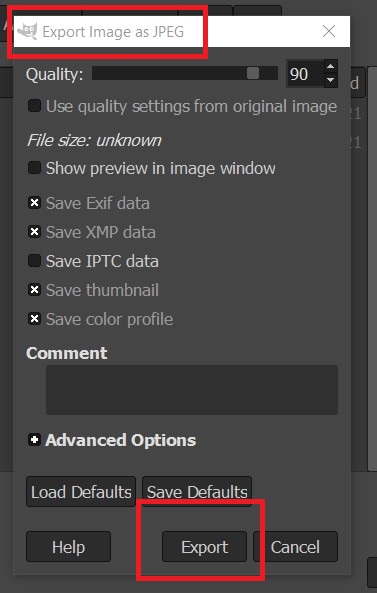
- To export the image go to File> export as> choose the destination file and the kind of file you want the picture to be (png or jpg), in both cases once you click on Export you have an options chart.
To save it as png, I didn’t change any parameter but to save it as jpg I set the qualitiy on 90%.
- To save the file go to File> save. It will be saved as a .xcf file
Adobe Illustrator is a vector graphics editor and design program developed and marketed by
Adobe Inc. Originally designed for the Apple Macintosh, development
of Adobe Illustrator began in 1985. Along with Creative Cloud the
latest version, Illustrator CC 2021, was released on October 20,
2020 and is the 25th generation in the product line. Adobe Illustrator
was reviewed as the best vector graphics editing program in 2018 by
PC Magazine.
Personally, my favorite program. I use it for project presentations,
illustrations of many kinds like drawings, content for social media,
posters, logos, Christmas cards, invitations, and many others.
I learned how to use it at my first job, working on signage design
and I felt in love with it. I want to use it for almost anything,
I find it friendly. You can download vectors for free on some
websites, they help to save some time while designing.
Process
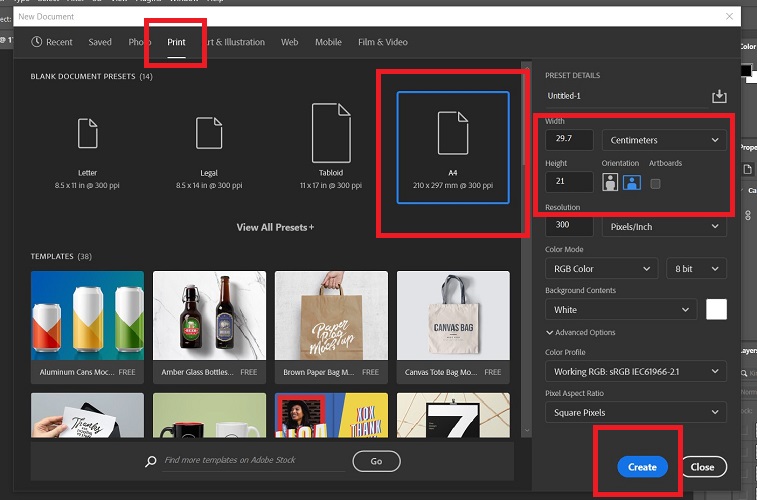
Where is how I created the infographic about my project:
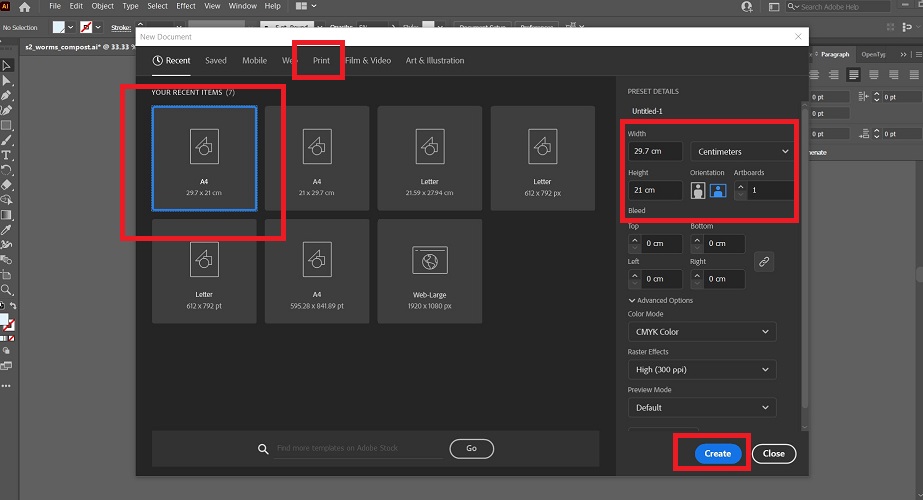
- To create a new document, you can select the print option where you can find preconfigured sizes, I chose A4, then on the right side you can change the
orientation and units you want the document to be, I chose horizontal and centimeters. Once everything is set according to your needs press create.
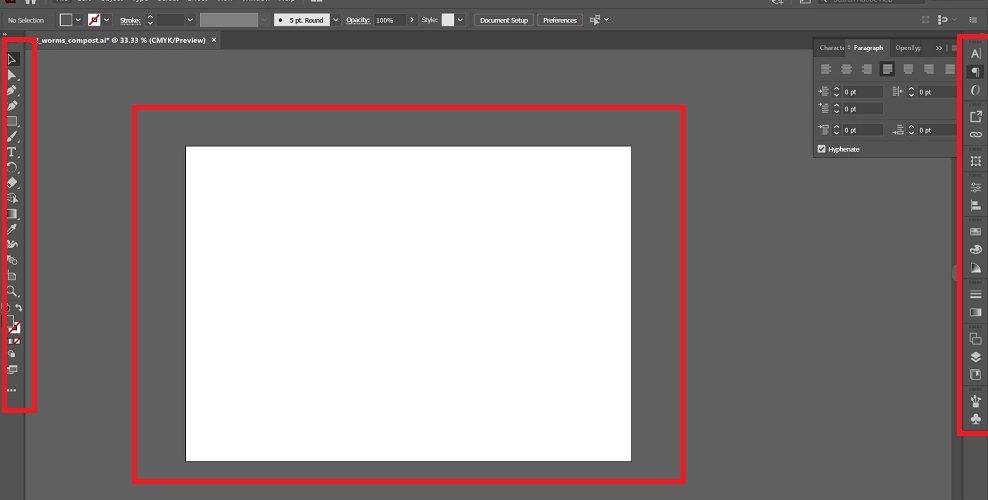
- On the workspace you will find on the left the tools, on the right the options to edit and centered the workspace on white.
- Created a gray rectangle to act as background, selecting the rectangle tool on the left and changing it color on the swatch pallet.

- Downloaded from free pick this vectors to work with, they are free and you can edit them according to your needs.
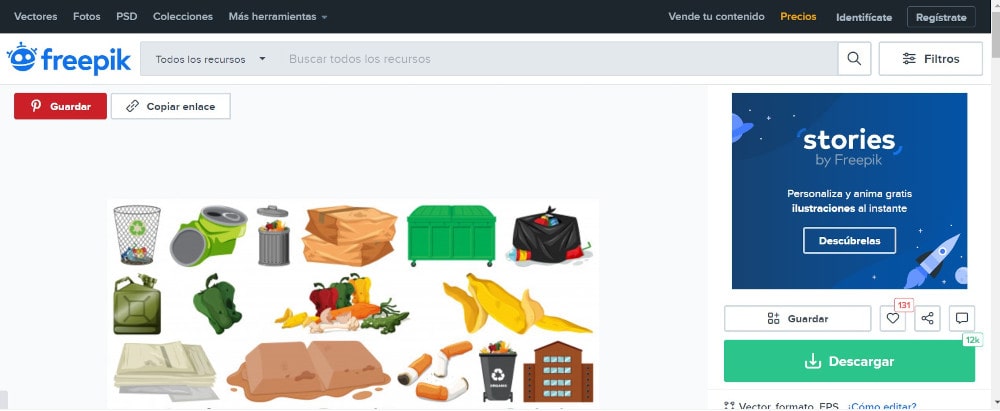
Download free vectors.
- You can add text, lines, rectangles,modify the color and size very easy as shown on the following image. This options are really simple to edit, because you just need
to select the object and transform it from the corners, you can change the color selecting the object and edit it from the swatch color bar.
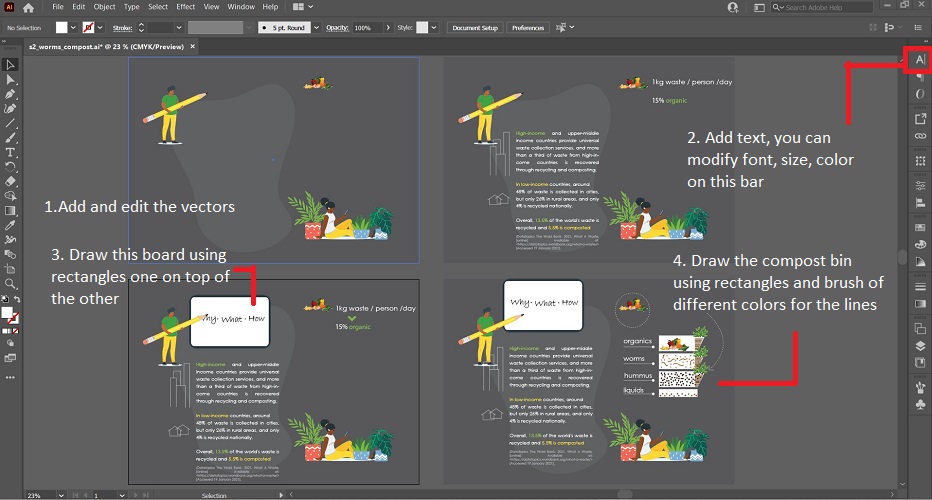
- You should save the file as ai and also you can save it as pdf (print> pdf or file>save as> pdf ) or jpg (file> export> export as> jpg. Mark on use artboards)
result
3D Design
AUTOCAD + SKETCHUP
Generally I use AutoCAD for plans and 2D drawings then depending on what I need to
to I use other programs. For example, if I need to quick 3D spaces and furniure
I use sketch up and AutoCAD 3D.
I find Auto Cad usefull for 2D, I decided to draw my first idea on 2 and 3D.
I don't really like it for 3D because it is not friendly for editing.
Process
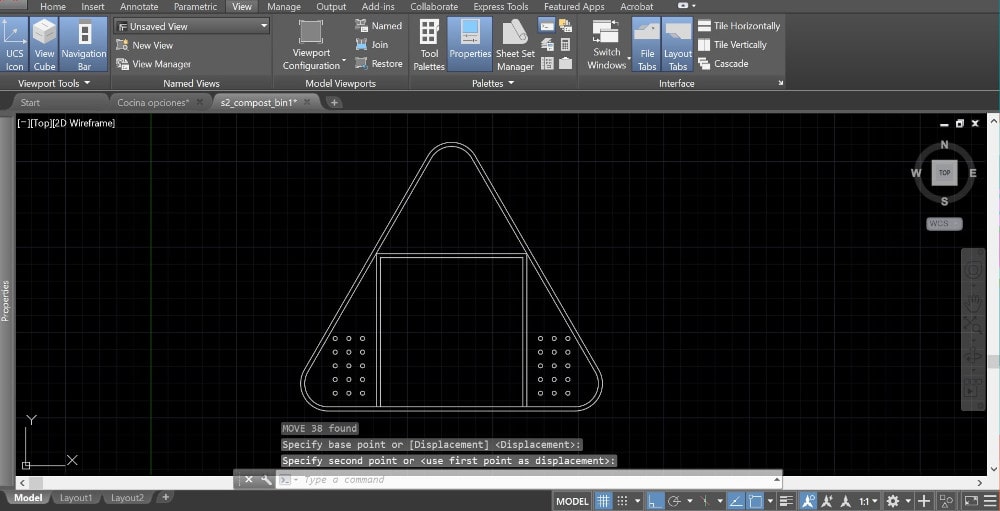
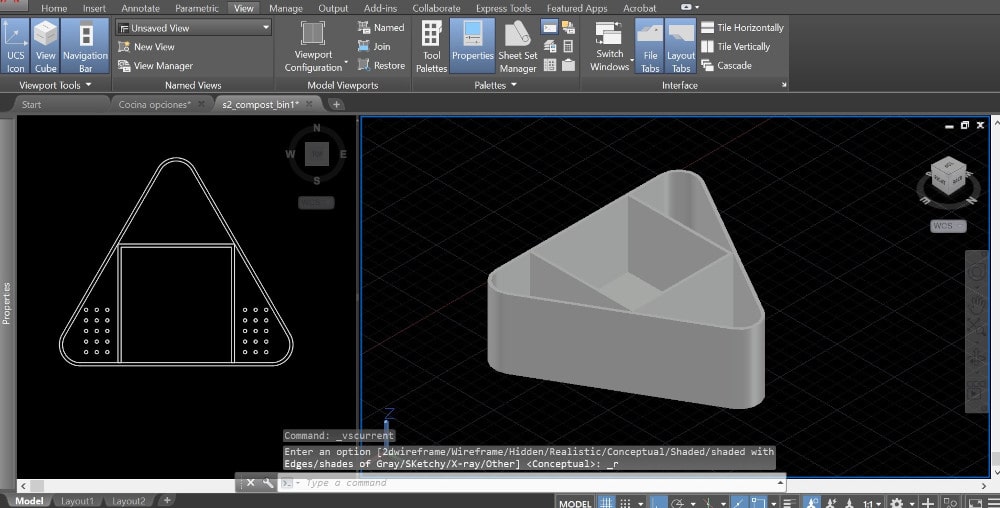
Autocad is a software not too intuitive, I recommed to follow a tutorial or take a class about it. This are the steps I followed to build this 3d model:
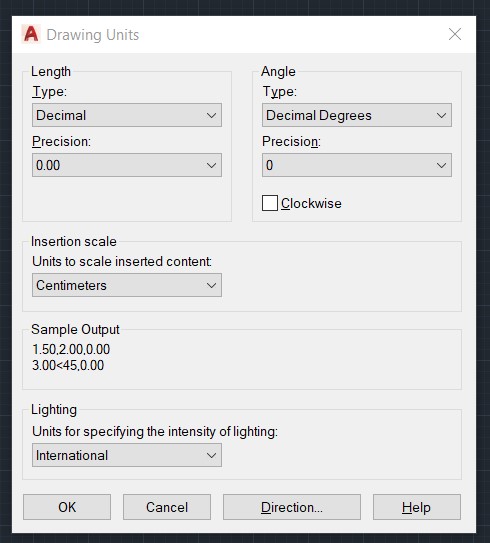
- You can create a new document, starting from a acad template. Once in the model, write units and this window will come up, there you can determine the units and precision, I chose cm and 2 decimal units

- I always use lines as guides, and oncve I'm ok with the drwing I errase them
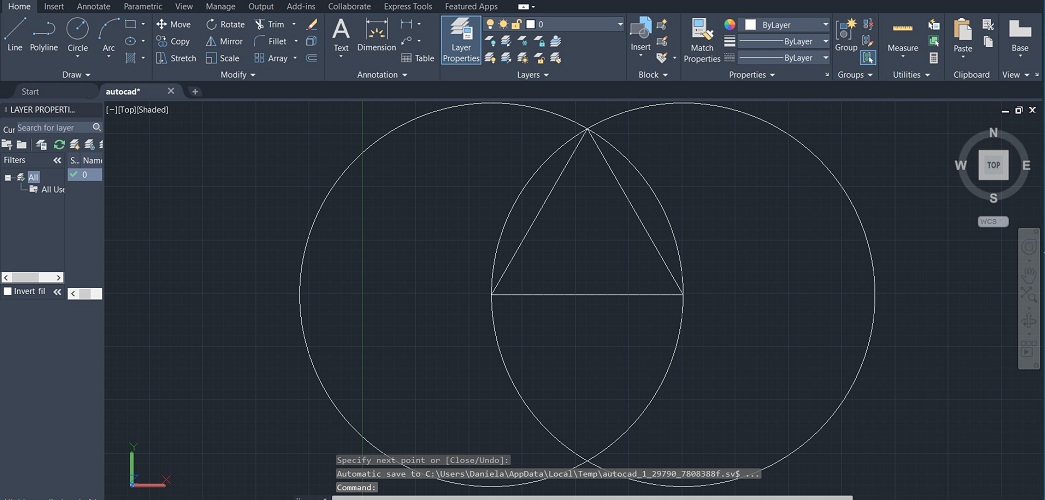
- Using polyline I drew a triangle, fillet the corners with a 2cm radius, and a 0.5 offset to set the width of the container
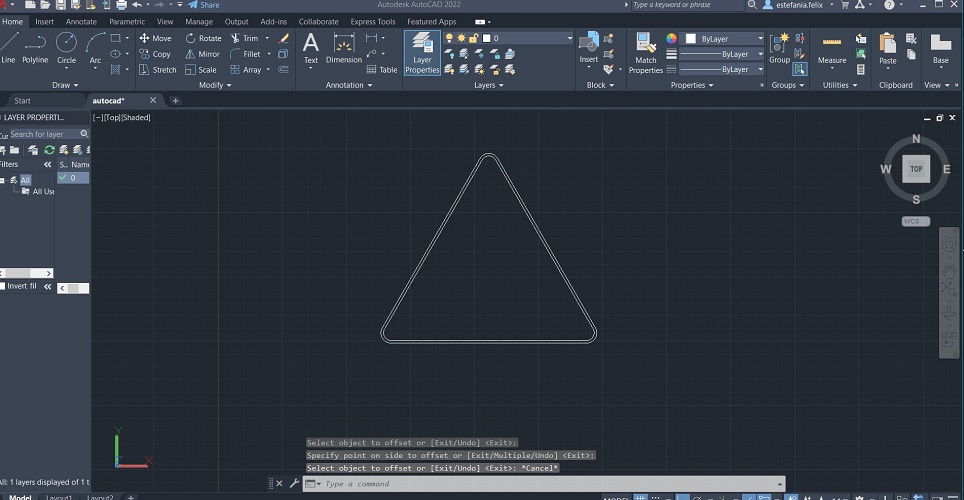
- Added the interior lines using polyline (it is important that the lines are a closed polyline to extrude them) and circles which I used array to have even columns and separation between circles.
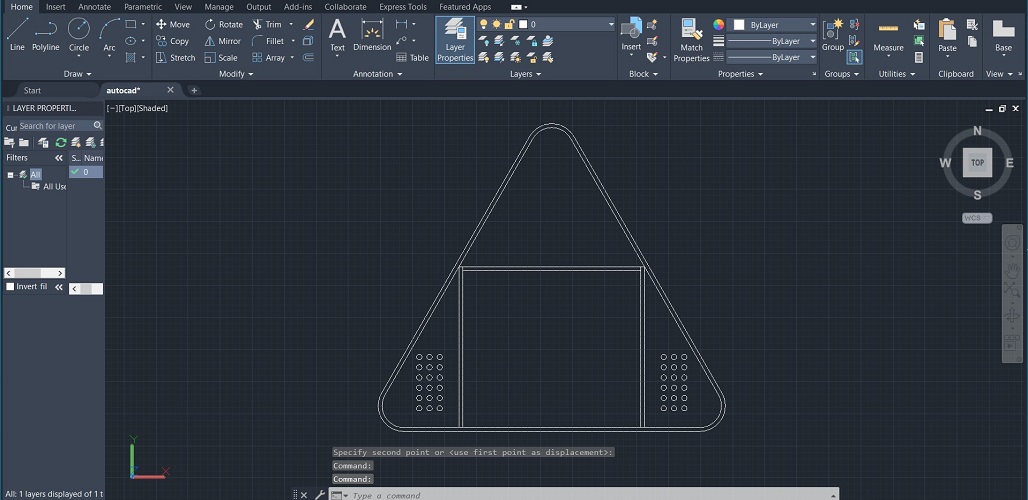
- Using the option named viewports you can split the screen, I like to do this in order to have 2D on one side and 3D on the other
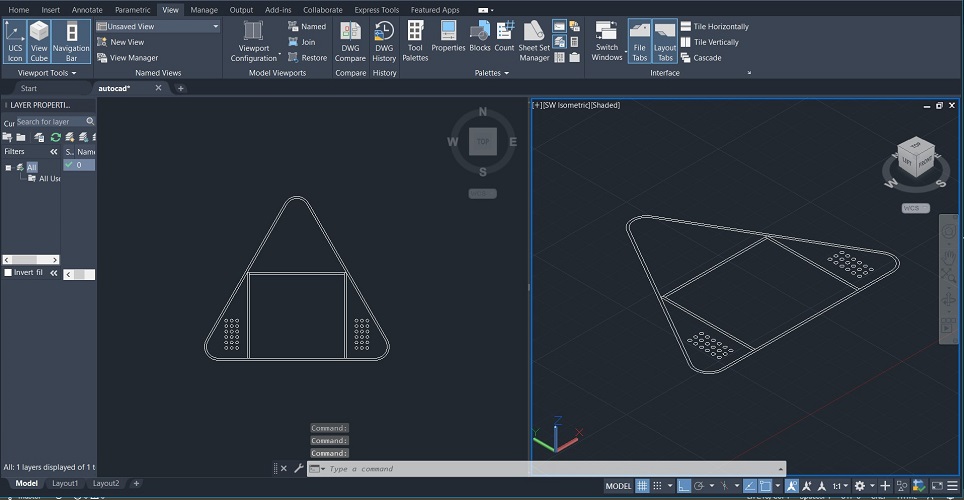
- Extrude both lines with the necessary height, in my case is 15cm, and then subtract one from another
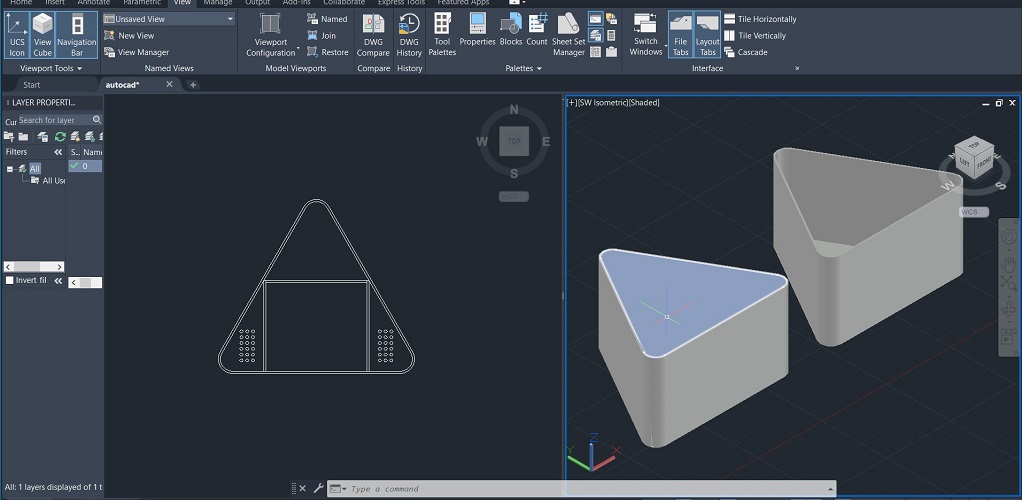
- Extrude the rectangles from the inner part and do the same for the circles, then subtract them from the base.
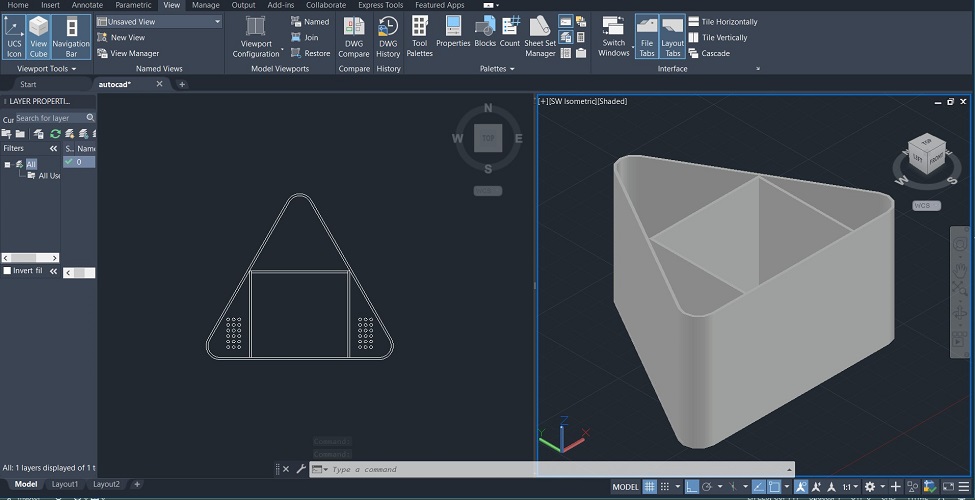
- Save the file you will have a .dwg
Result
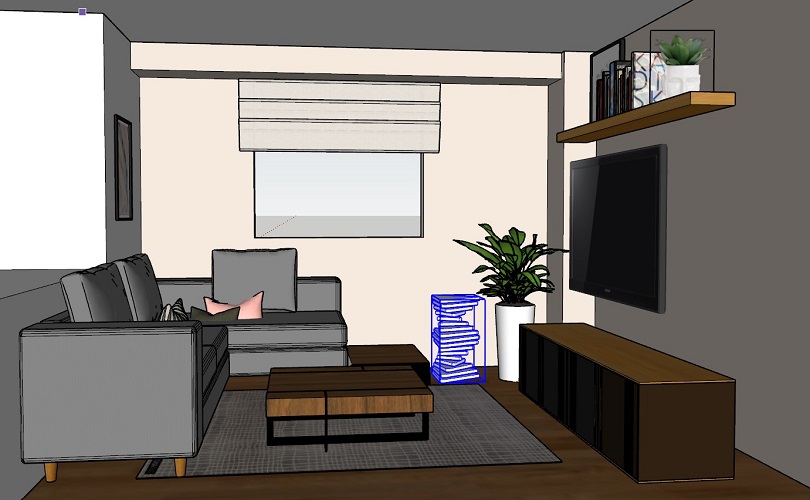
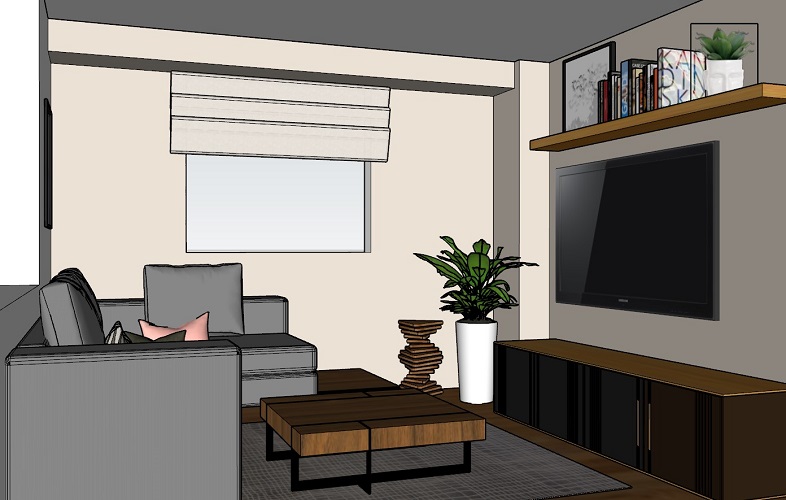
In Sketchup I imported the 3dm file I developed in Rhino and loaded in a 3D model to see how it looks in an interior space. I don't really like sketch up because you have
to group every object and have lines and surfaces separate.
I had this 3D model from a previous work but I find it usefull to adapt the model into it and show a preview of an interior space which uses my final project,
because one of my main objectives is to make it aesthetic.
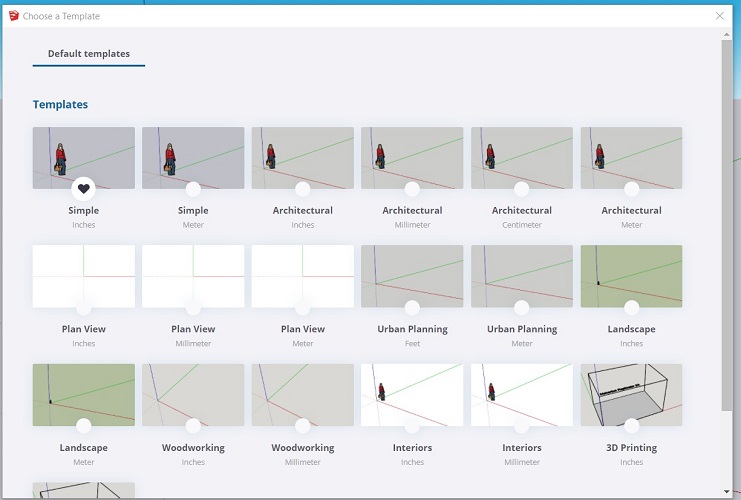
In sketch up these are the steps I followed to adapt my model>
- To start a new project you can use a predetermined template, in this case I chose architectural meters.
- I uploaded this previous model but you can also download an interior space from the sketch up 3D warehouse. In fact, most of the furniture used in any model
are from the 3D warehouse.
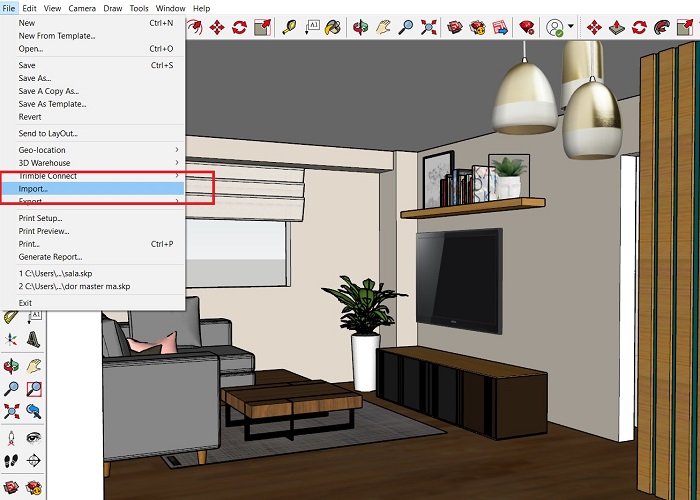
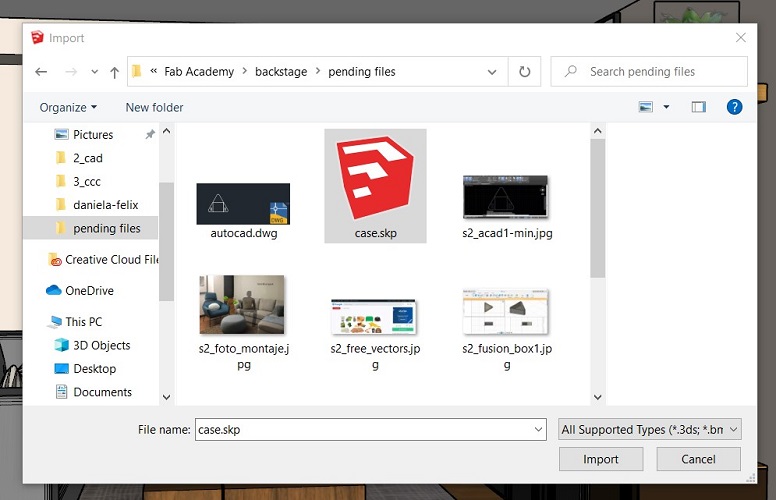
- Import the .skp file and adapt it to the model. This process is really simple, you can change the scale and order of the objects.
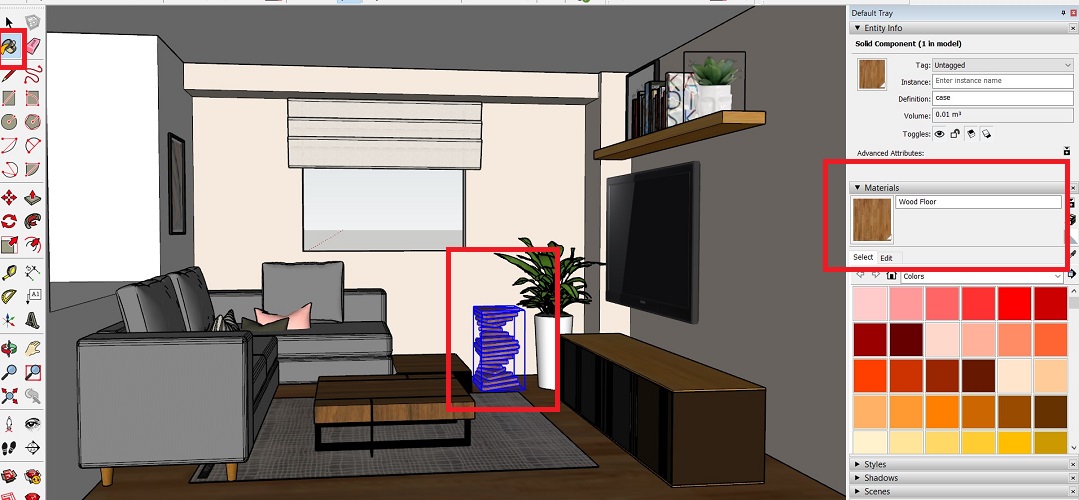
- The imported model has no material, you can select the object and assign one using th bucket tool on the bar on the left and selecting the material on the options on the right.
Result
I've tryed several times to upload this file but it is impossible, it is too heavy because all of the 3d objects it contains. I'm leaving a google drive link where you can download
the original file. You can find it with the rest of files at the bottom of this page.
Livingroom Sketch up.
Last year I took some courses on the Rhinoceros trainig website in order to design parametric furniture (The main reason for me to start the Fab Academy).
I've been following some tutorials to work with grasshopper, I find it really interesting, some times it's still hard for my to select the right tools
and fully understand how algorithms work, but It's something i'm excited to learn about.
Found this interesting link that shows an algorithm to build a parametric bench. I modified it as an initial idea to cover my vermi composter and make it
more appealing for interior spaces.
Parametric bench.
PROCESS
I followed the instructions avaliable on the previous link and adapted it to develop my 3D model, these are the steps I followed:
- To start a new file a chose small objects> centimeters
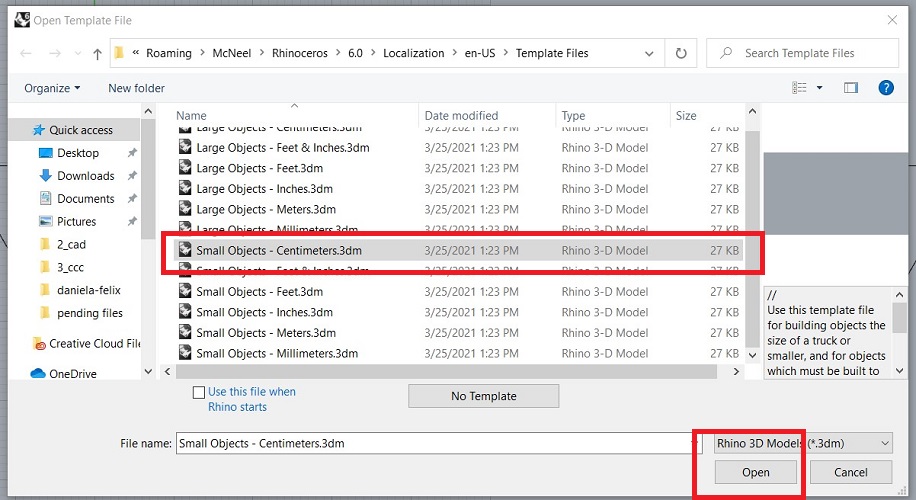
- Drew one triangle and fillet ir corners, similar process to what I did on Auto Cad but in this case I dont need the interior pieces, I just want to show the case.
Added 3 points in the middle and draw an horizontal line with the height of the object, in this case 55cm.

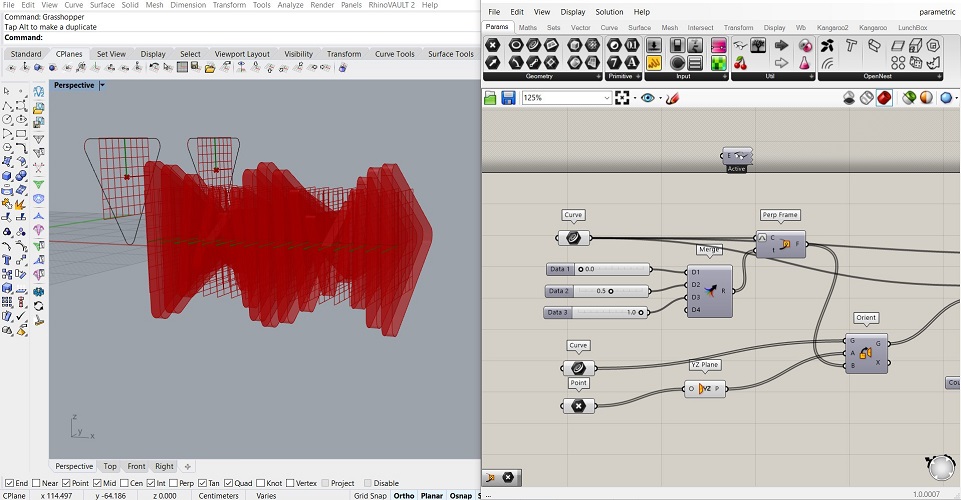
- Run grasshopper (then, follow the instructions on the video mentioned starting on the 11").
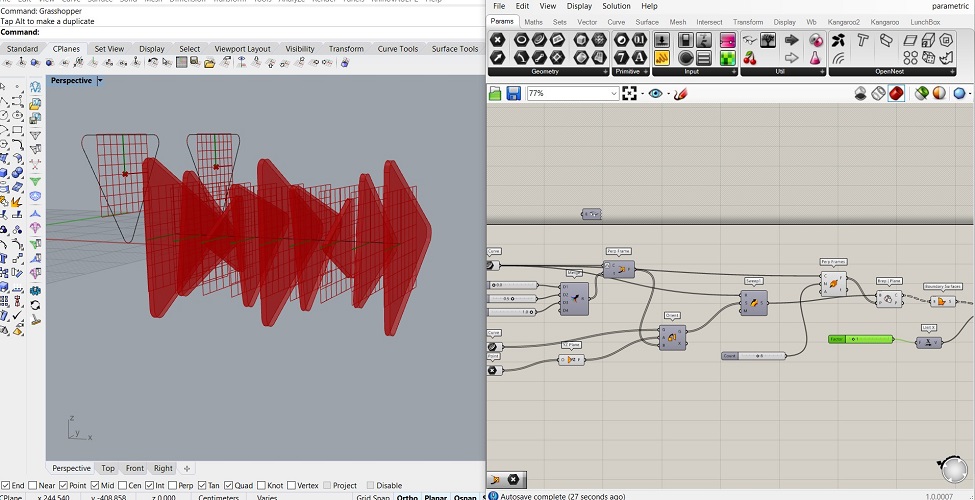
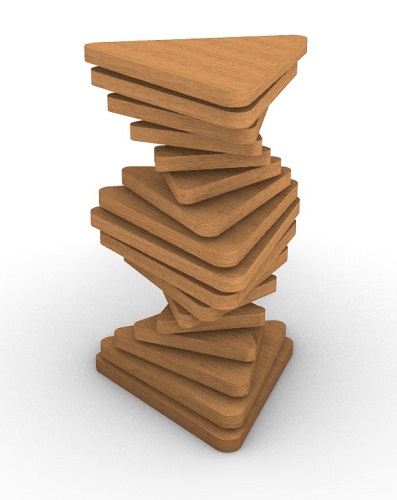
I developed this algorithm which picks the tringles with the center point as reference, locates them as planes on the height line and turns them around.
Extrude the planes in x axis. You can modify and control this outcome by changing a couple of factors, for example the separation between planes which will modify
automatically the number of planes, and the heigh of each plane.

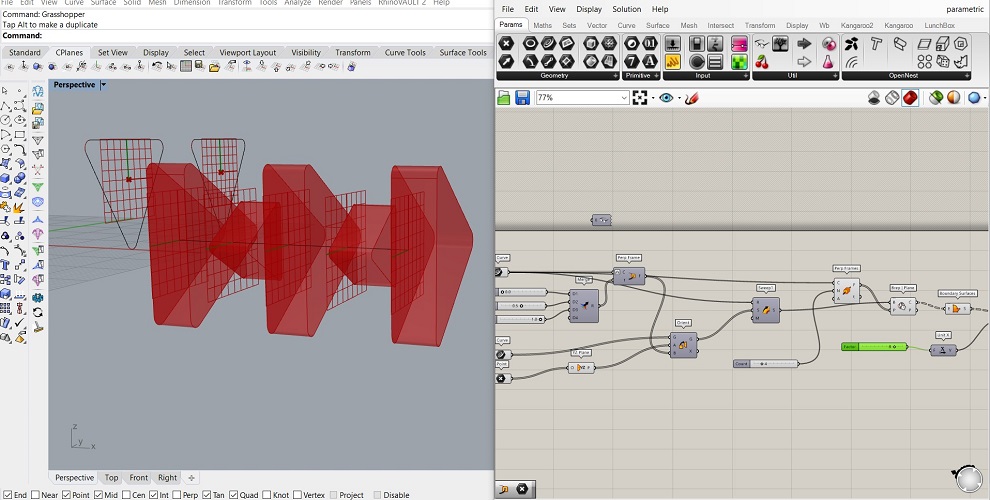
- One thing i love about grasshopper is that you can see the changes done simultaneously, and this "random" outcomes can generate many interesting ideas
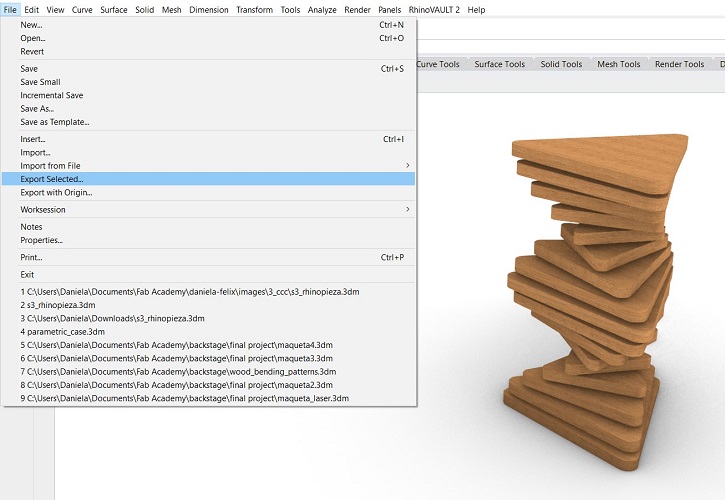
- Once you are happy with the outcome, righ click on the last parameter and select bake. This will make a 3D object that can not be modified with this algorithim any more.

- Save and close grasshopper. In rhino I turned the model from x to y axis and save the rhino file.
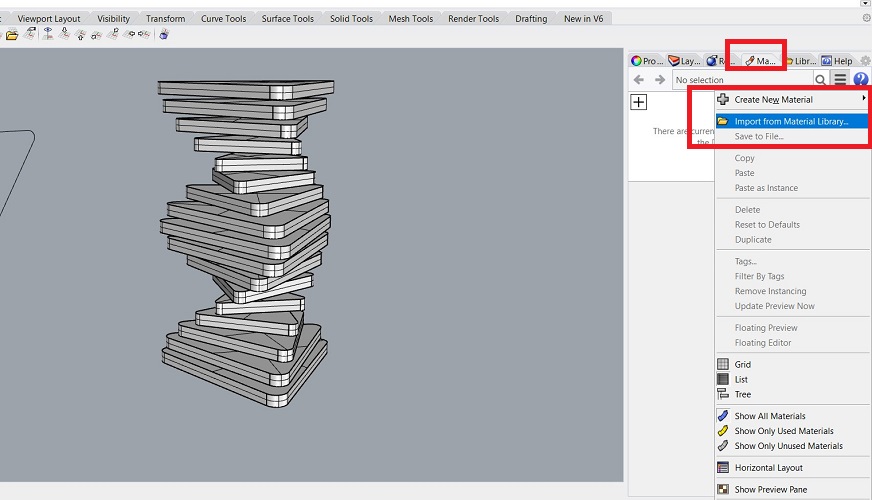
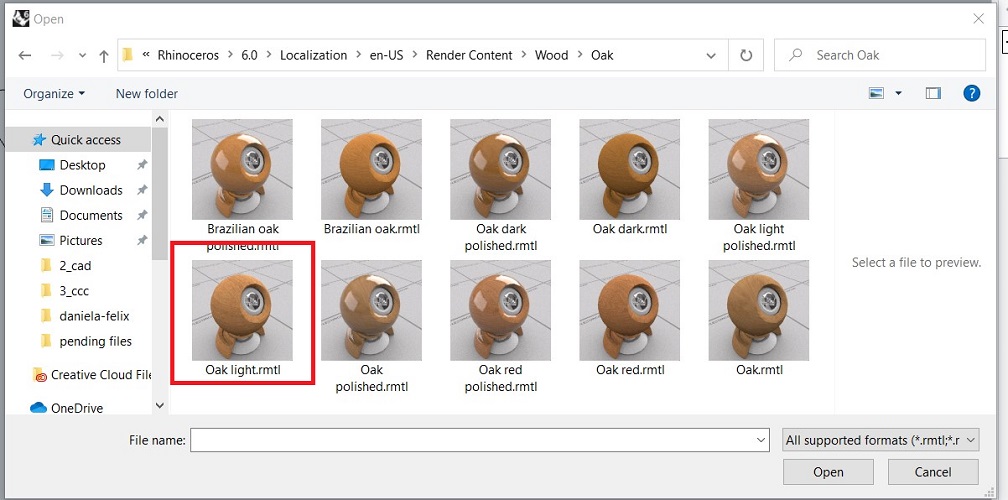
- To add material, go to materials and import from material library, there are lots of textures you can use, I chose an oak
- To export the object to use in sketch up you can do it as sketch file or if you plan to use it somewhere else export it as obj.
Result
SOME USEFUL LINKS
Download Grasshopper here. You can have
it with the Rhino 7 with the free trial for 90 days.
I downloaded and installed it. At the begining I tryed to use it with no previous preparation and it was a bad idea, I couldn't figure out how to draw
or edit components. Then I watch some videos on you tube and made 2 exercises, the first one was to build a geometric piece, i followed the video step
by step and had to create several files because i was having trouble joinin the lines. The second exercise esa to build a mechanical piece, also followed
the instructions step by step and made the result. Now I understand the basic stuff create the sketch on a surface, add measures, directions, etc. I will
continue trying and learning about this software, I find it interesting.
FILES
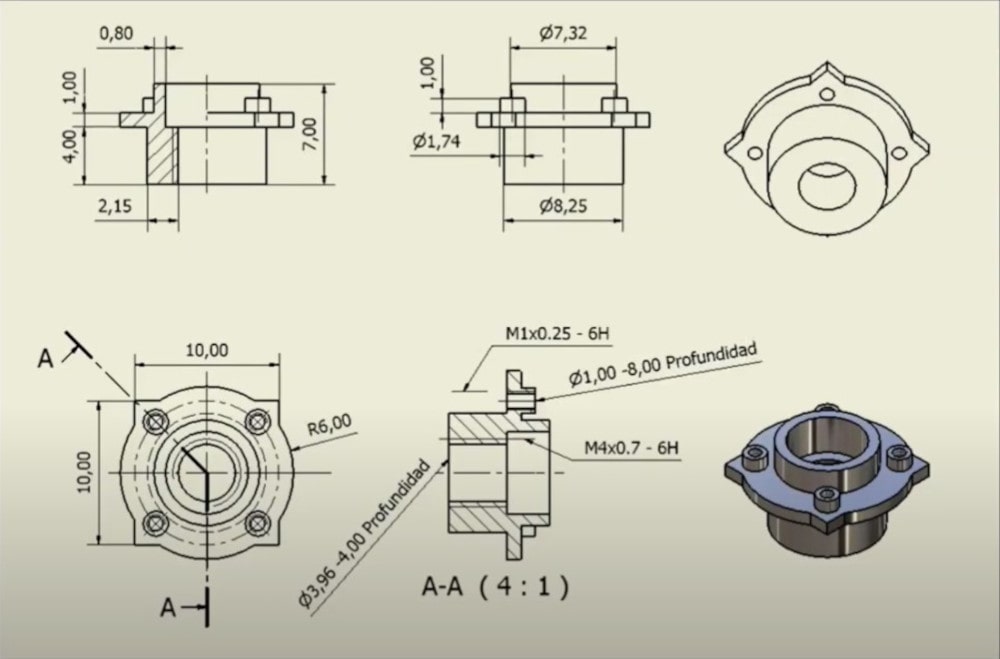
I'm sorry I didn't uploaded my files on time, I had some troubles with my memory and replaced it loosing them.
I trully may not be using this software to develop my final project, cause I found it completel
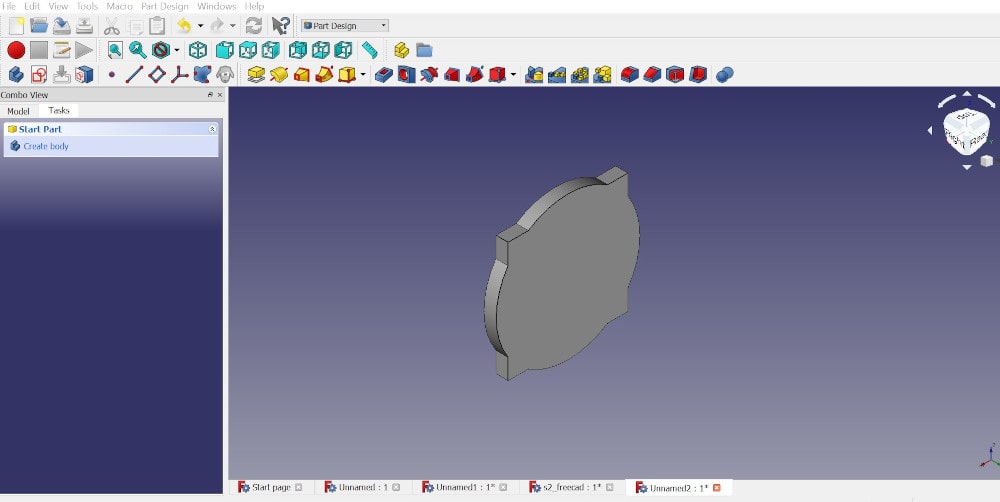
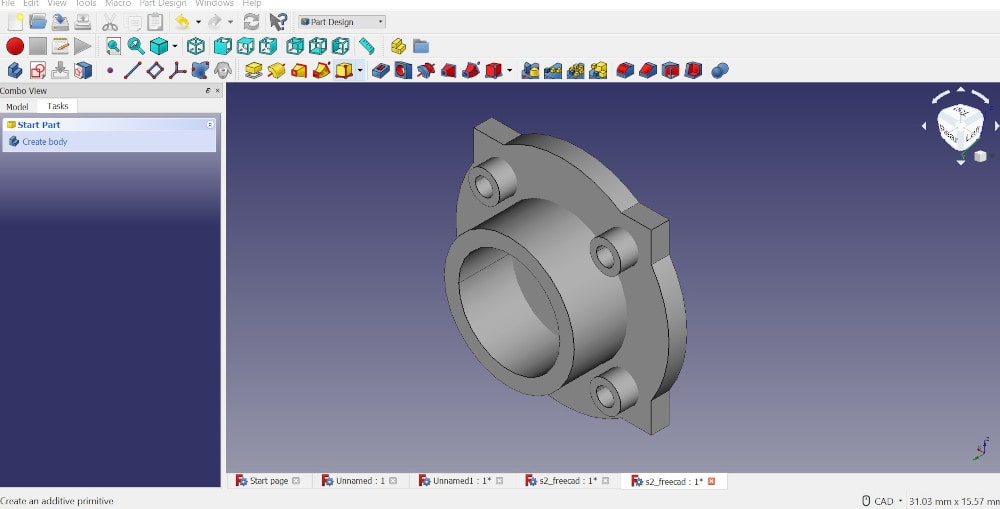
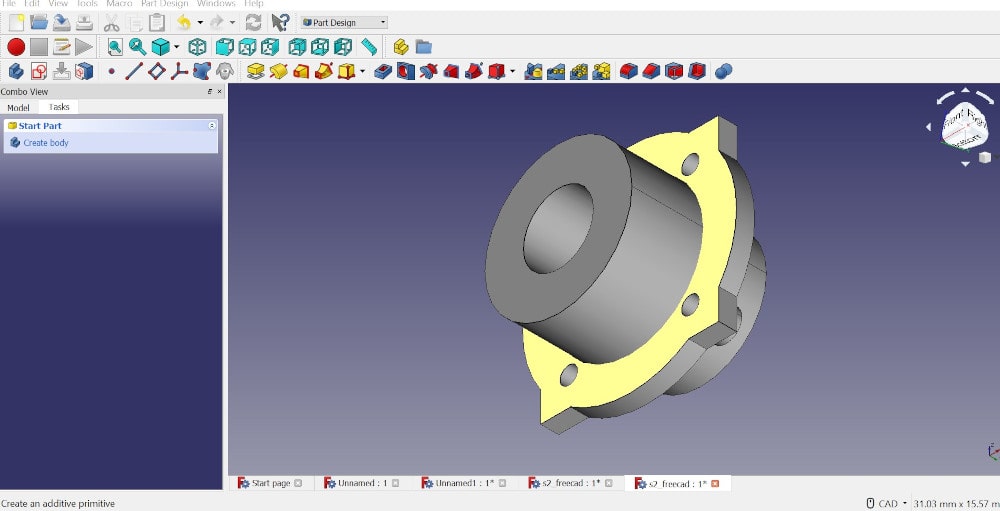
Another chance for freecad
I do not want to leave this work incomplete and under the suggestion and observations of the global evaluator I
have decided to try this program again and develop a basic exercise to tell my process and experience with the necessary backup file.
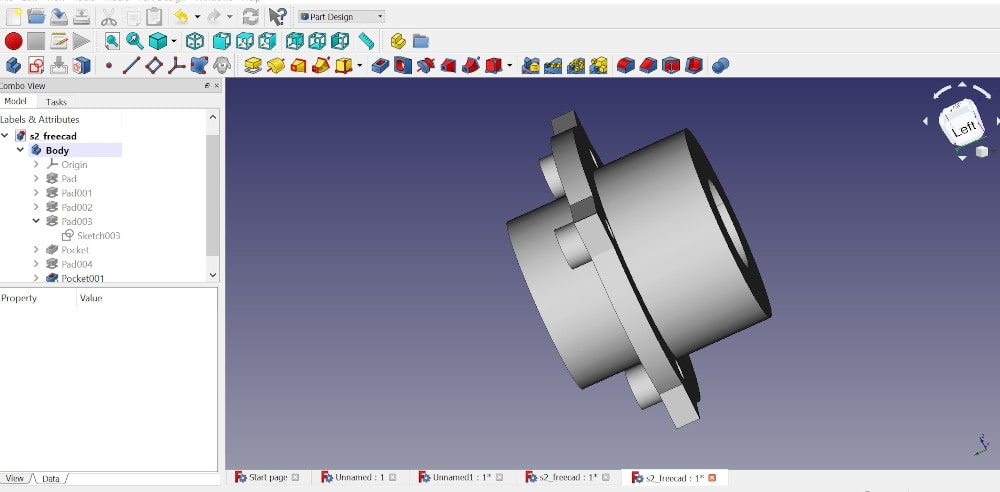
This box model could be usefull for my final project for the ground and worms container.
I started from this tutorial to Draw a cube and make it parametric
Some of the steps I followed are here:
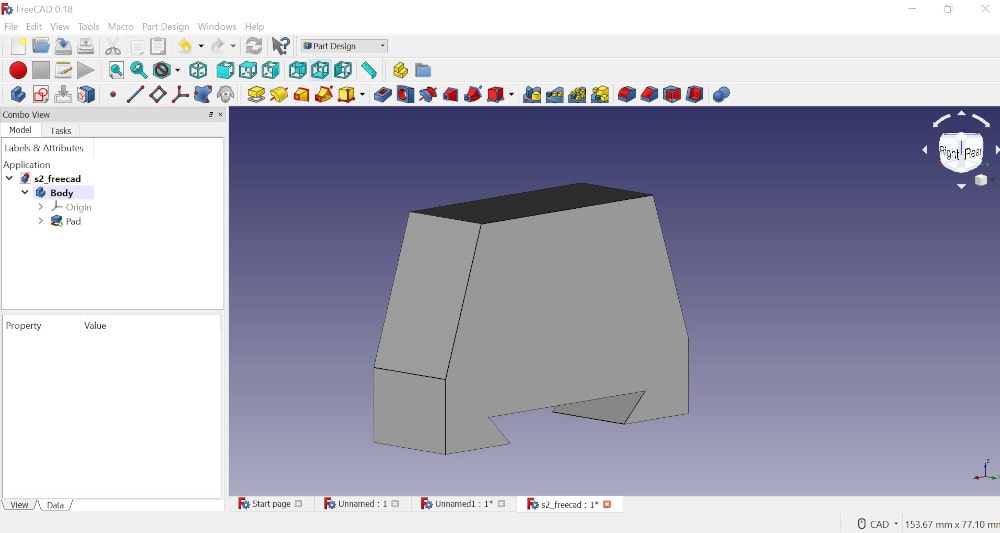
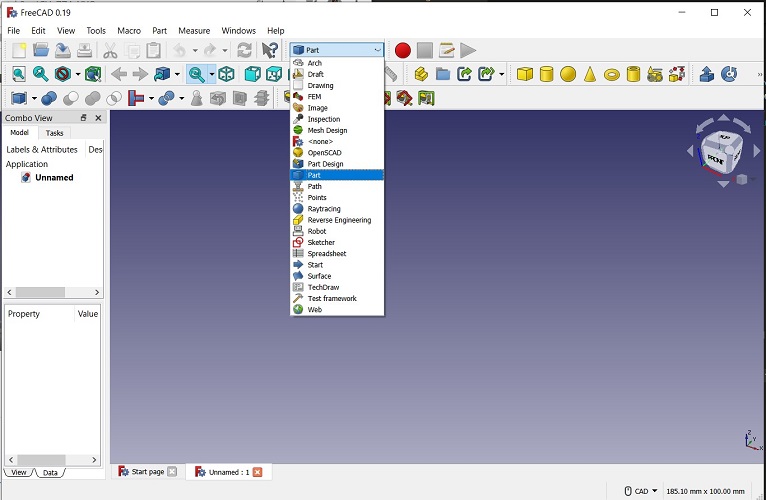
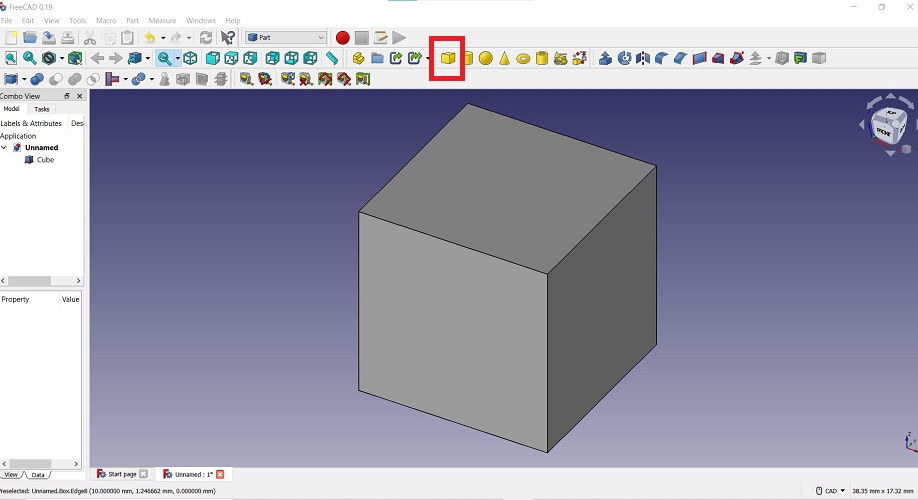
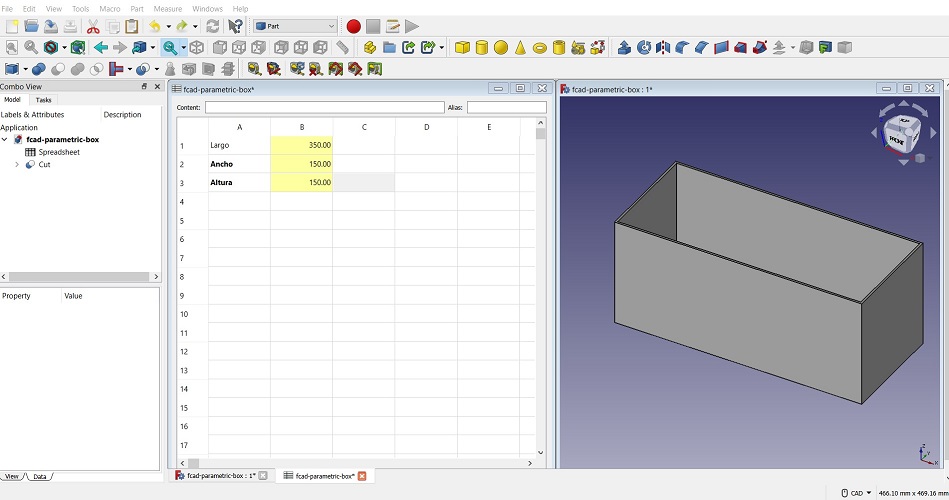
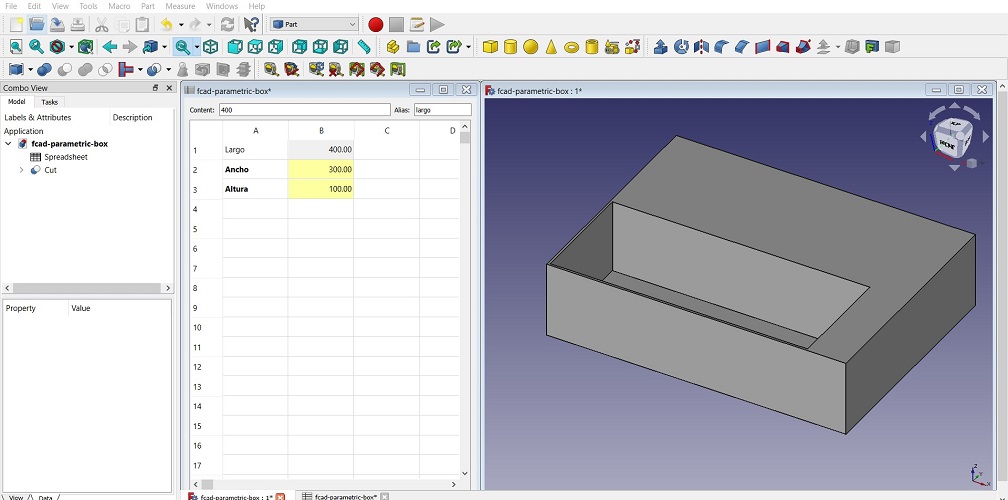
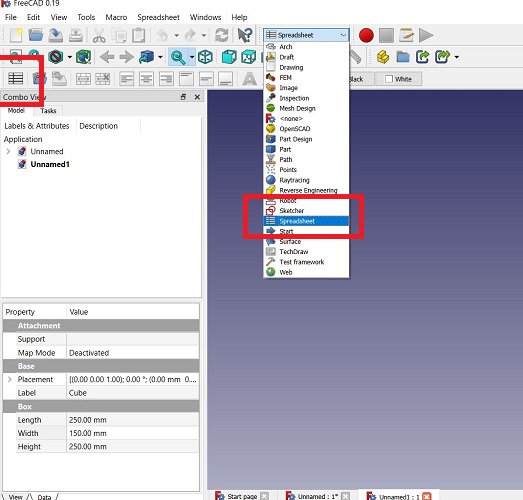
- Open a new file, and select part > and box (the yellow icon) to generate a cube.
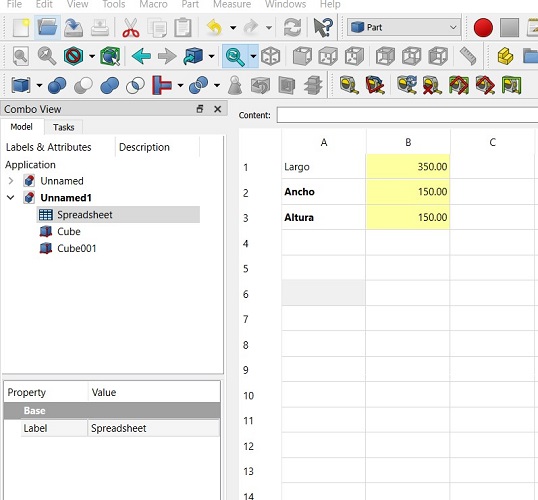
- Now select spreadsheet to determine the values and parameters of the box that will be modified. In the spreadsheet add values for lenght (largo), widht (ancho) and height (altura).
The units set for default are in mm, so I'll keep it that way.
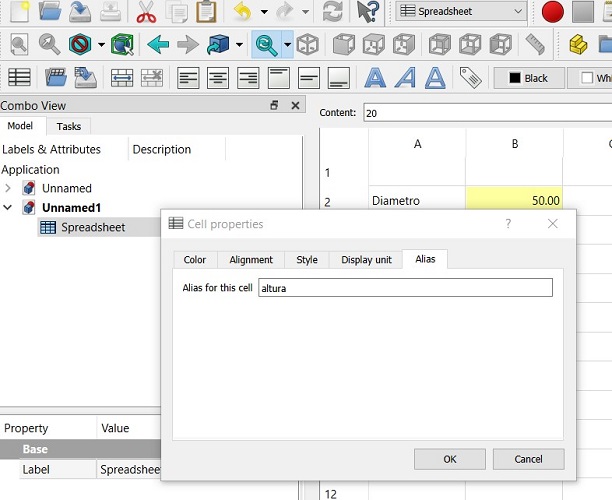
- Right click on the cell with the parameters and this window will come up, go to Alias and introduce a name for the parameter
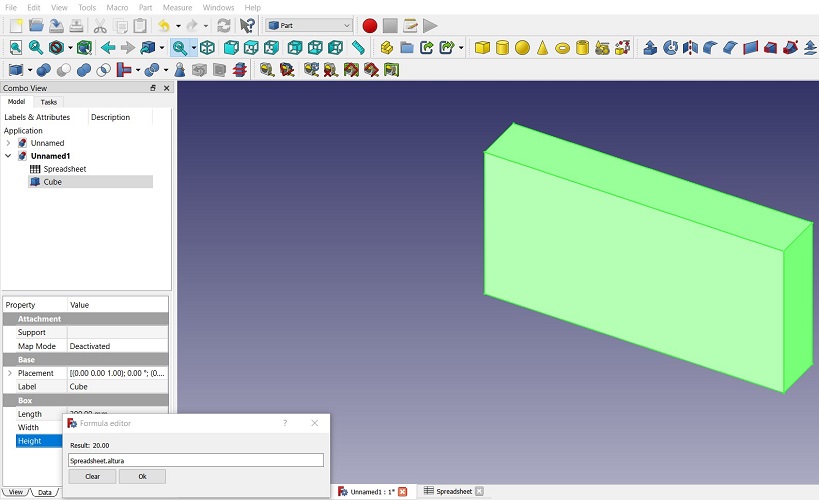
- In properties on the left bar, you have to relate the data to the spreadsheet. In order to do this, click on the blue circle and write spreadsheet. largo (you will have a list to chose from once
you start writing). Repeat this step for the rest of the parameters.
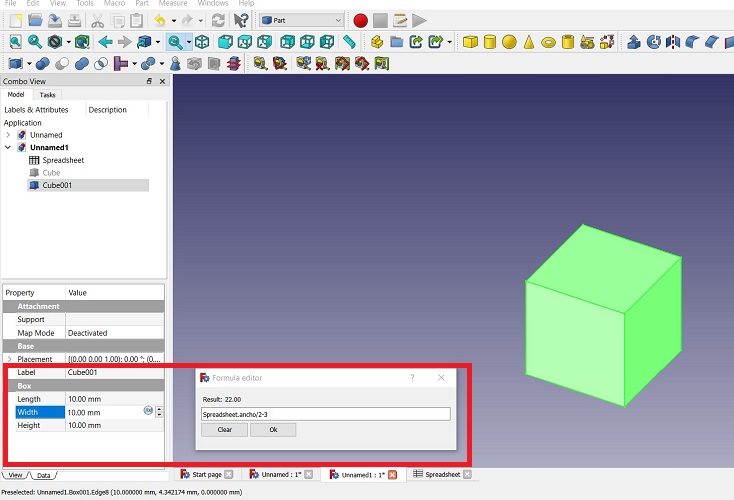
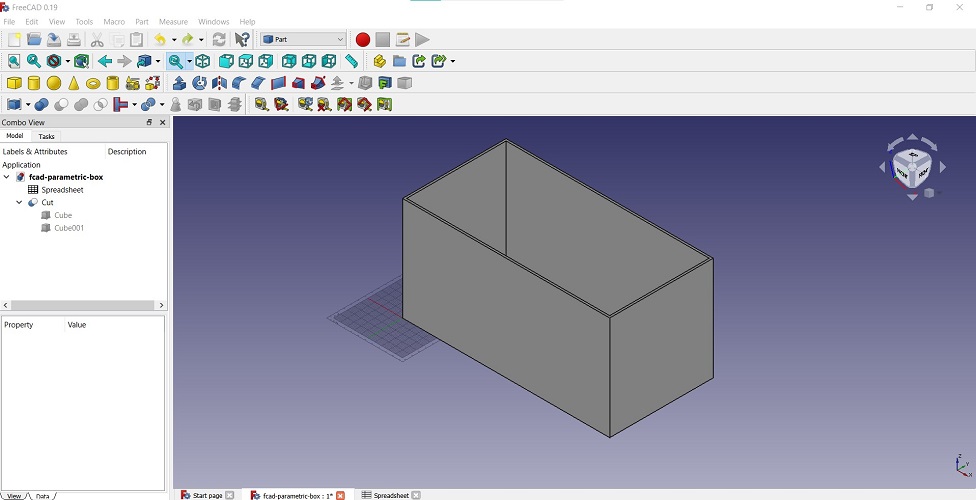
- Create a second box, repeating part> box and attaching the parameters clicking on properties> box> click on the blue circle and link the parameters in formula editor to "speadshee.largo" and the rest of parameters
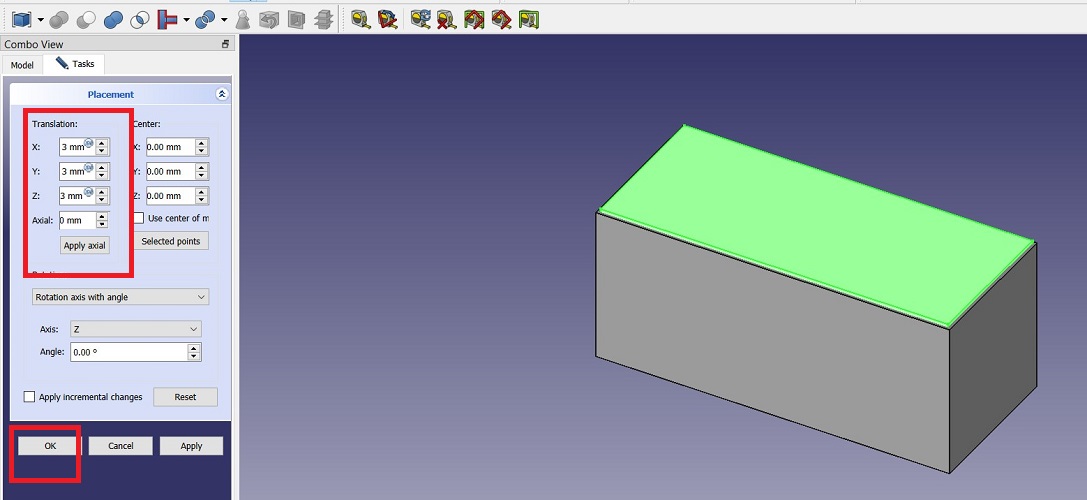
- For this second box I changed the placement moving it 3mm in all axes
- To subtract one box from the other, select both layers and go to "boolean operation". Select difference, the object to subtract from and the object to subtract with, when ready > close. Now I have an empty box.
- Go to windows> arrange icons> avaliable on the bar on top and you'll have the spreadsheet and 3D model on the screen. It is very interesting to change the values and see almost in real time the 3D with its modifications.
- To save the file you can press ctrl+s or go to file and save
Result
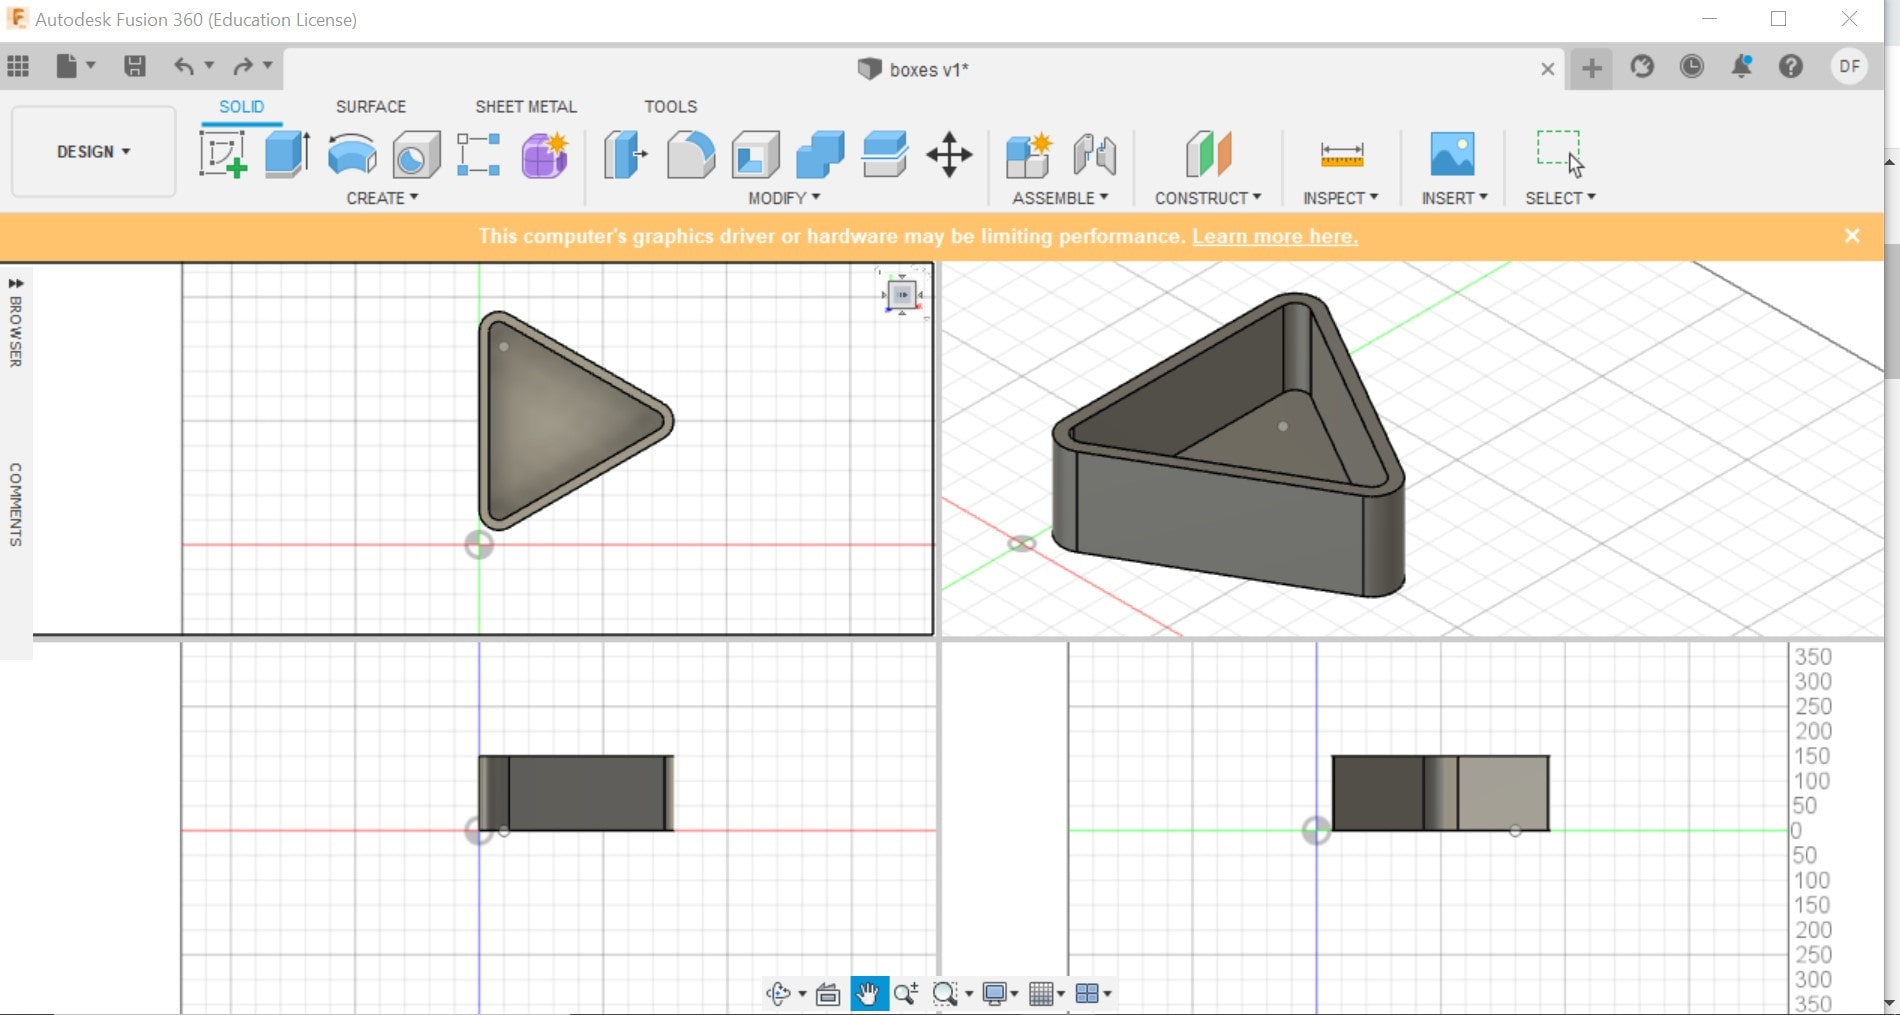
Wanted to try this new software to build my container. I liked the fast options this program has for 3D editing. Thought it would be easier to use because it
belongs to the Autodesk house but the tools, options, navigation, editing, is different.
At first I tried the program following my instincts but it was difficult for me to follow. Nevertheless, the result was this container that I plan to use in my final project.
The steps that I followed were:
- In DESIGN, select sketch, you can draw the geometry needed, I selected line and initially drew a line and circles to generate a triangle, then used trim tool to errase the
unwanted lines.
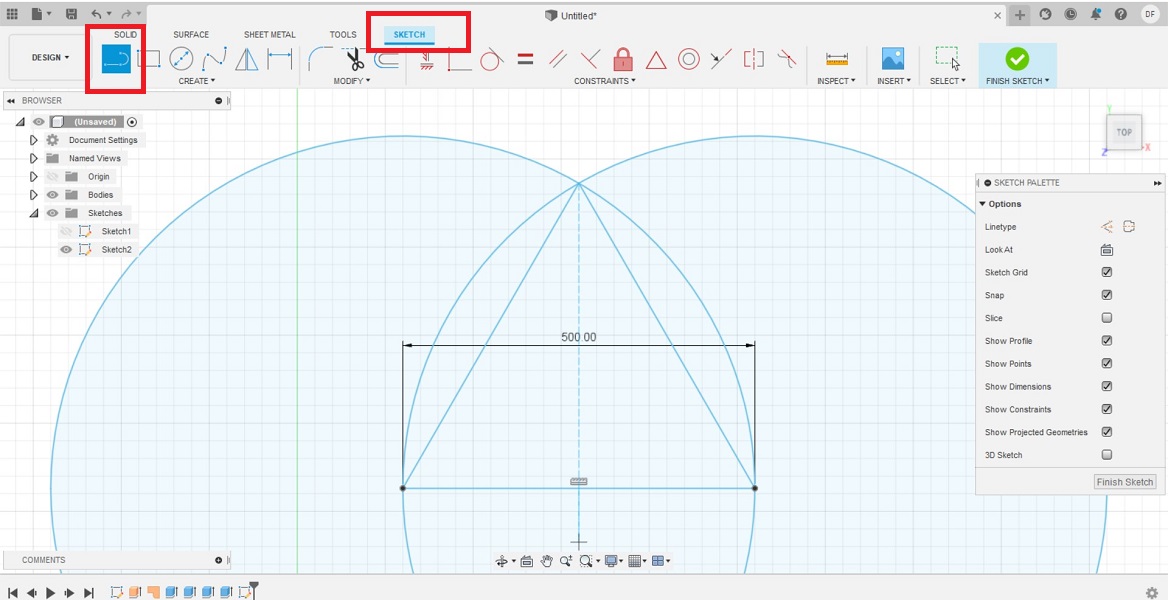
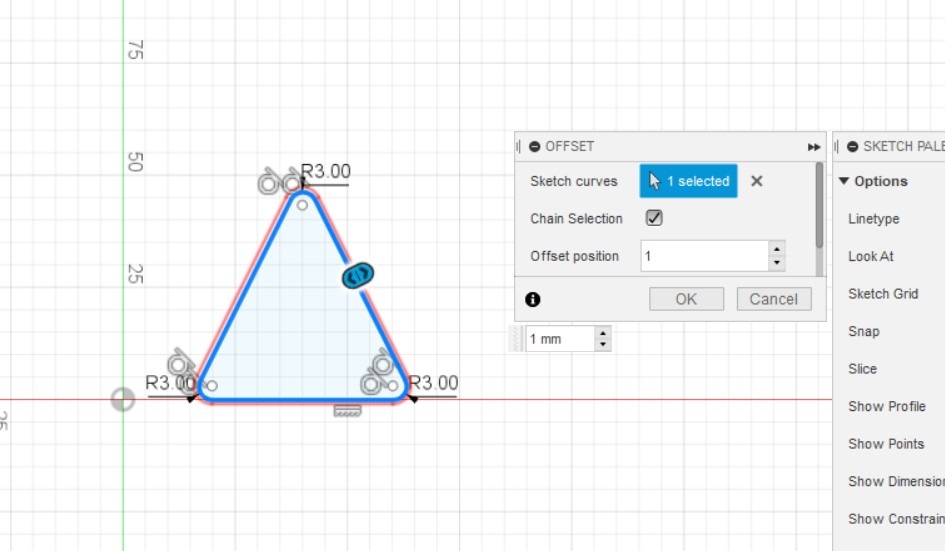
- Used fillet to make the corners round, you can change the dimension making double click on the text that pops up. Also made an offset to set a width of the container walls

- To make the 3D go to SOLID and press extrude, set 150mm
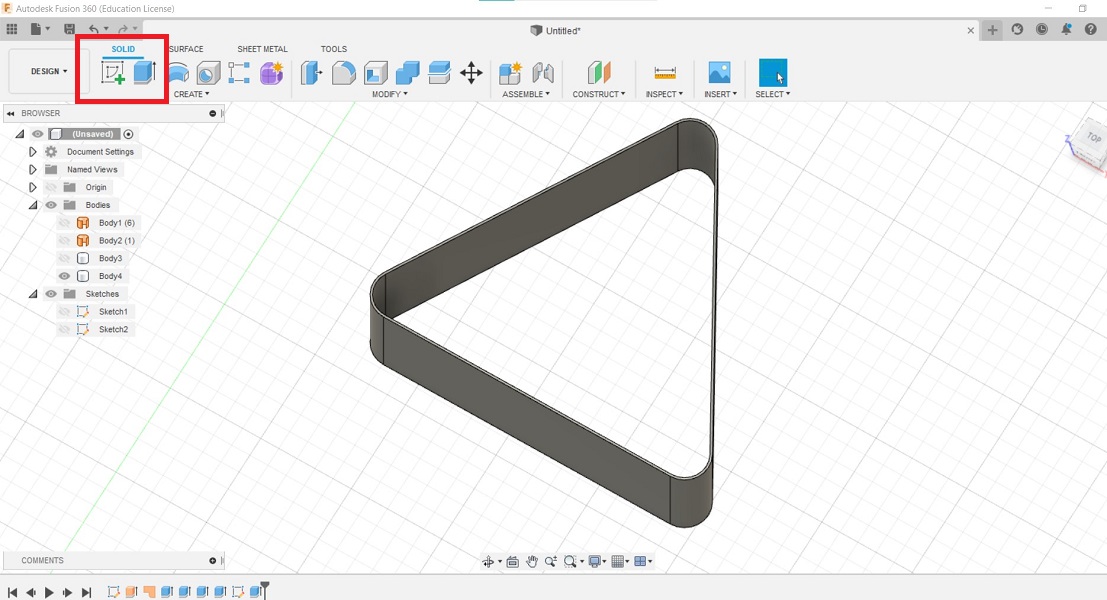
- For the base, go to surface and generate one. Then go back to solids and extrude it.
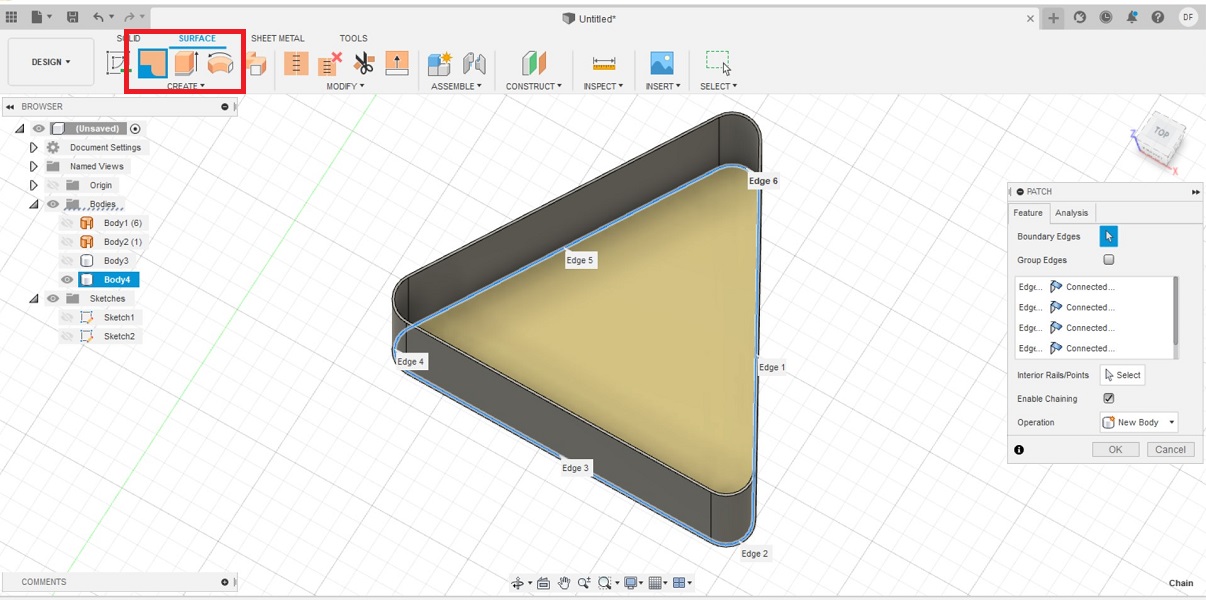
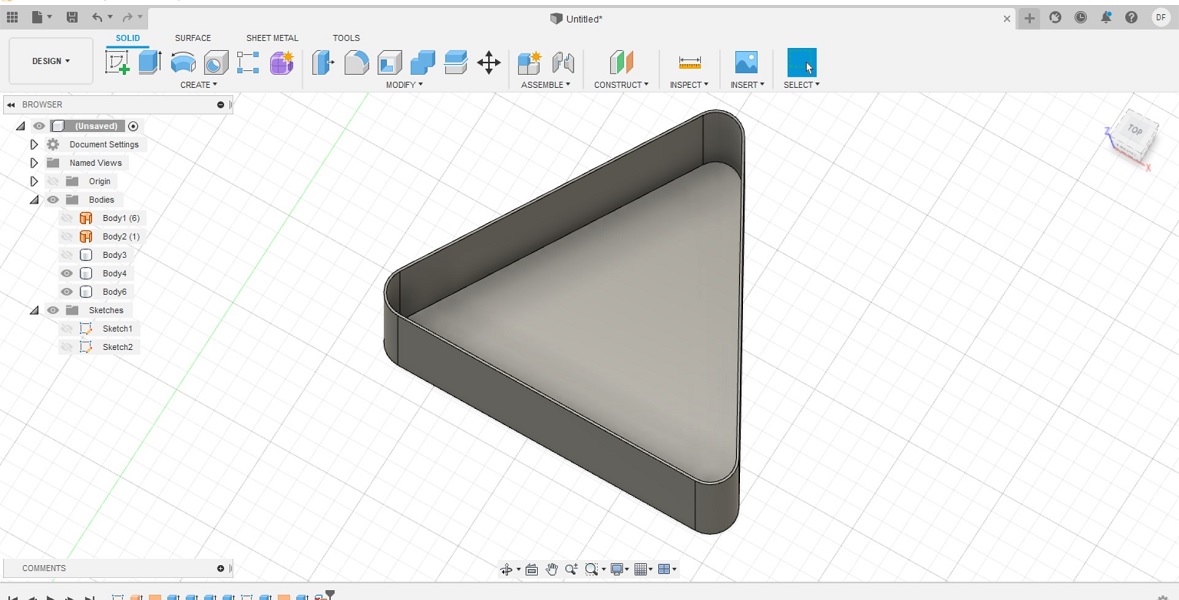
- This educational version keeps all files and modifications online, I saved it adding a name

Result
FINAL THOUGHTS
The last 10 years I’ve been using the same software, I am used to work with
Adobe and Autodesk, and It has been easy for me to access these due to
the educational licenses I have from the university. However,
I found out during this week that open-source software provide very
similar tools to achieve the objectives. Although there are training
and videos that can be easily accessed online, changing the mindset
of use can be difficult and frustrating at first.
The following table shows the advantages and disadvantages that I
have found in the use of some software that I have tried these days:
| Software |
Open source |
Closed source |
Positive aspects |
Negative aspects |
Comments (to my self) |
| Photoshop |
|
X |
Intuitive.
Great editing tools for photos and images. |
Needs training for more professional results. |
Discover new tools. |
| GIMP |
X |
|
Intuitive.
Similar interface to PS |
Needs training for more professional results. |
Discover new tools.
Keep exploring.
|
| Illustrator |
|
X |
Intuitive.
Has many downloadable free vectors. |
Heavy files when encrypted. |
Love it |
| Auto Cad |
|
X |
Many tools for 2D drawing |
Not so good for 3D, editing is not so easy. |
|
| Sketchup |
X |
|
Has it own tutorials on the software.
Helpful to build 3D spaces for a quick previer
Has many plugins for rendering and videos |
Not too friendly for editing. |
Try some of the plugins for rendering. |
| Rhino |
|
X
| Nice for 3D modeling
Allows you to navigate and edit easily
Similar interface to AutoCad
|
Neds training |
Keep practicing |
| Grasshopper |
|
X |
Comes with Rhino 6
Nice parametric results |
Needs training |
Keep practicing |
| FreeCad |
X |
|
Interesting for parametric design |
Needs training |
Keep practicing |
| Fusion 360 |
|
X |
Nice for 3D modeling
Allows you to edit directly on the 3D model. |
Needs training |
Keep practicing |
FILES