12. Molding & Casting
This week we were tasked with designing an object in 3D and then creating a mold for that object and making a cast from that mold. This week’s assignment has allot of steps with some long waiting periods between them, so it took a long time to complete.
Group Assignment
Review the safety data sheet for each of our molding and casting materials then make and compare test casts with each of them. Compare printing vs machining molds.
I actually did the group work for this assignment with my other classmates/coworkers in the previous cycle. You can see everything we did here (NIHERST student’s group page). However that cycle didn’t have the stipulation of creating and comparing a 3D printed mold vs a milled mold. Funny enough I had already gone down that route, because we wanted to know the results for ourselves. We run our local Fab Lab, and wanted to know which approach will work best for us in the future. So that aspect of the “group assignment” is documented on this page.
Individual Assignment
Design a mold around the process you’ll be using, produce it with a smooth surface finish, and use it to cast parts.
-
I will be making 2 molds, the main one will be milled out of wax, the other will be 3D printed. These will actually be Primary Positive Molds, which will be used to create Secondary Negative Molds out of silicon, and then finally use the Secondary Negative Molds to make a Positive casting of my object (in resin).
-
Why a primary and secondary mold? I wanted to end up with a practical mold that could be reused multiple times and where the final casting could be released easily. The physical properties of silicon are great for this. The problem is that we can’t machine a chunk of silicon. Even if we tried, the soft nature of silicon that we want for our mold would mean the milling process would create allot of inaccuracies from what we designed.
-
The group assignment required us to compare a 3D printed mold against a machined mold. I take this to mean comparing 2 of the same designs in the mold. So since I was going to be making a Primary positive mold with the machining process, I did the same for the 3D printing. Although using a soft filament (like TPU) and directly 3D printed the negative mold might work well
The Design
The design was for a small standing “object”. It has:
-
A half ball on the base.
-
A lightning bolt as the main body.
-
On one side of the bolt are the initials JK protruding out of the surface.
-
On the other side of the bolt are the initials JK indented into the surface.
Because this is a two sided object we need to make 2 halves and combine them for the final mold. My aim was to make a mold and cast that had a few different features. This so we can compare what works well and hat doesn’t for future projects. All the design work was done in TinkerCAD. Although Fusion 360 is much more powerful, we intend to teach this subject to teenage students, and TinkerCAD is much more accessible for them. I wanted to practice making a streamlined process for teaching, so I did the design in TinkerCAD.
Steps for creating the Positive Mold design from object:
- Create the design of my final object by combining TinkerCAD solid object and holes.
- I added a small tube at the base of the rounded stand. This would be to feed material into the Negative mold when making a cast.
- I designed 2 equally sized boxes with thick walls.
- In one box I places 4 rounded short dowel type protrusions.
- In the other box I placed 4 dowel shaped gaps. These allowed the two halves to align together properly when combined.
- I made a second copy of my main object, and rotated the 2nd copy.
- I placed the 1st copy of the object into the 1st box, with half of the body being combined into the box. This side had the JK protrusion.
- I placed the 2nd rotated copy of the object into the 2nd box, with half of the body being combine with the box. This side had the JK indentation.
- I ensured that the half-objects in each box were aligned properly so that when the molds are combined they join to make the single desired object.

Here’s the STL download of the file 3D print design .
Printing the mold
3D printing the Primary positive mold was pretty easy.
- I loaded the STL file into PRUSA slicer.
-
I was printing using generic PLA on our Prusa MK3S+, so I used the default settings for this in the PRUSA slicer.
-
Here are the more important settings used for our Prusa Mk3S+ printer with 0.4mm nozel:
Prusa Slicer main page

Prusa Slicer Print settings \ Layers and Perimeters

Prusa Slicer Print settings \ Infill

- sent model to the printer and printed.
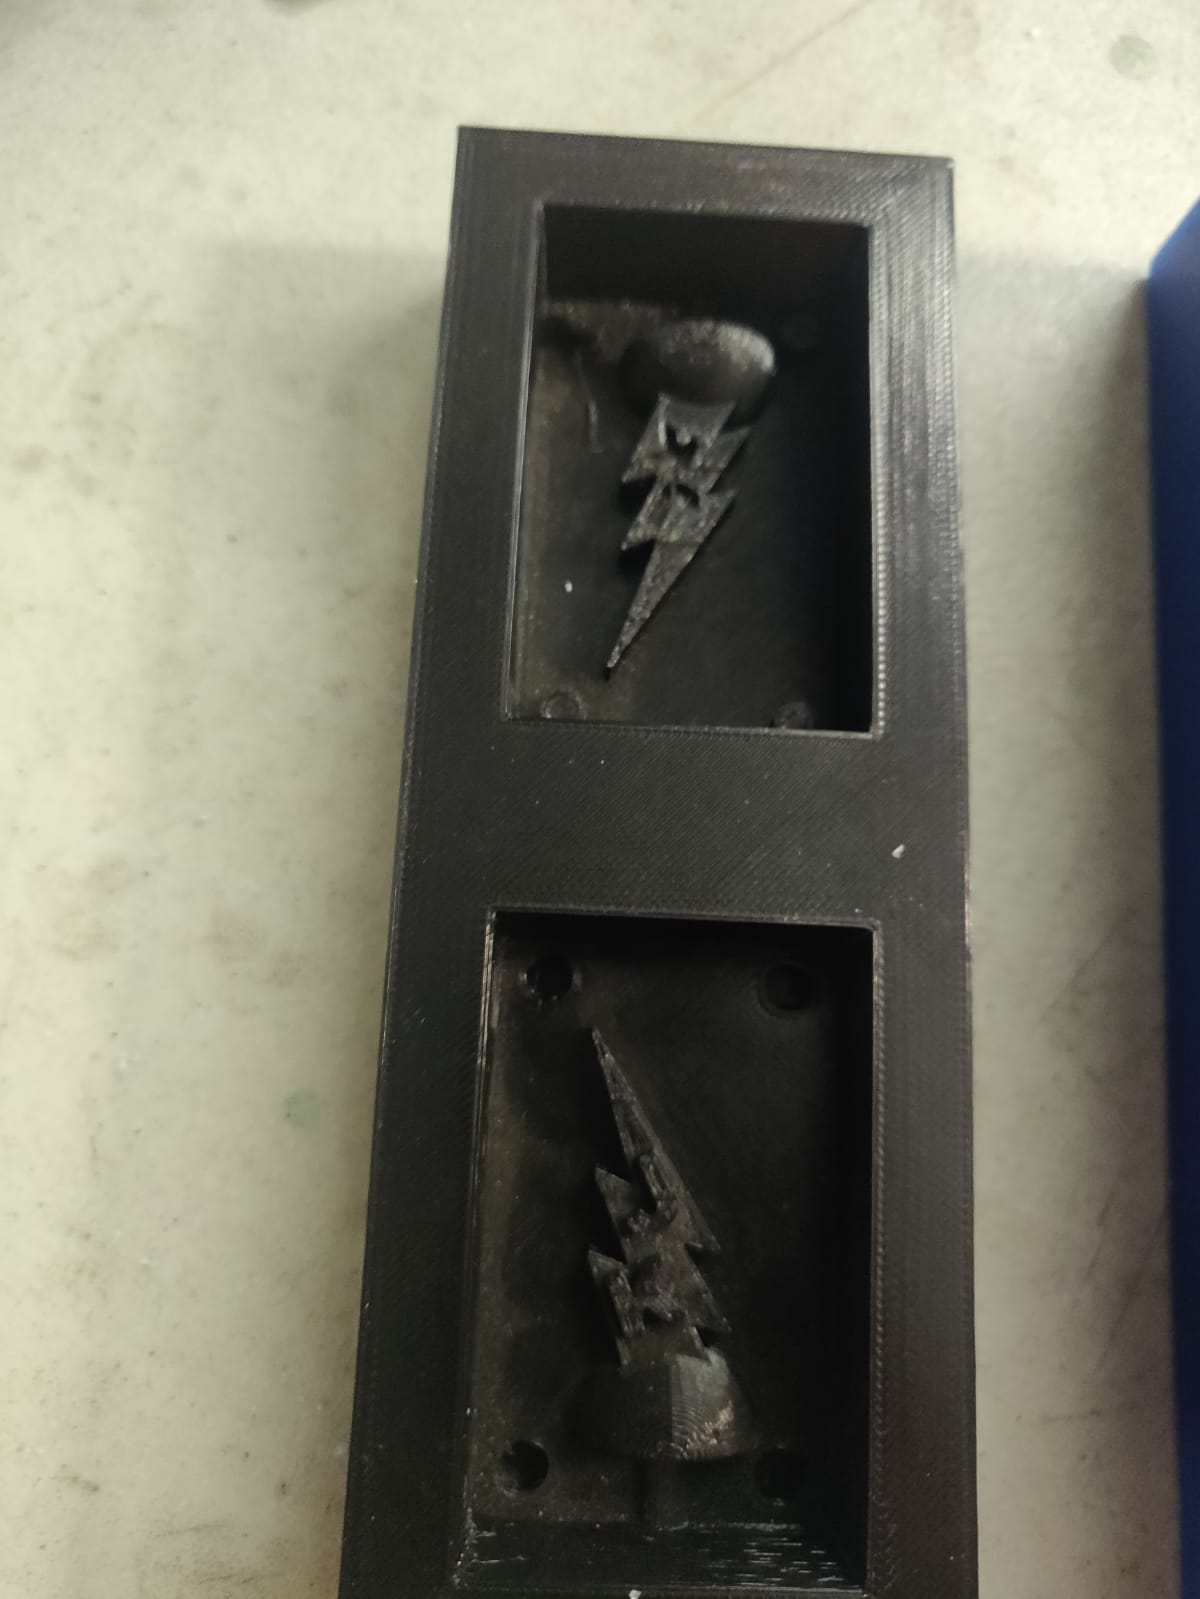
The end result after 3D printing (I probably could have picked a better colour for printing, so the pictures will show more detail, but the black was already open):
Machining the mold
Milling the mold was allot more complex than the 3D printing. Plus I was inexperienced with this process.
Minor design change
Firstly, I made one minor change to the design.
- We only had big blocks of milling wax left. The smallest of the blocks we had left in the lab was 3” x 7” x 2” (77mm x 179mm x 52mm). So that was the size I would be milling (I could have cut the larger block into smaller pieces to use. But since I would eventually be melting the removed wax back into the cavity to remake the block for future use, we just used the oversized block as is).
- The main nuisance dimension that I had to compensate for was the 52mm height of the wax. My drawing was only 25mm. I was unfamiliar with the milling software, and was unsure if using my initial drawing would result in the entire top 27mm of the wax block being milled off, which would take allot of time. So I altered my drawing by shifting the mold cutout to the top of a 52mm cube. It turns out this wasn’t necessary because the milling software can accommodate for relocating a design file within a larger stock block. At the very least, this potentially saved me a troubleshooting avenue later on. Here is the 52mm STL file.
setting up the toolpath
I used the Nomad 3 from Carbide 3D as the milling machine for my wax. The nomad comes with its own software carbide create, so I use this to create my toolpath.
-
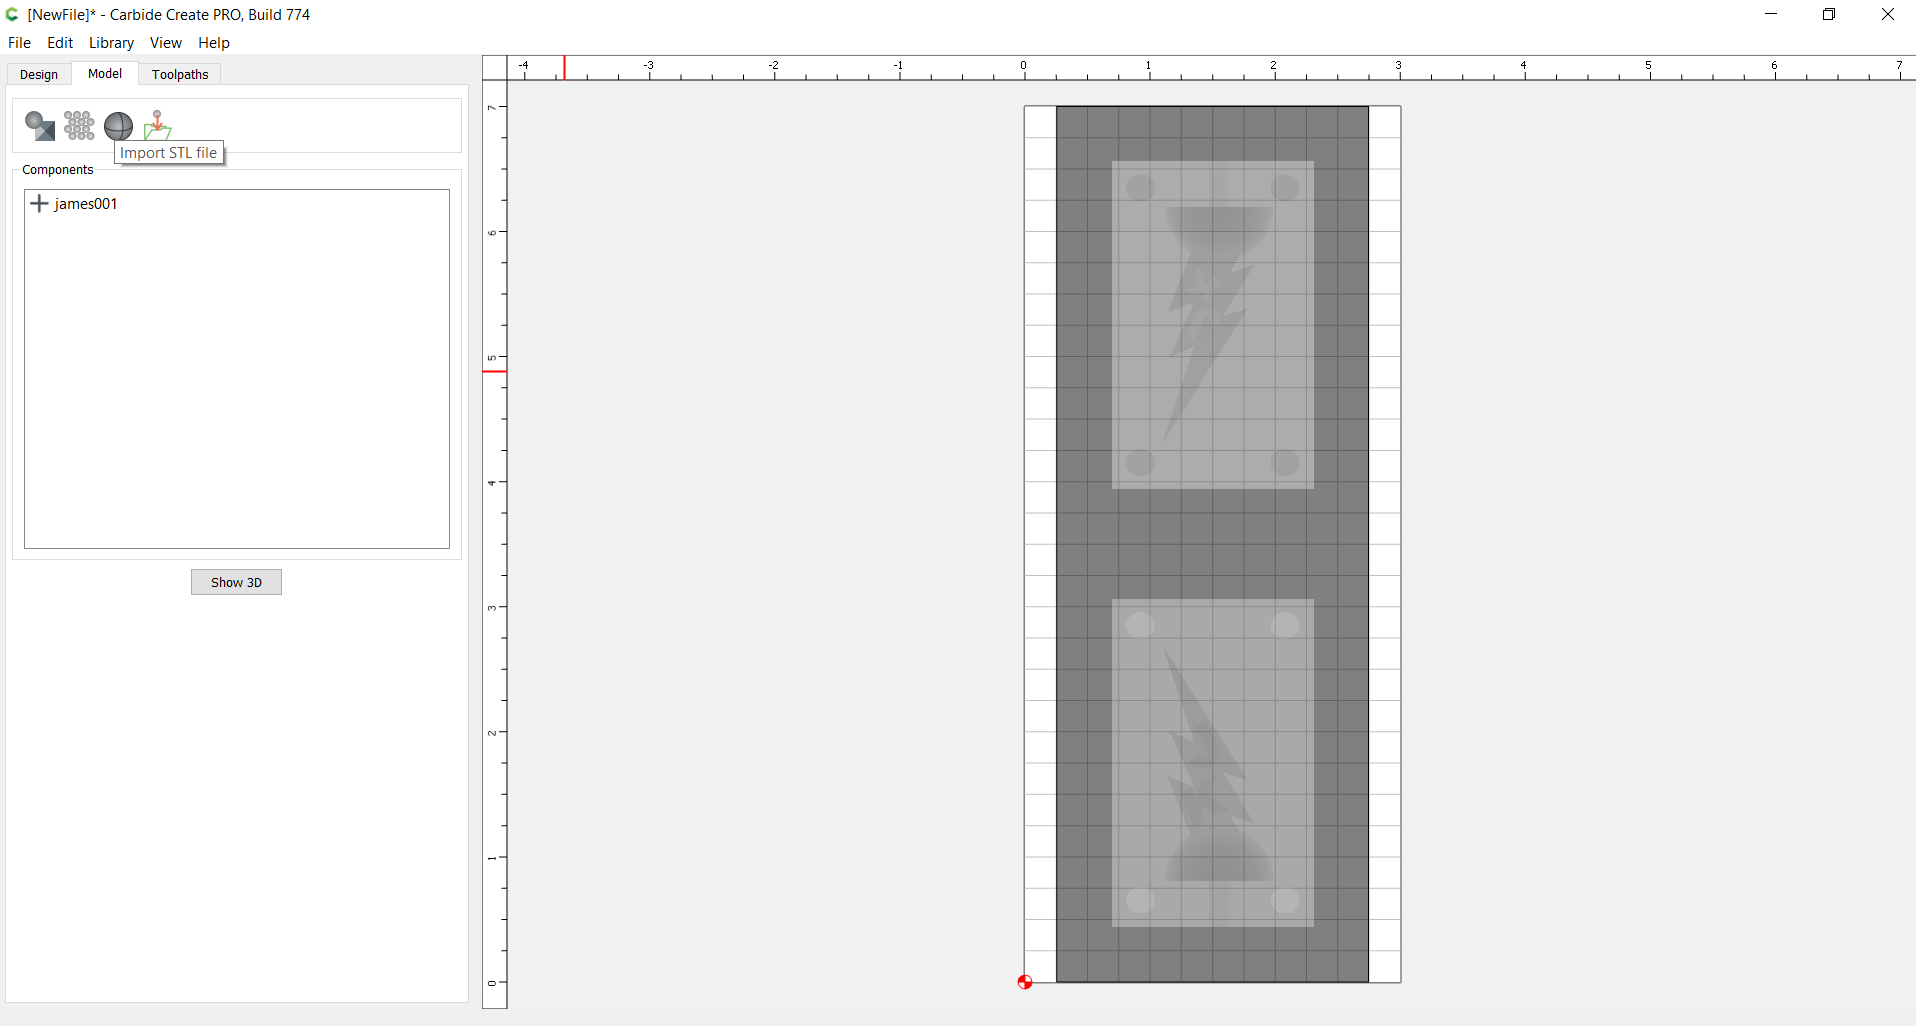
To import an STL file, you need to go to the “Model” tab, and click on the 3rd icon.
-
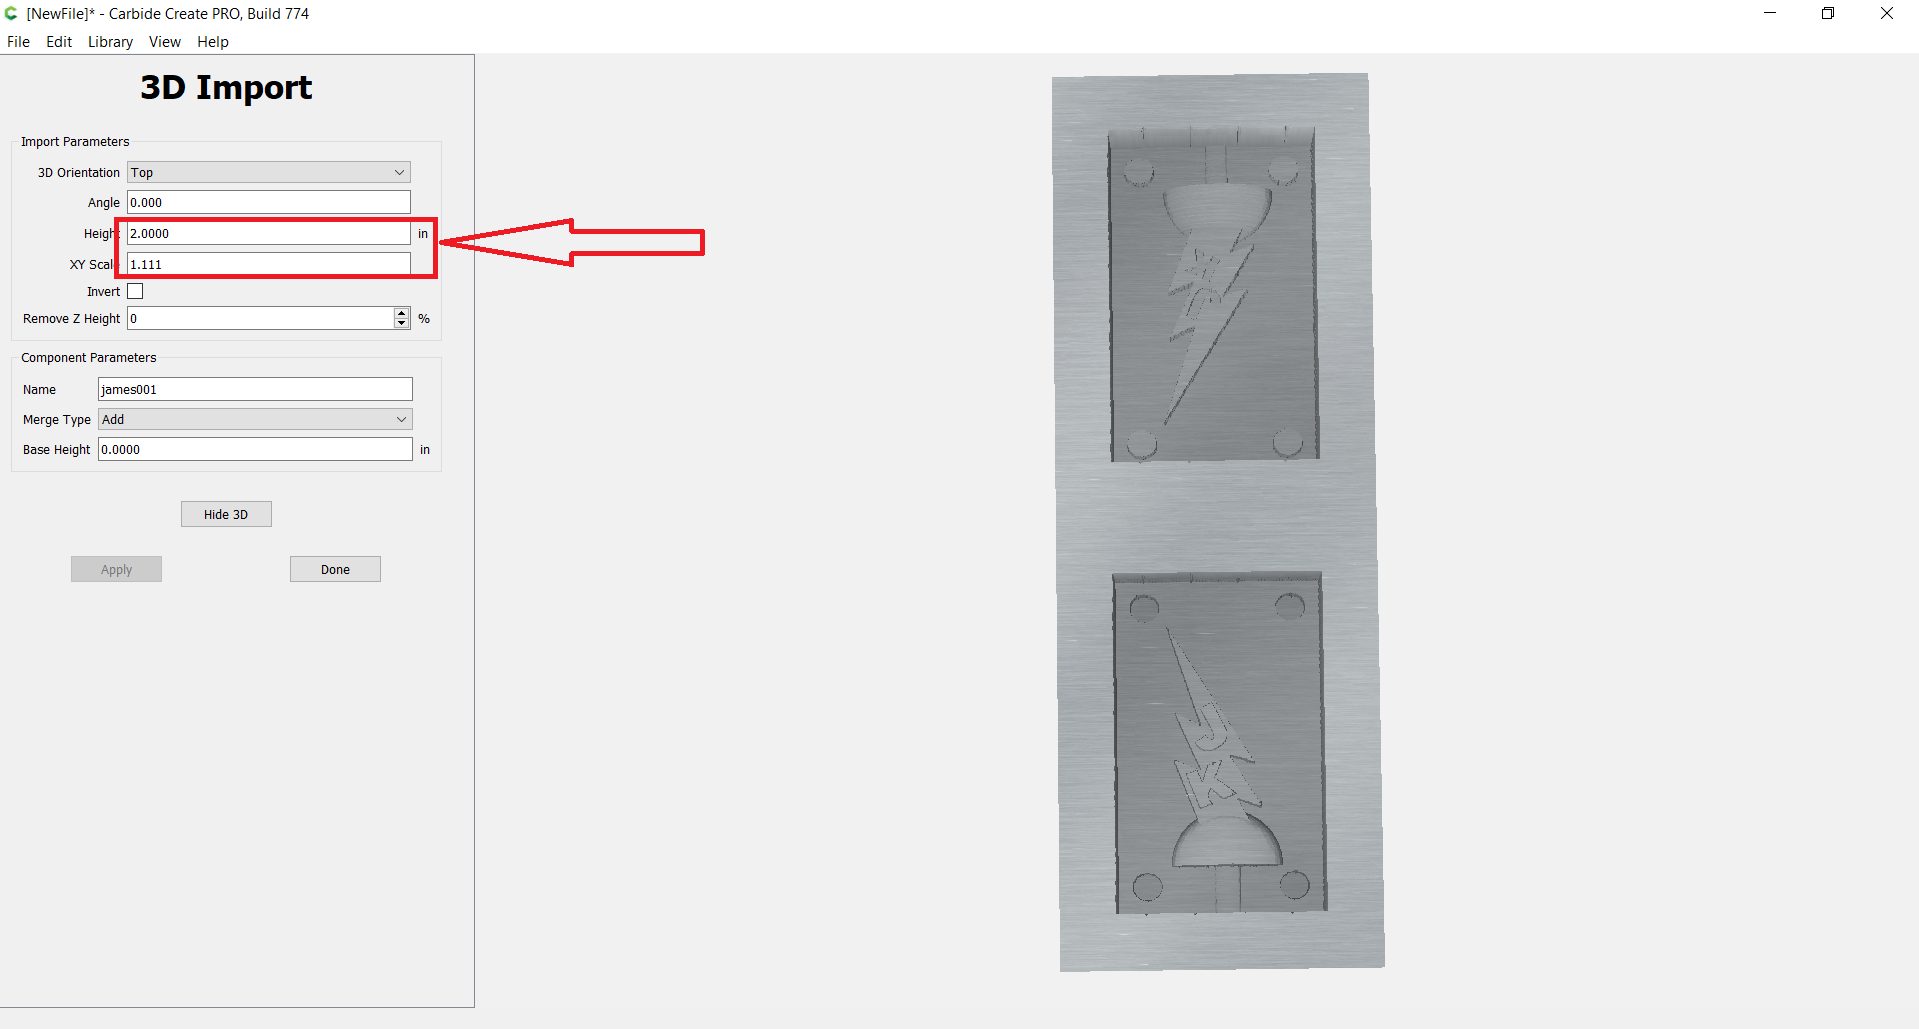
You need to indicate the height of the model you are importing. I changed the height from the default to 2 inches. And I changed the XY scale to 1.0 (for some reason the default was 1.111).
-
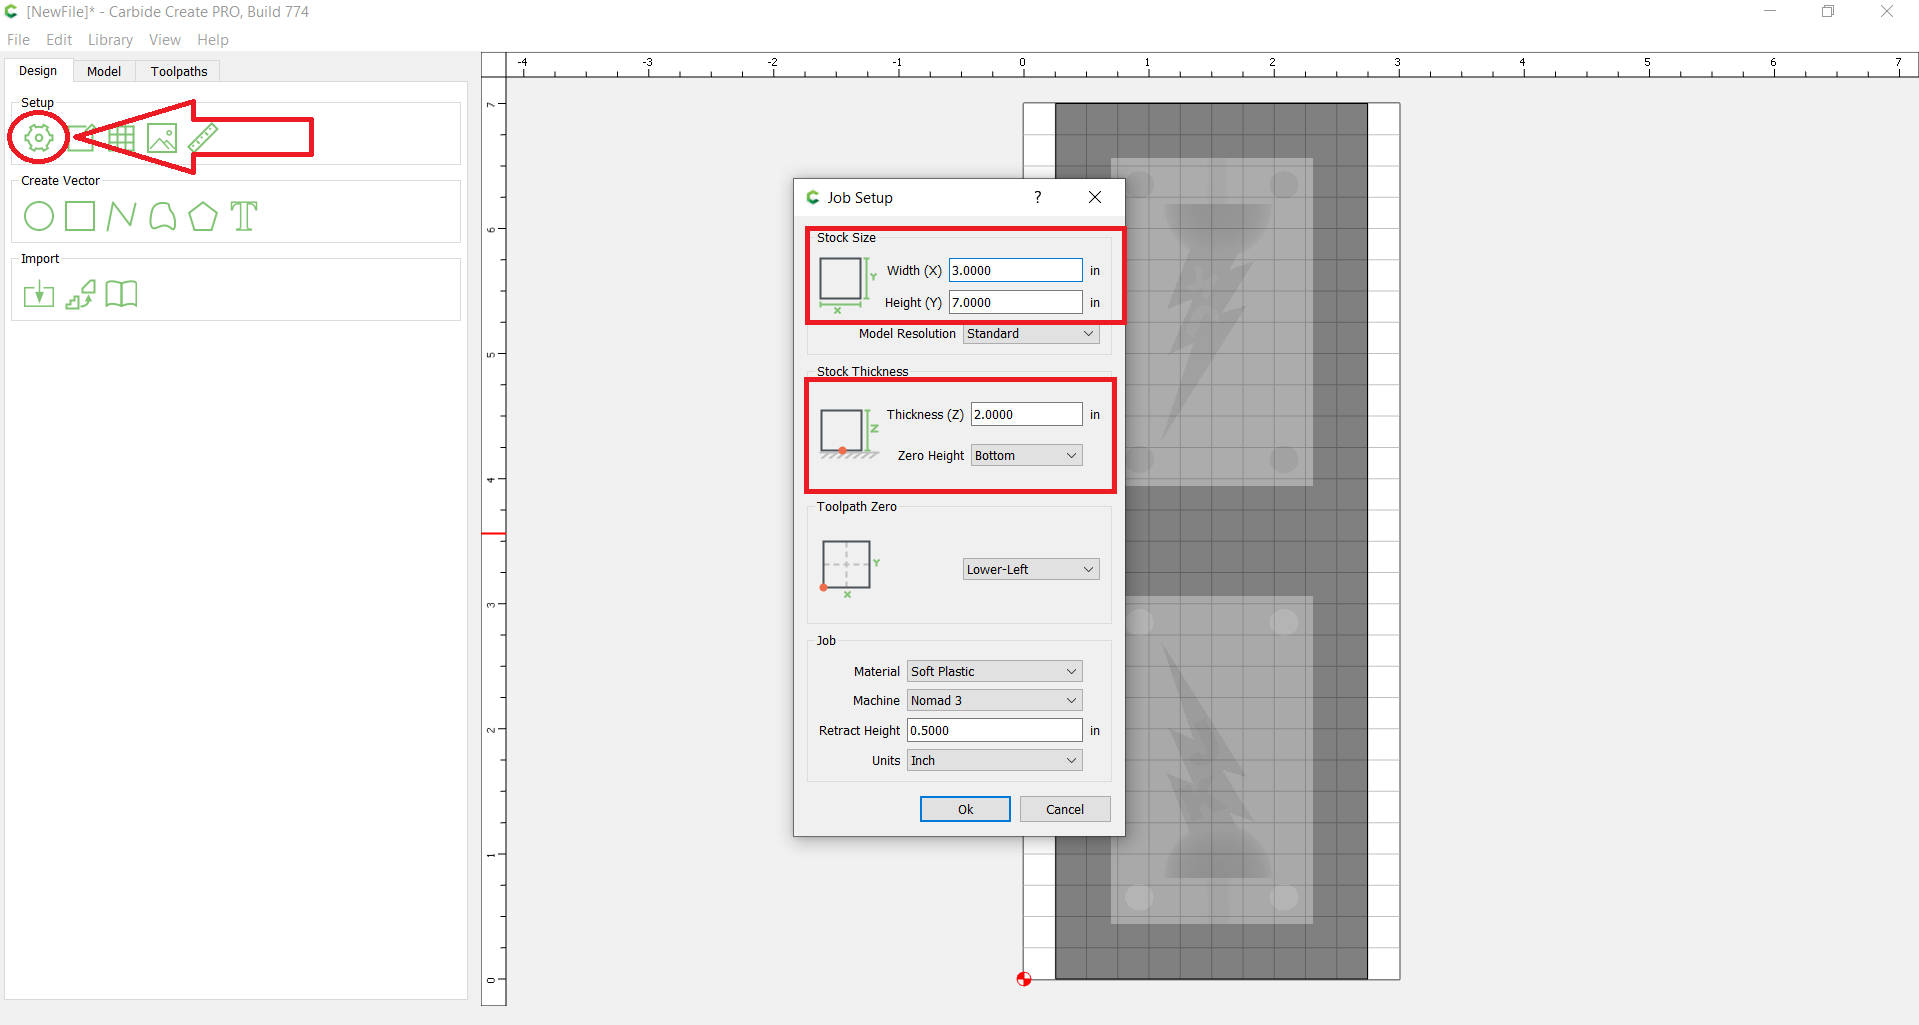
Next we need to set the size of the wax block. I selected the “Job Setup” icon and changed the stock size and thickness.
-
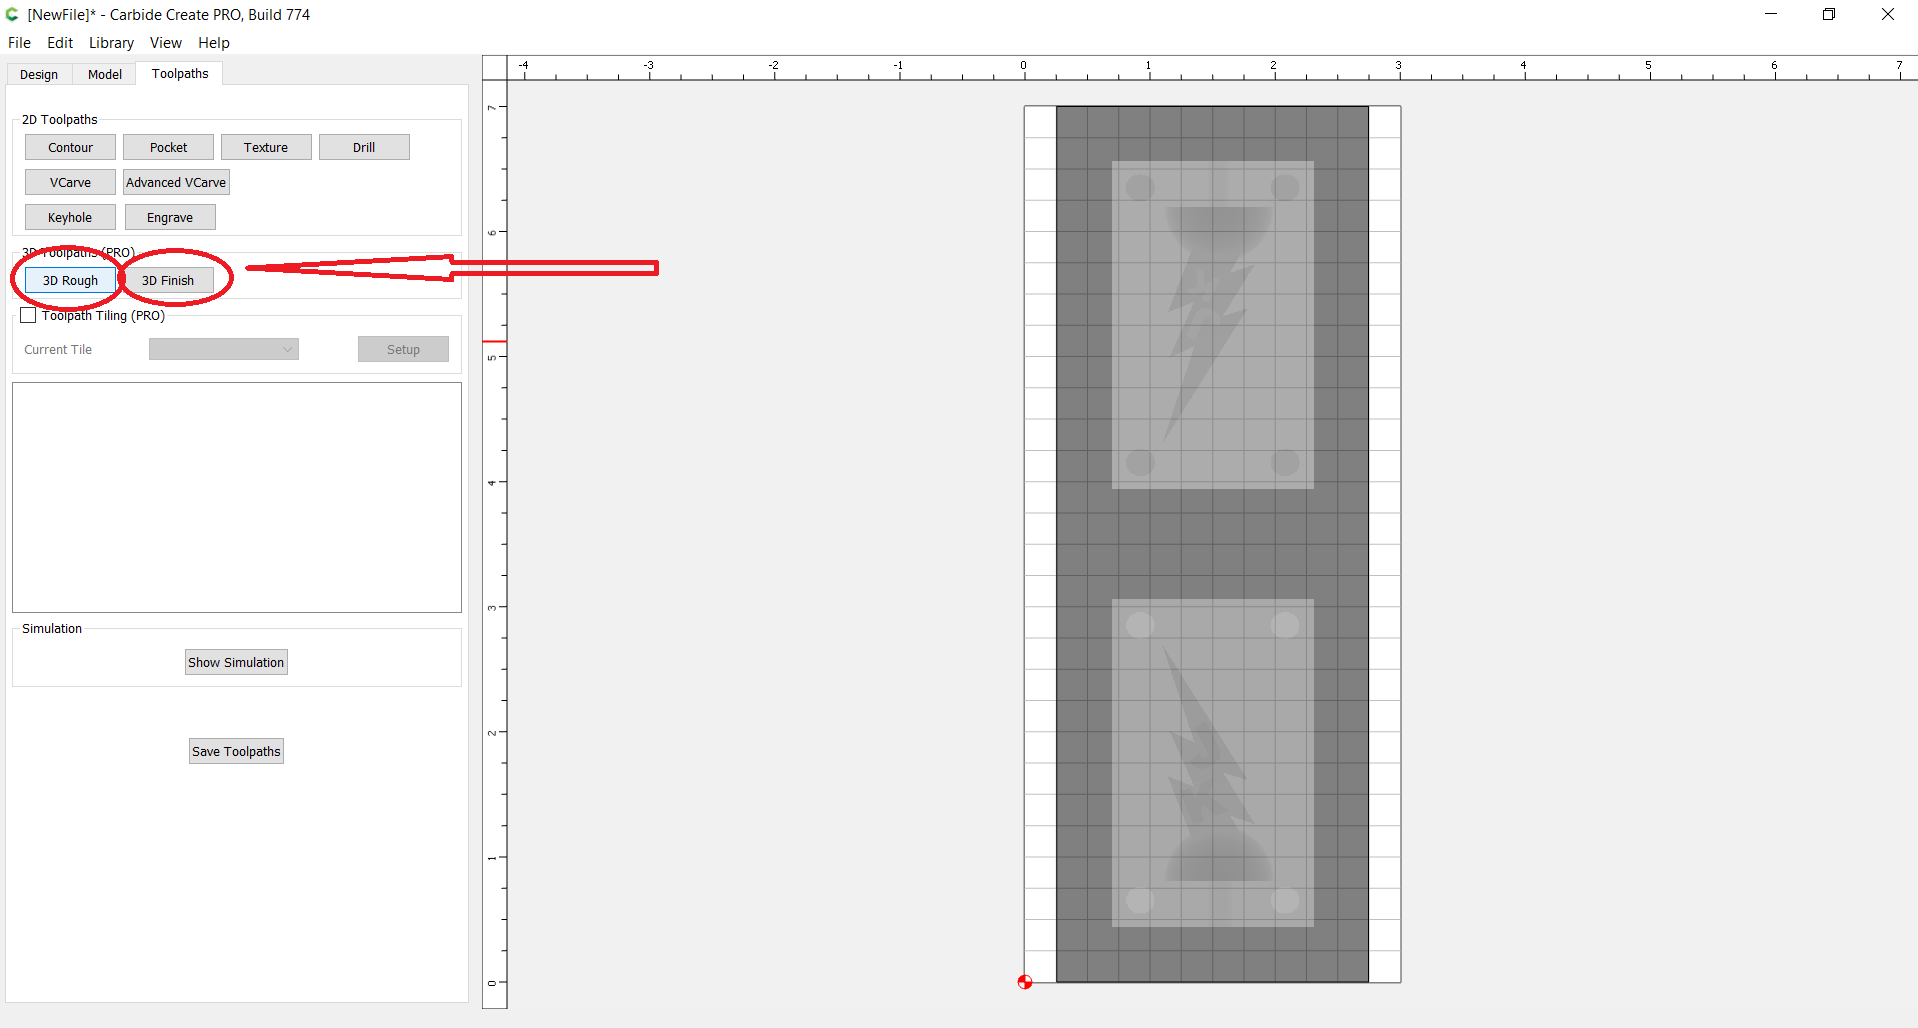
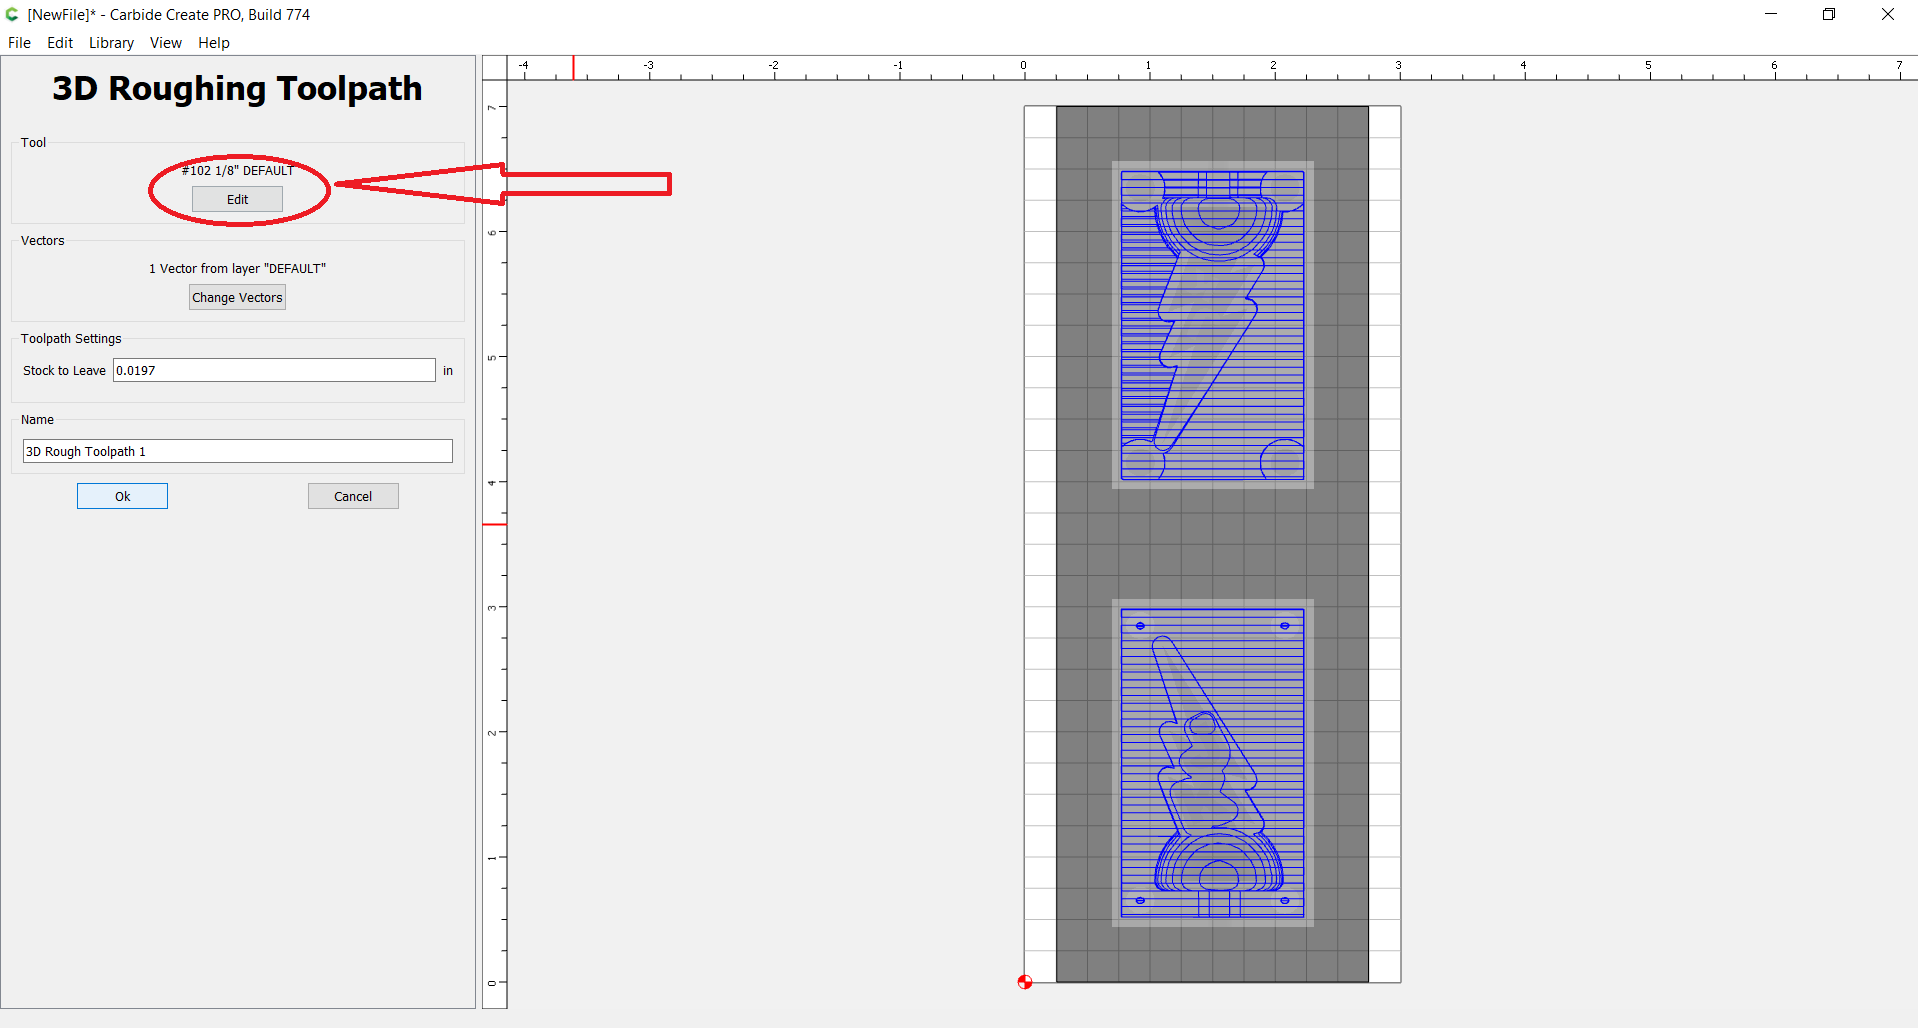
Then we have to select the options for our toolpath. I selected the buttons for setting up “3D Rough” and changed the options. We have allot of different Carbide 3D made bits to choose from in the software and we have most of them in the lab. Under “select tool” there isn’t a section for WAX, so I selected the section for “Carbide 3D- Nomad 3- Soft Plastic”. I selected the #102 flat 1/8” endmill as my roughing bit tool. I left all other options (stepover, Depth per pass, plunge rate, feed rate, RPM) as their defaults.
-
I then selected the “3D finish” button and selected the #111 ball mill 1/16” for the finishing tool. I chose a ball bit to get a smoother surface on my rounded base. I selected the 1/16” bit because my design has allot of tiny features and tight internal angles, and a smaller bit will get more of the detail. I decided against using an even smaller bit the #121 ball mill 1/32” because the cutting length of the bit seemed too short to get deep into the areas where it was needed without the wider 1/8” shaft getting in the way. Although the descriptions on the pages have the #111 and #121 having the same cutting length of 1/4”, you can see from the product pages that the #111 has a much longer cutting section on its shaft.
-
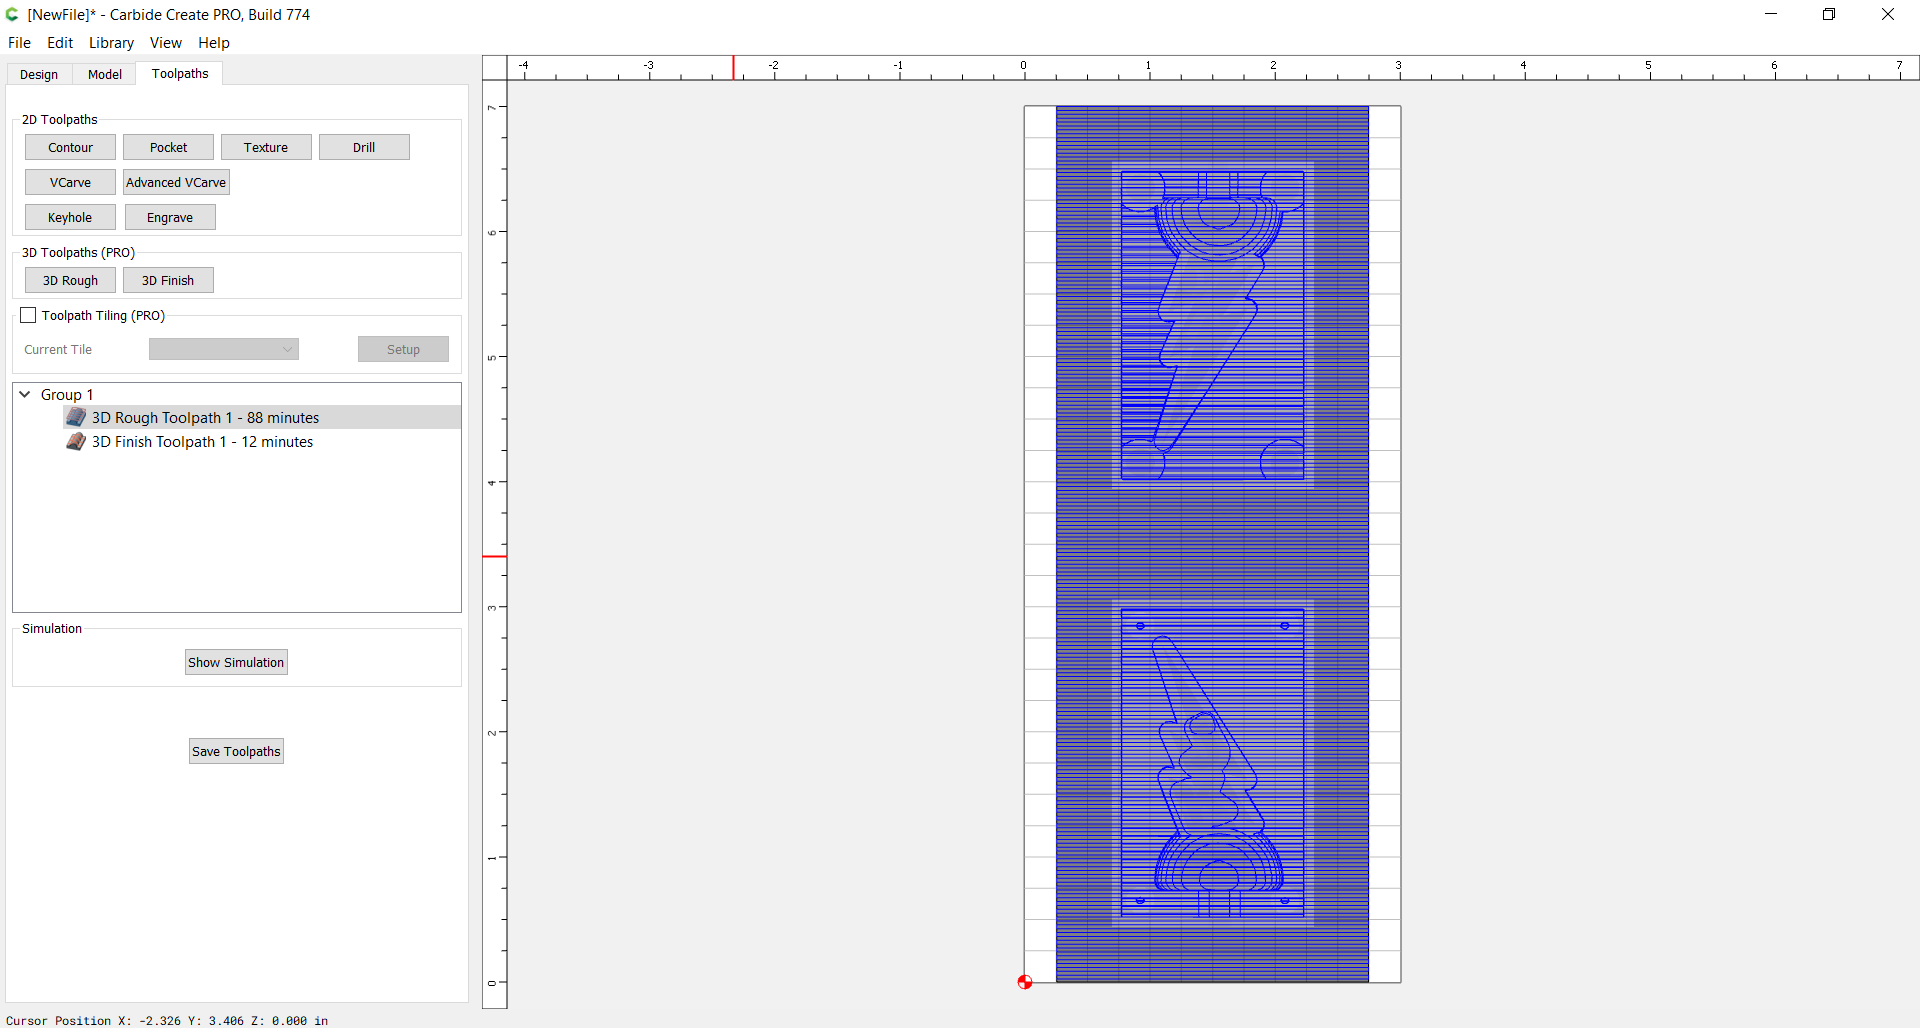
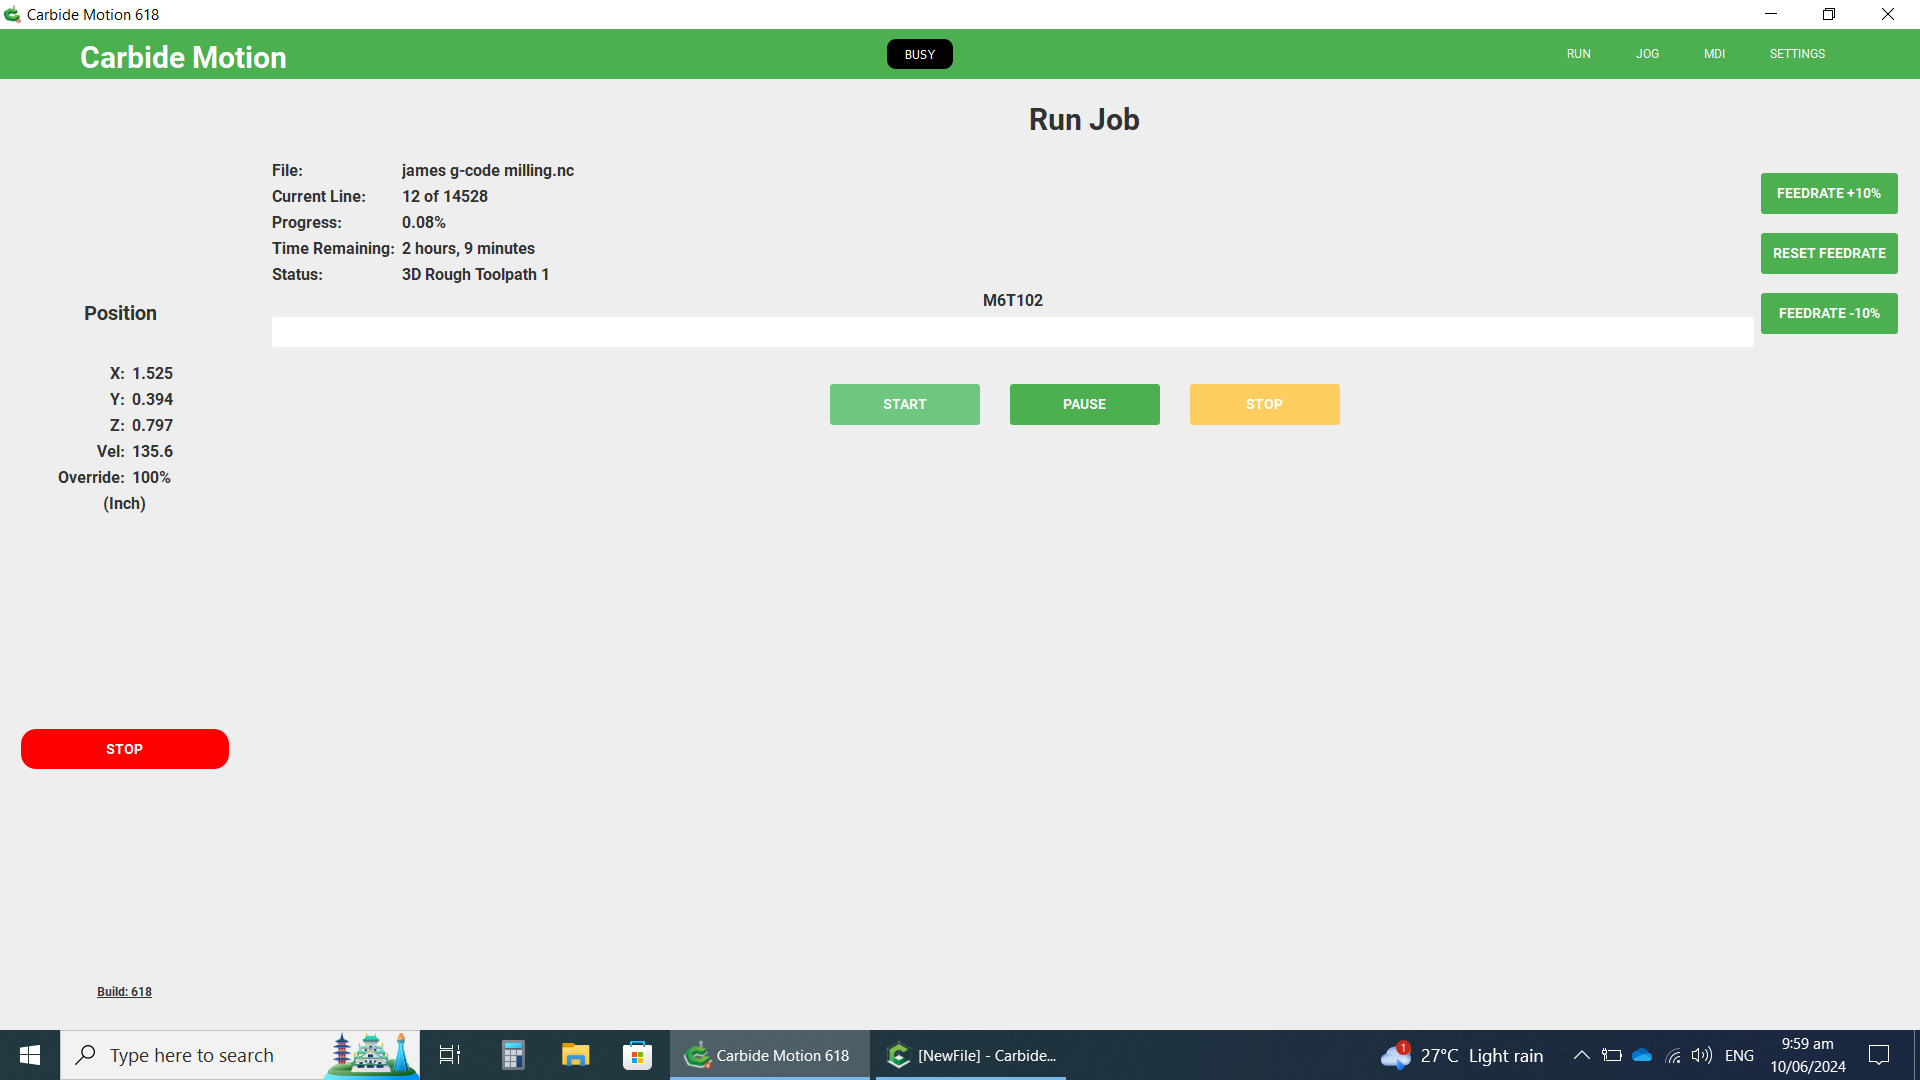
After setting up the tools for each pass, the times looked like this. With the rough path taking 88 minutes, and the finishing path taking 12 minutes.
-
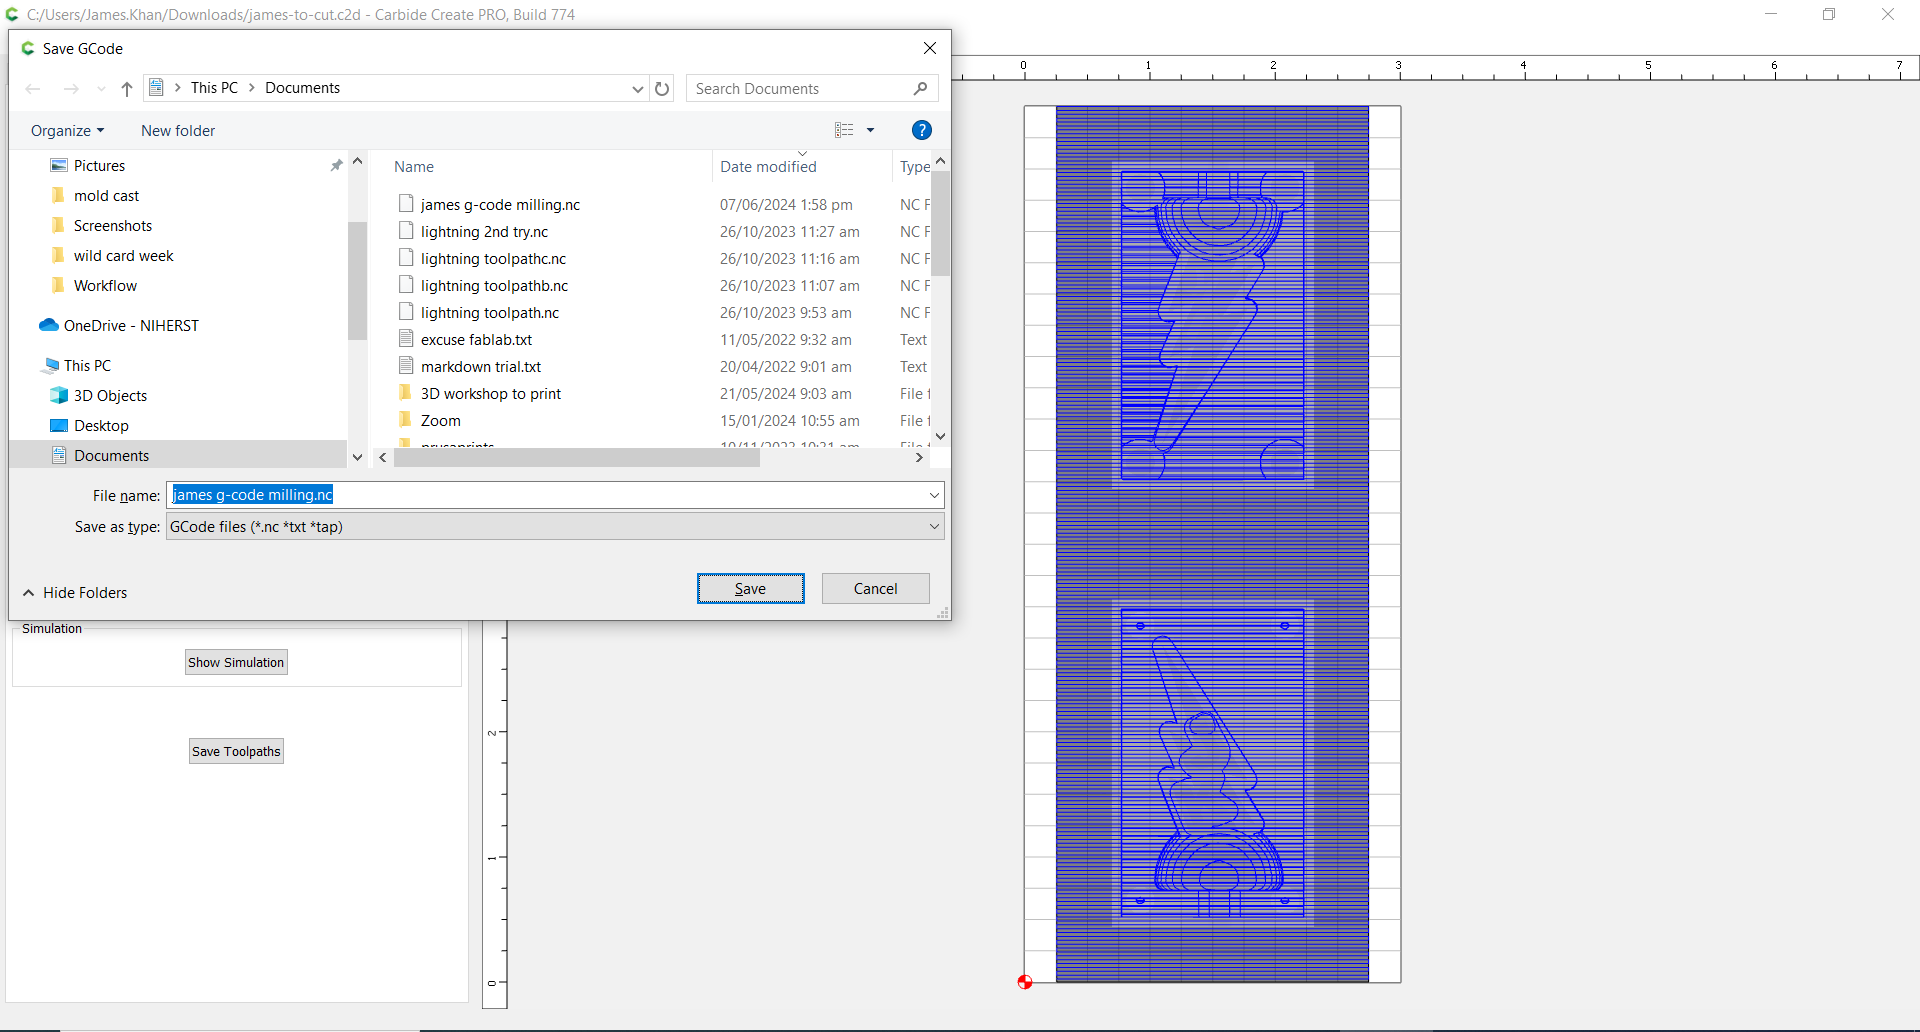
I then exported the toolpath G-Code by selecting “save toolpath” and “save G-Code”.
Setting up the Wax machining
-
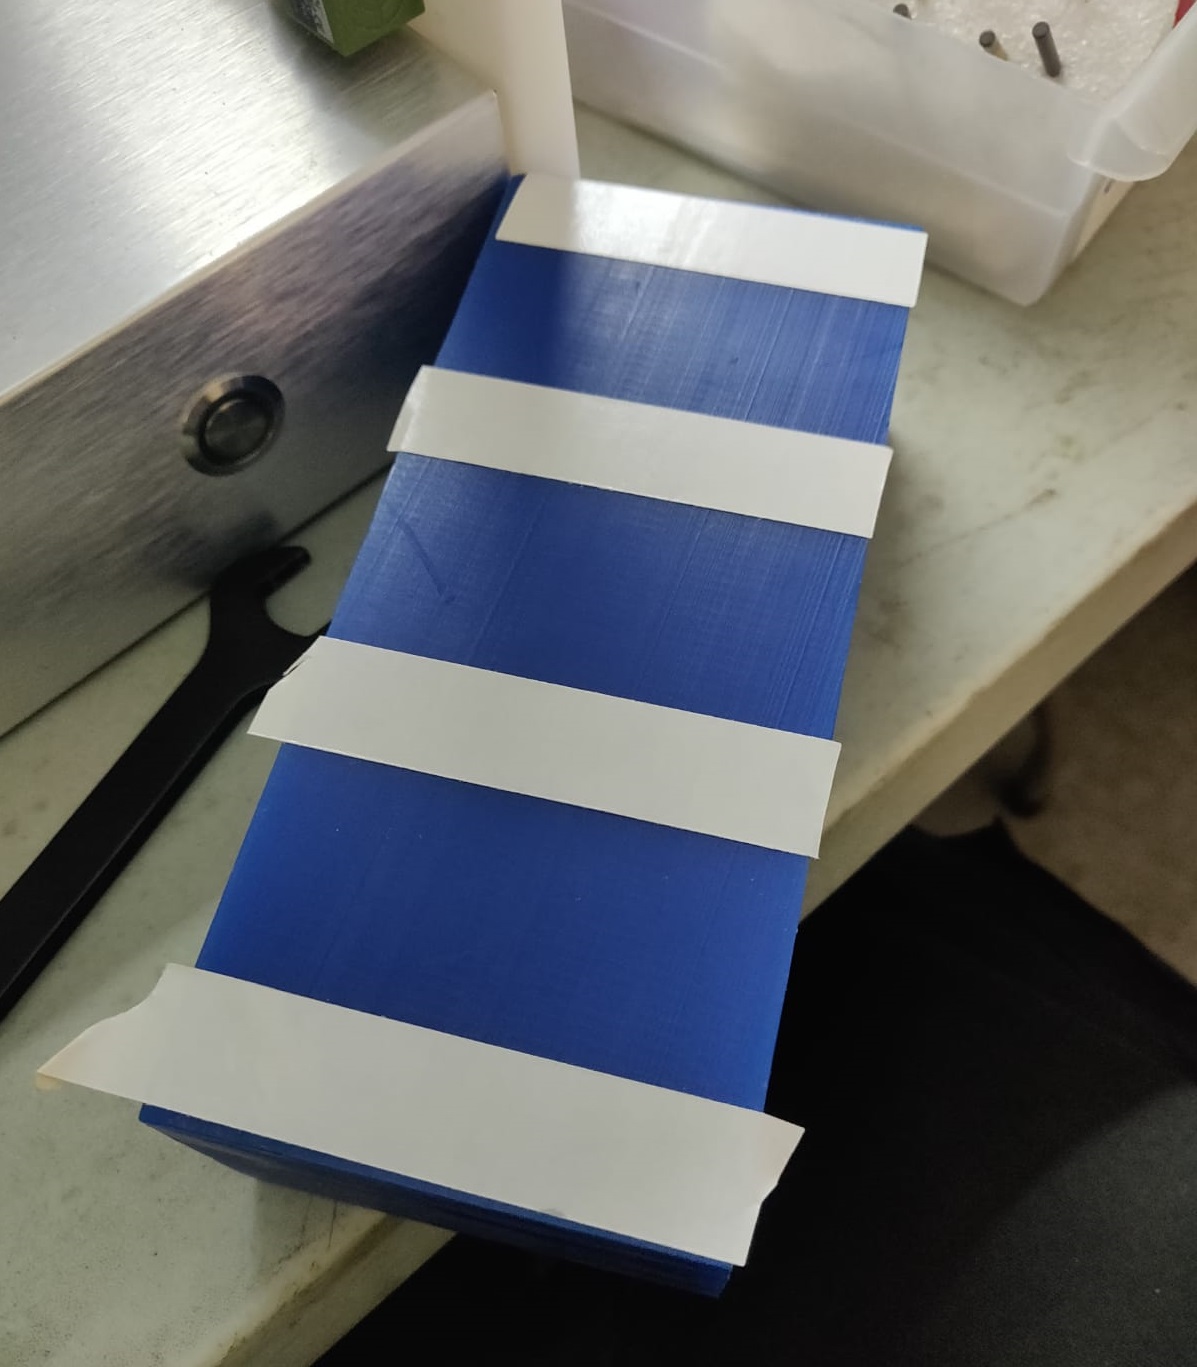
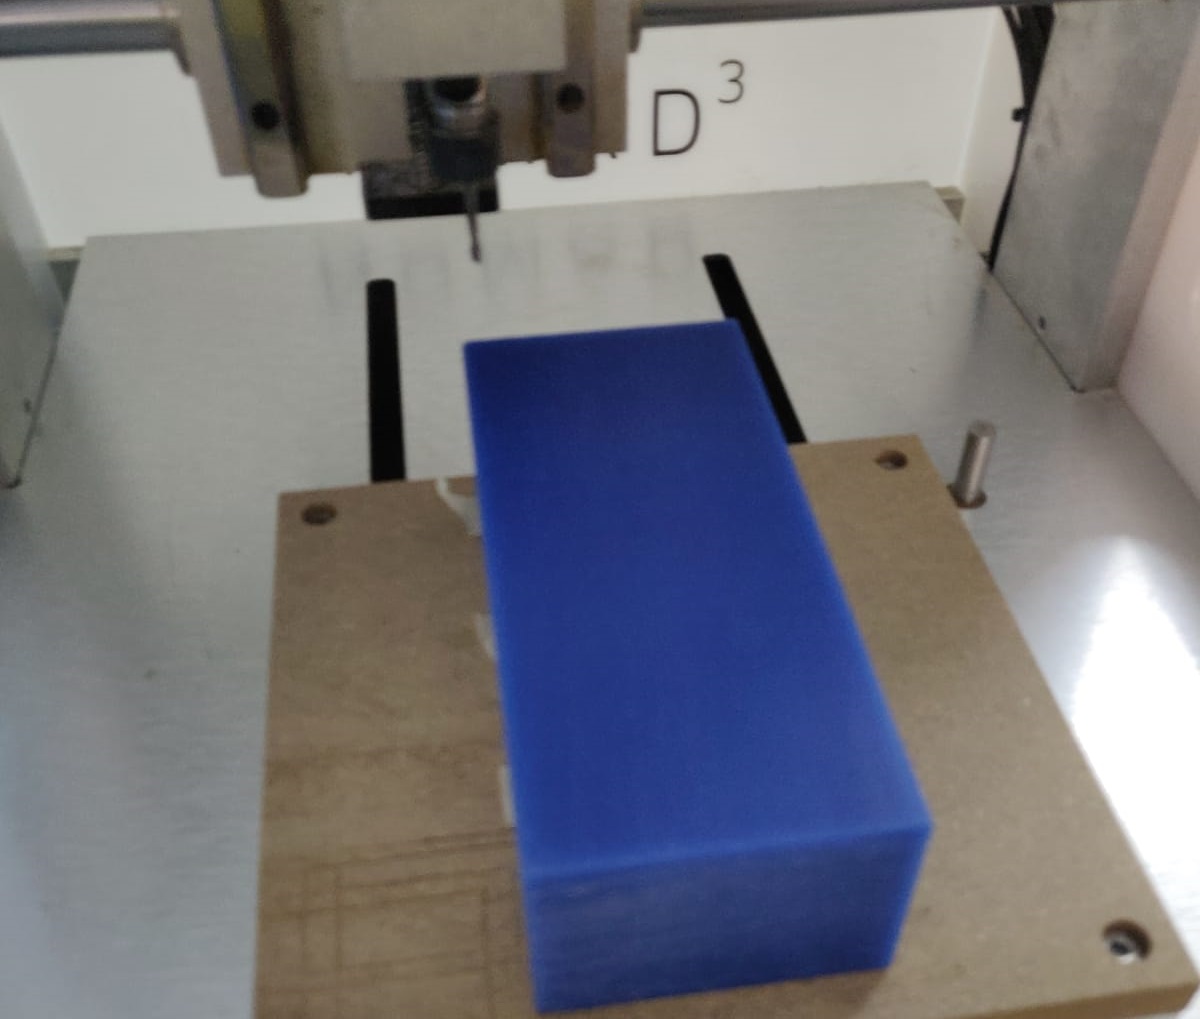
To use my wax block with my cutter, I had to apply some strips of double sided tape to it’s underneath and stick it to the bottom waste-board of the machine.
-
The actual cutting on the Nomad 3 is done by a separate program Carbide Motion. I connected my laptop to the Nomad 3 and turned it on. I opened the carbide motion and selected “connect to cutter”. I attached the #102 endmill. I used the Jog setting and the zero probe with the machine to set the zero point. In the program I loaded the G-Code file created for the toolpaths in Carbide Create. Everything seemed to load correctly
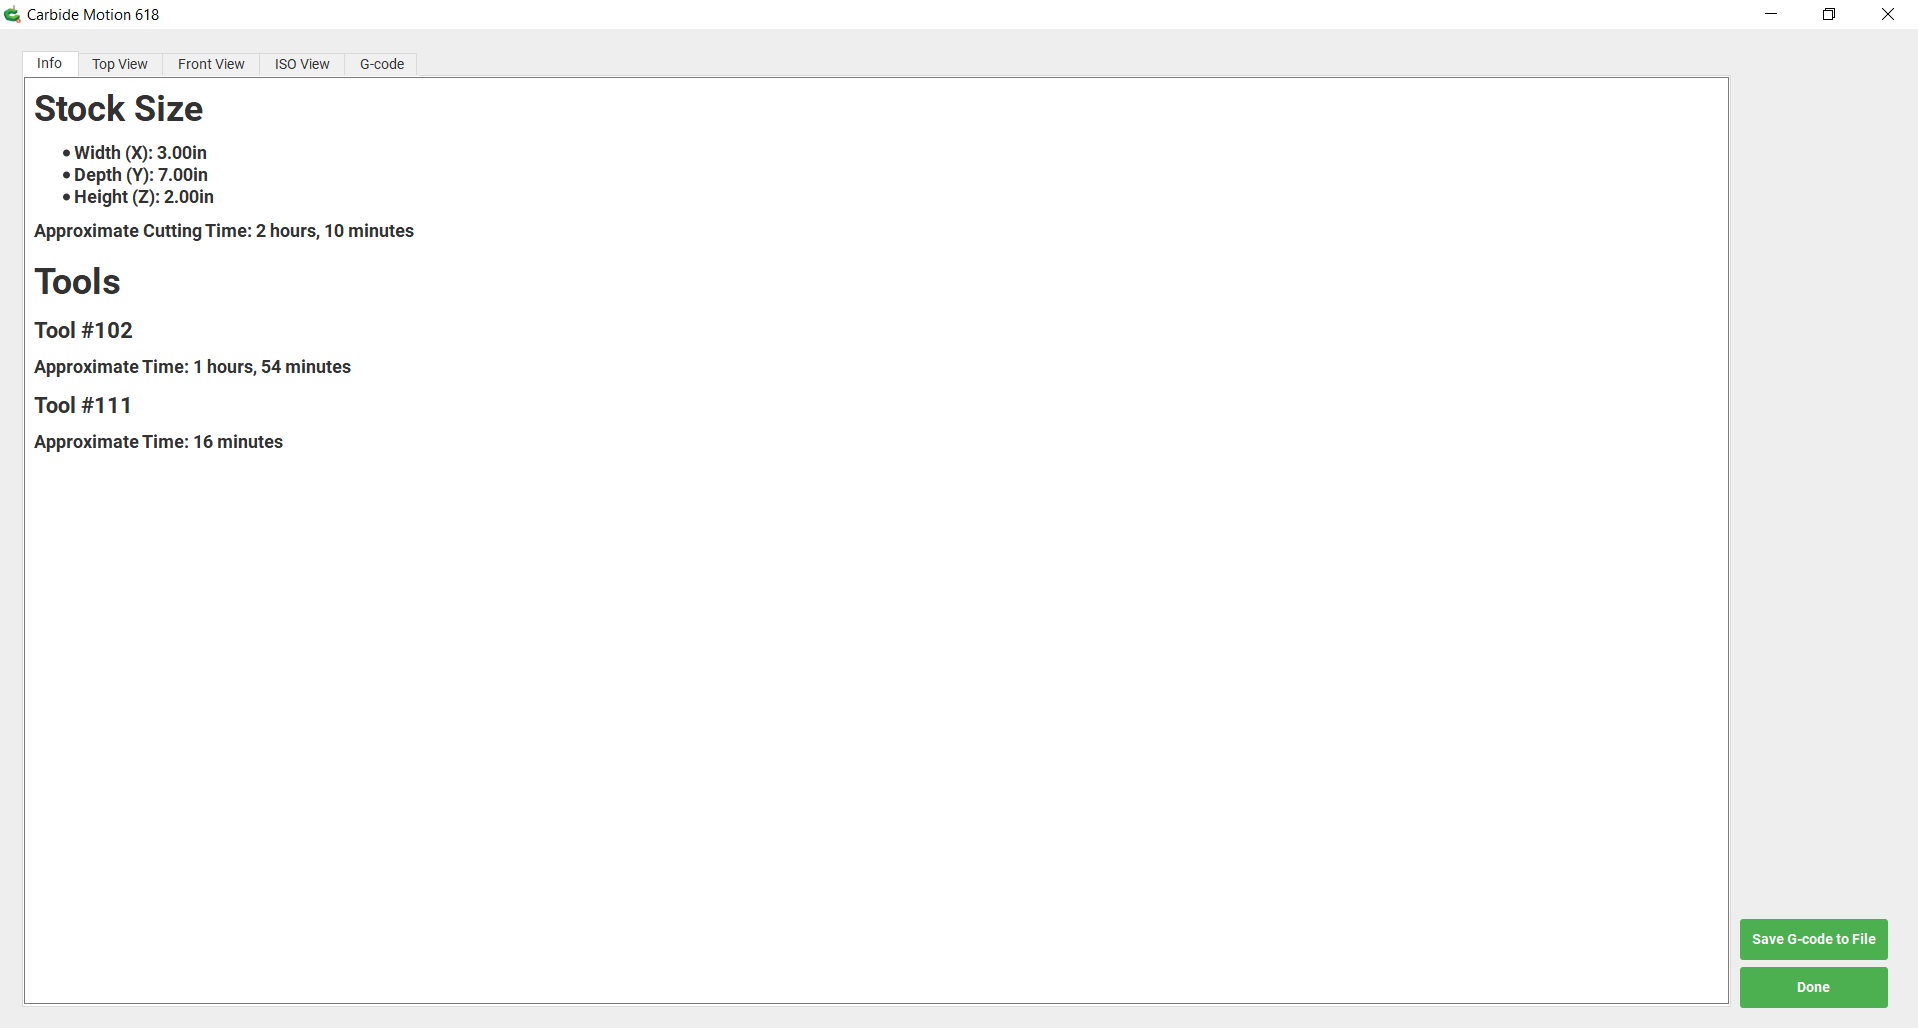
- Then I selected “Run” and “start job” and “start”. The spindle started to spin and the milling began.
- I disabled the door open safety magnet on the NOMAD so that I could open the door to vacuum up the loose wax shavings as they were cut. I only did this to ensure that everything was working correctly and to get pictures.
Start of roughing path (video https://youtu.be/z0hguX0hI_c )
Halfway through roughing pass (image)
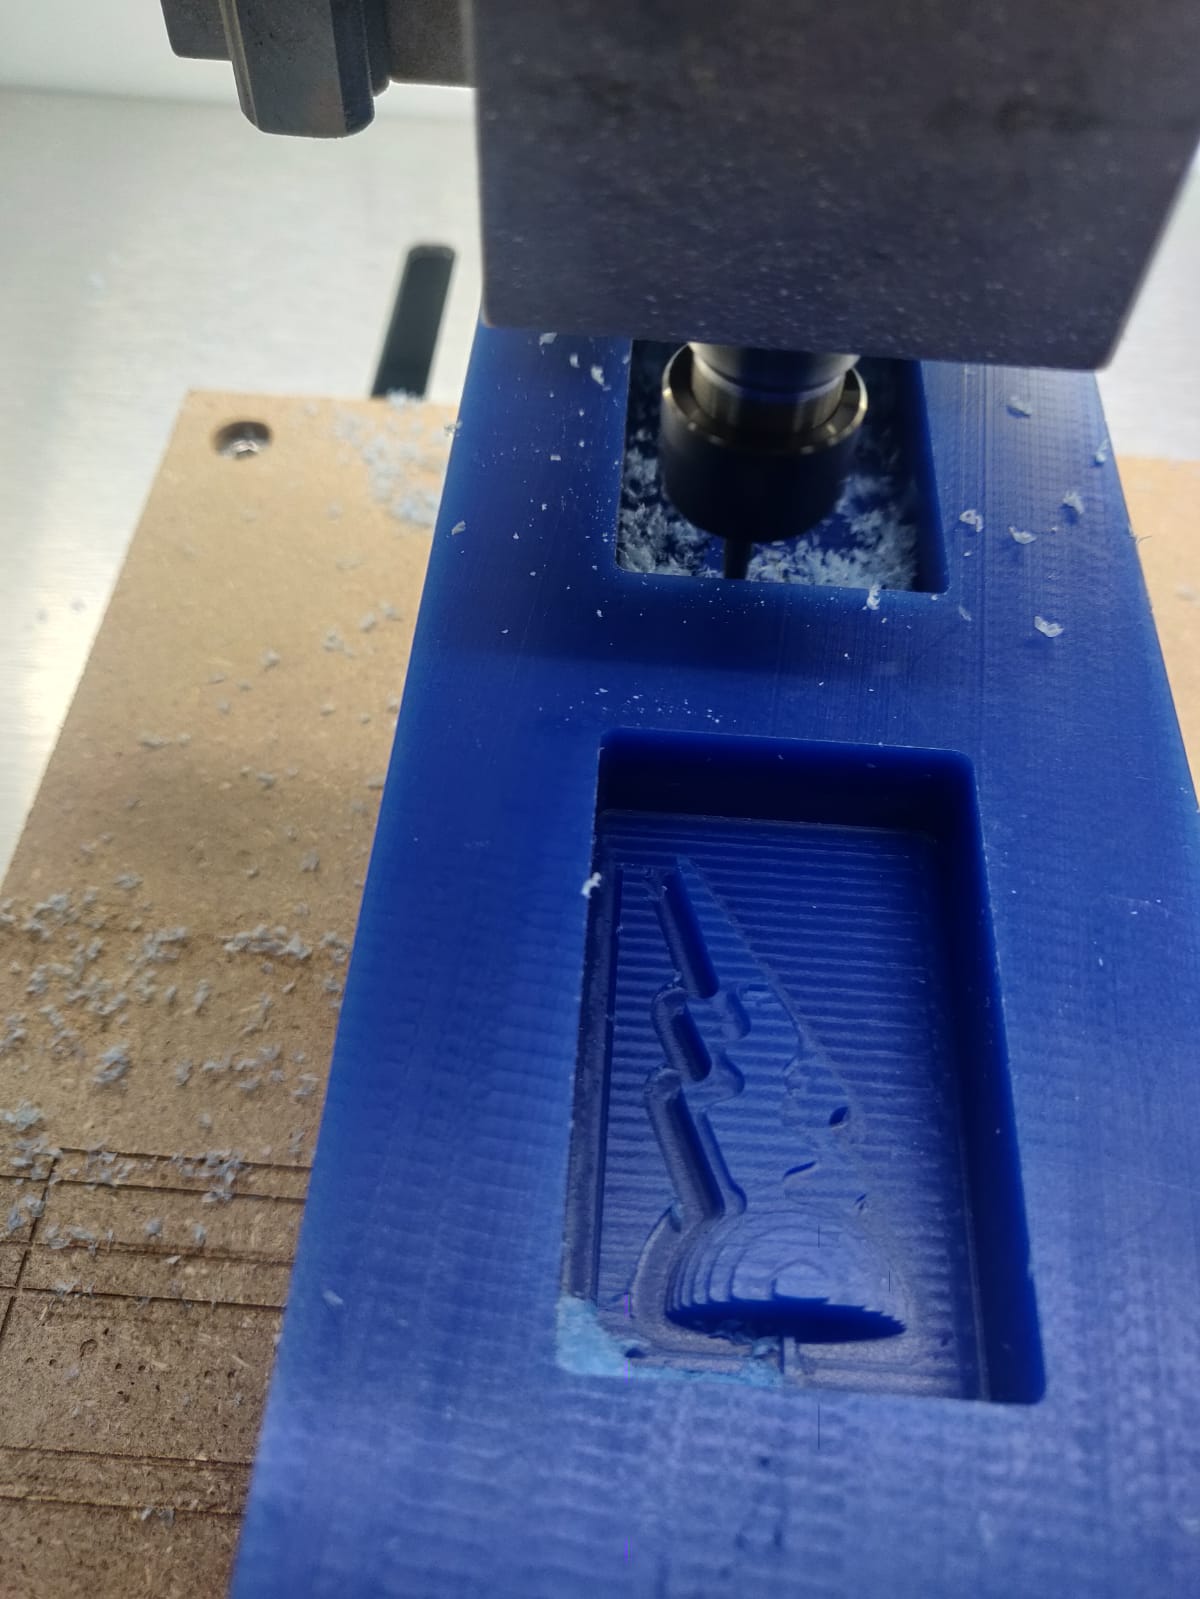
End of roughing pass (image)
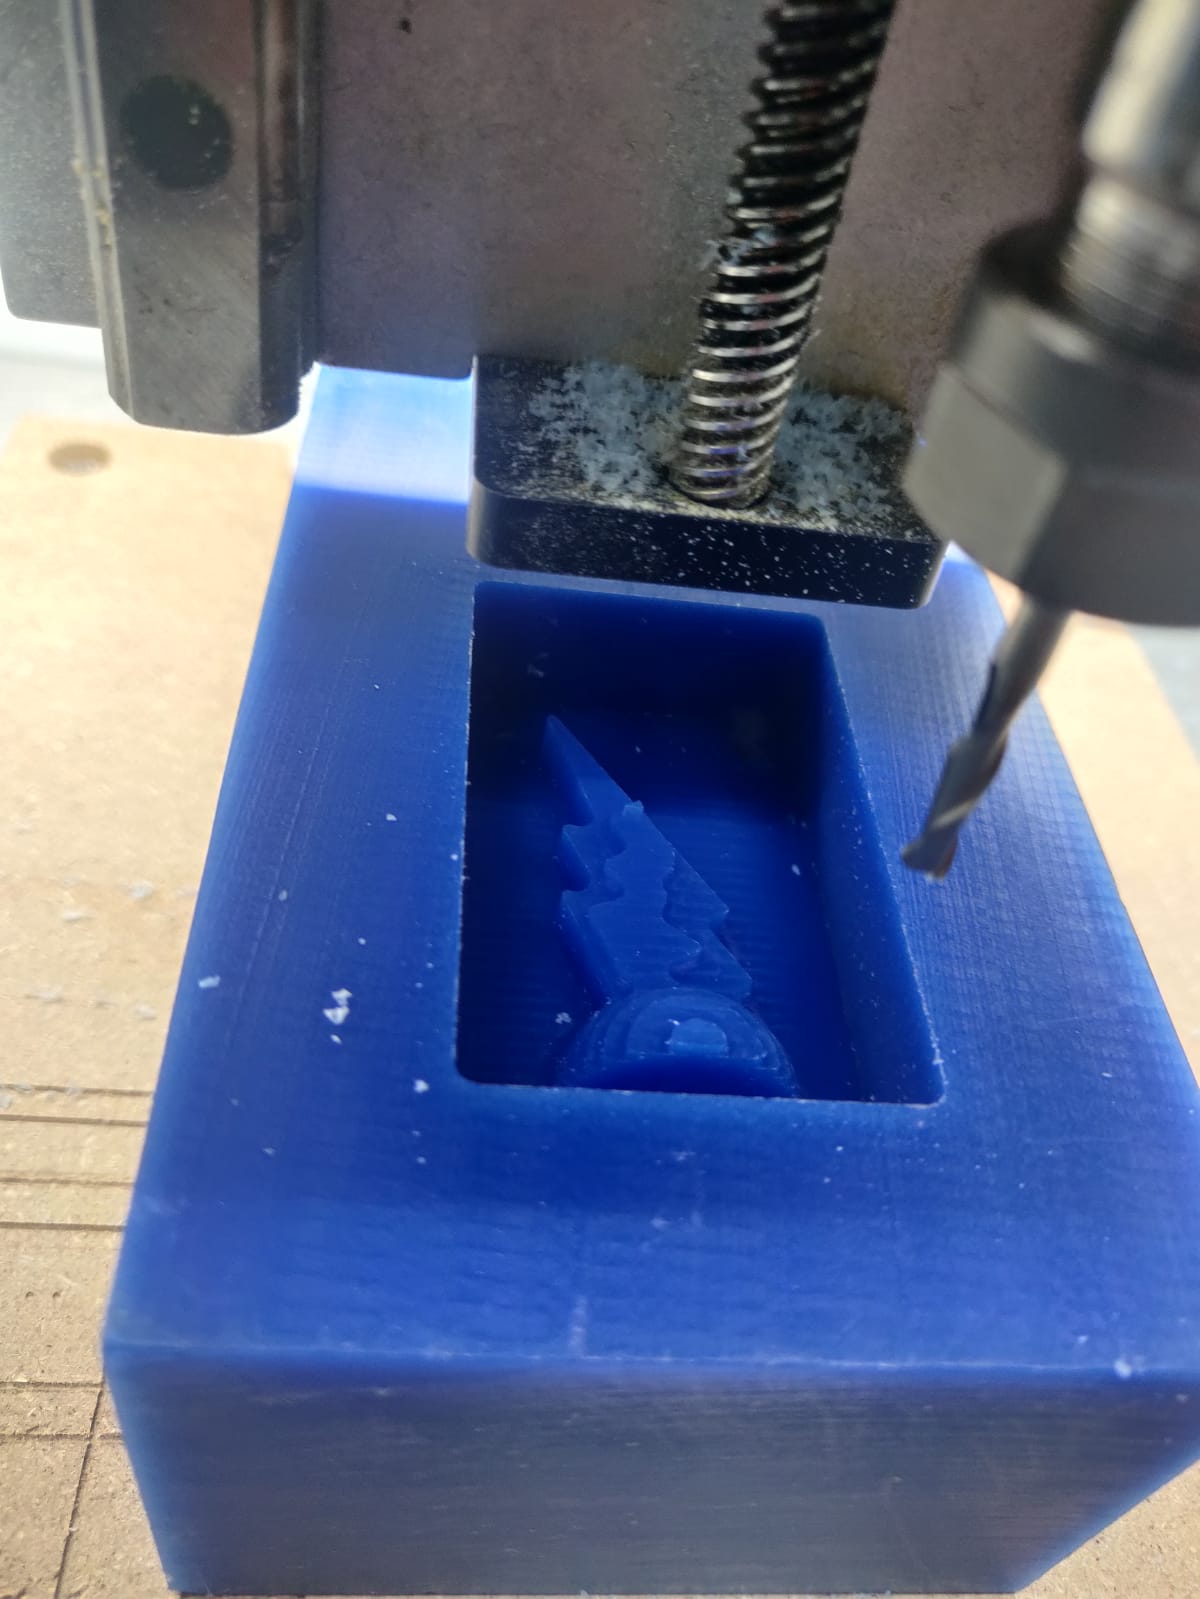
- After the roughing pass was done, the software indicated that it was time for the tool change. I re-enabled the door lid open detector so that the lid would register as open while I changed the endmill bit and wouldn’t restart spinning till I was done. I made the tool change to the #111 bit and continued the milling job. After the job was done I unstuck the wax block and cleaned out the shavings.
Finishing pass small snippet (video: https://www.youtube.com/watch?v=L71NHd9BCPI )
End of finishing pass (image)
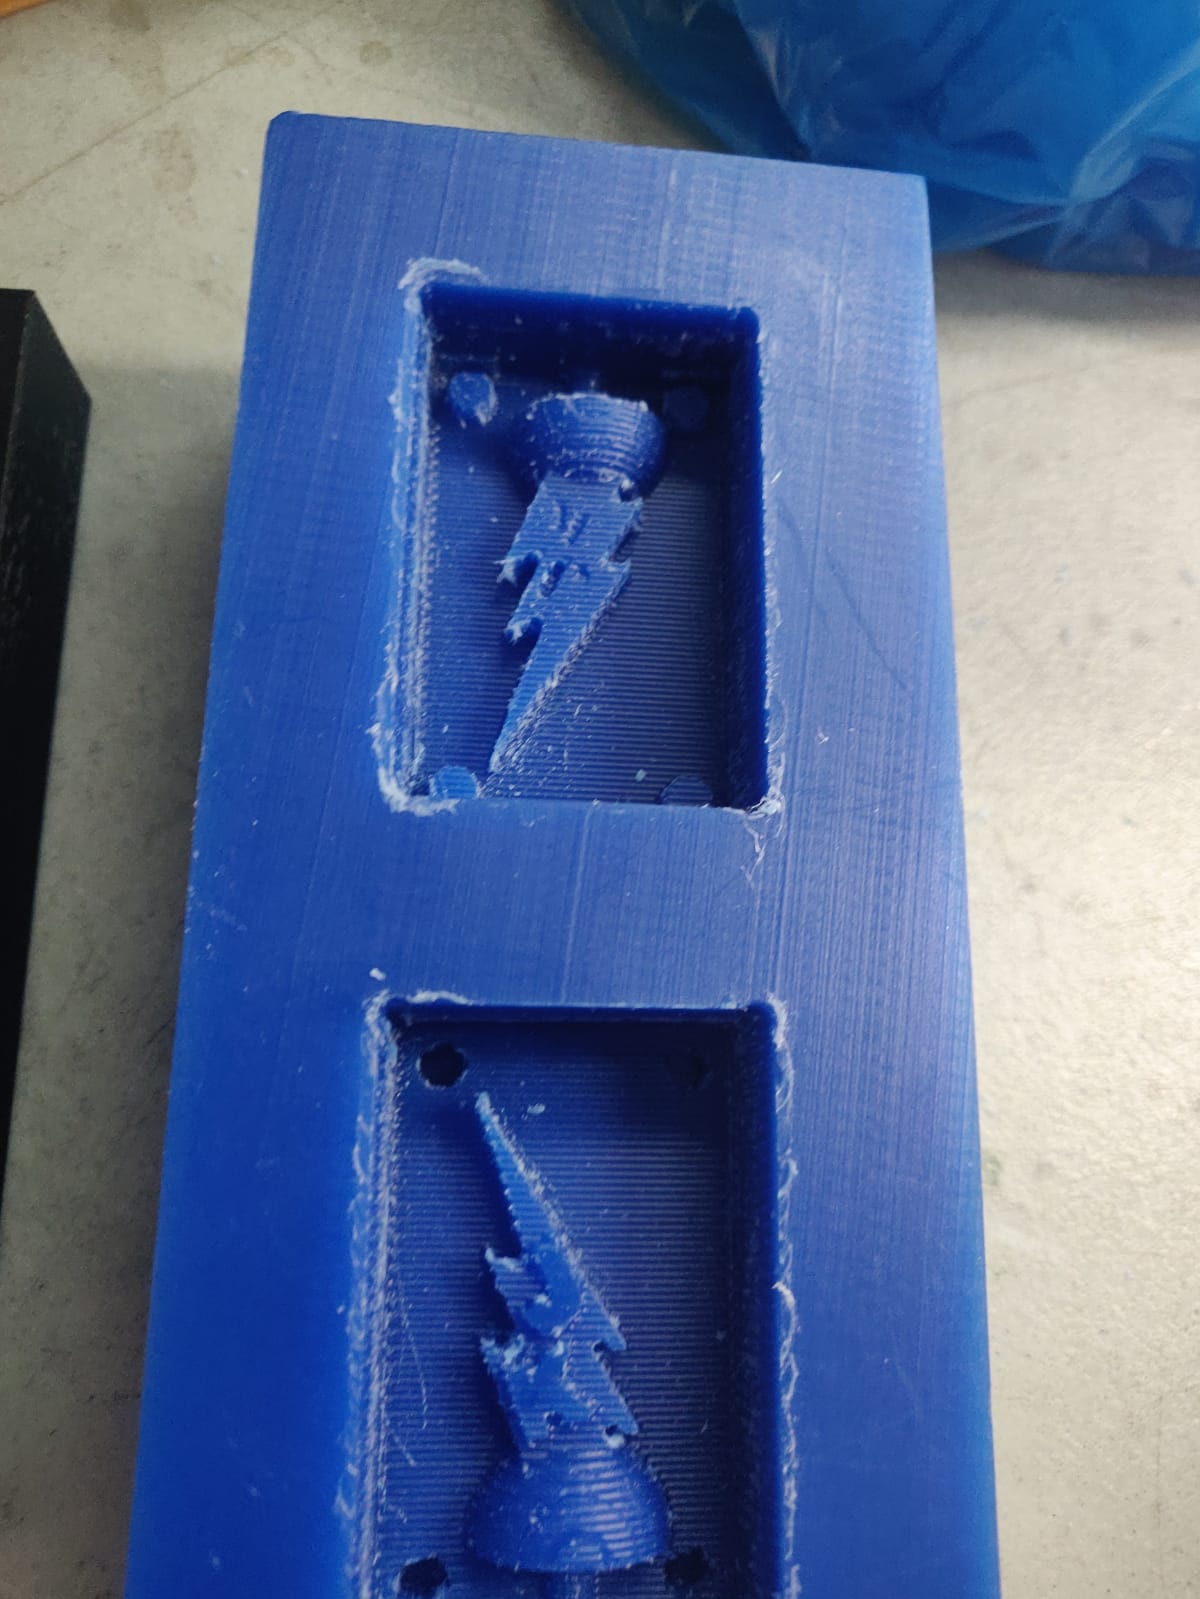
- Wax milling, what went wrong? The finished wax block isn’t as clean in details as I would have expected. From the video we can see that the upper shaft of the finishing bit was making contact with the inner walls of the mold cutout. This shouldn’t be happening, it’s as though the pathing software is treating the 1/16” bit as though the entire bit (shaft and head) is 1/16” wide, rather than most of the shaft being 1/8” and only the cutting edge 1/16”. Perhaps this can be solved by digging deep into the toolpath settings. Or we may have to resort to using other software. Or still just sacrifice some detail and use a 1/8” ball bit for finishing instead of the 1/16”. I will look into this for future milling tasks.
Choice of Silicon mold mix
Before we get into the steps for making my silicon molds, I wanted to mention why I ended up using the silicon that I did.
-
I used Smooth-On SmoothSil 940 to make my silicone molds.
-
Why SmoothSil 940? Smooth-On has a great reputation for silicon mold mixes. Our lab purchased SmoothSil 940 , Oomoo 25 , Oomoo 30, and brush on 40 in fairly large quantities.
-
These products are all very sensitive to temperatures for shelf life. For Oomoo the manufacturer states a shelf life of 9 months (from date of manufacture) at 23°C; 6 months at 27°C; and 2 months at 38°C. We live in a hot Caribbean country Trinidad and Tobago. Even though our lab is air conditioned during the week, the heat during the weekend as well as whatever it was exposed to during shipping, took a toll on the liquids.
-
By the time we were ready to use them, all the Oomoo was completely solid and unusable, as was the Brush-On. The only surviving mix was the SmoothSil 40. Even though it seemed to have thickened up a bit, it was still usable.
-
The SmoothSil was purchased for making food-safe molds, since it was designed for that. But since it was the only surviving silicon mix, we used it for non-food molds as well.
-
2 solid blocks of 1 gallon wasted OOMOO 30 and 40 (2 of 6).
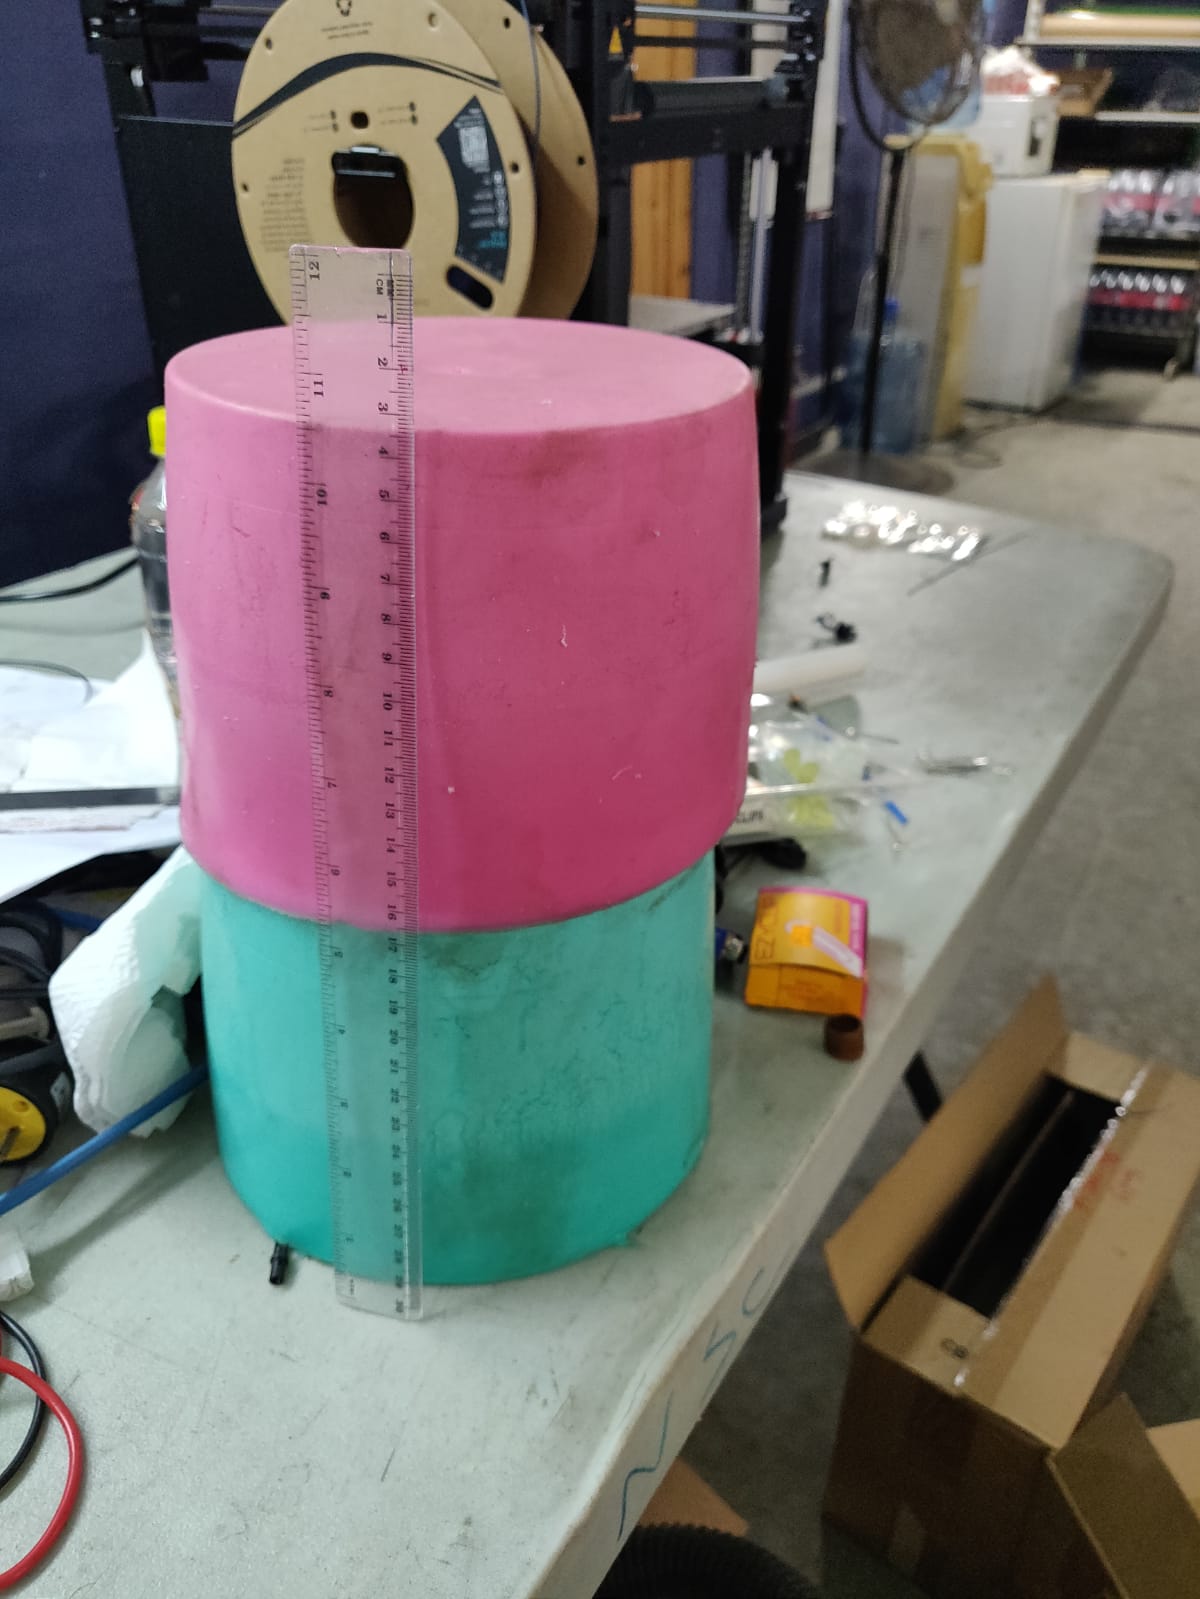
-
The moral of this note is “Don’t disregard the shelf life for Silicon mixes” and keep them as cool as you can. Most of us normally treat shelf life information as significantly over cautious (especially for non-food items), but they are very real for silicon mixes. If possible try to buy your mixes very close to the time you are going to use it.
Safety
The great thing about the Smooth-On product line is that they are very much aimed at regular consumers/hobbyists. Becasue of this they are very safe when compared to products designed for large scale or industrial applications. As a group, we looked through the Safety Data Sheets for the products we were using so we knew what precautions to take, these are all linked on our NIHERST molding and casting group page.
-
When using the Smooth-On Ease Release 200 I did so outdoors. The ease release is an aerosol spray so it’s easy for a few errant particles to stay airborn and start circulating.because our lab is an air conditioned enclosed space, I used this product outside. I also kept the bottle at arms length when spraying, just to make sure no errant particles rebounded. I also wore a long sleeve coverall, safety googles and rubber gloves to avoid just to avoid contamination. But according to the SDS, skin contact would normally only result in skin dryness.
-
I took the same precausions when using the Smooth-On SmoothSil 940 and Smooth-On EpoxAcast 650 + 102 (Medium) Hardener. We used disposable VINYL GLOVES throughout, and long sleeves and safety glasses while mixing. ALthough we probably could have worked problem free with our normal nitril gloves, according to an this Smooth On FAQ latex (and some nitrile) gloves can cause issues with the curing of silicon, so we sourced and used vinyl gloves for working with our molding materials.
Casting Silicon Molds (Negative)
- Now that we have our two Primary positive molds, it’s time to make the negative Secondary silicon molds.
-
First I sprayed both of my original Positive molds with Smooth-On Ease Release 200 according to the instructions (Spray light mist, brush into crevices, light spray again, let sit for at least 5 minutes). This was to reduce the chances and severity of the silicon sticking to the mold and being hard to remove.
-
I used Smooth-On SmoothSil 940 for my molds for reasons stated above.
- I measured out a little base 940 (235 g) than I needed by weight,
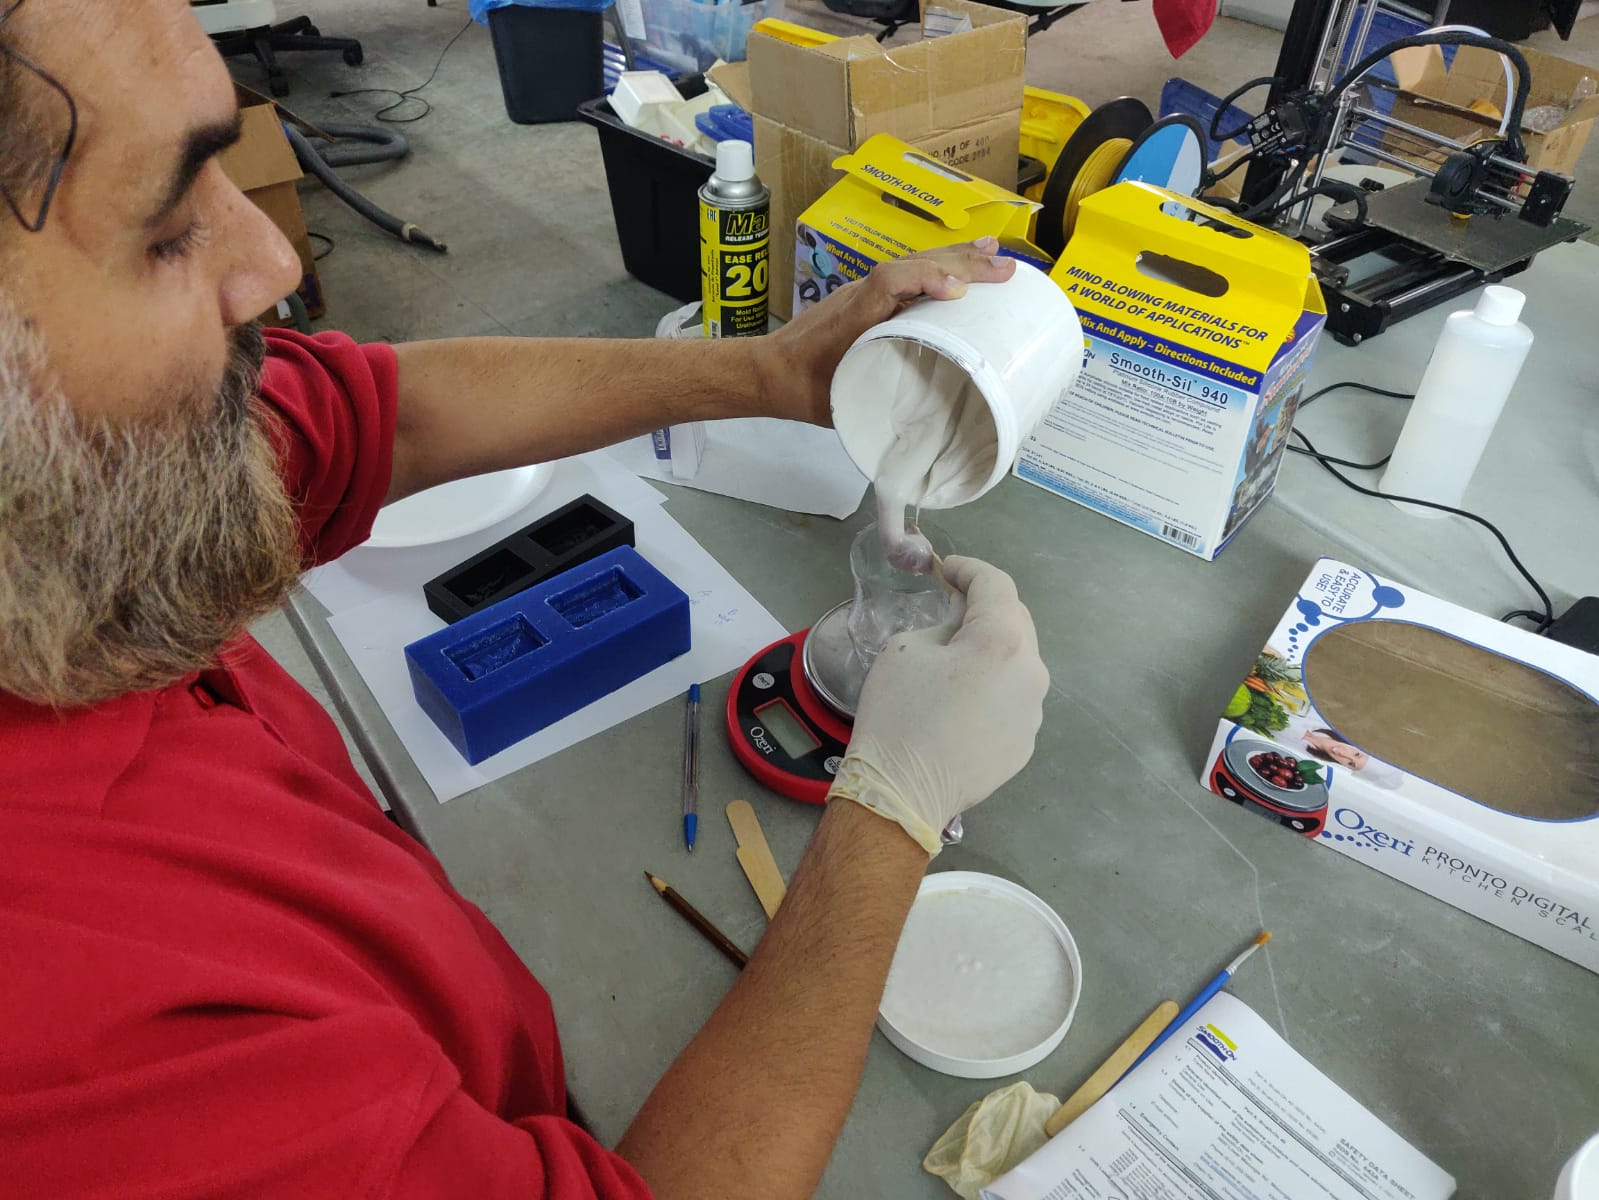
- and mixed in some of the hardener (26 g) That got me pretty close to the 100A:10B ratio recommended.
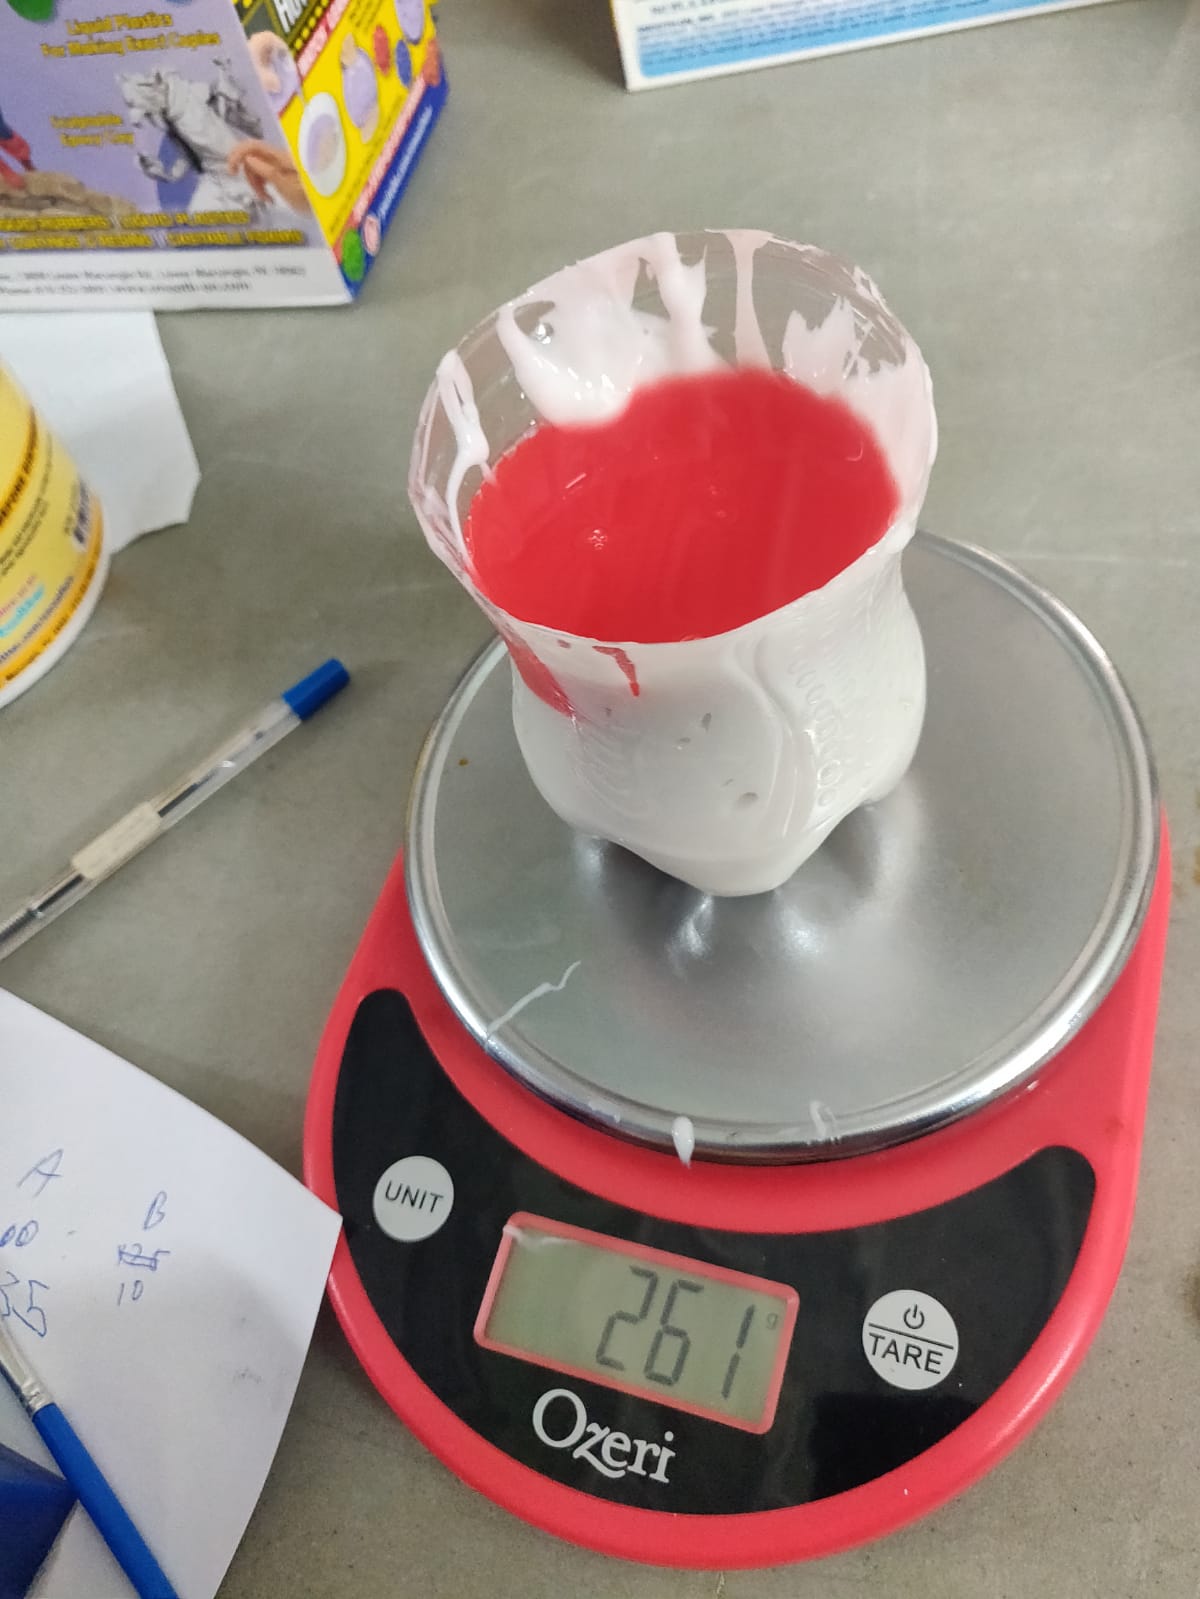
- And then mixed thoroughly for 3 minutes.
- I then scooped the silicon liquid into the molds.
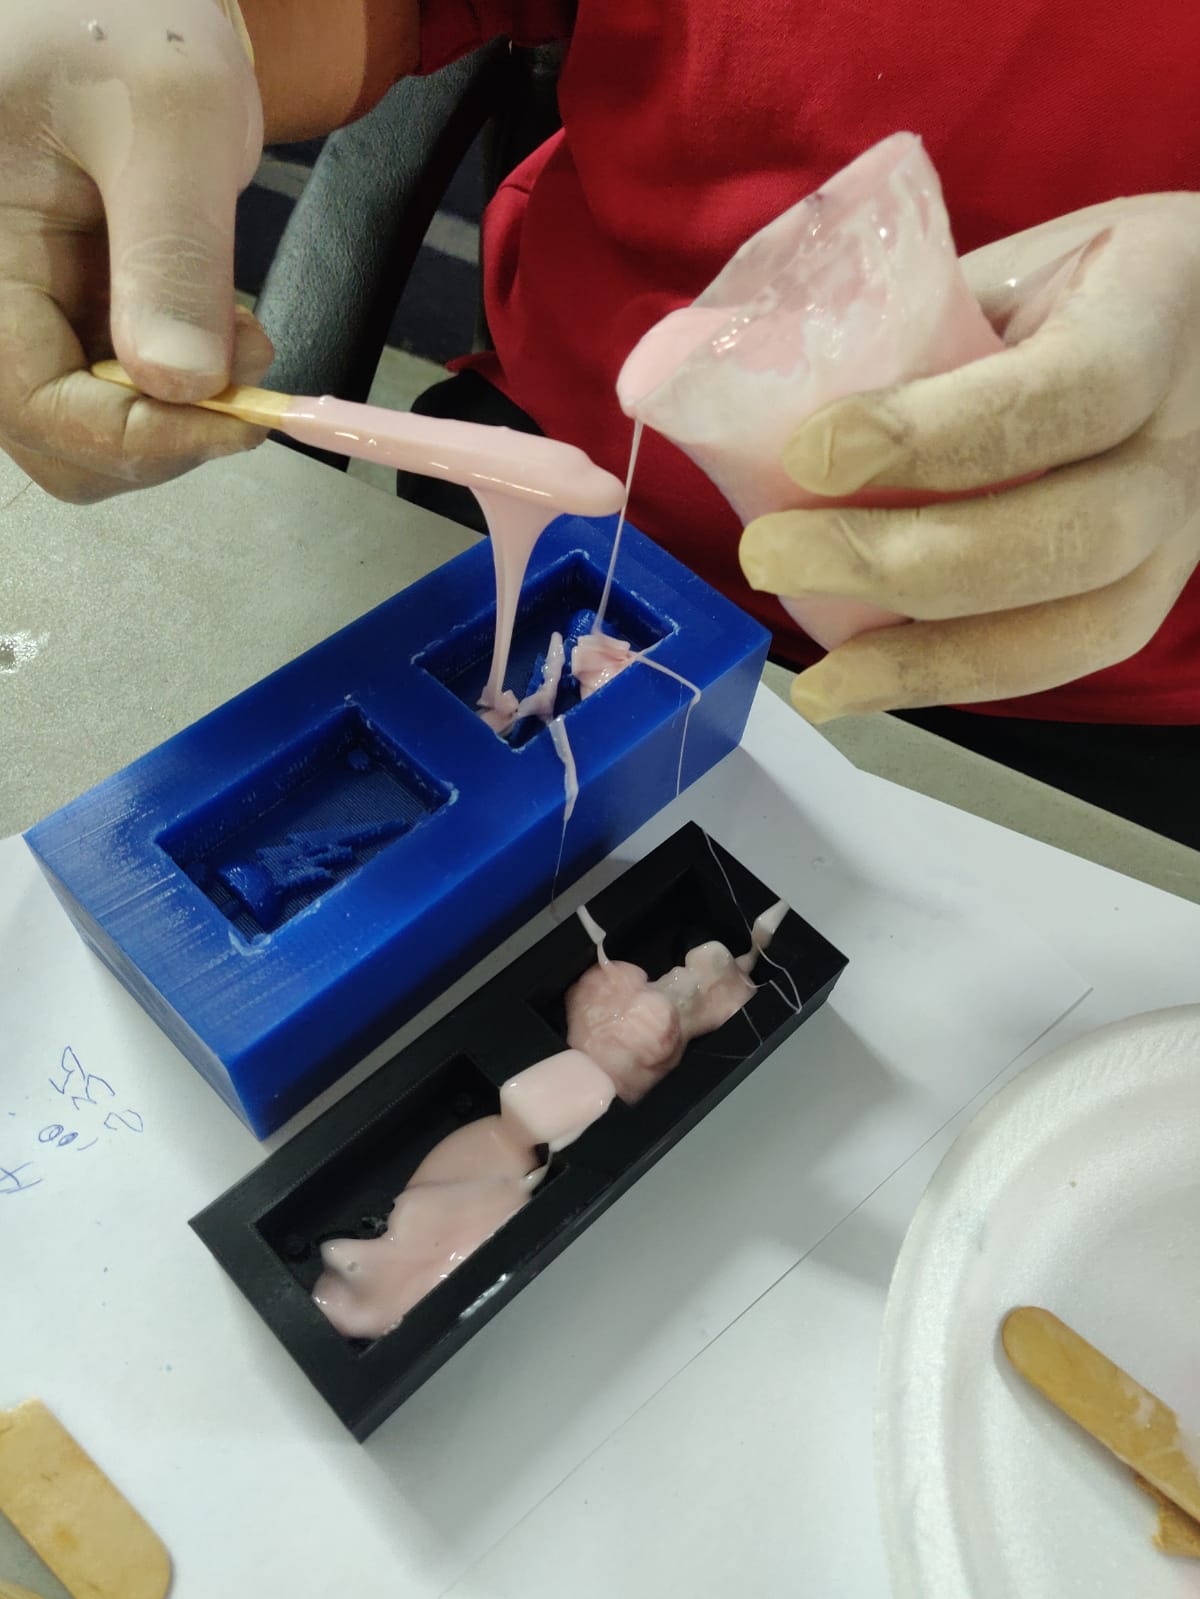
- The silicon mixture is quite viscous, so I used a skewer to prod the mixture into all the nooks and crannies of the mold. I then poured in more silicon mix into the mold till full and tapped them often to help get out air bubbles.
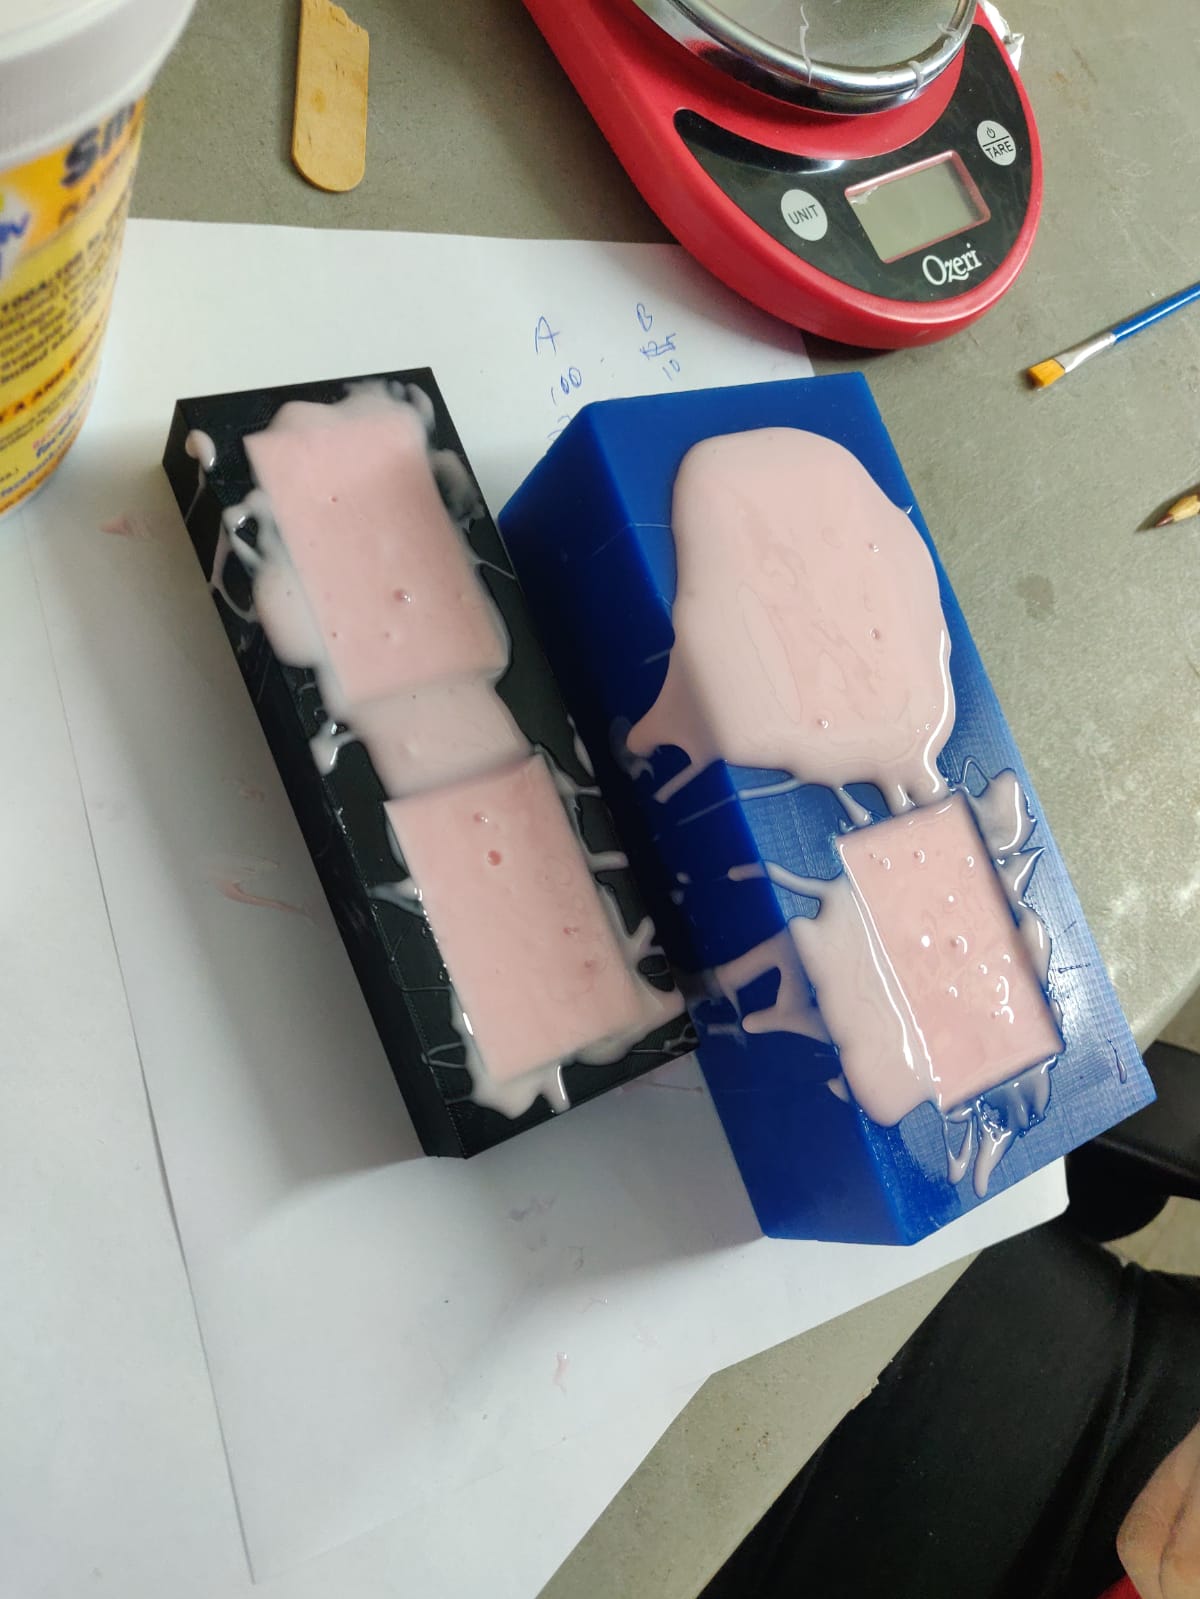
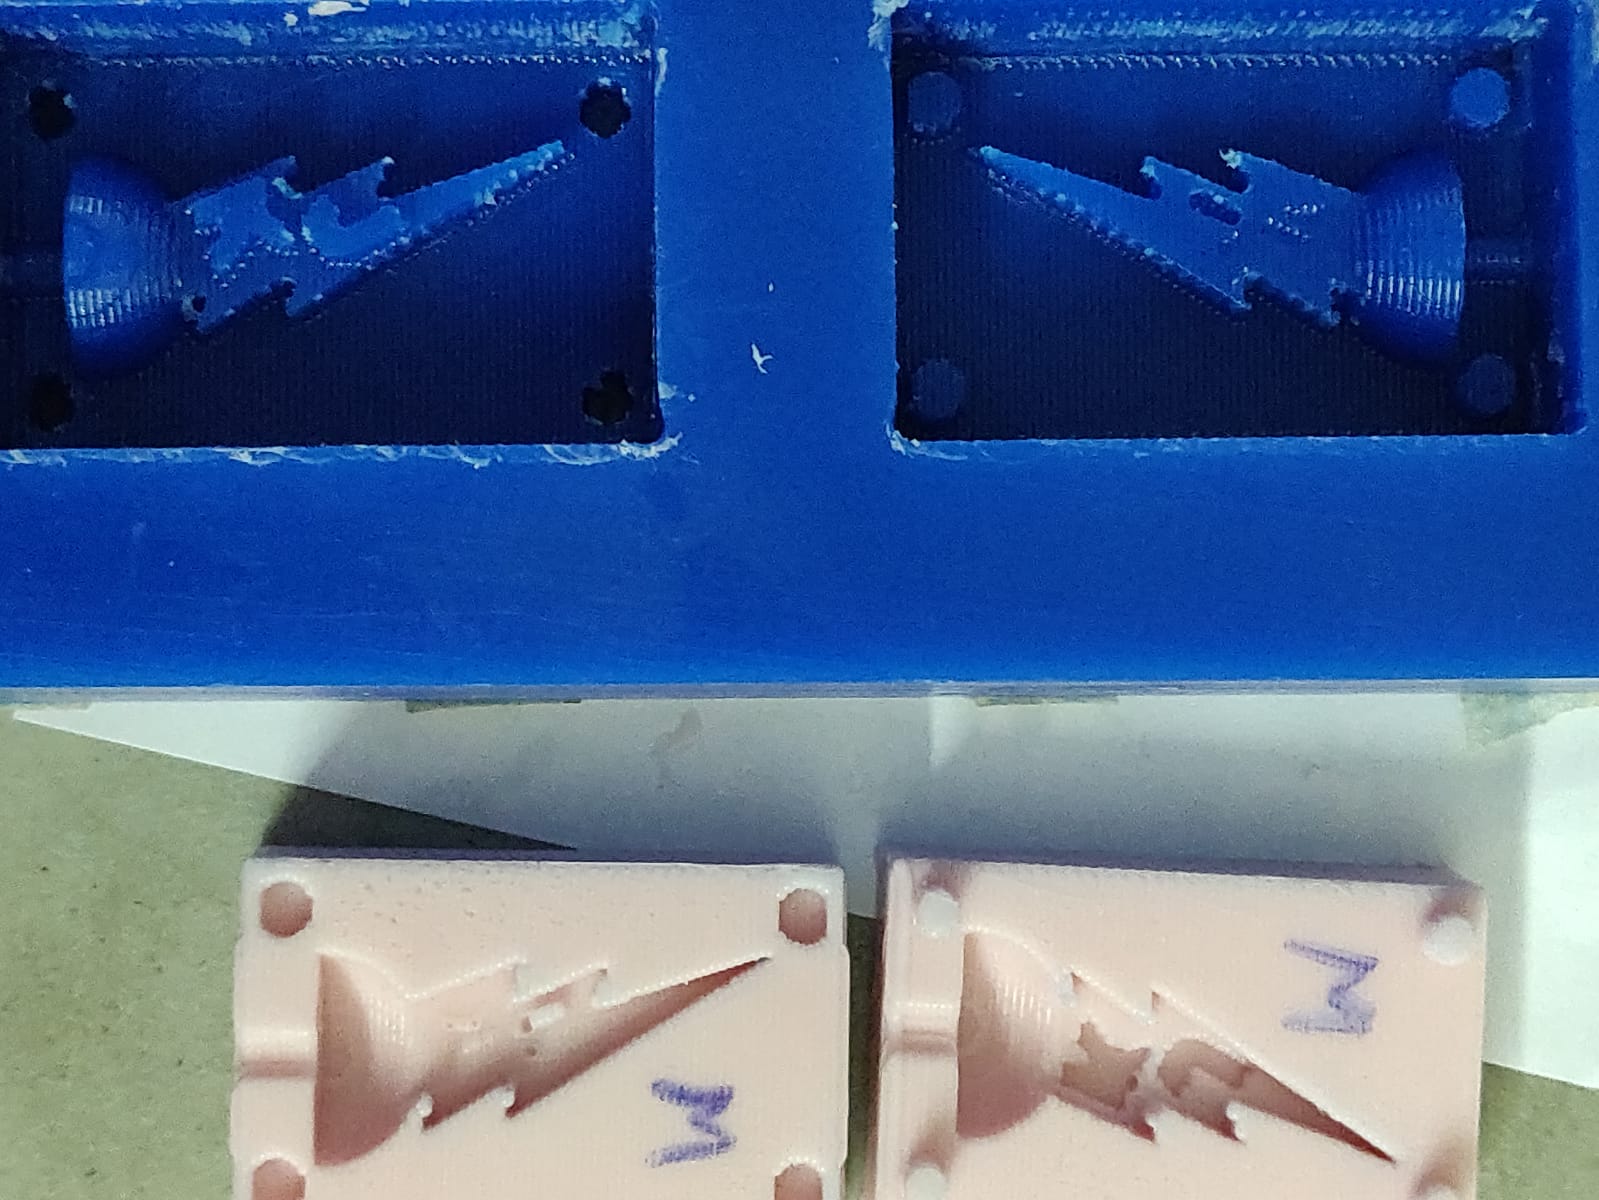
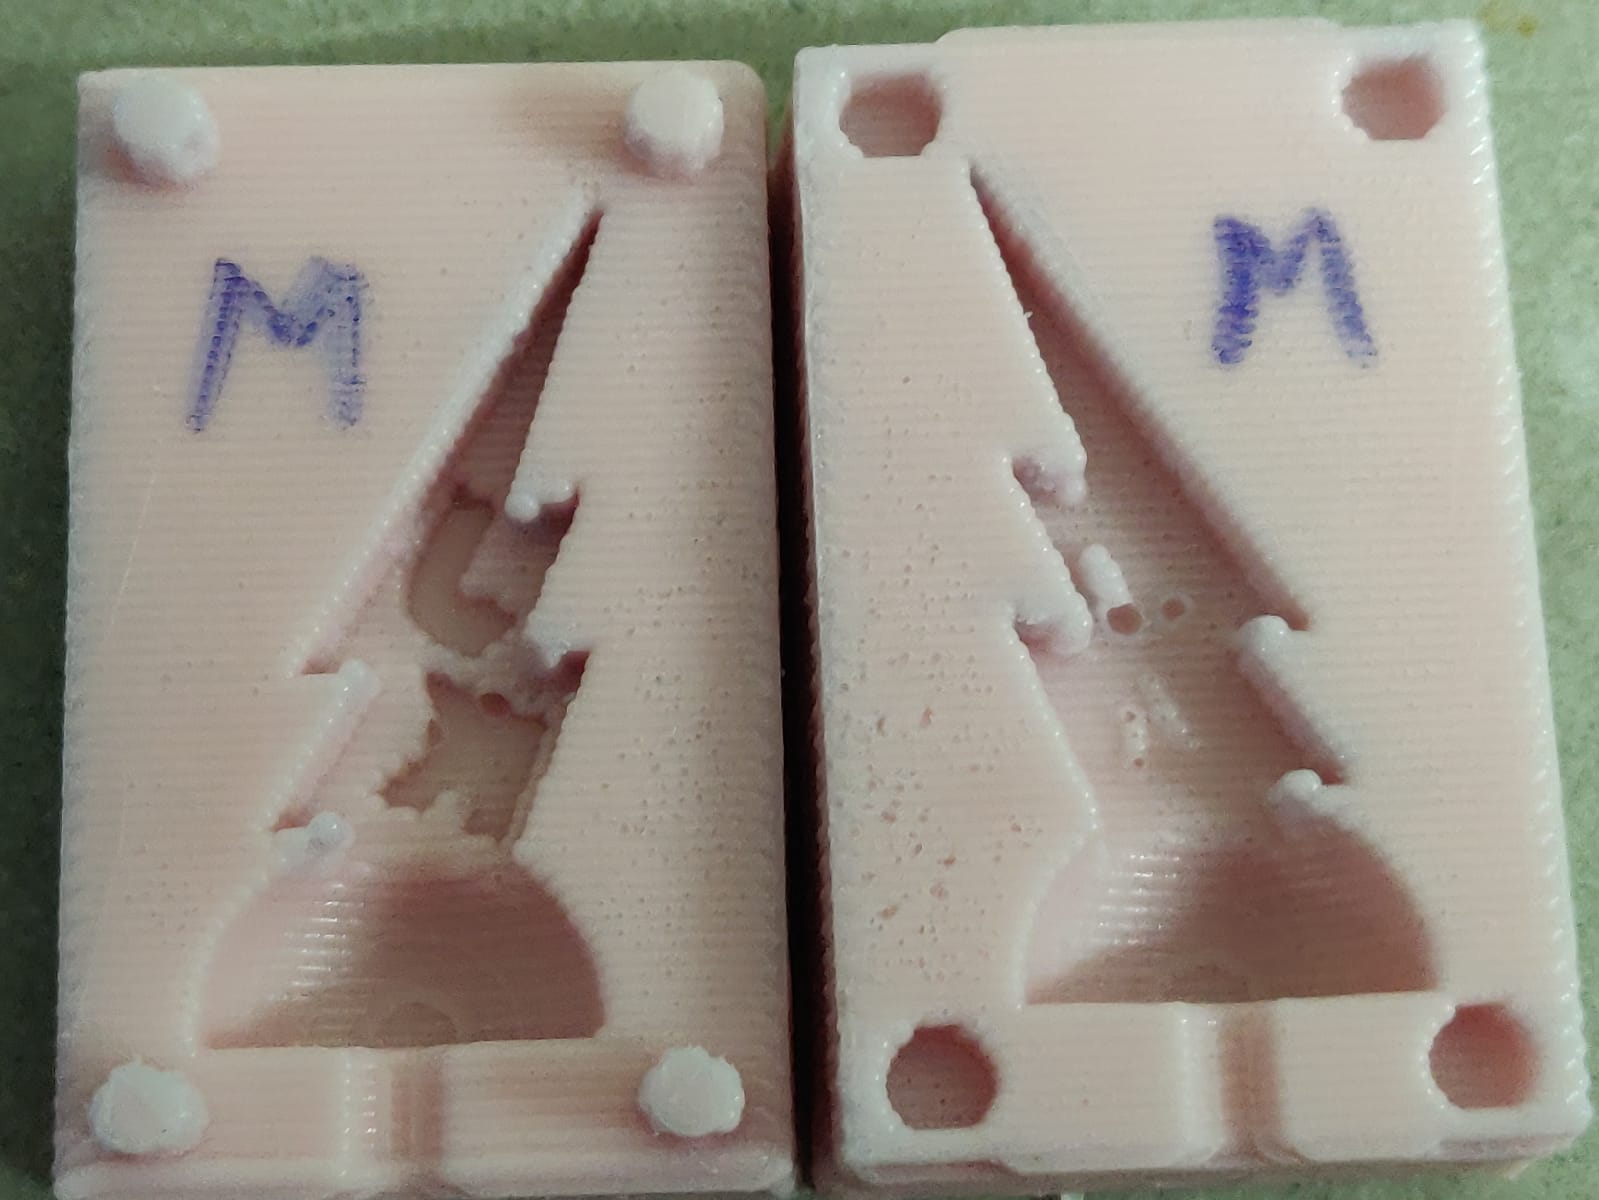
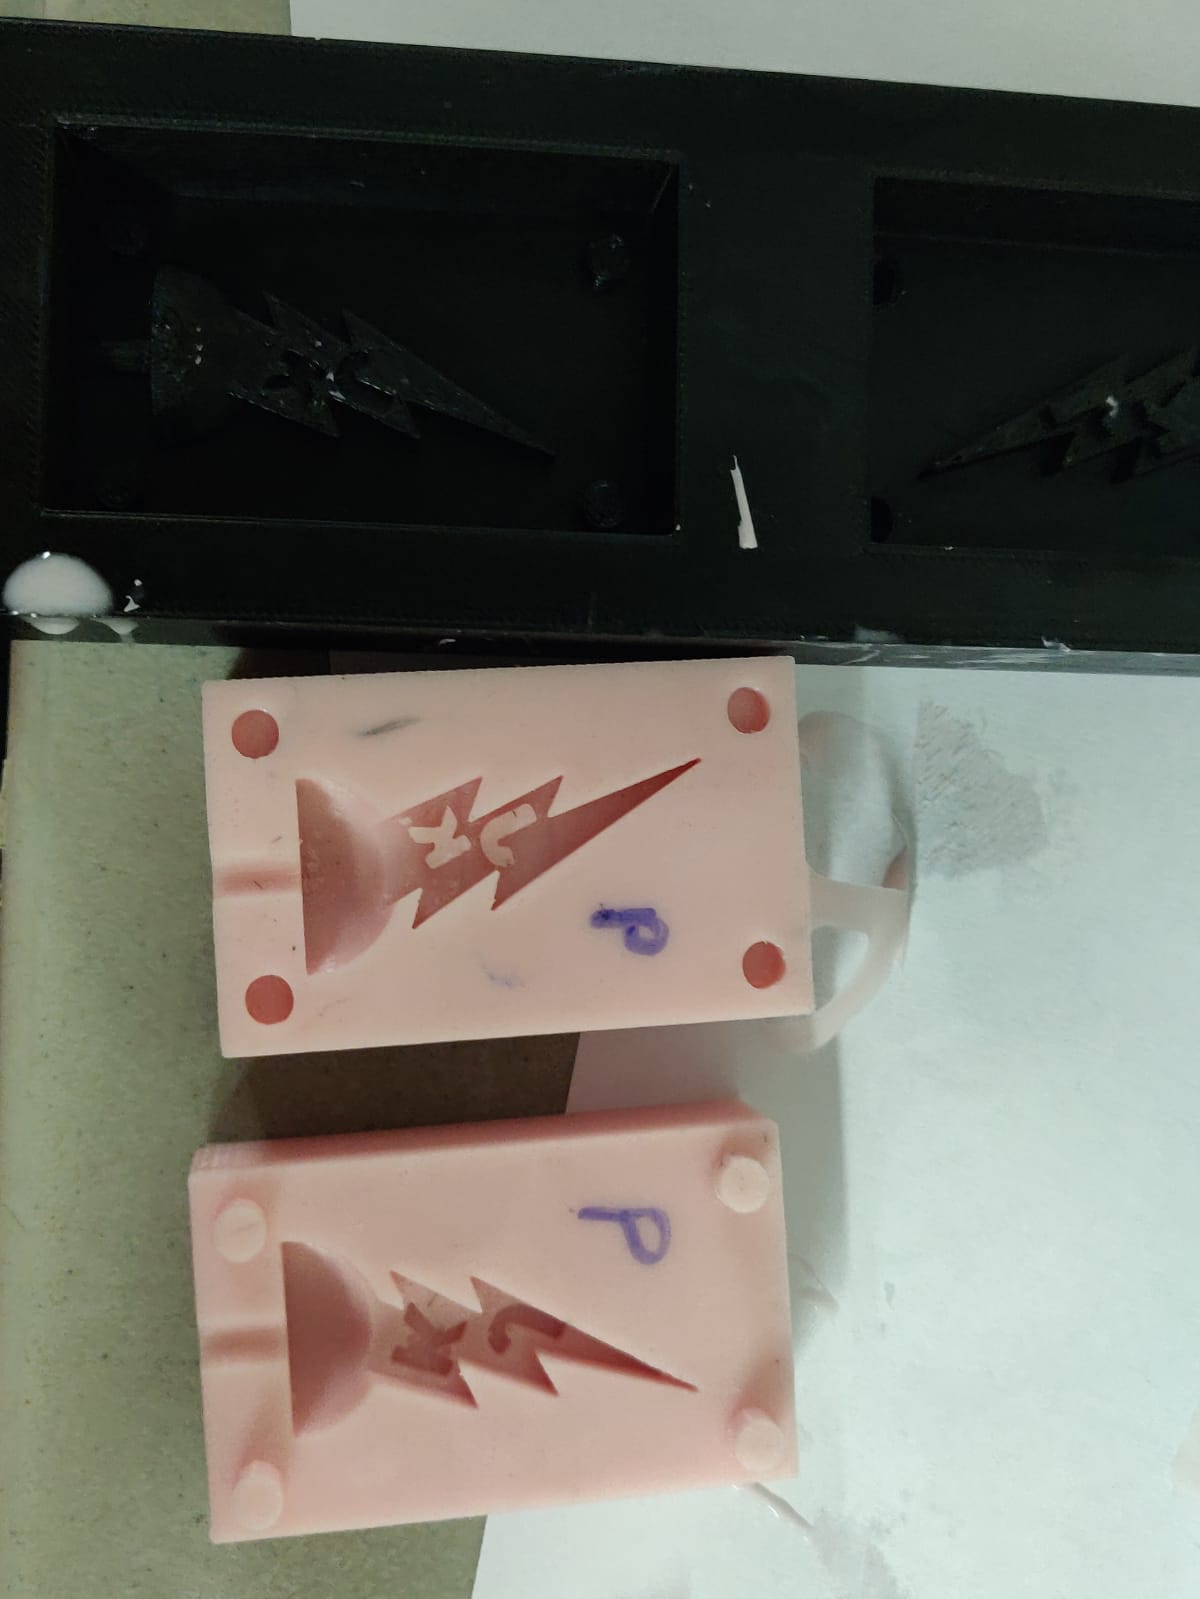
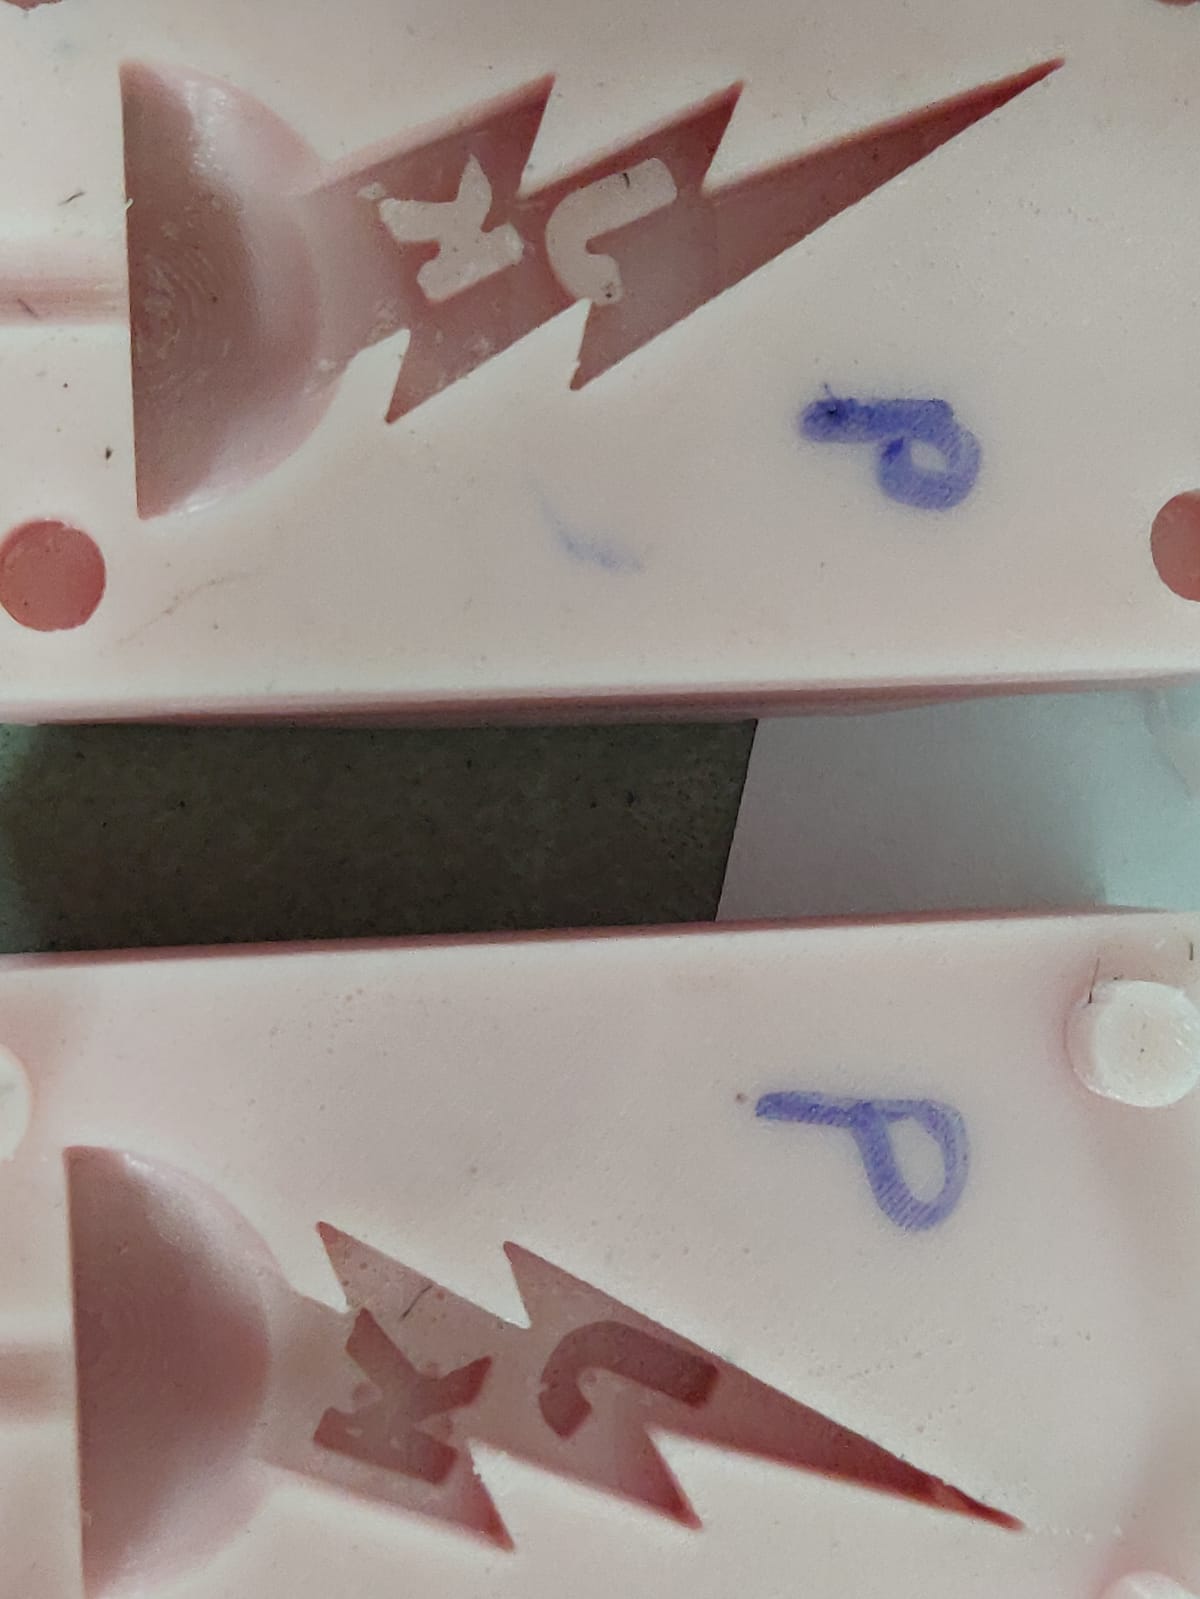
- I left them alone to harden overnight, and came back after 23 hours. They both came out of the molds quite easily. I labelled the silicon molds with W(wax) and P(Print) to keep track of them.
- Wax mold Positive to Silicon Negative.
- 3D Printed mold Positive to Silicon Negative.
Making Resin Casts
- I planned to use my new Silicon Negative molds to make my final castings out of resin. I used Smooth-On EpoxAcast 650 + 102 (Medium) Hardener. We have the 101 Fast Hardener as well, but I preferred to use the slowed hardener to give me more working time in case I made any mistakes.
-
Again I sprayed both Silicon molds with Smooth-On Ease Release 200 according to instructions like before.
-
I mixed 108g of EpoxAcast 650 with 15g of 102 hardener and a 2 small drops of Smooth-On red UVO pigment. And mixed thoroughly for 3 minutes.
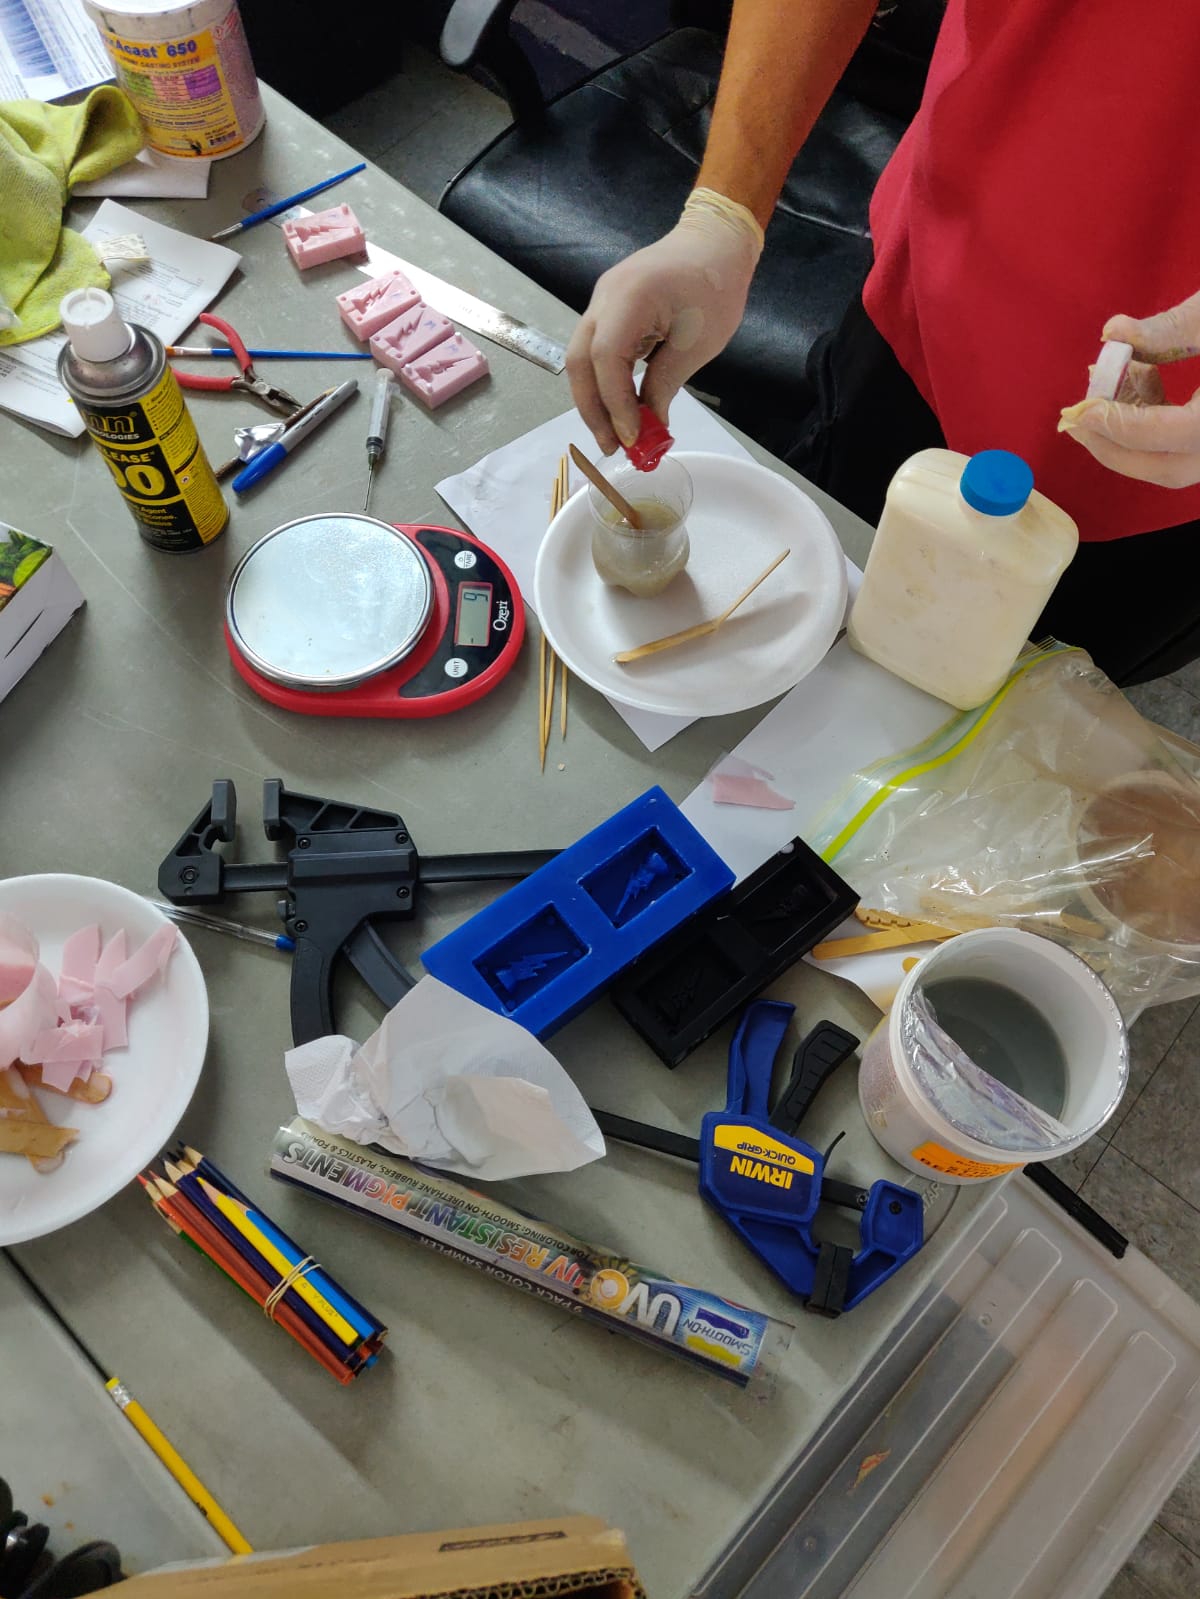
-
I used a small paint brush and brushed a small amount of the epoxy mix into the molds to get perfect coverage of the surface. Tutorials say this helps prevent air bubbles from forming against the surface of the mold, where they are most likely to occur.
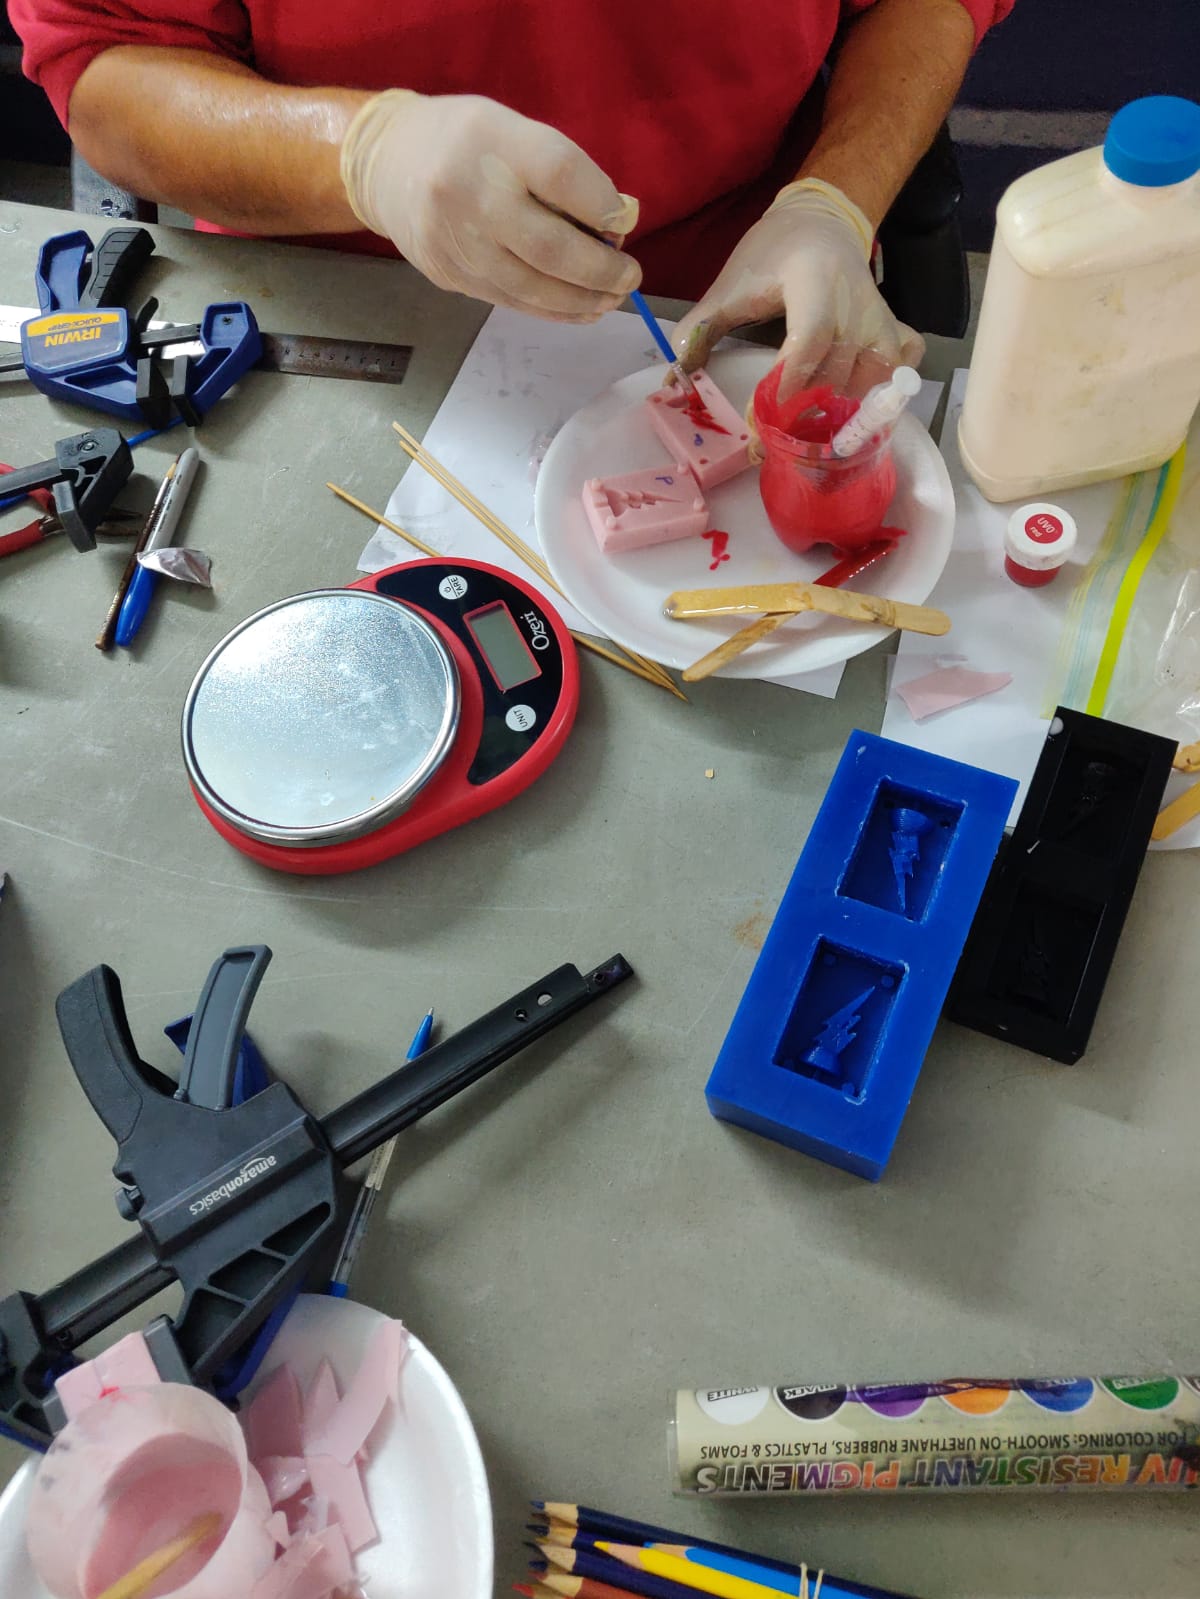
-
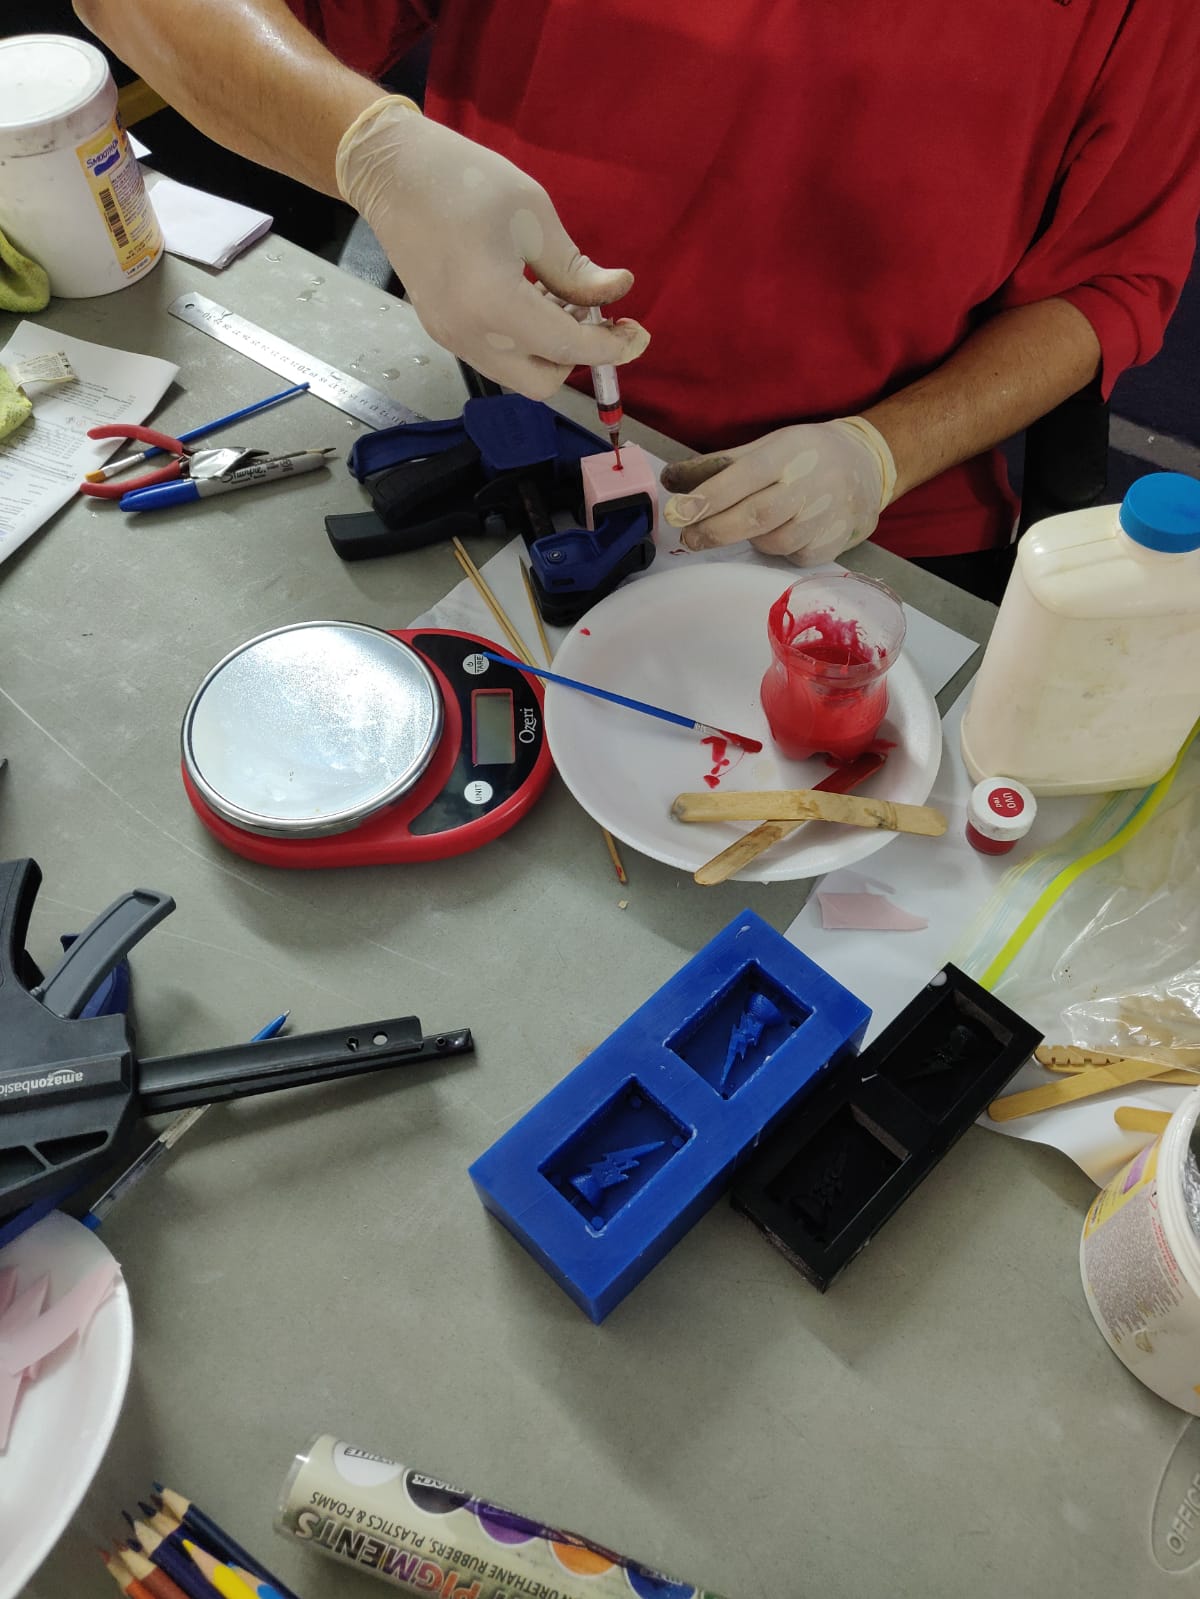
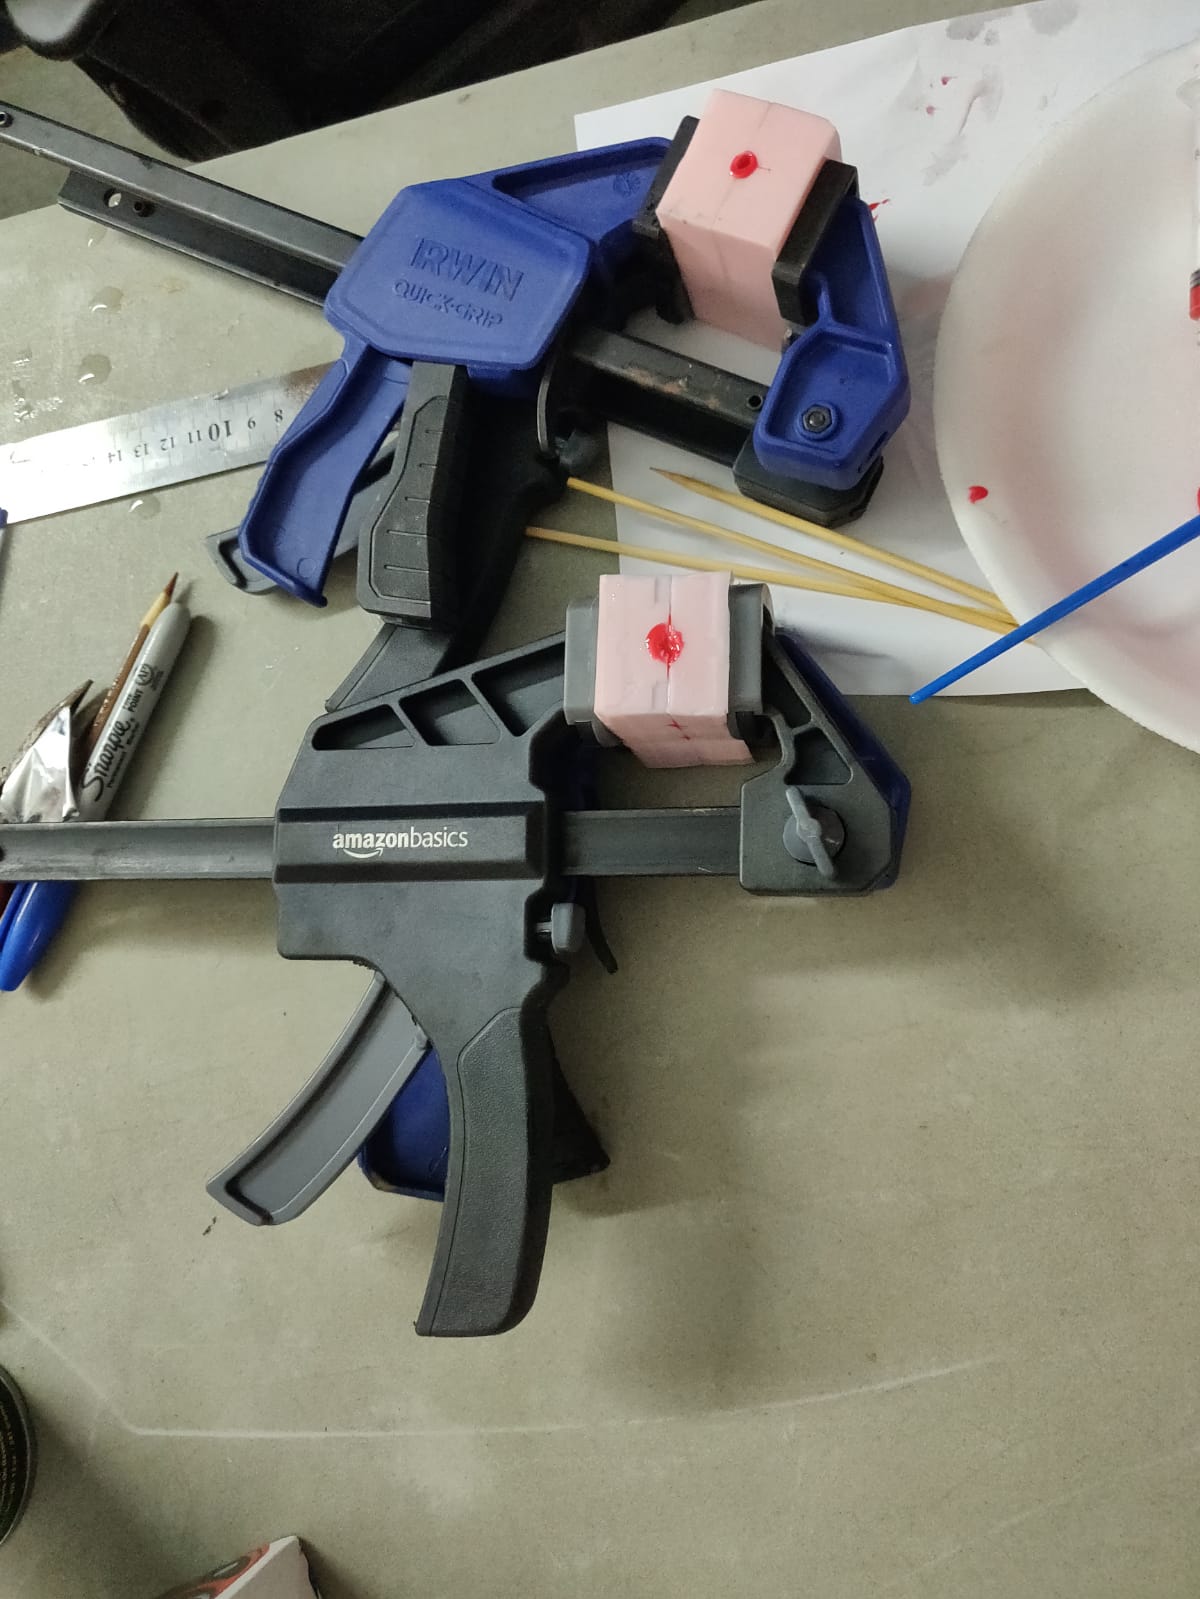
I placed the painted 2 sides of each mold together and used mini bar-clamps to hold them together with mild pressure. The protrusions and indentations on each side made them align perfectly. The molds were a little soft, so applying too much pressure warped them slightly, so only just enough pressure was used.
-
I used a disposable syringe (5ml) and needle (18 gauge) to suck up the epoxy mix and squirt it into the silicon molds through the small pour spout at the top of the molds. The needle/syringe size was huge by medical standards, but relatively small for applying epoxy. Since the epoxy mix was quite viscous, it was a little slow to suck up into the needle. I was constantly tapping the molds while adding the epoxy in order to prevent air bubbles. After the 2 molds were full to the top, I left them to harden overnight (it only needed 4 hours though).
Comparing results
- The next day I released the clamps and opened the molds to release the resin casts. The final step was cutting the extra material from the base of the casts where the epoxy was injected into the mold.
-
From 3D printed Positive mold
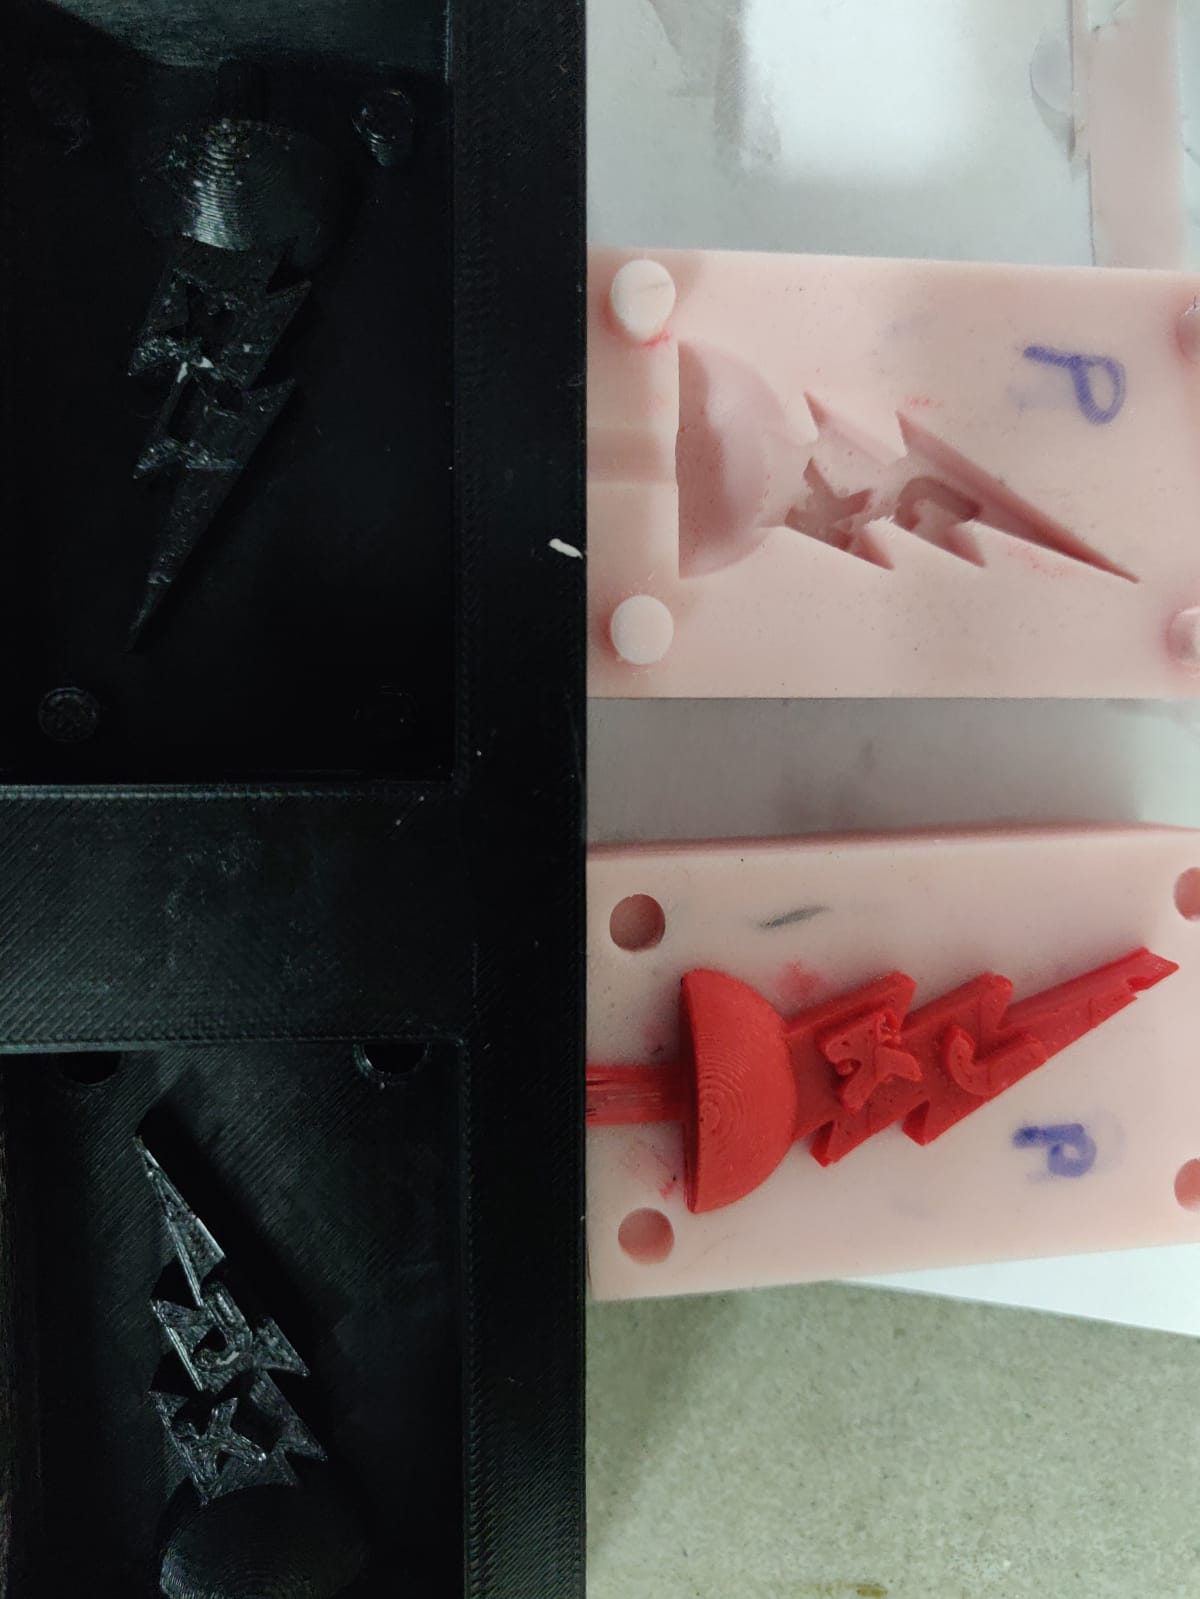
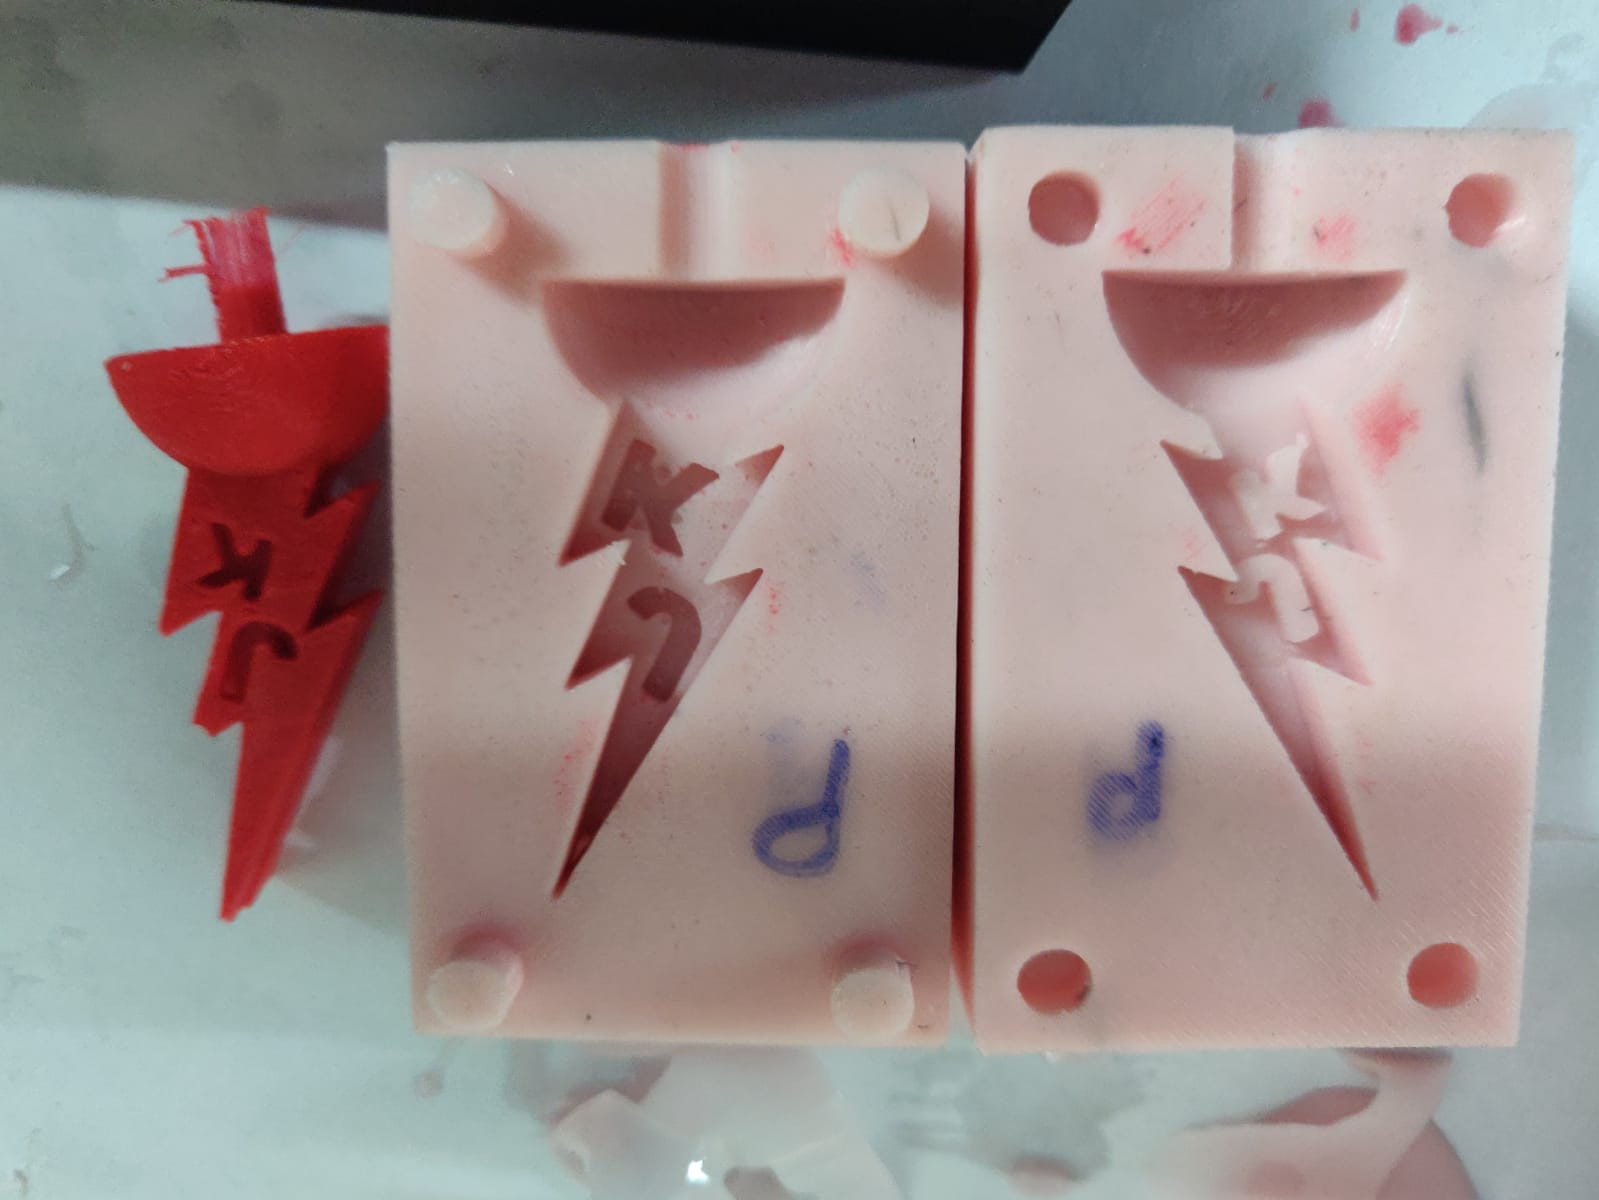
-
From the wax milled Positive mold
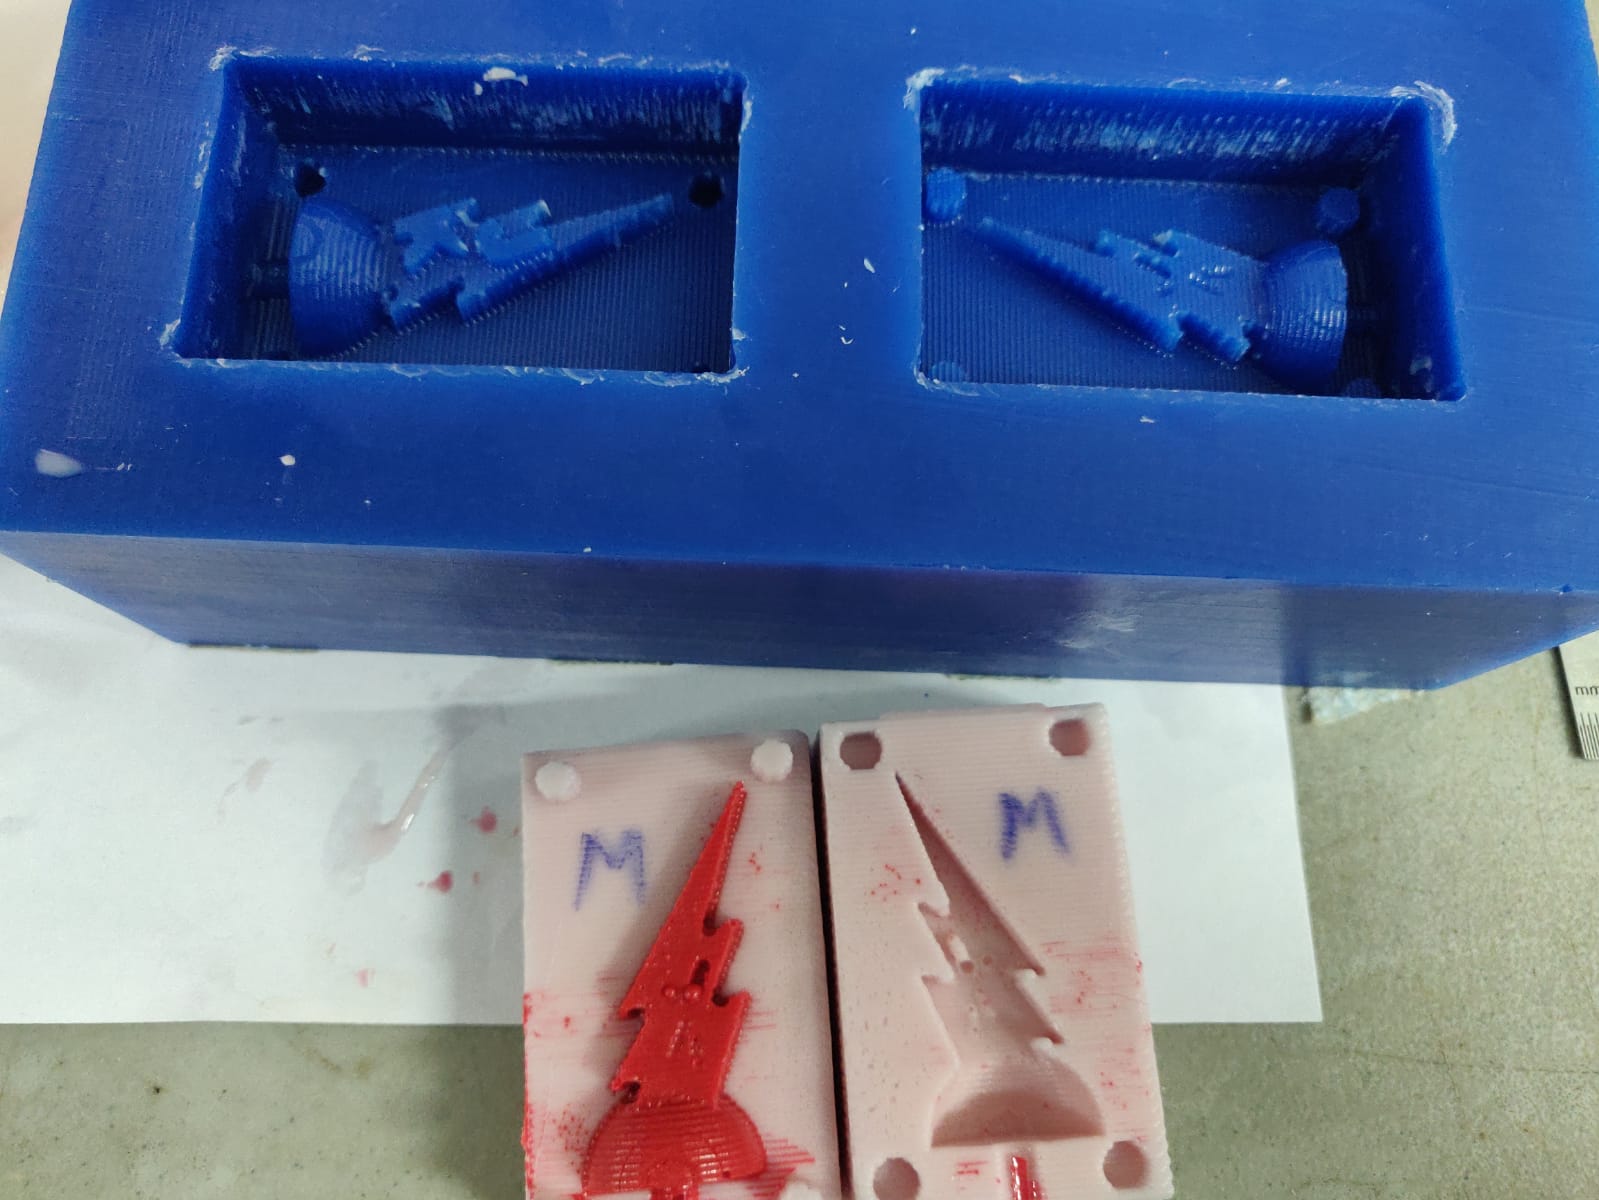
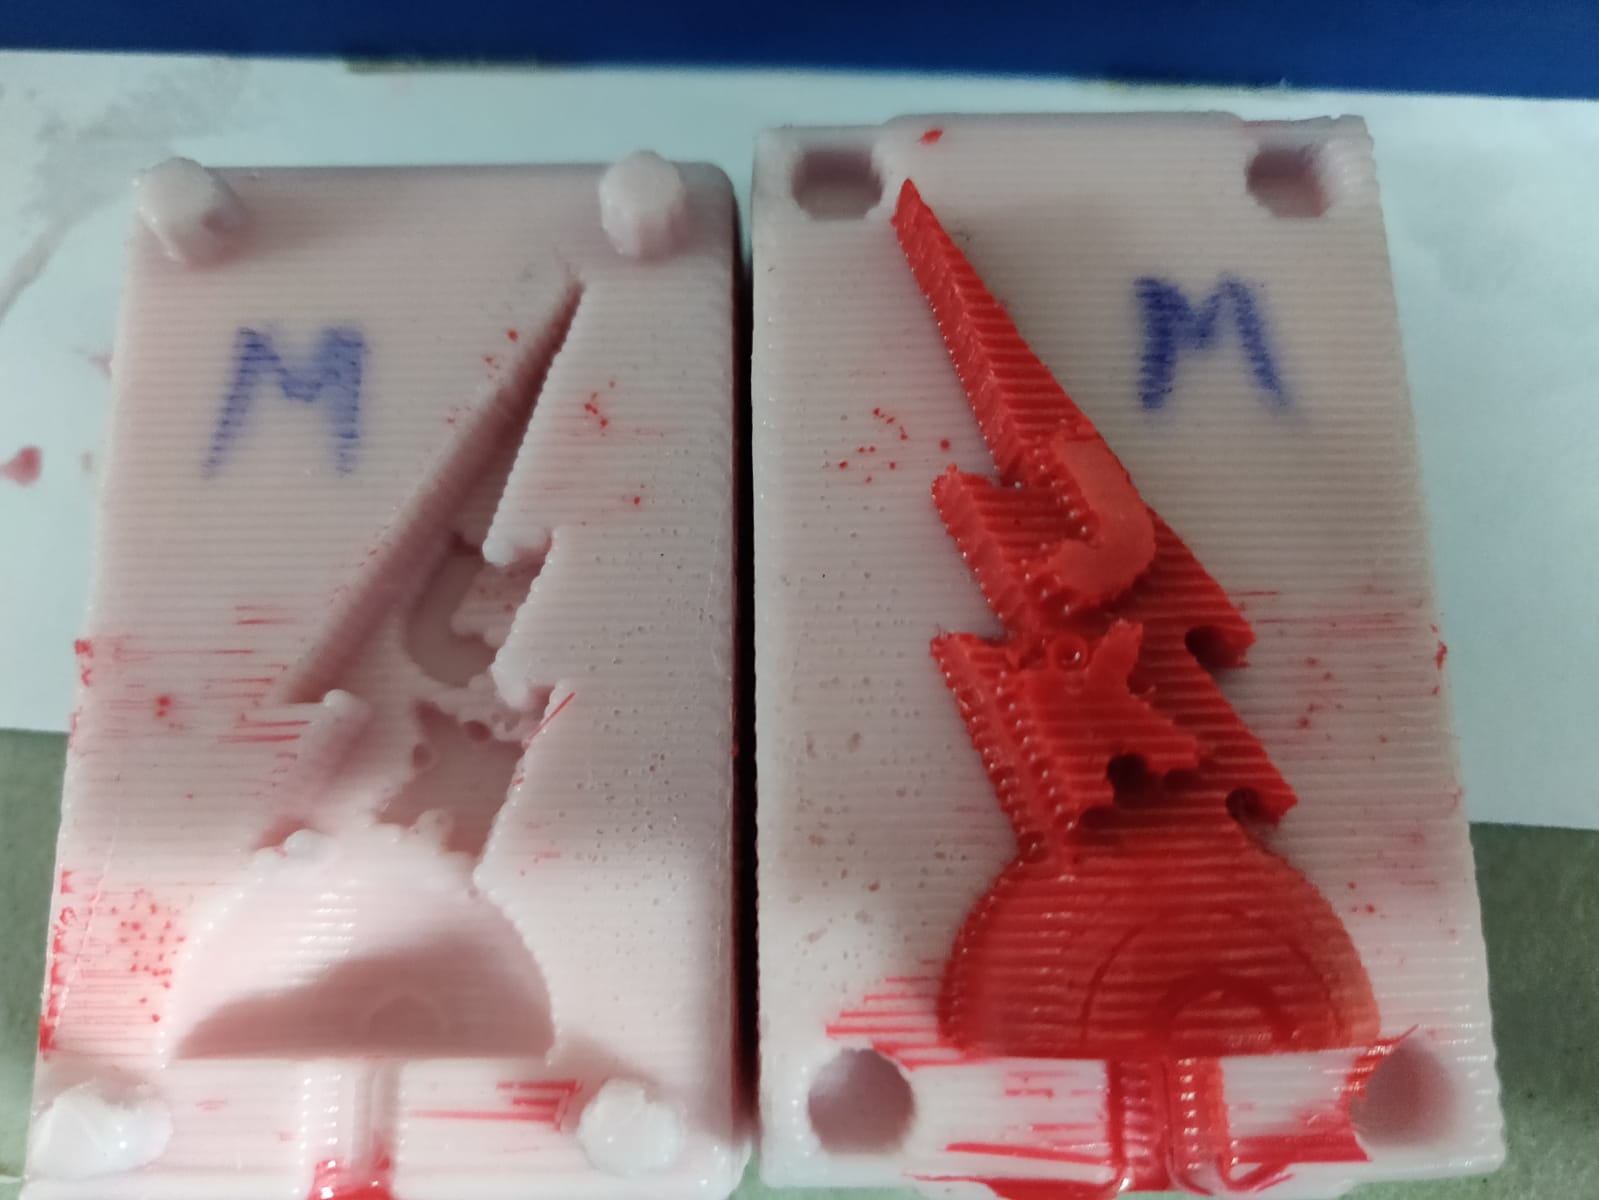
-
Comparing the 2 different results, the 3D printed mold looks to have created a much better end result. The surface is much smoother and the features have allot more detail. There is a small notch missing in the resin cast, and a small inclusion on the JK. These are both probably the result of air pockets in making the resin cast and silicon mold respectively. To get around this, I will use a tool to help vibrate my molds while they are filled to help get rid of the air pockets.
-
The machine wax mold was less impressive. I think allot of the issues had to deal with how the software laid out the finishing path. Looking at all the other molding and casting projects from the rest of my student group, I think the software carbide create Pro used for pathing didn’t do a very good job, or there are setting adjustments that I didn’t use that I should have. Students from my lab who used different pathing software seemed to get much smoother results than those of us who used Carbide Create Pro. The milled mold also had less detail. This was because my design had allot of sharp internal bends (that were somewhat deep), and even if I had used a much finer tip endmill, the shaft diameter would make it impossible to create that detail.
Lessons learned and future plans
- When filling a mold with liquid anything, always vibrate it allot, more than you think you need. If possible use a massager or other tool to vibrate the liquid to help get out air bubbles. The painting technique I used also helped allot.
- I want to test my design using the tool path software in Fusion 360 to see if I get better results.
- I think the best method for me in making 3D molds is to 3D print the negative first rather than machine it from wax. The main reason for this is that 3D printing is able to get us finer detail in most situations that a milling bit can generate. Even if I fix the smoothness issue for milling, the endmill size issue will still be restricting.
- I want to try making a 3D printed negative mold in TPU or another flexible filament and see if that gets me similar properties as a silicon mold. If that works, I think that would be my goto method for producing molds in the future.