WEEK 05
- 1.-Introduction
- 2.-Teamwork
- 3.-Scan me
- 4.-My figure
- 5.-Final proyect disc
- 6.-Isaac Peral's bust
- 7.-Another example of 3D scanning, modeling and printing: custom mask
- 8.-Examples of my work
- 9.-FILES
- 10.- Experience and conclusions from WEEK5
Scanning and Printing
Teamwork
Homework
More examples
Fab-Weeks
Are you looking for my assignments?
Links and notes
more information:
Week 05: Scanning and printing
1.-Introduction:
This week, I have started working with my colleague Gustavo on the characterization of our 3D printers (Form 3B, Sigmax R19 and Dyscovery). We have also scanned in 3D to obtain a digital model of ours, with which we have made figures. With individual work, I show how the figures can be made, I have worked on a piece of my final project and with a couple of more examples.
My week journal:
2.- Teamwork:
If you want to know the group assessment of this week, click on the image of SediCupCt.

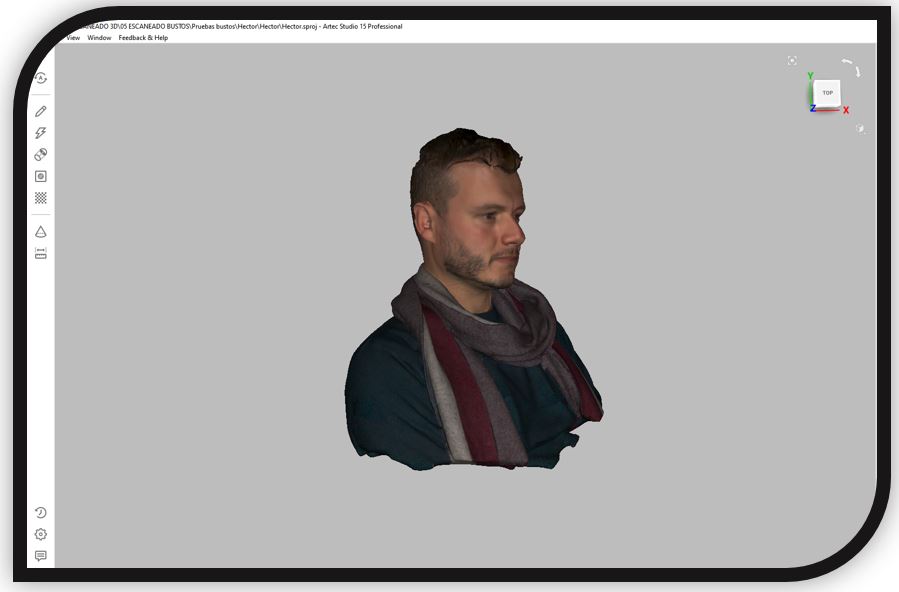
3.-Scan me:
The idea that my classmate Gustavo and I had was to scan ourselves in 3D to make 3D figures with our faces. He scanned me and I scanned him.
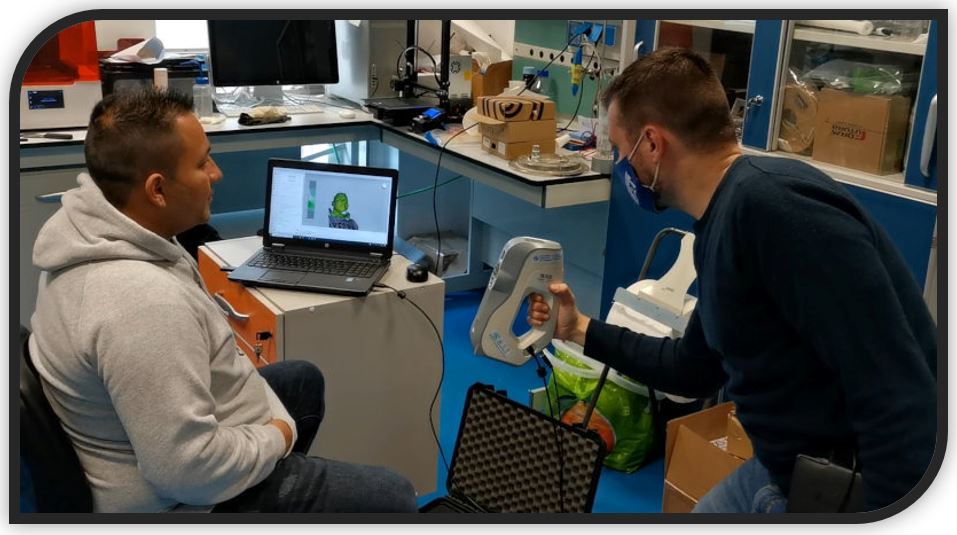
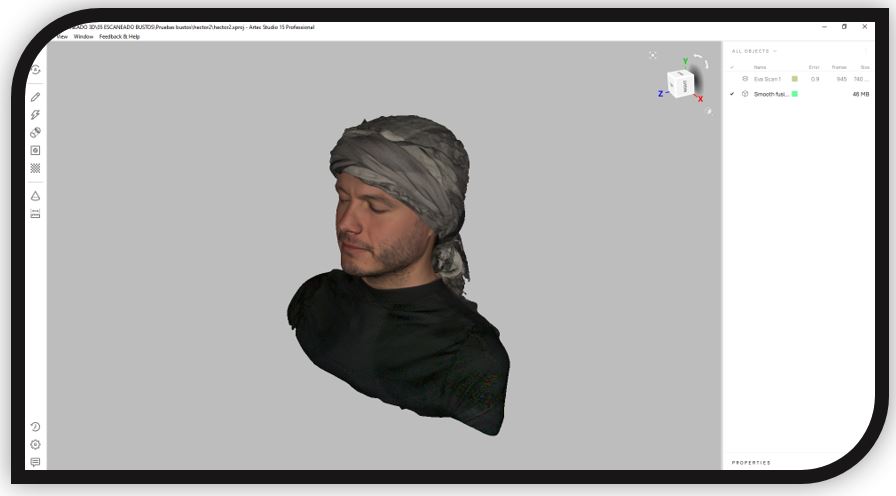
From my scan, I have a model with hair. But hair is a very difficult item to scan because it is shiny. The shine of the hair, makes the light reflect and generate noise.
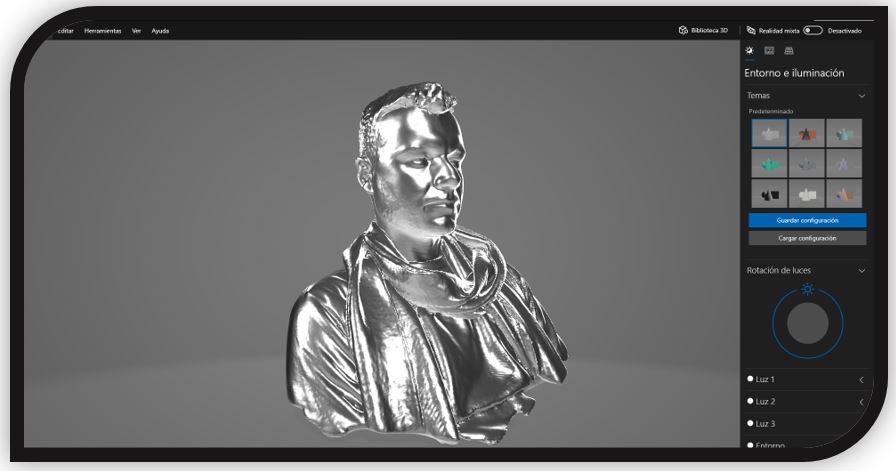
The result of the 3D hair scan is as follows:
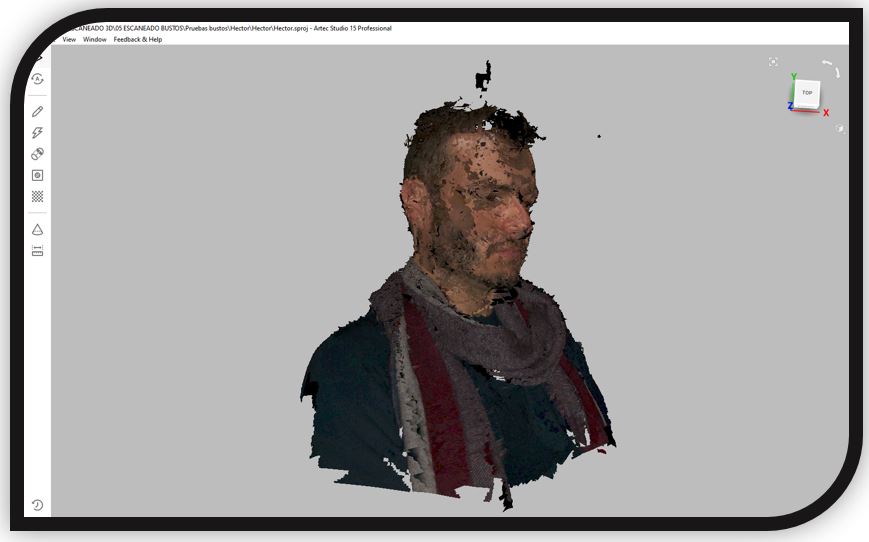
For this scan, 2174 frames were obtained with an error of 0.4. There are many frames, because hair is difficult to capture and you need to make several passes with the 3d scanner.
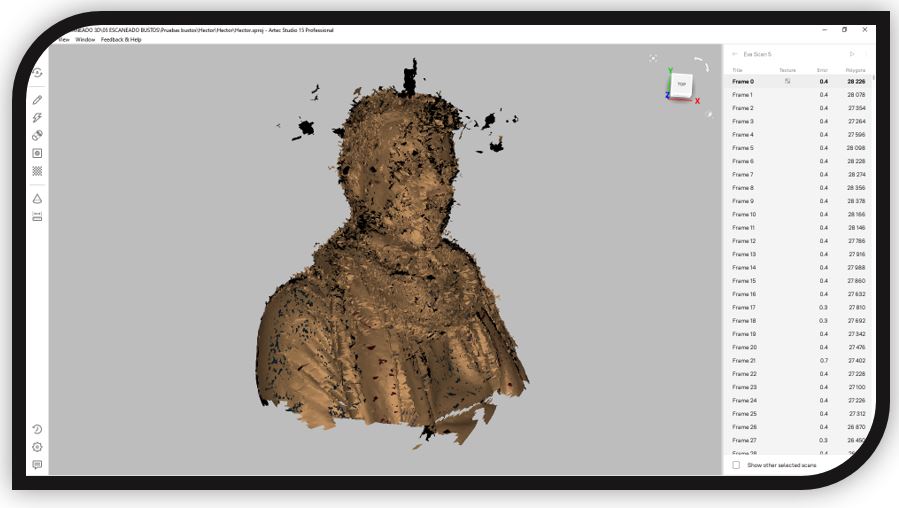
Merging the scan frames with textures, using the Artec Studio commands, creates the final model as a result.
This model can be exported in various ways. The two most used for 3D printing and modelling are:
** Obj file: export the model mesh with the textures
** Stl file: export the model mesh without the textures.
These files are a standard format that can be opened in many programs or viewers. For example, the 3D viewer in Windows 10.
As the hair is a difficult element for the 3D scanner and it was a bit weird.
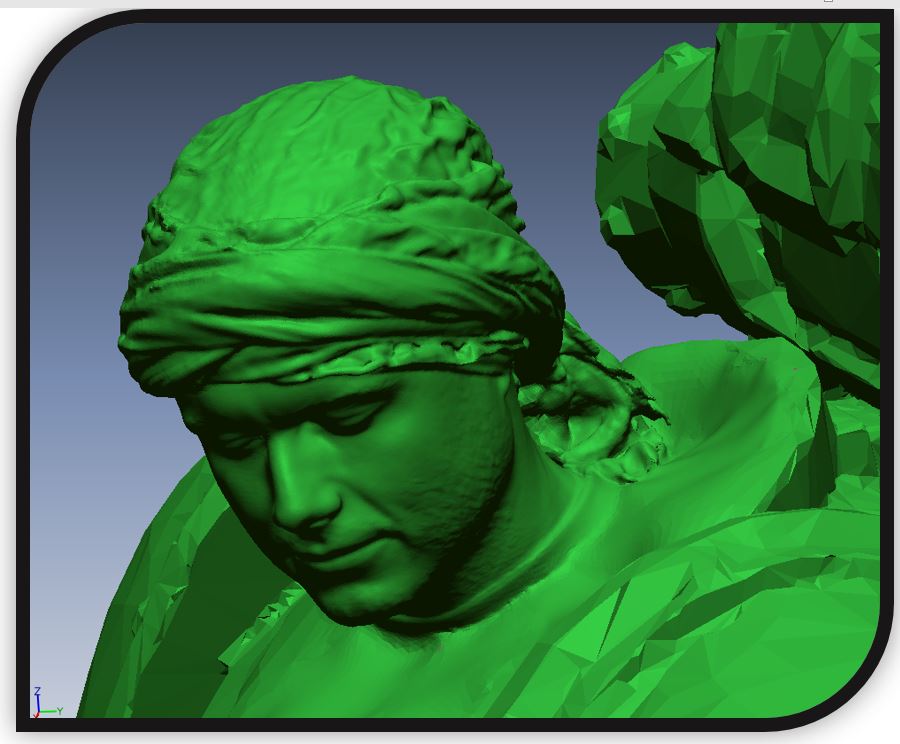
I used another 3D scan that we did, in which I put a bandanna over my head.
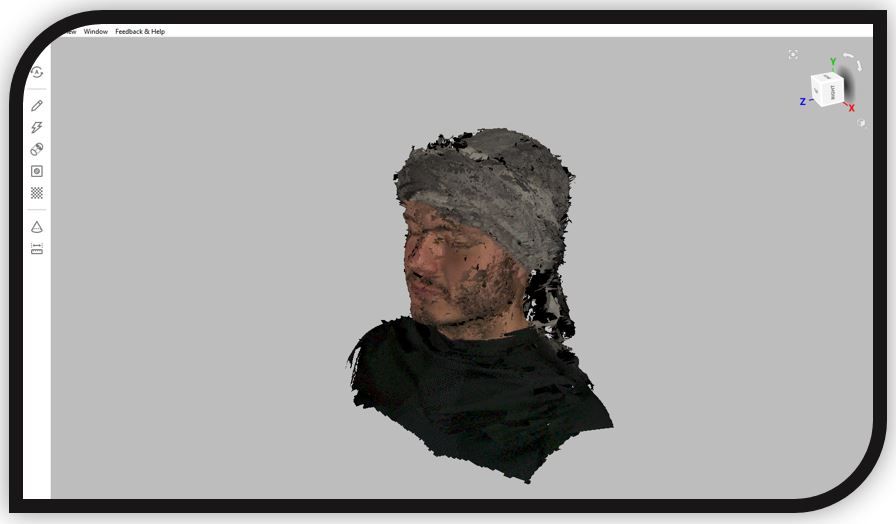
Being easier to scan, the scan could be done faster and only used 944 frames.
The result of the union of all the frames is the following:
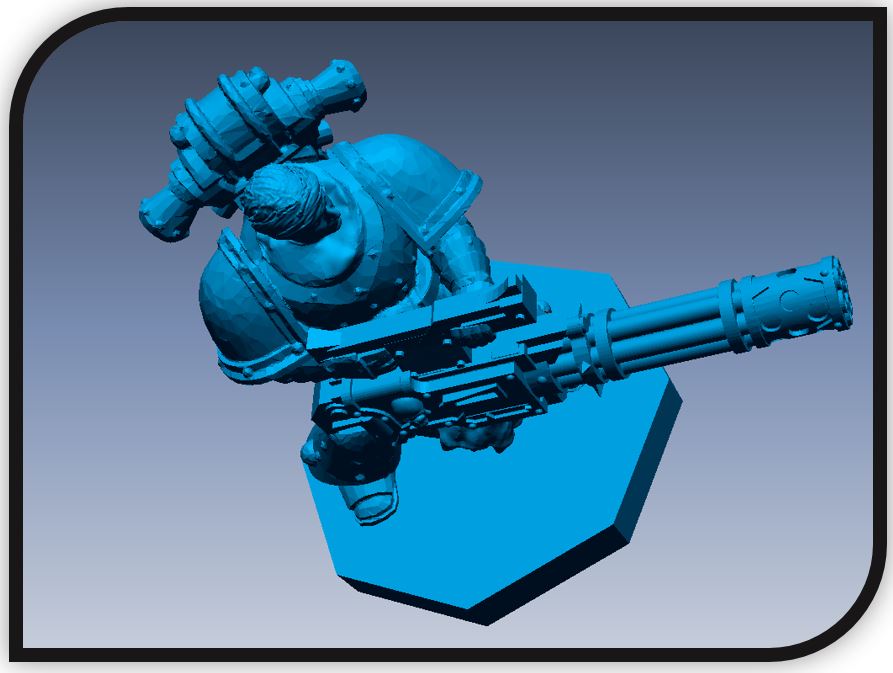
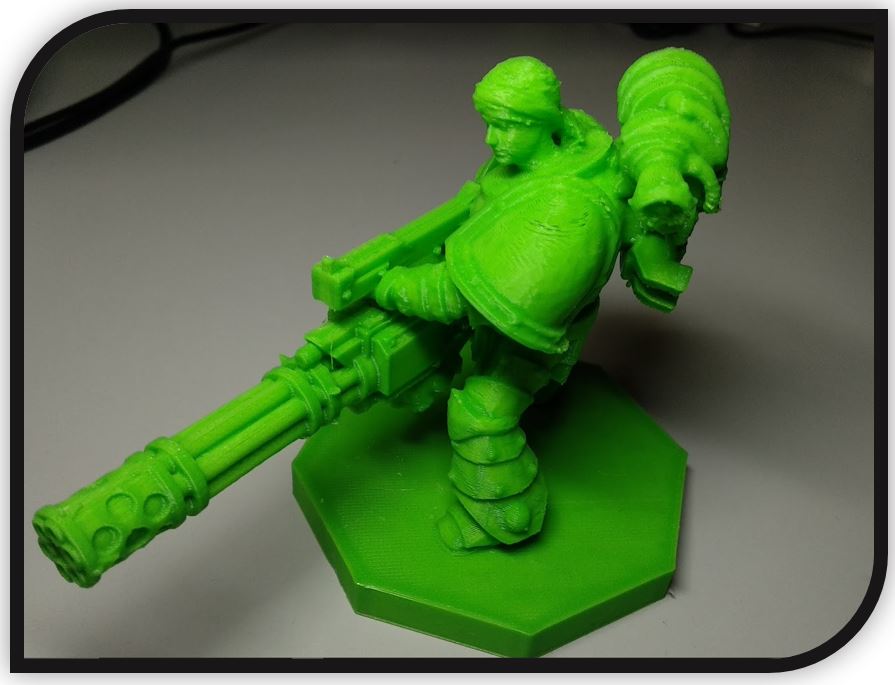
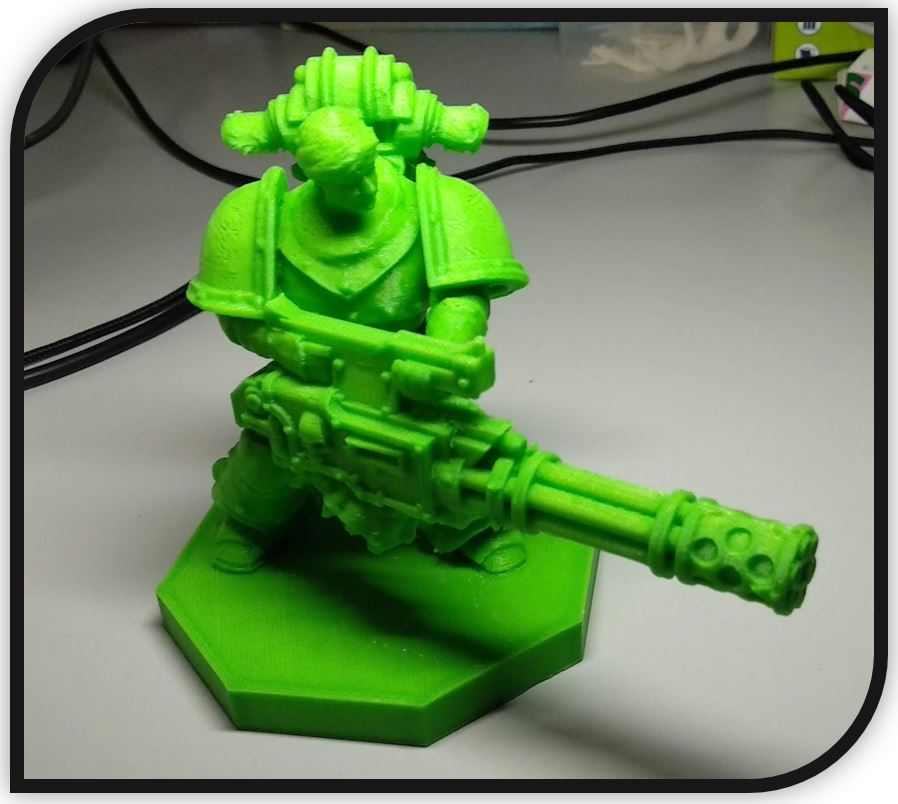
4.-My figure
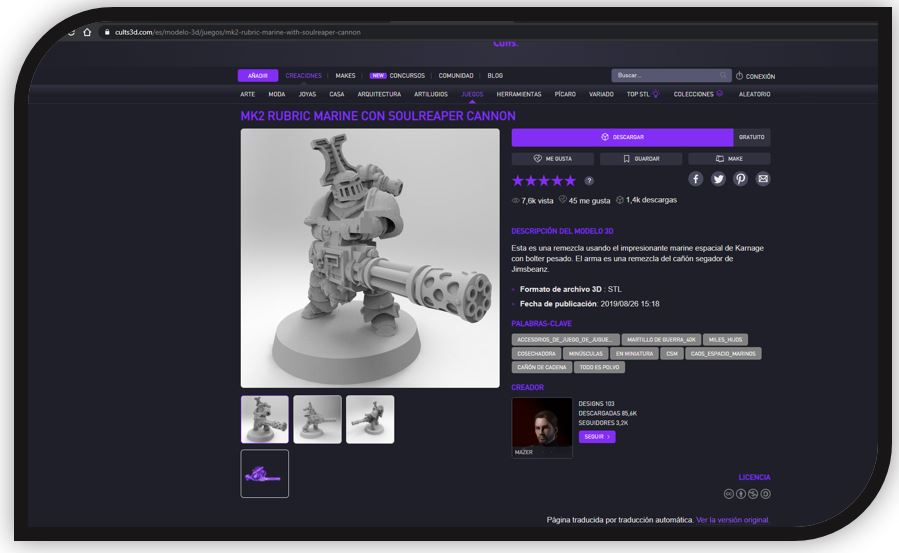
I will use a base of a rubric of a space marine from the board game Warhammer 40000. To obtain the model, I use the free page of Cults3D. https://cults3d.com/es/modelo-3d/juegos/mk2-rubric-marine-with-soulreaper-cannon
To work the downloaded model, I am going to use Geomagic Design. I import the model in the software.
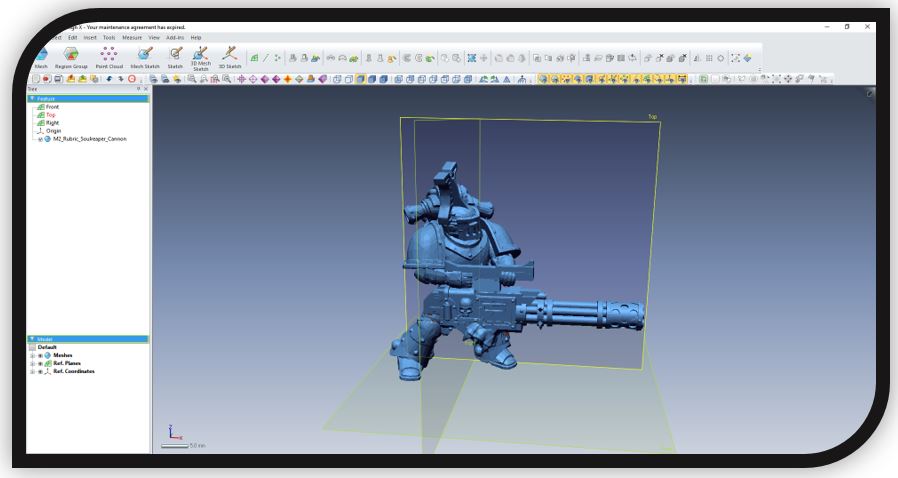
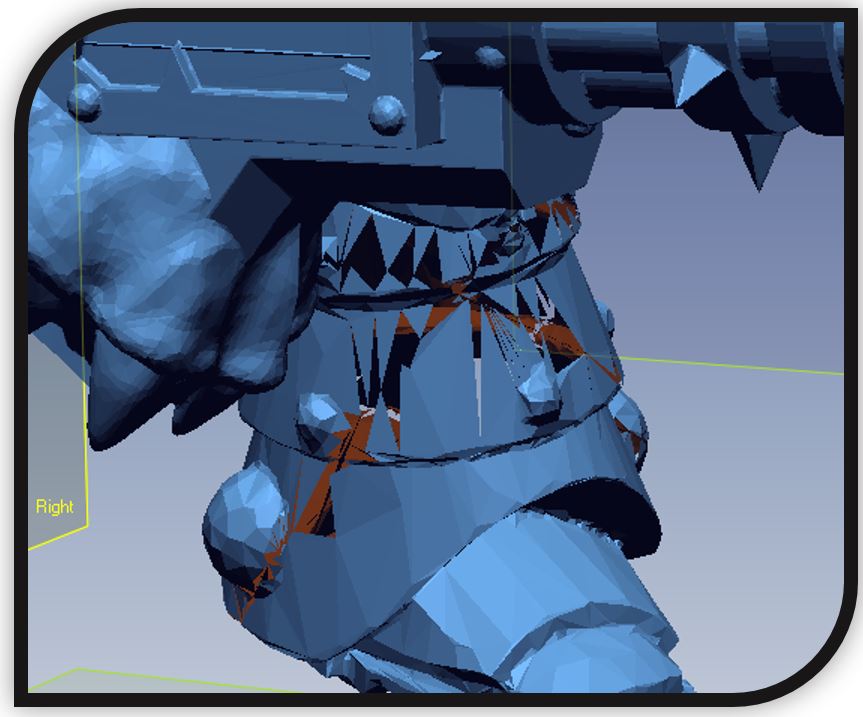
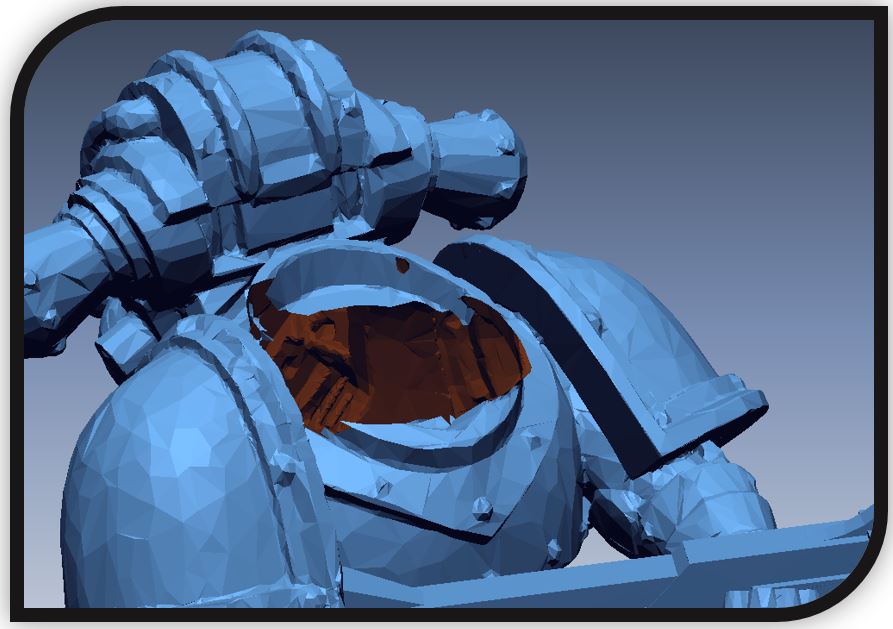
I see that there are some wrong areas that I will have to repair:
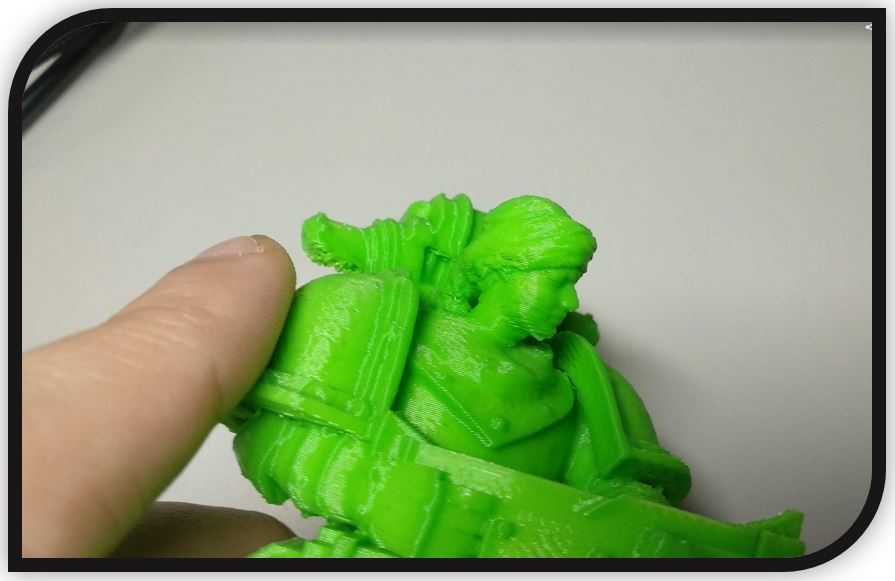
I'm going to cut off the figure's head to put my head scanned:
The scan of my head is in real size (1: 1 scale) and I will have to adjust the size the same as the figure.

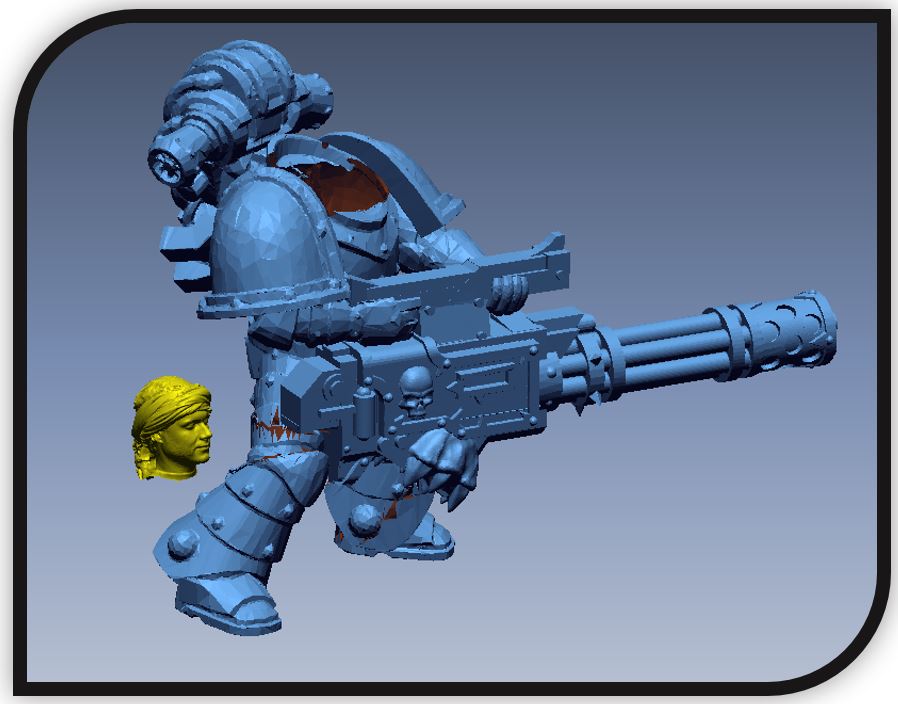
Now, I have to put it in position.
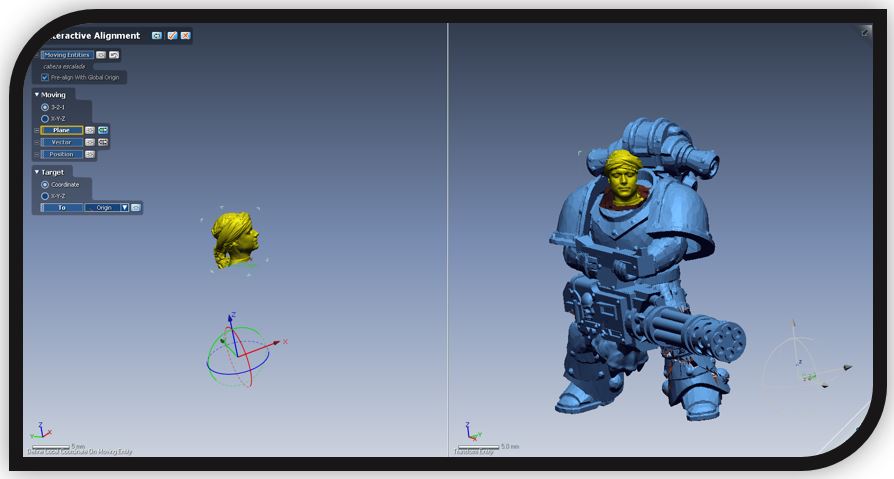
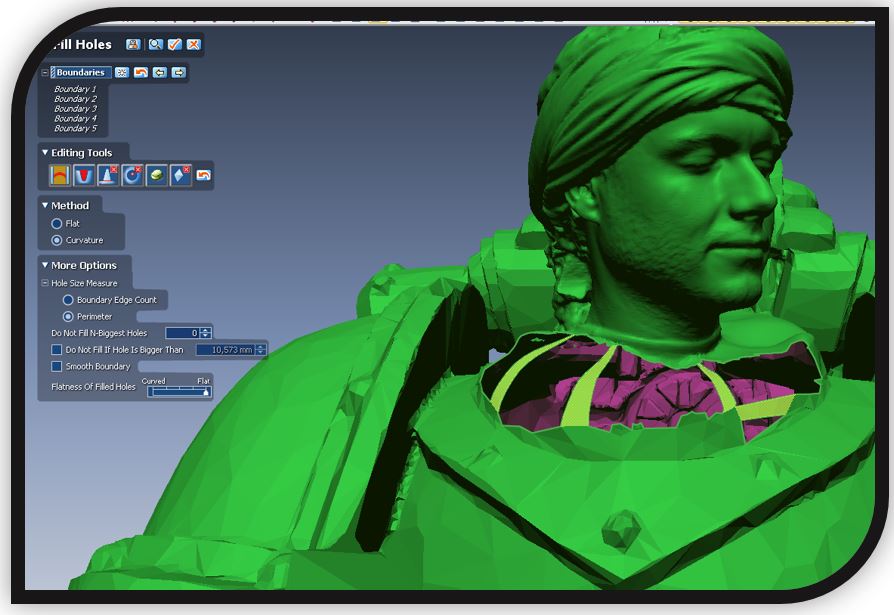
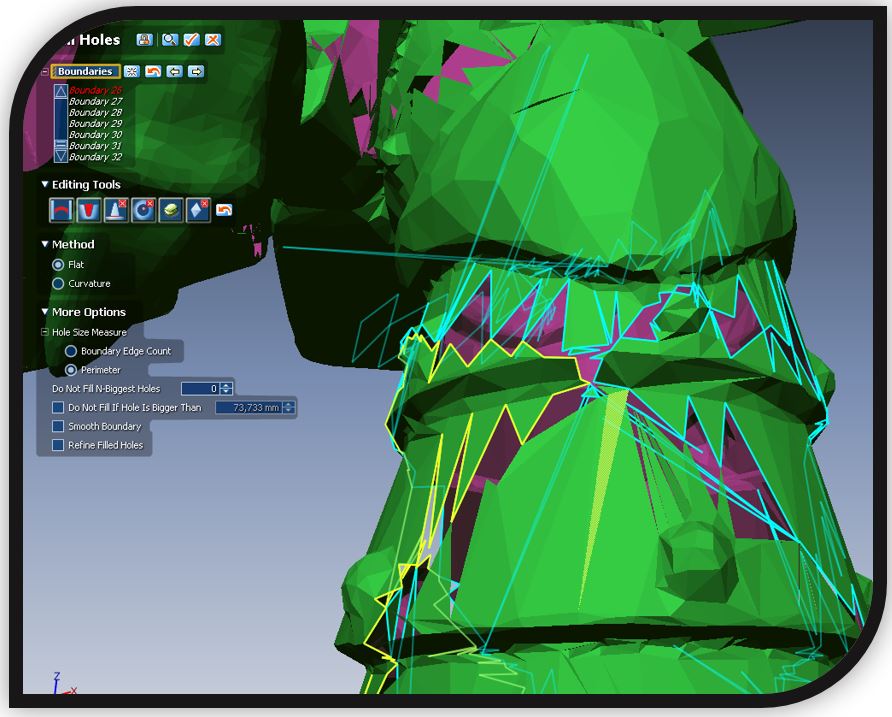
Then I have to merge the two separate meshes into one (I can use the "merge" command). And start fixing the holes and damaged areas.
After repairing the whole model, I am going to design a base for the figure.
The model that I am going to obtain is of a solid.
As I am working with mesh model, I transform this solid to mesh to be able to blend with my main mesh (same as before, with head and body).
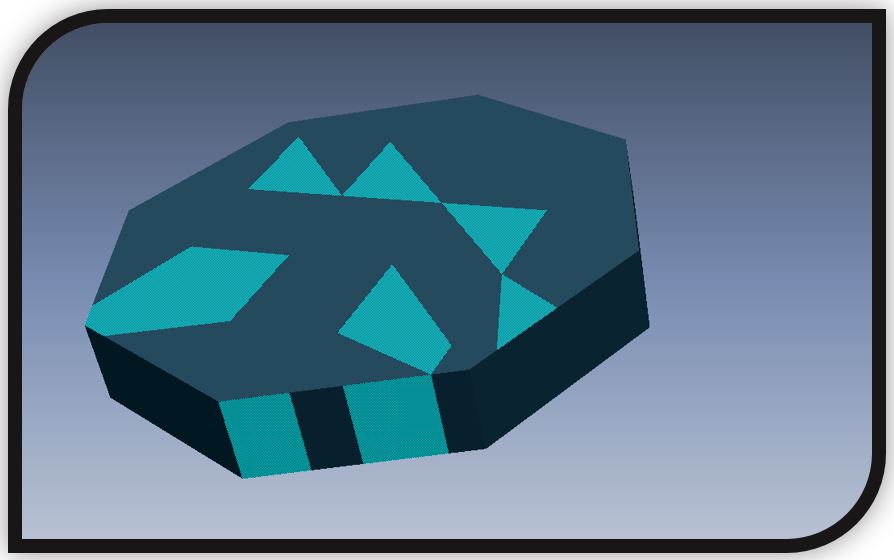
The result with the union of the base, is the complete doll and ready to print:
To print the figure, I am going to export the model in stl file. Then I will open the Cura software and put my stl model.
As a material I have used PLA thermoplastic, because it is one of the comfortable caterials to print because it does not have wrapping. It is also resistant and has a good finish.
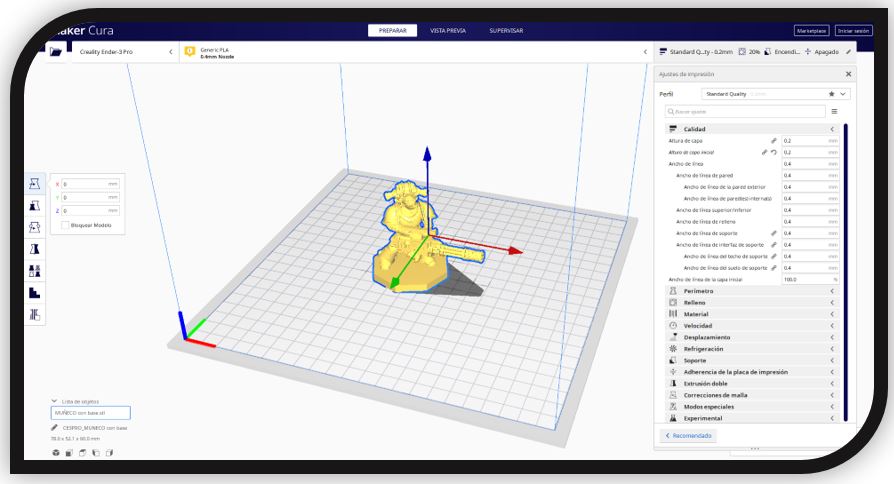
I configure the 3D printing parameters and verify the code.
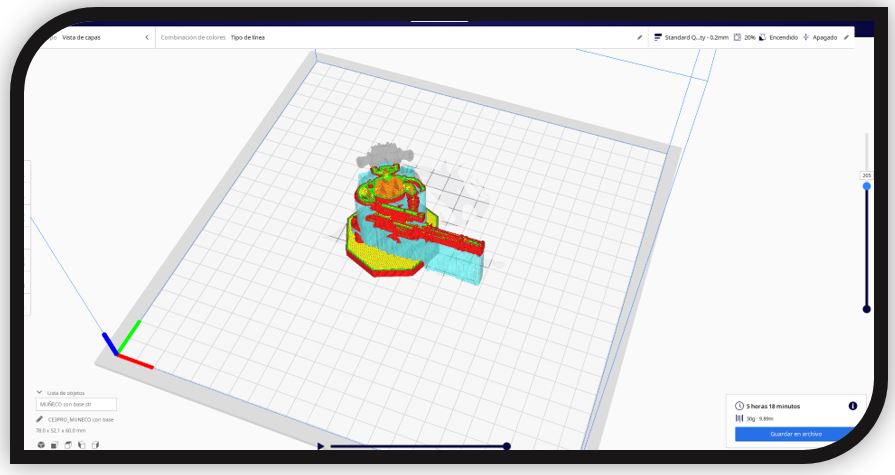
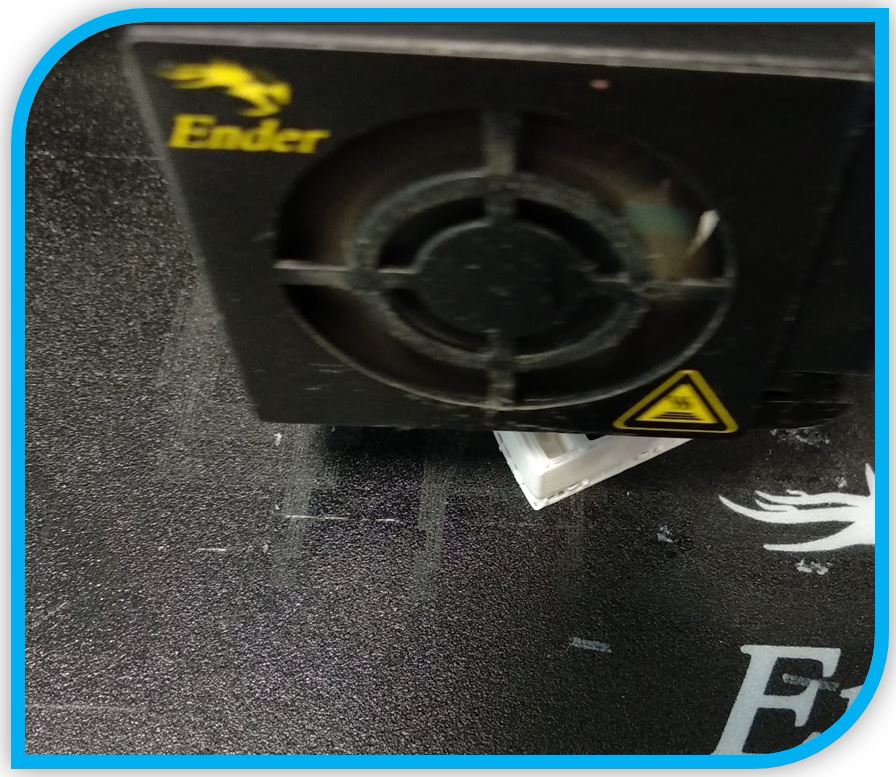
I launch 3D printing on the Ender 3D printer and the result is ...
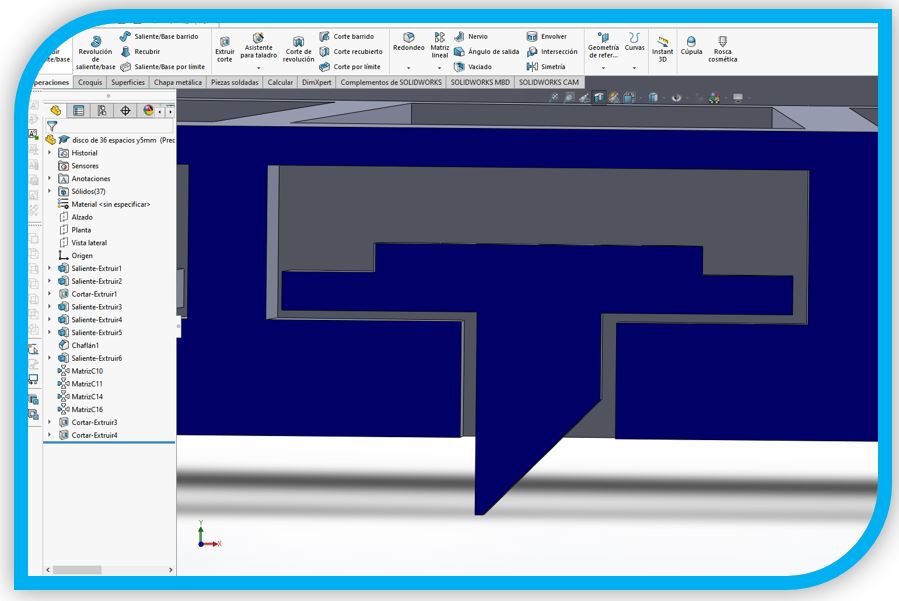
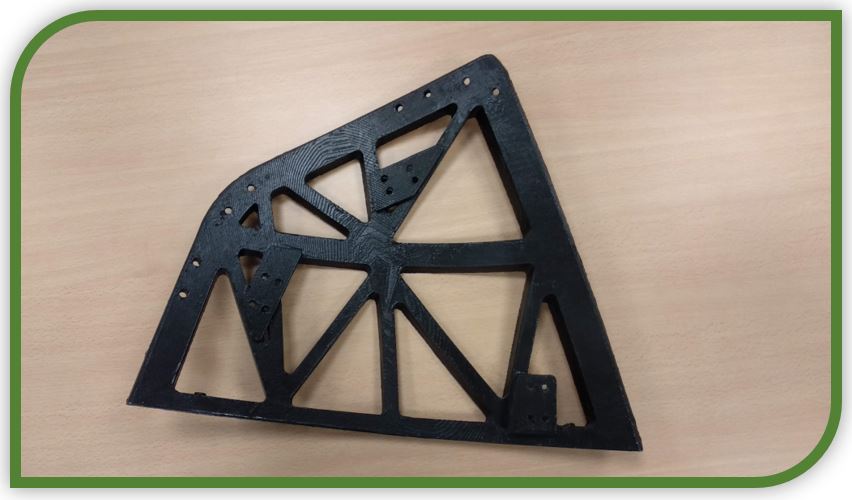
5.-Final proyect disc:
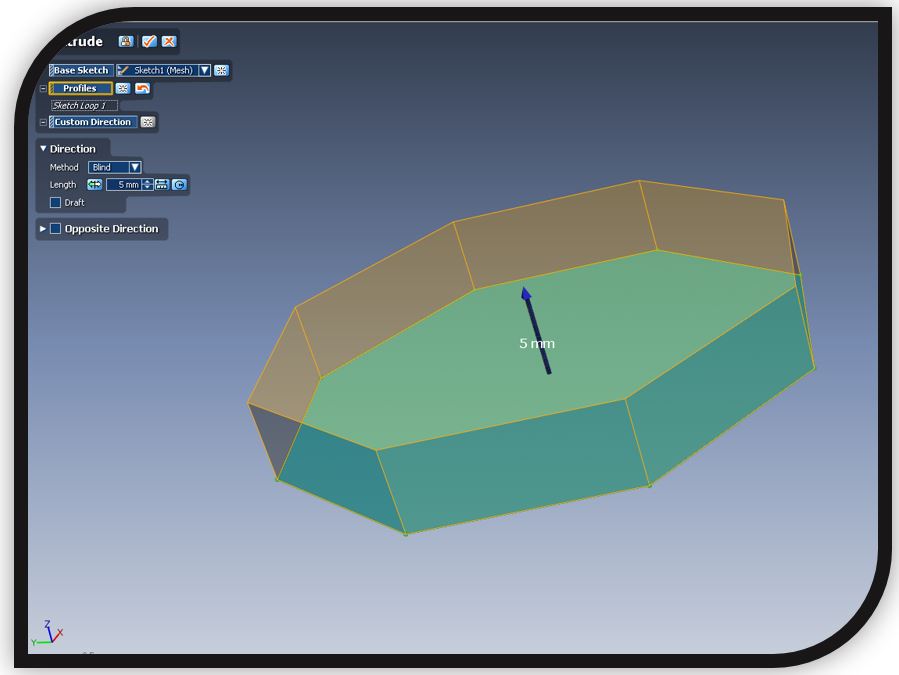
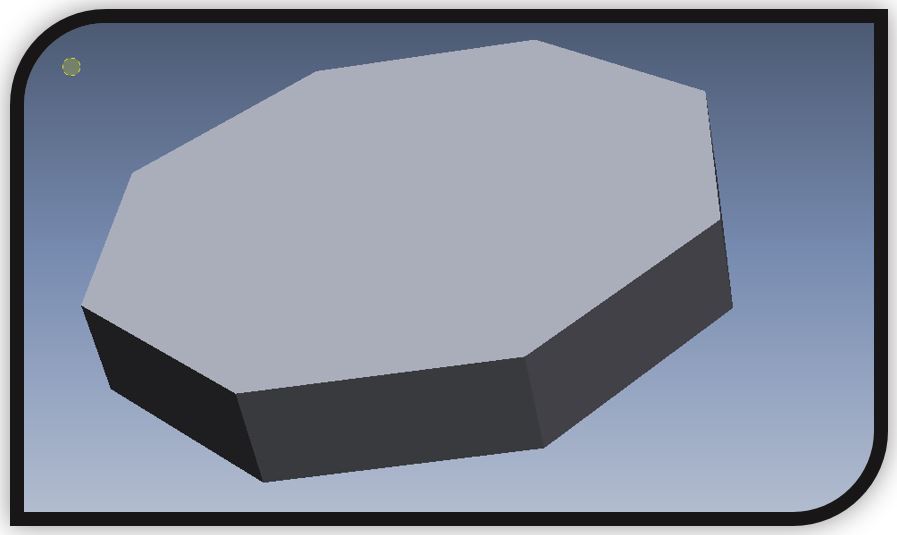
I take advantage of the fact that it is the week of 3D printing, I am going to design a first model of one of the discs for my final project. The disc will be printed in 3D to see a first result and test.
To design it I am going to use Solidworks.

The lower part has tabs, with anti-return function. They are designed to be 3D printed and can be detached, to be mobile.
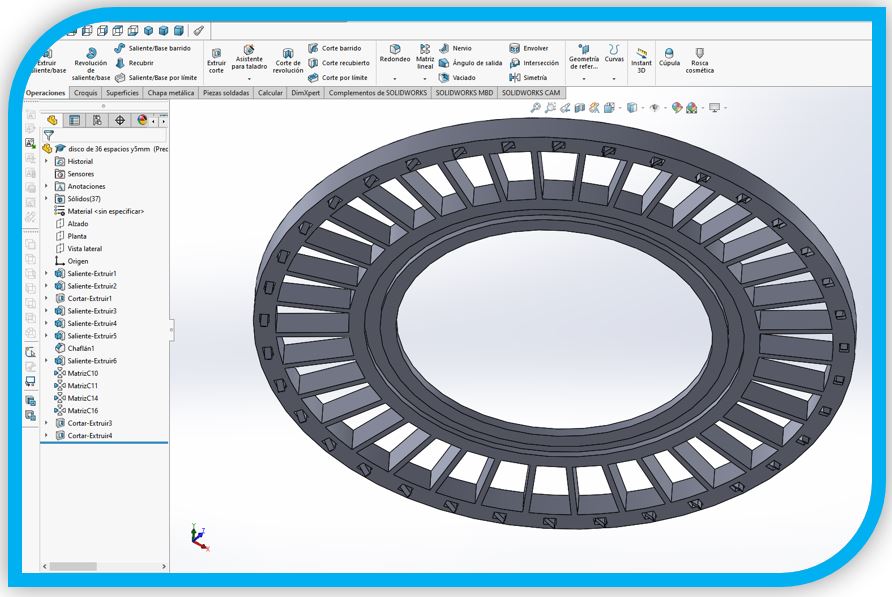
Disc tab detail.

They are shaped at an angle, so that they go up when they go in their direction, but they block the disk in the opposite direction, when they fall.
I export this design to Cura, in stl for 3D printing.
For the printing of the first album of the final project, I have also used PLA, because it is a cheap material and the surface finish it has is ok for this piece.
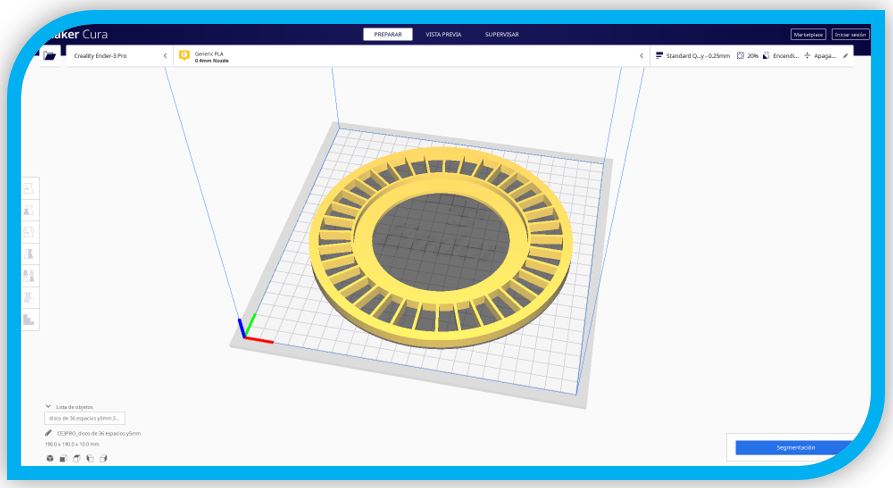
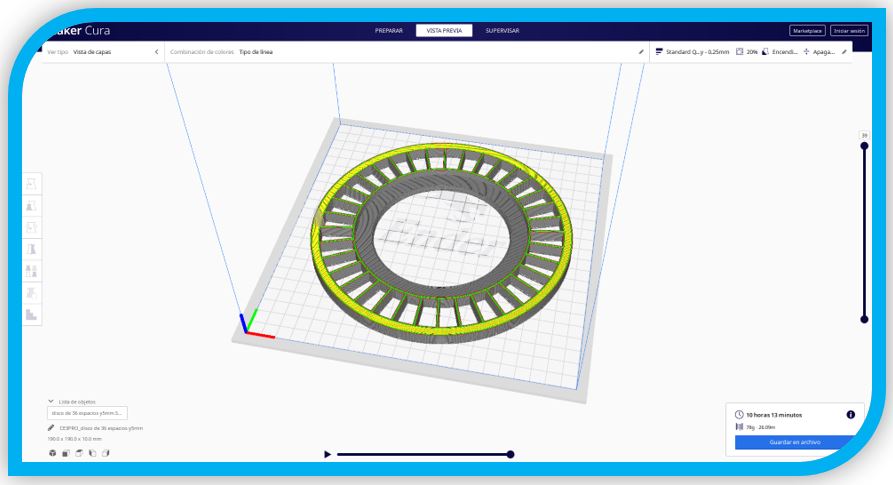
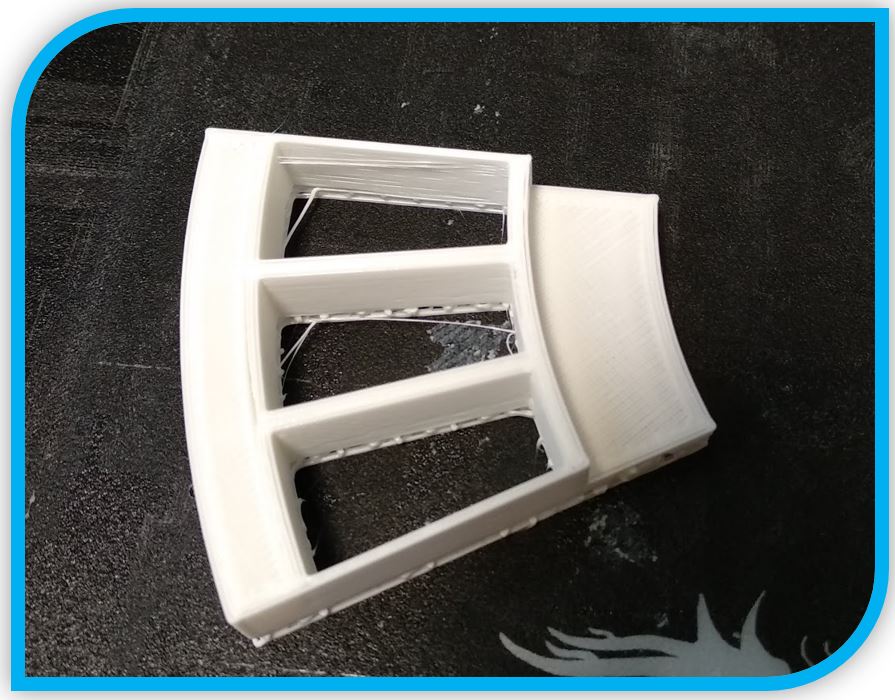
I slice it, and since I see that it takes 10 hours, I decide to print only one section.
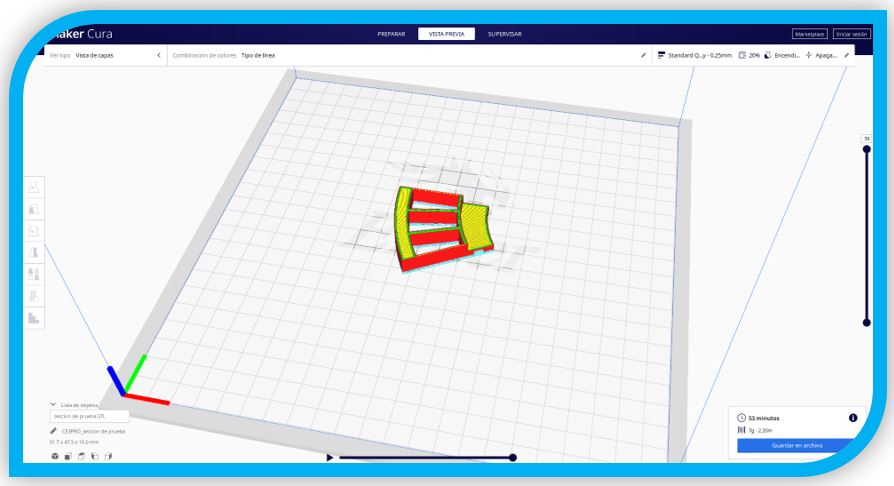
Printing in 3D.
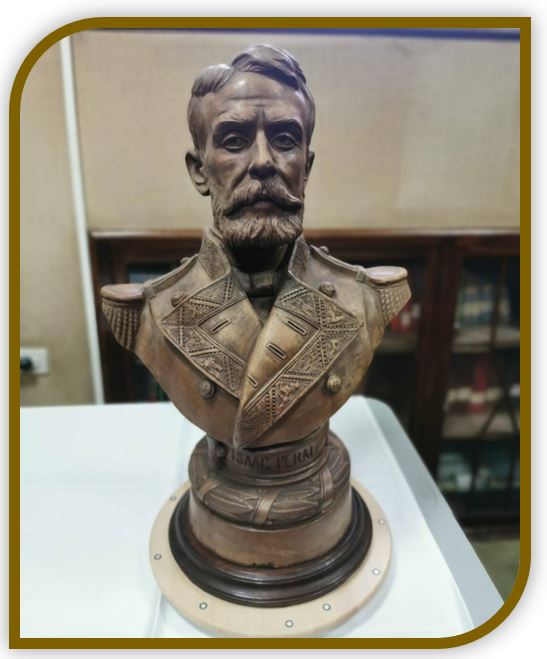
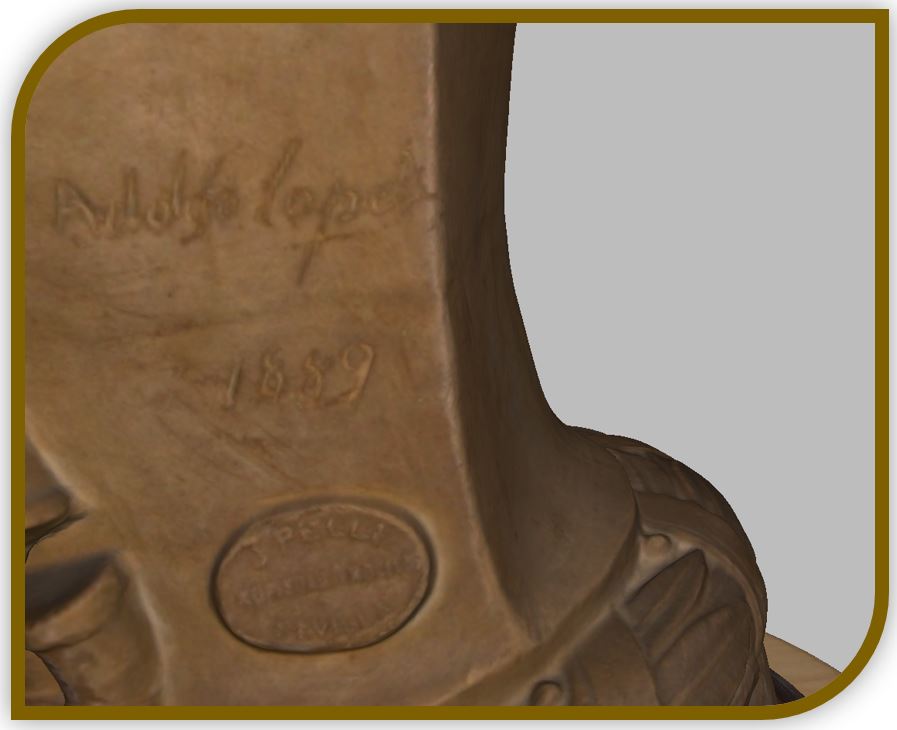
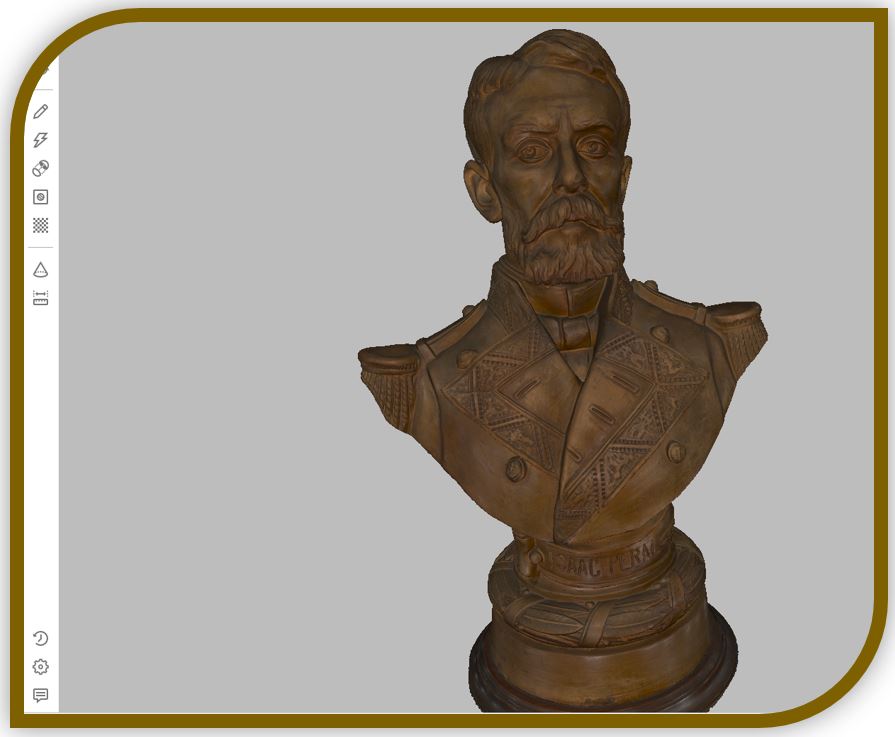
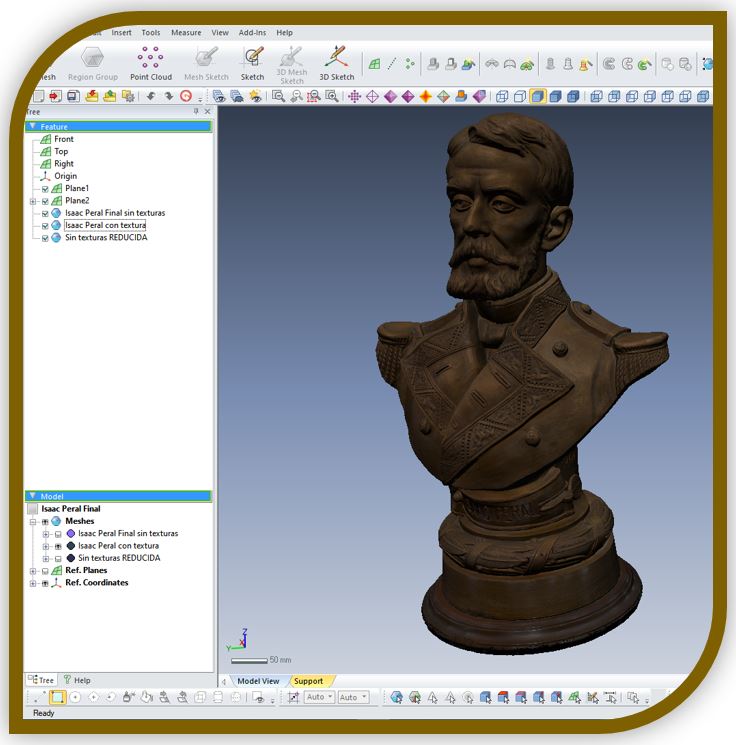
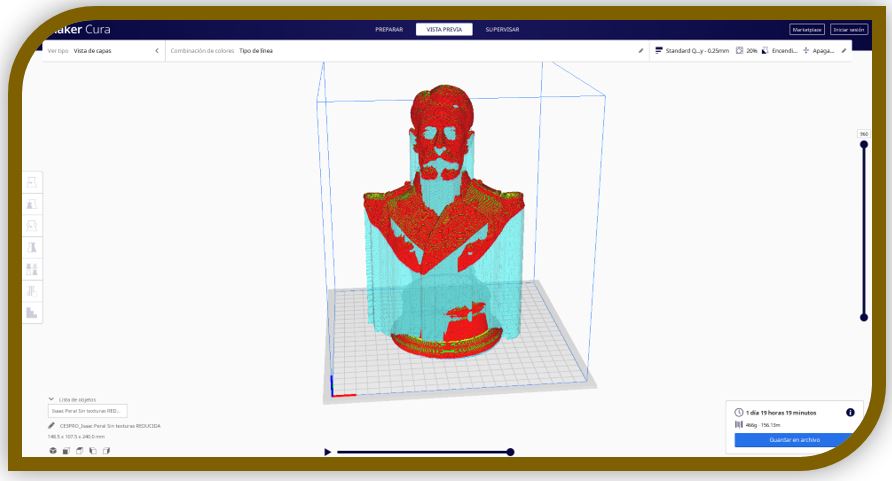
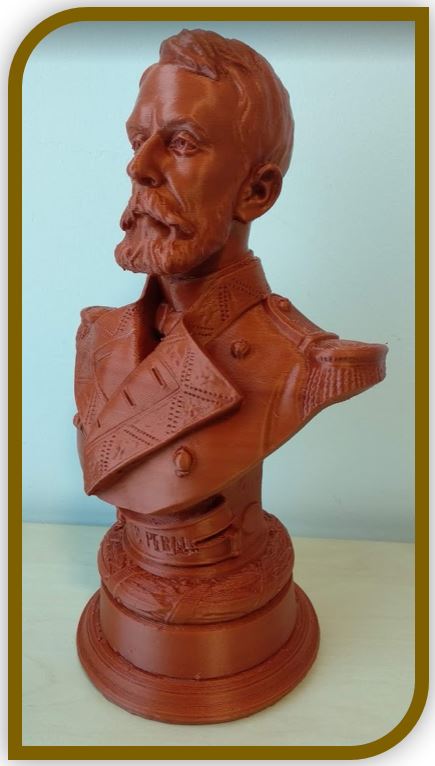
6.-Isaac Peral's bust:
To start: Isaac Peral y Caballero was and is famous for being the inventor of the submarine and therefore is an important historical person of Cartagena city.
In collaboration between the Armada de Submarinos de Cartagena and the UPCT, I scanned a historical bust of Isaac Peral, dating from 1889 AD. The use of 3D scanning in this case is aimed at heritage conservation.
With this technique, despite the fact that the bust may be broken in the future or lost due to some inconvenience, the information will be preserved as it was when scanned in 3d.
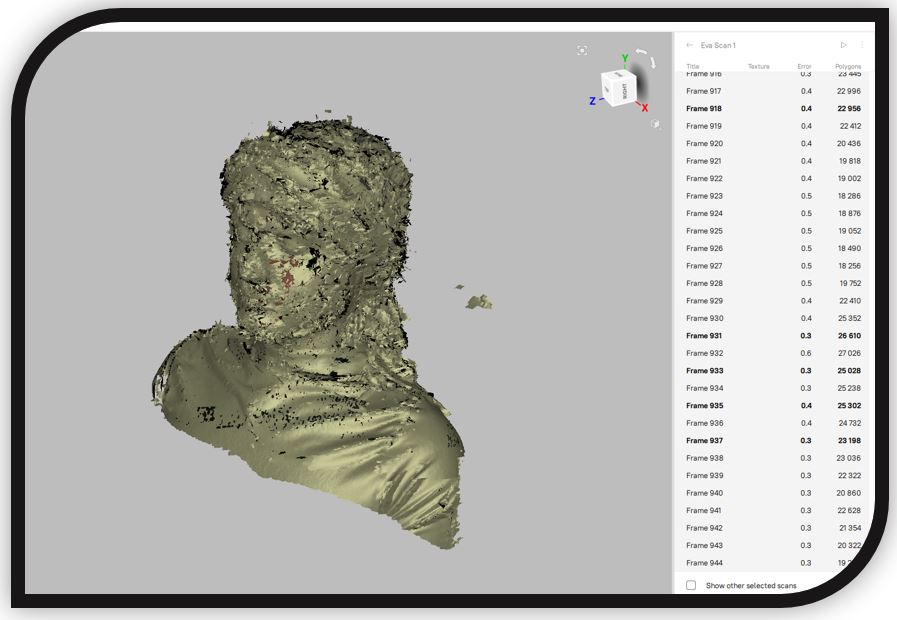
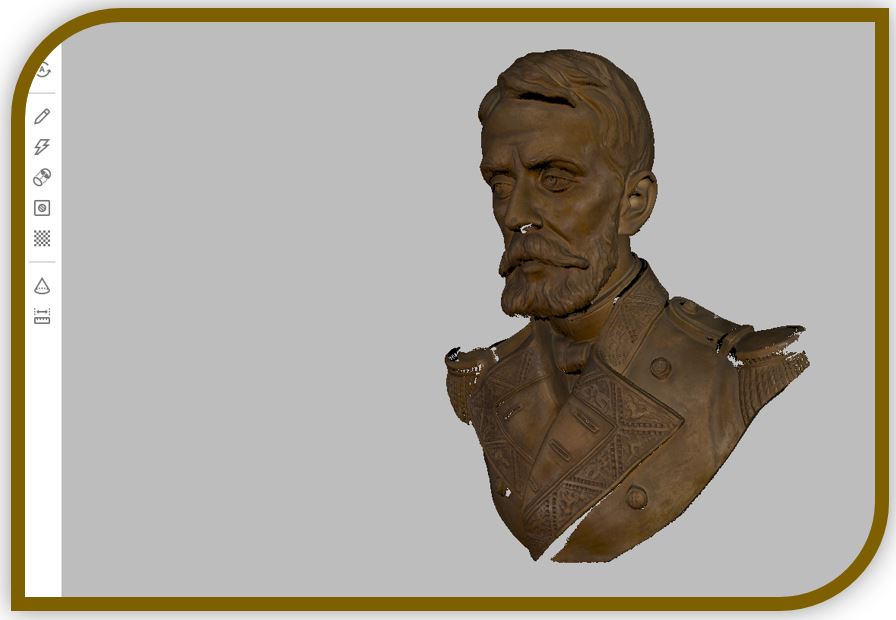
For the bust I made two complete scans, one with the EVA scanner, faster but with lower resolution and another 3d scan with the SPIDER scanner, slower but with higher resolution.
The EVA 3D scan:
The EVA 3d scanner, as it has less resolution, is capable of scanning an object faster, therefore, the point cloud or the mesh will have a lower number of elements and the files will weigh less and it requires fewer passes scan.
For the Issac’s bust and the EVA scanner, I only had to do a single pass to complete it and get a lightweight file.
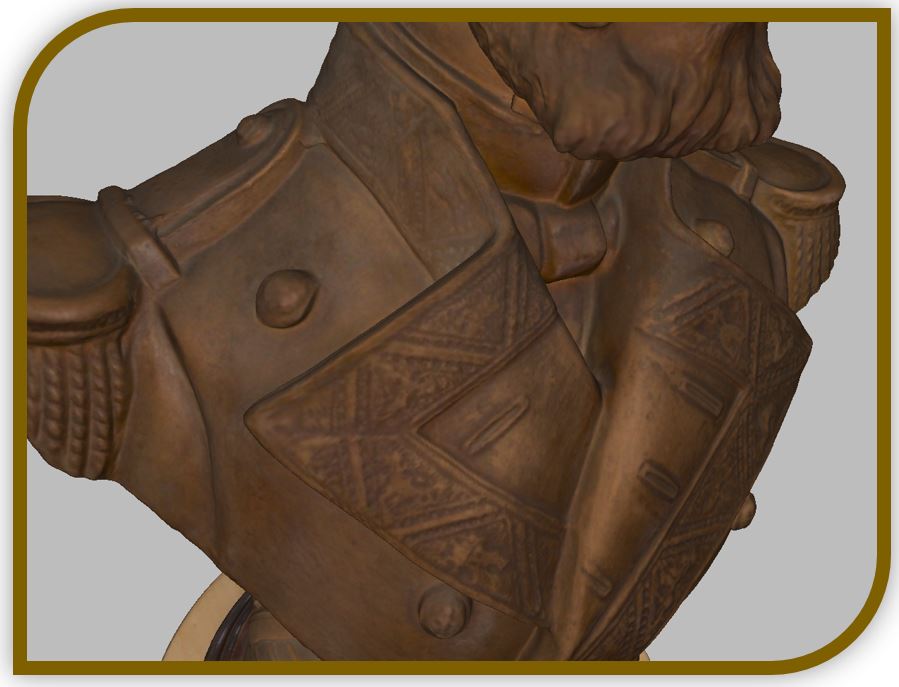
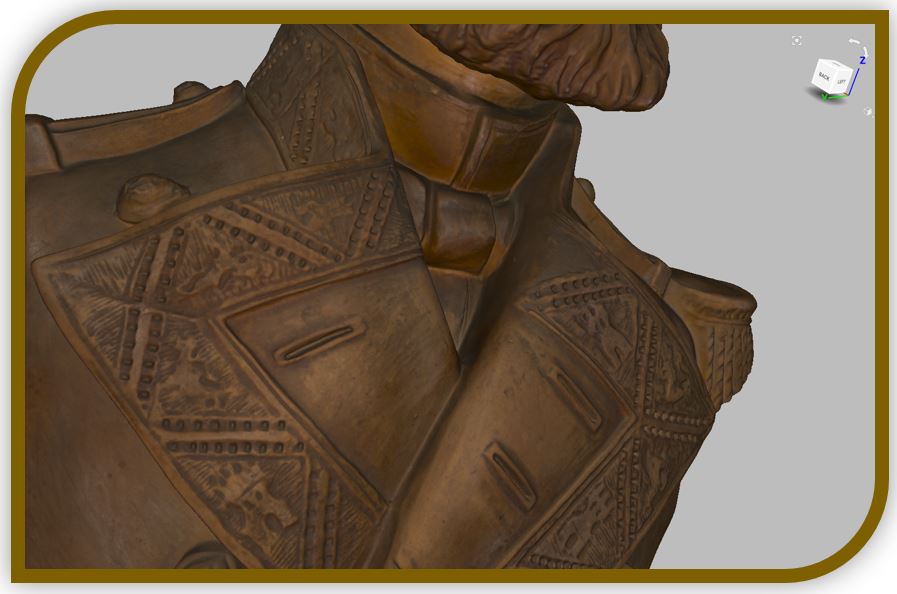
The downside of using this scanner is its resolution. For the details of the jacket, the embroidery cannot be appreciated well. Neither did the details of the buttons.
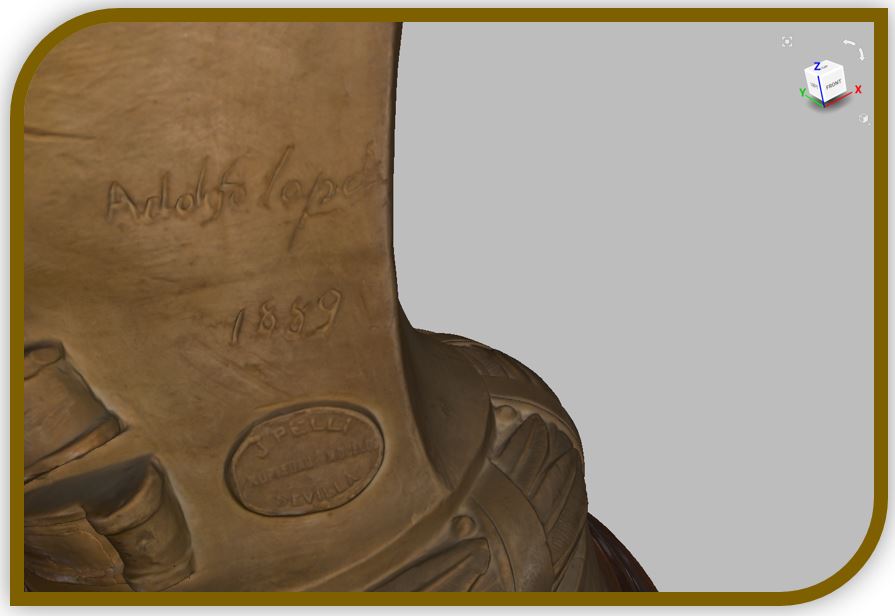
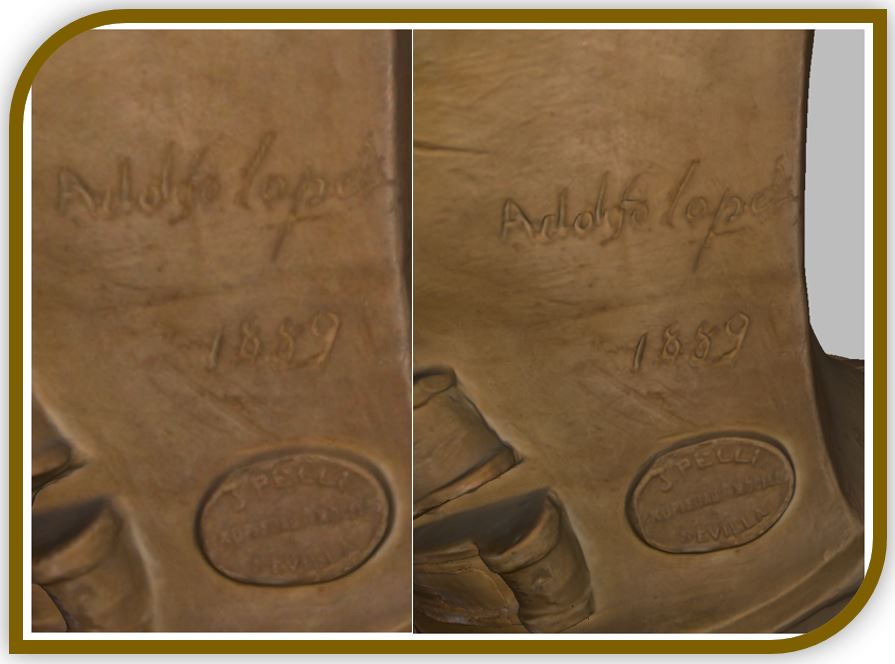
For the part of the author's signature and the year, not all of the detail is captured either.
But for example, as an advantage, is that the scan obtained is useful for making a 3D printing. The stl file that can be obtained is lighter and with a printable level of detail.
The SPIDER 3D scan:
As for historical preservation it is necessary to obtain the highest level of detail possible, I made another scan using the SPIDER 3D scanner.
In this case, as the higher the resolution, the higher the level of information and the greater the weight of the file, to make it easier to work, I did the bust in three passes.
Pass or top sweep:
Pass or center sweep:

Pass or bottom sweep:
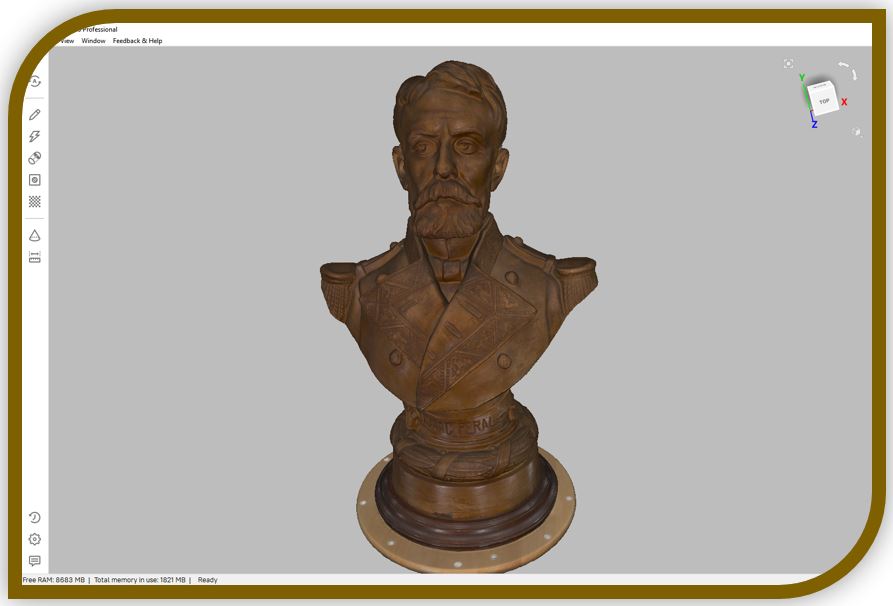
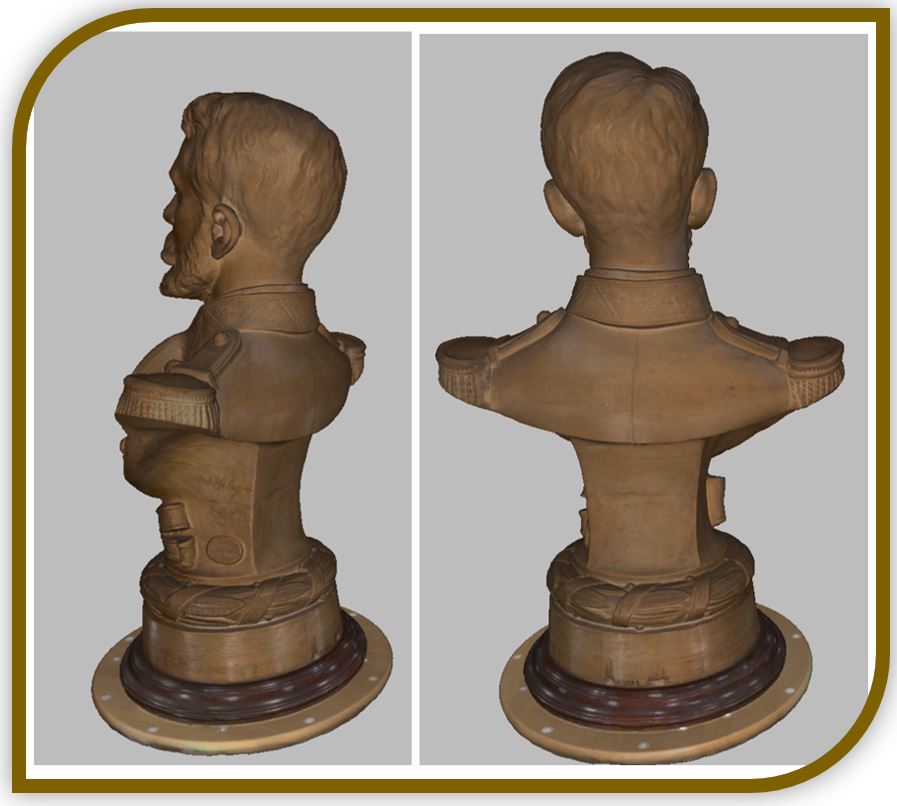
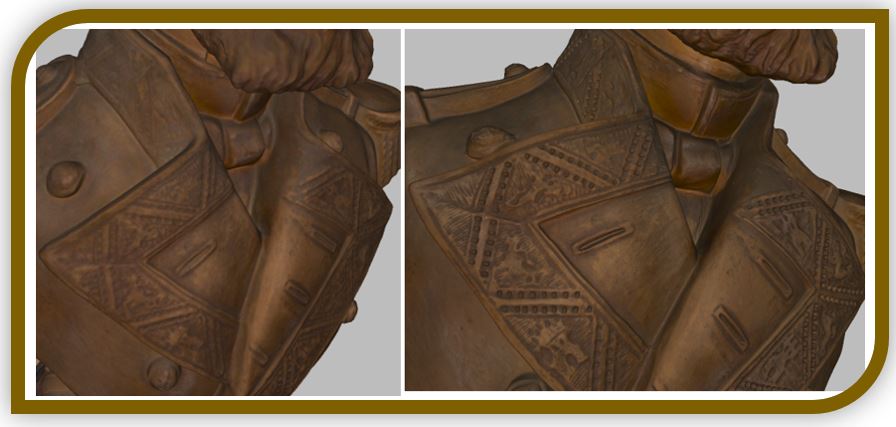
The combination of the three scanning meshes, generates the final result of the bust, with a greater level of detail.
Jacket Details
Signature details
Comparison:
Using Geomagic design:
By importing the model into the Geomagic Design software (obj file) I can repair possible defective areas and retouch the mesh triangles and their density.
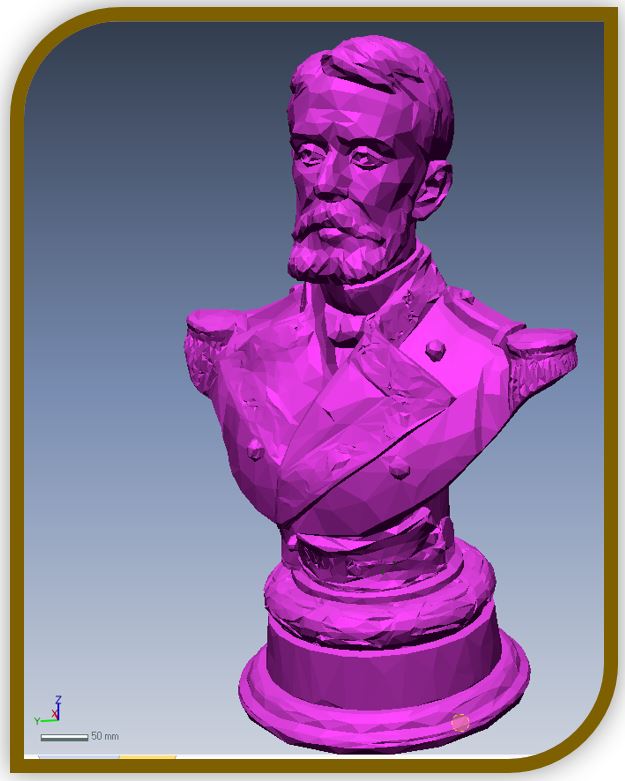
I will create a 3D printable model. To do this, I will reduce the number of triangles in the mesh so that the mesh weighs less, without losing all the details.
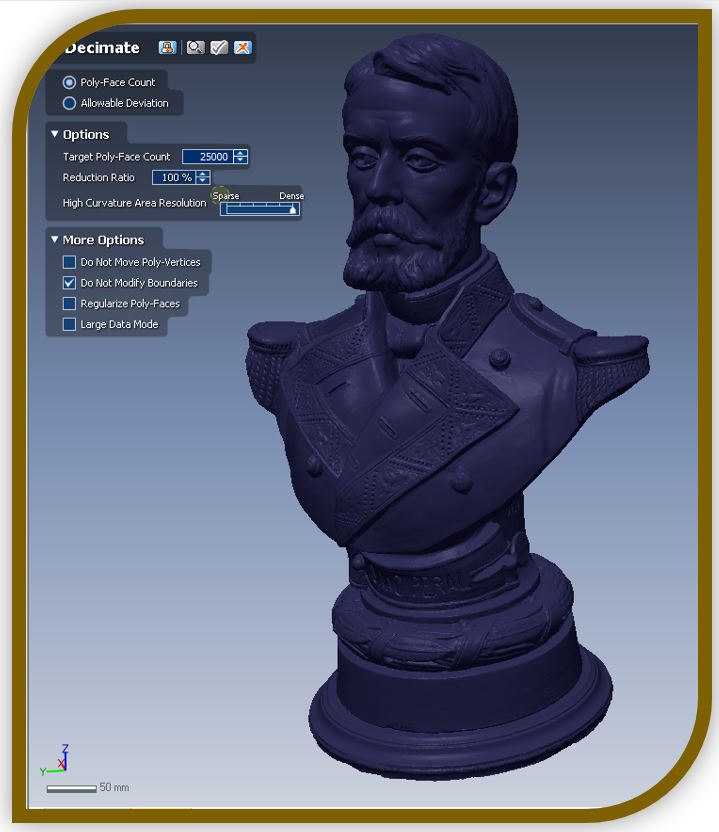
So that you can see the mesh reduction better, I'm going to create a low poly model.
3D Printing, Cura:
With the printable model, I will generate the gcode for the 3D printer with the Cura software.
I have also used PLA for the bust of Isaac Peral. Maybe I could have used ABS for having a little more resistance. But PLA also has very good resistance, it does not give problems to print and the bust is only an aesthetic piece.
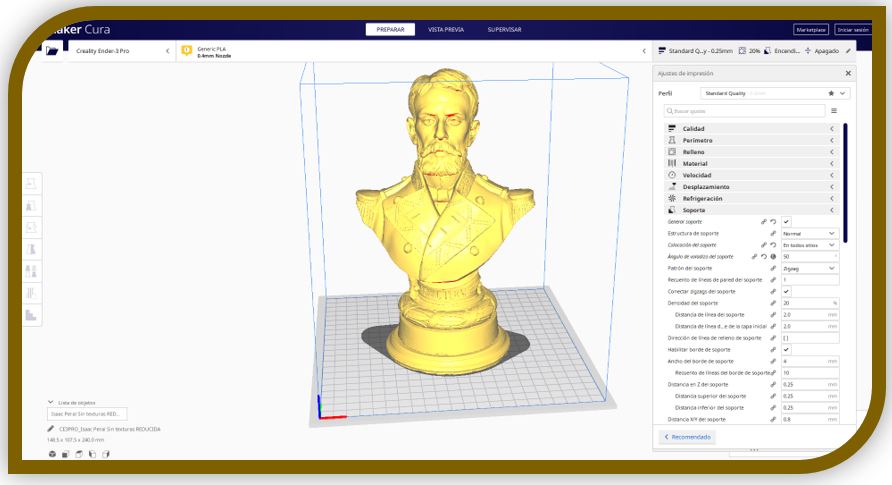
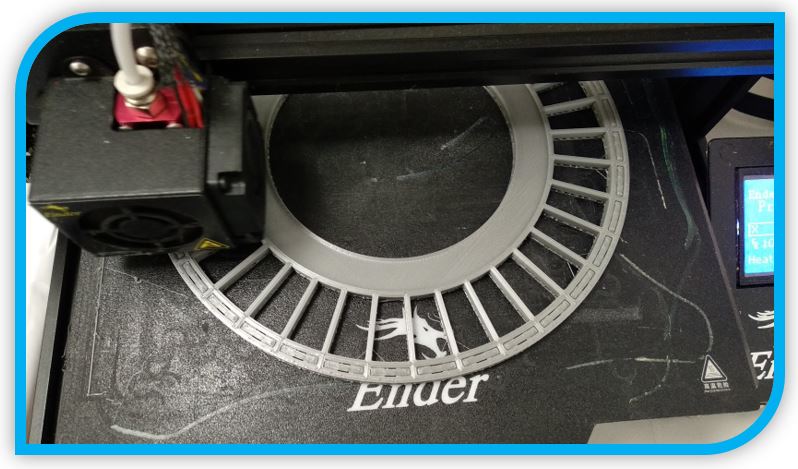
I scale the model to a smaller size, configure the printing parameters, verify and launch the gcode with the 3D printer.
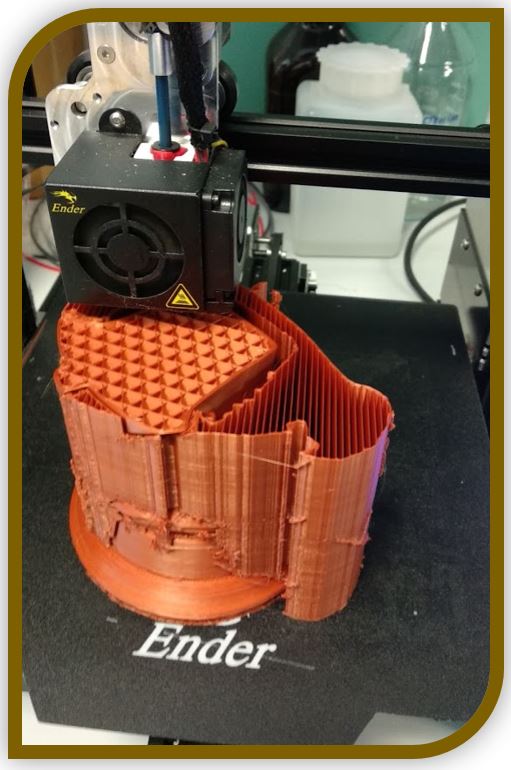
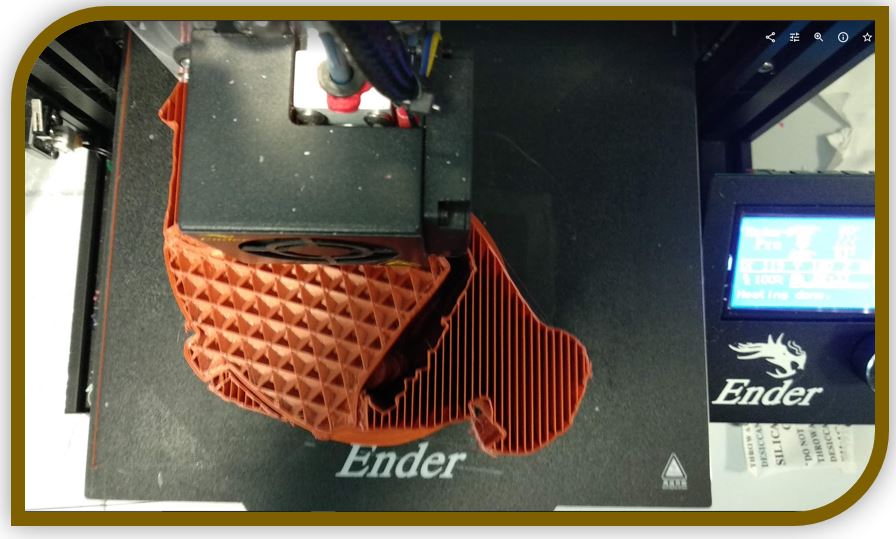
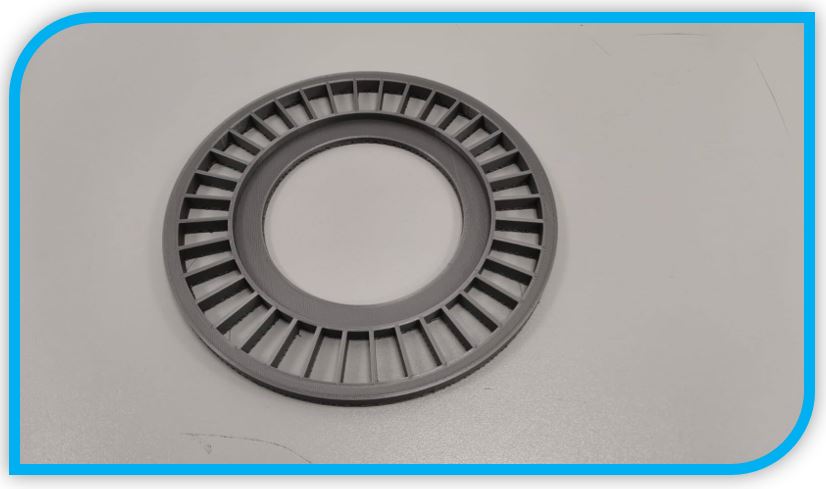
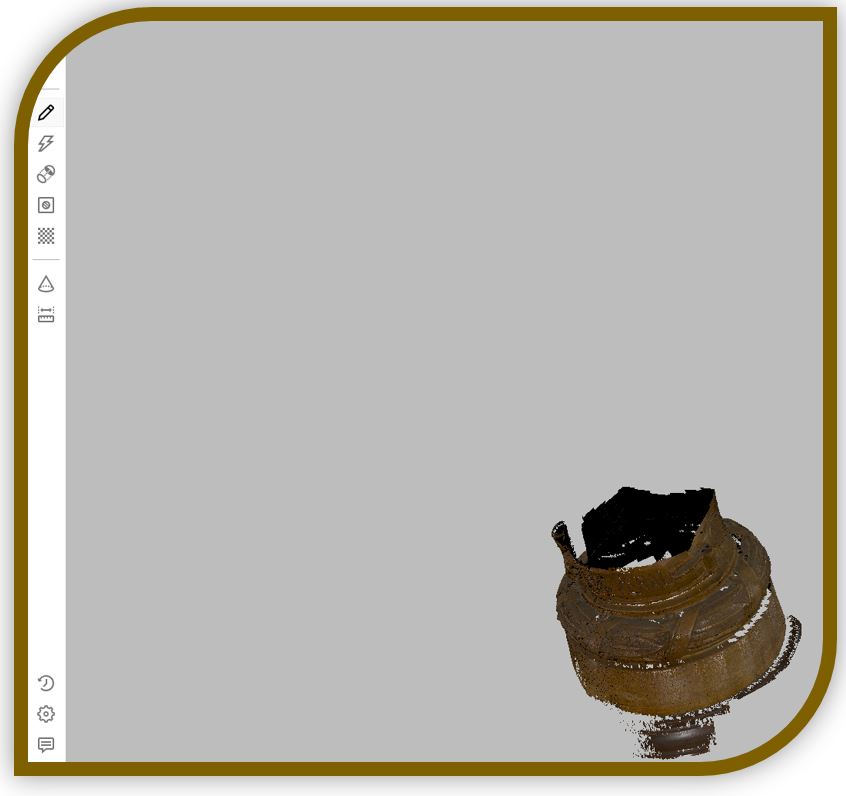
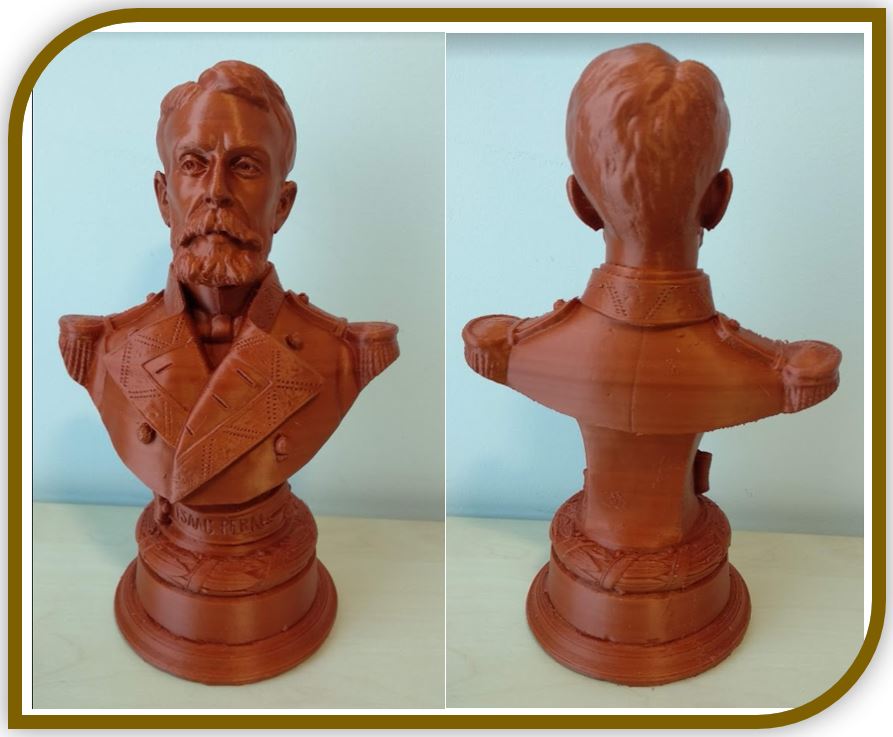
The result at the end is the following, but it still remains to remove the support material.
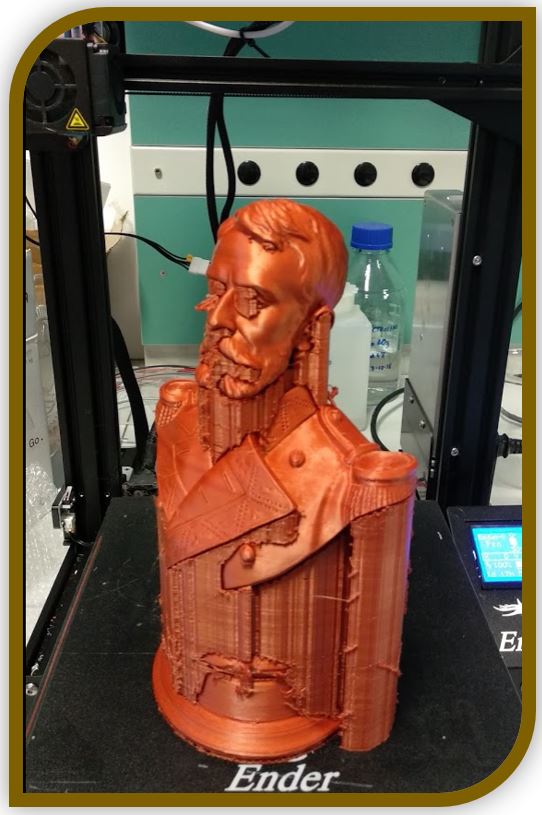
The Isaac Peral clean 3D bust is ...
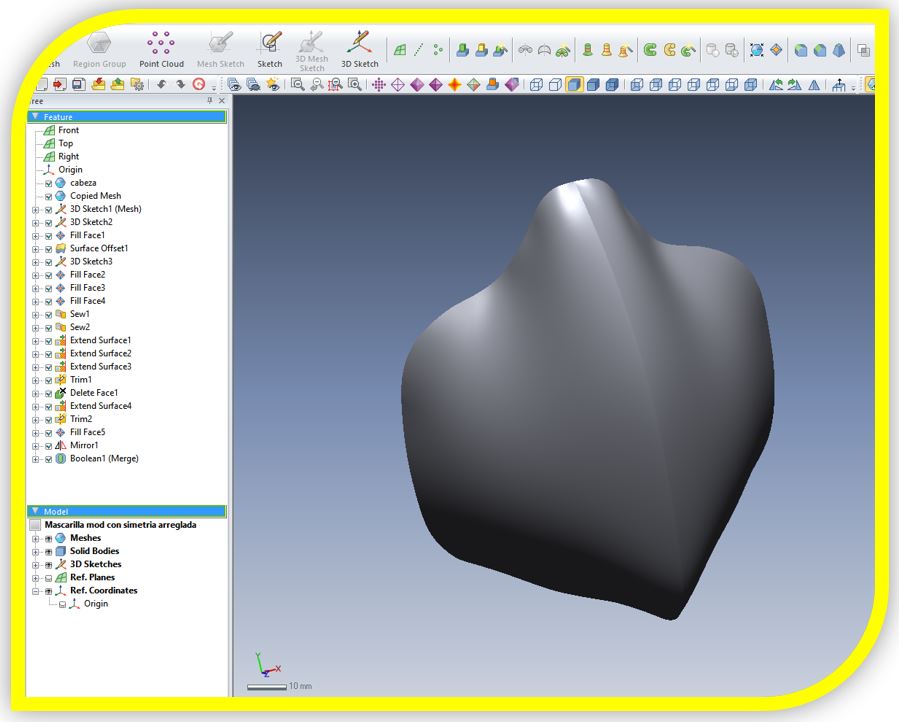
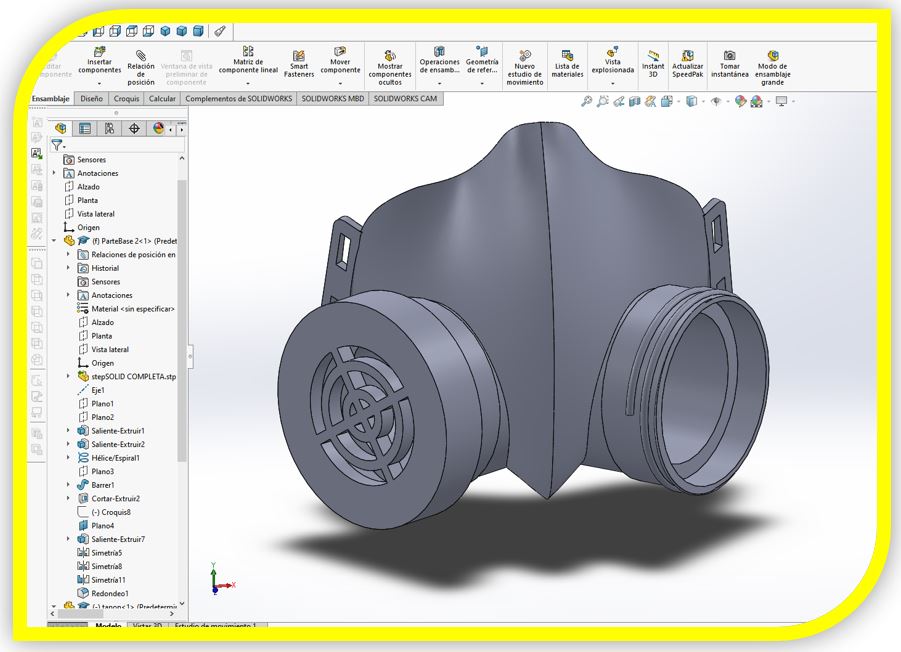
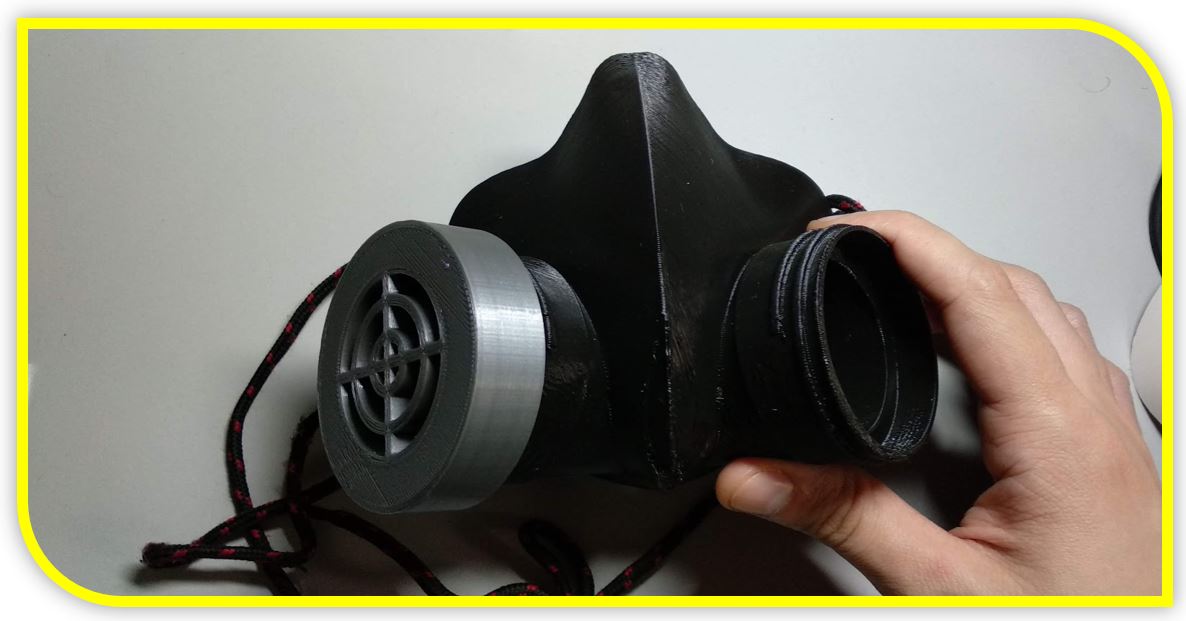
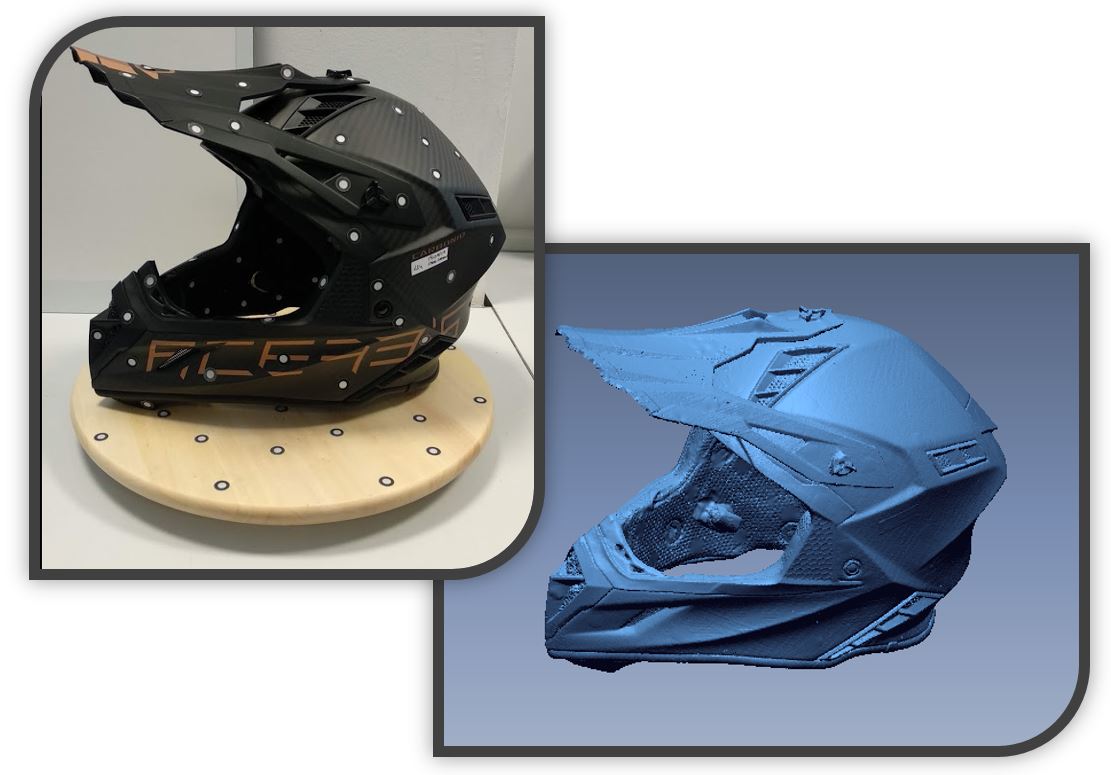
7.-Another example of 3D scanning, modeling and printing: custom mask:
With the movement of having to wear masks, it occurred to me to use a scan of my face to make an adapted personal mask.
for this I use Geomagic Design, which allows me to make 3D sketches on the mesh of my face.
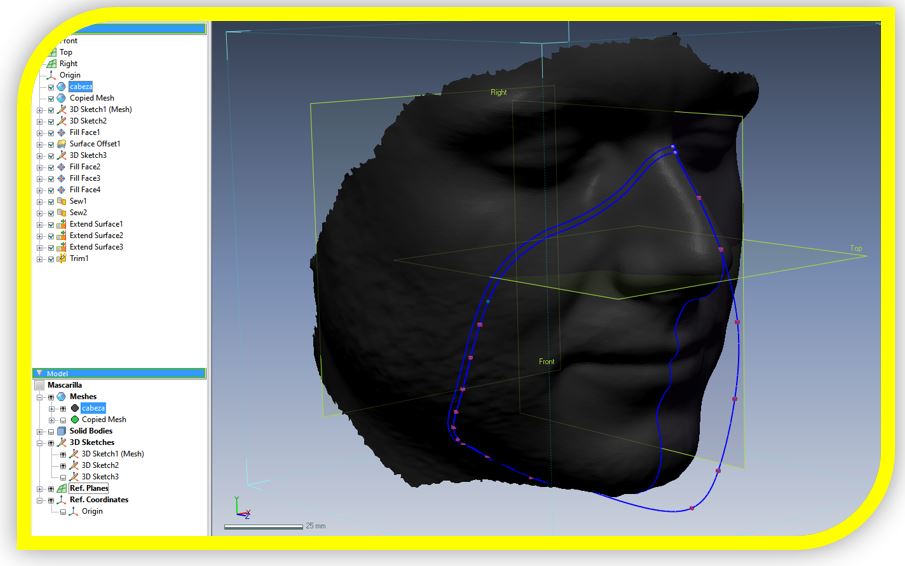
With this 3D sketch, I can create the main surface of my adapted mask.
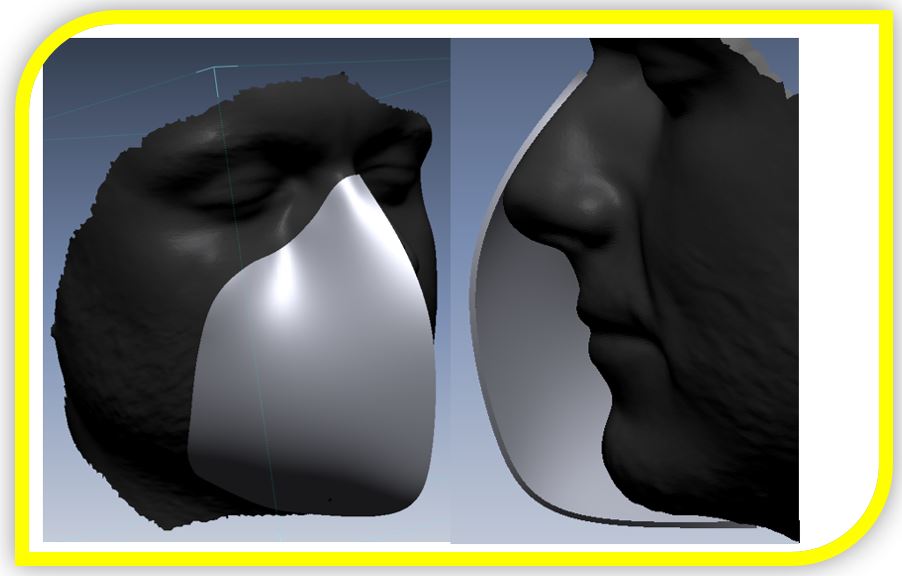
So, I'll take this generated base and export it to Solidworks to work out the details.
In Solidworks I will create the rest of the body shapes of the mask.
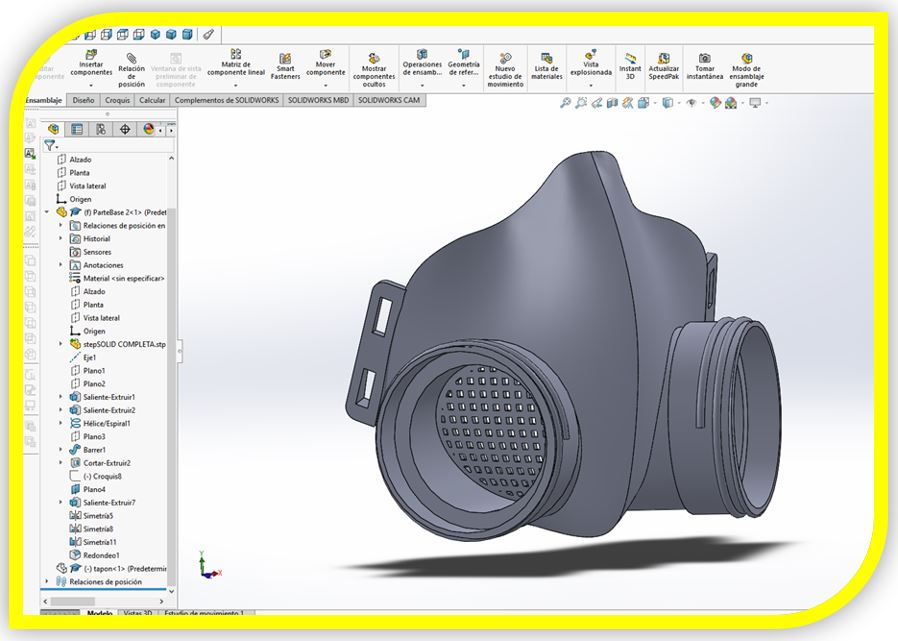
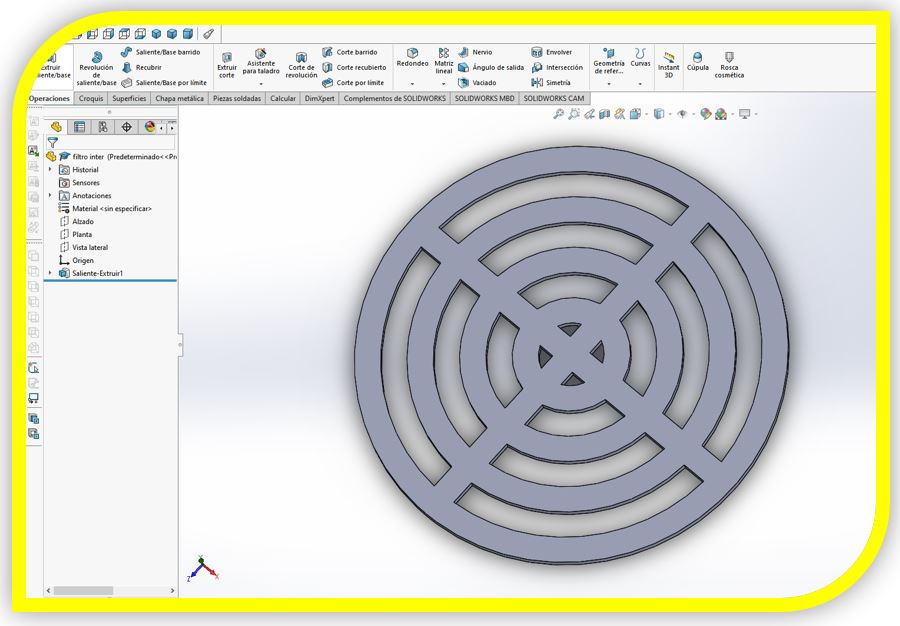
I'll create a cover for the filter.
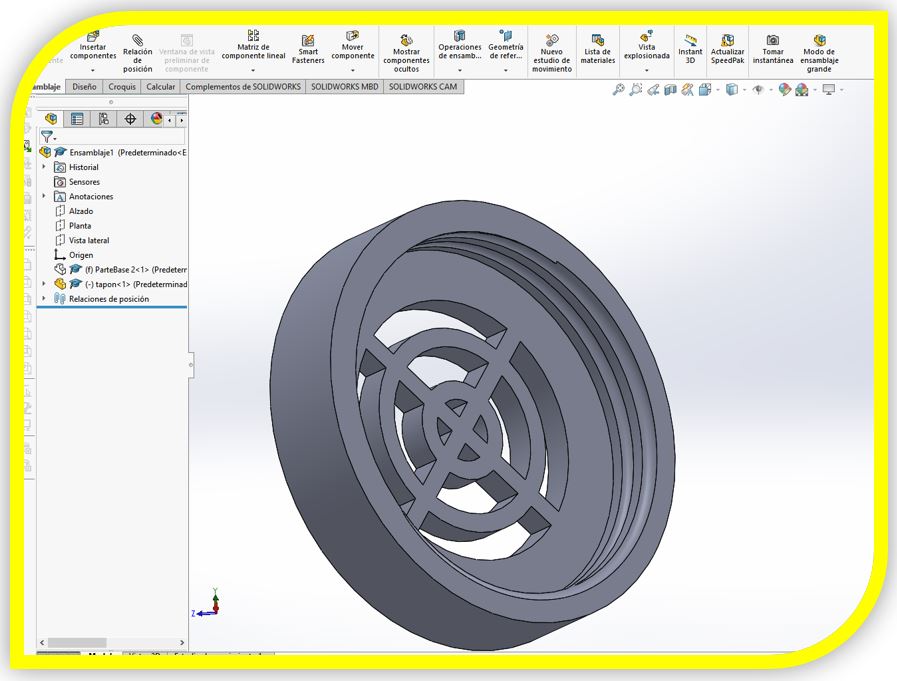
and a fixing filter.
the assembly will be:

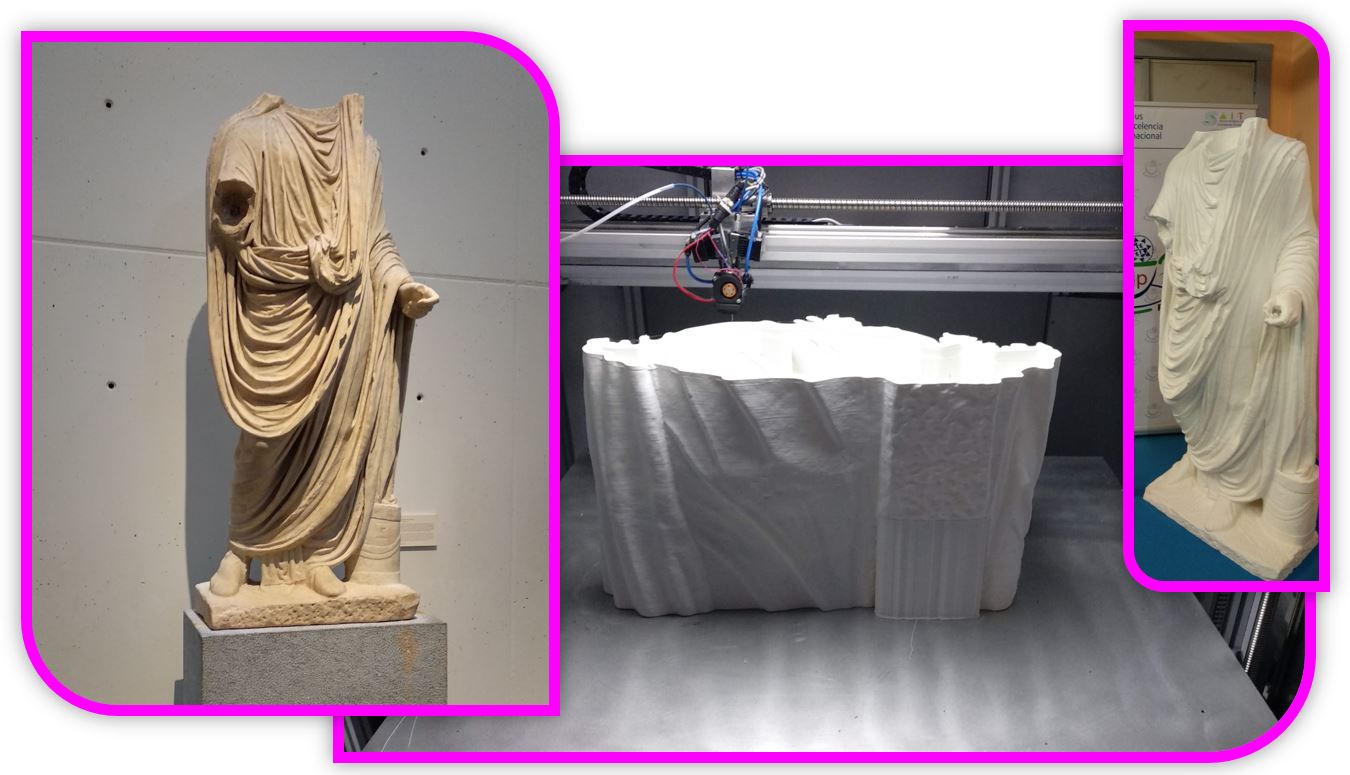
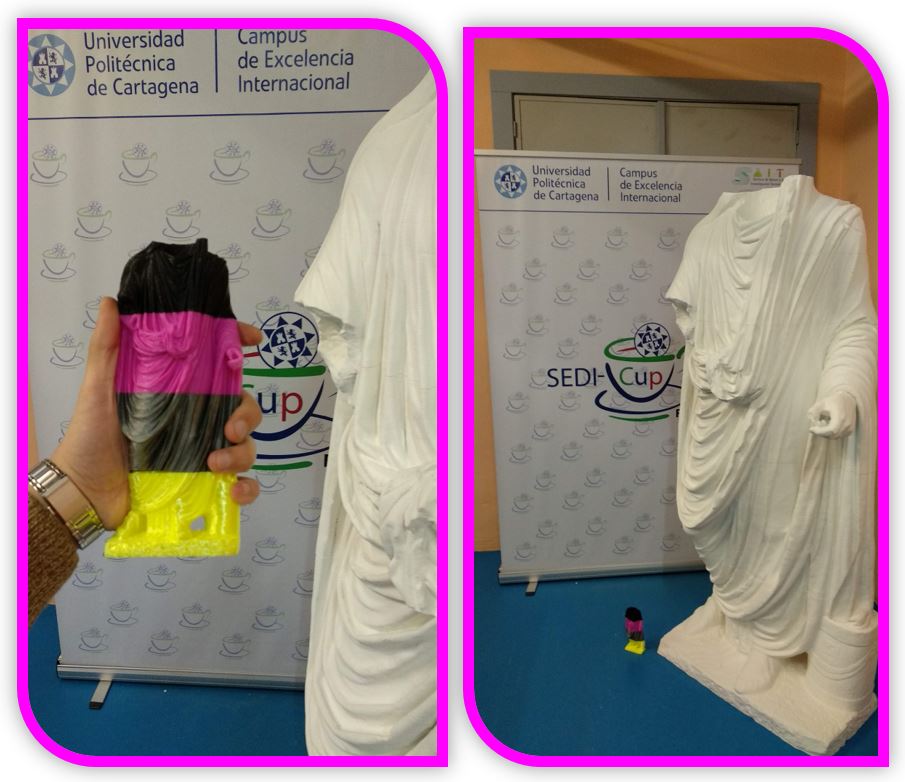
8.-Examples of my work:
Heritage conservation: Augusto
Cartagena's Roman Theater
The curiosity of this work is that it is printed on a large format 3D printer. Each piece is printed in a volume of approximately (800x1100x500) mm. The material used is PLA Premium which can be printed at 250 degrees. It is a bit different from PLA, harder and almost like ABS. It has a bit of wrapping, so you have to print carefully, but its wrapping is not as much as ABS or ASA.
Reverse engineering
Templates for assembling parts in the automotive, aviation and naval industries
9.- FILES
Disc Final Proyect vers01 PrintableMy Space Marine & Peral's bust STL Printables
10.-Experience and conclusions from WEEK5:
This week was entertaining for me, because it is about things I work with. So I decided to have a little fun and try to teach how you can make a doll with the scan of a face.
In addition, it was good for me to test my first album of the final project with 3D printing and be able to evaluate it.
I have also shown some examples with which I have worked as a curiosity, in case someone finds it interesting.