7. Computer controlled machining
Assignment of this week
- [ ] Demonstrate 2D design development for CNC production
- [ ] Describe workflows for CNC production Have you answered these questions?
- [ ] Linked to the group assignment page
- [ ] Documented how you designed your object (something big)
- [ ] Documented how you made your CAM-toolpath
- [ ] Documented how you made something BIG (setting up the machine, using fixings, testing joints, adjusting feeds and speeds, depth of cut etc.)
- [ ] Described problems and how you fixed them
- [ ] Included your design files and ‘hero shot’ photos of final object
Computer-Controlled Machining
Group assignment:
Test runout, alignment, speeds, feeds, and toolpaths for your machine Document your work (in a group or individually)


Individual project
Make (design+mill+assemble) something big: This week I have learned how to design and make a wood table in a very short and fast paced speed.
My original thought is to design a dinning table which could serve as a new table for my home. So by searching for some tutorial, I start to play with 3D design software, like Fusion 360 and Rinoceros. It is fun but stressful to pick up a new software in a very short time within several days. It is just like mission impossible. But following some tutorials from internet, I learned how to use Fusion 360 to create my sketch. However, the tool turned out to be nightmare after using for a while, because it took long time for the software to respond to my command. But anyway, I finally finished part of my first draft. There are two things need to be measure and confirmed. One is the thickness of the wood board, which is 18mm. And the radius of the cutter 6.4mm.
With the thickness and the diameter, I could decide the size of slots on each leg, which is 18.5mm. I leave extra 0.5mm to leave some space to join these parts.
For the inner right angles, round corner should be added at each inner right angle at radius 6.5mm, which is 0.1 mm bigger than the cutter radius.

Then, Saverio advise me to switch to Rino 7, which runs faster than Fusion 360. Last step is to put all parts together and make sure all the parts are closing parts.
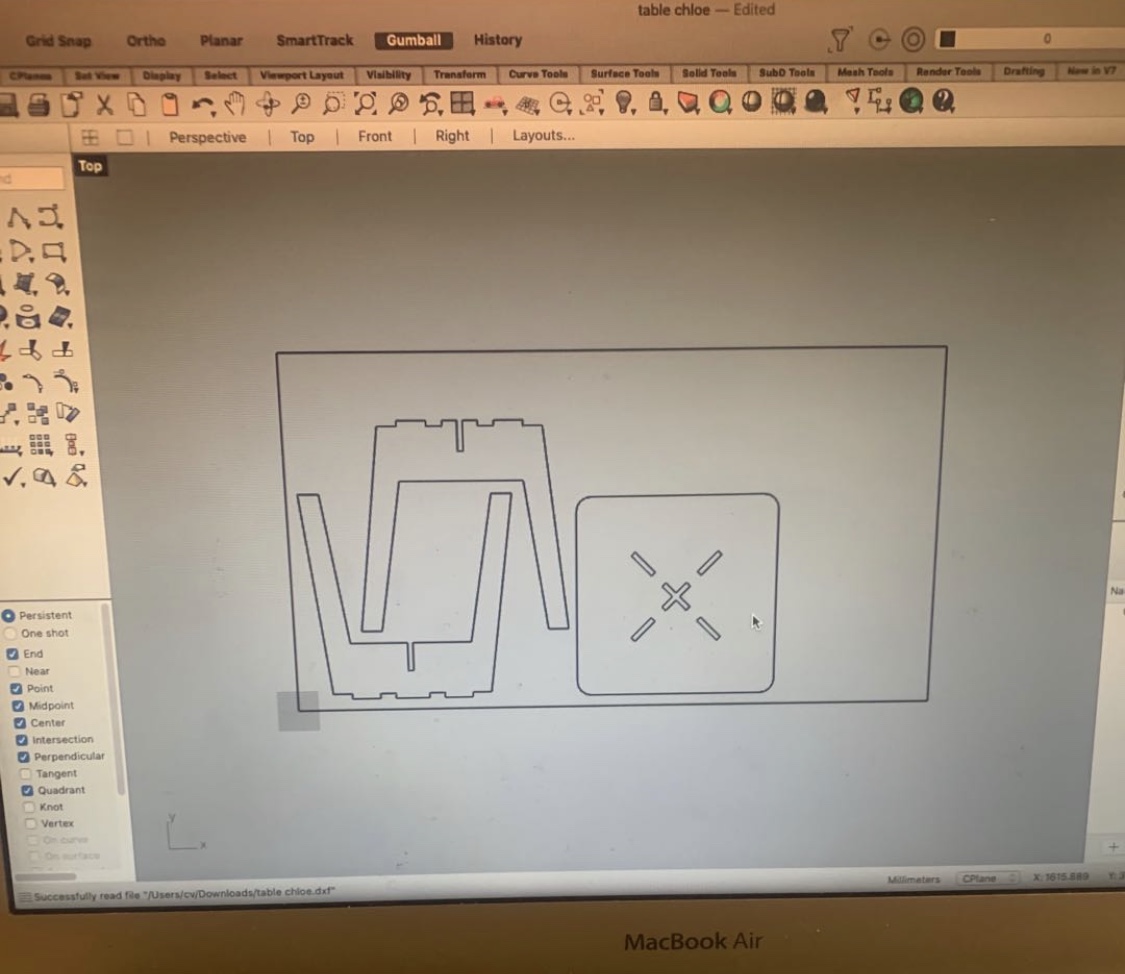
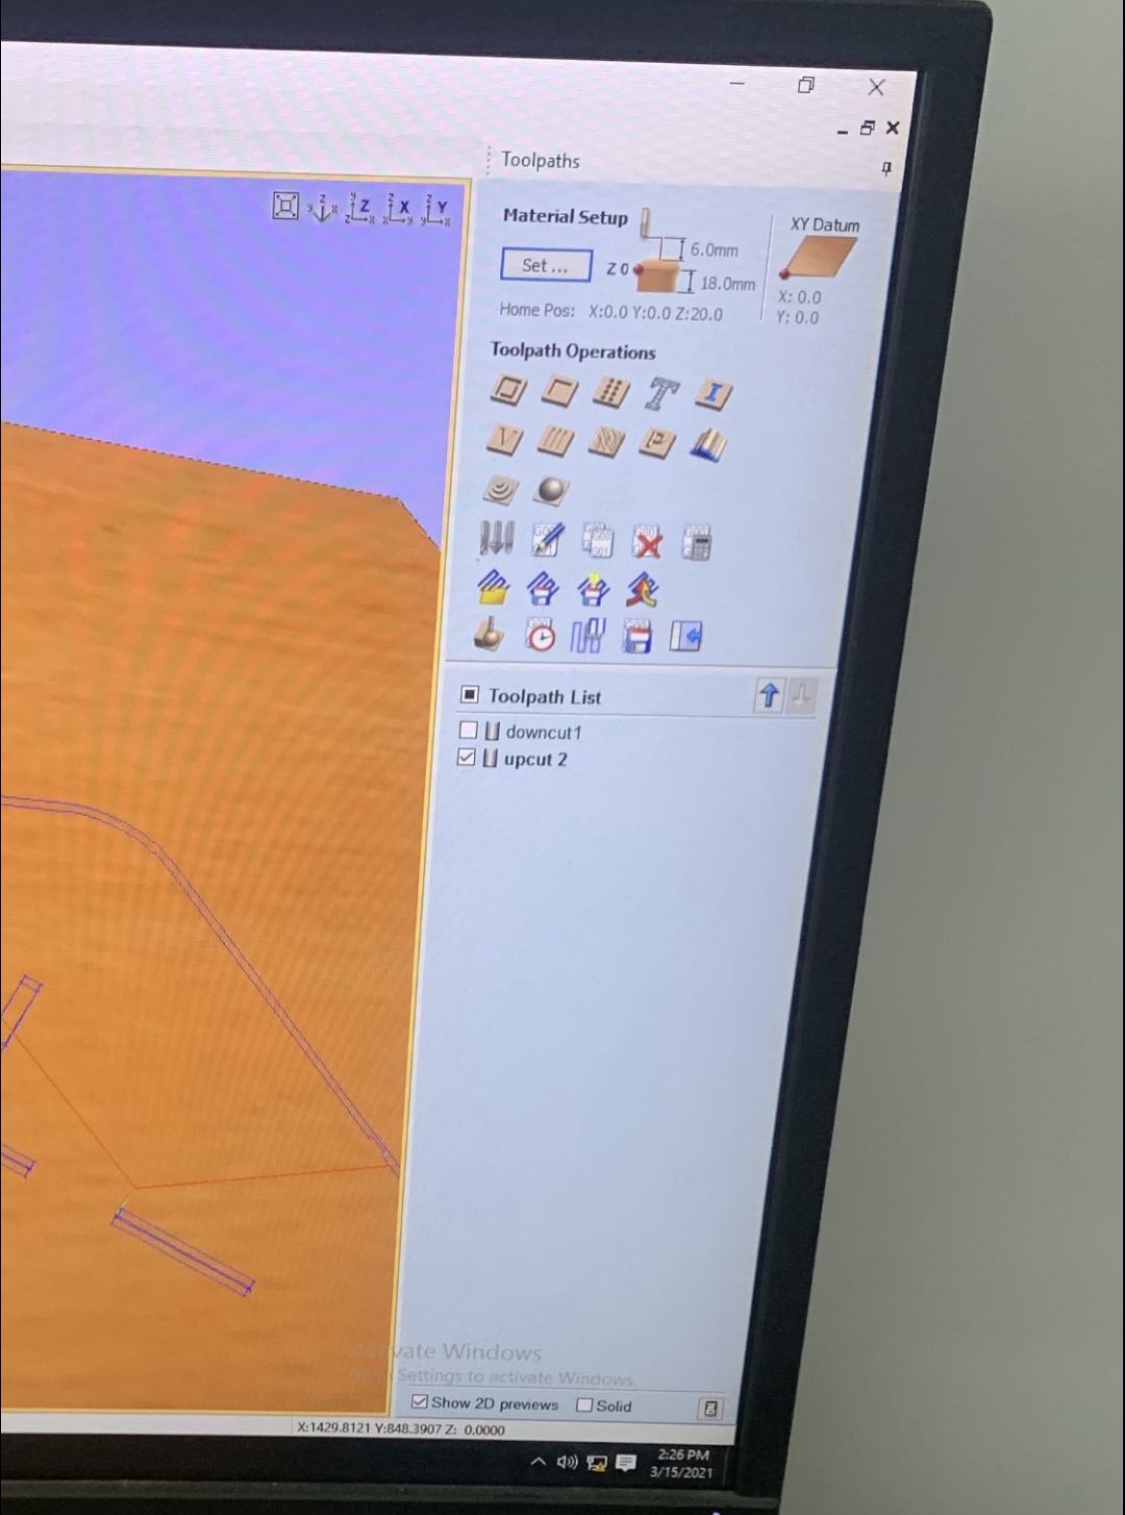
Later, we use the Vcarve to create the toolpath for the design. Set offset of each part and save the file for cutting later.
Preparation
Use screws to fix the wood board onto the bed of the machine. Make sure wood and bed are clean. Make sure the wood is laying flat.
CNC Milling
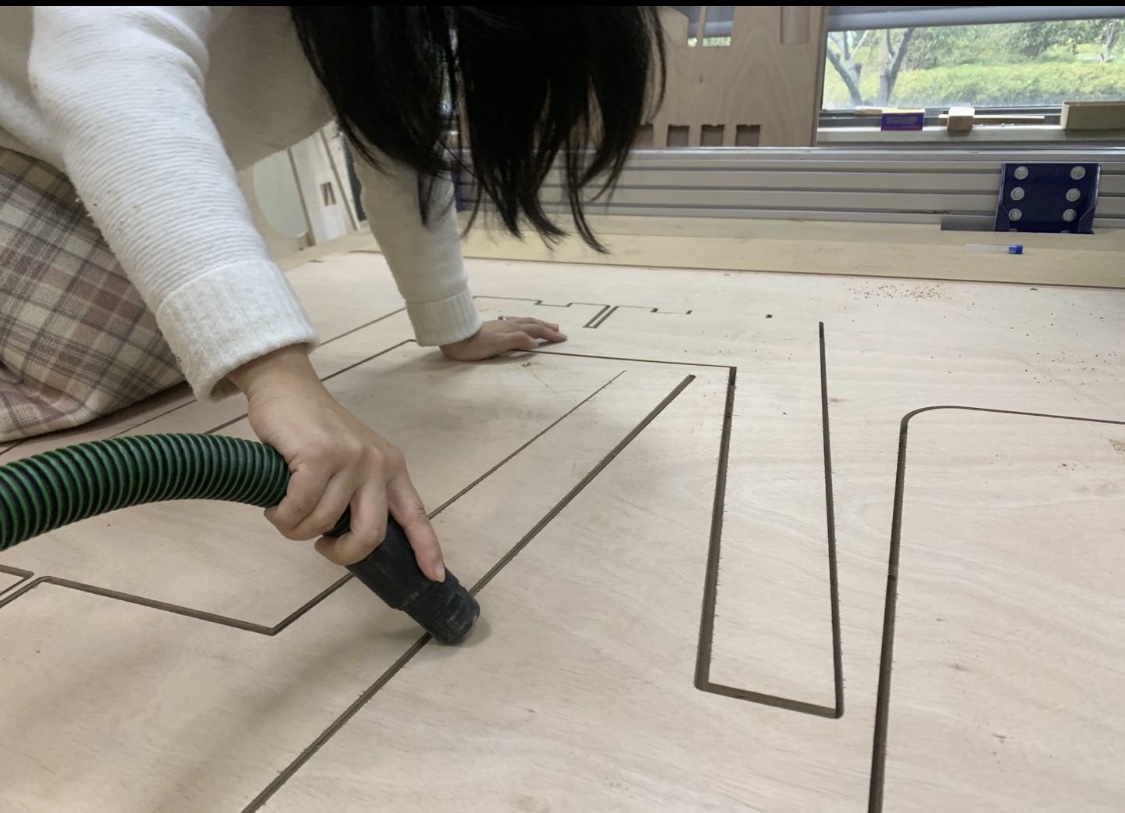
After finish designing, we went to the Shanghai Tech University to cut the design with ShopBot CNC Mill.
Safety
- Saverio told us to keep safety in mind when using this machine and be very careful when you are close to it.
- Mind your fingers, do not touch the wheels when it is working.
- And show us where is the emergency stop with the button to stop the machine in case of any emergency issue.
- Apart from that it is important to wear safety glasses when it is cutting, because the spear parts of wood might fly out of the bed of the machine.
- The ear should also be protected when the sound tunes out to be too loud. But at very beginning we should pay attention to the sound which could help us to determine the cutting is right.
Running the CNC Machine
- Turn on the power of shopbot machine. Then push the rest bottom twice.
- Turn on the computer and open the ShopBot software and then a red panel would turn out.

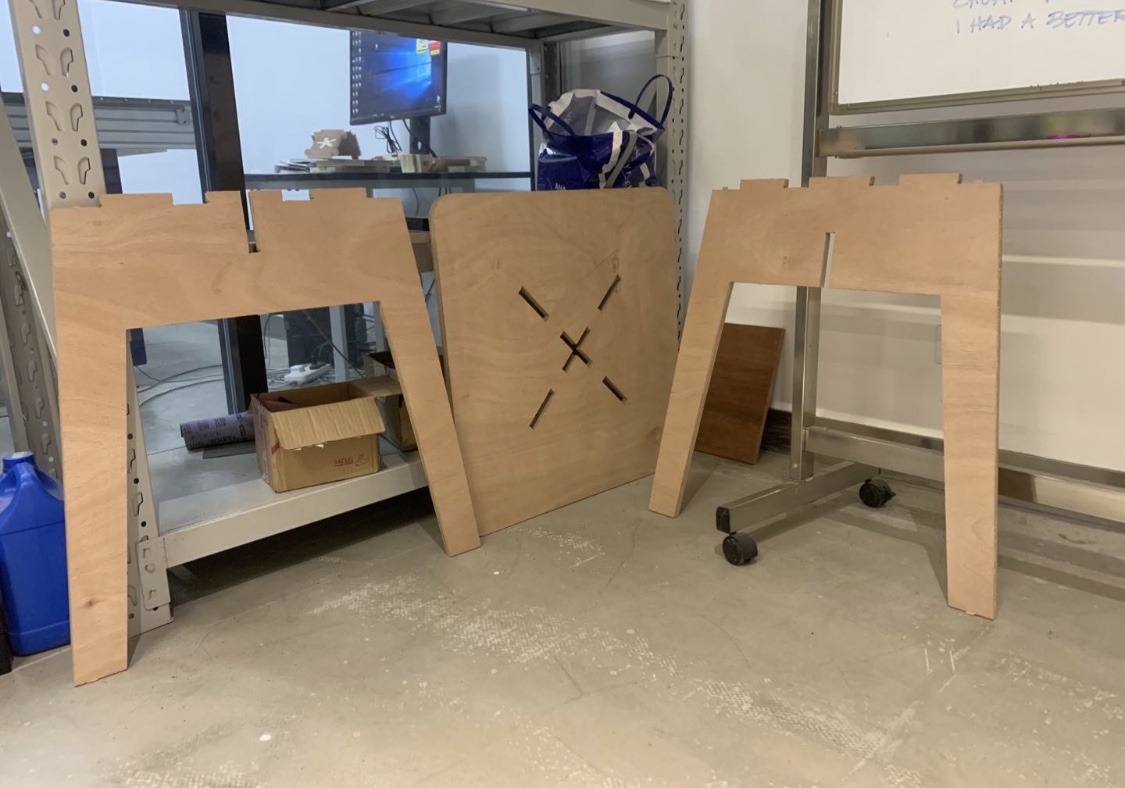
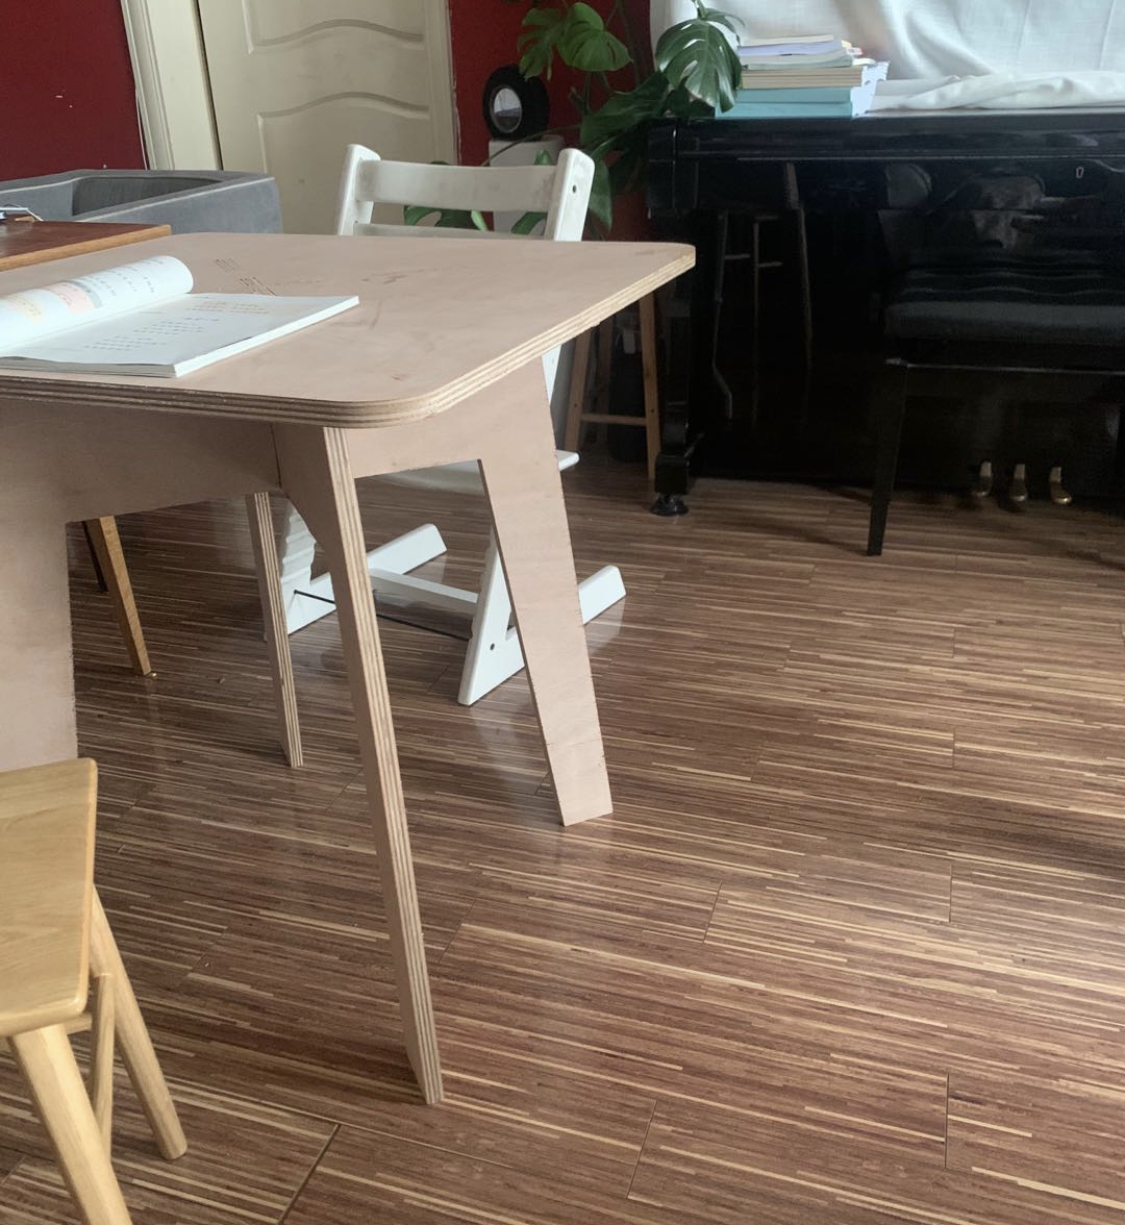
Hero Shot
Now my family have a new table!
Problem
Ok, this week I have to quickly pick two new design softwares, Fusion 360 which is too slow to use and Rino 7 which looks too complicated . I took long time to download and install software. After learning Fusion 360 for several days, I find this software is not efficient. As a result, I have to download Rino7, and take another days to learn this new software.
But the hardest part is at the very beginning. How to set up the software, how to use the functions, ect. There are hundreds of online tutorials, but for a new beginner, it is not easy to find a proper one. What happens quite often is that at the first five minutes of the tutorial I can fully follow the instructions, but as the process goes on, I have no idea what I am doing.
But anyway, I eventually have finished this week assignment with the help of our local Instructor Saverio. Many thanks to him, really helpful and skillful! I think I might need to take some time to reflect all I have learned.
file
file table 3dm file table dxf file part1 dxf file part2 dxf file part3 def