Week 11
Molding and Casting
This week at fablab was Molding and Casting.
Molding is the process of manufacturing by shaping liquid or pliable raw material using a rigid frame called a mold or matrix. This itself may have been made using a pattern or model of the final object. ... The liquid hardens or sets inside the mold, adopting its shape. A mold or mould is a hollowed-out block that is filled with a liquid or pliable material such as plastic, glass, metal, or ceramic raw material. A mold is the counterpart to a cast.
Casting is a manufacturing process in which a liquid material is usually poured into amold, which contains a hollow cavity of the desired shape, and then allowed to solidify. The solidified part is also known as a casting, which is ejected or broken out of the mold to complete the process.
Both the processes involves pouring of molten metal into a mold/die which will take the shape of cavity mold or die on solidification. The basic difference between moulding and casting is the method by which molten metal is poured. ... Casting use a one time mold but molding can use molds on repetition too.
Individual Assignment
This week's individual assignment was to do make a mold and cast. The task was to design a mold around the stock and tooling that you'll be using, mill it (rough cut + (at least) three-axis finish cut), and use it to cast parts
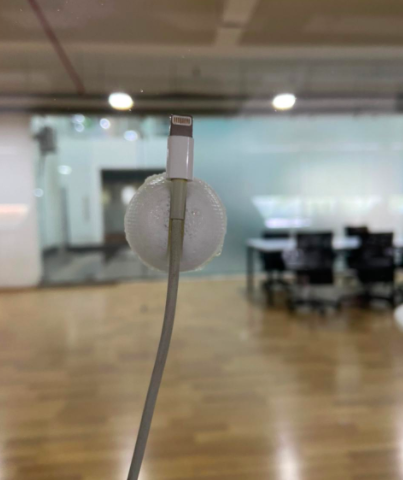
I decided to make a small organizer, which i can use to clip my chargers and other cables. I started off by designing a hemispherical clip using Fusion 360.

The original design file can be downloaded from here
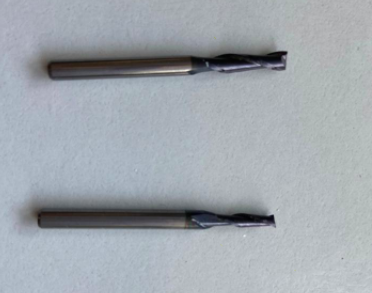
When the design was done, I went ahead and milled the model on machinable wax using Modella. For this I used a 3mm flat end bit for the rough cut and a ball end bit for the fair cut.
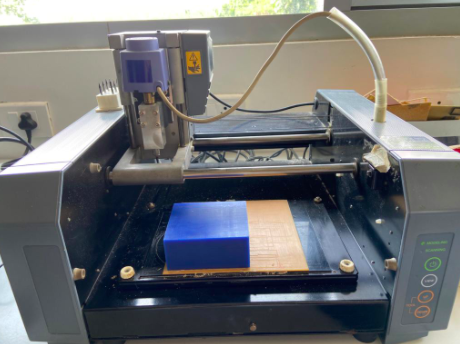
While cutting, we have to clean out the excess wax, as there is a possibility that the wax gets hardened at the end of the milling bit and bit could break.
Once the rough cut ws done, this is what I got.
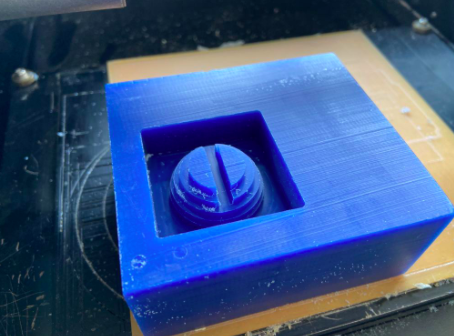
I then changed the bit and put it up for the fair cut. And this is when i realised I needed extra walls. I laser cut extra walls using acrylic sheet and stuck it to the wax block.

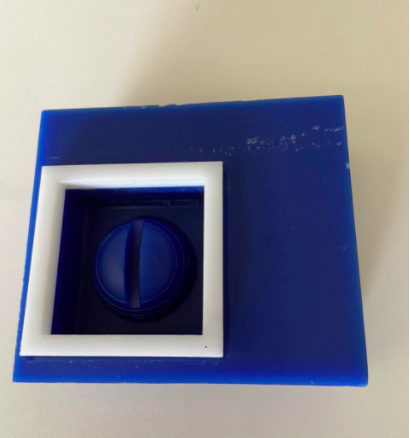
Once it was done, I measured the volume of the cavity by pouring water in the cavity and then into a cup.

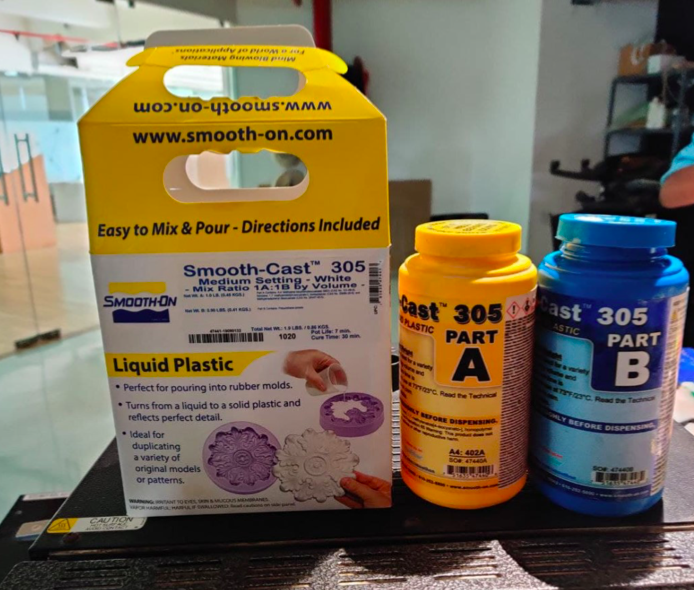
Once this was done, I cleared the water out of the wax using compressed air. I mixed the Part A and Part B to make the mould. I measured it by volume amd poured it into the mould in a close to laminar flow by holding it really high. This is to avoid the formation of bubbles.

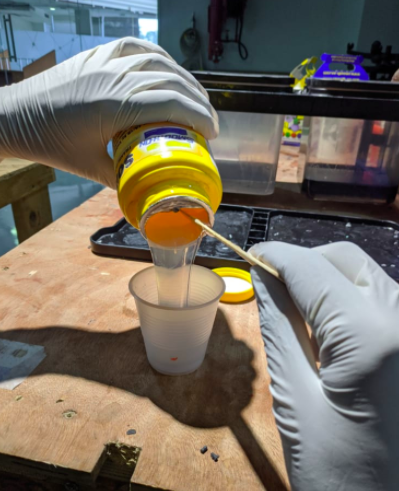
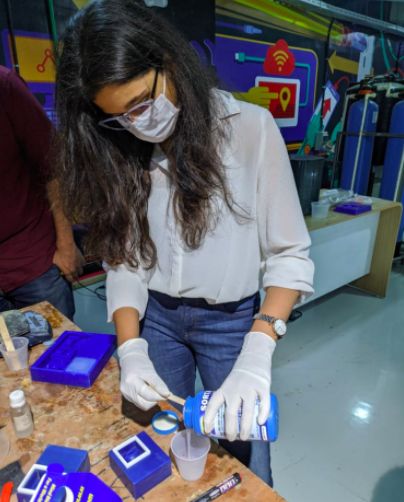
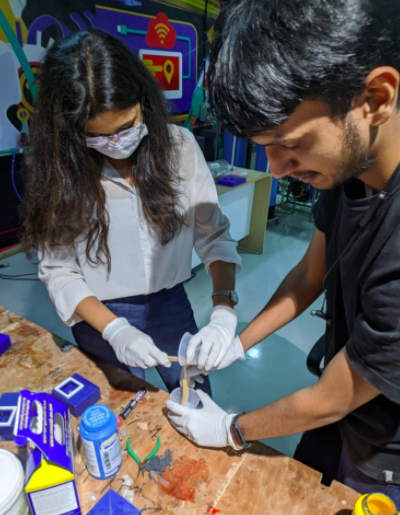
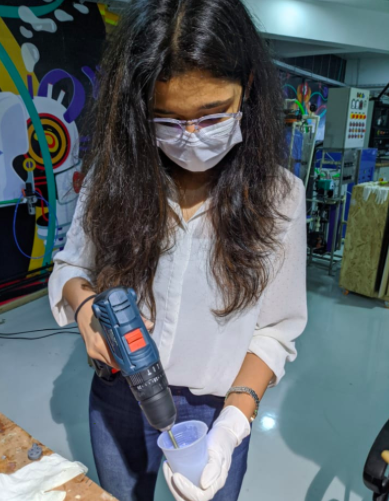
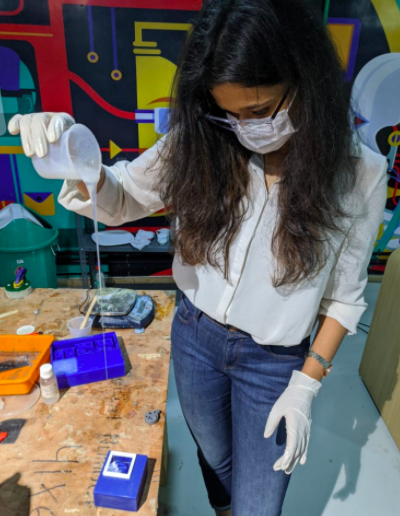
I went back after six hours to check if it is cured and it was cured perfectly without any bubbles disrupting the design.
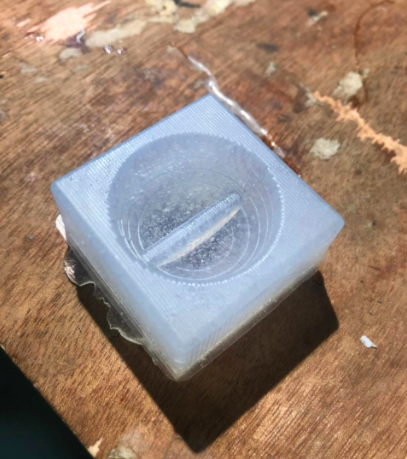
I then proceeded to do the casting. I mixed the Part A and Part B of the casting material. This was also mixed by volume to a ratio 1:1. I then poured it into the mold that I made
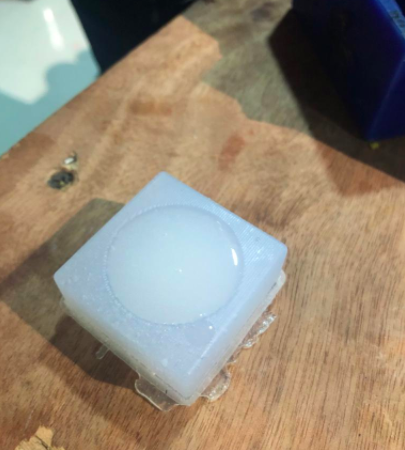
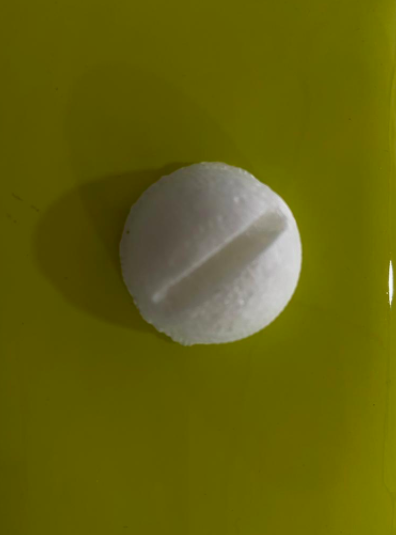
This was cured in a much lesser time. I checked it in 30 minutes and it was completely done. I then took it out of the mold and tested if my cables fit in. And it did!

Group Assignment
This weeks Group Assignment is to review the safety data sheets for each of your molding and casting materials, then make and compare test casts with each of them.
Smooth Cast
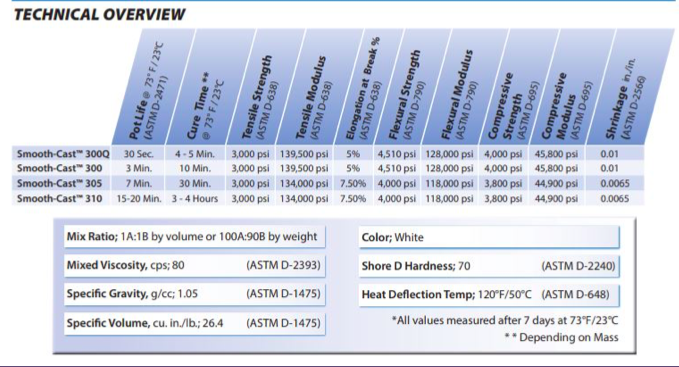
The Smooth-Cast™ 300 Series of liquid plastics are ultra-low viscosity casting resins that yield castings that are bright white and virtually bubble free. Vacuum degassing is not necessary. They offer the convenience of a 1A:1B by volume or 100A:90B by weight mix ratio. The differences between them are pot life and demold time.
Instructions:
Safety: Materials should be stored and used in a warm environment (73° F / 23° C). These products have a limited shelf life and should be used as soon as possible. All liquid urethanes are moisture sensitive and will absorb atmospheric moisture. Mixing tools and containers should be clean and made of metal, glass or plastic. Mixing should be done in a well-ventilated area. Wear safety glasses, long sleeves and rubber gloves to minimize contamination risk. Because no two applications are quite the same, a small test application to determine suitability for your project is recommended if performance of this material is in question.
Applying A Release Agent : A release agent is necessary to facilitate demolding when casting into or over most surfaces. Use a release agent made specifically for mold making (Universal™ Mold Release or Mann’s Ease Release™ 200 available from Smooth-On or your Smooth-On distributor). A liberal coat of release agent should be applied onto all surfaces that will contact the plastic.
Measuring & Mixing:Liquid urethanes are moisture sensitive and will absorb atmospheric moisture. Mixing tools and containers should be clean and made of metal, glass or plastic. Materials should be stored and used in a warm environment (73°F/23°C).
Pouring: Pour your mixture in a single spot at the lowest point of the containment field and let the mixture seek its level. This will help minimize air entrapment.
Inhalation: Remove source(s) of contamination and move victim to fresh air. If breathing has stopped, give artificial respiration, then oxygen if needed. Contact physician immediately.
Ingestion: Do not induce vomiting unless instructed by a physician. Never give anything by mouth to an unconscious person.
Eye Contact: Flush eyes with plenty of water. If irritation persists, seek medical attention. Skin Contact: In case of skin contact, wash thoroughly with soap and water.
Aditya Easy Cast Transparent Epoxy Resin
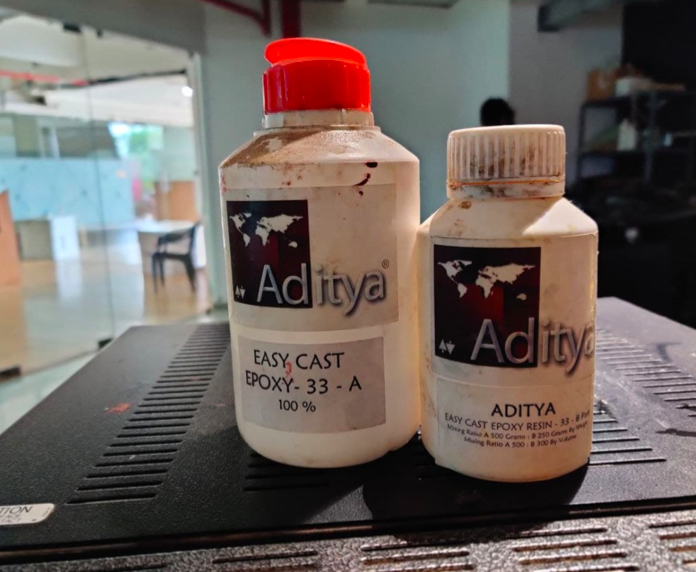
Aditya Easy Cast Transparent Epoxy Resin - 33-750gm is very easy to use. Aditya Clear Cast Epoxy 33 can be casted into moulds of Silicone Rubber to Create Transparent Crafts, Lockets, Jewellery and Trophies. Pigments are available to make Opaque Colour Castings. It comes in Part A and Part B. Features include: Transparent It’s like water so flows into each and every corner of mould. Easy Part A 100 parts : Part B 50 parts mixing ratio. Non-Yellowing
Rules to follow during molding and casting
Always make sure that the area you are using is not a closed one and there is proper ventilation according to room size standard
Every material has its own health and safety guidelines. Please follow those. Some may be very harmful and may need special equipment. Please refer the datasheet.
Use rubber gloves to minimize contamination risk. Wear vinyl gloves only. Latex gloves will inhibit the cure of the rubber. The thing is most of the mixing process involved is exothermic and you can use heat resistant gloves(if its a metal casting). Make sure you use the gloves where the chemicals can't enter your skin. Don't make any contact with the chemicals.
Contact with skin and eyes may cause irritation. Flush eyes with water for 15 minutes and seek immediate medical attention. Remove from skin with waterless hand cleaner followed by soap and water.
You can also use Safety glasses to avoid eye splashes during mixing and pouring.
Never eat, drink, or smoke in work areas.
Practice good personal hygiene after using this material, especially before eating, drinking, smoking, using the toilet, or applying cosmetics.
Use mask so that the mix do not go your face.
Maintain cleanliness where you work.
Do not throw any mix or chemicals in the basin as it may clot the pipeline. If you have waste put it in a cut and let it settle or solidify and you an throw it later.
Close all the lids after use as the chemicals may not be reusable if left it open in atmosphere.
Keep the materials out of children's reach
We had two main materials for the mold in our lab for the silcone mold. One was oomoo and another was aditya. Aditya was from the local vendor which only mentioned the ratio of the mixture but not the pot pot time and the setting time. so we decided to use both to know about them and then use it to make a mold.
Sorta-Clear 37
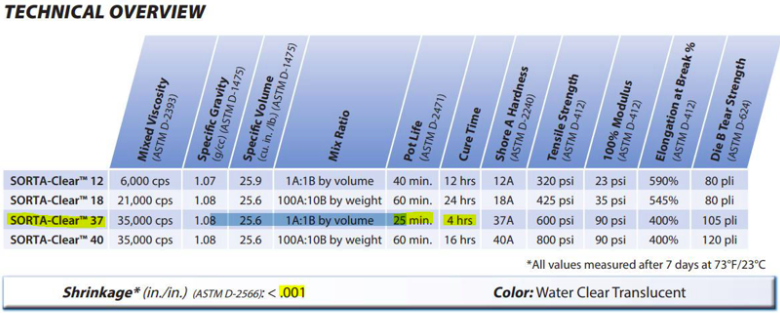
SORTA-Clear 37 is a premium water white translucent silicone rubbers (platinum catalyst) which cure at room temperature with negligible shrinkage. These rubbers feature high tensile and tear strength. They offer the convenience of a 1A:1B by volume mix ratio. They are ideal for making prototype, jewelry or other molds of any configuration where model visibility is important (i.e. extracting a model from the mold via cutting). Materials such as urethane, epoxy or polyester resins can then be cast into these silicone without application of a release agent. Other materials such as wax and low melt metal alloys can also be cast into the mold made out from this rubber. These can be pigmented with SILC Pig™ silicone pigments. They are also FOOD SAFE and can be used for culinary applications including casting chocolate and other confections.
Testing
Since the SortA-Clear 37 which we had been using was old, there were bubbles already in the rubber before mixing. First we decided to save time for understanding the process safety and the quality of the mold so used the old milled was for molding. Main thing first, since the mix has a pot life of 25 min, keep everything ready on the table so that the process goes uninterrupted, wear your safety gears like gloves, masks, and glasses. First trying the SortA-Clear 37, it had the ratio of 1:1 by volume and 100:139 for part A : Part B. There are 3 ways three ways to mix Part A and Part B.
Pour a volume of Part A and same volume of Part B and mix it
Pour a weight of Part A and pour Part B of 1.3 times the weight of Part B
In our case, we used the second one, mix by weight, but took reference of amount of material by volume. To estimate the amount we should be mixing, the volume of the mix has to be known so as to prepare it so take a cup, translucent or transparent, pour water into the milled part , pour the water into the cup, mark the total volume and mark half the volume. Now put the cup on the weighing scale set the weight to zero with the cup (In case you cant set zero the weight with cut, please consider the weight of the cup and use the difference for calculation). Pour Part A up till half mark we made on the cup or a little bit more for being safe of amount of mix. Weigh it and add Part B by weight ratio of 100:130 (A:B), i.e if the weight of Part A is "x" gm "1.3*x gm" of Part B should be poured. Then mix it with only horizontal strokes, not vertical strokes or it might add the air bubbles into the mix. Less the air bubble, better your mold will be.slow mix has to be done so that the air bubble do not form. You might use vacuum chamber to remove the air bubbles if you have it in your lab. We did not have it in our lab so we were unable to use it. If the bubble comes in the surface where the material is cased, you might have defect in your mold and the part which will be cast out of that mold. Remember that the pot life of the mix is just 25 minute of do not let the mix stay for more than that. It might be different for your material which should be mentioned in the datasheet.
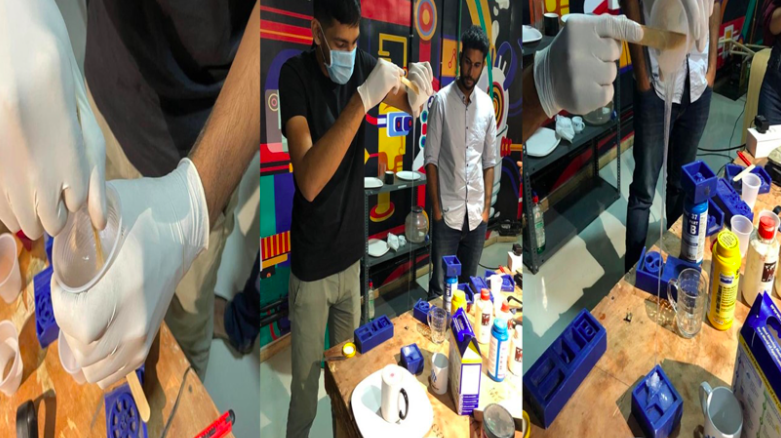
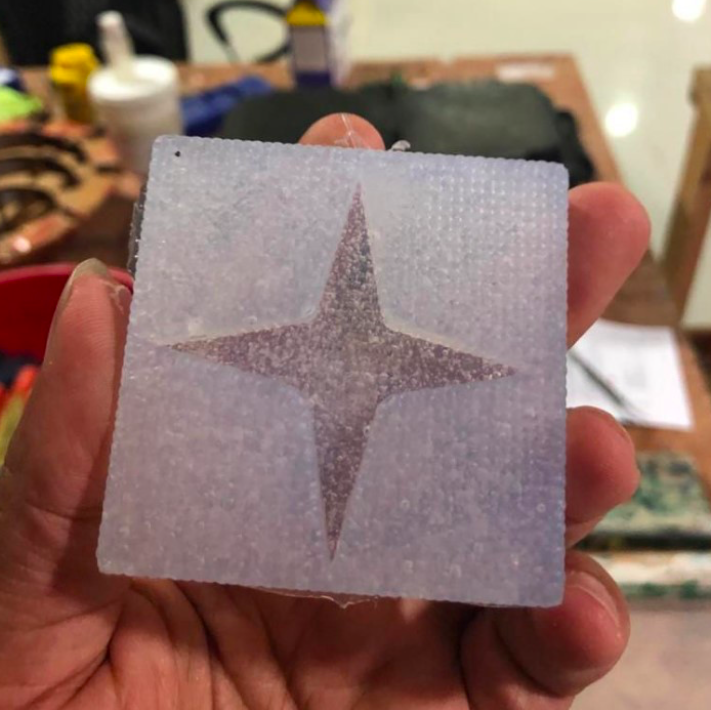
After the mixing was done, pour it slowly from one end of the mold letting it flow smoothly. The trick according to our instructor was to pour it slowly stretching the flow so that if there is any bubble in the mix, it will go out during the stretch. After the mix was poured onto the wax, we shook it so that the mix gets into all corners and if in case if there is any bubble trapped, it might come up to the surface. The mix has the cure time of 4 hrs, so at least leave it for 4 hrs untouched. For us we left it overnight as we did it in the evening. After it is cured, the mold can be ejected easily as it is rubber and can stretch. Same was done from the aditya silicon with the ratio of 30-14gm hardner per 1Kg rubber. It was poured into another mold but did not cure even it was left for one and half day. so we rejected that.
Lessons Learnt
Some of the lessons I learnt during the process included the following
-It is important to choose the right mill bit for perfectly smooth wax mold.
-It is important to mix the casting mixture very well to properly incorporate the entire mixture together. This ensures the perfection of setting time and reduce imperfections.
-It is important to pour the mixture into the mold in a very slow manner in a straight line of streamlined flow to prevent formation of air bubbles inside the cast.
-It is very important to read through and check the datasheet of the cast material, and to also ensure that the product is not expired.
Files
The .f3d design file can be downloaded from here
The .stl design file can be downloaded from here