Week 1
Project Management, Principles and Practices
This week's Assignment was to understand the principles and practices followed at FabLab, which helped me learn, what exactly are we going to do in the upcoming weeks. In a week's time, I learned the basics of HTML, CSS, GitLab and even decided and sketched my final project. I understood the use of different commands used in terminal and how to use terminal to perform various tasks and actions including installing and configuring Git. I also learned how to do documentation using HTML, CSS and JavaScript.
Tools Used
Mac OS BigSur Ver. 11.1
Terminal
Sublime Text Editor
Google Chrome.
What I Did
Step 1: I started off by learning basic commands on terminal. It was slightly challenging, but I then learned easy wasy to use it. I took help from my Instructor, and also from youtube and other websites. I learned commands to find the directory, list contents, install, etc.
pwd --> this is where you are in the folder structure
ls --> this command shows an overview of all the files in the folder you are at
ls - al --> this shows all the files including the "hidden" files in the folder (lists attributes)
ls - l --> this provides a list with all the attributes
cd --> change directory, this way you can move around in folders and paths
cd - --> you go back one folder in the path
cd ../../ --> go back 2 directories
touch [name] --> create a file, name the file between the brackets
mk --> command to make something like a folder or file
mkdir --> this makes a folder (directory therefore the dir)
rm --> command to remove something like a folder or file
rm -rf --> this removes a directory with all files in it, be careful with this command!
ctrl c --> force quit - this way you get out whatever is happening
Step 2: I then went ahead and understood the basics of Git and how to use it. I also learned how to install Git using terminal and what are the steps involved in doing so.
git config –global user.name “Name”
git config –global user.email “e-mail”
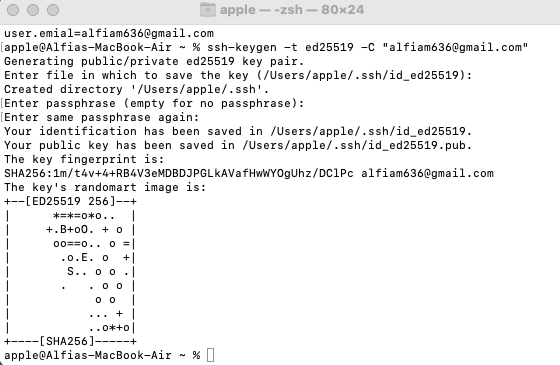
The next step was to set up the SSH key and the .pub folder. For me personally, this part was a bit tricky and had to do it twice to get it done. My instructor had helped me with this, I also used GitLab Docs Tutorial for understanding how it works.
To generate an SSH key pair, i opened terminal, typed
ssh-keygen -t ed25519 -C "comment"On pressing enter, I got a similar output to this :
Generating public/private ed25519 key pair.Then, on accepting the suggested file name anad directory, i got the output to create a passphrase.
Enter file in which to save the key (/home/user/.ssh/id_ed25519):
Enter passphrase (empty for no passphrase):This passphrase is really important and will be asked everytime I push my files. This way, I generated a public and an encryption key. Step 3: The next thing to do was to clone the git repository locally. For this, I used the comment
Enter same passphrase again:
git clone git@gitlab.fabcloud.org:academany/fabacademy/2021/labs/waag/students/alfia-m.gitStep 4: The last thing to do with this was to learn to push into the repository using terminal. I learned a few commands for that.
git status --> this shows the status of git, so which files changed, if there's something waiting to be push or pulled etc.
git add . --> this adds all the files that were changed to the list.
git add [filename] --> this only adds this specific file to the grocery list
git commit --> this moves the files I added from my workspace to my local repository
git commit -m 'message' --> you always need to add a message to your commit. Easiest is to use -m 'message' otherwise vim opens.
git push --> this pushes the files to the remote repository on GitLab
git pull --> works the other way around from push, so it updates my local workspace with the latest version

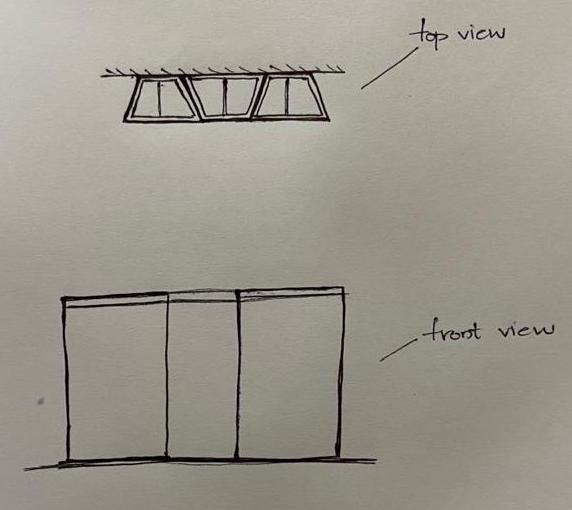
Final project and sketch
This week i also took time to come up with an idea for the final project as well as a basic sketch for it. It is a modular smart trashcan that uses an Ultra Sound input to open the can lid avoiding people touching the can while disposing trash. It comes in modules making it visually attractive and at the same time, easy to seperate and segregate.
Documentation Website
Web Development
Web development is the work involved in developing a Web site for the Internet (World Wide Web) or an intranet (a private network).[1] Web development can range from developing a simple single static page of plain text to complex web applications, electronic businesses, and social network services. A more comprehensive list of tasks to which Web development commonly refers, may include Web engineering, Web design, Web content development, client liaison, client-side/server-side scripting, Web server and network security configuration, and e-commerce development.
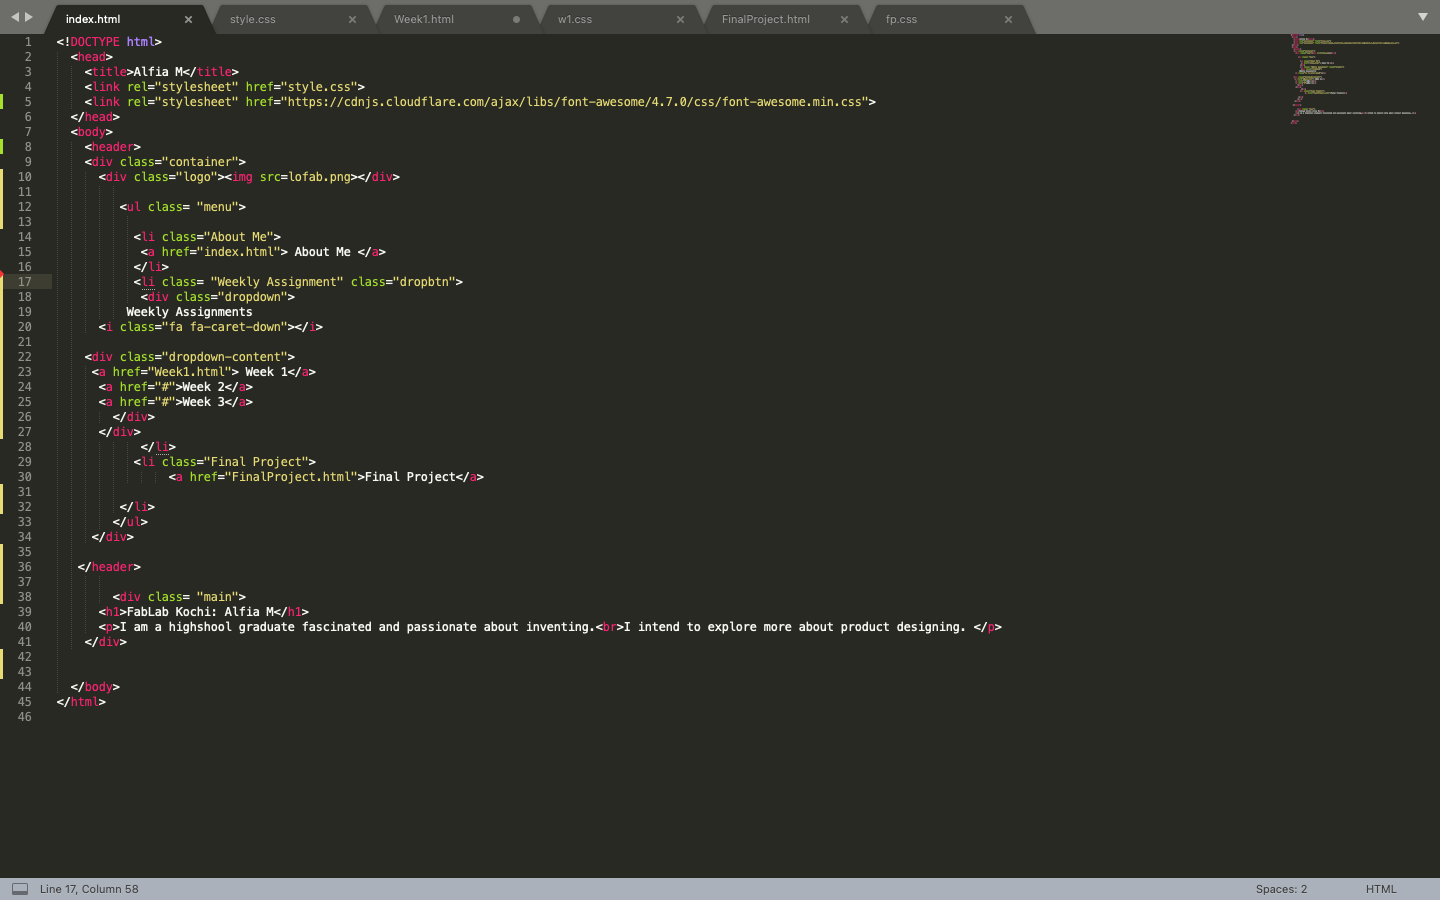
For developing my website, since I didn't have much of a hands on experience with developing, I first downloaded a website and tried editing it. But since I was a beginner, I could not do much editing apart from the text. So I decided to go from the basics. I built a page from scratch and tried understanding everything and then shifted to a different template.
Building a website from the basics helped me understand html and css way better than before.
This was the initial webpage I created without using any templates or others codes.

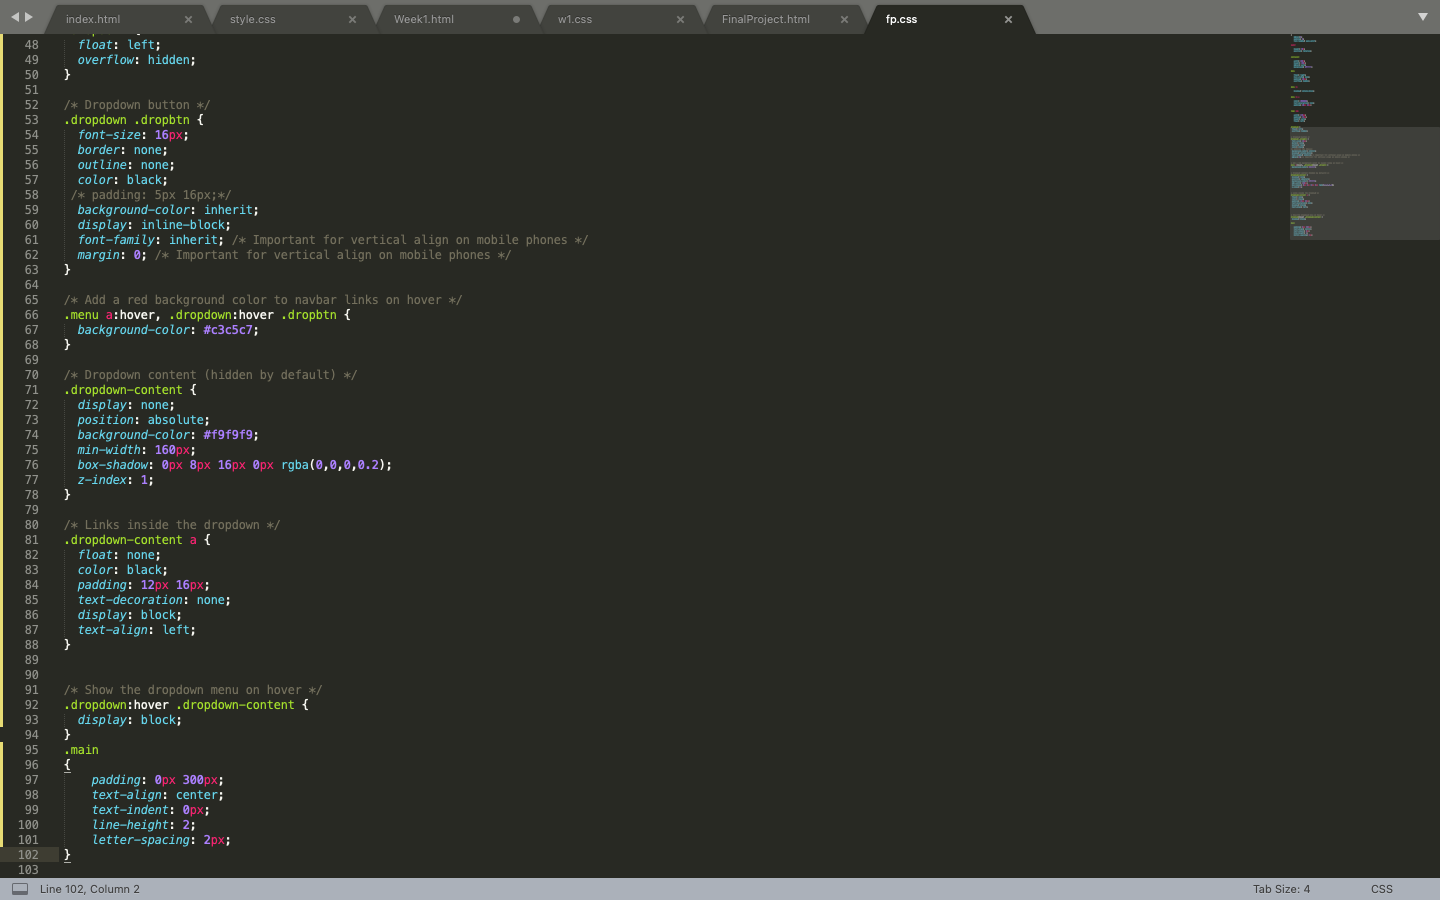
I then picked up a css code online and used it to design my website
Next Week »