19. project development
Every development about the final project can be found on this page. On this page you find a brief summery of what is done. For the full explenation of the final project click on the link above.
What materials and components were used?
the wall
- one arduino
- 10 meter copper tape
- plywood 2440mmx1220mmx12mm
- one neopixel of 8 pixels
- one retrobutton
- 6 meter wooden beam 44mmx44mm
- a couple of screws
- 5 meter electrical cable in diffirent colour
- plexi plate 900mmx600mmx4mm can be coloured acrylic as well
- plywood 900mmx600mmx4mm
module one: nerve spiral
- one arduine
- plywood 100mmx100mmx12mm
- one neopixel of 8 pixels
- one buzzer
- copper tabe 30 cm
- copper wire 40 cm
- electrical wire 2 meter in different colour
module two : the maze
- one ardiuno nano
- plywood 300mmx200mmx12mm
- copper tape 30 cm
- one neopixel
- elektrical wire
Where did they come from?
- The wood come from a local wood vendor
- Wood and plexi for the lasercutter comes from opitec
- Vinyl comes from the feerieke
- All electronic parts come from a local electroshop
What processes were used?
I have almost used every technique that you can find in the lab:
- lasercutting
- 3D printing
- cnc milling
- vinylcutter
- programming
- woodworking
- a little bit of welding
- 3D drawing ( fusion360)
- 2D drawing
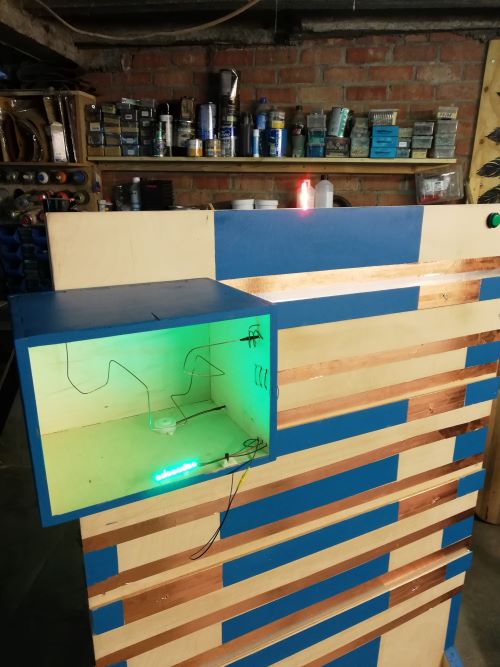
assemble everything and monyshots
Now that some modules are ready i put everything together.

The 2 Modules I have made work, I wished I had time to make some more before the presentation, it is something that I will work on some more and hopefully during the summer in one of our makercamps in the lab. I have a couple of ideas that i want to make:
- including a timer and scoreboard
- a module linked to a app on the smartphone with a quiz about science and technology.
- elektrogame
- making the board with the milling machine
eletronic design and production
The last big part of the final project is designing and making a PCB. I decide not to make a PCB as main component, but i decided to make a module with PCB of my own. the main reason for this is that i want to implement the project with children and that they can make their own module and i know that making pcb ‘s is too hard to do with children. it is impotant to show them that it excists and that you can make them your own. but the challenge for them is to make a module of their own.
The module I have added is a riddle about coulour they have to guess the right coulour and hold it in front of the sensor. When it is the right colour the board will dedect it and give a signal to the master.
I want to include the colour sensor in the wall The idea is that you have to download the app on you phone and change the colour of the RGB Led when is the correct colour the sensor will detect it and give a high signal to the wall. I have made a board for this in week 11 And remade it in week12 with the integraded neopixel.
intelectual property.
I want my project to be open source with creative commons. Everything we make here in the lab with the creative STEM is free to use if they mension our name. Everybody can Get all the plans. i want to revere to the assigment of week 18. i explane everything over there.
Thank you
As last I want to thank everybody in mine enviroment for the help and motivation to get trough this course.
First of all I want to give a special thanks to Dr.Maria-Cristina Ciocci and Dr.Benny Malengier from Ingegno fab lab to give me the opportiunity to enter this programme and give a lot of advice during the classes. I want to thank my colleagues from the creative STEM to listen to my projects and help brainstorming for the assignments and final project.
At last I want to thank my instructor Hadil Habashneh to guide through the course and help with all the problems that came by.
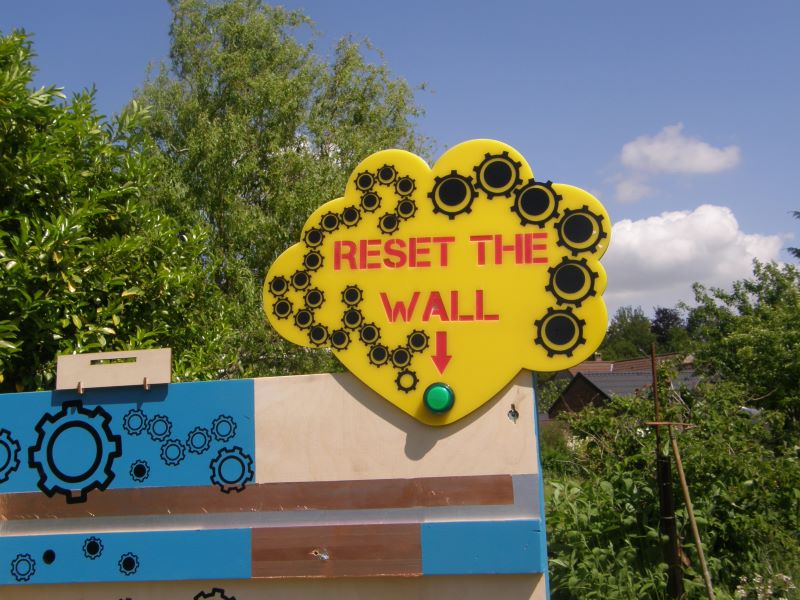
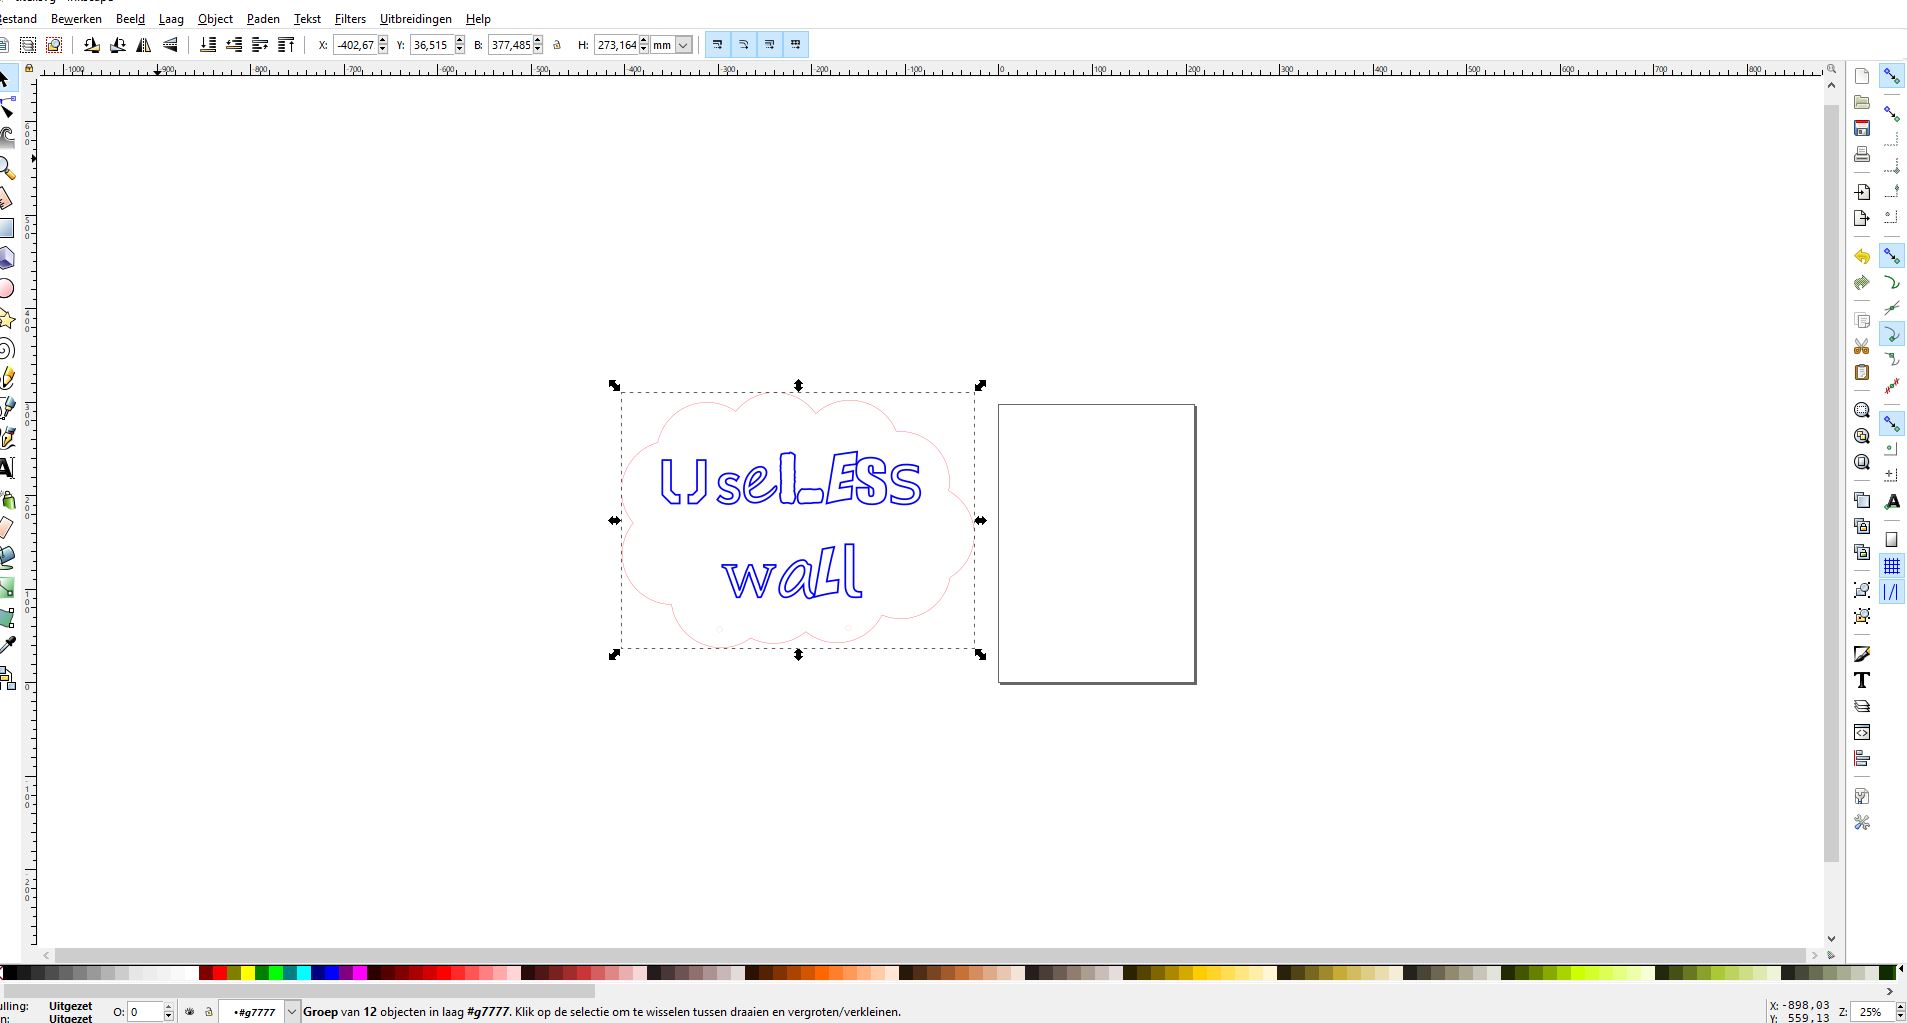
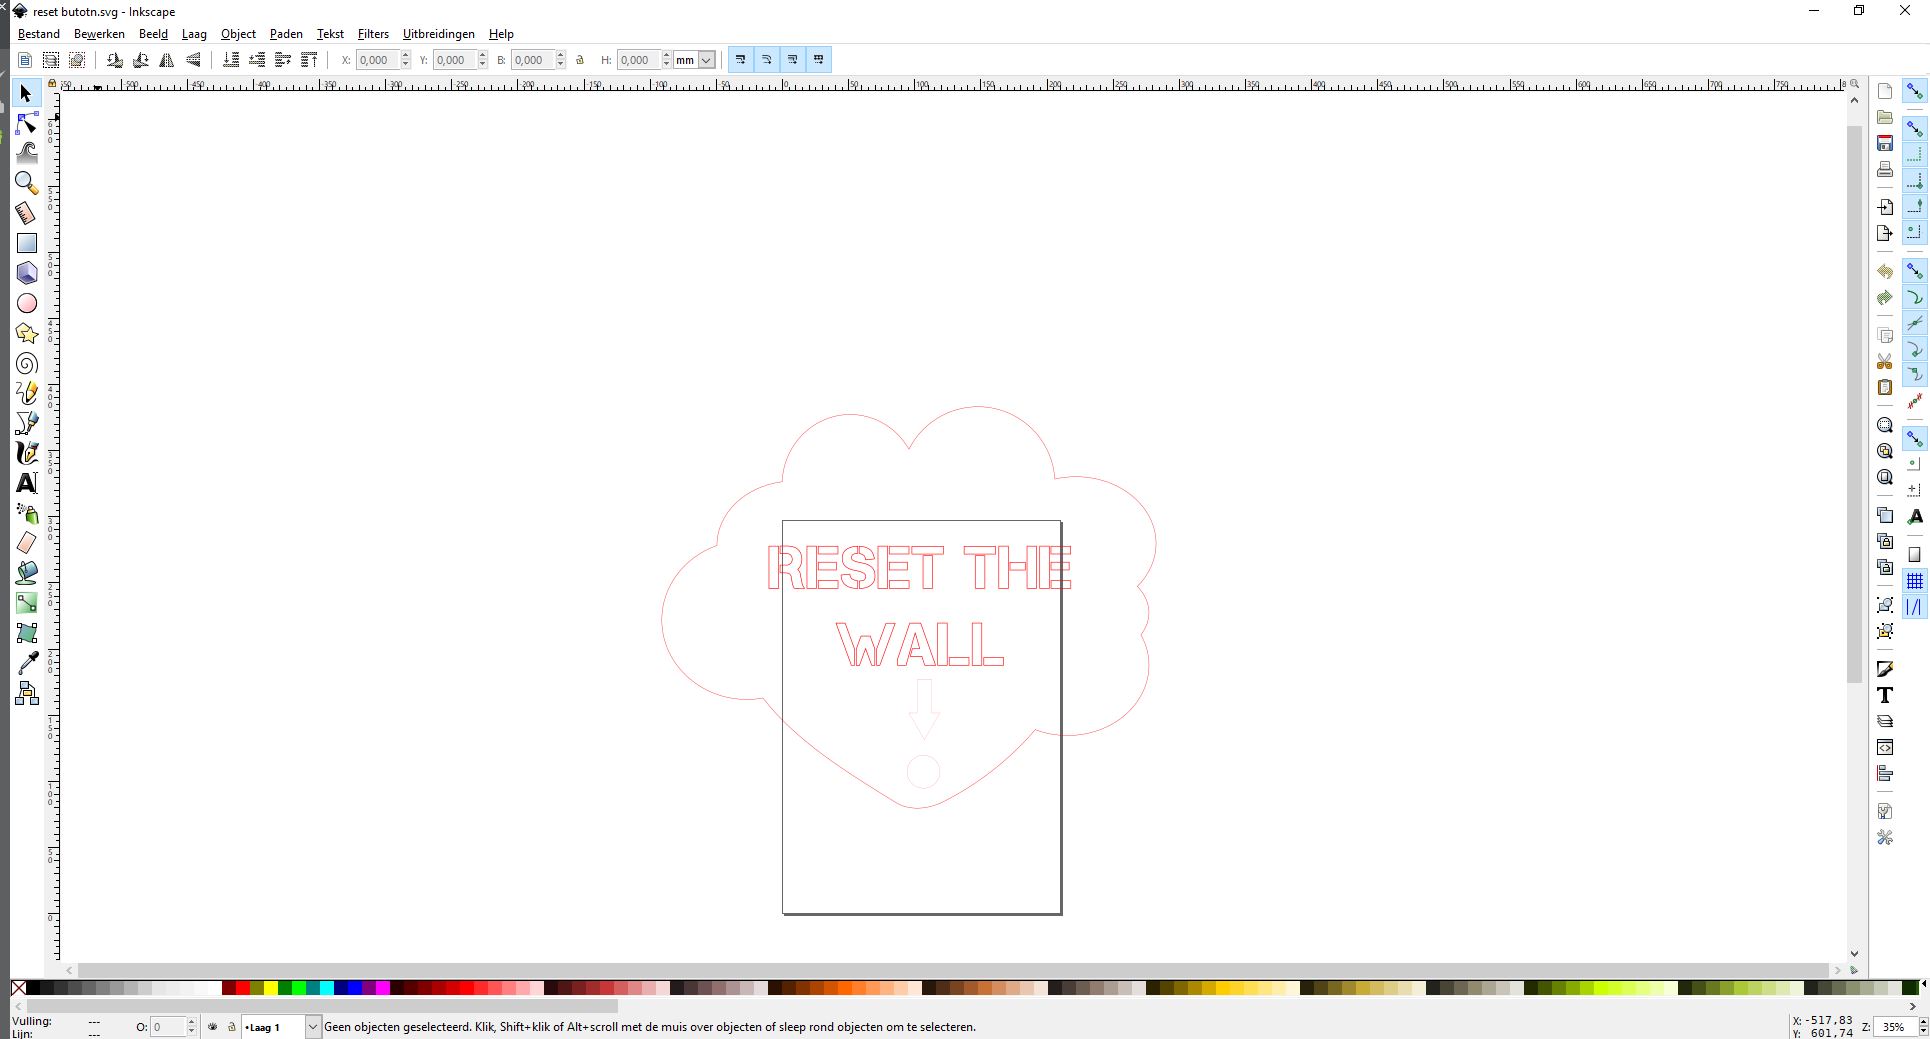
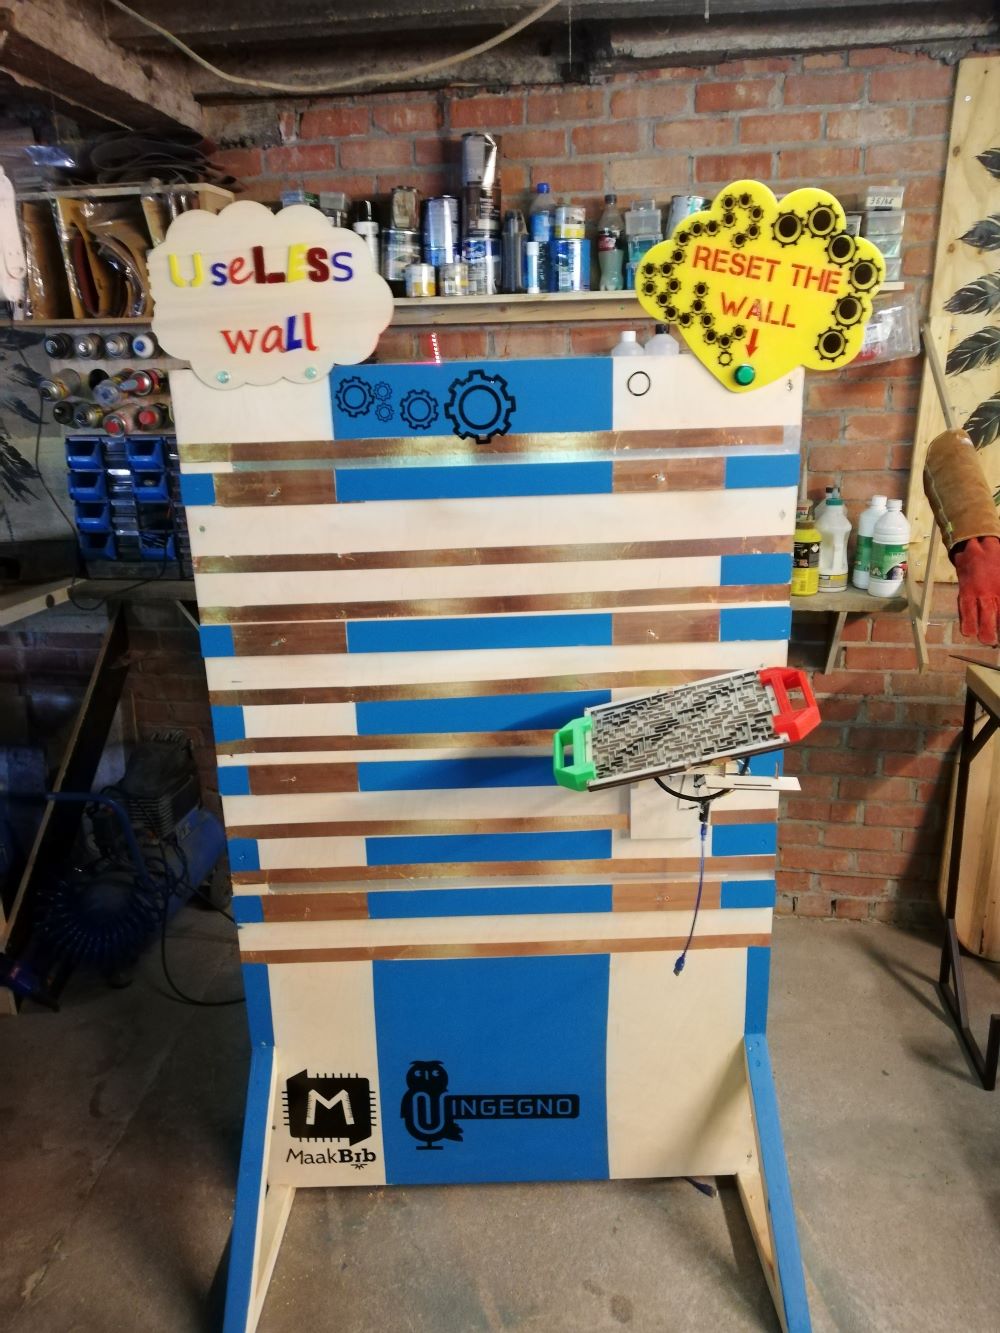
decorating the wall
Because the main users off the wall will be children (off all ages) it should also be fun to look at and not a boring wall with a couple of wires in it.
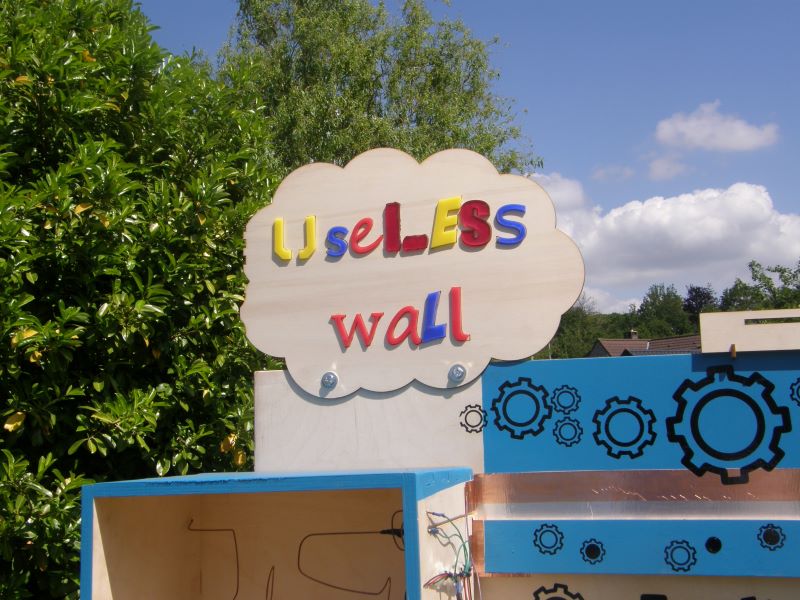
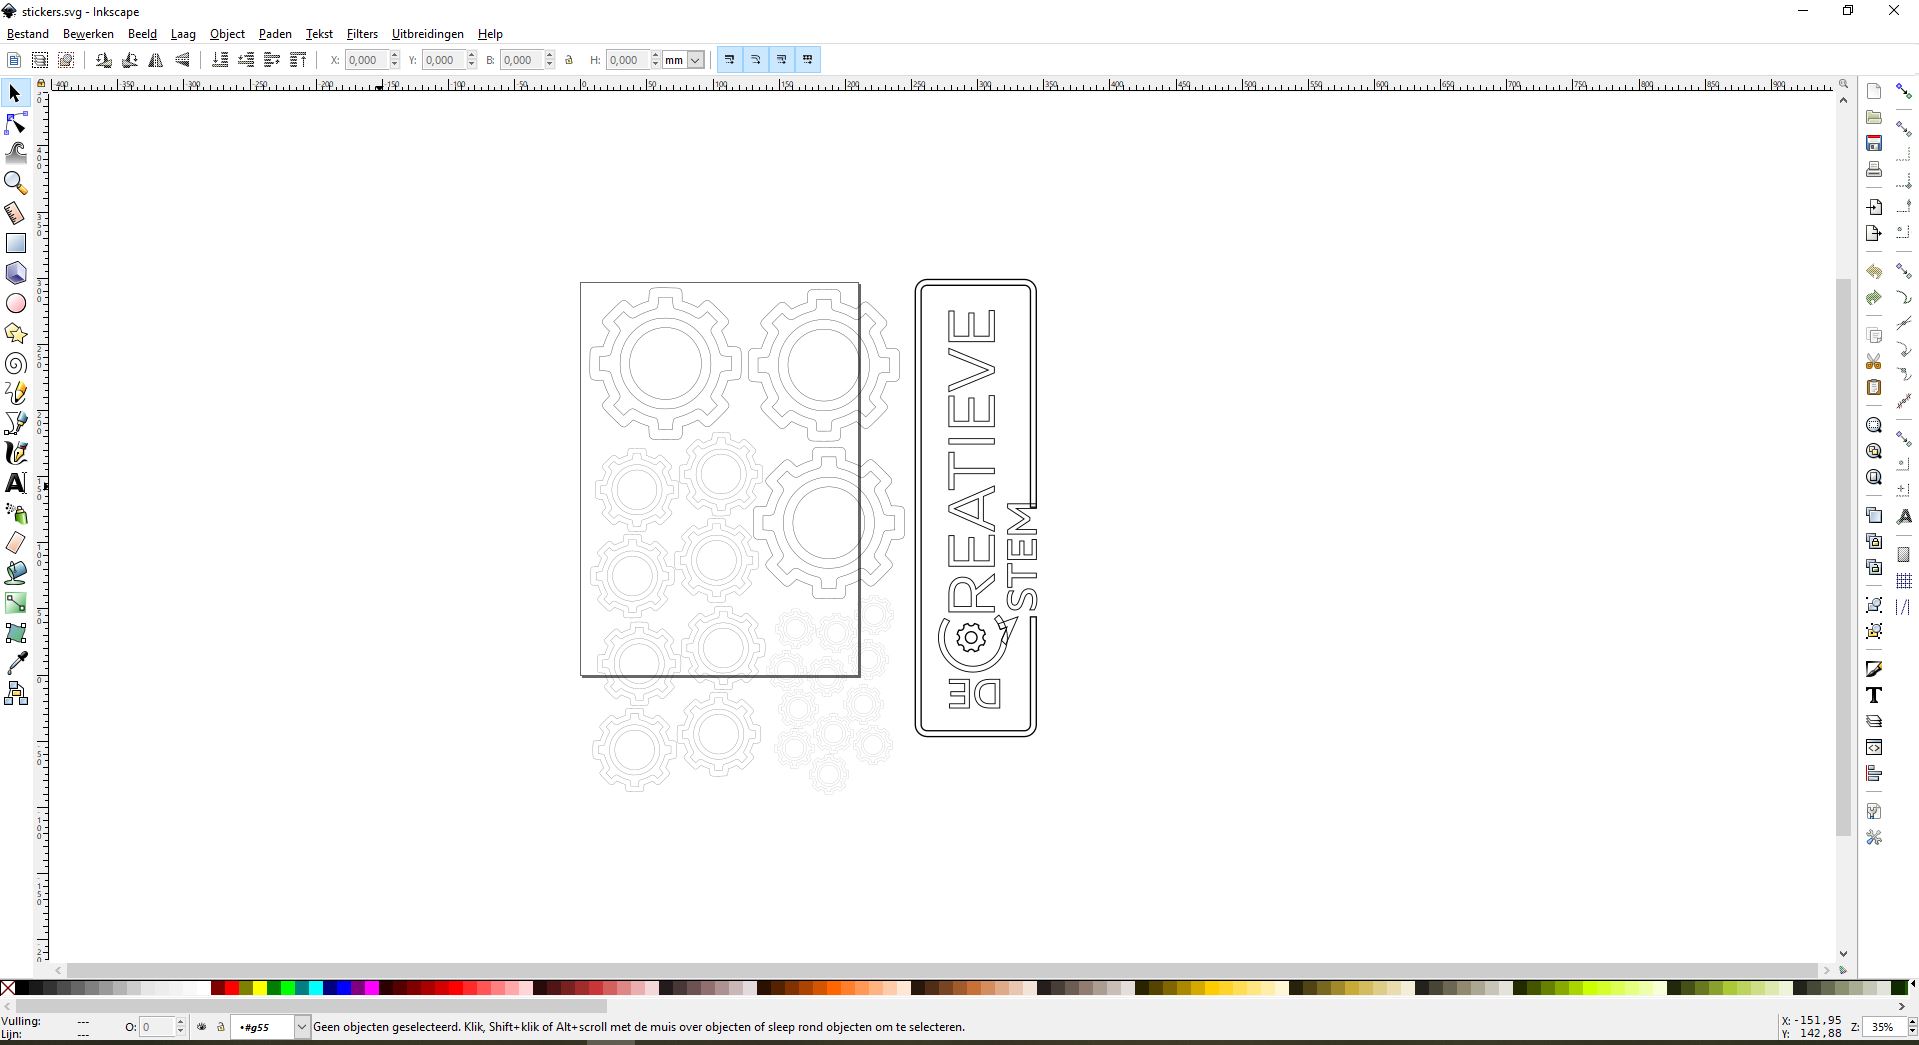
I used the lasercutter and vinyl cutter for this. I designed this in inkscape.
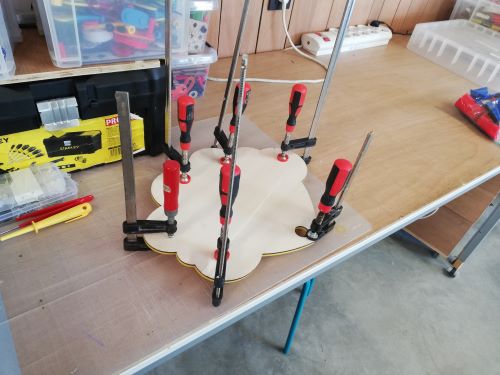
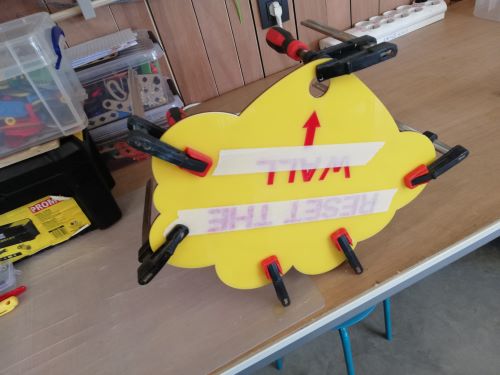
The first two i made with the lasercutter out of plexi.
I used these designes to cut them in different colours and then glued them together.
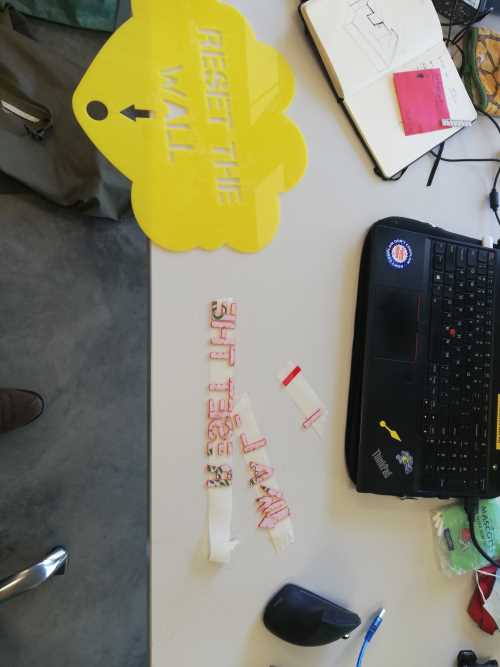
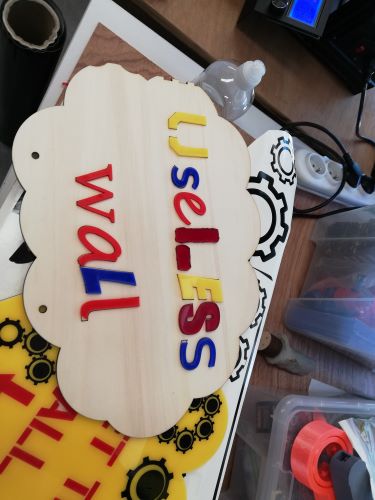
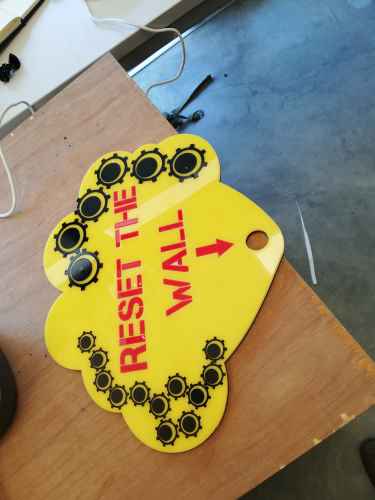
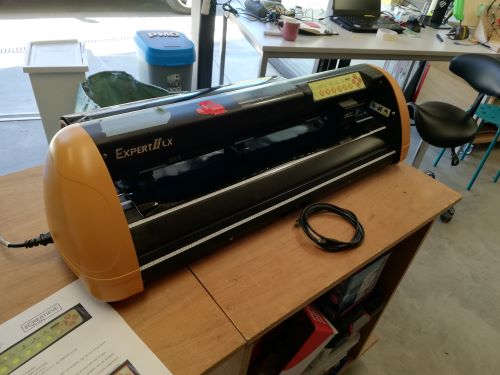
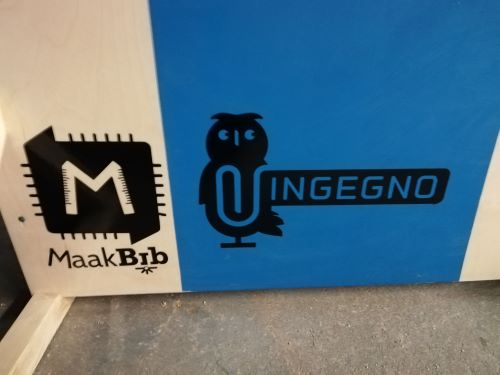
I also made a couple of stickers with the vinyl cutter, I drawed some gears and all the logos of the lab here in gent.

For the lasercutting part i use a metaquip I talk about this machine in the assigment of week 4.

I used 2 different cutting machines the first was a big one but the knive broke during the cutting.
I put everything on the wall.
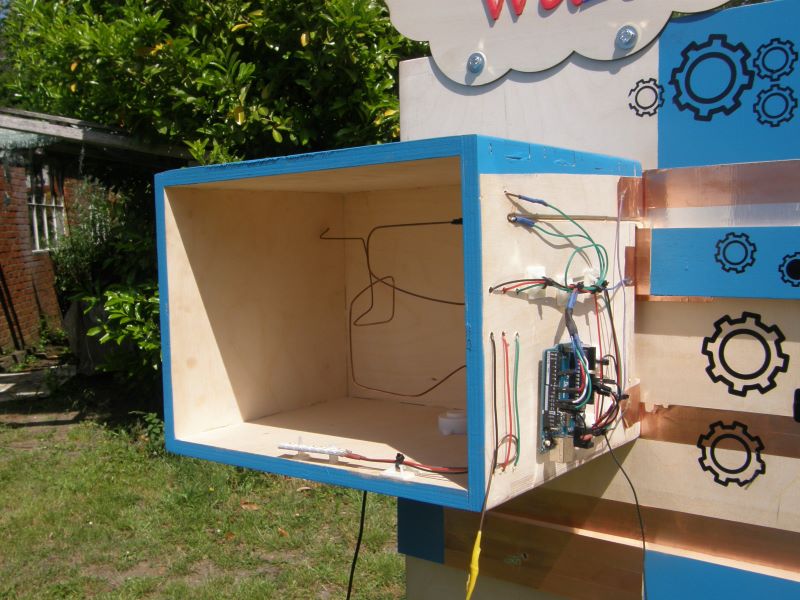
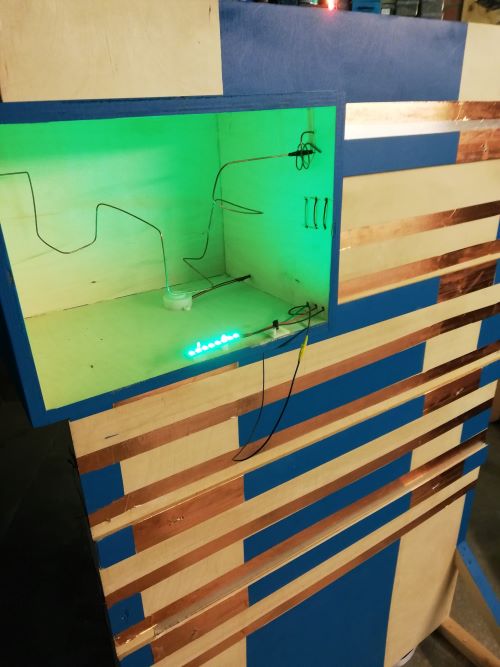
module one: nerve spiral.
For this part i used a cnc milling machine. I used the shapeoke3 which i explaned in week 3. First i designed it in fusion360 , it is made parametrecly , this way it can be used with other plywood with a diffirent thicness.


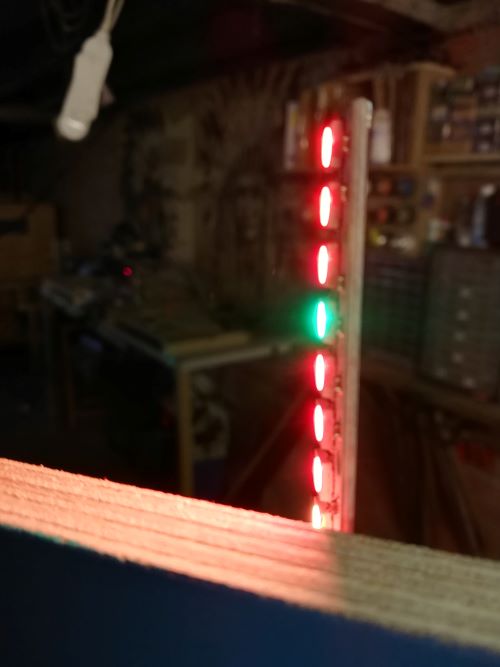
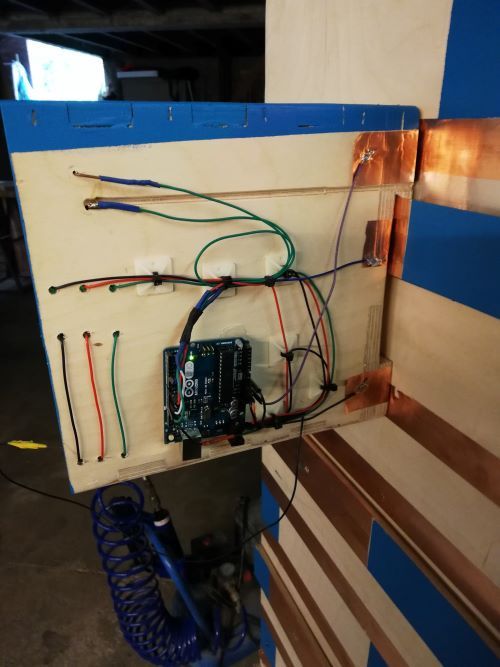
Inside the box is a nerve spiral made out of a copper wire . The goal of this game is to follow the spiral without touching it. When you touch the spiral the neopixel flickers red and the buzzer makes a irritating noice. When the participant is able to solve the spiral it touches another copper wire and the neopixel turn green and the module give a high signal to the master. The box also contains an arduino to guide everything.
I programmed this module also with the blokkencode. this module has the
boolean my_1;
boolean my_2;
boolean my_3;
boolean my_4;
boolean my_5;
boolean my_6;
boolean my_7;
boolean my_8;
int NeoPixel_2 = 13;
int doos1 = 2;
int doos2 = 3;
int doos3 = 4;
int doos4 = 5;
int doos5 = 6;
int doos6 = 7;
int doos7 = 8;
int doos8 = 9;
int Drukknop1 = 10;

#include <Adafruit_NeoPixel.h>
Adafruit_NeoPixel myNeo_NeoPixel_2 = Adafruit_NeoPixel(8, 13, NEO_GRB + NEO_KHZ800);
boolean Drukknop1_PRESSED = LOW;

long Drukknop1buttonTimer = 0;
#define Drukknop1minShortPressTime 80
#define Drukknop1longPressTime 750
boolean Drukknop1buttonActive = false;
boolean Drukknop1longPressActive = false;
#define Drukknop1NOPRESS    0
#define Drukknop1SHORTPRESS 1
#define Drukknop1LONGPRESS  2
int Drukknop1PressType = Drukknop1NOPRESS;


void handleDrukknop1Press() {
  Drukknop1PressType = Drukknop1NOPRESS;
      if (digitalRead(Drukknop1) == Drukknop1_PRESSED) {
        if (Drukknop1buttonActive == false) {
          Drukknop1buttonActive = true;
          Drukknop1buttonTimer = millis();
        }
        if ((millis() - Drukknop1buttonTimer > Drukknop1longPressTime) && (Drukknop1longPressActive == false)) {
          Drukknop1longPressActive = true;
          Drukknop1PressType = Drukknop1LONGPRESS;
        }
      } else {
        if (Drukknop1buttonActive == true) {
          if (Drukknop1longPressActive == true) {
            Drukknop1longPressActive = false;
          } else {
            //avoid fast fluctuations to be identified as a click
            if (millis() - Drukknop1buttonTimer > Drukknop1minShortPressTime)
              Drukknop1PressType = Drukknop1SHORTPRESS;
          }
          Drukknop1buttonActive = false;
        }
      }
}


// Deze functie beschrijven...
void uitput() {
  if (my_1 == HIGH) {
    myNeo_NeoPixel_2.setPixelColor(1-1, myNeo_NeoPixel_2.Color(0,255,0));
    myNeo_NeoPixel_2.show();
  } else {
    myNeo_NeoPixel_2.setPixelColor(1-1, myNeo_NeoPixel_2.Color(255,0,0));
    myNeo_NeoPixel_2.show();
  }
  if (my_2 == HIGH) {
    myNeo_NeoPixel_2.setPixelColor(2-1, myNeo_NeoPixel_2.Color(0,255,0));
    myNeo_NeoPixel_2.show();
  } else {
    myNeo_NeoPixel_2.setPixelColor(2-1, myNeo_NeoPixel_2.Color(255,0,0));
    myNeo_NeoPixel_2.show();
  }
  if (my_3 == HIGH) {
    myNeo_NeoPixel_2.setPixelColor(3-1, myNeo_NeoPixel_2.Color(0,255,0));
    myNeo_NeoPixel_2.show();
  } else {
    myNeo_NeoPixel_2.setPixelColor(3-1, myNeo_NeoPixel_2.Color(255,0,0));
    myNeo_NeoPixel_2.show();
  }
  if (my_4 == HIGH) {
    myNeo_NeoPixel_2.setPixelColor(4-1, myNeo_NeoPixel_2.Color(0,255,0));
    myNeo_NeoPixel_2.show();
  } else {
    myNeo_NeoPixel_2.setPixelColor(4-1, myNeo_NeoPixel_2.Color(255,0,0));
    myNeo_NeoPixel_2.show();
  }
  if (my_5 == HIGH) {
    myNeo_NeoPixel_2.setPixelColor(5-1, myNeo_NeoPixel_2.Color(0,255,0));
    myNeo_NeoPixel_2.show();
  } else {
    myNeo_NeoPixel_2.setPixelColor(5-1, myNeo_NeoPixel_2.Color(255,0,0));
    myNeo_NeoPixel_2.show();
  }
  if (my_6 == HIGH) {
    myNeo_NeoPixel_2.setPixelColor(6-1, myNeo_NeoPixel_2.Color(0,255,0));
    myNeo_NeoPixel_2.show();
  } else {
    myNeo_NeoPixel_2.setPixelColor(6-1, myNeo_NeoPixel_2.Color(255,0,0));
    myNeo_NeoPixel_2.show();
  }
  if (my_7 == HIGH) {
    myNeo_NeoPixel_2.setPixelColor(7-1, myNeo_NeoPixel_2.Color(0,255,0));
    myNeo_NeoPixel_2.show();
  } else {
    myNeo_NeoPixel_2.setPixelColor(7-1, myNeo_NeoPixel_2.Color(255,0,0));
    myNeo_NeoPixel_2.show();
  }
  if (my_8 == HIGH) {
    myNeo_NeoPixel_2.setPixelColor(8-1, myNeo_NeoPixel_2.Color(0,255,0));
    myNeo_NeoPixel_2.show();
  } else {
    myNeo_NeoPixel_2.setPixelColor(8-1, myNeo_NeoPixel_2.Color(255,0,0));
    myNeo_NeoPixel_2.show();
  }
  handleDrukknop1Press();

  if (Drukknop1PressType == Drukknop1SHORTPRESS) {
    //START STATEMENTS SHORT PRESS
    rood();
    //END  STATEMENTS SHORT PRESS
  } else if (Drukknop1PressType == Drukknop1LONGPRESS) {
    //START STATEMENTS LONG PRESS
    //END  STATEMENTS LONG PRESS
  } else if (!Drukknop1longPressActive && digitalRead(Drukknop1) == Drukknop1_PRESSED) {
    //START STATEMENTS PRESS
    //END  STATEMENTS PRESS
  }

}

// Deze functie beschrijven...
void rood() {
  for (int count = 0; count < 5; count++) {
    myNeo_NeoPixel_2.setPixelColor(1-1, myNeo_NeoPixel_2.Color(255,0,0));
    myNeo_NeoPixel_2.show();
    myNeo_NeoPixel_2.setPixelColor(2-1, myNeo_NeoPixel_2.Color(255,0,0));
    myNeo_NeoPixel_2.show();
    myNeo_NeoPixel_2.setPixelColor(3-1, myNeo_NeoPixel_2.Color(255,0,0));
    myNeo_NeoPixel_2.show();
    myNeo_NeoPixel_2.setPixelColor(4-1, myNeo_NeoPixel_2.Color(255,0,0));
    myNeo_NeoPixel_2.show();
    myNeo_NeoPixel_2.setPixelColor(5-1, myNeo_NeoPixel_2.Color(255,0,0));
    myNeo_NeoPixel_2.show();
    myNeo_NeoPixel_2.setPixelColor(6-1, myNeo_NeoPixel_2.Color(255,0,0));
    myNeo_NeoPixel_2.show();
    myNeo_NeoPixel_2.setPixelColor(7-1, myNeo_NeoPixel_2.Color(255,0,0));
    myNeo_NeoPixel_2.show();
    myNeo_NeoPixel_2.setPixelColor(8-1, myNeo_NeoPixel_2.Color(255,0,0));
    myNeo_NeoPixel_2.show();
    delay(100);
    myNeo_NeoPixel_2.setPixelColor(1-1, myNeo_NeoPixel_2.Color(0,0,0));
    myNeo_NeoPixel_2.show();
    myNeo_NeoPixel_2.setPixelColor(2-1, myNeo_NeoPixel_2.Color(0,0,0));
    myNeo_NeoPixel_2.show();
    myNeo_NeoPixel_2.setPixelColor(3-1, myNeo_NeoPixel_2.Color(0,0,0));
    myNeo_NeoPixel_2.show();
    myNeo_NeoPixel_2.setPixelColor(4-1, myNeo_NeoPixel_2.Color(0,0,0));
    myNeo_NeoPixel_2.show();
    myNeo_NeoPixel_2.setPixelColor(5-1, myNeo_NeoPixel_2.Color(0,0,0));
    myNeo_NeoPixel_2.show();
    myNeo_NeoPixel_2.setPixelColor(6-1, myNeo_NeoPixel_2.Color(0,0,0));
    myNeo_NeoPixel_2.show();
    myNeo_NeoPixel_2.setPixelColor(7-1, myNeo_NeoPixel_2.Color(0,0,0));
    myNeo_NeoPixel_2.show();
    myNeo_NeoPixel_2.setPixelColor(8-1, myNeo_NeoPixel_2.Color(0,0,0));
    myNeo_NeoPixel_2.show();
    delay(100);
  }
  myNeo_NeoPixel_2.setPixelColor(1-1, myNeo_NeoPixel_2.Color(255,0,0));
  myNeo_NeoPixel_2.show();
  myNeo_NeoPixel_2.setPixelColor(2-1, myNeo_NeoPixel_2.Color(255,0,0));
  myNeo_NeoPixel_2.show();
  myNeo_NeoPixel_2.setPixelColor(3-1, myNeo_NeoPixel_2.Color(255,0,0));
  myNeo_NeoPixel_2.show();
  myNeo_NeoPixel_2.setPixelColor(4-1, myNeo_NeoPixel_2.Color(255,0,0));
  myNeo_NeoPixel_2.show();
}

// Deze functie beschrijven...
void input_lezen() {
  my_1 = digitalRead(doos1);
  my_2 = digitalRead(doos2);
  my_3 = digitalRead(doos3);
  my_4 = digitalRead(doos4);
  my_5 = digitalRead(doos5);
  my_6 = digitalRead(doos6);
  my_7 = digitalRead(doos7);
  my_8 = digitalRead(doos8);
}


void setup() {
  myNeo_NeoPixel_2.begin();
  myNeo_NeoPixel_2.show();
  pinMode(doos1, INPUT);
  pinMode(doos2, INPUT);
  pinMode(doos3, INPUT);
  pinMode(doos4, INPUT);
  pinMode(doos5, INPUT);
  pinMode(doos6, INPUT);
  pinMode(doos7, INPUT);
  pinMode(doos8, INPUT);
  pinMode(Drukknop1, INPUT_PULLUP);

  rood();

}

void loop() {
  input_lezen();
  uitput();

}
If I have time left after the next module I want to mill a board of my own insstead of a arduino, but i first wanted to test the hole system.
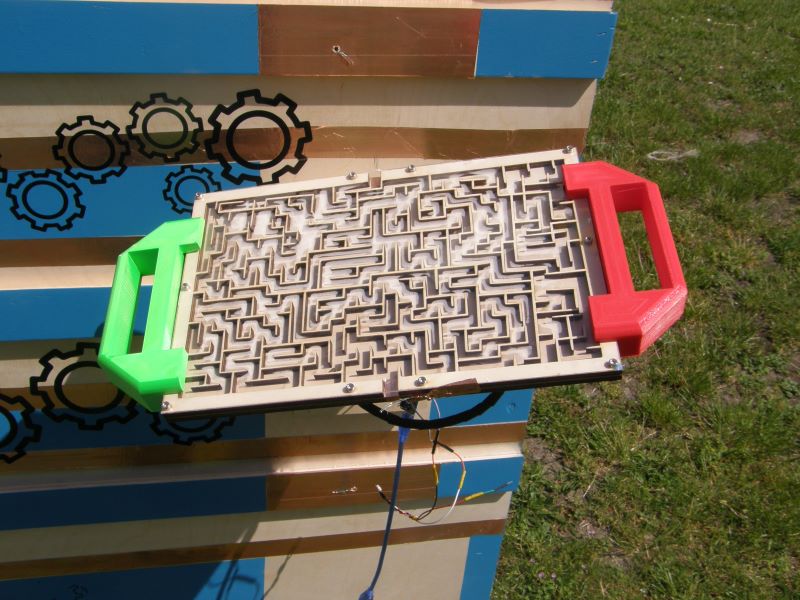
module two : electromaze
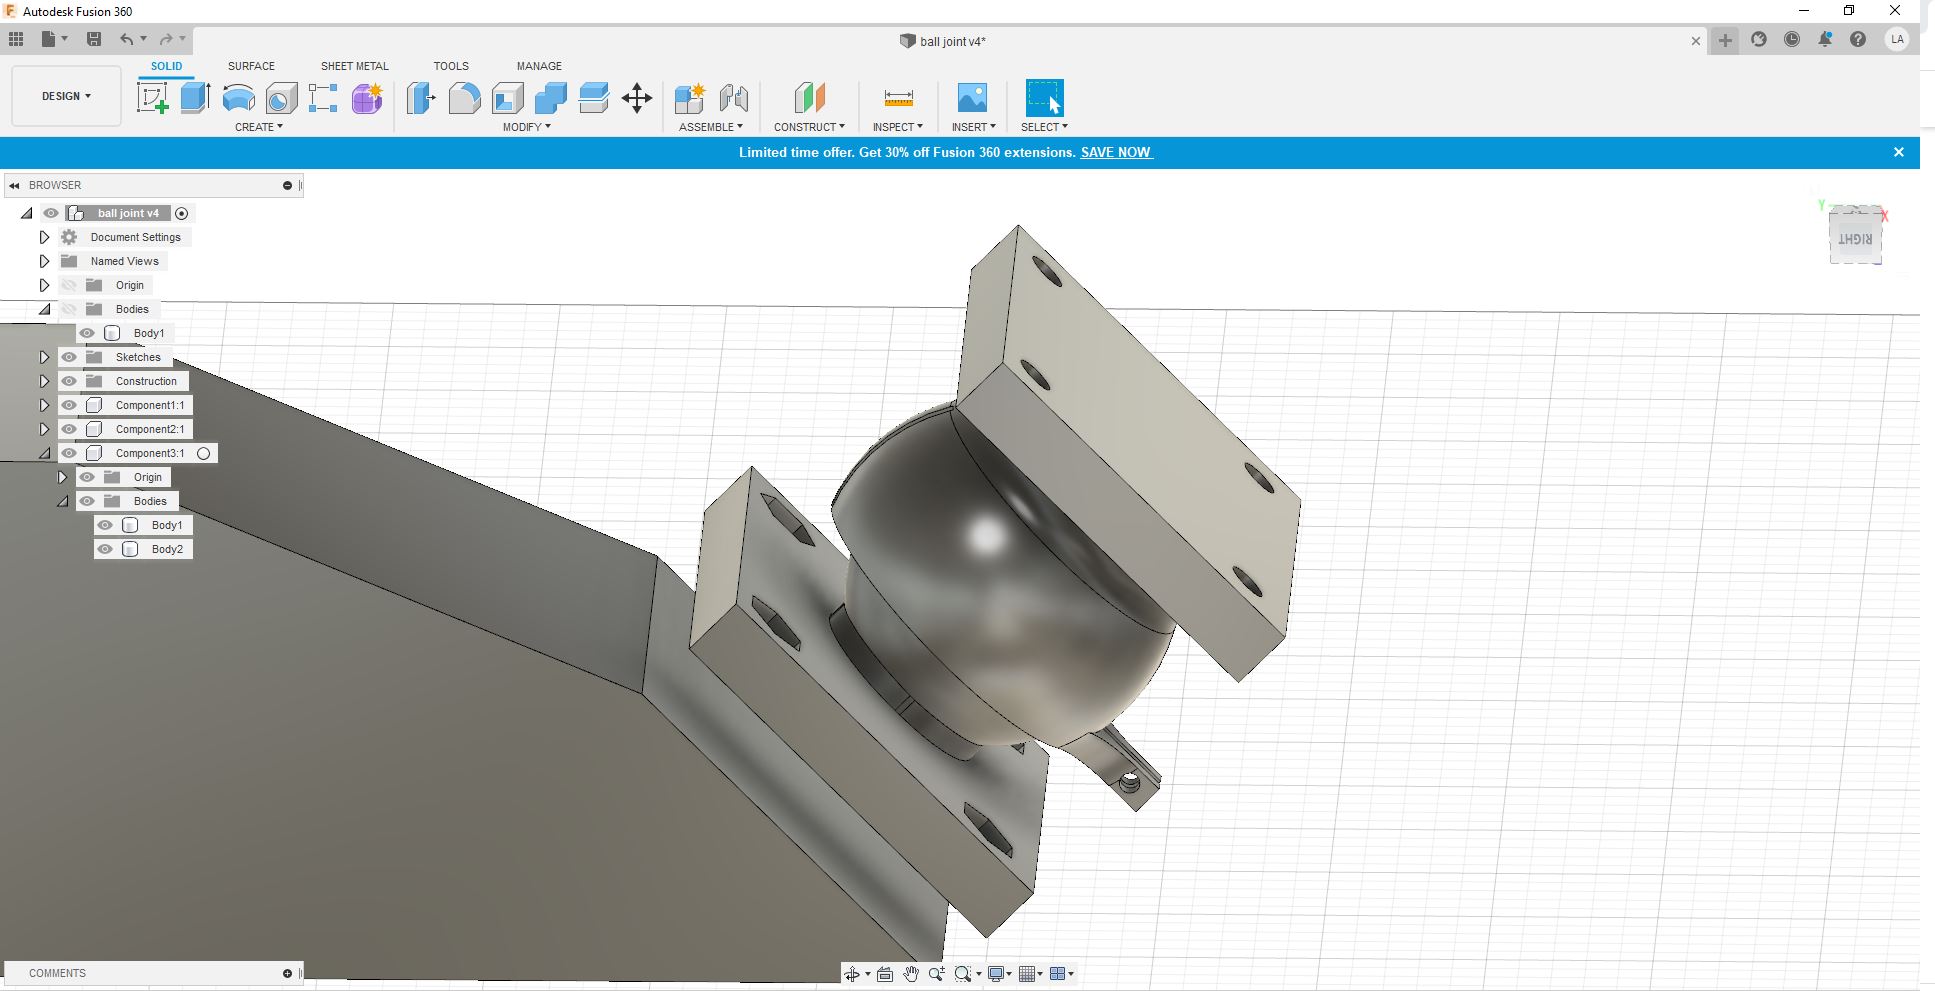
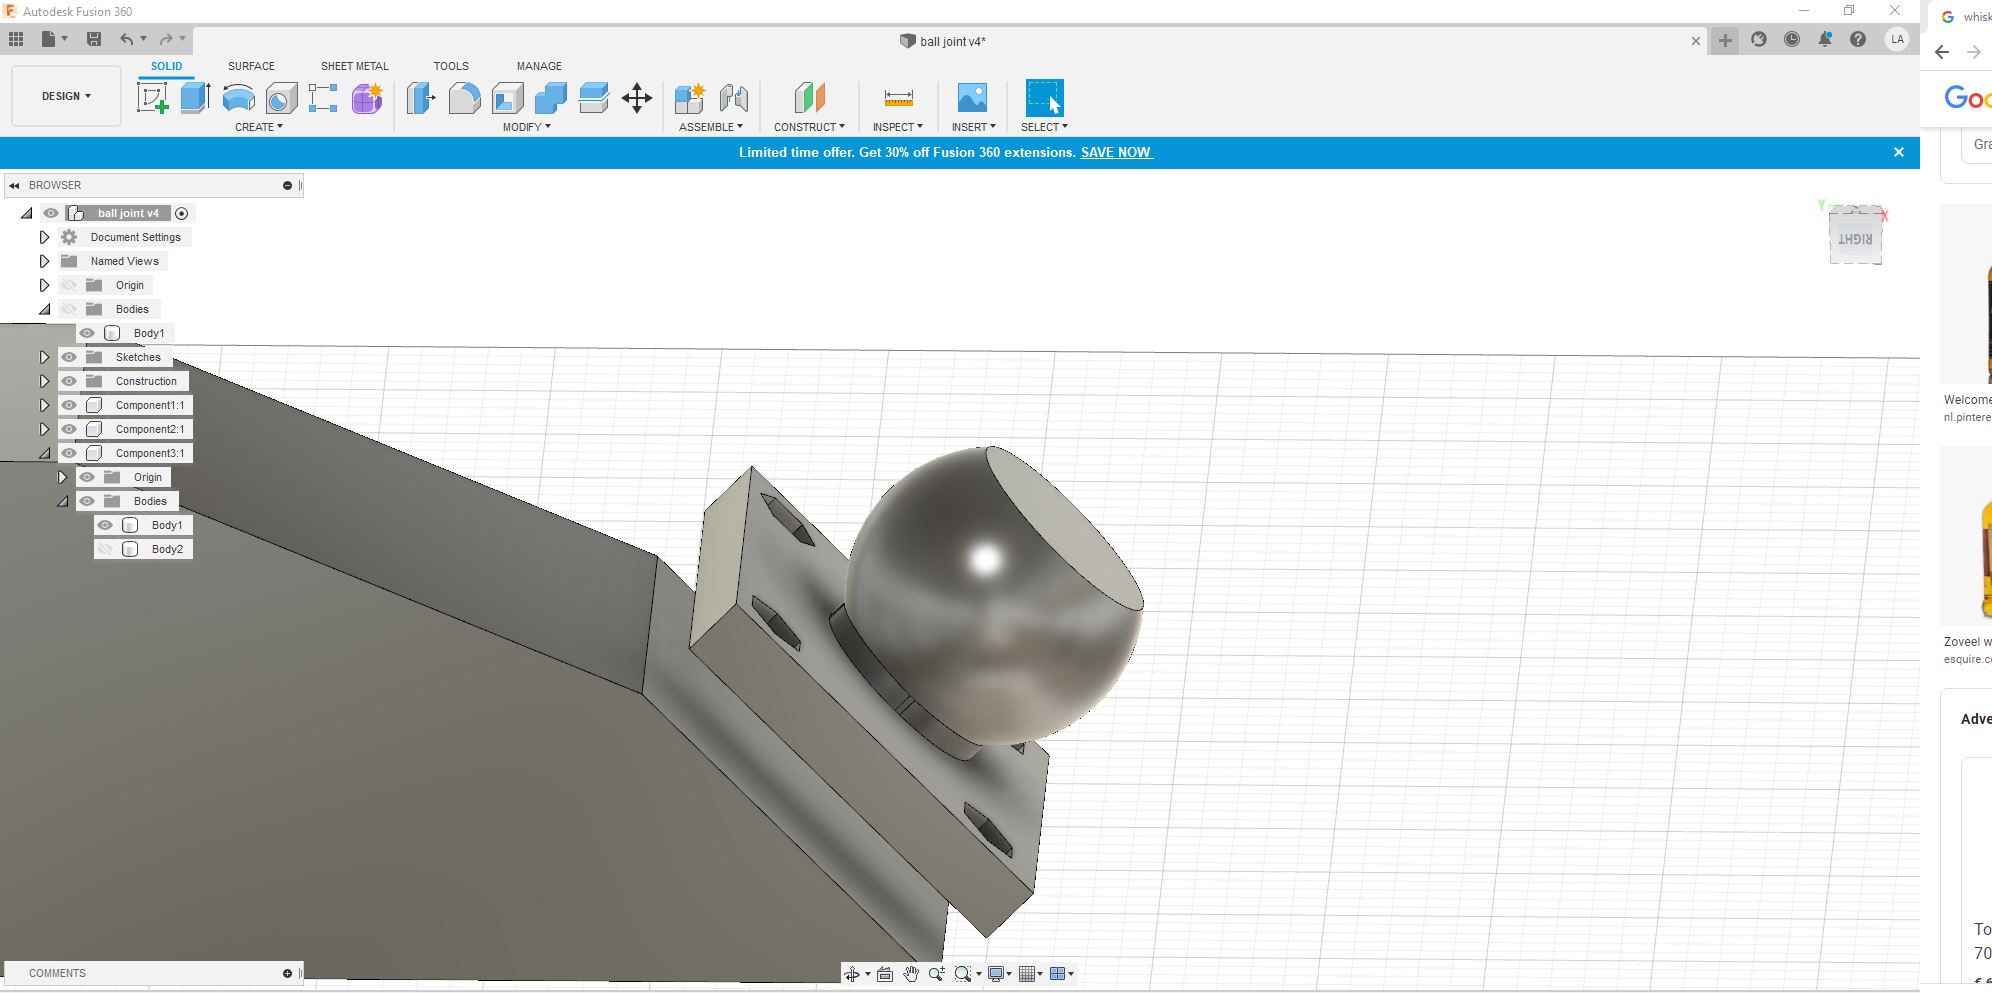
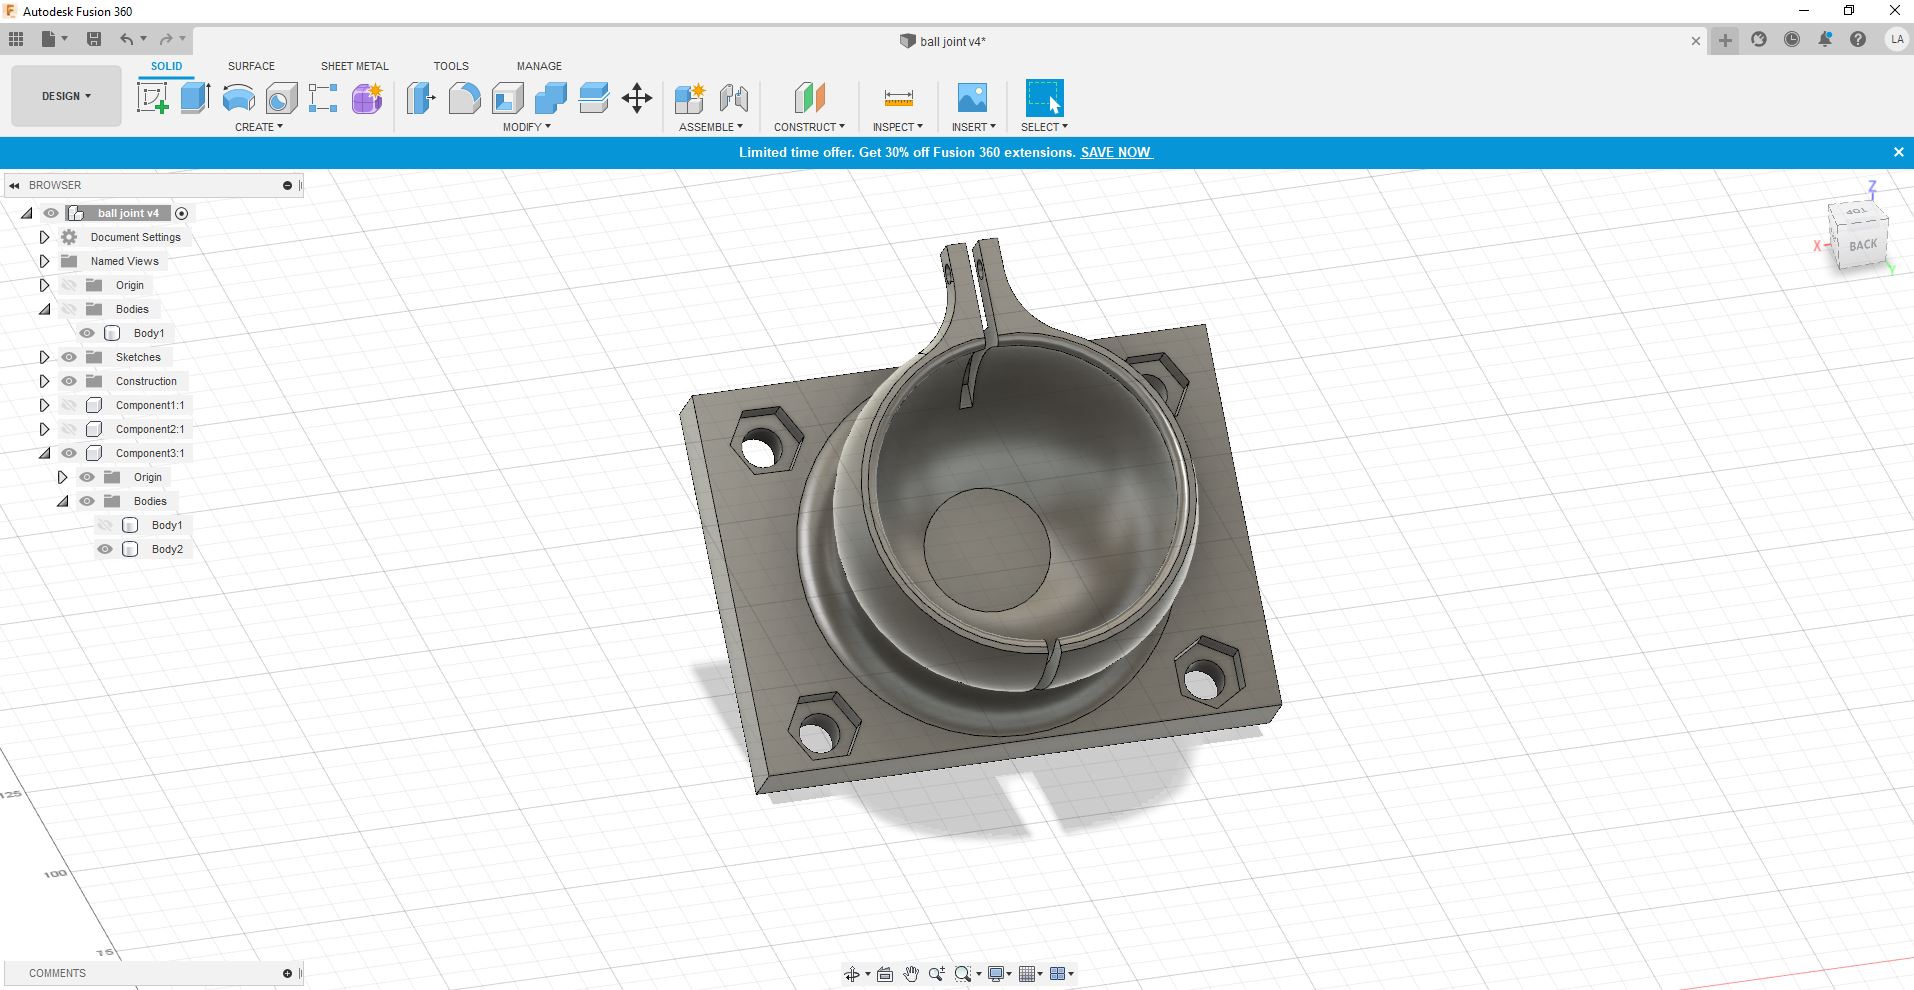
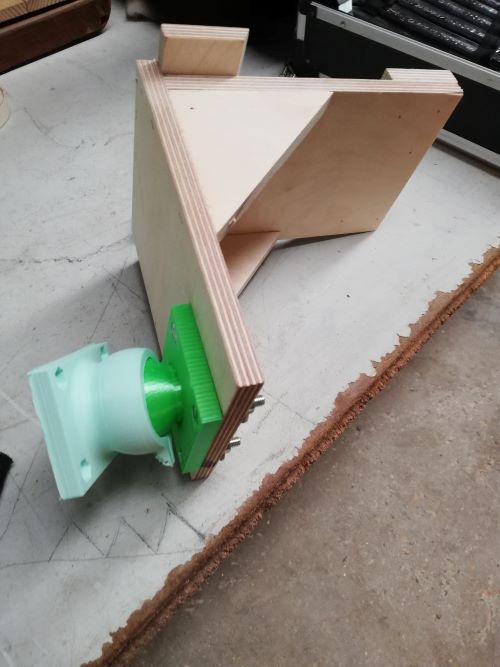
The second challenge is a maze that you have to solve. For this module i used 3D printing and lasercutting. The purpuse of this module is to solve the maze , inside the maze is a iron ball and by rotating the maze it is possible to solve the maze. I designed a ball joint in fusion360 so you can move the maze around and guide the ball inside the maze to the finish.
I printed this parts with the 3D printer (Ender3 pro) with the following settings
- layer height 0.15
- infill 40 %
- no support
When I tried to assemble the two pieces one broke.
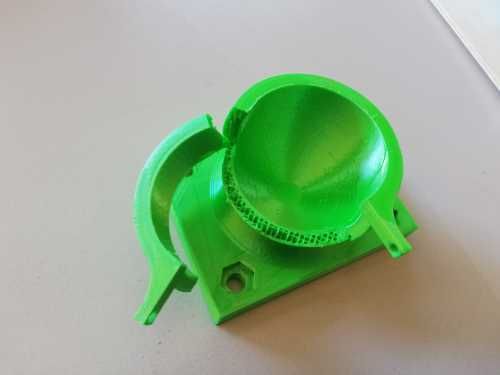
I printed the object again but with 60% infill. Before I assembeled the new parts I heated the hole piece with a heatgun. This proved succesfull. They clicked in eachother and cooled off perfecttely.

The next part is the maze. I made this part in inkscape and lasercuted it. I first made it with the cnc milling machine but it it was not good. Afterwards I decided to do it with the lasercutter. It was faster than milling it because the material is very thin.
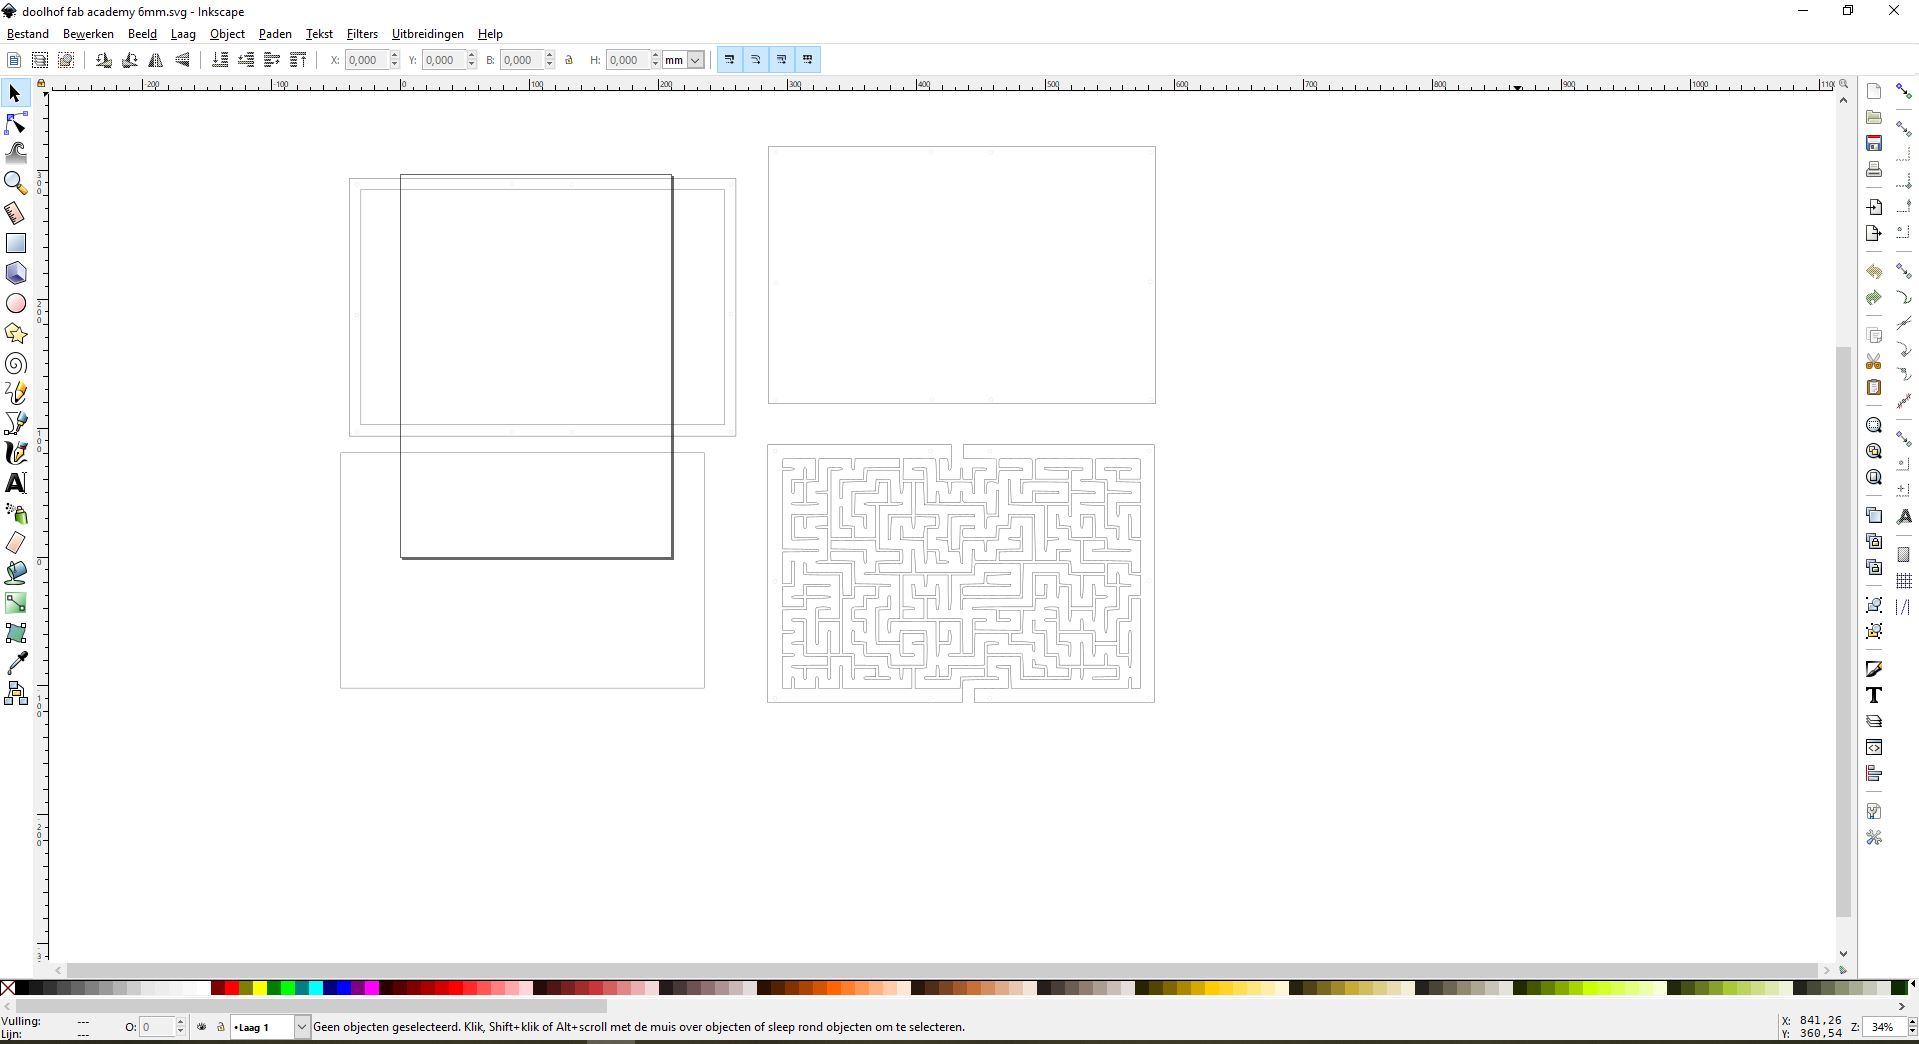
I made the main part out of 4 mm plywood and a sheet of PETG.
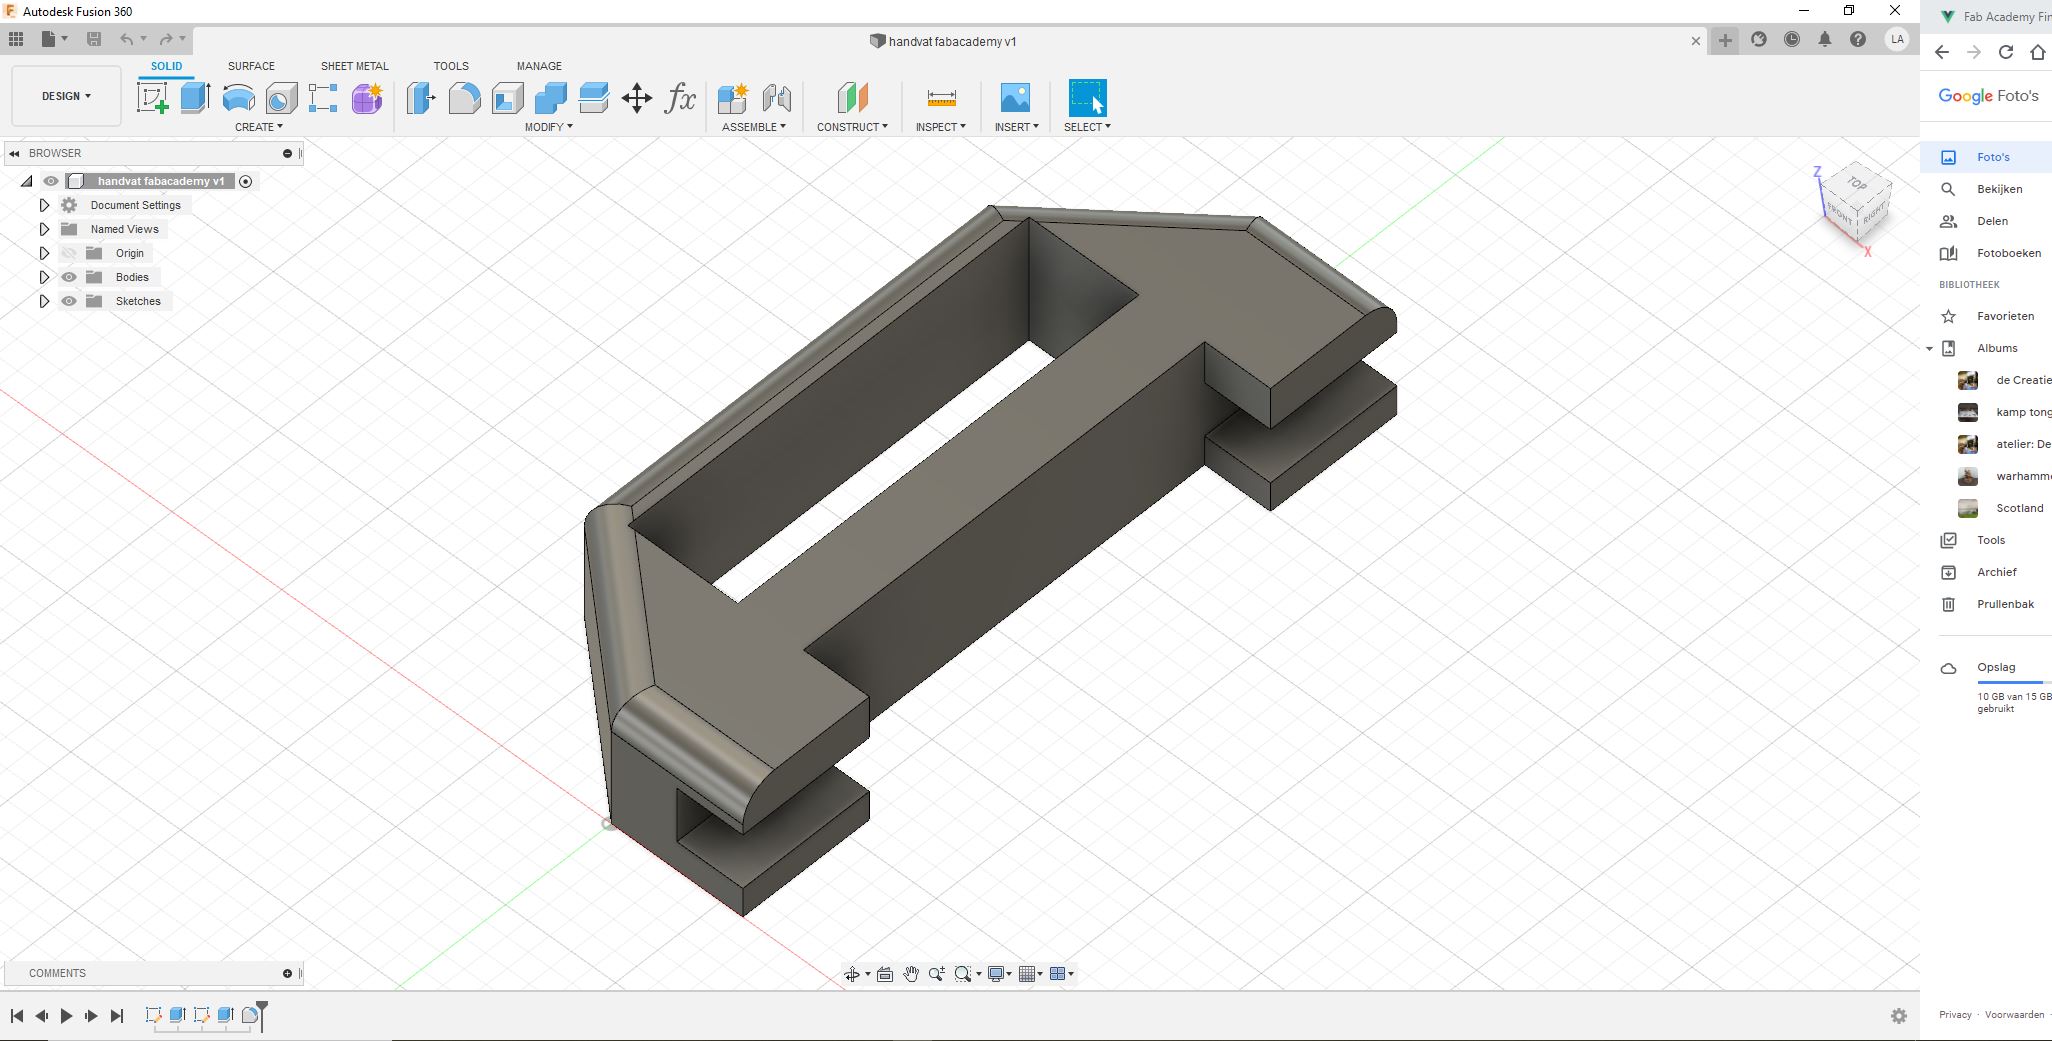
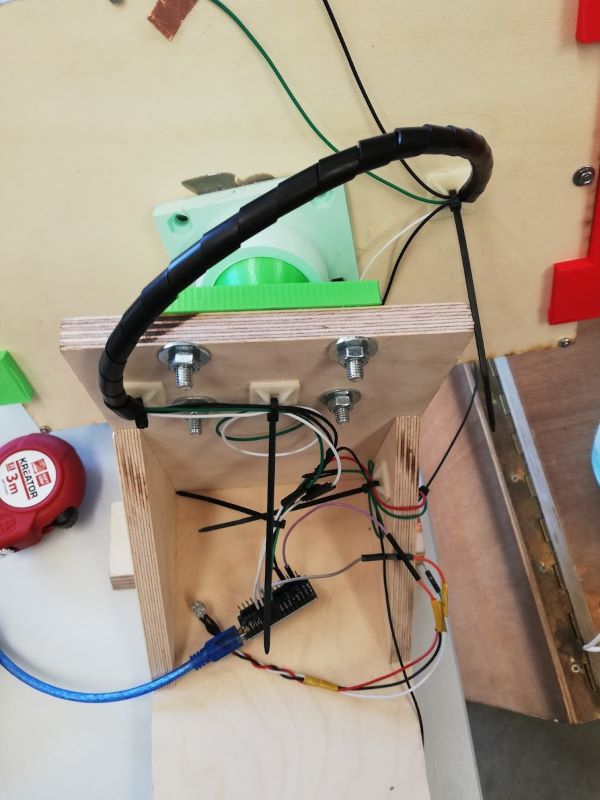
Now i assembeled this module. I noticed that it would be nicer to add some handles so i made 2 handels in fusion 360 and 3D printed them.
Now I added the electronic part, I soldered the parts and made the code.
The code is the next part for this module. I also made it with blokkencode . This is the code:
int NeoPixel_2 = 6;
int Drukknop1 = 8;
int Drukknop1_2 = 7;
int DigOutput1 = 5;

#include <Adafruit_NeoPixel.h>
Adafruit_NeoPixel myNeo_NeoPixel_2 = Adafruit_NeoPixel(1, 6, NEO_GRB + NEO_KHZ800);
boolean Drukknop1_PRESSED = HIGH;

boolean Drukknop1_2_PRESSED = HIGH;

long Drukknop1buttonTimer = 0;
#define Drukknop1minShortPressTime 80
#define Drukknop1longPressTime 750
boolean Drukknop1buttonActive = false;
boolean Drukknop1longPressActive = false;
#define Drukknop1NOPRESS    0
#define Drukknop1SHORTPRESS 1
#define Drukknop1LONGPRESS  2
int Drukknop1PressType = Drukknop1NOPRESS;
long Drukknop1_2buttonTimer = 0;
#define Drukknop1_2minShortPressTime 80
#define Drukknop1_2longPressTime 750
boolean Drukknop1_2buttonActive = false;
boolean Drukknop1_2longPressActive = false;
#define Drukknop1_2NOPRESS    0
#define Drukknop1_2SHORTPRESS 1
#define Drukknop1_2LONGPRESS  2
int Drukknop1_2PressType = Drukknop1_2NOPRESS;

// Deze functie beschrijven...
void opstarten() {
  myNeo_NeoPixel_2.setPixelColor(1-1, myNeo_NeoPixel_2.Color(255,0,0));
  myNeo_NeoPixel_2.show();
  delay(1000);
  myNeo_NeoPixel_2.setPixelColor(1-1, myNeo_NeoPixel_2.Color(255,0,0));
  myNeo_NeoPixel_2.show();
  delay(1000);
  myNeo_NeoPixel_2.setPixelColor(1-1, myNeo_NeoPixel_2.Color(255,0,0));
  myNeo_NeoPixel_2.show();
}


void handleDrukknop1Press() {
  Drukknop1PressType = Drukknop1NOPRESS;
      if (digitalRead(Drukknop1) == Drukknop1_PRESSED) {
        if (Drukknop1buttonActive == false) {
          Drukknop1buttonActive = true;
          Drukknop1buttonTimer = millis();
        }
        if ((millis() - Drukknop1buttonTimer > Drukknop1longPressTime) && (Drukknop1longPressActive == false)) {
          Drukknop1longPressActive = true;
          Drukknop1PressType = Drukknop1LONGPRESS;
        }
      } else {
        if (Drukknop1buttonActive == true) {
          if (Drukknop1longPressActive == true) {
            Drukknop1longPressActive = false;
          } else {
            //avoid fast fluctuations to be identified as a click
            if (millis() - Drukknop1buttonTimer > Drukknop1minShortPressTime)
              Drukknop1PressType = Drukknop1SHORTPRESS;
          }
          Drukknop1buttonActive = false;
        }
      }
}


// Deze functie beschrijven...
void groen() {
  handleDrukknop1Press();

  if (Drukknop1PressType == Drukknop1SHORTPRESS) {
    //START STATEMENTS SHORT PRESS
    myNeo_NeoPixel_2.setPixelColor(1-1, myNeo_NeoPixel_2.Color(0,255,0));
    myNeo_NeoPixel_2.show();
    digitalWrite(5, HIGH);
    //END  STATEMENTS SHORT PRESS
  } else if (Drukknop1PressType == Drukknop1LONGPRESS) {
    //START STATEMENTS LONG PRESS
    //END  STATEMENTS LONG PRESS
  } else if (!Drukknop1longPressActive && digitalRead(Drukknop1) == Drukknop1_PRESSED) {
    //START STATEMENTS PRESS
    //END  STATEMENTS PRESS
  }

}


void handleDrukknop1_2Press() {
  Drukknop1_2PressType = Drukknop1_2NOPRESS;
      if (digitalRead(Drukknop1_2) == Drukknop1_2_PRESSED) {
        if (Drukknop1_2buttonActive == false) {
          Drukknop1_2buttonActive = true;
          Drukknop1_2buttonTimer = millis();
        }
        if ((millis() - Drukknop1_2buttonTimer > Drukknop1_2longPressTime) && (Drukknop1_2longPressActive == false)) {
          Drukknop1_2longPressActive = true;
          Drukknop1_2PressType = Drukknop1_2LONGPRESS;
        }
      } else {
        if (Drukknop1_2buttonActive == true) {
          if (Drukknop1_2longPressActive == true) {
            Drukknop1_2longPressActive = false;
          } else {
            //avoid fast fluctuations to be identified as a click
            if (millis() - Drukknop1_2buttonTimer > Drukknop1_2minShortPressTime)
              Drukknop1_2PressType = Drukknop1_2SHORTPRESS;
          }
          Drukknop1_2buttonActive = false;
        }
      }
}


// Deze functie beschrijven...
void rood() {
  handleDrukknop1_2Press();

  if (Drukknop1_2PressType == Drukknop1_2SHORTPRESS) {
    //START STATEMENTS SHORT PRESS
    myNeo_NeoPixel_2.setPixelColor(1-1, myNeo_NeoPixel_2.Color(255,0,0));
    myNeo_NeoPixel_2.show();
    digitalWrite(5, LOW);
    //END  STATEMENTS SHORT PRESS
  } else if (Drukknop1_2PressType == Drukknop1_2LONGPRESS) {
    //START STATEMENTS LONG PRESS
    //END  STATEMENTS LONG PRESS
  } else if (!Drukknop1_2longPressActive && digitalRead(Drukknop1_2) == Drukknop1_2_PRESSED) {
    //START STATEMENTS PRESS
    //END  STATEMENTS PRESS
  }

}


void setup() {
  myNeo_NeoPixel_2.begin();
  myNeo_NeoPixel_2.show();
  pinMode(Drukknop1, INPUT);
  pinMode(Drukknop1_2, INPUT);
  pinMode(DigOutput1, OUTPUT);
  pinMode(5, OUTPUT);

  opstarten();

}

void loop() {
  groen();
  rood();

}