Computer Controller Cutting
This weeks individual assignment was to design and make a parametric construction kit aswell as create our own vinyl sticker. Since I am already familar with the process of making single layered stickers, I decided that mine would be multi layered. My local instructer tasked our class with creating our own sticker that would commemorate the year. I thought abouut mine and the realized that nothing is a better symbol than a mask. For my parametric construction kit, I decided that I would make a basket that I could use to hold tools. In the each section below I will explained how I built it and what I used.
Vinyl Cutting
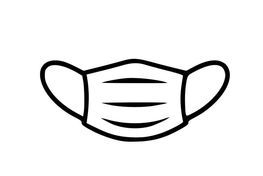 The first thing that I made this week was my sticker. I decided that I was going to make a mask so the first thing that I did was look for a good reference photo. I found this photo to the right to use as my reference photo and then proceeded to put it into Silhouette Studio. Since my image was already clean and didnt need anything trimmed out of it, I went strait for the trace tool. The trace tool did a really great job of converting my mask into a series of simple lines that the machine can cut. It also has multiple different settings that allow you to chose what you want to cut out. For now though, I kept the settings as reccommended.
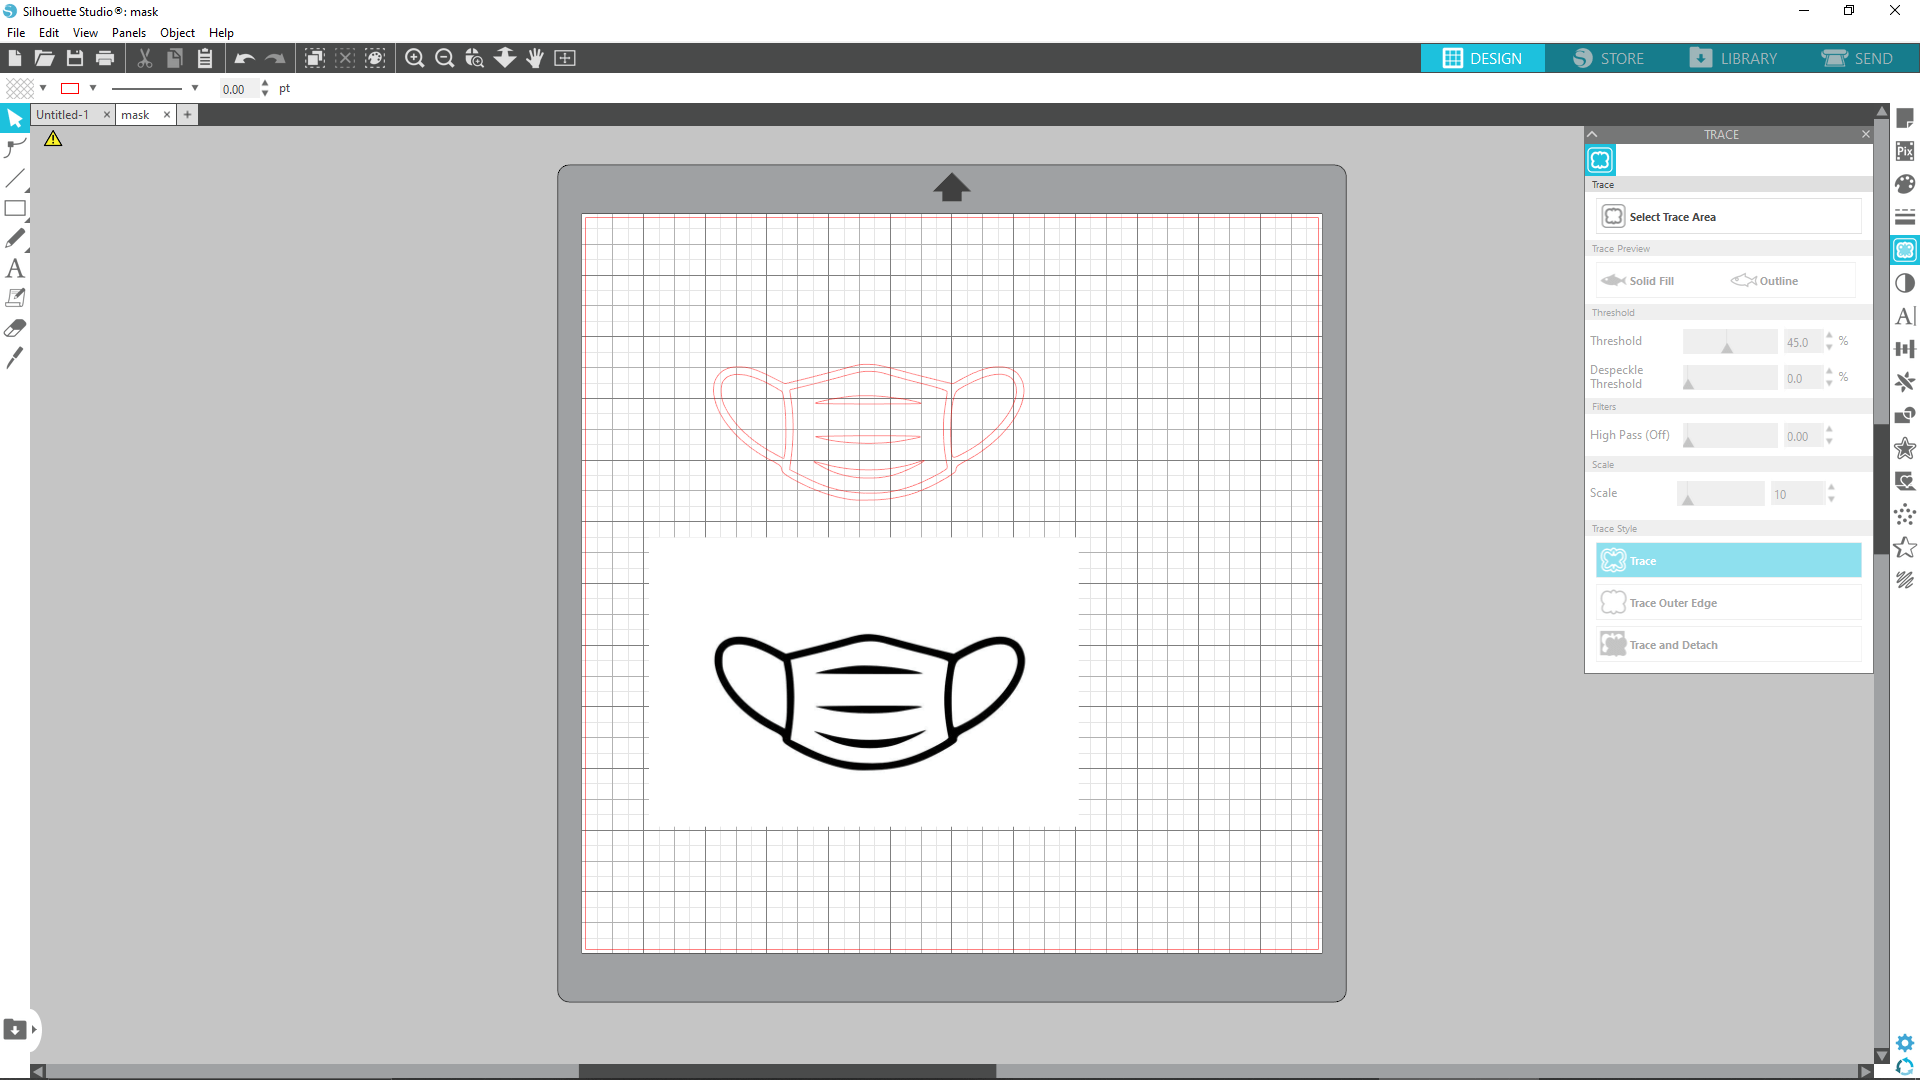
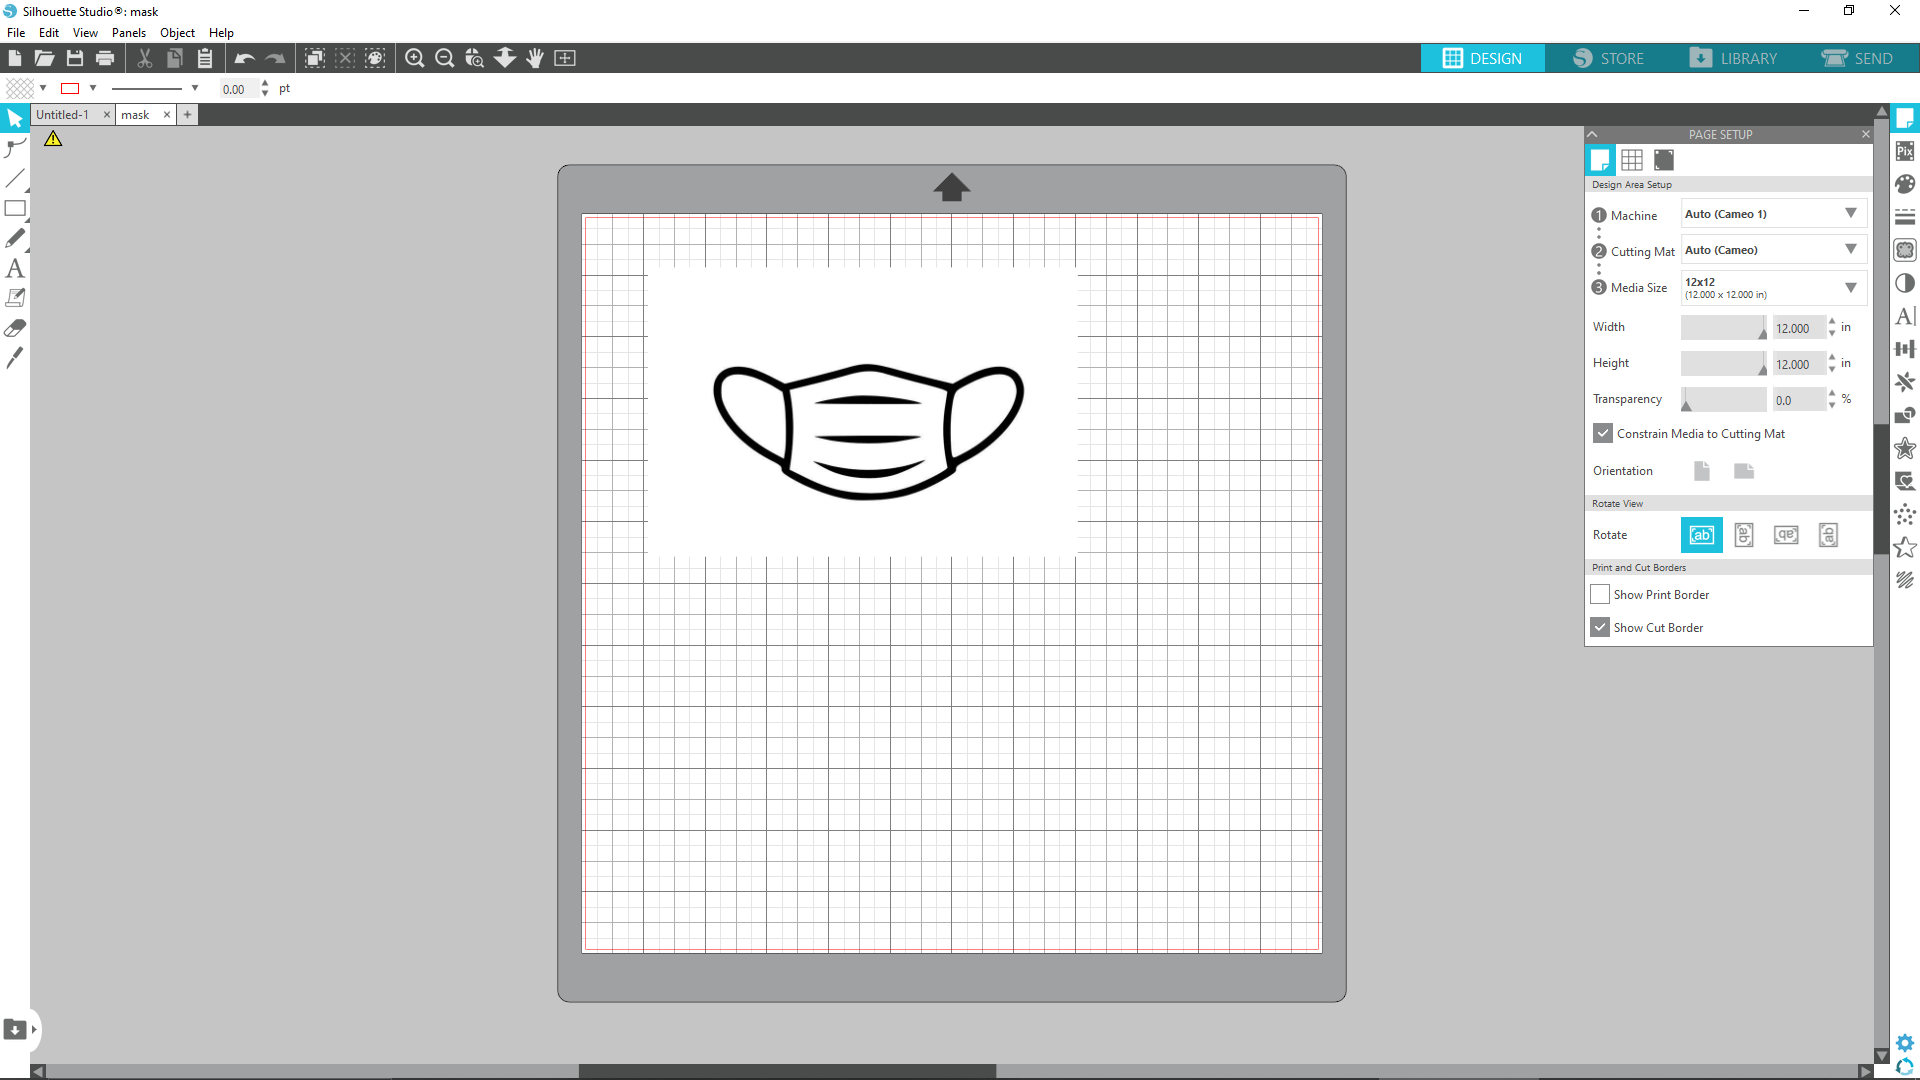
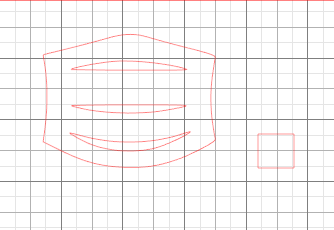 Once I had my design in Silhouette, I needed to create a reference square that I could use to line up the two layers later on. I quickly drew out a sqaure in the bottom right corner so that I could line up the two layers with relative ease. I used the “trace” tool to convert the bitmap image into a series of lines that could be cut by the machine. It is important while doing this to verify that everything you want to cut is there. I used the navigation bar in the top right to move over to the cut menu once I knew that I had everything where I wanted it. Once I was in the menu, I used this workflow to guide me through the process of setting everything up. I made sure to double check that the blade number it provided me, was the blade that the machine had setup. In my case it wasnt so I went and changed the blade to the right number in the machine. The first time I tried to cut it, it didnt go through all the way in some places. Instead of turning up the power and potentially cutting one of the mats, I ran it two times. This seemed to work as the vinyl peeled right off. The second layer I cut in glossy ble and was a littler simpler to make than the first layer. I then weeded the sticker getting rid of any unwanted materials. My lab has clear transfer taped which really helped me out when alligning my two layers. Putting the two layers together I was presented with my final sticker.

The first time I tried to cut it, it didnt go through all the way in some places. Instead of turning up the power and potentially cutting one of the mats, I ran it two times. This seemed to work as the vinyl peeled right off. The second layer I cut in glossy blue and was a littler simpler to make than the first layer. Luckily, it didnt take me to long to post process. The first thing I did is cut off any extra material. The was only a little extra that was on the right side but nothing to much. The next thing I did was use a pair of tweezers to take out the inside section of my mask that would have been covered up. I could have left this piece but I felt that leaving it would create an uneven look because of the two different layers. I then weeded all of the remaining outside material but was sure to keep the reference square. Once I ran the second cut, I weeded that using the same steps and was able to move on to alligning them. I figured out that my lab had clear transfer tape that I could use. This really helped me becuase I was able to line up everything perfectly. The reference squares also played a major role in helping me. I then used a squeegy to make sure both sheets were attached to each other. Instead of peeling up the vinyl here, I was able to keep that same transfer tape piece on. Becuase of this I could then line up my sticker to the window that we all put out stickers on.
Parametric Design
Prior to listening to this weeks lecture, I had ever heard of parametric design. I was familar with using constraints in designs and for the simple designs that I was working on, this would be more than enough. I would change a deminsion and becuase of my constraits that I had applied it would change the structure of my design. Sometimes I would over constrain objects and the object would break when I would change one value. Now that I have discovered parametric design tool in Fusion 360 I have implemented it into designs that I am making in class. For this weeks assignment, I designed a basket thats tabs width and length can be added or subtracted easily using extra pieces that easily assemble togther. I will explain how I made it below.
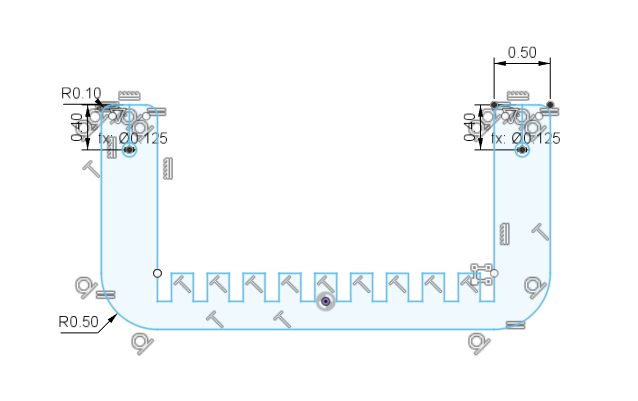
 The first step was to note areas where I may need parameters and to note them. Then I would navigate under modify to the dedicated parameters section. I created my first parameter called matthick which represented the thickness of my material and then created another one called tabdepth. These were the two critical ones that I used throughout my design. My thrid parameter that I created was called doweldiameter. I will explain more how I used it later on. Using my first two constraints, I created a U shaped sketch. While the size of it didnt matter I made sure to make the define each tab with my parameter. I also created a circle with the diameter ‘dowdiameter’ in the left and right corners of my design.
 I replicated the same proccess as above for the second piece of my design. The only difference between the two is that on the second sketch I placed the tabs on the bottom of the U shape.
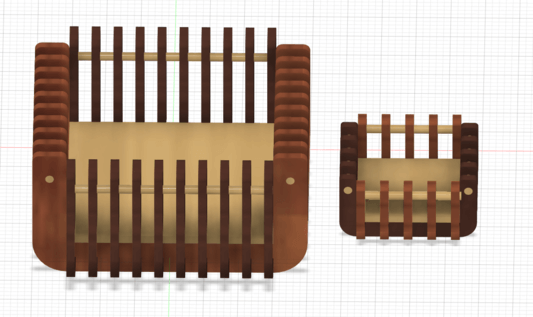
 I then scaled down my first design to make it half as large. Becuase of the parameters that I had inserted before, everything in my design became smaller exept for the tabs. Putting is side by side with the larger version revealed the power of paramteric design. It would have taken me 5x longer if I would have had to completely redesign my box. But because of my parameters it took me a matter of minutes. The last thing I had to do to my design was add the dowels and create a small base. Both of them were easy enough and only required two simple sketchs. After that I used the keyboard shortcut letter A to start adjusting my appearance. Since I eventually want to make my basket out of wood, I used three different stains to represent each type of wood. In the end I think it came out better than I could have thought.
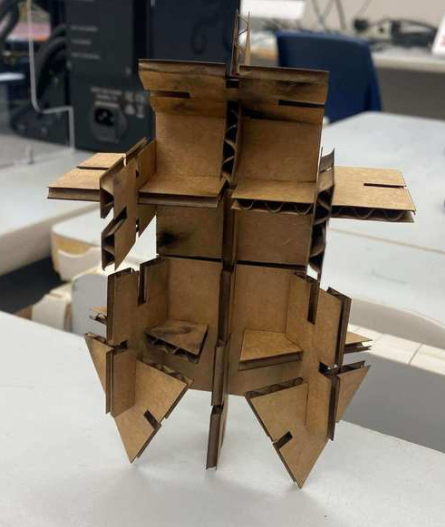
Testing my skills - Steve
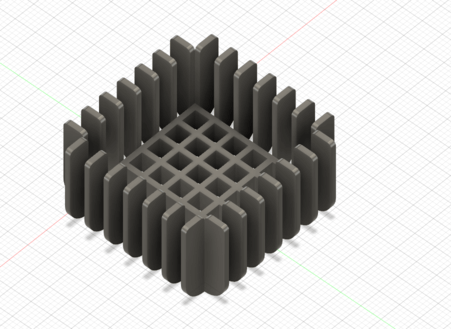
Before I started to design my basket, I designed what I call Steve. Steve was a great little project of mine that allowed me to hone in my skill before designing my basket. I only parameters that I used for this project were to define tab width and height. I wont talk to much about steve as most of the stuff that I learned from steve, I talked about while building my basket.
Laser Settings
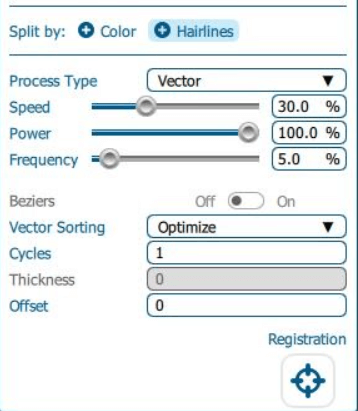
These are the specific laser setttings that i used for my labs laser (Fusion Pro 48)