Computer Aided Design
Pixlr - Raster
In the past, I have used Pixlr on various projects from simple photoshopping to designing stickers. While it isnt the best tool in my opinion for designing stickers, when it comes to editing photos, I think it is the best free software. It has many of the same tool as photoshop does and its user interface is easy to navigate. It has some useful tools like an AI selection system that can detect and seperate the background of an image. My classmate Teddy Warner asked me when designing his website what tool he should use to create a background. If you go to his homepage and look at the background you will see the final product. It looks professional and most importantly only took him 10 minutes to create.


Inkscape - Vector
Keeping along with the theme of free softwares, Inkscape is the top free software for designing two deminsional sketchs. I have used inkscape before but only for a short period of time but havent touched it since. I spent a few hours relearning inkscape and then proceeded to design the part that I will be laser cutting. I have attached an image of it below. The one this that really frustrated me, and something that I probably could have fixed, was zooming in. Unlike Corel Draw, I couldn’t find a way to set it up to allow me to zoom in and out using my scroll wheel. I could see how this could affect productivity when making a large scale design. My file

Corel Draw - Vector
I found Corel Draw to be the more affective software when designing in 2d. I am also use to Corel Draw as it is my go to software for 2d drawings. I made the same design that I had made using Inkscape but it took me far less time. I like the amount of presets that it has compared to Inkscape. Both of these platforms struggle with creating and editing images. What I have found to be beneficial is to use a software like Pixlr to manipulate the photo to get what I want. There are also alot of sources online for both softwares that help design specific, complicated elements. My file
FreeCad - 3D Program
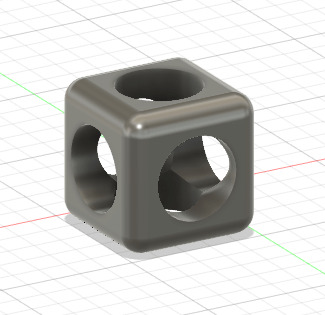
For all the different 3d softwares that I used, I created a cube with three holes as you will see all over this page. FreeCad, while not my personal preference, was very easy to use. I loved the presets that it came with aswell as the simple text line that comes up allowing you to adjust the fillet. Being a free tool, there is nothing major to complain about. I spent some time designing this cube with a few special design aspects. I used this as the standard for testing all of the different 3D softwares. I also found that adjusting the opacity of the shape I was building helped me out when designing the inner workings of my cube. I know Fusion also has the feature but the way it displays the component once adjusting the opacity rendered itself useless. For being a free software, FreeCad was really good. It had a few quirks but im sure that they would not be an issue as my mastery of FreeCad progresses. My TestCube file
TinkerCad - 3D Program
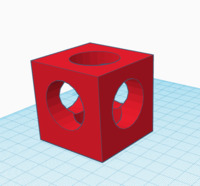
TinkerCad was by far the worst software that I used. While its interface was extremely simple and easy to navigate, It was obviously designed with kids in mind. I designed the same cube that I did on all the other programs except there is no way to fillet in object. The closest that you can get to filleting would be to use the cylinders that it provides. Even then it is way to much of a hassle. I also found it extremely had to line up shapes onto other shapes. Since my cube requires the cylinders to be aligned in the middle, this was a struggle. At the end my cube came out looking like something that could be designed in seconds in Fusion or any other program. My TestCube file
Sketchup - 3D Program
 Just like TinkerCad, I found Sketchup to bea software that is targeted at beginners but yet overly complicated at the same time. Simple aspects like filleting didnt exist and trying to set the deminsion of an object was too tedious. I was able to get a cube with the holes in it just like I did in TinkerCad but the process took way to long. I also dont like how Sketchup doesnt have a tool to allow you to create a sketch on a defined plane. Instead the only indicator of what plane you are working on is through the color of the segment you are drawing. There were to many times where I thought I was working on the correct plane but I wasnt. I do like how there are many presets and things you can download on sketchup to add to your sketch. If you are designing a building then the software would be the best so far because you can easily add landscaping and furniture. I have unfortunately lost this file.
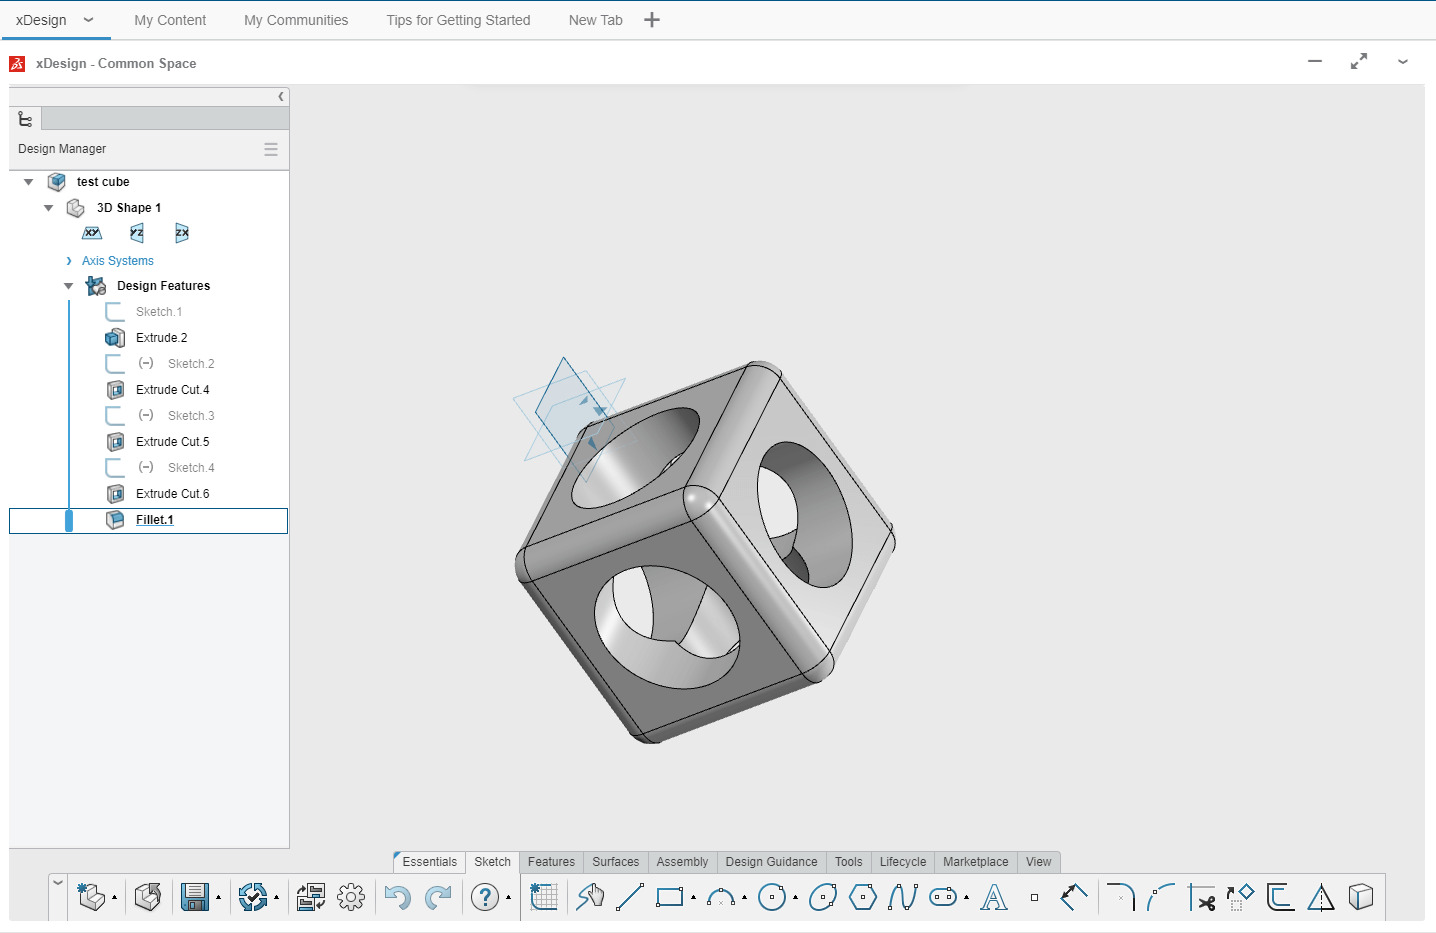
xDesign - Program
I found xDesign to be the easiest out of all that softwares that I tries with this week. I would mainly attribute this to its simularity with Fusion360. All of the tools in Fusion are in xDesign, just in a different location. Originally I tried to use it on my laptop, which struggles with running CAD softwares, and I couldnt for the life of me move the view cube. Only when I went on my computer was I able to move the cube. I started to like the layout more and more as I progressed and plan on using it to design more parts of my project in the future. Also, unlike Fusion, I was able to run it on my laptop which was a big plus for me.
Fusion360 - Simulation
Since Fusion360 is the primary software that I use, I am very familar with the basics of the software. So instead of learning more about designing in Fusion, I worked on learning about the animation tool. At first I found it extremely hard and overly complicated. I was expecting to see a command to spin something and a command to explode my project. Unfortunately, none of that was the case and I had to learn from the very beginning. I first tried rotating an object that I made during my engineering class. Rotating the auger was relatively easy so I moved onto exploding my final project. It took me an hour to get it all sorted out and then I used the auto-explode tool. I will upload that file on my final project page as well as at the bottom of my page. You can view the Auger animation by clicking on the animation button on the top left. The Auger that I designed and is show below in my animation was from video 12 of Kevin Kennedy’s Learn Fusion360 in 30 Days video series on youtube. My Bioengineering class has been working through this series and this was a perfect example to show how to simulate movement.
My Final Project
After designing my test cube in a few different test softwares, I went back to my roots in Fusion360. I started off by creating a new component called ‘CNC Part’ and started a new sketch. I then created a triangle, offset it 7.5mm to form a triangle in a triangle. Using the sketch fillet tool, I rounded out the interior considering that it will be created using a CNC. I then cut the corners down to make them flat. After creating what would become the frame of my project, I created a new component called “Acrylic”. This component would be the top and bottom. I then projected the outside lines from the ‘CNC Part’ and copied that into the sketch. I extruded the triangle like shape .125 inches since that is the thickness of the acrylic that I will be using. I followed this up by creating a new component called ‘Interior’. This compenent would house the interior mounts that I would use to house the PCB and mount the LED to the interior of the frame. This took far longer to design than any other thing that I done previously in this design. Once I completed the interior, I used the explode feature to capture each element of my project.
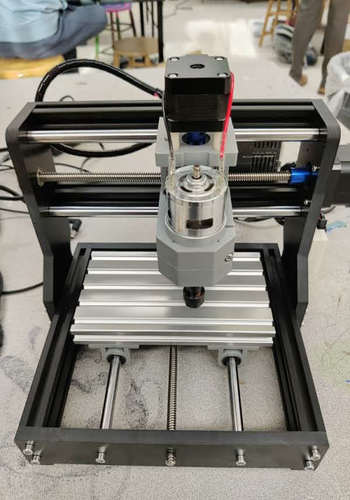
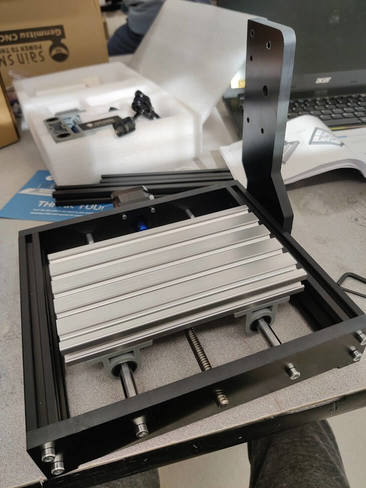
Extra: Building my CNC
Prior to this weeks video coming out, my piers and I were tasked with setting up a CNC machine that will be crucial for electronics week and a 3D printer. Becuase of Coronavirus, we arent able to go to the FabLab as much as we would be able to in a normal year. Fortunately my teacher, Mr. Dubick, was able to provide us with some essential tools for at home. He gave each of us a soldering iron, calipers, and much much more. Setting up the CNC took me approximately 3 hours and the 3d printer took a little less. Since I am already pretty familar with 3d printers, I would mess around with my CNC. I started to learn how GRBL control and eventaully milled out this text saying Iphone. I also took a timelapse of the 1 minute long cut. I have attached both below. I then moved onto watching this weeks lecture. I learned that Neil loves to use open source softwars like FreeCad and Inkscape. He also encouraged us to try new things this week in his assignment: Design my project in as many different tools as possible. In each section below, I will explain the tools I used along with what I liked and disliked about them.
Testing out my CNC
Building my CNC