Programmer Adapter Serial to UPDI
I needed a UPDI programmer for my Embedded Programming assignment. I heard in various places that you can add a resistor to one of the lines of a serial (FTDI) programmer/debugger to turn it into an UPDI programmer. This seems like on of the lowest cost ways to get my own fabricated UPDI programmer going outside of a Fab Lab. I will document making this board and programming another board via UPDI with it using a Future Technology Devices International (FTDI) Part No: TTL-232R-5V below.
I was talking about this with my Fab Brother, Alan Han and he messaged me:
“Hey Dan, just occurred to me that I figured out programming the attiny1624 via an FTDI to serial adapter instead of the Atmel ICE last time, think I used a layout similar to this:”
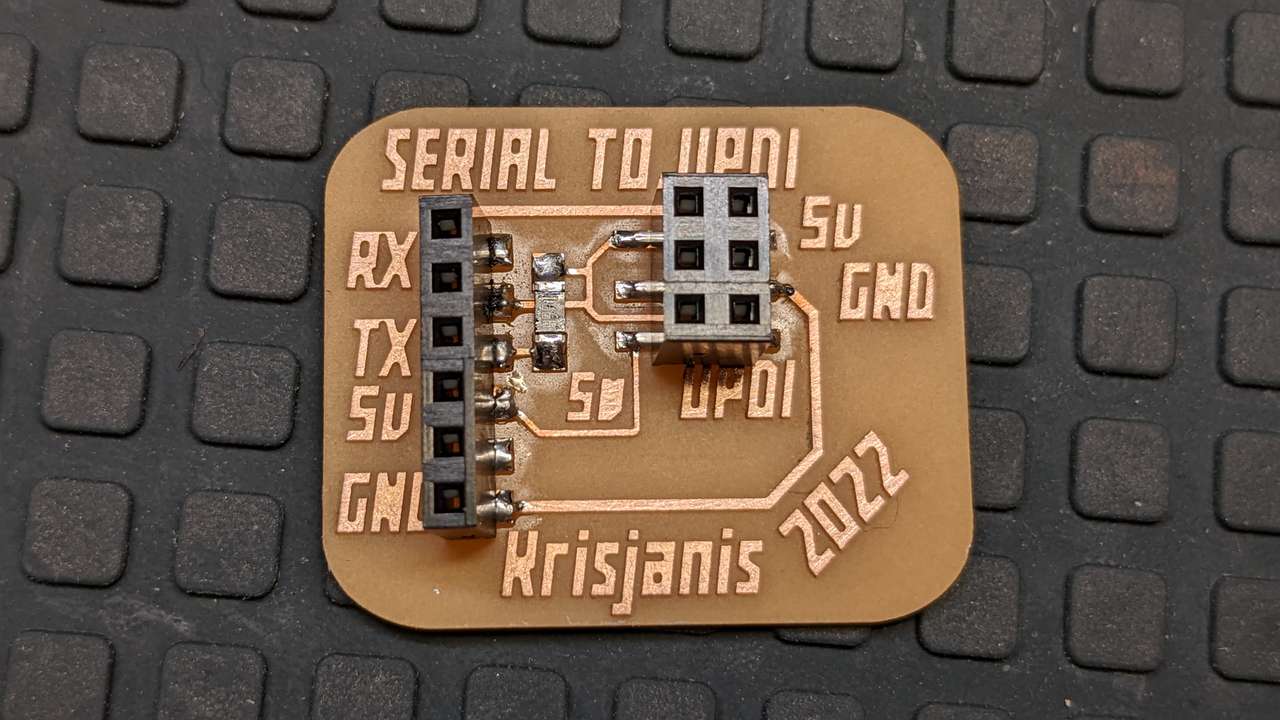
Programmer Adapter Serial to UPDI
The Programmer Adapter Serial to UPDI board was designed and fabbed by Krisjanis Rijnieks of Alto Fab Lab. Krisjanis who is an awesomely practical instructor and Fab Academy video Tutorial creator.
SVG Cleanup
I first downloaded and unzipped the SVGs from Krisjanis website above. I mashed all the different SVGs into one SVG file in inkscape, by opening each one and copying all svg vectors from each file except the mask. I did this cause I wanted to make one SVG with milled labels on the Nomad 3 Mill.

Above: This is the actual inkscape SVG I cleaned up, right click and select save image as… to download the inkscape SVG if you’d like to use it for CAM toolpath generation.
I used my SVG clean up technique to create a optimized SVG.
Milling
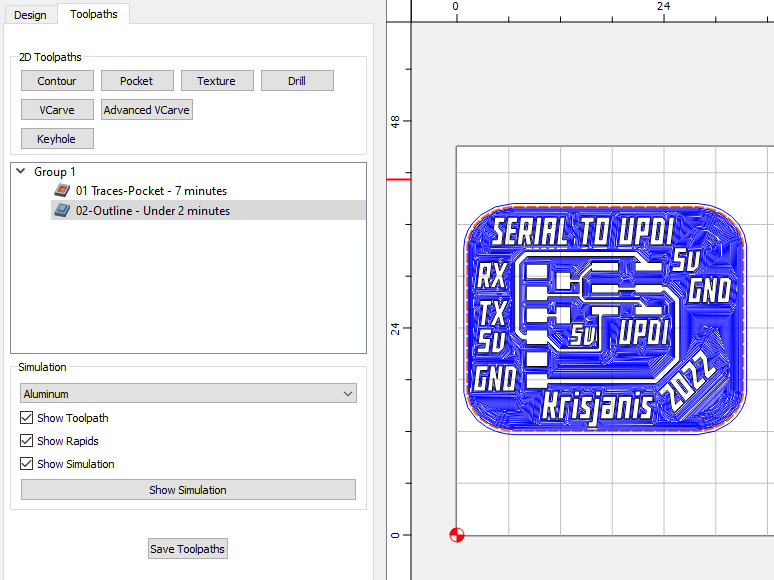
I used Carbide Create to generate CAM toolpaths
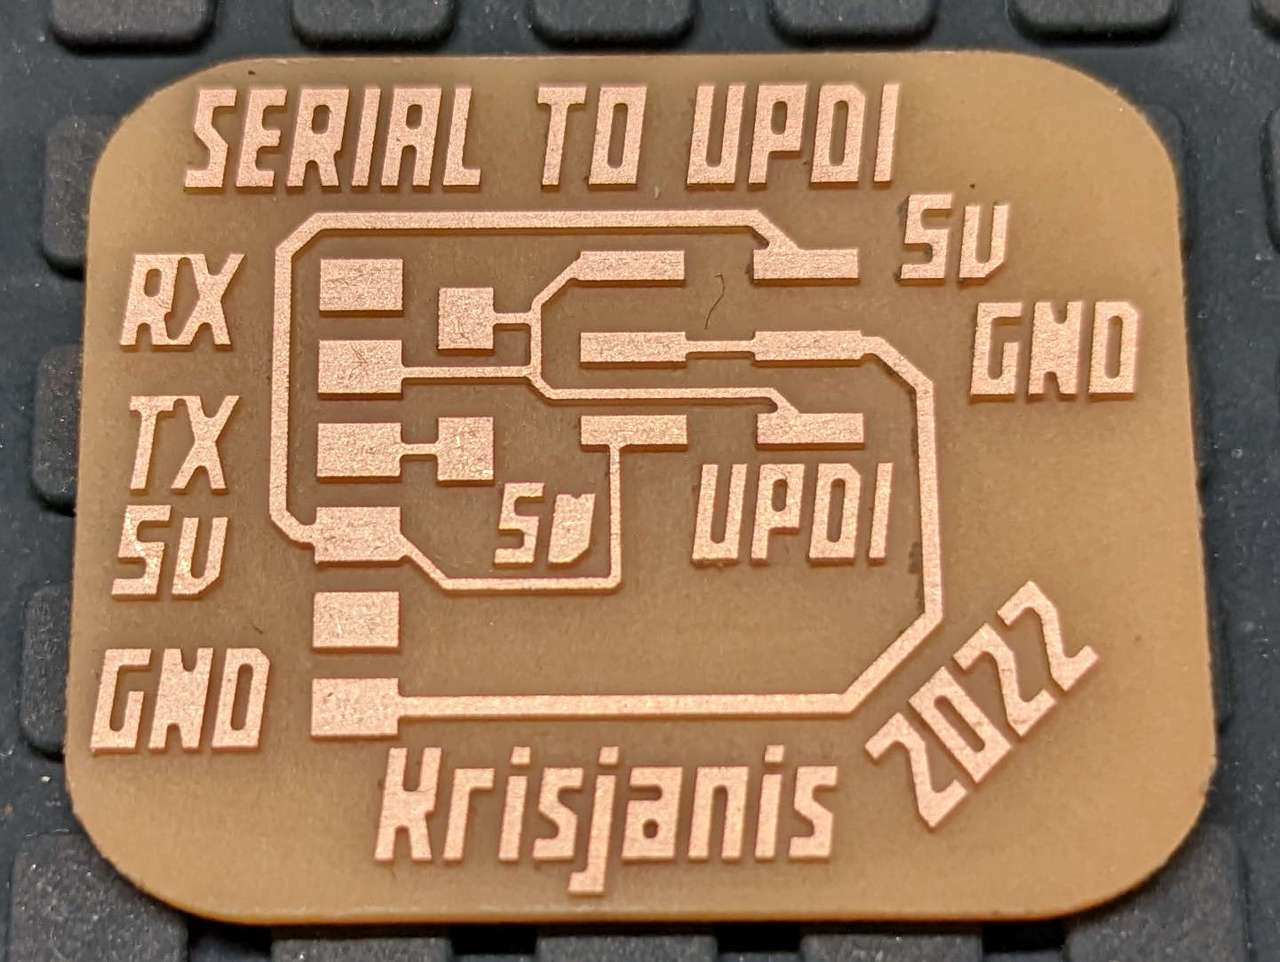
The board milled nicely.
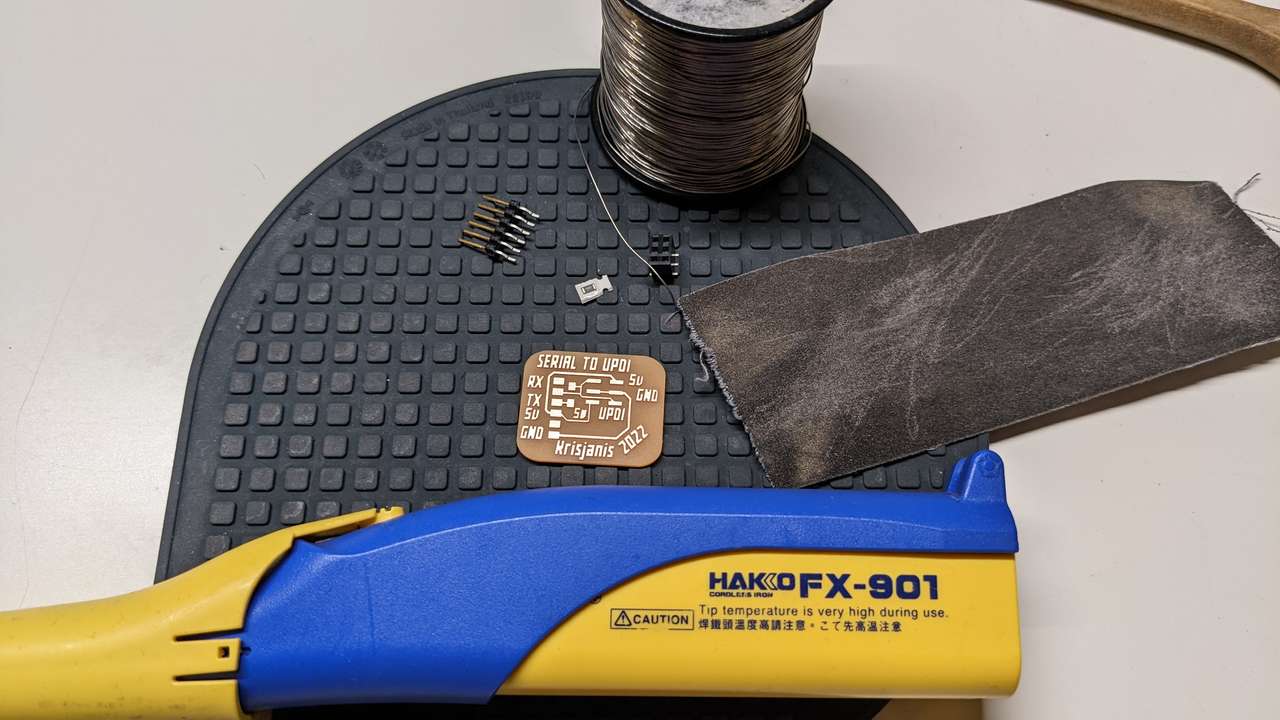
Stuffing
I used Krisjanis’ HTML Interactive Bill of Materials (iBOM)iBOM to select the needed components for stuffing. R1 is 4.99k. The rest of the components are standard 2.54 mm pitch connectors.
Interactive BOM
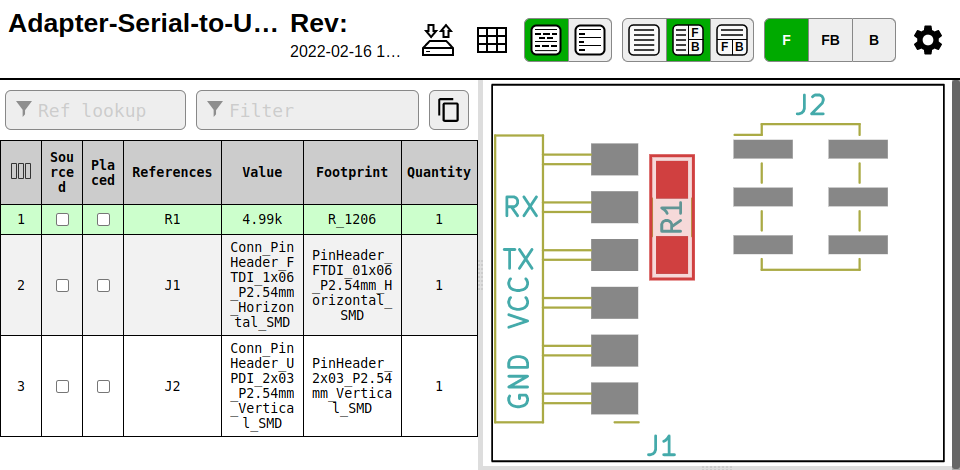
Above: Click image above to access Krisjanis’ HTML Interactive Bill of Materials (iBOM).
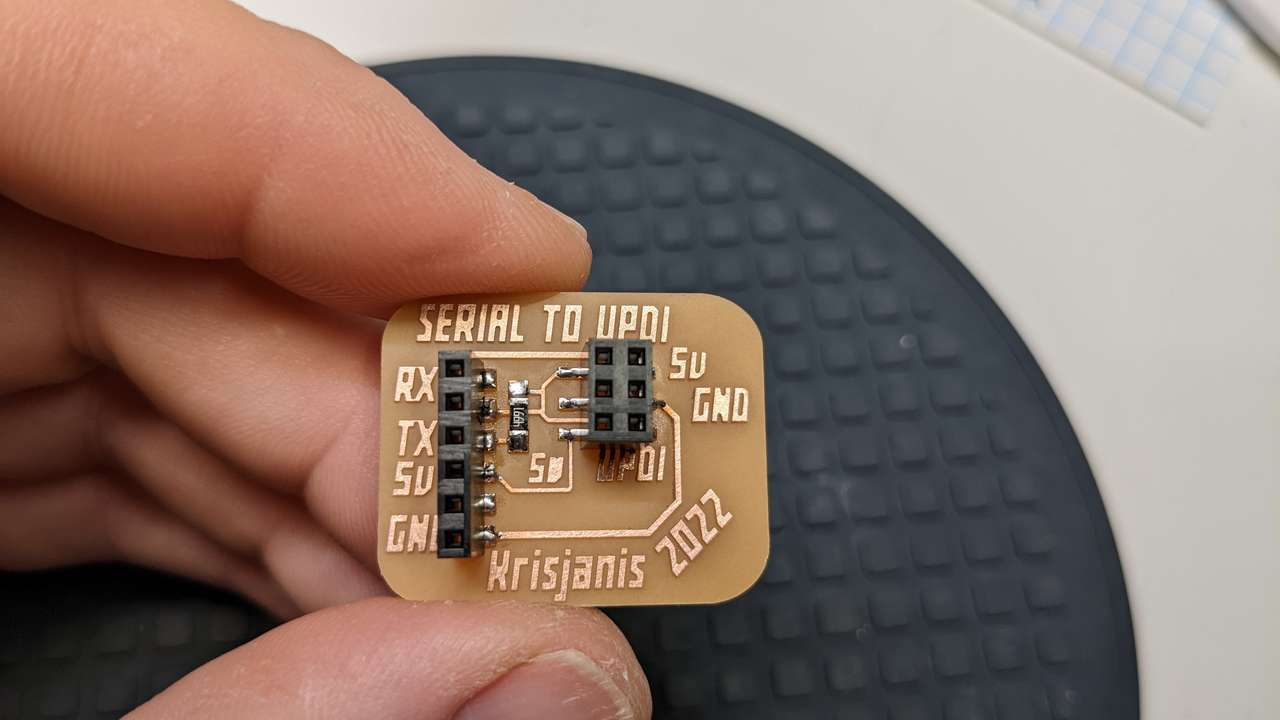
Hmm after stuffing the board I realized I wanted compatibility with various TTL to USB cables. So I came up with the variant below by moving CAM vectors around in Carbide Create.
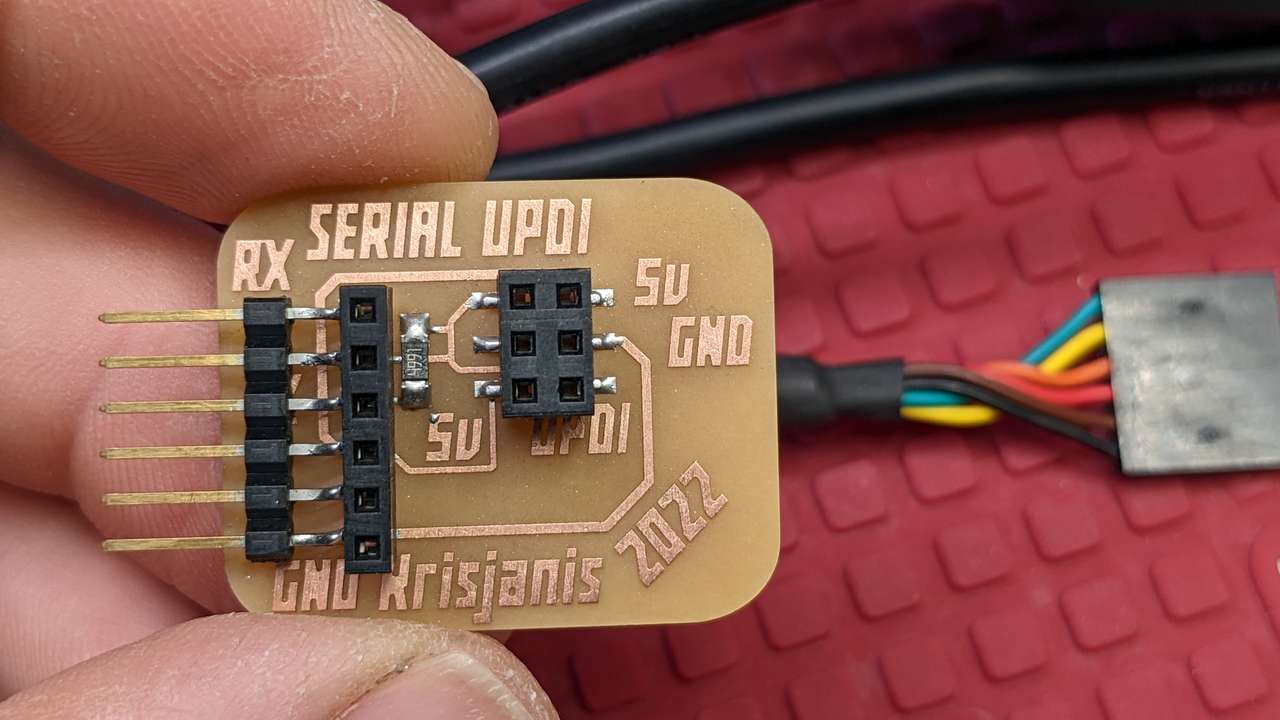 New version.
Testing
The instructions on Krisjanis’ site says:
“For programming it is recommended to use the Arduino IDE with megaTinyCore and similar installed. You can also use tools such as pyupdi or pymcuprog.
Select the serial port of your programmer Select the programmer type: SerialUPDI - SLOW”
I also found Krisjanis’ video Setting up UPDI Programming Toolkit with Arduino, megaTinyCore and pyupdi useful to get everything setup to program via UDPI with my FTDI TTL-232R-5V Serial to USB cable I had already.
Important
This setup will NOT work with a 3.3V FTDI TTL-232R-5V Serial to USB cable, or clone. The chips we are working with are 5V only. However, if you go to GitLab and search for alto fab lab you can find boards designed for 3.3V
Following the video I edited my preferences.txt file in Arduino 1.8.13 and added the following line. Mine is a bit different than the video since I am running Linux Mint.
build.path=/home/meistertek/Documents/Apps/Arduino/build if you do this you’d replace my user name meistertek with your user name.
Then I finally understood what was going on, we were going to save compiled build code to the build directory! Yay! I learned a thing! My file was called TinyPugBoardLED.ino.hex
Next I went to the pyupdi on github and clicked the Code button and then Download ZIP. I unzipped the file and renamed it pyudpi and moved that folder to my preferred directory ‘/home/meistertek/Documents/Apps’
I then tried running ./pyudpi.py
and got: bash: ./pyudpi.py: No such file or directory
I looked up how to run python scripts on Linux and found out I need to use the command python pyupdi.py and got:
Traceback (most recent call last):
  File "pyupdi.py", line 10, in <module>
    from device.device import Device
ModuleNotFoundError: No module named 'device'
This seemed like it was working, but needs some other stuff. Back to the video.
cat requirements.txt lists:
intelhex
pylint
pyserial
These dependencies are required. Now to install them:
pip3 install -r requirements.txt
Now when I run ./pyupdi.py I got:
bash: ./pyupdi.py: Permission denied
So I changed the file permissions with:
sudo chmod 755 ./pyupdi.py
./pyupdi.py
now I got:
Traceback (most recent call last):
File “./pyupdi.py”, line 10, in
sudo chmod 755 pyupdi.py
I tried python pyupdi.py again
Traceback (most recent call last):
File “./pyupdi.py”, line 10, in
I gave up for tonight I need to rest! I will ask Krisjanis for help.
Returning to work on this project. IO noted the statement “DEPRECATION NOTICE! This repository is no longer maintained. Use the serialupdi feature of pymcuprog. pyupdi functionality has been incorporated as a part of pymcuprog: install from pypi: https://pypi.org/project/pymcuprog/”
So I gave that a try:
install using pip from pypi: https://pypi.org/project/pymcuprog
pip install pymcuprog
I needed to install pyedbglib pip install pyedbglib a dependency for pymcuprog
install pip install libusb
I plugged in my FTDI USB to Serial cable and connected my ATtiny 3226 Pug Board to Krisjanis adapter board. and ran the command:
lsusb and got the response: Bus 003 Device 006: ID 0403:6001 Future Technology Devices International, Ltd FT232 Serial (UART) IC
I then ran the command dmesg | grep -i FTDI and got more info
[35907.137131] usb 3-2.4: Manufacturer: FTDI
[35907.186163] usbcore: registered new interface driver ftdi_sio
[35907.186747] usbserial: USB Serial support registered for FTDI USB Serial Device
[35907.187914] ftdi_sio 3-2.4:1.0: FTDI USB Serial Device converter detected
[35907.189107] usb 3-2.4: FTDI USB Serial Device converter now attached to ttyUSB0
I then read the pymcuprog help file on how to use pymcuprog with my FTDI USB to Serial cable. I derived the following command:
sudo adduser $USER dialout (already done in my case)
sudo chmod a+rw /dev/ttyUSB0 (grant read write permissions to serial por)
pymcuprog ping -t uart -u ttyUSB0 -d attiny3226
This did not work! Going to rest and then try MPLAB SNAP