15. Mechanical Design
Sorting Color M&M
References
- Skittles Machine
- Arduino-Powered Mechatronic Colour Sorter Files uploaded in Gitlab
- 3D Printed Arduino Skittles Sorter
- My Nonstop / Skittles sorting machine
- magical marble sorting machine
- Anti-Entropy Machine. M&M color sorter
- Automated Skittles Sorter
- M&Ms and Skittles sorting machine
- Adafruit TCS34725 RGB Sensor Demo
Yes!! All of these projects and references helped us to think in the mechanism of machines
Proof of Concept
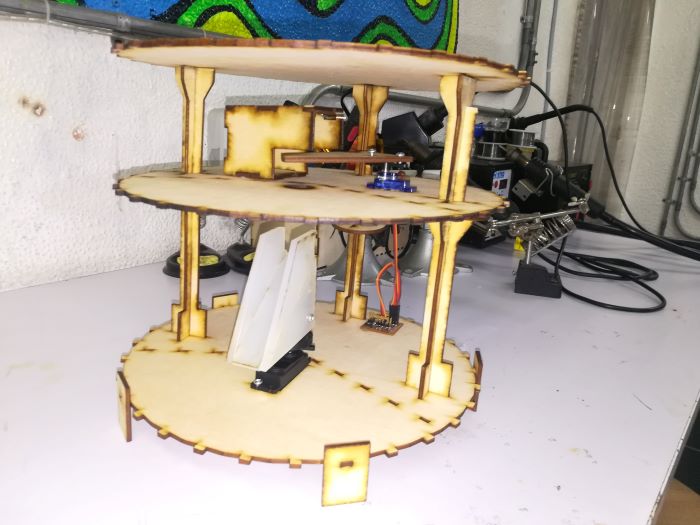
After, a great discussion with me and lamia, We decided to make our machine with a cylinder shape. We choose the wood material to be easy to get that shape with our dimensions.
Also we have some parts with acrylic and others with 3d printing…
So, we thought in the whole parts and the mechanism … then divided the design process.
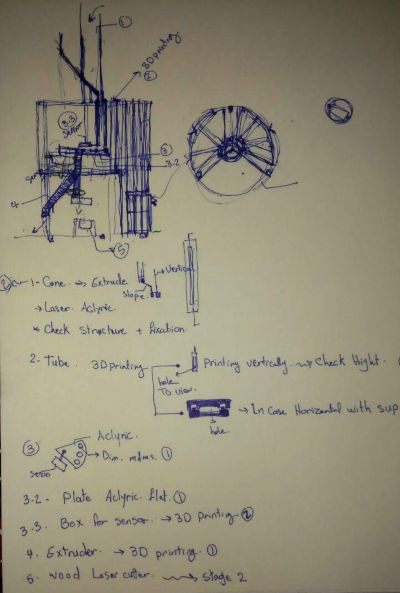
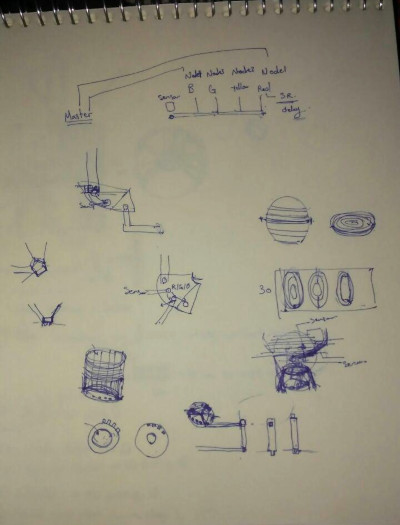
Sorry for these amazing free hand sketches … but from here we start!
So we split the machines to
-
Laser cutting parts with wood and acrylic
-
Main cheese ‘Wood’
- The cone ‘Acrylic’
- The box for phototransistor board ‘Wood with dark color’
-
The base of bottom servo ‘Wood’
-
3d printing parts
-
M&M Tube
- The extruder tube
Then we divided the work to
- Outer design … the main cheese, also the structure of the machine
- Inner design … the servos places and the box of the phototransistor … the tubes
So I will design the first one and the second for lamia.
Design machine
Actually, this machine inspired us. So it helps me to get ideas to start in design process
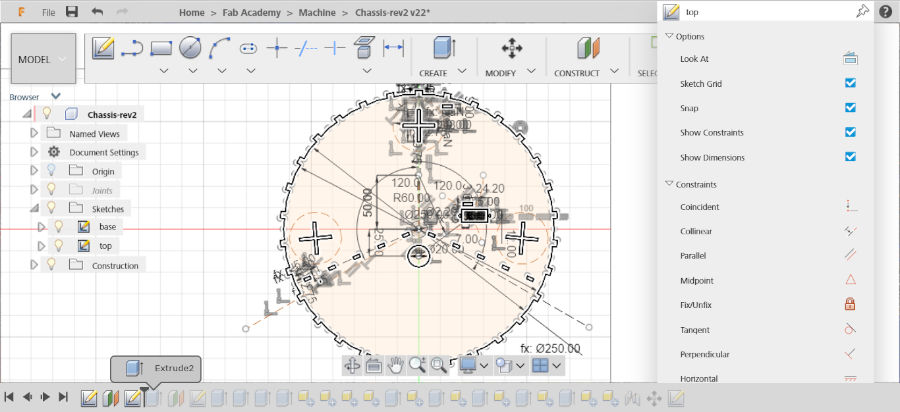
I have been decided from the first of the diploma to use grasshopper as a Parametric tool. But this week, it’s group assignment, I have to shift to Fusion360 to share our work with each other. At the first I didn’t feel free with fusion … but it works.
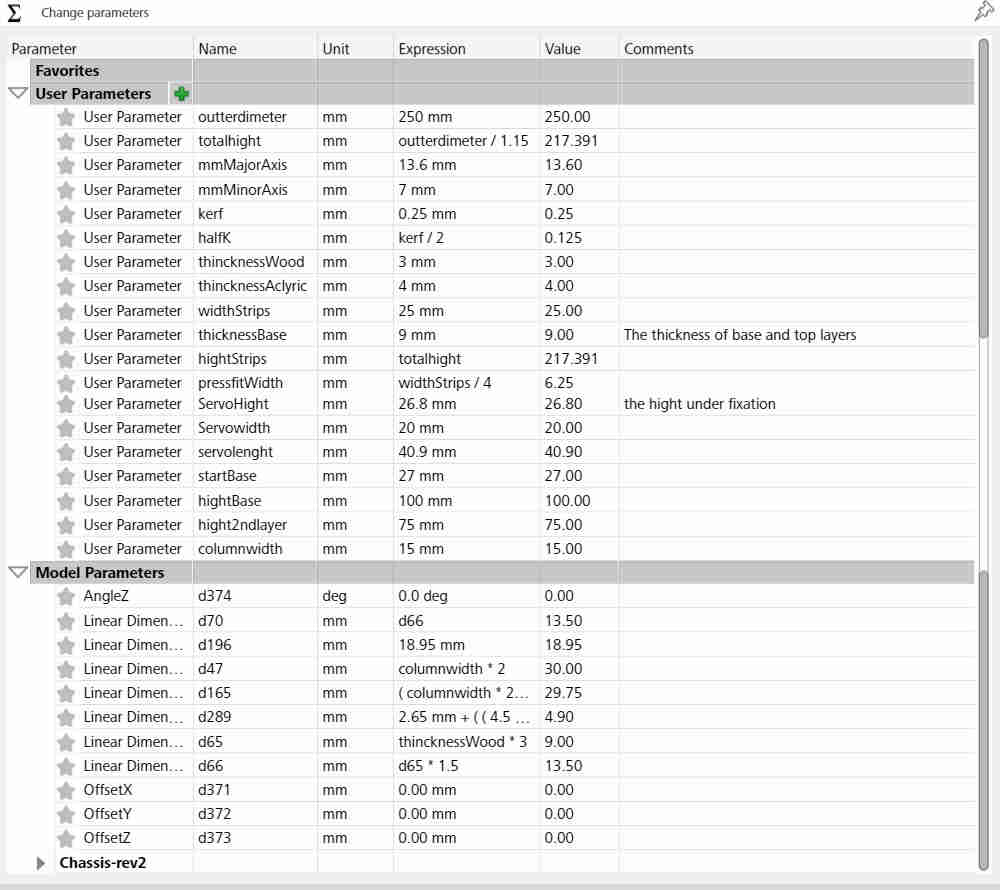
- The first step before I start drawing my design, the parameters… I add all parameters that I will use and through design process I edit and add new parameters that I need.
- I started with the plate … We need three circle layers in our machine … One of them to the base that the servo motor fixed in. The second layer in the middle of the machine. The third one is the top layer. Between the second and the third layer, there are a servo motor, the PCBs and the phototransistor box that Lamia will design.
Lamia’s Design
- Then, I added the holes of the servo motors, screw, phototransistor box, the fixation of 3d parts that Lamia designed
Please, check her designs from Here
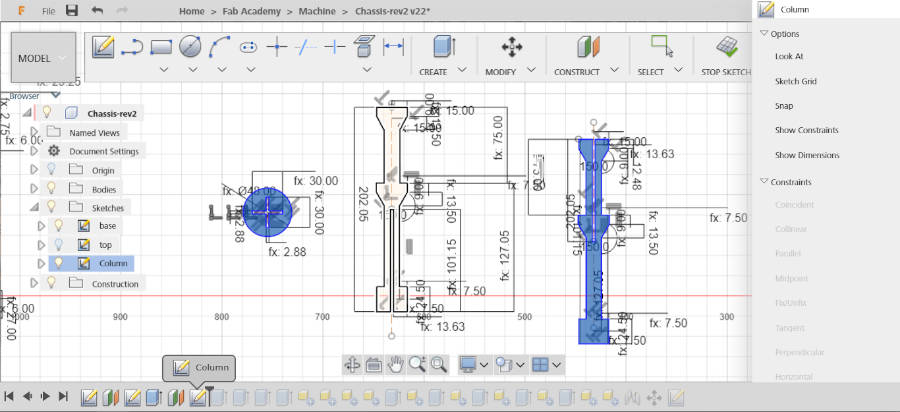
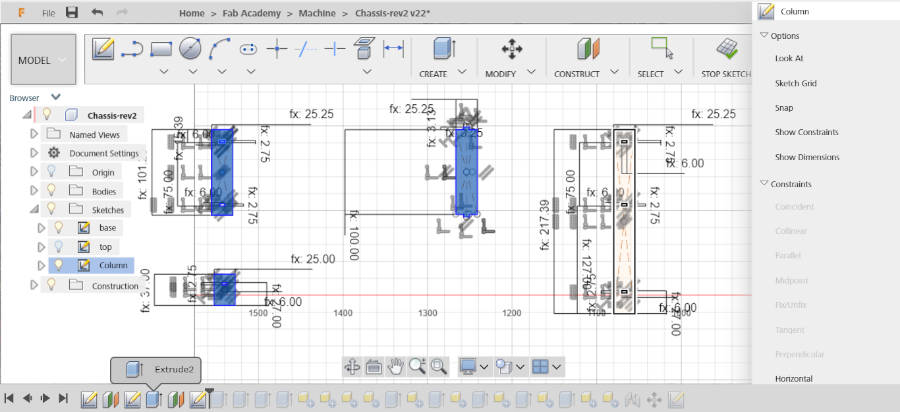
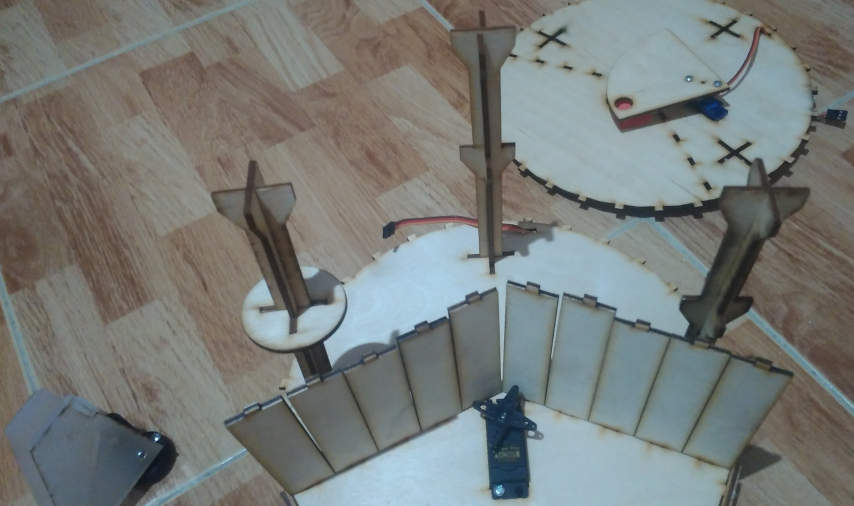
- After, I coordinate the heights between the layers with Lamia, because it will reflect in the 3d parts that she designed and the height of columns structure that I will design. I started to design the columns. I choose this shape to be easy cutting in laser cutter, we didn’t want to use 3d printing in this stage, we just make a prototype machine and test our design in this version also we have a limit time. Plus, we can design this column with 2D. So, I designed many columns, but this one I think it will be stable structure.
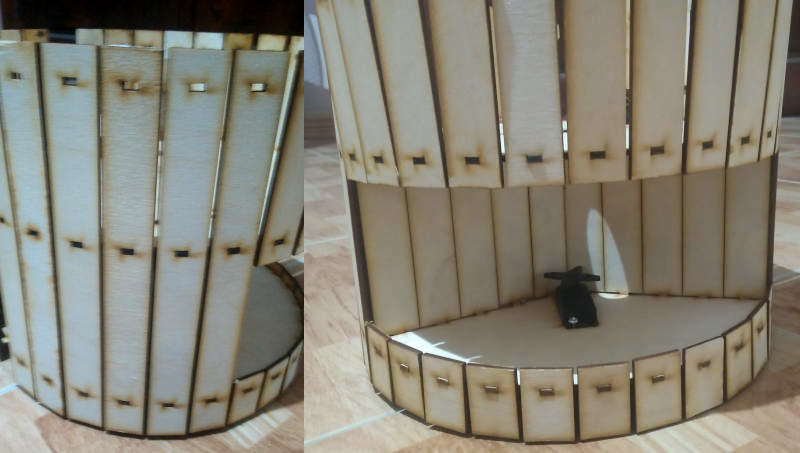
- The last stage of my design, is the skin of the machine. We wanted to make a funny design from the first.
So I want to give this sense!

It depends on the height between layers.
Now, we have a parametric design for M&M Sorting Machine. You can watch the design process.
Enjoy!
M&M Sorting Machine Design from Nada Gamal on Vimeo.
Fabrication
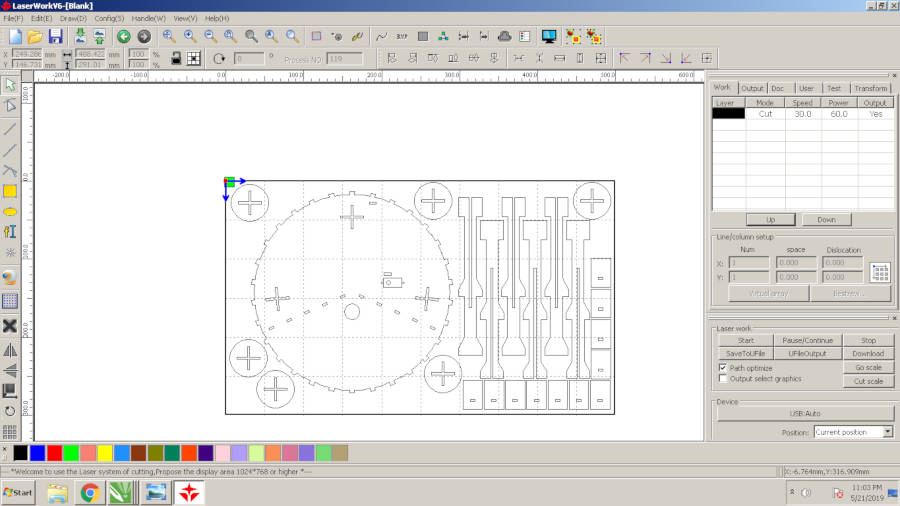
- The first step, I perfect to start with, is testing all my press fit parts with different speeds, power and the focus of laser. When I reached to the default settings, I start cutting all my parts.
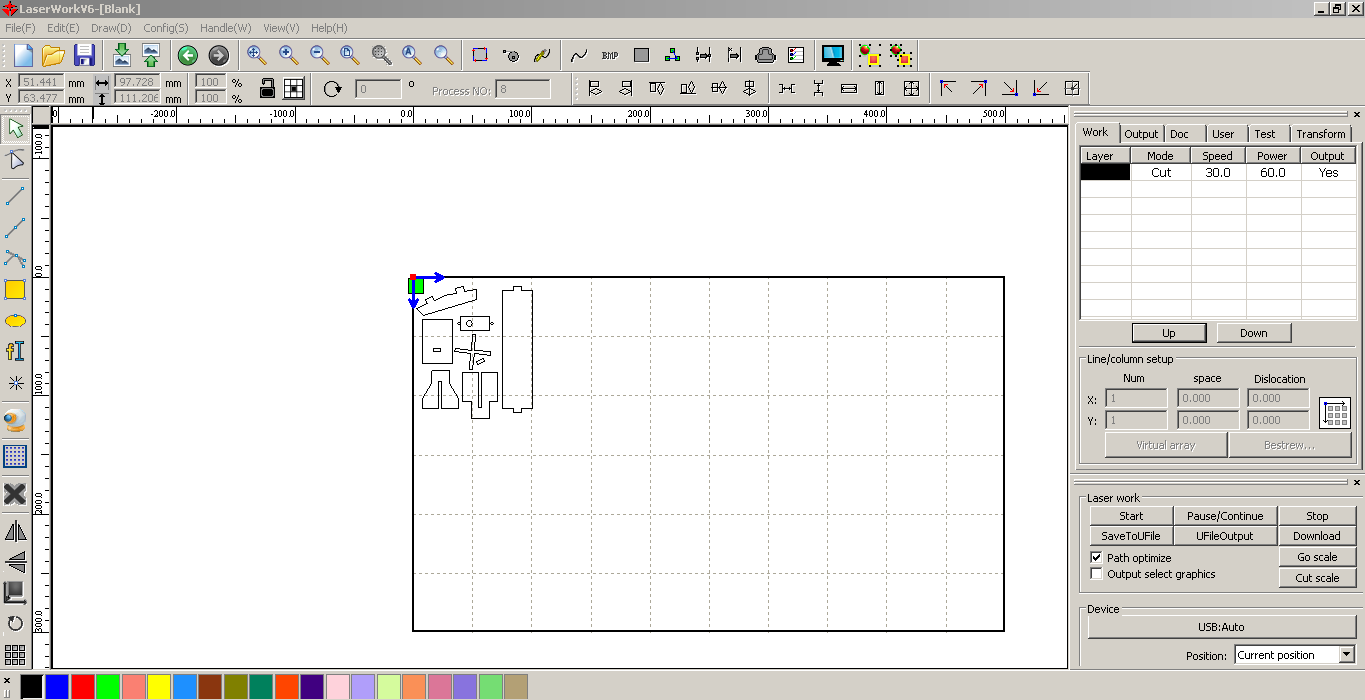
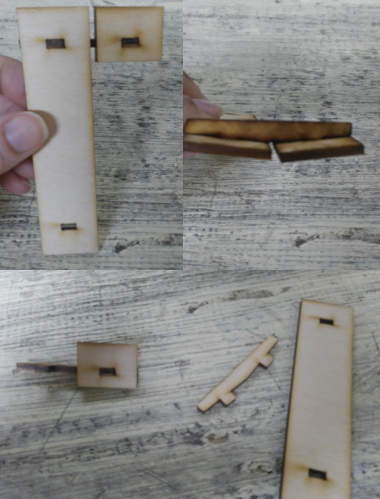
- After testing I found the power 60 and speed 30 with Kerf 0.25 is good. So I started to cut my sheets.
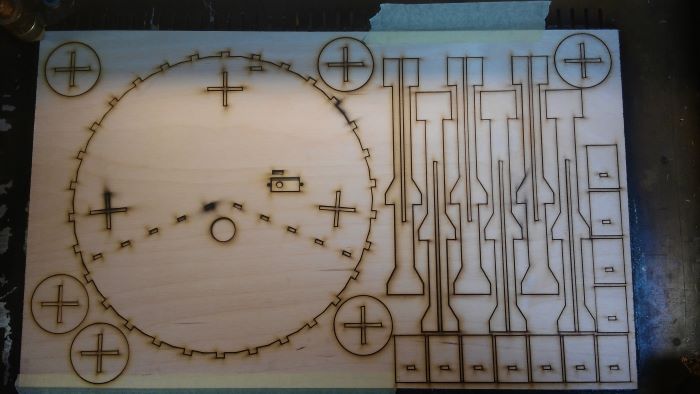
- Sheet 2
We have two variables with our laser cut process… One of them the wood issue … just one sheet 30*50cm, the thickness of sheet is different from point to point, it reach to 1mm!! The second issue is the plate, the plate isn’t flat… So, after a lot of trial with this machine, I reached to, I have to fix my sheet exactly like PCBs in Roland mill… Also the result is not satisfied and all my designs are damaged but this is the best solution in our case!
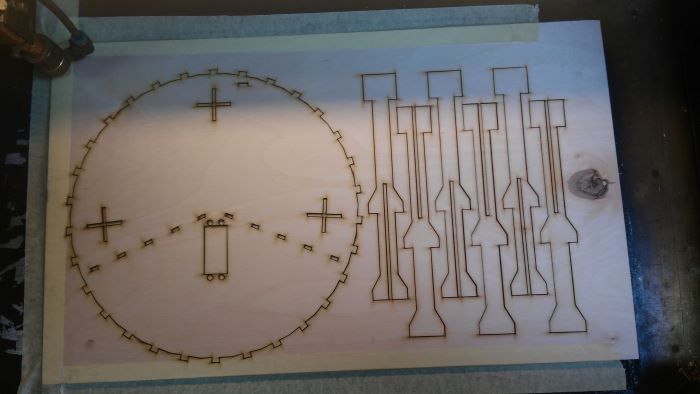
- Sheet 3

Integration Parts
Lamia integrated between her parts and mind.
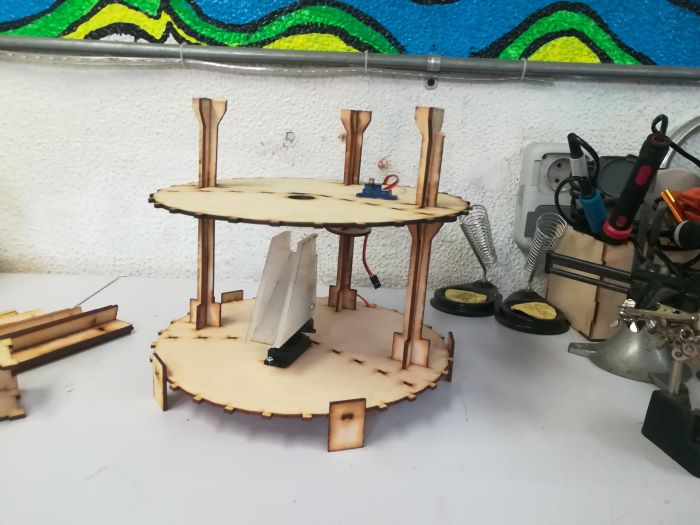
Then I continue to finish this process
continue on Machine Design
See you..