16. Interface and Application Programming
I’m waiting this week before starting the diploma!
I’m very excited to try Firefly, I see a lot of tutorials and the amazing function that firefly can do with grasshopper.
I wanted to use it in the input device week, then in the Output device. But my instructor recommended to use it in Interface week to focus in what I learn every week.
References
Actually I have been started the first step from two weeks!
I printed the Firefly user’s guide, and take extra time to learn more and read more about it. Also I found a useful tutorials that learned me a lot.
I watched the whole series of these amazing tutorials
It’s very simple and valuable.
This tutorials beside the firefly user’s guide. It’s very enough to start from zero.
Also I recommended this tutorials
So, after all these tutorials and references, I got some points
- Firefly is plugin in grasshopper, that can communicate with Arduino Boards.
- We can make animation or visualization real time in grasshopper with our electronics devices by using firefly.
-
In our case, We don’t use commercial boards … So the Arduino board wouldn’t be accepted. I asked Ohad Meyuhas ‘Our Guru’ for this point. He encouraged me to make my arduino board by myself. There are an impressive previous boards in fab academy have been made before. So Ohaid recommended to read more and choose one of them to make.
- Satshakit
- Fabio
Also, in the reginal review week for the networking and communication, from two weeks, CEPT student have been made the three boards and it was a rich discussion that helped me in this week.
So, I have to do one of these boards that includes one of microcontrollers ‘Atmega family’ and program it with our programmer that we made in the first week of electronics.
Starting with firefly
- First, we need to have two things in parallel.
- Download Arduino IDE, you can chose the version that match with your software and install it.
- Download Firefly and follow the steps in the user guide to install.
So direct when you install the firefly… and the WinAVR, the firefly library will be uploaded in your Arduino IDE.
-
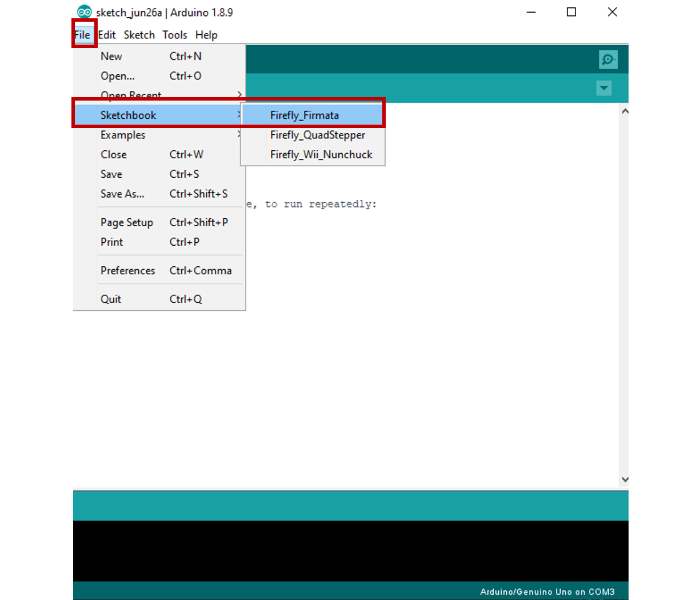
Open File >> Sketchbook >> Firefly_Firmata
-
Then connect your arduino board with USB >> Upload
-
Now the library is uploaded in arduino board, Close Arduino IDE
-
Open grasshopper and firefly.
-
Then follow this steps
-
Port available component … read any COM port that connected in your pc.
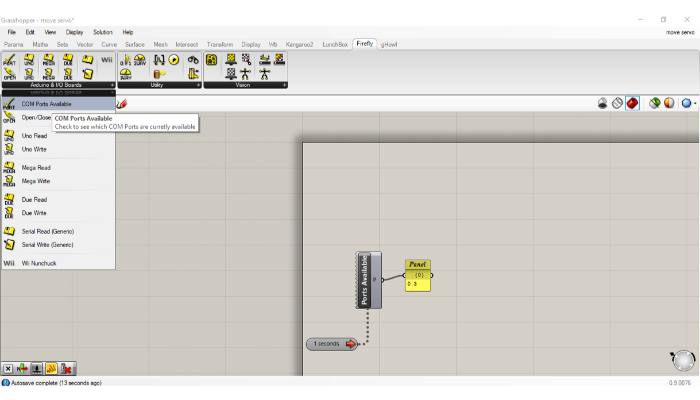
- Open port … to select which port you connected in pc and can control to open or close with the toggle button.
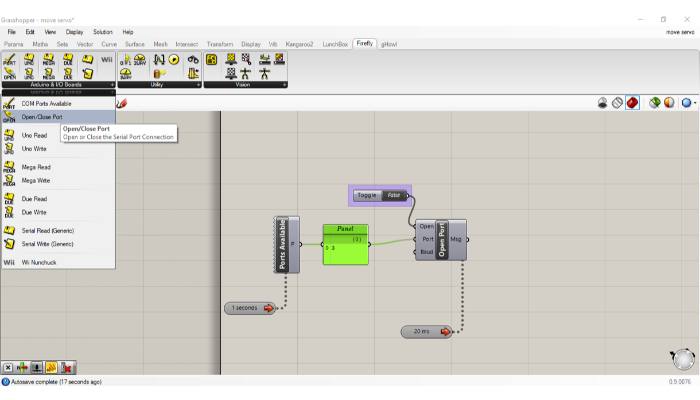
- chose which component that you need ‘Write UNO or Read UNO’, for my case I want to write, So I used Write
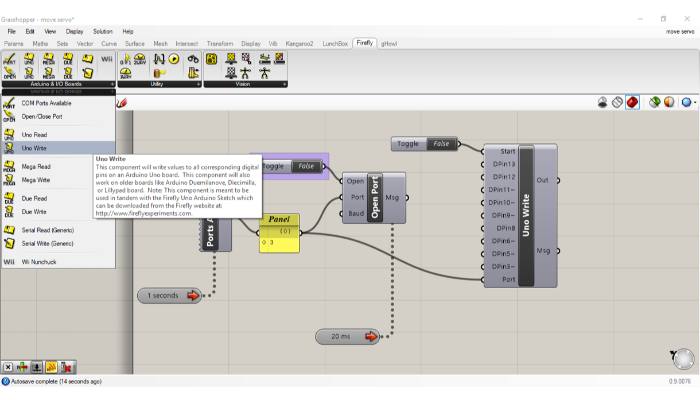
-
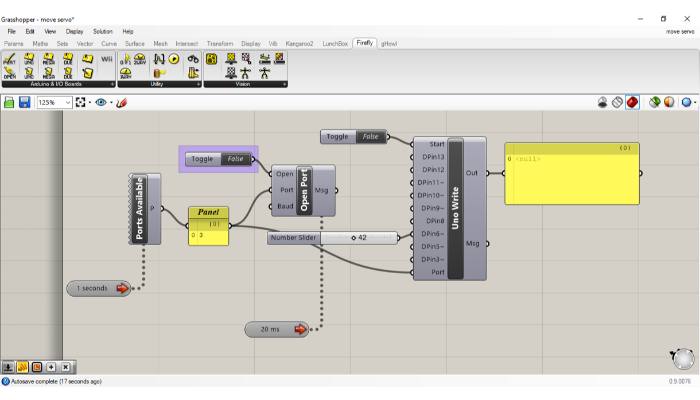
Connect slider parameter to have a variable of inputs.
-
We notice that the output message from the write component is ‘null’, that because we close the port and close the write component
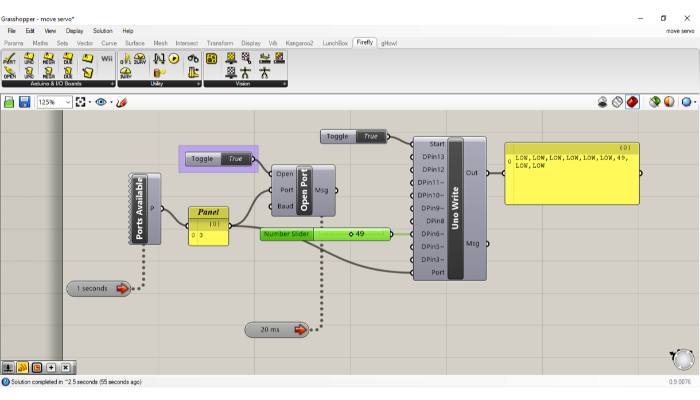
- Change the toggle to ‘true’, Then right click in the selected pin and chose what you need… servo, digital or PWM.
In my case, I chosen Servo.
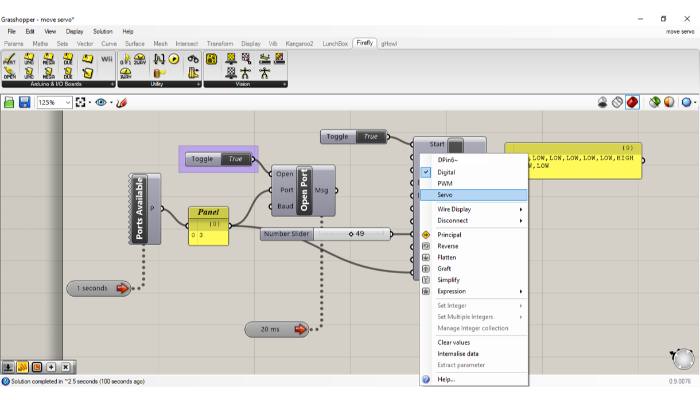
- Finally, we have the output values of the all 9 pins.
So, Now I know every step to make this assignment, So Let’s start!
Firefly Firmata Error
Yes!!
It’s totally true … as usual … I started with the first simple step with error!
First, I want to test my first trial with firefly with the usual way with arduino board as the user’s guide to determent any error could happened and solve it… but this error is very early for this step, I just Upload the library code with the normal way with Arduino board.
So I copied the error and googled it…
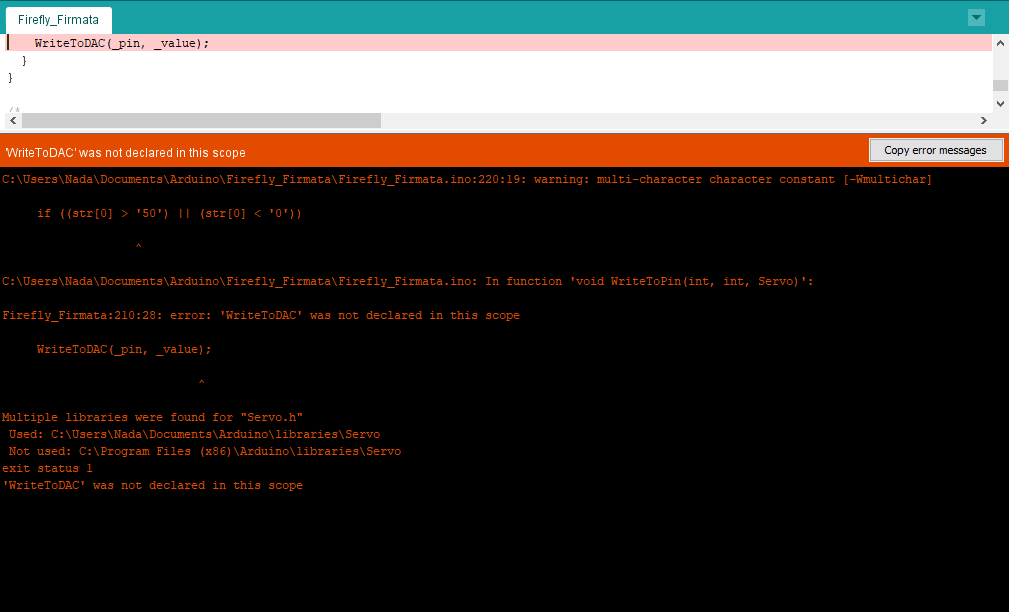
“WriteToDAC’was not declared in this scope”
Fortunately, I found this error is an issue in firefly website.
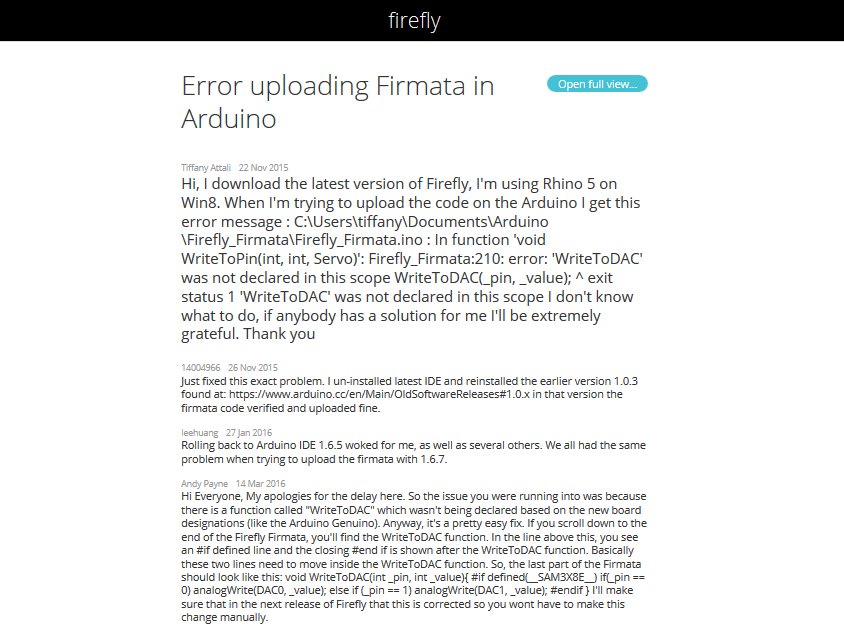
So I followed this link and made this steps
In the end of the code, We just replaced
   #if defined(__SAM3X8E__)

void WriteToDAC(int _pin, int _value){
  if(_pin == 0) analogWrite(DAC0, _value);
   else if (_pin == 1) analogWrite(DAC1, _value);
}
#endif
With that
void WriteToDAC(int _pin, int _value){

   #if defined(__SAM3X8E__)
  if(_pin == 0) analogWrite(DAC0, _value);
   else if (_pin == 1) analogWrite(DAC1, _value);

#endif
}
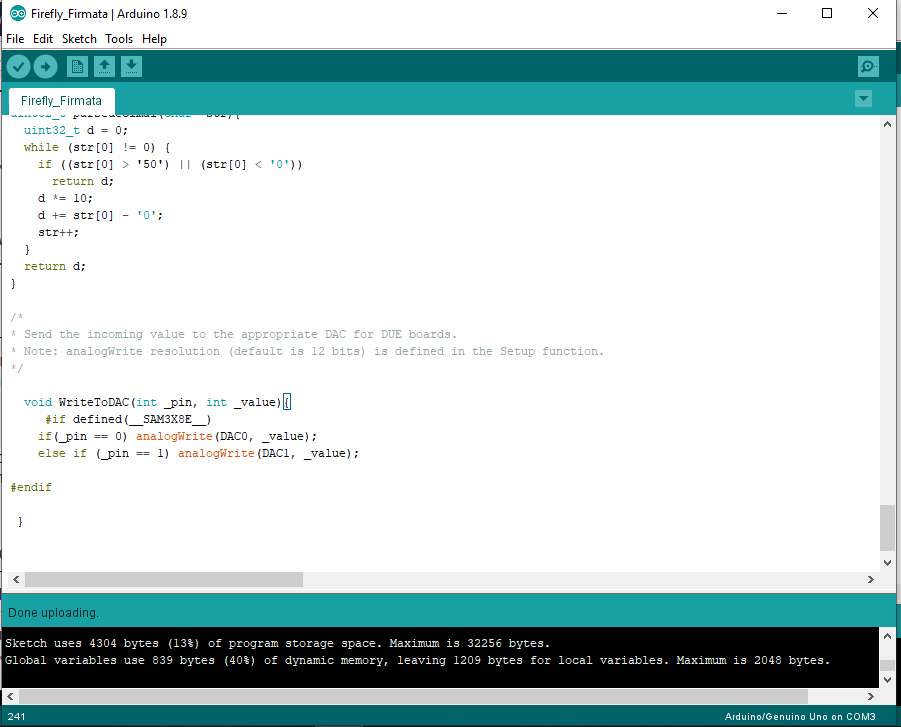
That’s it …
Finally, the sketch is uploaded successfully in Arduino board!
Now we will follow the previous steps of firefly, that I explained.
- Remember we need to close Arduino IDE before we start serial communication with firefly.
- Then I opened firefly and made my sketch.
Feel free to download the file
Test it be yourself!
This video could help you.
Control servo with Arduino board
Firefly with Arduino Board_Control Servo from Nada Gamal on Vimeo.
After this step … we make sure that everything is going well. So Now I can start with my new board.
Satshakit
I decided to use Satshakit as a microcontroller board with Atmega328, So it’s really good to start with the datasheet.
Then I reviewed and read the whole documentation for Satshakit.
Actually, I preferred this week to use the same board and spend more time in different codes.
There are many versions of Satshakit … I used the Satshakit cnc.
I downloaded these files to start fabrication
Also the most import thing … The bill of material
For this point… I want to use the same values in the board… I’m not a master in electronics to replace any values… some Components aren’t available with me to use. So I didn’t have a choice expect I use the same values of these components with through hole on the SMD pads! without any editing in the board or replace the components… that’s happened because I didn’t check the BOM before starting fabricate my board.
And that one of the lessons that I have learned this week.
Fabricate the Board
This time I wanted to try another technic that our lab used in the manufacturing process. They used another endmills that more strength than Fab endmills … So we can increase the speed of fabrication without any fears of endmills broken.
I have been made this process before when I was in advanced maker diploma, but I don’t know if there any parameters are changed in the machine for this long time, So I asked help from Mahmoud Kotbthe technical operations manager in FabLab Egypt, he shown me the whole process again and all parameters…
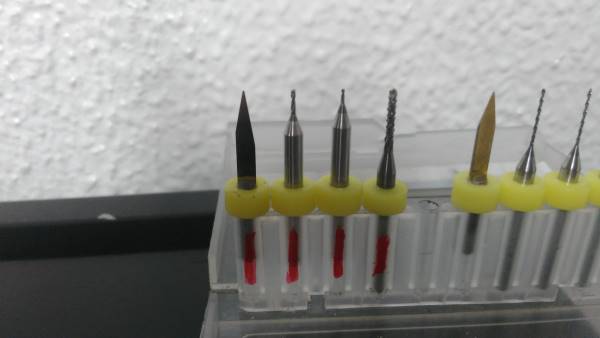
- The first step, we used the V endmill, its dimeter is 0.4 mm ‘the first one in the previous picture’ in the traces process.
- Then we used the second endmill to make the holes in the PCB with endmill dimeter 0.6 mm.
- The last process, Outline .. We made that with the fourth endmill with dimeter 0.8 mm.
All of the whole process, we used speed 10! So my board is fabricated in 12 min.s only with offset 4 in milling!
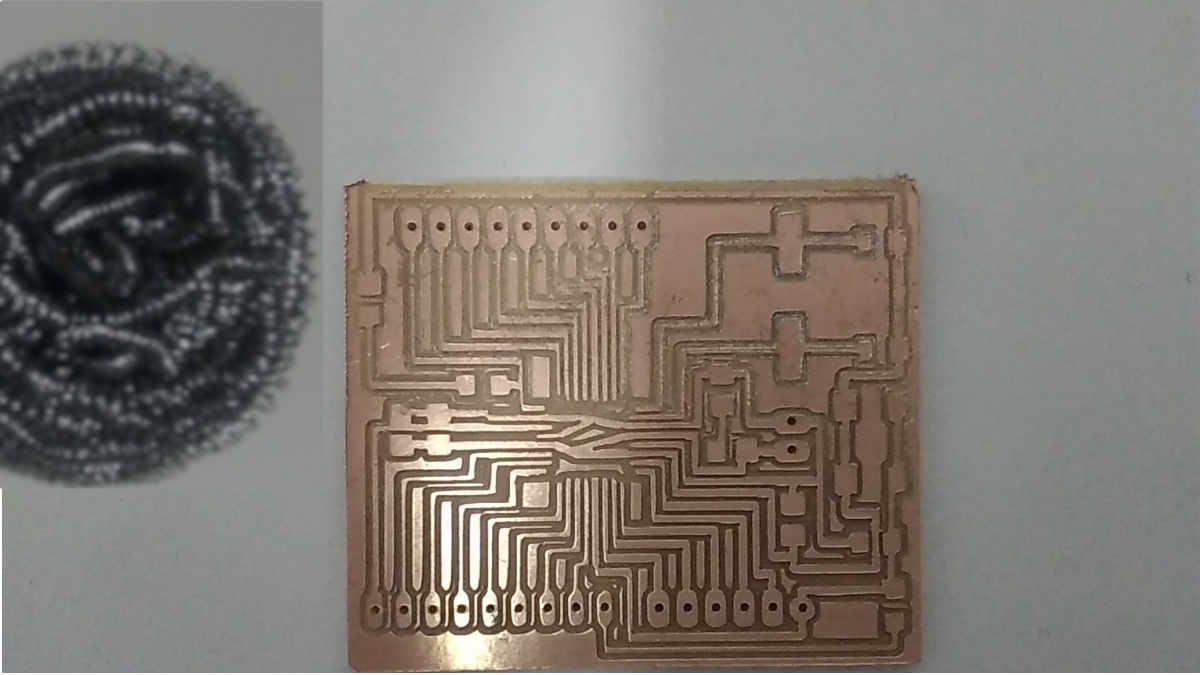
The right half side is the result after finishing fabrication … That’s because the speed and endmills that we used… the left side after we cleaned the PCB.
Then we used the tinning solution, this is first time I know this info. so I searched about this process and I found it to prevent the copper form oxidation.
Weld the Atmega328
Then I finished the through holes weld … I took about 5 hours to weld this board!
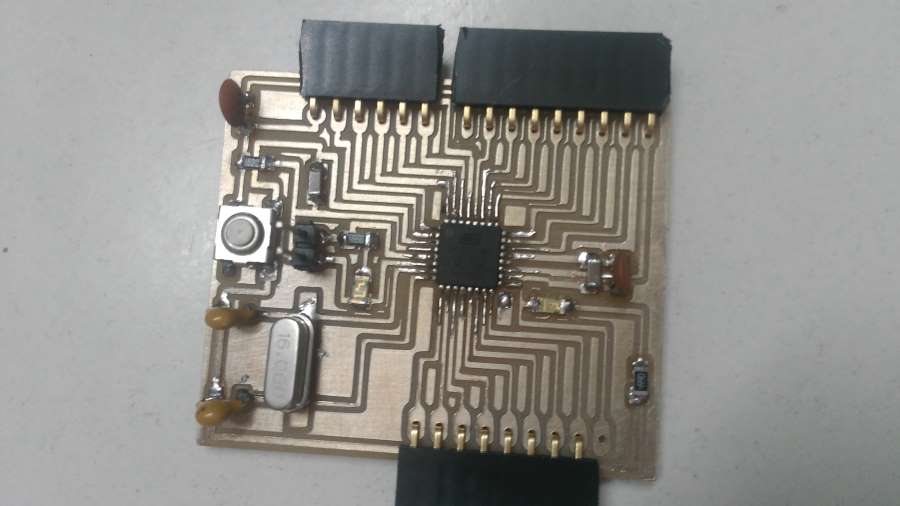
Now, we will discover if it will work or have errors!
Program Satshakit
I take Satshakit_Get Start as a reference. There is three ways to program Satshakit
By Arduino Board
By USBtinyISP
FTDI Cable
I tried the both of Arduino board and USBtinyISP
So, let me explain what I did
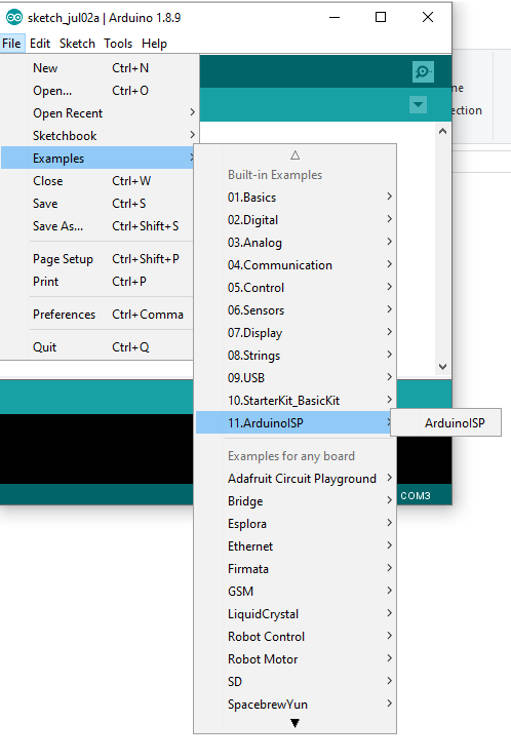
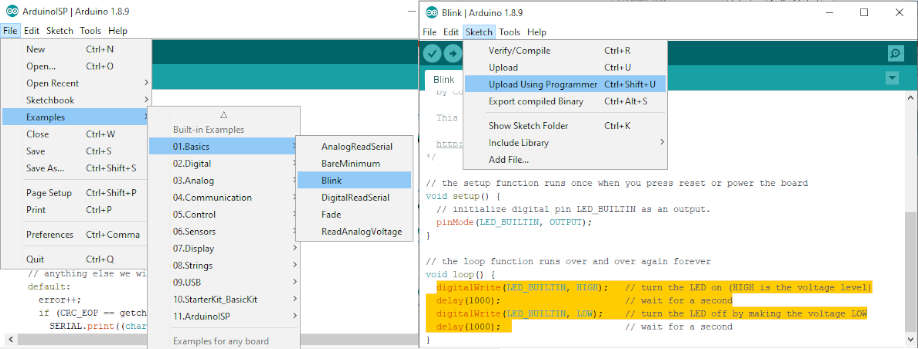
- File > Examples > ArduinoISP
-
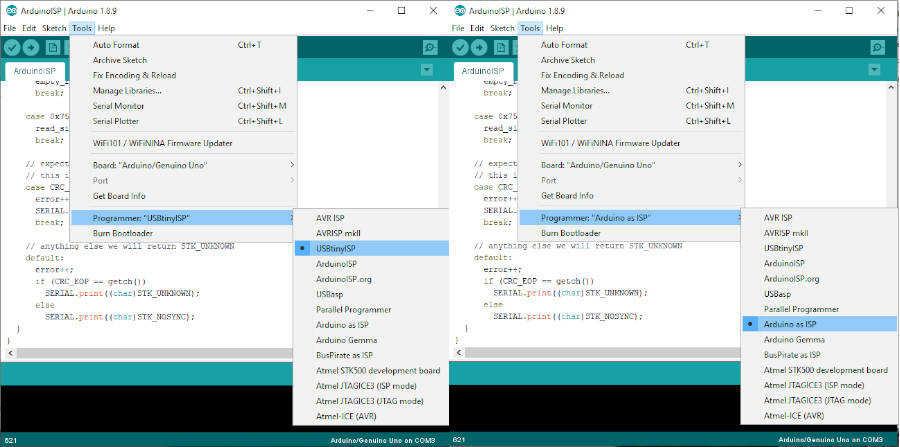
Select Programmer what you use
- Tools > Programmer > Arduino as ISP / USBtinyISP
-
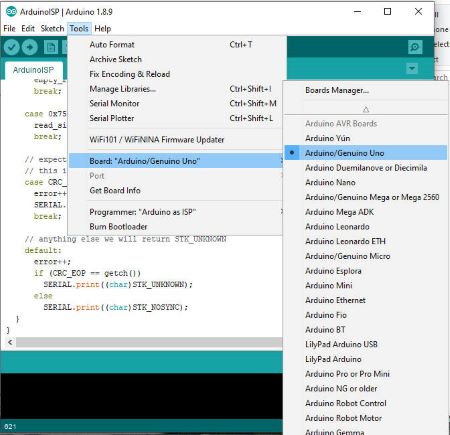
Select Board
Tools > Board > Arduino UNO
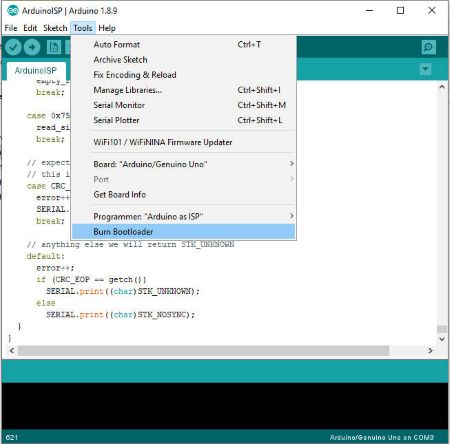
-
Tools > Burn Bootloader
To make sure the atmega is programmed … I uploaded the Blink sketch, then tried serval delays to blink the LED.
Program Atmega328 with Arduino
Firefly and USBISP
As we explained before, the first step for communication between firefly and Satshakit is define the port number …
without this step we can’t start to use firefly…
My USBISP has a special case, sometimes the COM port appears sometimes not…
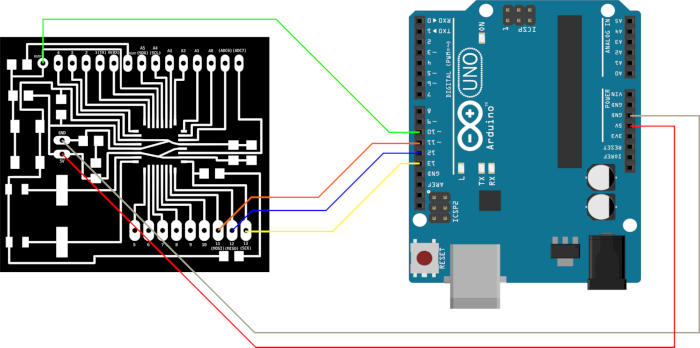
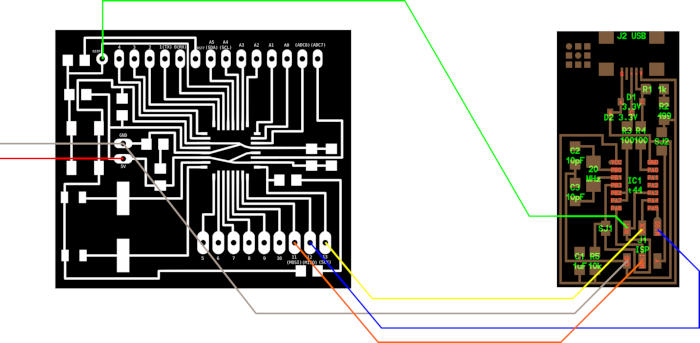
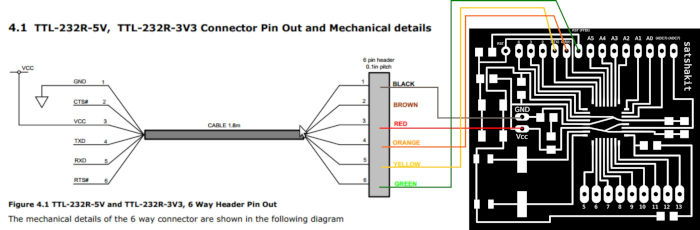
Also, we need just Communication between satshakit and firefly … So I used FTDI in this step… just connect RX,TX,GND and VCC with the TX,RX,GND and VCC to the boards refer to this image
FTDI can define the port number, So it’s easy to use!
In this video, I started with file that I made in the computer aided design week… then added the firefly code that I made this week.
This Pattern includes 6039 panels… So, I selected a specific panel and connected their angle with the input value to the servo … Then I change the selected panel with new angle so the servo angle will be changed …You will notice that there are two panels ‘red and blue’ for the two servos.
Download the file
image.sampler.firefly.control.servos