Learning a different kind of language
Learning to program is the same thing has learning a new language but instead to be germand or spanish, it's the arduino code. You have some rules and syntax to follow and new words to learn. Practice is the key, but instead of doing this with a human, you can do it with a PCP. The group assigment is on the page of Philippe.
Learning to code
We create a simple circut in week 7 containing a little brain (ATtiny44) and LED and a button. It's now time to play more with it and try to program that LED and button.
I choose to go with the language Arduino. Well known and used by the community of Arduino, this language can have some library and the architecture is very simple. I don't have a lot of experience in this language, but I already saw some project made with it and seems to be fun, usefull and user friendly.
To program a board, you can use a IDE (Integrated Development Environment) that you will use to write your program and push it on your board. Here is the
Arduino IDE that I will use to program. The program was originaly made for the Arduino Card, but you can change that in the software.
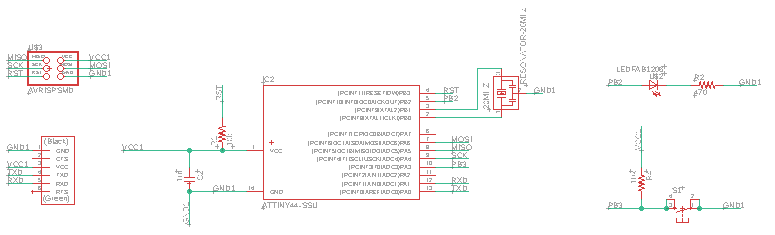
Read the datasheet ATiny44
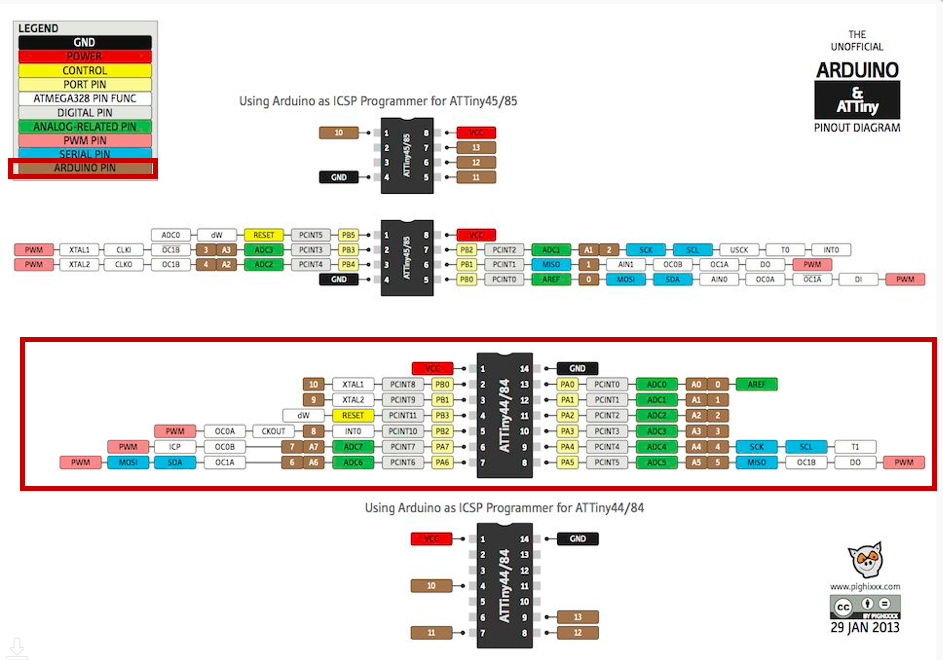
Type of pins
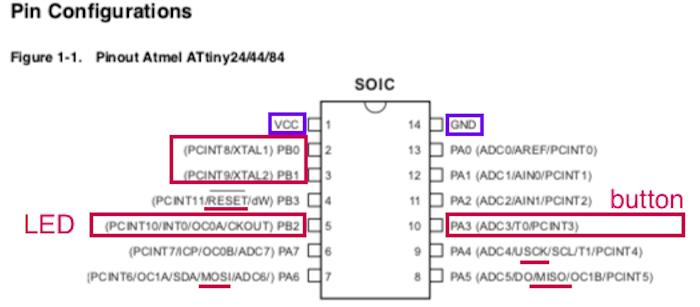
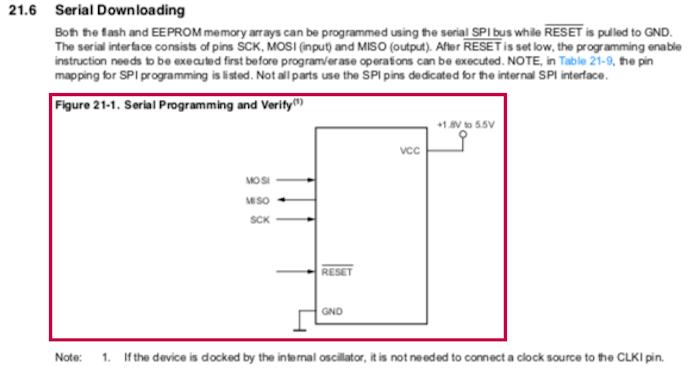
Diagram to communicate by ISP
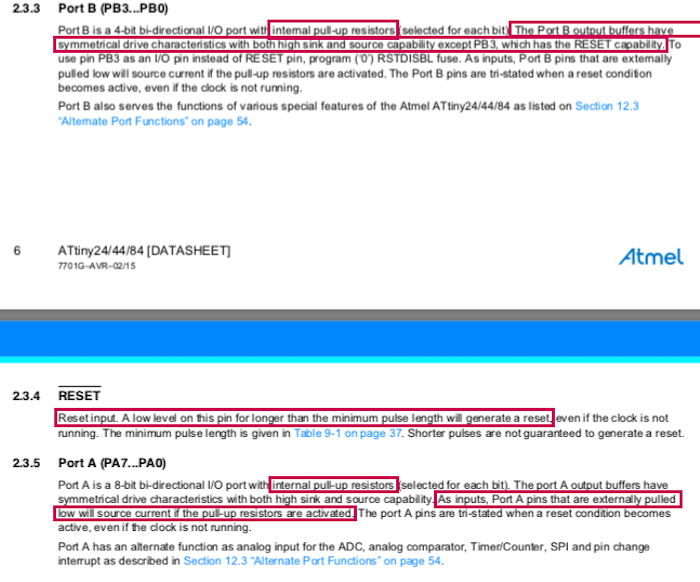
Description of the pins
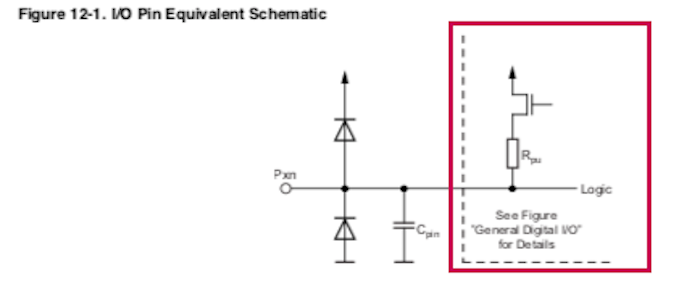
Pull-up ressistance insite of the MCU
Before anyting, creating a board or program it, always read the datasheet. They are fiew information your normaly check before starting anything:
- Verify what each pin can do. How many vcc do you have? witch one is the ground? Leave the pin RESET, MOSI, MISO, and SCK available for a ISP. Each pin have name beside it, has you can see in the picture that you can refere for the wirering or the coding. I will uste the PB2 pin for my led has a INTO and I will use it has a output.I will use the PA3
- Read the description of the pins you will use for what. Can they be use for input and/or output? Do they have special condition to use them?
- Other information:
- Input voltage
- Space of the memory flash (how maximum your code must be)
- How many PWM pin I have related to my needs
- What are the internal clock? I will use a external 20MHz resonator, but I could use also the internal clock. If I want for blink a led, don't close any doors at this point.
How to
1-Set your IDE and connect it to your board
- In the interface of Arduino, you can choose the type of board that you will program and the type of programmer that you will use. To do that you can follow this tutorial to import the ATtiny44 board in the IDE.
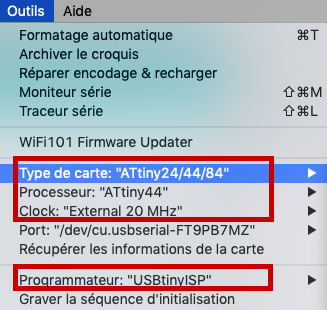
- After installing it, choose your type of clock that you have and the type of programmer that you will use.
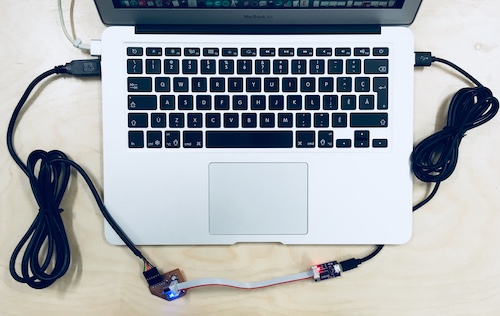
- Connect your programmer and your board to your computer.
- You are now ready to code.
Go in arduino Preferences and add another board
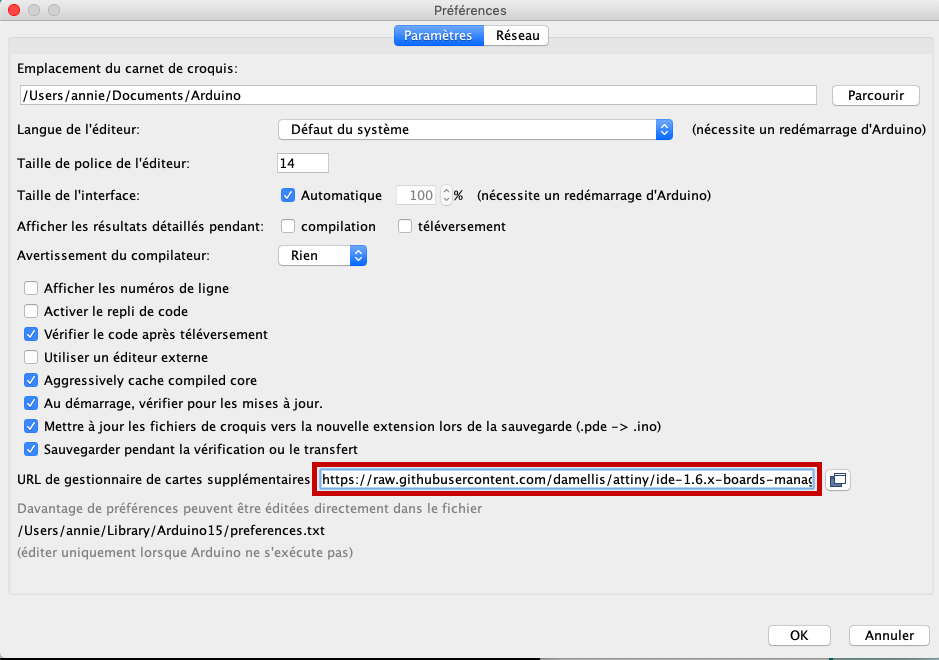
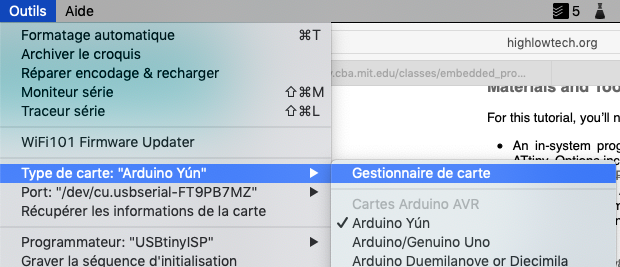
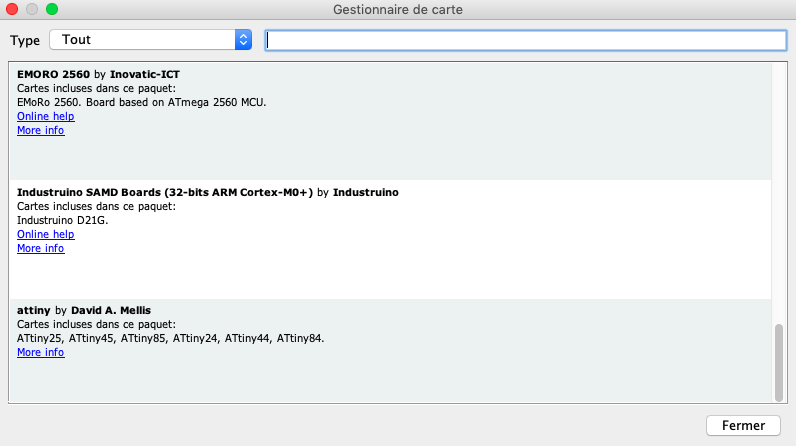
Go in Tools and Board manager and install the section attiny by David (should be the last one at the buttom)
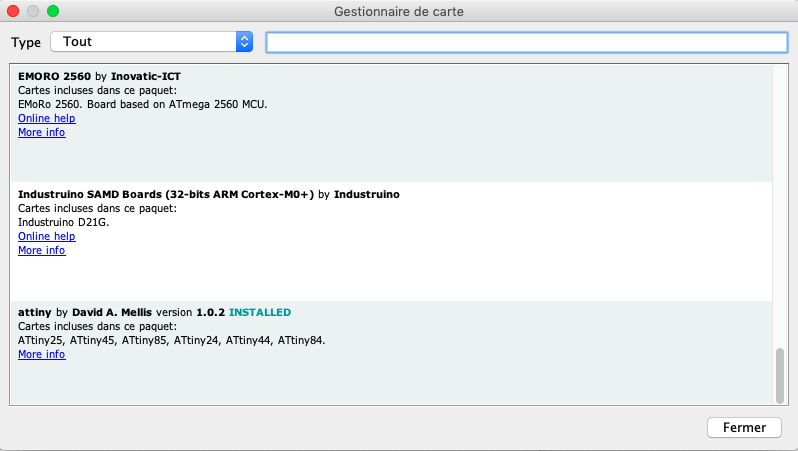
Here is installed
You should be able to see ATtiny in your Board menu
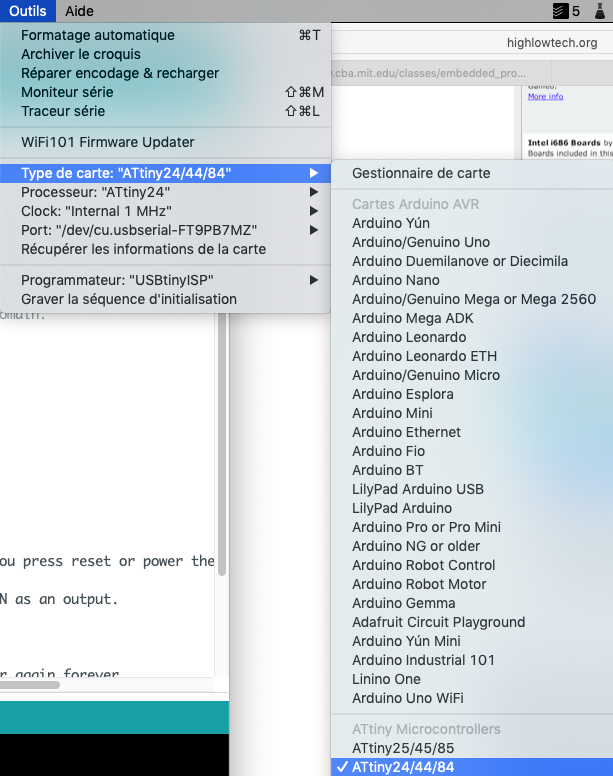
Choose your Board, Processor, Clock and Programmer that you use
Connect your board and programmer to your computer
2-Program a button and a led
In Arduino
I searched on Internet some exemples of code to program a button and a LED for arduino and the I was rabidly submerge of suggestions. You can then analyse the suggestion and make it your own. This is the architecture of a Arduino code on Arduino:- If you need a special library, you have to call it first.
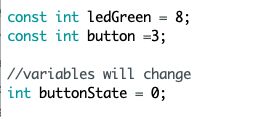
- After, start by putting the variables you need.
- const int = variable that will never change like the pin where your components are. Be careful, you need to tell the equivalent pin for Arduino. You can search ATtiny44 pinout arduino to find the equivalent.
- int = variable that can change like a buttonState
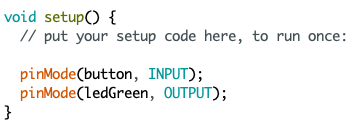
- Write void setup() { Write here the code you want to read only one time } like identifying, for exemple, which pin is a output and witch one is a input
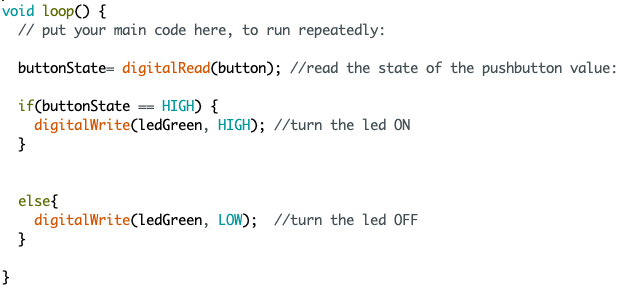
- This last main section is void loop() {} and it's for your code that you want to read over and over.
- Electronic is basicly passing electricity or not passing electricity. So in Arduino when you say HIGHit meen that it will have electricity so the led, for exemple will be on. If you use LOW the LED will be off.
- I use the if and the else to explain 2 different actions that it can do depending of the circonstance.
- When you need to read something that maybe will change, you change play with State but you have to identify it in your variable the initiale state.
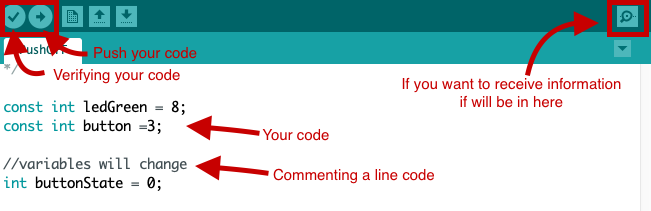
- When you are ready to put the code on your board, you can click on the check mark and make Arduino verify your code to see the potential error and then push it.
- Also, don't forget to annotate your code. with /* texte */ for annotations and // texte for commenting a line code.
In C language
- I made everything with the help of Arduino, now just for fun what could be the equivalent of blink a LED but with the C language. I first, (and like always) go on internet a try to find a base of a code that can fit to my board that I can modify to work in my condition. Exactly like I did with Arduino. I found something similar on this site.
- I modify the code on Sublime texte to indicate the right pins fot the Led and button. I save it. The way you write the C code is less understandable than Arduino but still similar in a way. For exemple you have to create some variables and include libraries in the first section. Than you have a main(loop in arduino) that have the code. Remember the datasheet where it explain the internal pull-up resistor? In C code you have to activate it and always refere to the port.
- The main code mean that if the button is not pressed, the led will be on and if it is, the led will be off.
- I open Atmel Studio and wire the board to it and the FTDI. Atmel can program your board, but it will not power it.
- You can select your MCU and upload your code. Voilà!!!
ATtiny 44 pinout in Arduino
My pin number in my schématic
My variables and my equivalent pin in Arduino
My void setup with the input,output pin
The main code that will be reading repeatedly
Verifying and pushing the code
In C, this is the code I use
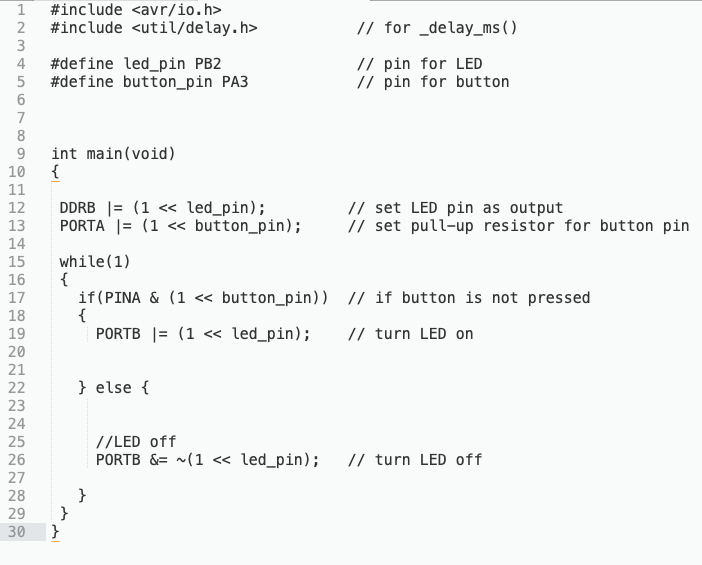
This is how I program it in C language.

Final result
The moral of this story
Even if I don't have any experience in coding, the community and the exemples of code help me a lot for creating this simple action. I will do the same strategy for my final project. Slowly but surely I am training my mind to understand this new language. I already found some really great code exemples to help me with the code for my sensor of air quality. The next question I will investigate is how to set and read sensor data. Files
Contact
Annie Ferlatte
ferlatte.annie@gmail.com
Montreal, QC, Canada