Using big materials
The laser is easy to iterate and to resiliente to your error, but when you begin to work with thicker or robust materiel, then the laser is not enough and the cnc is a better tool to play with these kind of material. This group assignment is from Sylvain.
Creating something big
The Computer Numerical Control (CNC) at échoFab is a 2'X3'. It can work with wood, plastic, aluminium 6061, copper, but not much harder materials. This technology cuts a material making spinning a tool (very similar to a drill bit) and moving in your material. The force generated is impressive and if soething happens like your bits break or a little piece of your materal stay stock in your bit, and begin to spin at 24 000rpm ...it could be dangerous. I fear using this machine when using hard materials. Working with soft material like wax or cutting a micron of copper on the top of a FR1 is still good for me. I can make mistakes and learn, it's more resilient. This week will be a personal challenge for me to fear less or eliminate that fear (That would be a miracle, but I can still dream about it.) I will design a shoe holder using Lexan and wood. The lexan is a very strong plastic and I will do a jonction with wood. I will try to use the flexibility of the wood to create a press fit jonction with the plastic.
I inspired myself with that video. This Youtube channel is very nice to have some ideas and tips for the CNC. The exemples of fonction I see most frequently are in shape of rectangles with come dogbone. Like the jonction with the laser cutter, it's very distinctive and give a specific esthetic to your object. With some creativity, I think we can pass true it and make it a more delicate and design integrated.
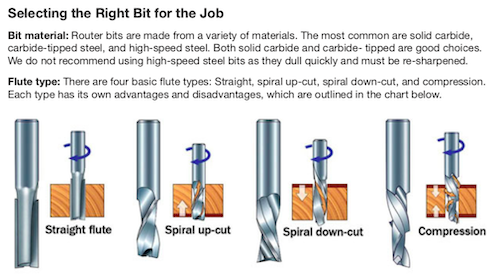
The CNC work with bits and many of them can do differents things depending their composition, their shapes and the way they cut the material. The shape and the bits influence the final geometry of your piece. For exemple, if you do a perfect square, your corner will be sharp, but in reality when you will produce it, your corner will be rounded, taking the same circonference of your bits. You can play with that: you can take a very little bits and you will never notice that the corner is round, but your production time will be much longer. How far you will go? Kwowing that limitation, I will integrate it directly in my design. The shape of the bits will influence the resolution of your shapes. Remember that the machine will spin very fast, so the evacuation of the chips load is important. If your bit is creating friction, it will produce heat and that heat and wood dust can turn into fire or this heat and plastic dust can melt and create a big mess that you don't want to clean after. There are a very important relation between the chip load, the spindle speed and the speed you are going in the material. Precise bits is very helpful to find tips on this relation. This aspect of the bits will also influence the finish of your piece. Remember, if you saw or drill a hole in a piece of wood, you can see that you create a hole. Applying a force down your wood will be perfect, but on the other side you will see that the wood fiber had lifted and the finish is not perfect. The bits are the same thing, a spiral down-cut, do a better finish on the top of the material, a spiral up-cut do a better finish on the bottom surface and evacuate the chip load but the top witch limite incidend mixing the heat and chip load. You can also have the compression which is a mix of both up and down-cut. It gives a nice finish on both sides, but the chip load is stock in the middle. To create a joinery integrated in your design, you must take in consideration the size of your bits and the way they work.
How to
1-Design
- I design in two modules. The top and the bottom will be in lexan and the wood will allow the jonction on the wall. I was thinking at the beggining to make everything in lexan, but press fit jonction are better and tighter if one material is hard and another one softer.
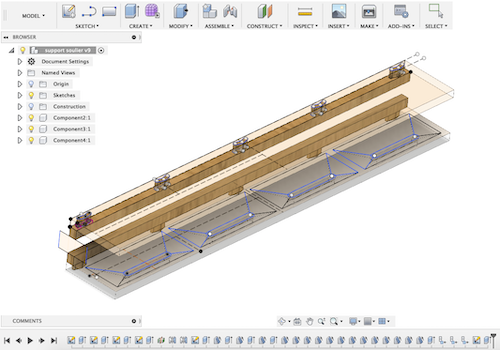
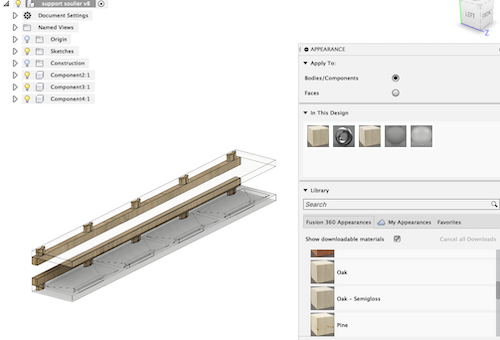
- You can see on the first picture my final design showing also all my sketches that I create to produce this object.
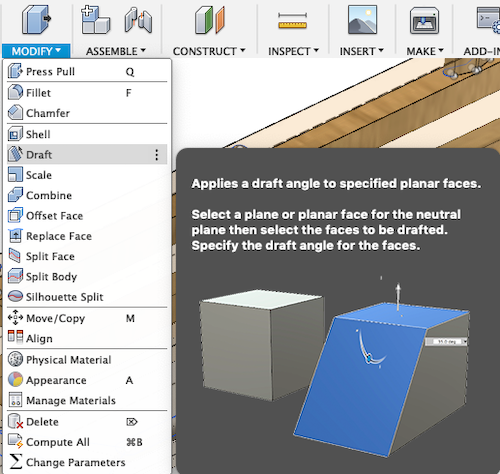
- I use a new fonction to create the 3d geometry of the bottom. To allow the shoes to evacuate the water, if necessary, I create some angle to let the water evacuate. To do that, I create a flat sketch and I use the Draft fonction.
- This fonction allows you to easily create draft angle without creating angular construction plan or changing you sketch plan. You can click on two horizontal faces and bend one to create a angle. Clever fonction that I glade I found and try.
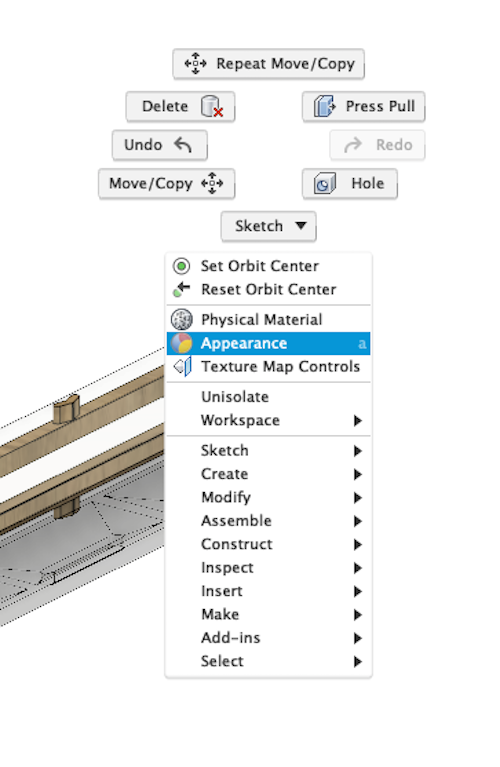
- I found also the Appearance menu who let you put some meterial on each of your body and component to simulate the final esthetic. I wanted to create something light and discreate so that was a good way to confirm my thought. Once you click right and on Appearance, you can choose your material and drag it on the good body. Voilà!
I am glade to have all these opportunities to improve my skills on 3D modeling on Fusion. I am getting better and better and this help me alot to modelise and make the design that is in my head.
Fusion 360 design
The fonction Draft
Simulate the Appearance
2-CNC toolpath
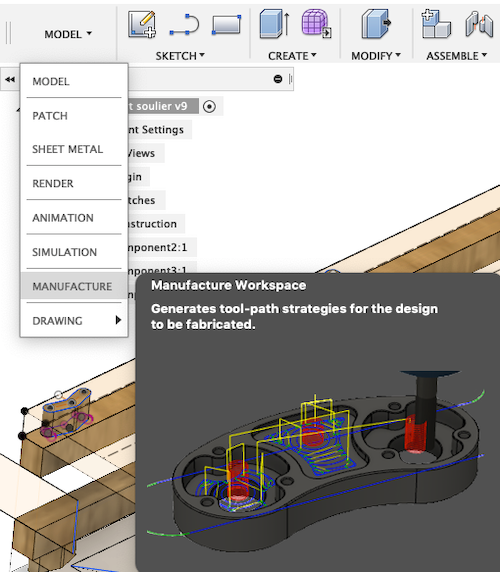
- Integrated in Fusion 360, you can generate your gcode to program the CNC. Instead of Model, you can choose Manufacture
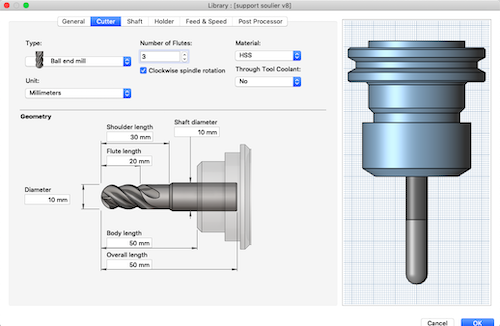
- The first thing you can do in this new area is to create your tools. I will personaly use the same tool for my hole opperation and also the same feed and speed for the Lexan and the wood.The multiple depth chanche perhaps it's smaller for the lexan.
- For the spindel I use a 16000rpms. I don't want to go to fast is both material. The risk of the lexan is to melt it and the wood to heat it. We need more tork than speed.
- For the cutting feedrate, I use a 1000mm/min. The spindle speed and the cutting feedrate are related. It's a ratio to have a chipload small and constant. To find this proportion I ask few persons with experience in cnc and they confirm my speed. You can observe also that when ou enter these parameter, the ramps and plung feedrate will automaticaly be set at 333,33 mm/min. It's part of the ration, but it's important to verify that it's slower than your normal feed and speed. It reduce de presion on the bits.
- When you create a new tool in you library, you can mesure your bit that you will use in real life and fill the information needed to modelize the bits. The software will then make your life easier calculating for you the offset it needs to preserve the geometry and warn you if it thinks you made a mistake with the height for exemple. Also, this library can be use over and over again for other project.
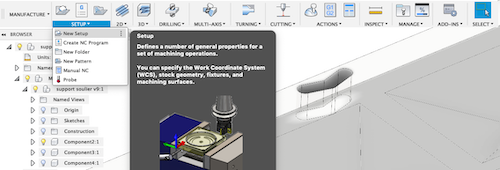
- You have to create a new Set Up. Because in my model I have different parts, I hide the component I didn't want. Then in your new set up, you will began by creating a stock who will represent your material and chose a path. Next to the Set up menu in Fusion, you have the 2D, 3D and drilling menu that you can play with to generate different type of movement. For exemple, I choose a 2D adaptative movement to follow the outside of the wood joinery. Clicking the edge of what you need, you can choose the direction of the bits and if it needs to follow the inside, outside or in the middle of this edge.
- You will set also the distance of the Clearance height:
- I use a distance of 10mm for the total clearance height (this is when the machine travel to go at a certain place), to make sure I clear everything
- I use a distance of 5mm for the retraction height. For the retraction, no need to go very far, it in the main section of job.
- Always use multiple depths. This multiple depths fonction is really important to prevent your bits to break for exemple. It will reduce the force applying on the bits and in drilling for exemple, it will help to cool down and take off some chips inside.
- I use a maximum of 3 mm by depth and for extrat safety like for the lexan or finishing touch you can reduce to 1mm or 0.5mm
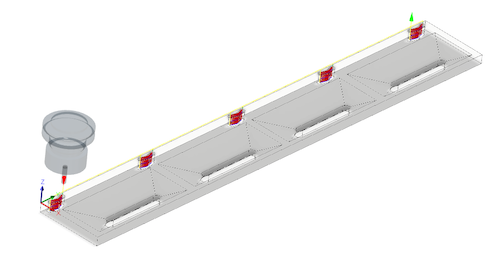
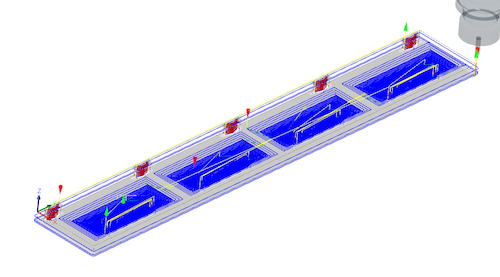
- For the lexan top part, my toolpath is very simple. As you can see the pictures, I create my sloth exactly the good size for my bits so that the path will be faster.
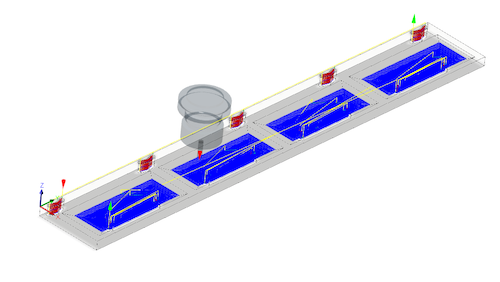
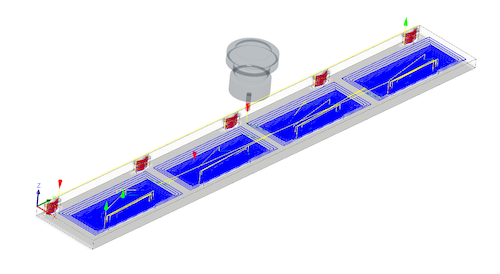
- For the lexan bottom part, I try to test the 3D menu. You will use the 2D menu more for flat use and the 3D menu to follow curvature for exemple. I create a pocket to take off most of the material uneeded and after I make a Scallop fonction to make it smooth.
- When you do a Scallop, you need to set also a overlap to your bits so that it have a smooter heel. I use a 3mm overlap to make a better finish.
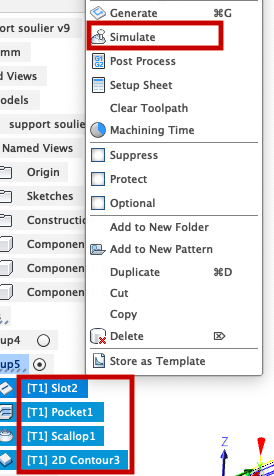
- To test everything together, I select all the fonction, right click and simulate.
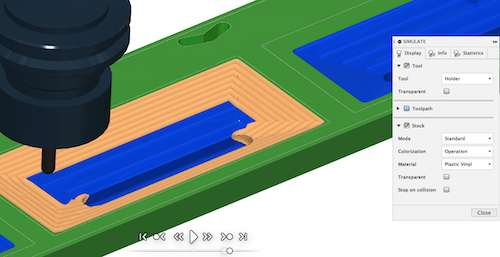
- In the simulate fonction, you can see what will it be. Here the green means the original stock, The blue is my pocket action and the orange is the scalop fonction.
Creating a CNC toolpath
Do: Stock, Geometry, Height, Simulation
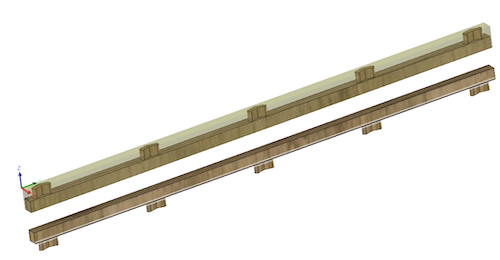
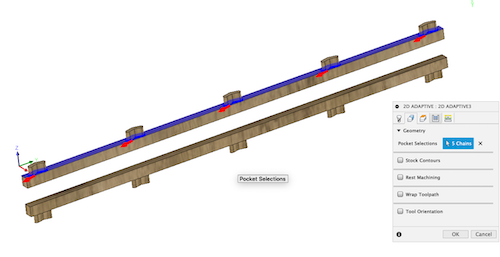
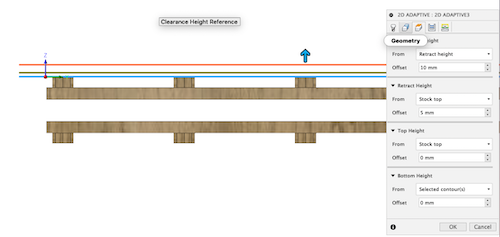

Lexan, top part
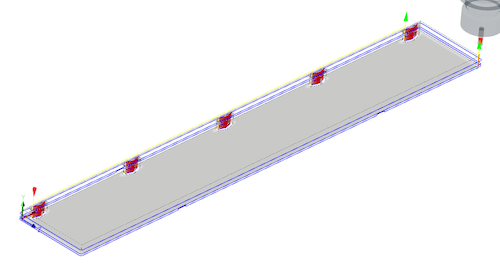
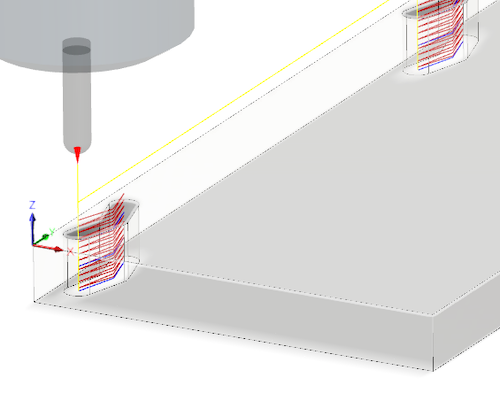
You can create more than one action to make your final geometry and simulate it all toghetter.
3-Production
- Even if I simulate everything and search for good feed and speed, I am more confortable to ask another person confirm my CNC job just to make sure I didn't miss anything. Thanks to my instructor to do that check up.
- I bolted my materal on the bed of the machine usine screw where I know that nothing will be cut there.
- The following steps are the same steps that milling a PCB. You put the tool in your machine, make the zero where you plan it on your stock (very important). When everything is ready, you have to wear some protection glasses and earmuff and you can start the machine. Make sure you are watching it to avoid any accident by pausing it.
- For the Lexan, I think that it should have been better to make a last finishing cut only to take off this last fragile platic. I take a wood scisor to take them off, it was very easy but next time it could be nice.
Bolt your material in place, make your zero and start the machine
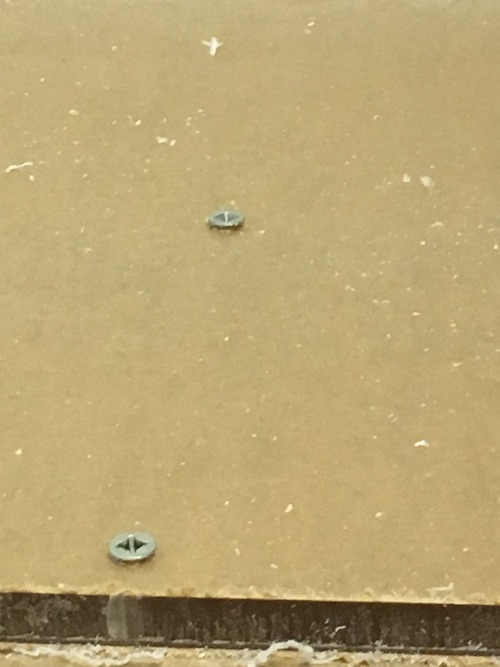
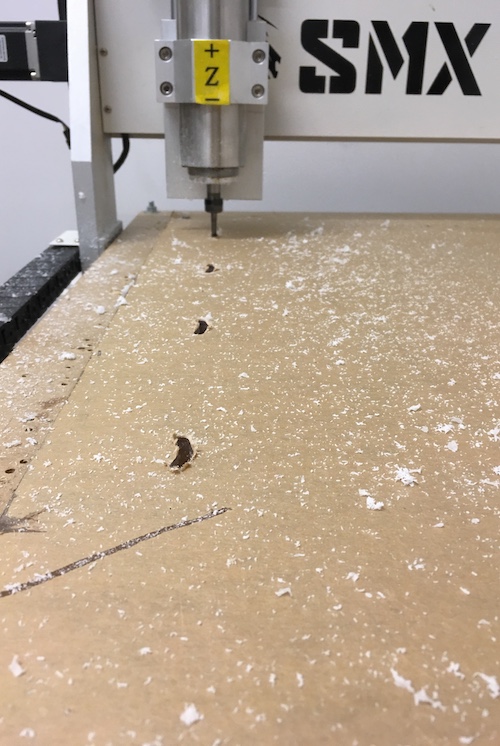
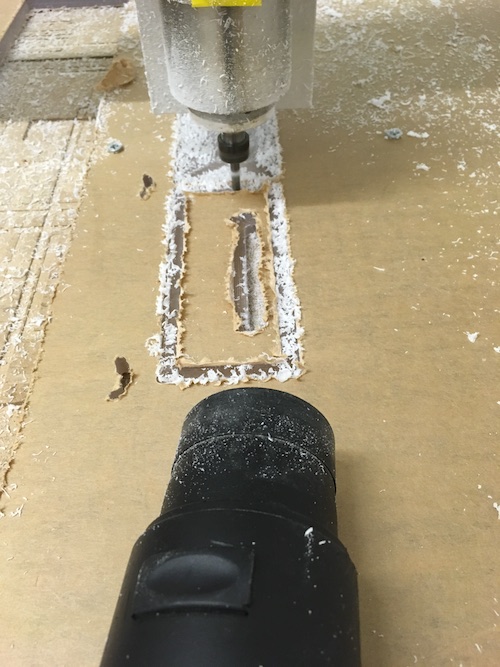
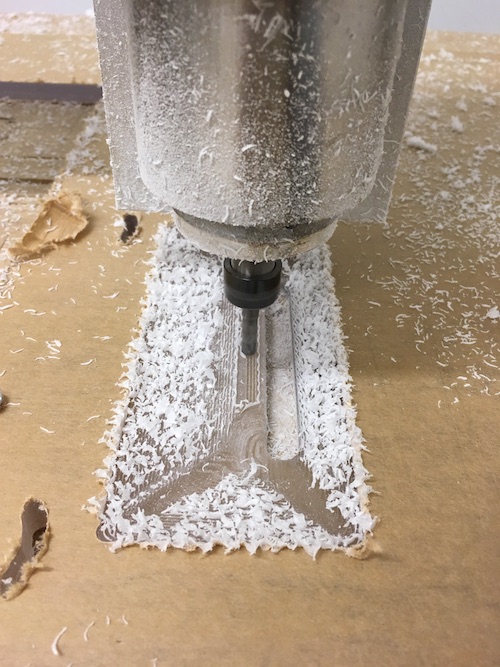
For the wood I take some massive pine.
Finish the job with a saw to be safe
This is the finishing result. I sand a little bit the top edge to help the wood press fit in. Next time I will plan a tolerance a little bit bigger.
The moral of this story
This week was a discovery of hardeness of material mixed with some fear. It went smoother that I expected. The pine wood is a realy nice and soft material to work with. Also I will always plan a finishing pass in the future if I need a really smooth finish. I really like the texture of the lexan. Perhaps I will continue exploring creating tecture with the path of the CNC. I think we all need to do it one time to learn the design rules that will apply next. Files
Contact
Annie Ferlatte
ferlatte.annie@gmail.com
Montreal, QC, Canada
