18. Wildcard Week (May 29)
This week we were suggested to design and produce something with a digital fabrication process (incorporating computer-aided design and manufacturing) not covered in another assignment, documenting the requirements that our assignment meets, and including everything necessary to reproduce it. Possibilities could include (but are not limited to) composites, textiles,biotechnology, robotics, and cooking.
I decided to work with composites.
Composites
I have always been intrigued by the potential of composites to combine the best properties of two of more materials. I have heard of them more as FRPs in the context of achieving a high strength to weight ratio for airplanes. I am excited to use natural fibres such as burlap jute rolls with epoxy to form a composite and find out how its strength increases. In the long term, I am really excited at the possibilities of bio-based composites replacing higher energy materials.
I watched Neil’s Fab Academy 2016 video which was in detail about composites. He recommended to stay way from fibre glass and carbon fibre to begin due to their harmful effects. He also suggested to make coupons (rectangular composite blocks) to master the work flow before making something with the mold. Neil also shared Sam Calisch’s technique for composite paddle making, which we could learn from.
I was curious and also looked up composite making videos on youtube. One of them was about making the Hybrid Hemp-Glass Fiber Reinforced Epoxy Composite. Another one was about perfect Vacuum Resin Infusion of a Carbon Fibre.
Making a Coupon
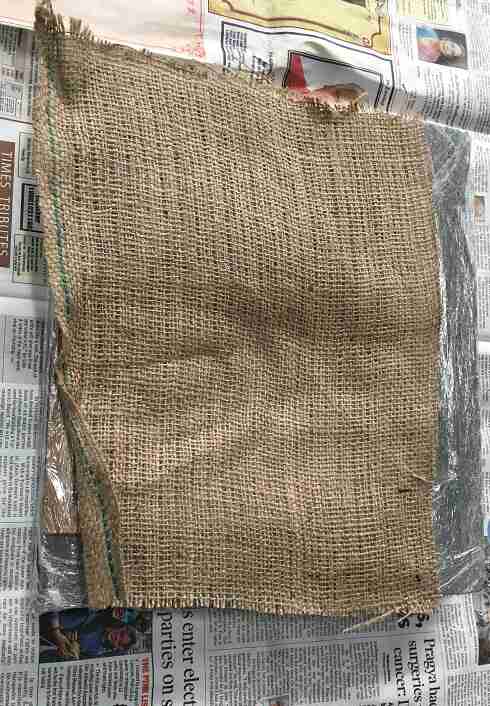
For making a coupon, I used two wooden plyboards which could be clamped. I got a burlap jute roll for free from a nearby vegetable vendor. I had Haksons epoxy resin from the molding and casting week. So, I was ready to create a coupon.
From Neil’s advice, I felt that compression molding technique would be easier to apply with a better two way surface finish as opposed to vacuum bagging. So, I thought of starting with this technique for making a coupon.
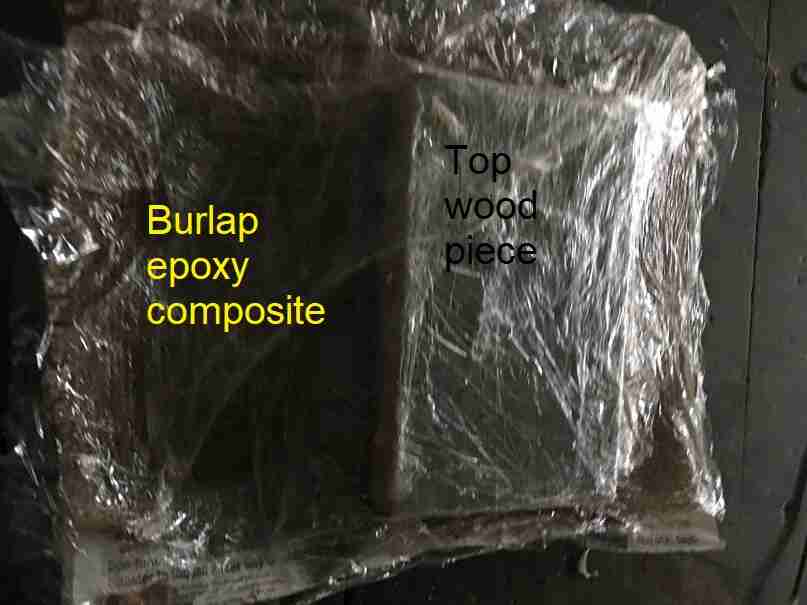
Firstly, I put multiple layers of food wrap on both the pieces of wood (mold). This would help release the composite from the wood easily.
Resin Jute composite making
I used the same epoxy from the molding and casting week, which was Haksons epoxy resin and hardener
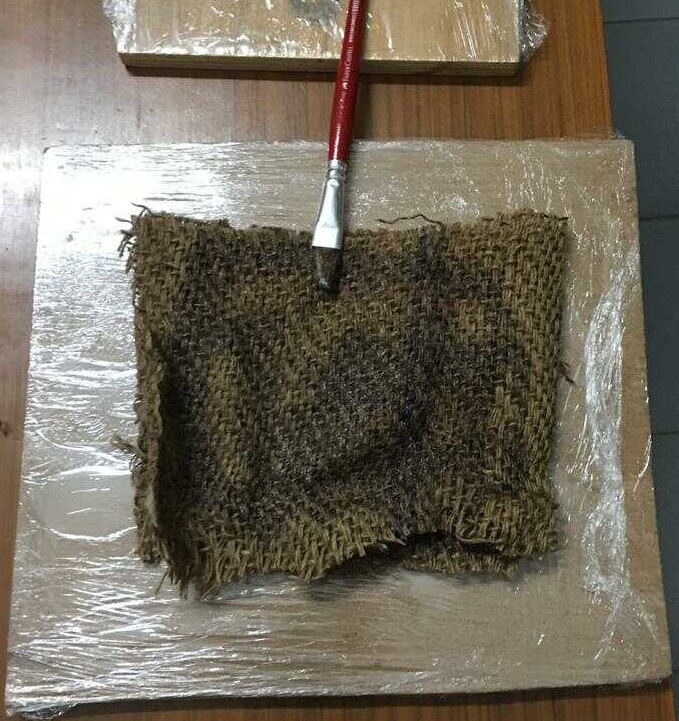
The resin and hardner was to be mixed in the ratio of 2:1 and I used 120 gm of epoxy and 60 gm of hardner for 4 layers of burlap of size 15 cm by 20 cm.
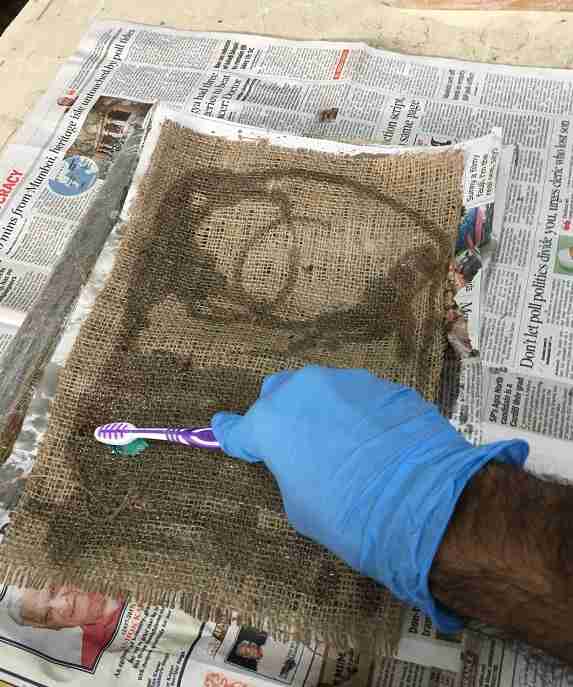
We used a spoon to place resin solution on burlap and used a brush to make sure that it gets into the pores of burlap.
I forgot to add paper in between which could act like a breather material to take excess epoxy out of burlap. I added a layer of paper in between every layer of burlap.
I had two clamps which I used to apply pressure on the composite sandwiched in between wood at the top and the bottom.
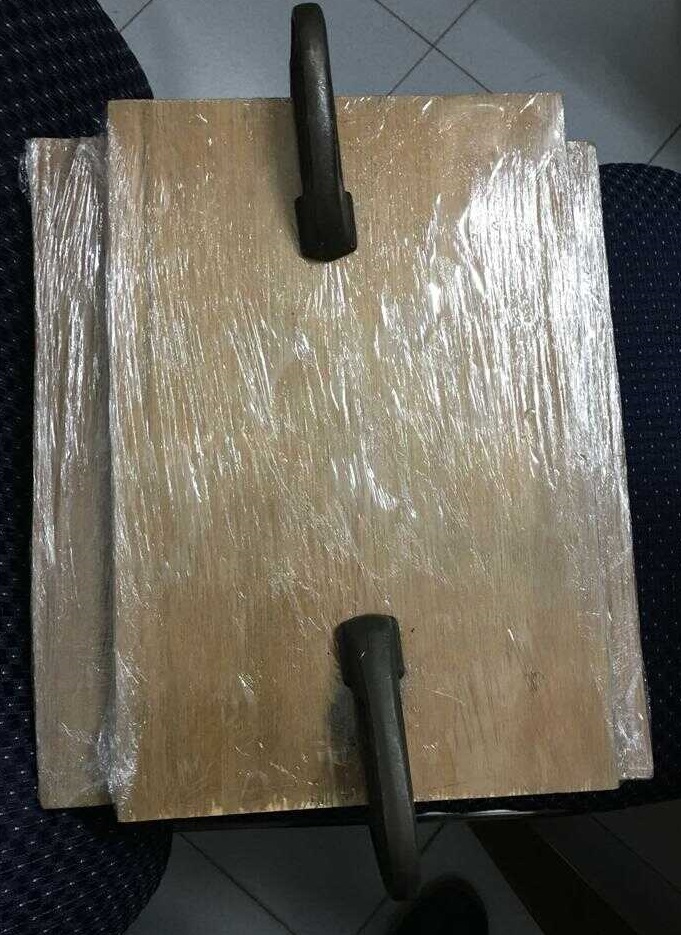
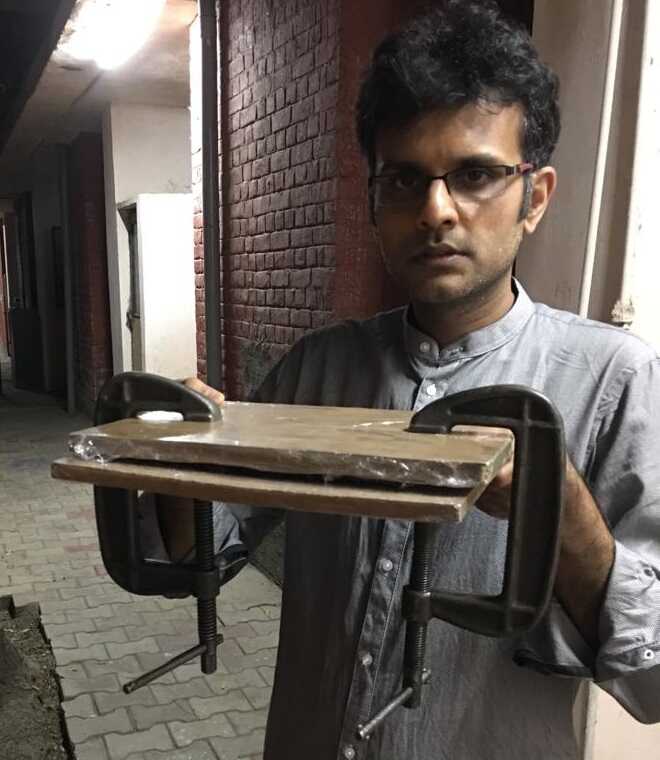
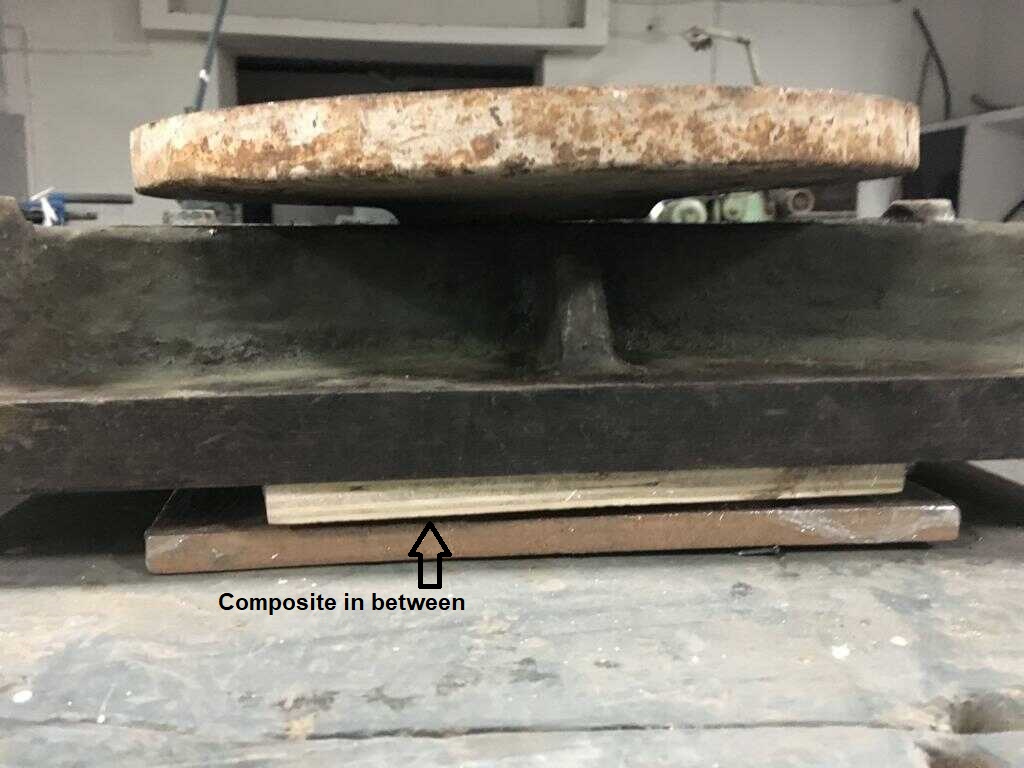
I felt that this may not apply the pressure uniformly as Neil had mentioned to use hydrostatic force if possible. I had a very heavy weight in our workshop which I felt would be more appropriate to apply uniform pressure over composite so I used that instead.
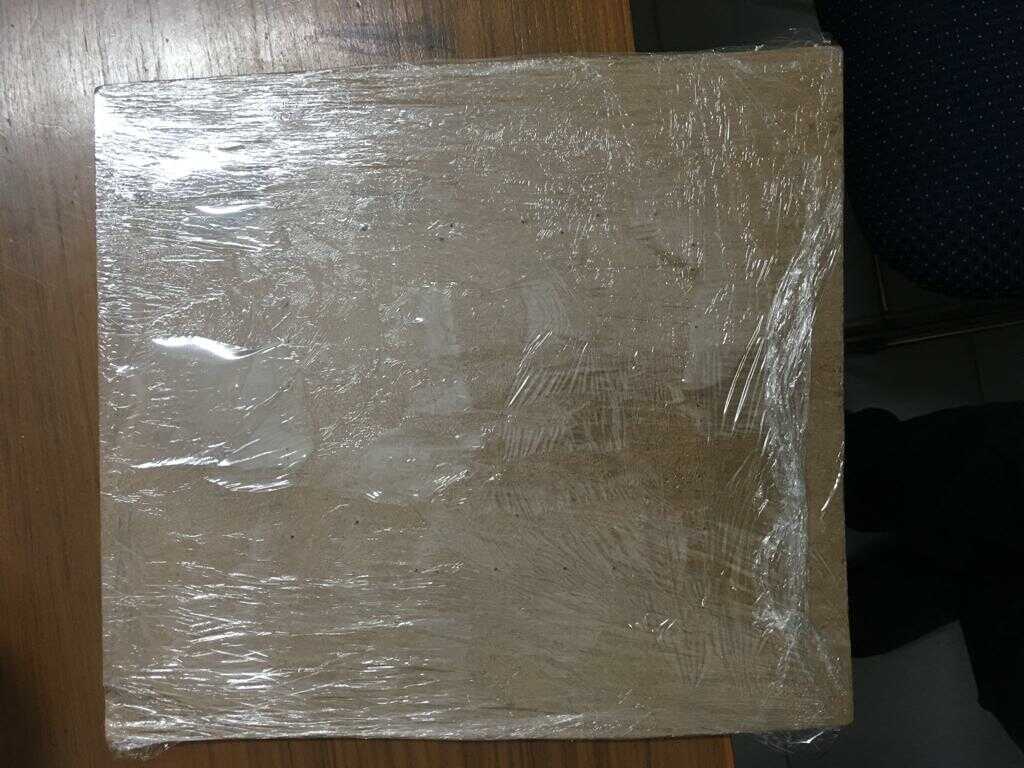
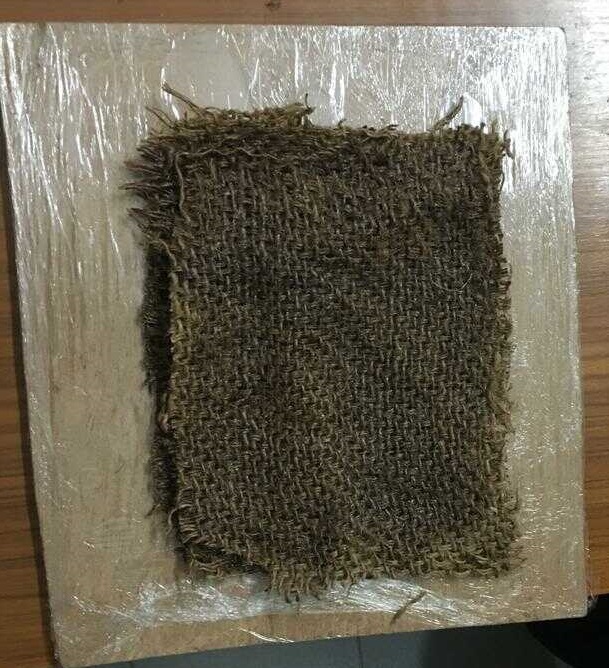
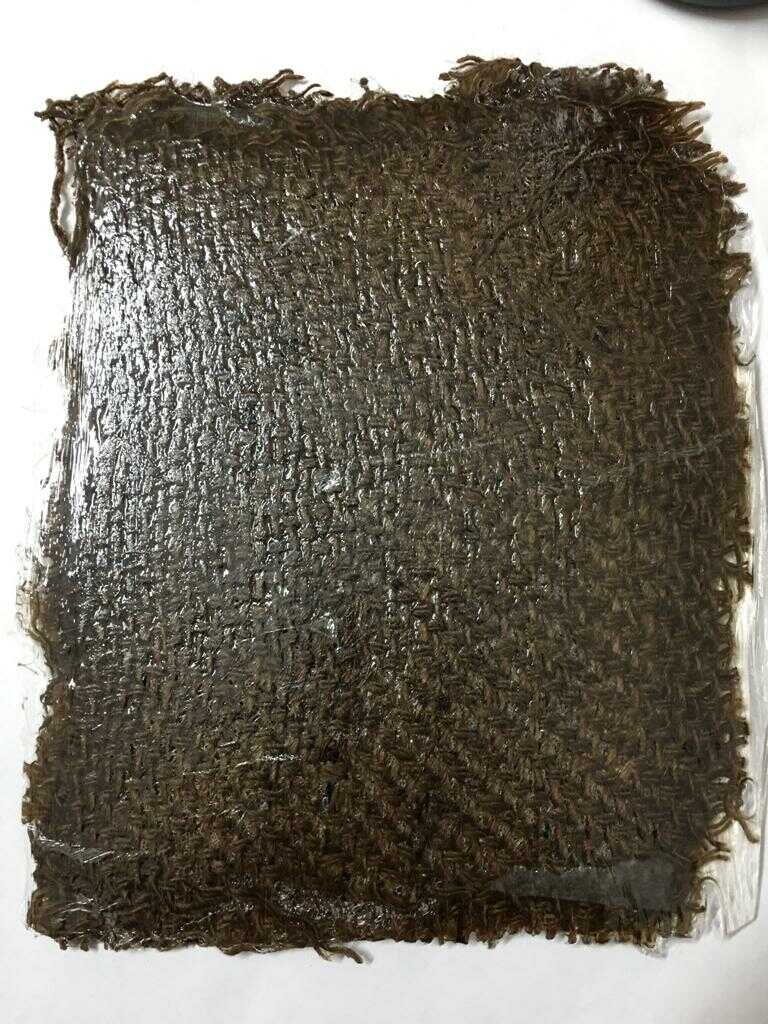
I waited for 24 hours with my fingers crossed for the composite to coupon cure and voila, it turned out quite well.
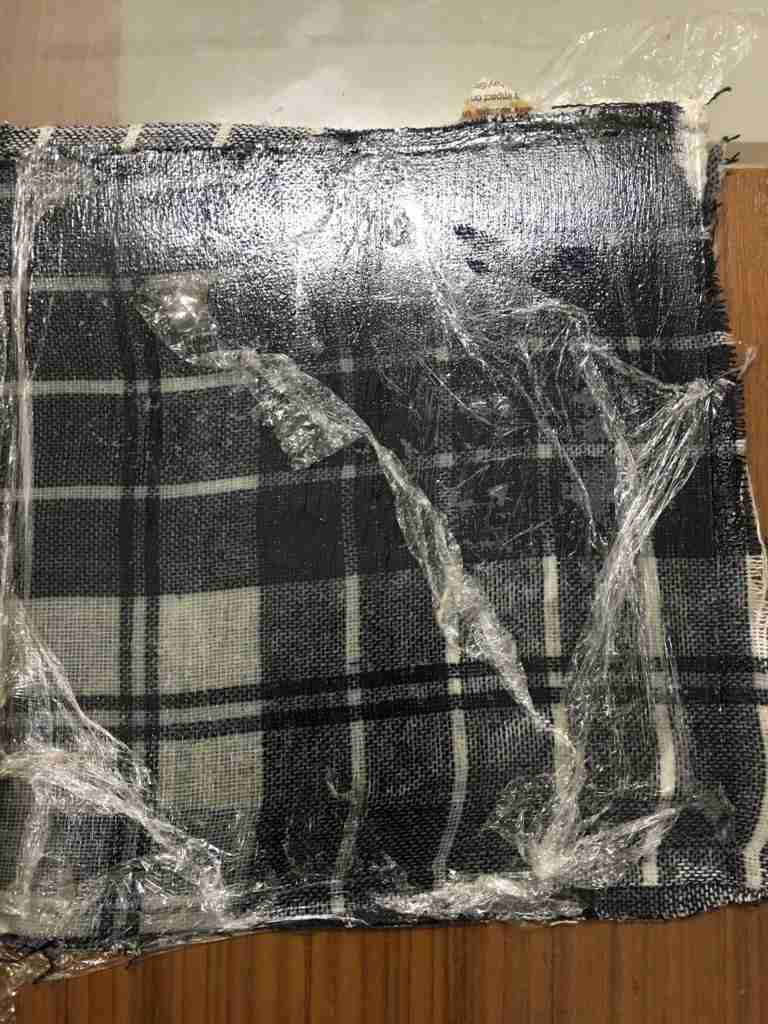
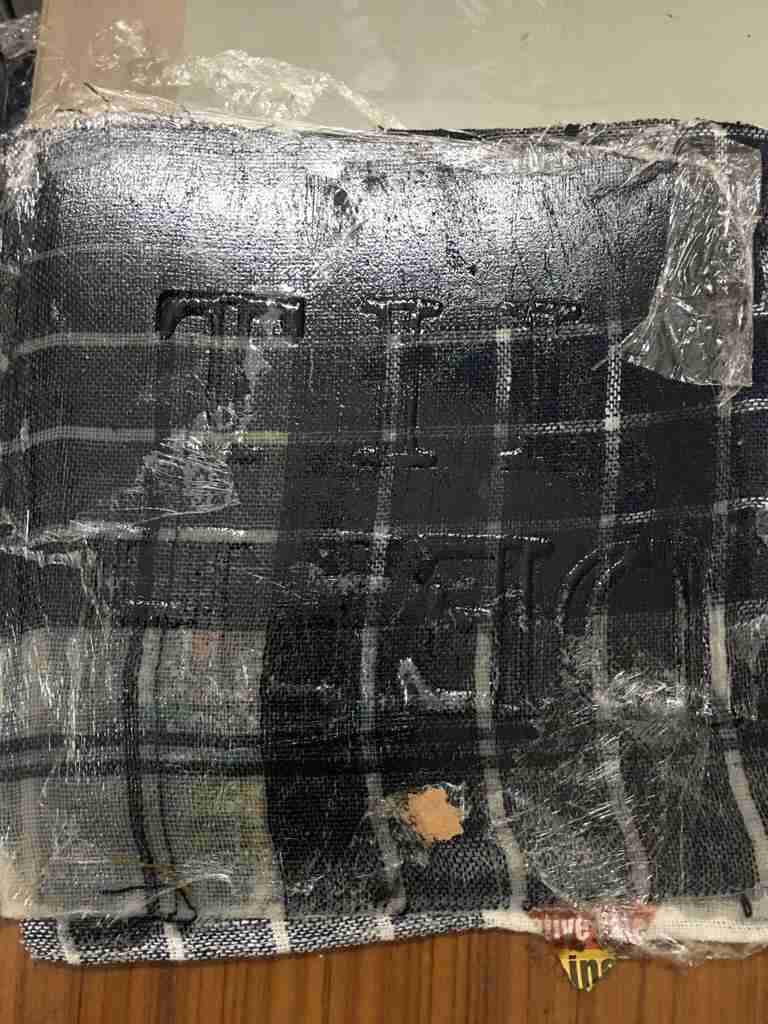
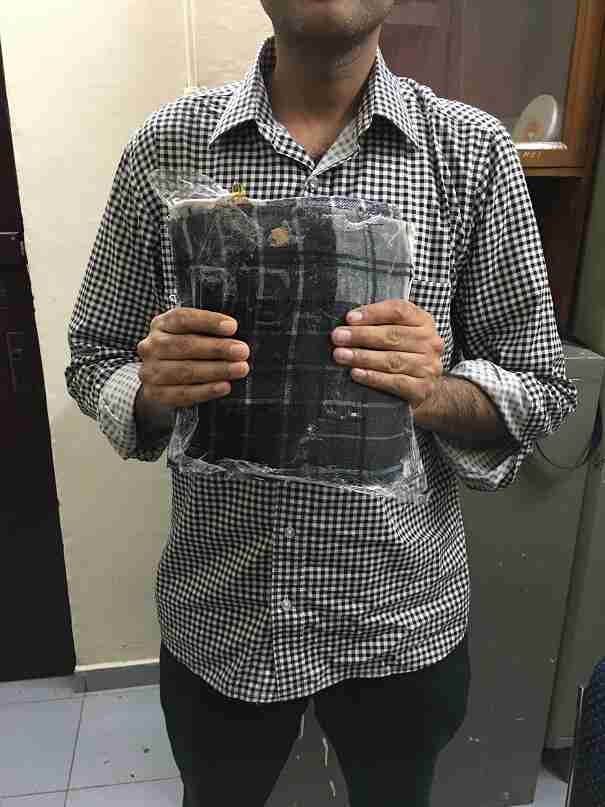
This image shows the composite coupon with the epoxy coming out.
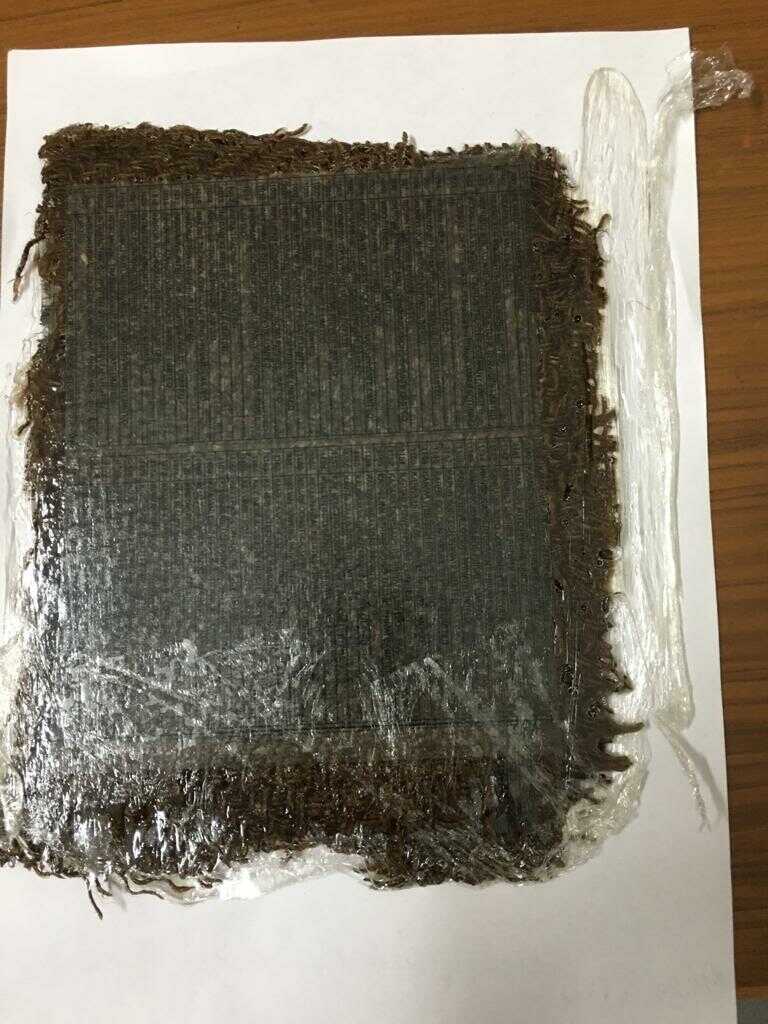
I cut the epoxy coming out with a pair of scissors.
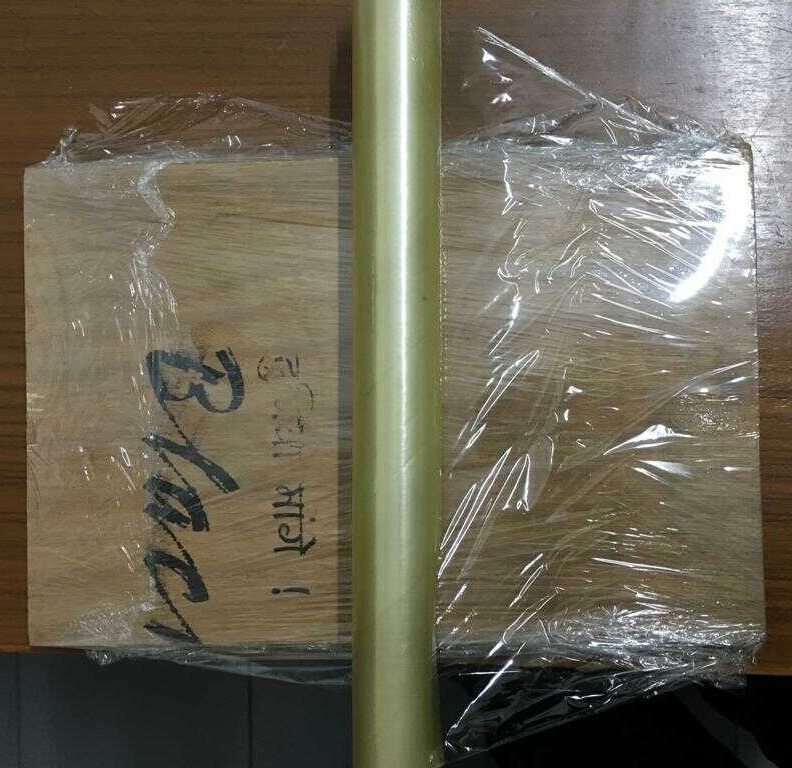
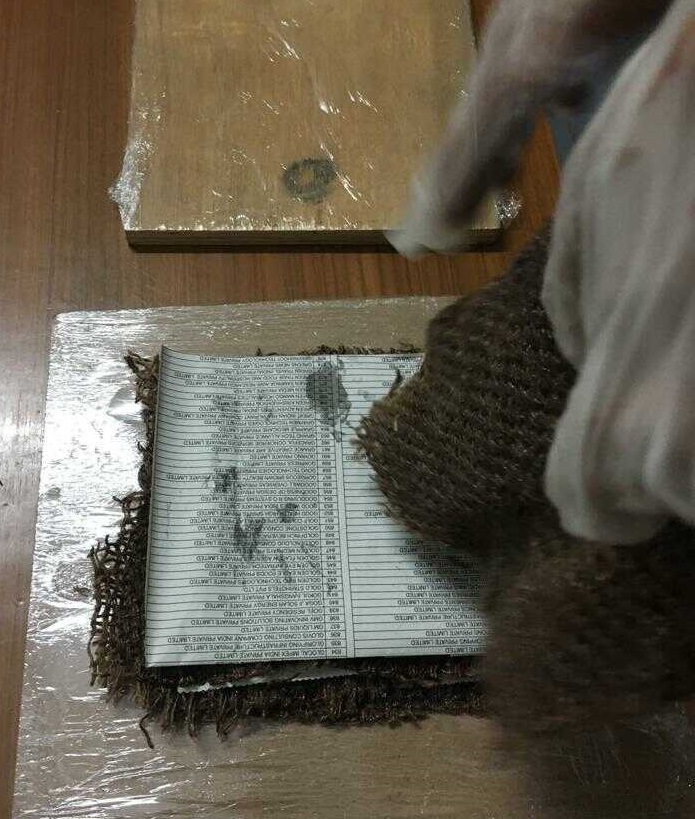
This shows the other side of the coupon which had a paper between the mold and the coupon.
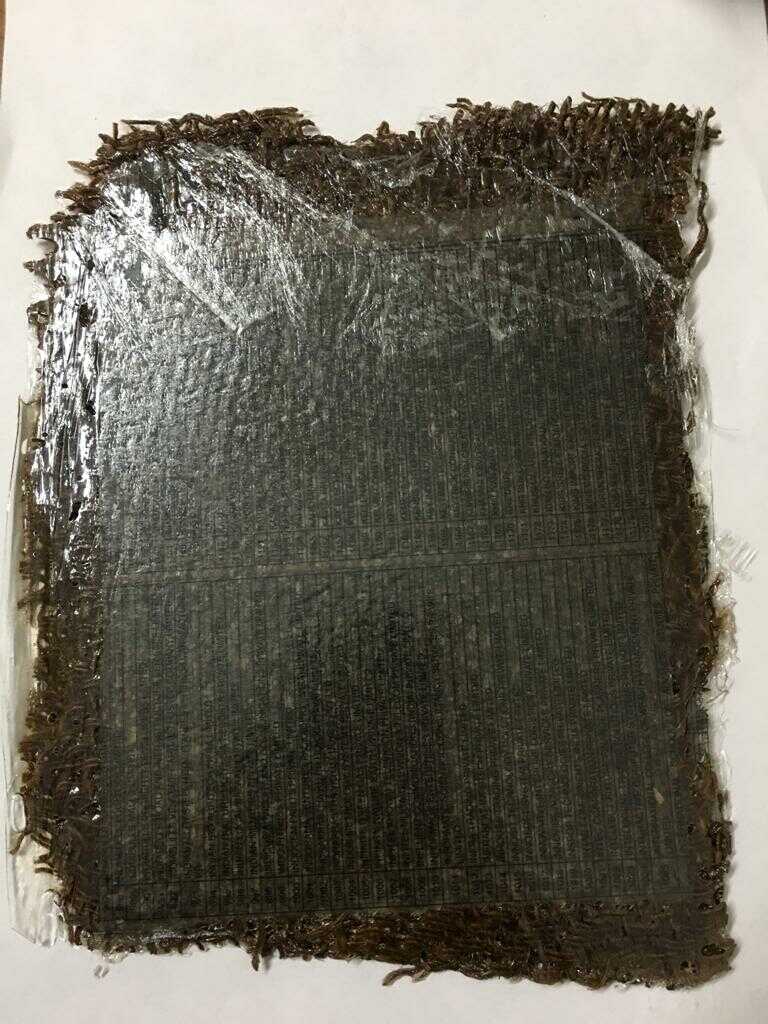
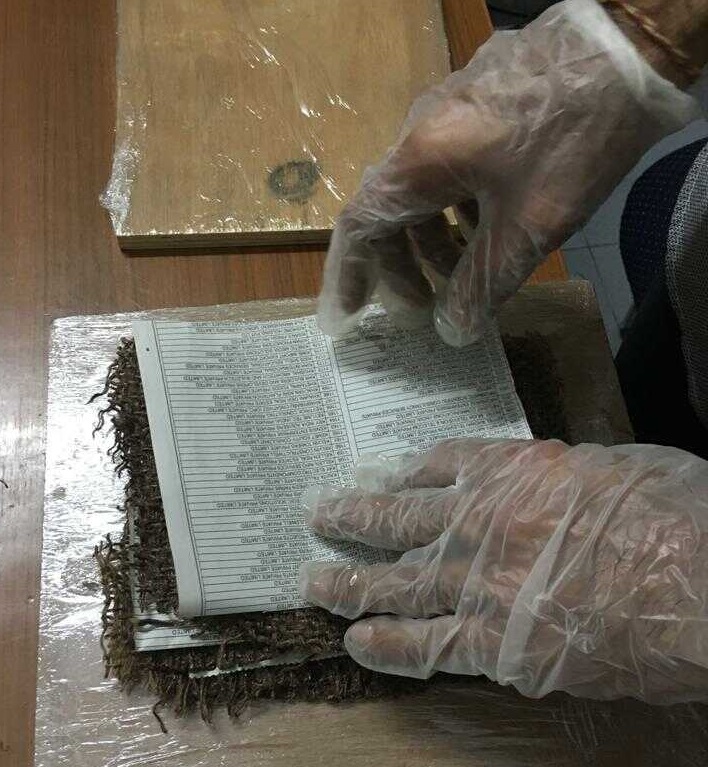
This shows another view of the coupon.

Datasheet
I had used the same resin as I had used in the molding and casting week so one can refer to that.
Safety precautions
The safety precautions are the same as when dealing with any chemical. We need to wear gloves when dealing with the resin.
Learnings
I did find the epoxy to release heat and a pungent smell when I was applying it to the burlap jute.
Jute is available in India very cheaply so if this process could be mastered then this could lead to development of high quality cheap products.
Epoxy on the other hand is not that cheap and I didn’t know how much epoxy had to be applied to the burlap and I went with my gut feeling to stop when I felt that jute had soaked enough of it.
To reduce the amount of epoxy to be used and increase the ratio of jute to the resin, it would help if the resin has smaller holes in between. Jute had coarser grid so perhaps cotton canvas may be better.
I feel that the experiment of making a coupon was quite successful and I am all set to make a mold to make something useful with burlap epoxy composite.
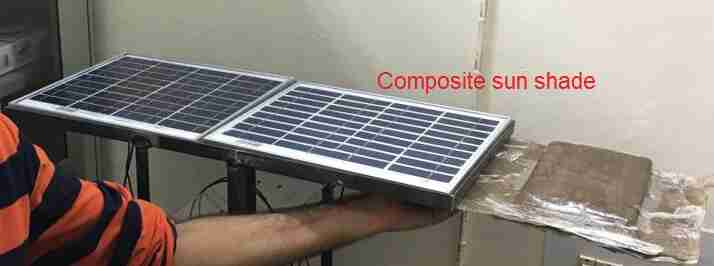
Composite sun shade
I wanted to add solar panels to my bike. The most readily available material was creating a welded structure with iron. This was making the bike heavier.
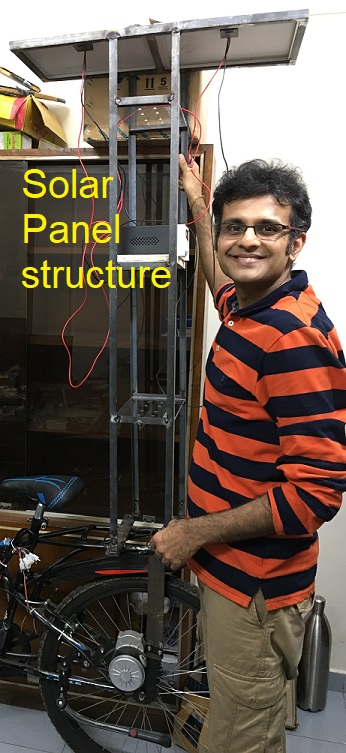
So, I decided to start off making a composite sun shade and gradually I could replace more and more of the solar panel structure with composite.
Mold making
Cutting wood block
I cut a 1 foot by 1 foot wood piece first.
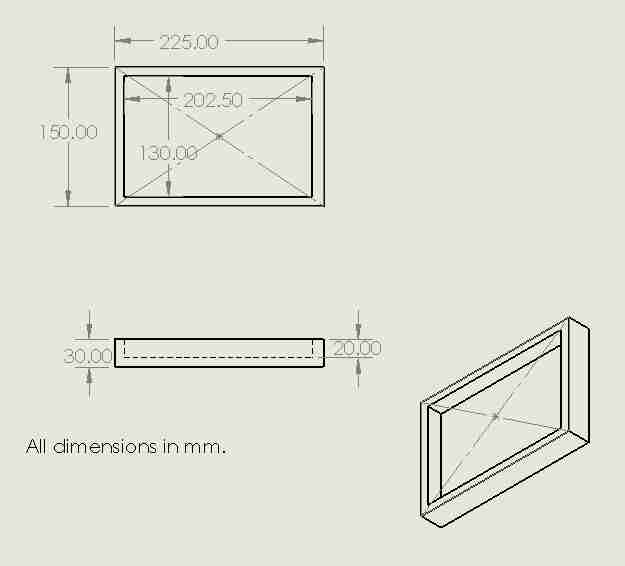
CAD of mold
I then wanted to make a 6 inch by 9 inch pocket of 2 cm depth in it with some part of it as cantilever.
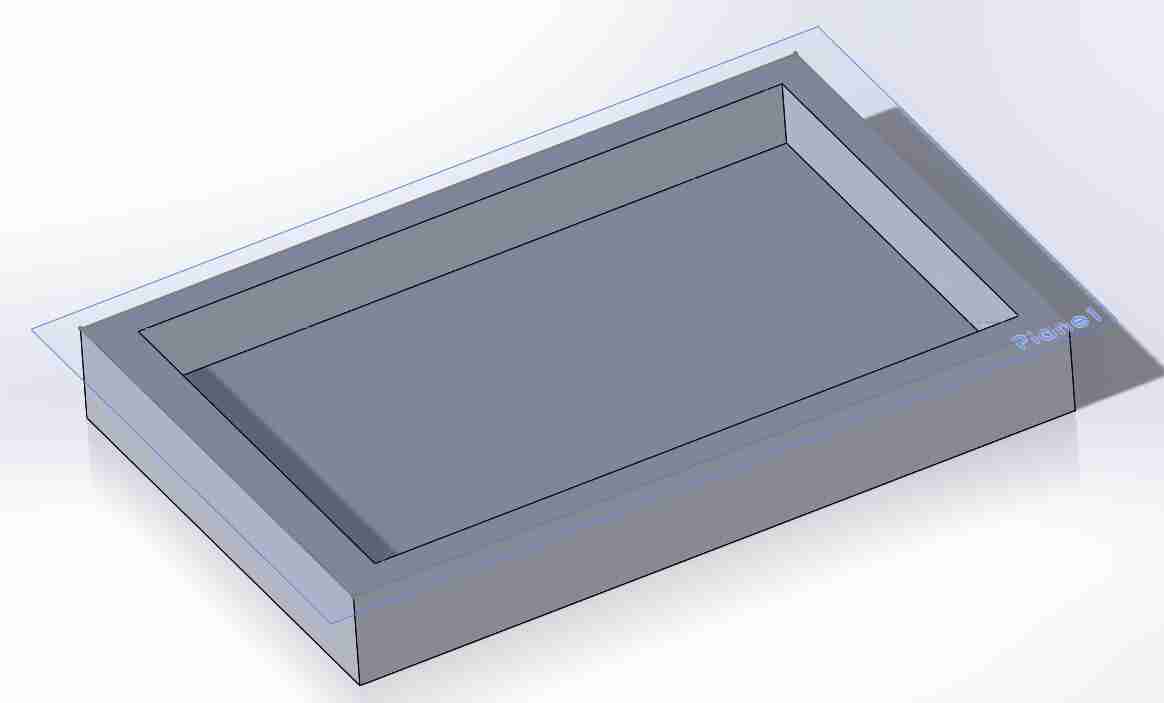
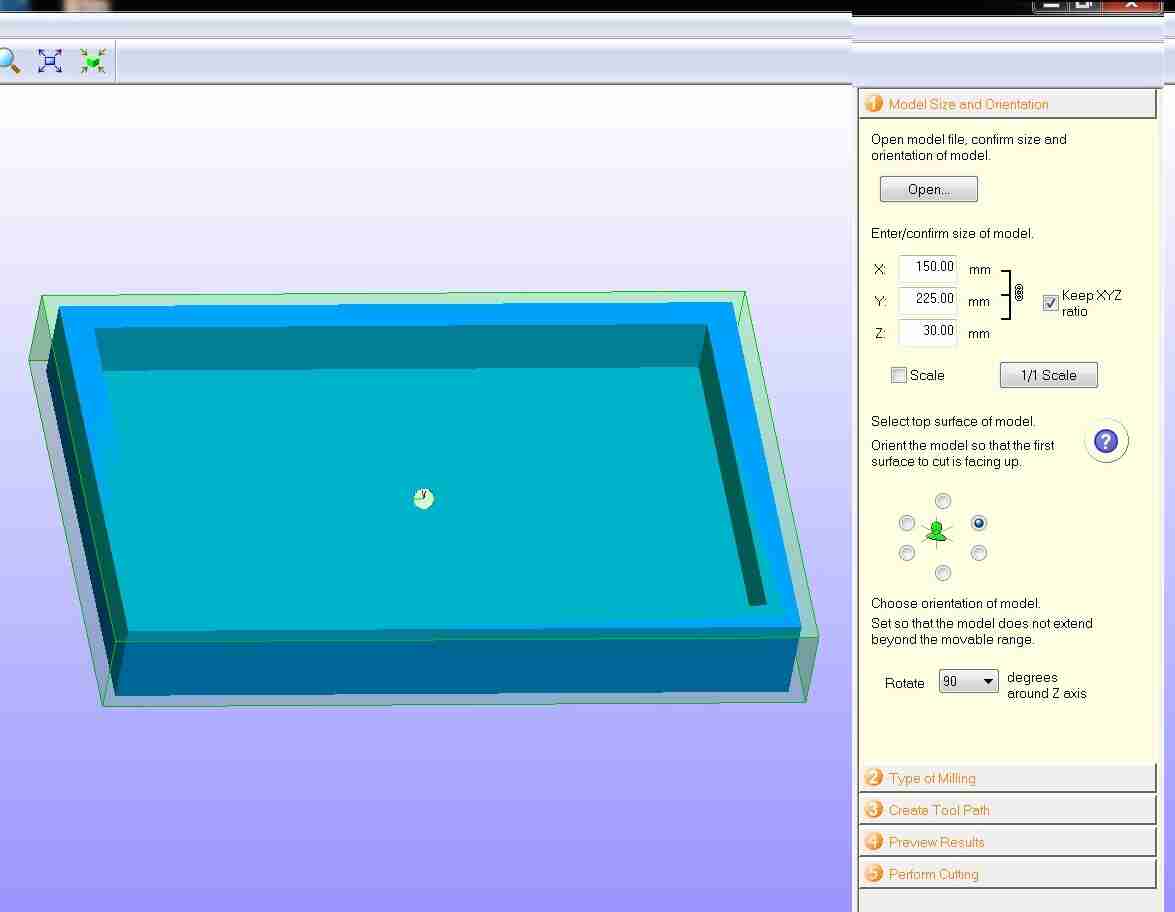
I made an .stl file of it and imported in SRP player which is the software which works with Roland MDX-540.
SRP Player
I imported the stl file in SRP player and worked through the screens. For this screen, the z axis should be facing up.
I wanted to have a faster cutting time.
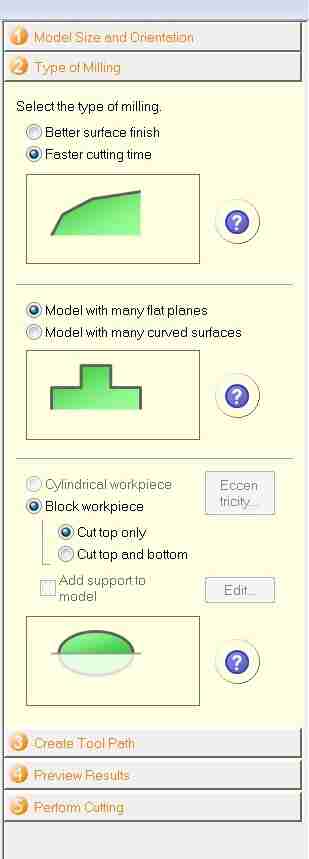
Soft wood was the material I had.

I left the cutting parameters for roughing and finishing as it is.
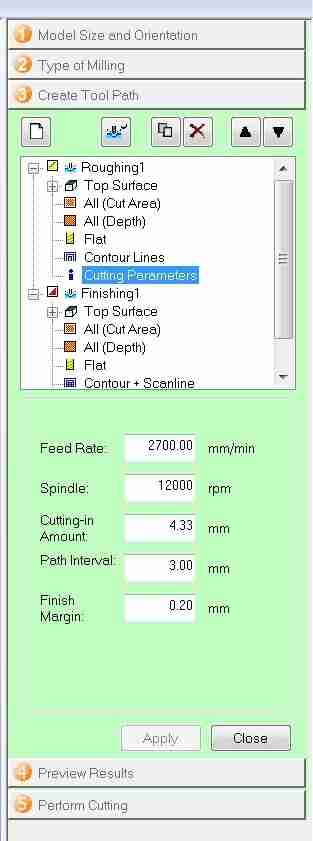
The total cutting time was 1.8 hours with 12 minutes for roughing and rest of the time for finishing.

The tool was 5 mm square end mill bit and this shows the roughing operation going on.
This shows the finishing operation having started.
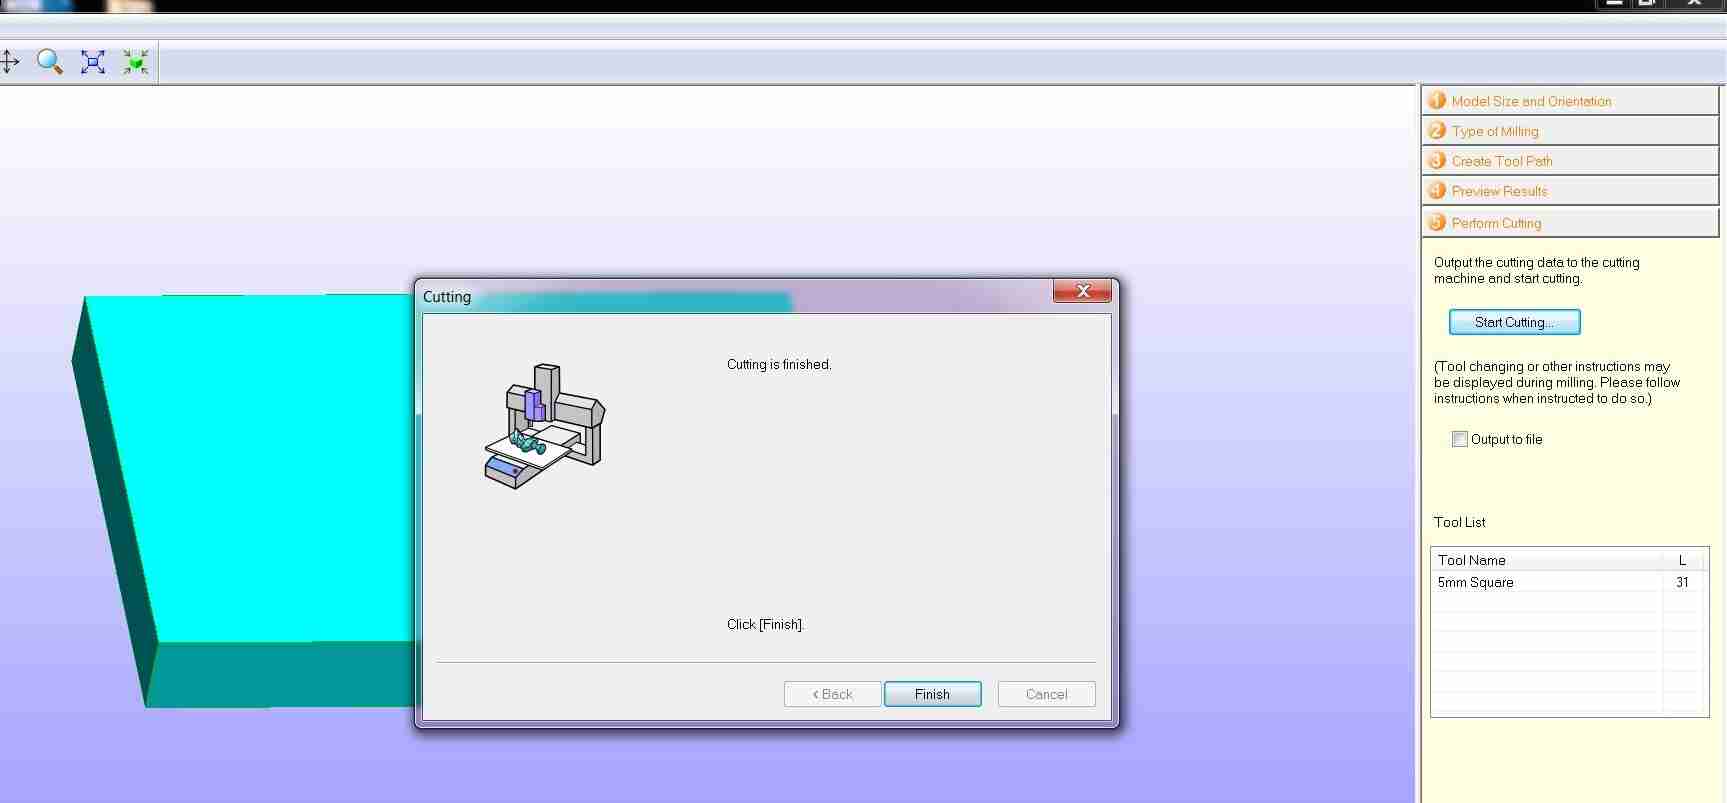
The cutting finished in 1.8 hours.
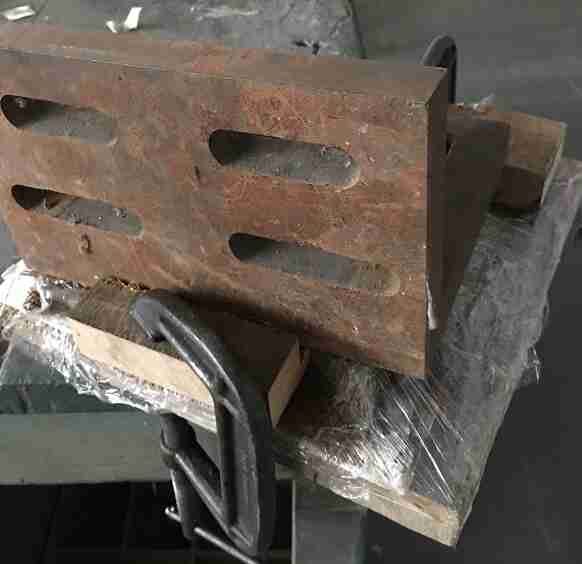
Roland MDX-540 router
The double sided foam tape is applied securing the mold on the bed. This screen shows the corresponding cutting on the MDX-540 router. I am getting the chips out of the way for cutting.
This video shows the finishing with the mold.
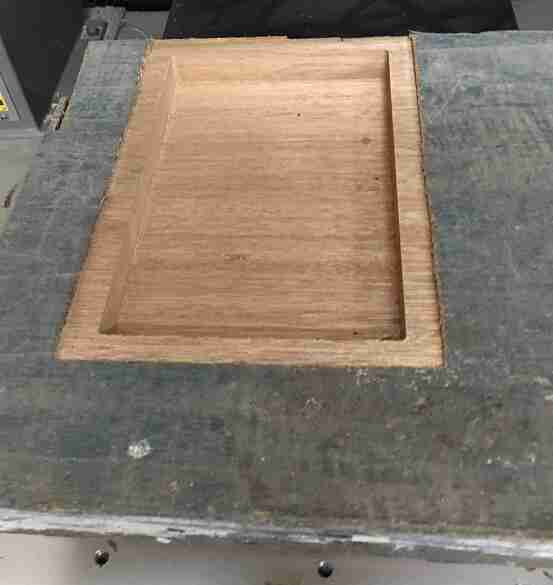
As we can see that the mold is on one side of the work piece.
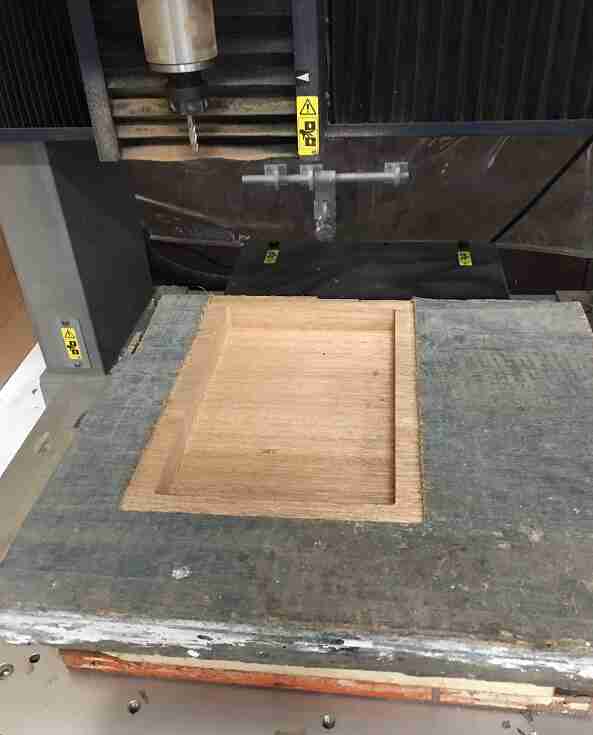
The mold feels as smooth as silk.
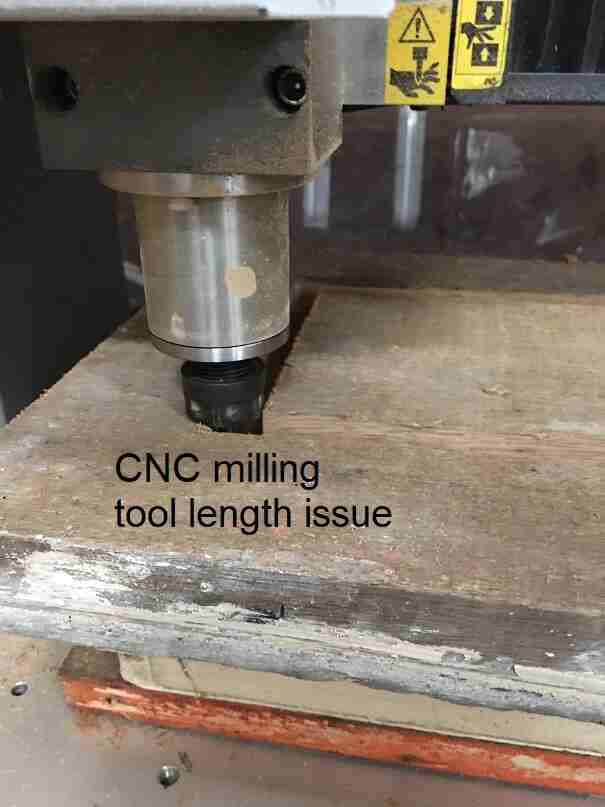
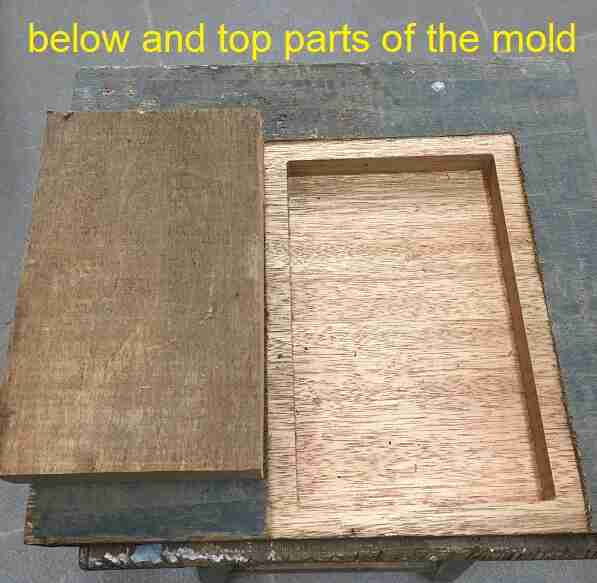
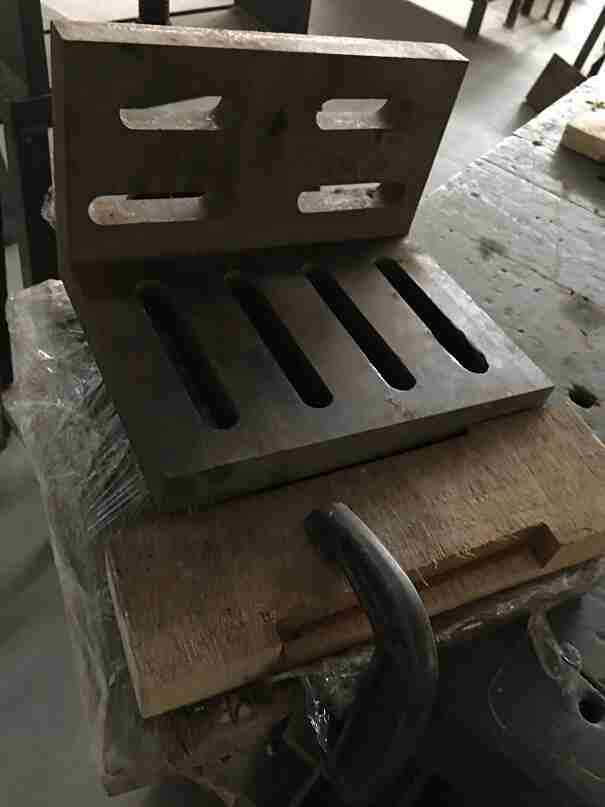
Making the negative of the mold to compress the epoxy-jute composite was easy with just a rectangular box of the size of the pocket. But I didn’t keep the tool length in mind this time and the tool got stuck so I had redo it.
This is how the top and the bottom parts look like and they fit really well.
Composite making
After making the mold, the next step was to mix the epoxy resin constituents and cut the jute and paper in the right size. The process followed was exactly the same as the one mentioned up in this page for making the coupon so I am not repeating it here. The resin was also the same.
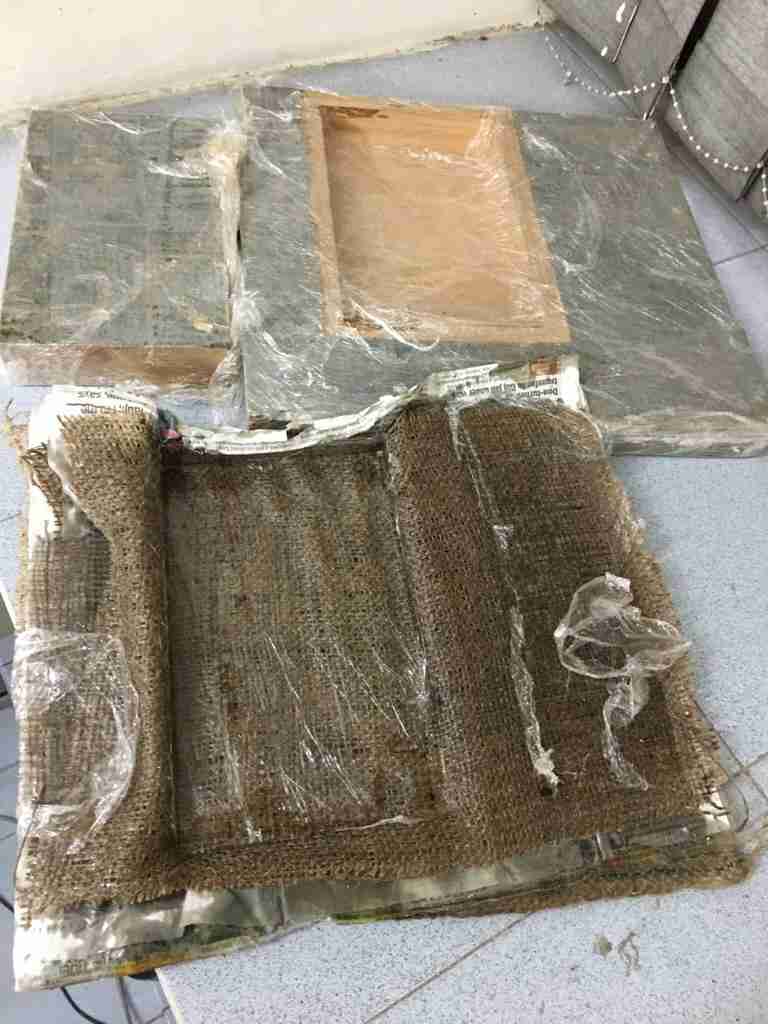
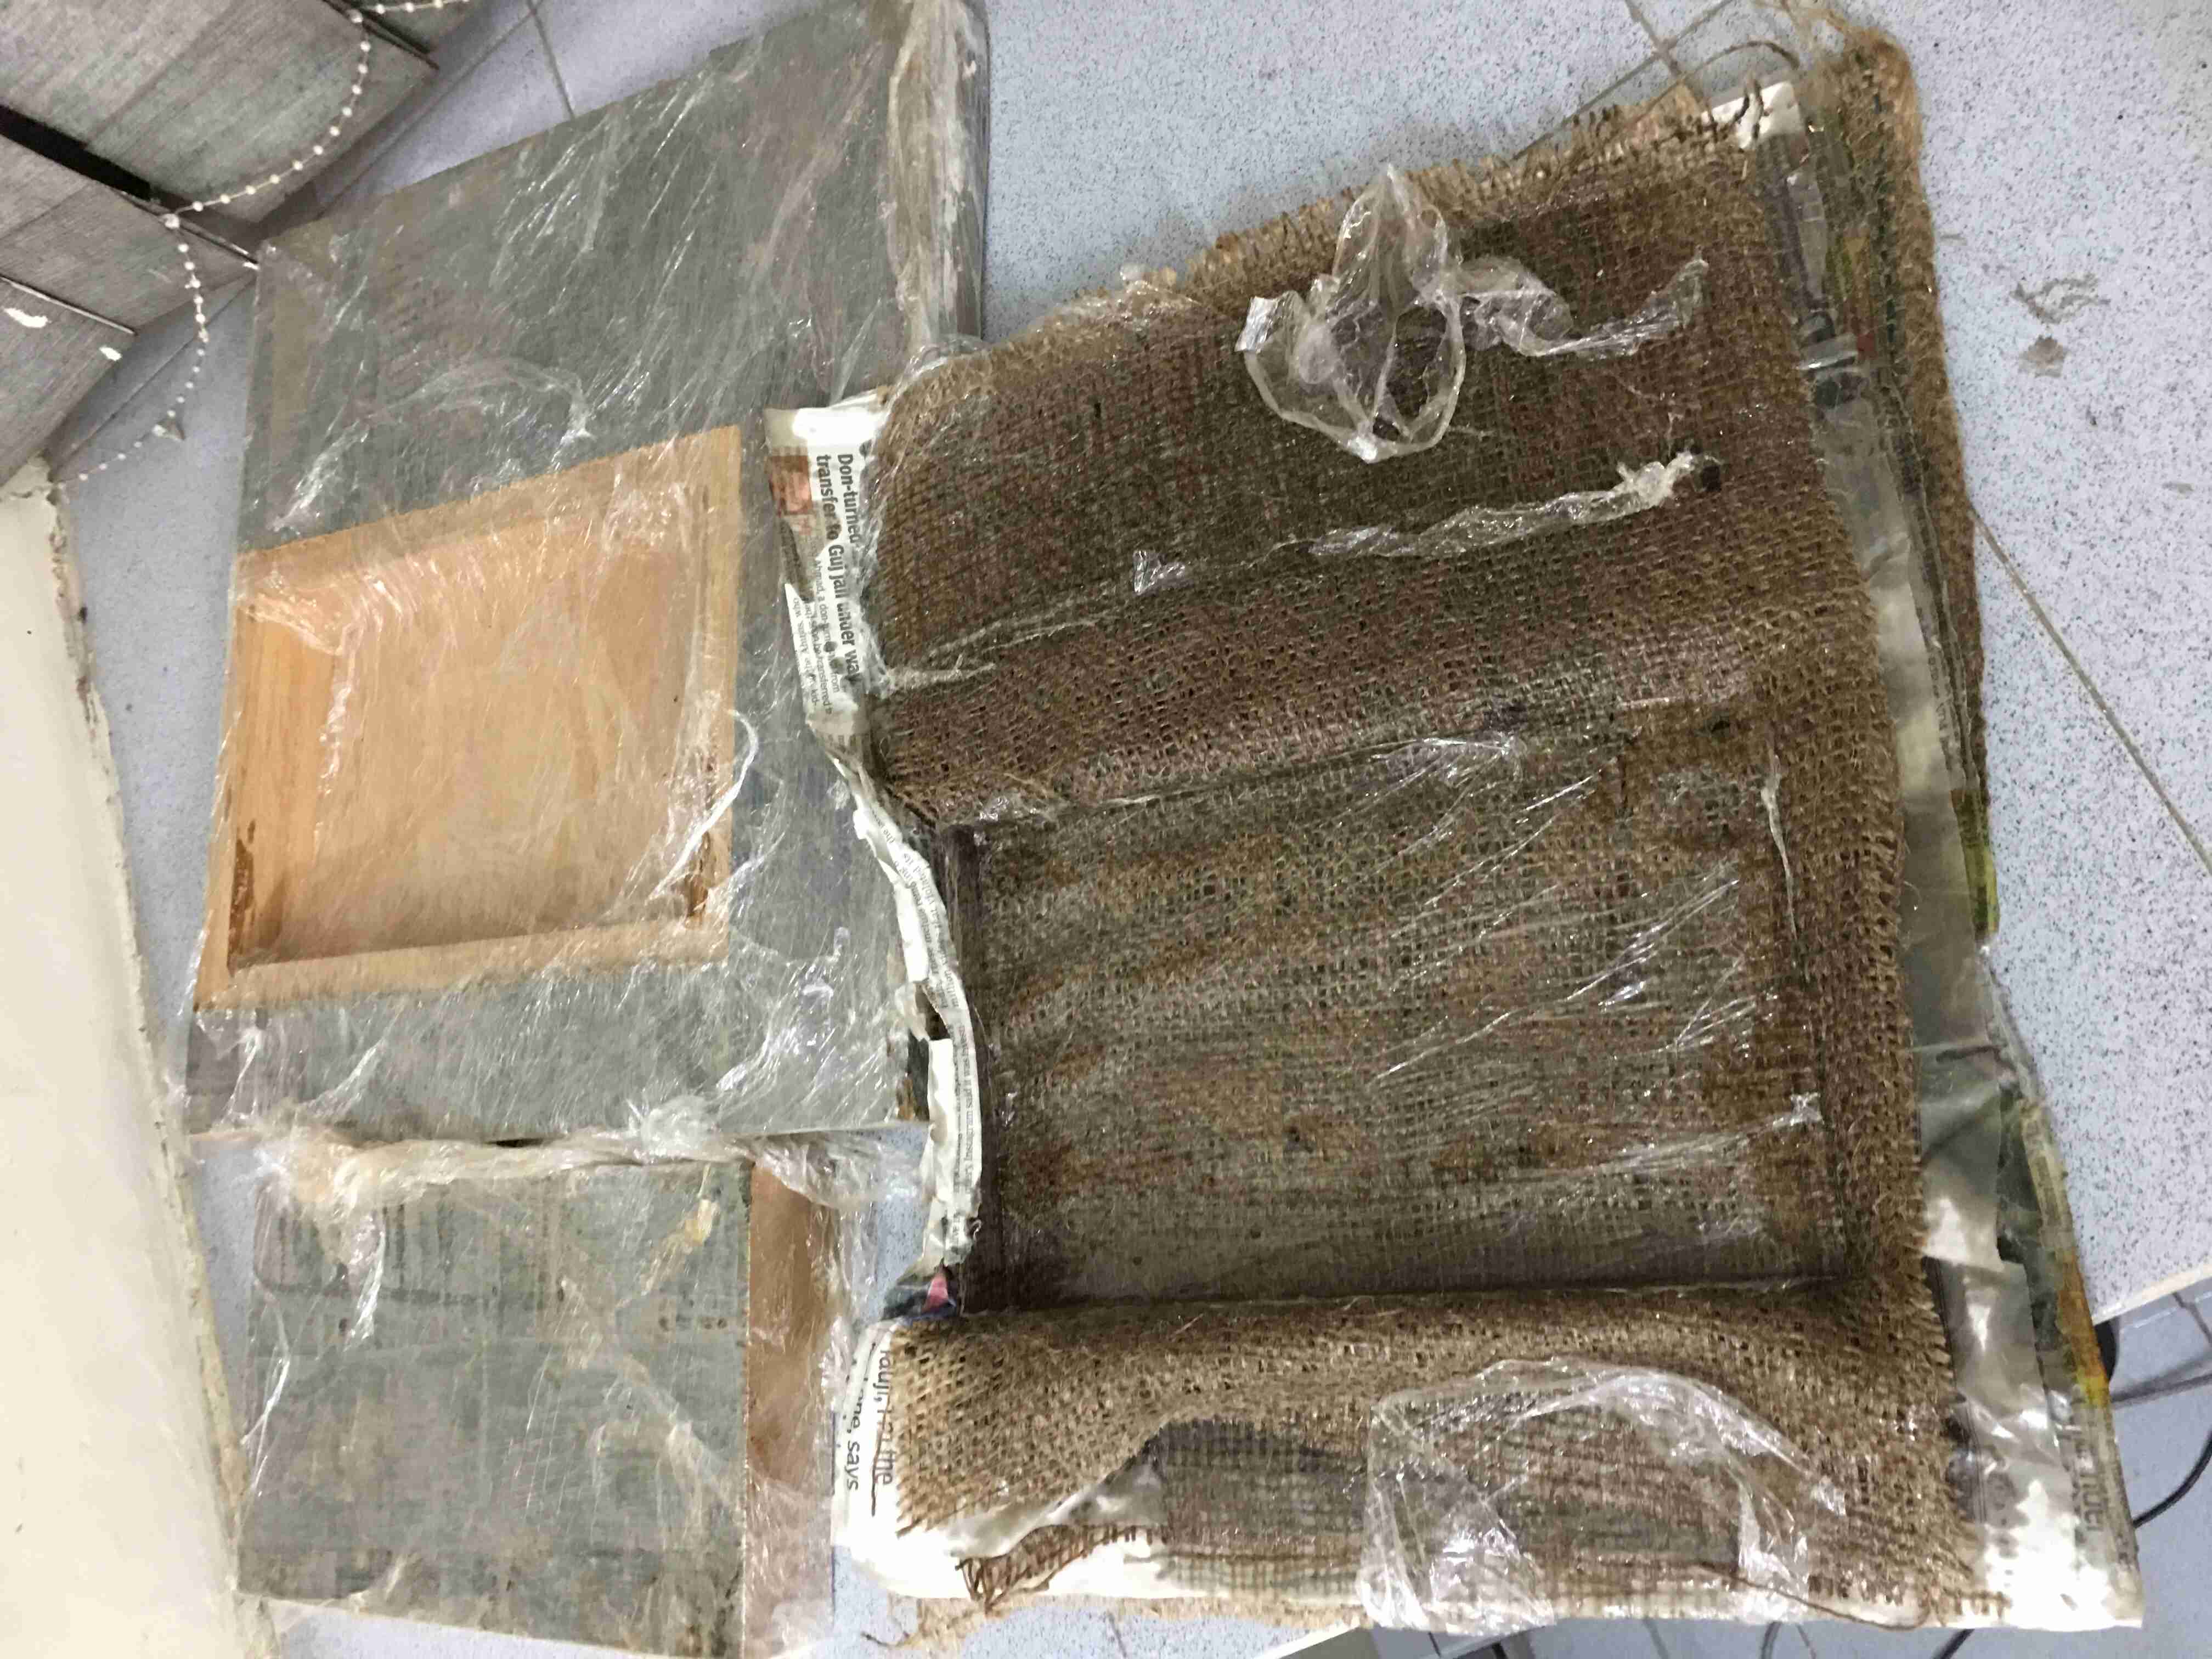
Firstly, food cling wrap was wrapped around the top and the bottom parts of the mold. This shows the jute being laid on the bottom part of the mold.
I took about 300 gm of epoxy resin mixture which seemed to be a little too much for laying 4 layers of jute. I used a brush to spread the epoxy in between the jute.
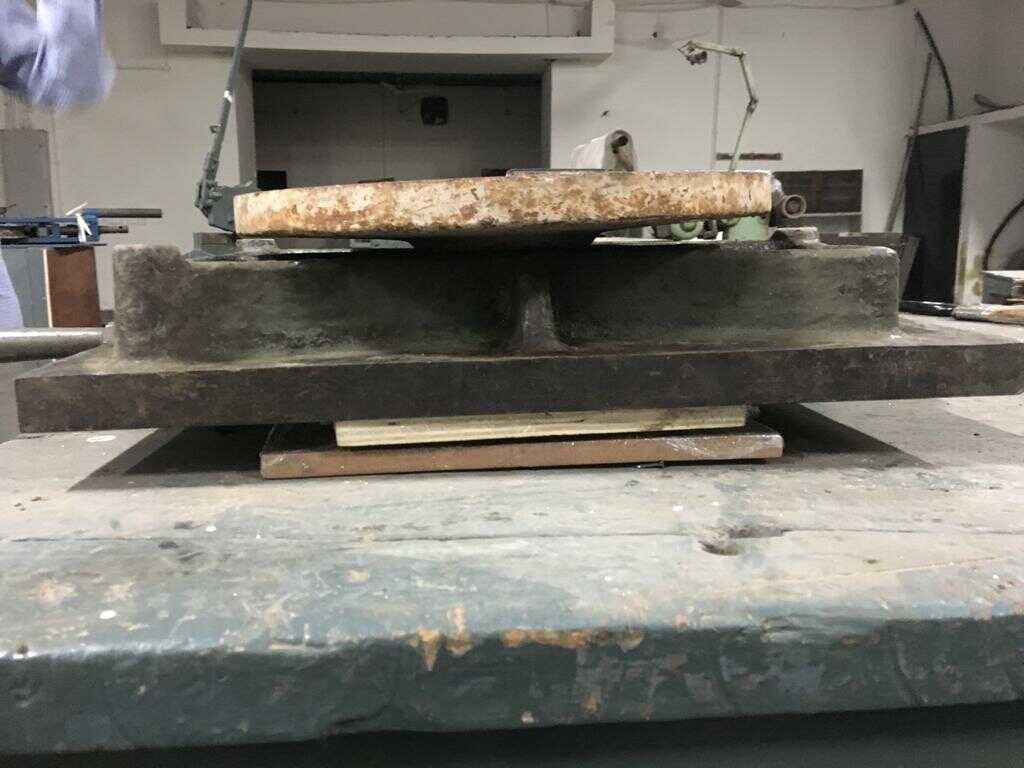
The epoxy resin-jute has been sandwiched between the molds and we are ready now to compress it with some heavy weights.
I put some heavy weight lying in our workshop and clamped the sides.
This shows the clamp on the other side.
This is what I got after 24 hours of curing time.
The part that was compressed with by the heavy weight was very strong but the parts on the sides which were just clamped were not as strong. The lesson is to have made a negative of the mold and put heavy weight on the entire piece uniformly.
Hero shot
This shows how the composite sun shade would extend from the solar panel to prevent heat from getting to the rider as well be light weight.
Coupon of cotton canvas
I also attempted to make a coupon for cotton canvas. It also got engraved as the wood piece had engraving on it. This composite piece was strong but stretchy. My hands were dirty so I couldn’t take photos of the process.
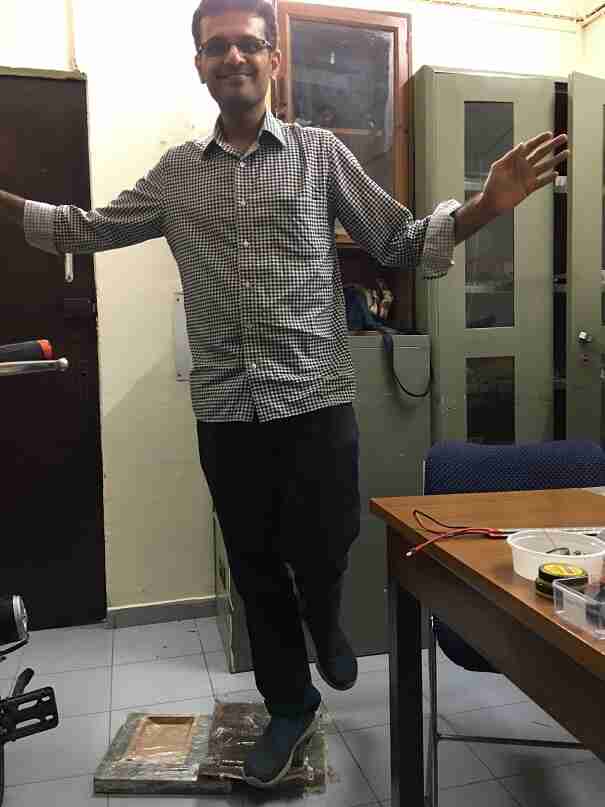
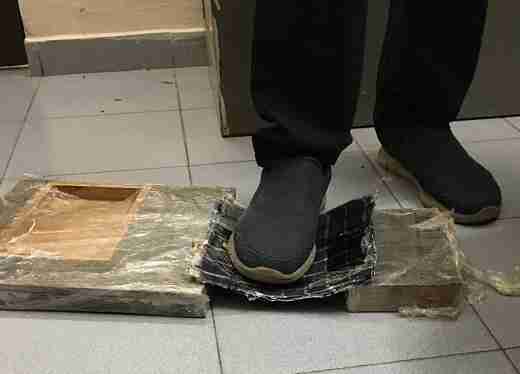
Weight tests
Jute based composite coupon
The jute based composite coupon was very strong. It didn’t bend even a little when I put my entire weight on it.
Jute based composite sun shade
The sun shade was strong in the middle but not on the sides where it wasn’t compressed as much.
Cotton based composite coupon
The cotton canvas was strong but bendy.
Design Files
The design files can be downloaded from here.

Solar powered electric bike con kit by Jay Dhariwal is licensed under a Creative Commons Attribution 4.0 International License