9. Embedded Programming (Mar 20)
This week we were suggested to compare the performance and development workflows for different architectures for the group assignment. For the individual assignment, we had to read the microcontroller datasheet and program the board to do something with as many programming languages and programming environments as possible.
Microcontroller datasheet
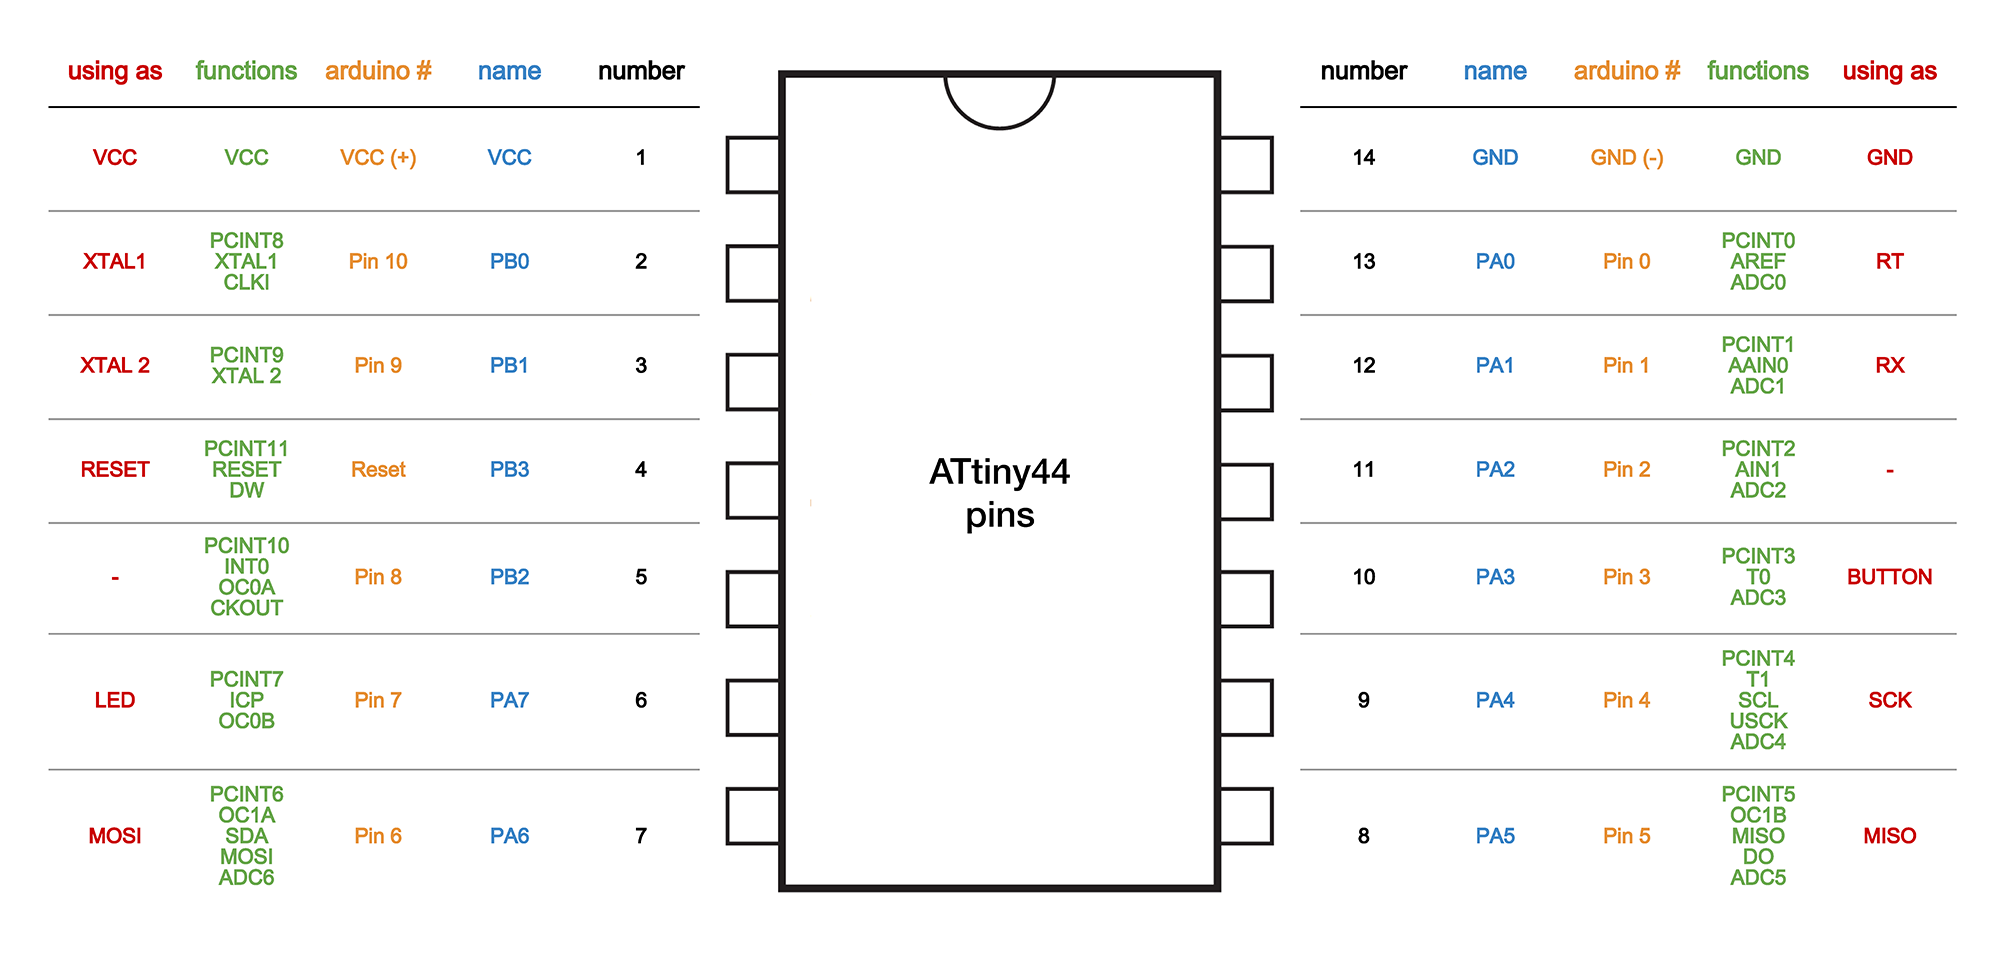
I had modified the echo hello world board this week which has the ATtiny44A uC on it. All the uC looks tiny but there are a whole host of things going on in it. Its summary and complete datasheets can be downloaded from here.
Ines Ariza relates the ATtiny44a pins to arduino pins which many of us are familiar. This uC has pins for power, ground, Rx and Tx, SPI communication and digital pins. Many pins can do multiple things such as physical pin 7 can be used for SDA of I2C, MOSI of SPI and also as a digital pin. ATtiny44a can also be programmed using the SPI communication with Arduino IDE.
Other important points from datasheet
- It has advanced RISC architecture.
- The operating voltage is 1.8-5.5 V.
- The Temperature Range is -40 C to 85 C which shows that this chip is pretty robust.
- The program memory is 4 kB.
- The number of pins are 14.
- It has 1 SPI and 1 I2C for digital communication.
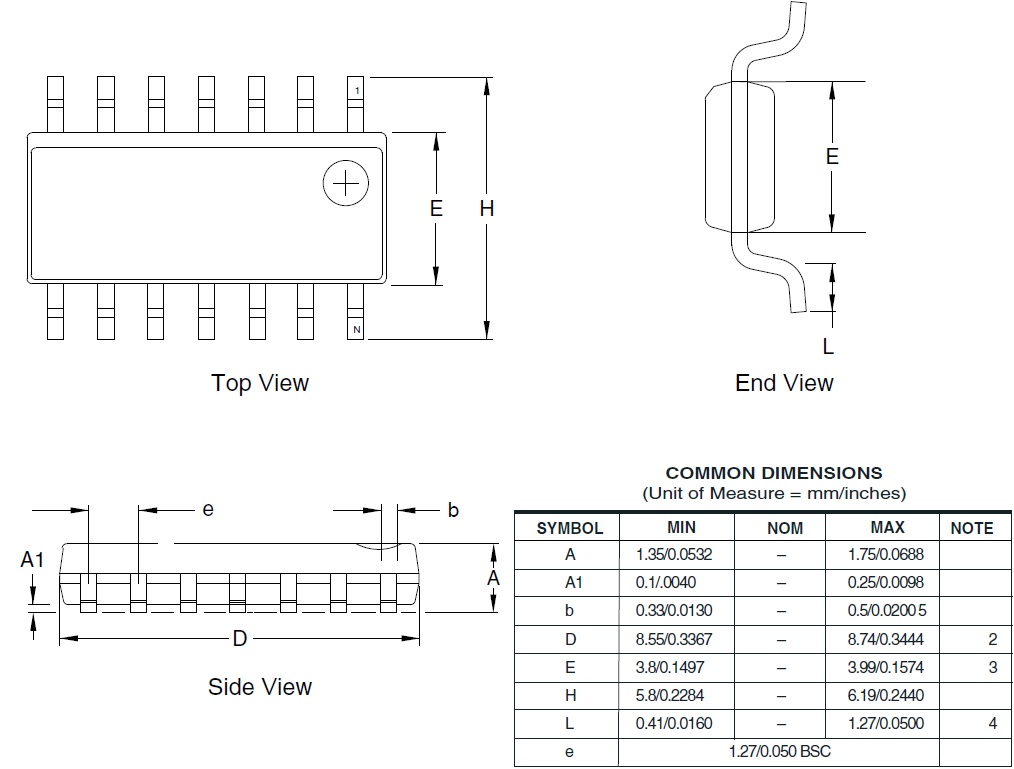
- The datasheet also provides the CAD of this chip which is useful for laying components when designing PCBs or to verify the distance between traces when the PCB is milled.
Programming languages
There are different ways of programming the echo hello world board that I added two push buttons and 1 LED to in the electronics design week.
The easiest way is using C with Arduino libraries which many of us are familiar of how to use. The drawback with Arduino is that it takes up a lot of space in the MC as it loads a lot of libraries in the uC.
The next way is using C with avr-gcc libraries. This only loads the essential libraries in the uC and so takes much lesser space in the uC.
Assembly language programming takes the least amount of space but is not as easy as other two options.
I am planning to use C with Arduino libraries and C with avr-gcc libraries.
Hardware programmers
I am planning to use Arduino as an ISP and FabISP/USBtiny.
Arduino as ISP
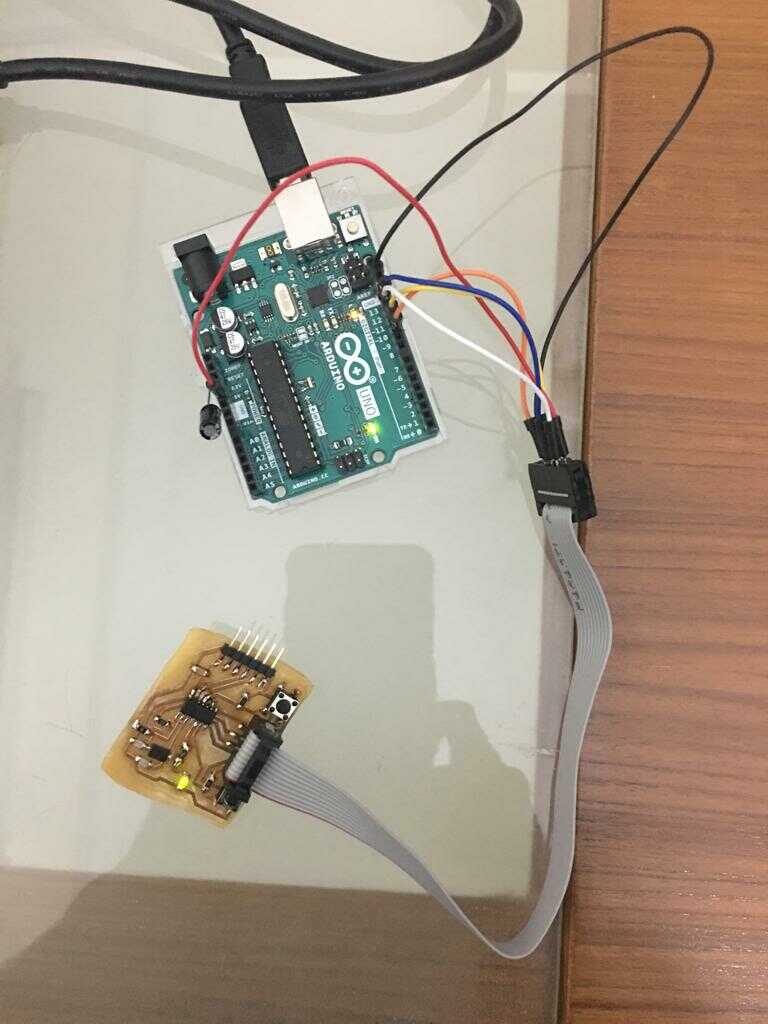
I programmed the echo hello world board having the ATTINY44A microcontroller using Arduino as ISP. I used this tutorial to program.
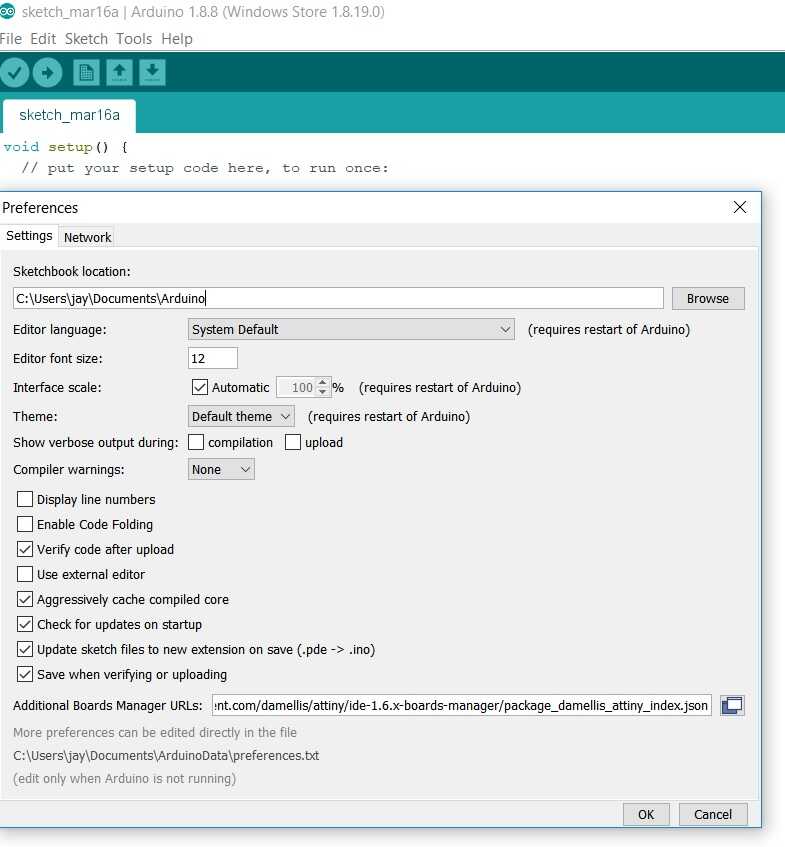
Adding support for ATTINY
First, we need to open Arduino IDE. Next, we go to File > Preferences. At the bottom of the page, where we see “Additional Boards Manager URLs”, we need to paste “https://raw.githubusercontent.com/damellis/attiny/ide-1.6.x-boards-manager/package_damellis_attiny_index.json”. Click Ok.
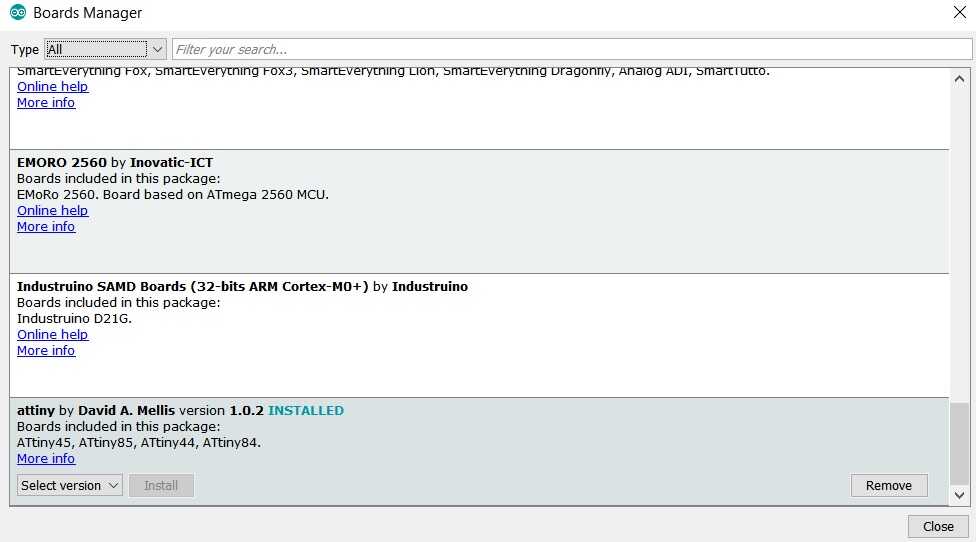
We now need to navigate to Tools > Board > Board Manager. Please scroll to the bottom to find attiny. Please install it.
We should be able to find attiny listed under Tools > Board.
Setting Arduino as an ISP
Please navigate to File > Examples > Arduino ISP code and upload it on the Arduino Uno. The settings for the pins would be different if you have Arduino Mega 2560.

Next, we need to connect a 10 uF between ground and reset pins on Arduino Uno. This will act as a filter and stop Arduino from resetting when programming attiny.
Connection scheme between echo hello world board and Arduino ISP programmer
We now need to connect the header pins from echo hello world board to Arduino using SPI communication protocol as per the following connection scheme from Arduino to the board:
Arduino Pin 13 —> SCK (corresponds to physical pin 9 of ATtiny44)
Arduino Pin 12 —> MISO (corresponds to physical pin 8 of ATtiny44)
Arduino Pin 11 —> MOSI (corresponds to physical pin 7 of ATtiny44)
Arduino Pin 10 —> RESET (corresponds to physical pin 4 of ATtiny44)
Arduino 5V —> VCC (corresponds to physical pin 1 of ATtiny44)
Arduino Ground —> GND (corresponds to physical pin 14 of ATtiny44)
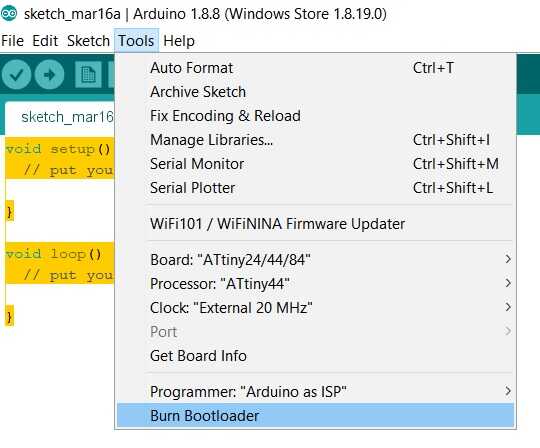
Bootloader
Bootloader is basically like an operating system for the uCs. The bootloader is the first thing processed by uC when it is powered on and it then instructs the uC from where to execute instructions. The bootloader provides access to hardware features such as I2C, SPI, etc.
We need to burn bootloader in the uC now as per the image. Please also select the other options such as external clock of 20 MHz.
Upload code
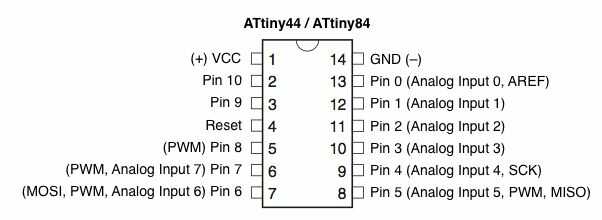
Before programming Arduino pins, we need to know the Arduino digital pins corresponding to ATTINY44 physical pins.
I have two push buttons and one LED. I have written the Arduino code to have LED blinking every 50 ms by default. If push button on physical pin 6 of ATTINY44A is kept pressed, the LED blinks every 500 ms and if the push button on physical pin 11 of ATTINY44A is kept pressed then the LED blinks every 5 seconds. The Arduino code can be downloaded here. The code is uploaded in the usual manner and the video of its operation can be seen below.
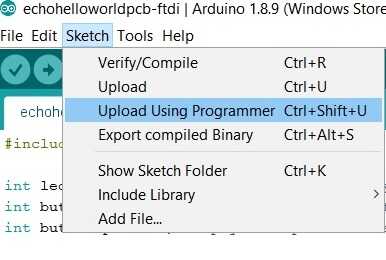
USBasp as ISP with Arduino IDE
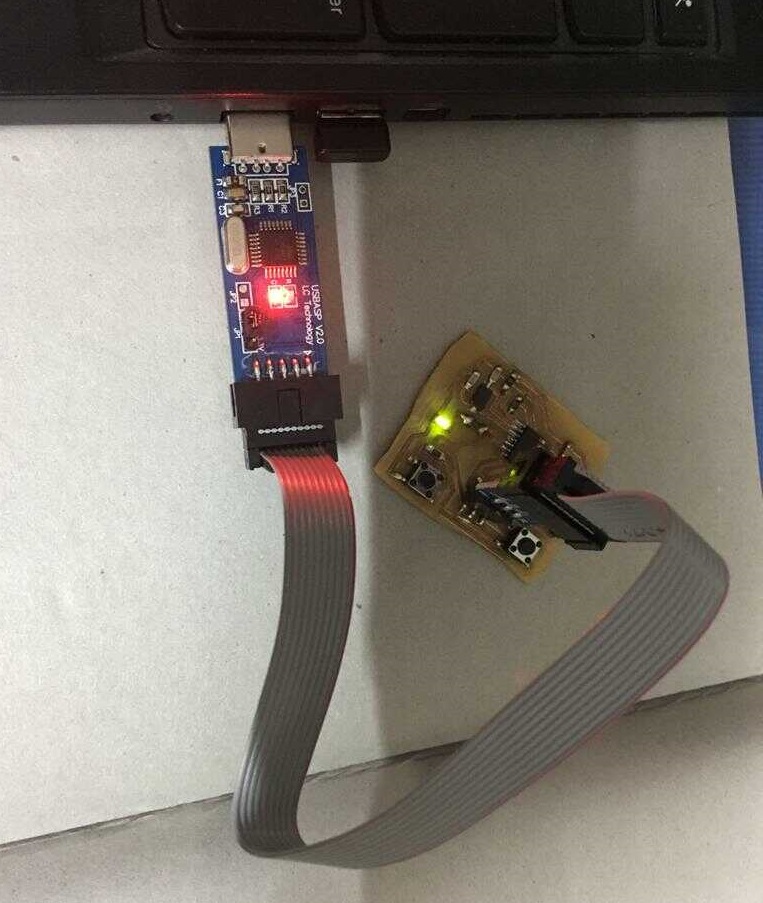
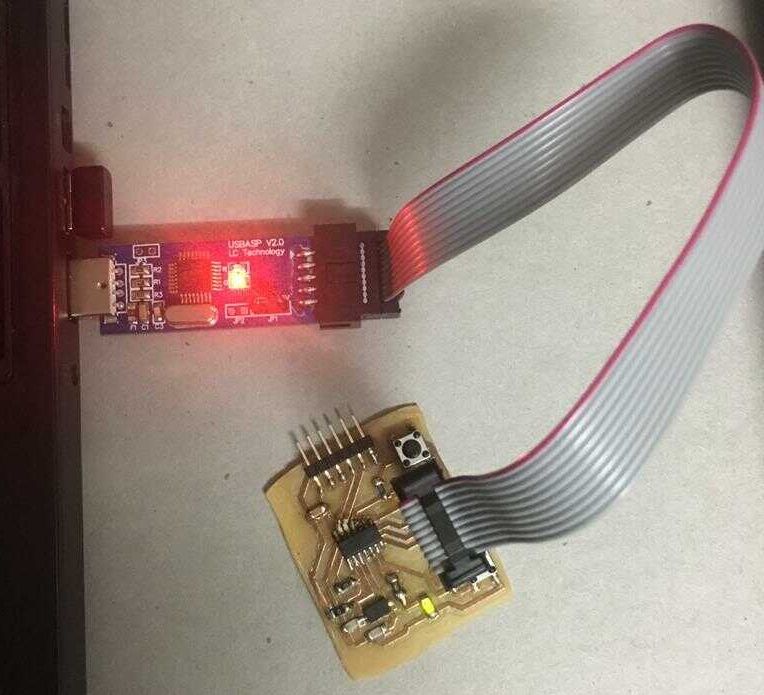
I also had a USPasp lying around which I thought of using as an ISP.
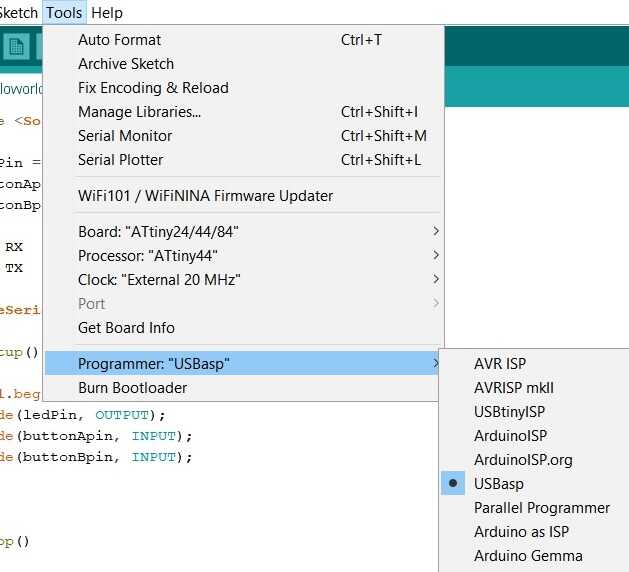
The program with USBasp has to be uploaded with the upload using programmer option.
This shows the connections between the USBasp and the echo board.
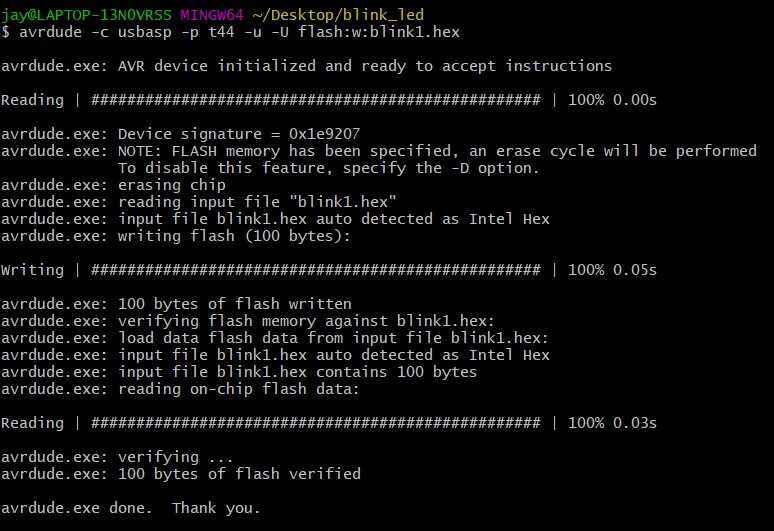
USBasp as ISP with avr-gcc
I first blinked an LED using avr-gcc. I used the c code from our remote instructor’s webpage. I downloaded the makefile from this webpage and modified it for my programmer which was usbasp and the target file name. The command used was
make -f blink1.c.make

I used advice from this link to convert .elf file to .hex file.
The command used was
avr-objcopy -j .text -j .data -O ihex blink1.elf blink1.hex
To write the program into the uC, I used advice from here
The command used was
avrdude -c usbasp -p t44 -u -U flash:w:blink1.hex
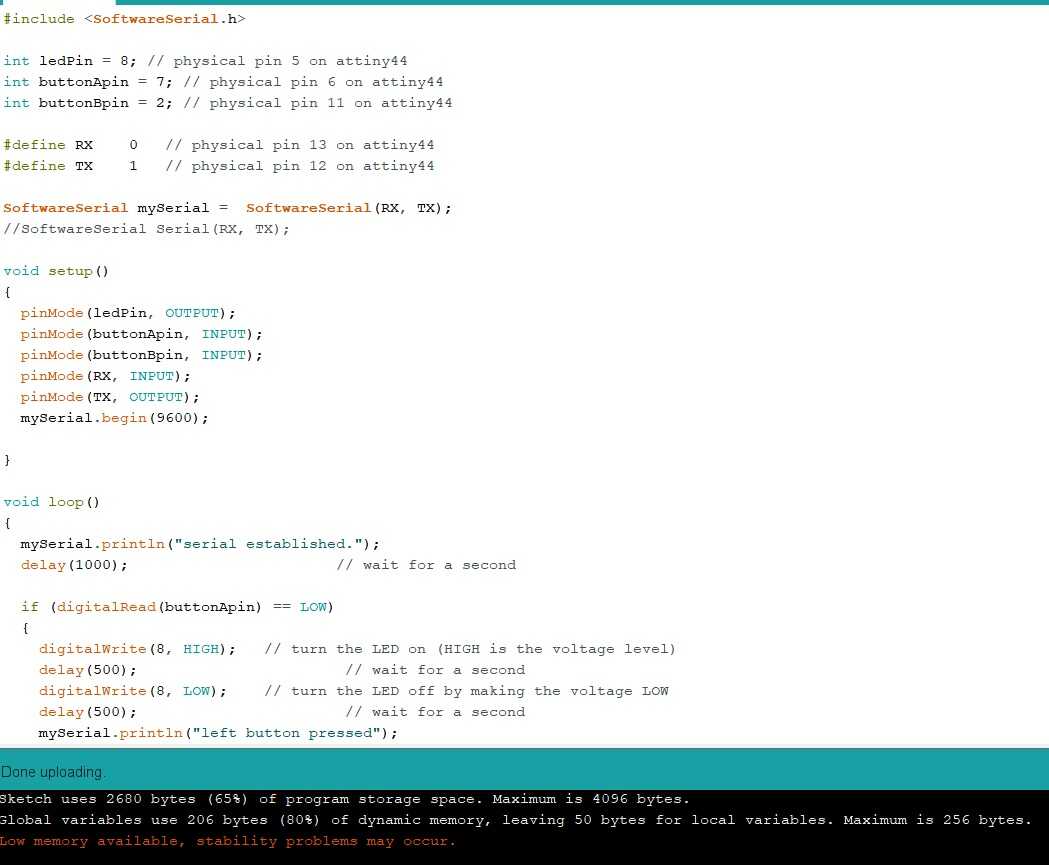
Serial communication with FTDI module
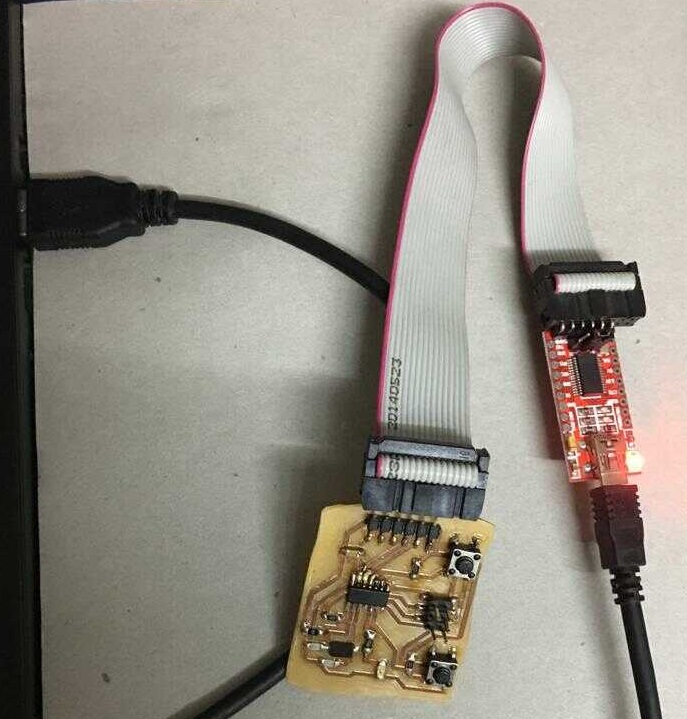
I also wanted to setup serial communication with FT232Rl FTDI USB to TTL Serial Converter Adapter Module for Arduino. I saw a tutorial to get a sense of how to do it. I modified my Arduino code by adding the serial communication aspects to it and uploaded this code to echo hello world board with header pins as I had done this before.
After uploading the code, the connections were made between the ftdi board and echo board pcb.
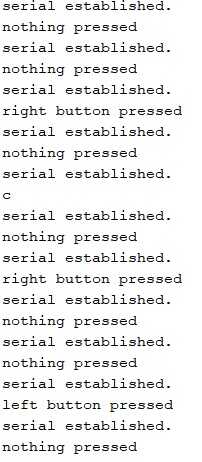
For serial communication through the Serial Monitor in Arduino, I changed the settings as follows and opened the Serial Monitor on Arduino.
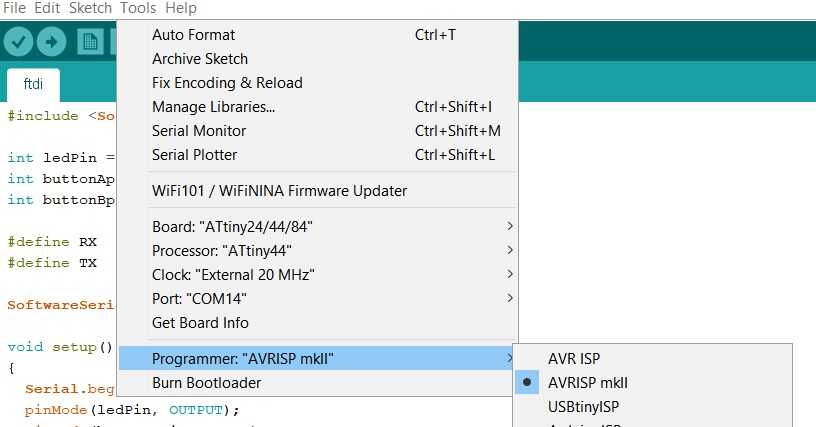
Serial communication happened successfully.
Questions and future directions
I was very happy to have programmed a pcb made by me in different programming environments. I would like to get better with embedded C instead of using Arduino environment. I would also like to use flexible PCBs to program the boards.
Different architectures
This week’s group assignment was to compare different architectures of microcontrollers. All uCs use one of the two basic design models - Harvard or Von Neumann architectures.
Harvard Architecture vs Von Neumann Architecture
Von Neumann architecture has only a single bus which has to be used for data transfers and fetching the instructions. Therefore, the data transfers and instruction fetches can’t happen at the same time and must be scheduled
The Harvard architecture on the other hand has physically separate systems for data and instructions.
This cartoon from this article explains the difference between Harvard and Von Neumann architecture in a funny way.

These differences result in the Harvard architecture to require more hardware but the speed of execution is faster than Von Neumann architecture.
This infographic from this article explains the main difference with a block diagram.

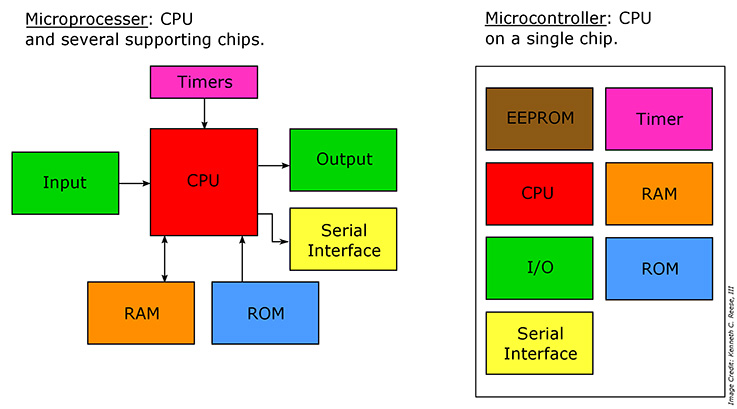
Microprocessor vs Microcontroller
These terms are used quite often but it is important to understand the differences. The schematic from this article explains it well. A microcontroller (uC) can be looked at as a single chip computer with all the components embedded in it but microprocessor (uP) has surrounding chips which support functions such as memory, I/O, interfaces, etc.
uC is thus less expensive, simple to set up and operate but this also means that it doesn’t have an operating system and is single threaded. The tasks that uC can do are predefined such as its applications to run a digital camera, washing machine or a microwave oven. It uses I2C, SPI or serial for communication.
We all have heard of uPs such i7, Pentium chips, etc. They may be similar in size physically to uCs but can achieve a lot more. They run operating systems such as Windows, Linux, etc. The tasks don’t have to be predefined for them. They can be used for gaming, web browsing, word documents, photo editing, etc. in a multi threaded environment.
But these days with advances in technologies, the differences between uC and uP are getting blurred with SoC i.e. System on Chip devices. Raspberry Pi is a common example which has all the components on a single chip to power up a computer.
Designs and Codes
Download for the arduino code with echo hello world board to blink leds using push buttons.
Download for the arduino code with serial communication with ftdi cable.
Download for the makefile using avr-gcc environment with USBasp as programmer.

Solar powered electric bike con kit by Jay Dhariwal is licensed under a Creative Commons Attribution 4.0 International License