This Week's Assignment
Long story short, start nailing down a final project.
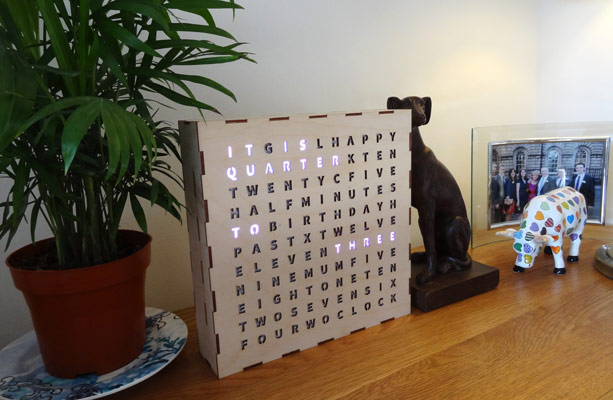
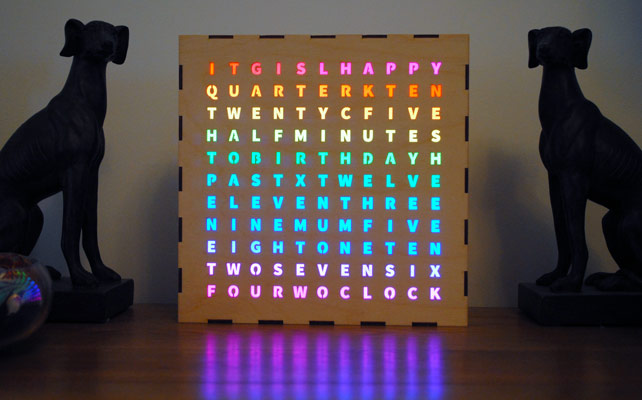
My original plan was to make an LED Catan table, and to work on WordClock2.0 as part of my weekly classes. Time constraints are forcing me to put the Catan table on the back burners, and make WordClock2.0 my final project. I'll just have to make it extra awesome so that I don't feel to guilty doing a project I've already done a prototype iteration on.
The questions I'm answering below are ripped almost straight from the assignment in the class archive.
What Does It Do?
Quite simply, it tells the time in words.
Digging a little deeper, some of the "extra" features I want are:
-
WiFi connectivity for Network Time Protocol (NTP)
-
Brightness limitations based on temperature (to reduce heat build up inside the clock)
-
A networked user interface (probably an Android app), allowing the user to control time zone, network selection and the brightness and colour of the LEDs.
Who's Done What Before?
Word clocks are pretty much a dime a dozen in the maker community. Here's a non-exhaustive list of the clocks that inspired me to make one.
-
The QLOCKTWO seems to be the original (I think). It's coolness combined with it's exorbitant price inspired people to try making their own.
-
Doug Jackson of dougswordclocks.com has a number of Instructables that follow his iterations on making a word clock: A Word Clock, The Word Clock - Arduino version and The Wordclock Grew Up!. He now makes and sells them for a living.
-
Alessio wrote a pretty cool genetic algorithm that generates word layouts for word clocks. Unfortunately I found his post after I had already layed my one out!
-
Joakim made one using an Arduino Yun to get network connectivity and used some LPD8806 Controllable RGB LEDs to make the LED matrix.
-
buckeyguy89 made a beautiful word clock in wood. The electronics inside, however, leave a lot to be desired! This is the clock I drew the most creative inspiration from. I just think the wood look is really sleek compared too all the black vinyl versions and the "chaos" word clock (it has random letters filling spaces between words) is more intriguing.
-
Trax at elektronicka.ba made one of the most polished word clocks I've seen.
-
ClockTHREE have kits and assembled versions available to buy.
-
Daniel Rojas made a super cool watch-sized version.
-
Bernd Krolla built a really great word clock framework based around the Raspberry Pi. The video on YouTube is definitely worth a watch. It has lots of bells and whistles.
-
There's also this one, this one, this one, this one, this one, this one, this one, and this one.
-
I've made one! There are some details in my Final Project Proposals.


When you boil them all down, it largely becomes a choice of
- vinyl cut face vs laser cut face
- LED matrix using multiplexing vs addressable LEDs
- what are the extras you want
Materials: What, Where and How Much?
I'm actually going to make two of these: one for me, and a replacement one for my mum. Each clock will need (roughly):
- 2x sheet of 3mm plywood, 300mm x 600mm (≈ £3 a sheet, Fab Lab stock)
- 121 WS2812b LEDs on strips of 60 LEDs/m. (≈ £6 per metre, ≈ 2m per clock, AliExpress).
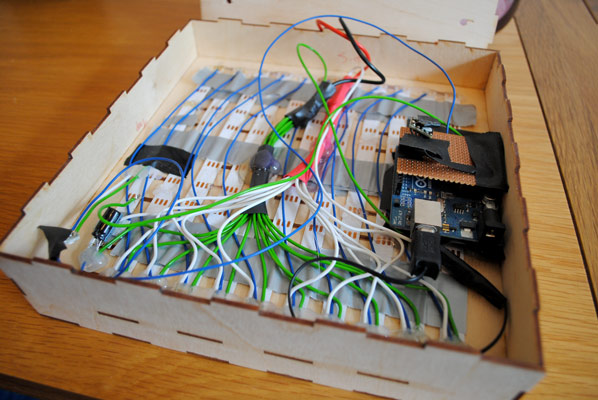
- Control electronics (exact hardware still not 100% defined, almost certainly < £10 all in, some Fab Lab stock, some from my personal stock)
- 5V switch mode power supply, minimum 2A but preferably more (≈ £5 - £15 depending on power, probably from Farnell/CPC/RS)
- A thin diffusing layer. Paper is OK, but I've already scavenged the diffusion layers from the insides of a broken LED backlit LCD screen (free!)
Total cost per clock will probably be in the region of £35 with another £10 for a suitable power supply.
What Processes Will Be Used?
-
I've already made a 3D model.
-
The body and internals of the clock will be cut from 3mm plywood on the laser cutter. I've already cut a test version out of cardboard.
-
I've experimented with writing a network interfacing Android app.
-
I've already experimented with pretty much all of the electronics I'll need in various weekly assignments.
- I've used the WS2812b LEDs with an ATtiny85 and also with a PSoC 4.
- I've used an I2C based TMP275 temperature sensor.
- I've experimented with the ESP8266 for adding WiFi to projects.
What Questions Need To Be Answered?
I still haven't decided exactly what microcontroller to use. It's a toss up between:
-
Using a PSoC4 for most parts with an ESP8266 just for the networking
-
Using an ESP8266 for most parts, with just an ATtiny85 for driving the LEDs
Option 1 is a bit more expensive (in terms of BOM cost) but has the benefit of being more flexible for any future modifications to the design. It also comes with full debug capabilities for the PSoC 4, which is where most of the "complicated" code will be running.
Option 2 is a bit cheaper, but the workflow for developing directly on the ESP8266 still isn't as slick as I would like and has no debug capabilities. The components it uses are also a little bit more accessible to the average maker as I could conceivably do all of the coding in the Arduino IDE.
Right now I favour option 1, but nothing is set in stone.
What Tasks Need To Be Completed?
A lot! I still need to finalise my hardware and then start tying all the software together. In terms of "design", it's all pretty much there in my head. It's just the execution bit that needs work...
What Is The Schedule?
Well I would quite like to be done in time for the first presentations on the 10th of June so that's my working prototype target. Bells and whistles in software can be done later if necessary.
How Will It Be Evaluated?
By the hardest critic of all: me.
My basic "must haves" are:
- It tells the time
- Time is maintained by using NTP
- The user can choose the colour and brightness of the LEDs
The "nice to haves" are:
- The network settings can be configured without physically connecting the clock to a PC
- The fall back is that the network settings are hard coded/sent over UART
- The app to control the clock
- The fall back is that the user can configure the clock brightness/colour/time zone etc by sending formatted HTTP URLs
- Network settings are restored on power loss
- Time is maintained on loss of network using an RTC (probably a DS3232 or DS1307)
Comments
comments powered by Disqus