This Week's Assignment
The assignment for this week was to write an application that interfaces to an input and/or output device. I was originally going to take the opportunity to try writing a small Android app that interfaces to my WiFi Character LCD from last week. Unfortunately, got about 70% of the way there and then broke the LCD screen...
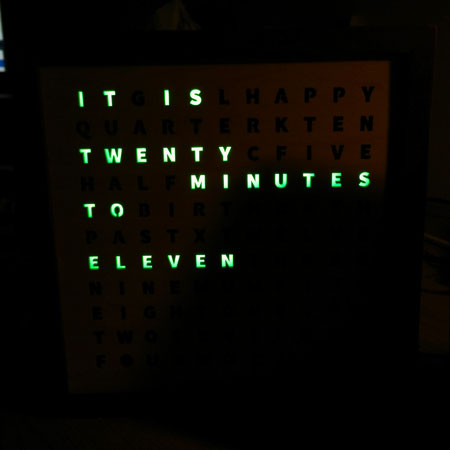
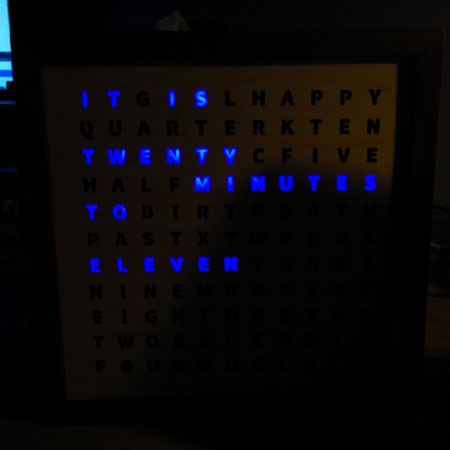
By the time I got round to finishing this assignment off, I was well under way with my final project: WordClock2.0. So, I went back to the beginning and wrote a small Android app to set the colour of the LEDs on the clock over WiFi.
Warning in advance, this is a very scrappy piece of programming. It works (most of the time) but there are a lot of improvements to be made!
Here's the final result.
Developing For Android
Android development is completely new to me. I did Java back in first year of uni (almost a decade ago now!), and I honestly can't remember any of it! I'm very much a C programmer these days.
I downloaded and installed Android Studio and used this excellent Android development for beginners tutorial by Darryl Bayliss.
Once I had my very own version of "Bookmaster General", I set about making my own app for the word clock.
Functionality
I decided early on to keep the functionality to a minimum to keep life simple. What I wanted was to be able to:
- Connect to the clock
- Toggle the green LED on the control PCB
- Set the colour of the RGB LEDs in the clock
Even getting this much functionality took me way longer than it should have!
App Layout
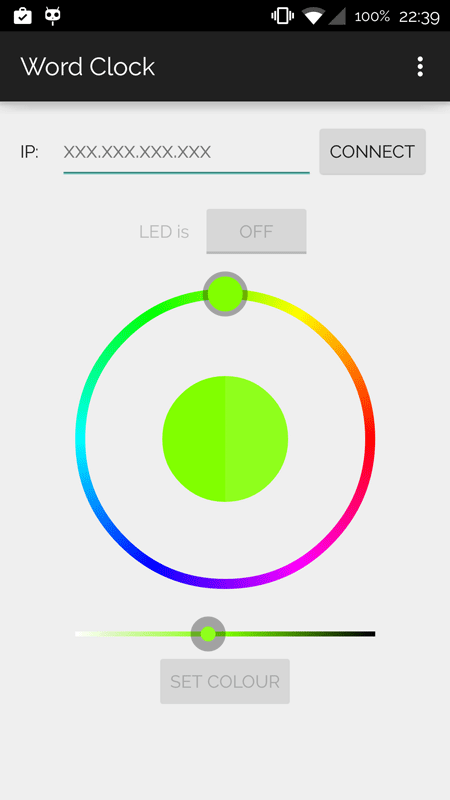
Android app layouts are defined in an XML file. I found getting the layout I wanted was easy to get started, but very hard to master! I was expecting this though - just think how many different android devices are out there, and image trying to make a layout so flexible it looks good on them all! Again, to keep things simple, I just aimed to put together something usable on my OnePlus One, and only in portrait mode. Here's my basic layout when you first open the app.
As an example of the XML layout, the code below defines the very top line of widgets in my app: the "IP" label, the text entry box, and the "CONNECT" button.
<LinearLayout
    android:layout_width="match_parent"
    android:layout_height="wrap_content"
    android:orientation="horizontal">

    <TextView
        android:layout_width="wrap_content"
        android:layout_height="wrap_content"
        android:text="@string/ip_address_label"
        android:paddingRight="16dp"/>

    <EditText
        android:layout_width="0dp"
        android:layout_weight="1"
        android:layout_height="wrap_content"
        android:id="@+id/edit_ip_address"
        android:hint="@string/ip_address_hint" />
    <Button
        android:layout_width="wrap_content"
        android:layout_height="wrap_content"
        android:id="@+id/connect_disconnect_button"
        android:onClick="connectDisconnect"
        android:text="Connect"/>
</LinearLayout>
The android:id tag is used so that you can find your UI widgets and interact with them in your code. Something I found particularly interesting was the use of the @string/ style of coding. Basically, instead of writing your strings in your code as you use them, the Android convention is to give all your strings and ID and then save them all in another XML file, strings.xml. The idea is that it becomes easy to nip in and change the text in your app. It's particularly powerful when it comes to translating your app into other languages, as all the strings that need changed are in one place! As you can see from the code snippet above, I was lazy some of the time and just used strings directly in the code.
Also, I should mention at this point that I didn't make that colour picking widget myself! I used the HoloColorPicker library by LarsWerkman.
Implementing Functionality
I basically used the "Bookmaster General" example from the tutorial I did as a framework for my app. One major problem I had was with syncing between different threads.
Basically, whenever you do something that is going to take some time, you spin off a new thread so that your UI thread stays responsive. I used an Async TextHttpResponseHandler to do my network interactions. That was fine, except that I was doing the task calling from a WordClock class I made instead of in my MainActivity. This lead to all kinds of problems with trying to pass around Contexts so that I could make a simple progress bar when the clock was connecting!
In the end I ran out of time and gave up. The result is that the first time you hit the CONNECT button, it will essentially fail because the check on device.connected happens before the asynchronous task finishes. You can see how this looks in a snip of my debug output.
06-29 22:40:01.750  21882-21882/? D/WordClockConDis﹕ Connection button pressed
06-29 22:40:01.750  21882-21882/? D/WordClockConDis﹕ Attempting to connect to 192.168.1.21
06-29 22:40:01.750  21882-21882/? D/WordClockCon﹕ Attempting connection to:  http://192.168.1.21/id
06-29 22:40:01.754  21882-21882/? E/WordClockConDis﹕ I failed :(
06-29 22:40:01.891  21882-21882/? D/WordClockCon﹕ Host responded! Response: {"id": "1", "name": "wordclock", "connected": true}
See how it reports a failure, but then the host responds? Damn annoying!
One other problem I noticed was that the colours I was seeing on the LEDs didn't match what was displayed on my phone very well. I managed to get it pretty close by scaling the LED brightness to 1/4 the max value and also doing a simple gamma correction. I just used the algorithm I found here.
private int gammaCorrect(int rawColour){
    // Used to apply a rudimentary gamma correction to compensate for
    // the human eye and also limit the LED brightness to 64/255 per channel
    return (int)(64*Math.pow((double)rawColour/255,(1/.45)));
}
App Walkthrough
Here's a quick run through of using the app:
-
When the app is first opened, you get the screen shown below. You can't send anything to the clock until you enter the clock's IP address and click "CONNECT".
-
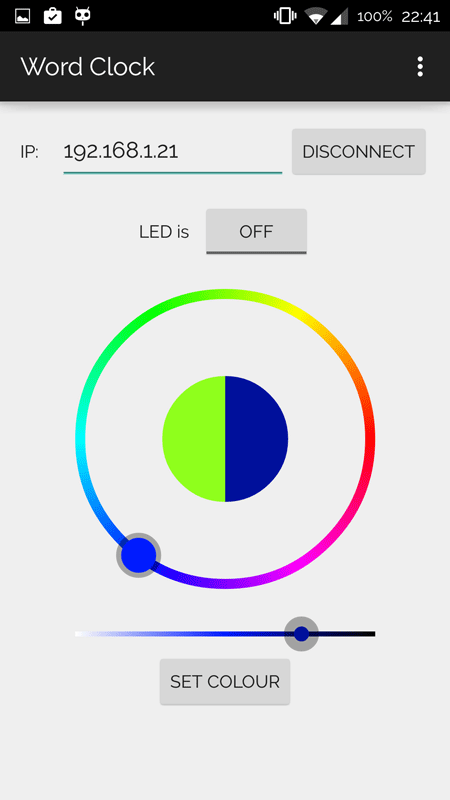
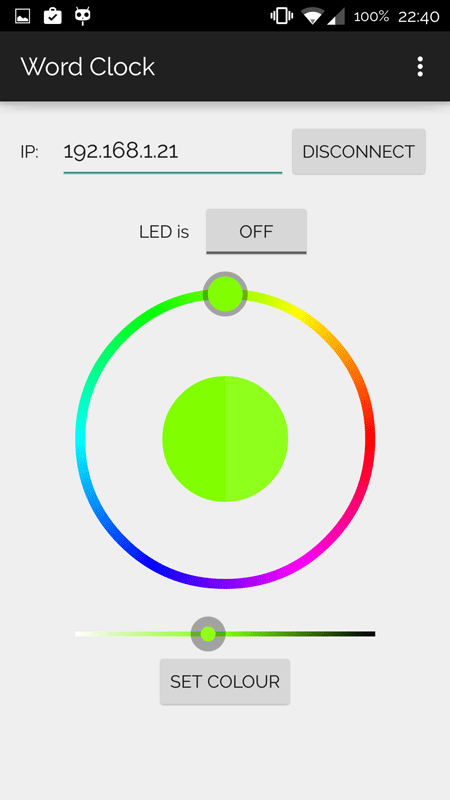
Once you connect, the widgets that send commands to the clock become active.
-
Hitting the "SET COLOUR" button will send the current colour to the clock.
)
-
As you move the slider around, it hows the old colour and the current colour. Colour is set using the hue wheel and saturation/brightness slider.
-
When you click "SET COLOUR", the new colour gets sent to the clock and the colour picker widget gets updated to reflect the change.
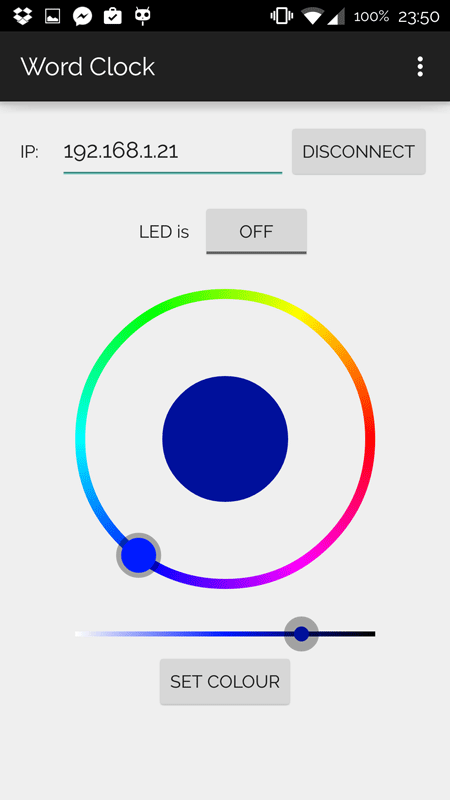
The LED toggle button at the top just turns the green LED on the control PCB on or off, and is basically just there as a sanity check while I was developing!
What Needs Work?
Ummmmm...everything.
It needs an icon. It needs to do async task thread interaction properly. It needs to adapt to different display and different display orientations. It needs to do service discovery so you just use "http://wordclock.local" instead of having to supply the IP address. It needs a whole host of other things I can't even think of right now.
Basically, it works if you don't look too close! It's fine as a proof of concept though...right?!
Get The Files
I wouldn't really recommend looking too close at this code, but if you dare...
- Here are the source files for my proof of concept word clock app
Comments
comments powered by Disqus