The assignment for this week: read a microcontroller data sheet program your board to do something, with as many different programming languages and programming environments as possible
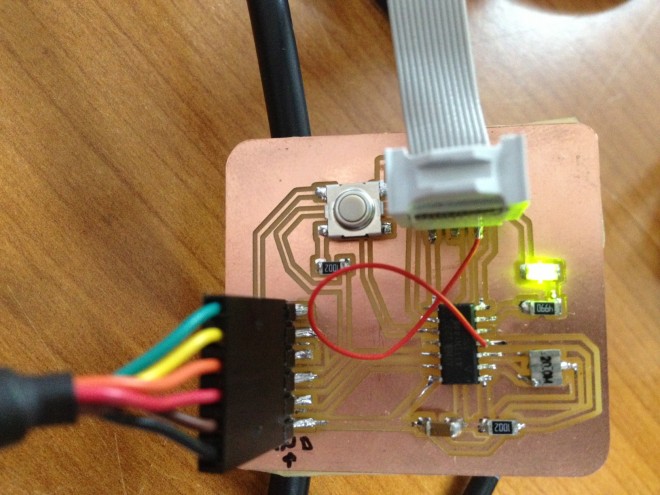
I started the assignment a bit behind as I still needed to solder my board so I’ll have a board for programming.
It looked promising as I finished solder, connected to the AVR programmer and had a green light … BUT – as I tried to disconnect the board from the cable it pulled the component with the copper line of the board… yes, a disastrous event. I had no time to mill a new board so I left with no board to program.
Never the less – I did try as much programming environment as I could.
After the coding work (details below) I used Doug’s board and my FabISP for programming.
Thank you Doug!
Arduino IDE:
I followed the Providence Lab tutorial (thanks) to set the environment right, changed the button program according to the instructions in the tutorial and that was it (for the moment).
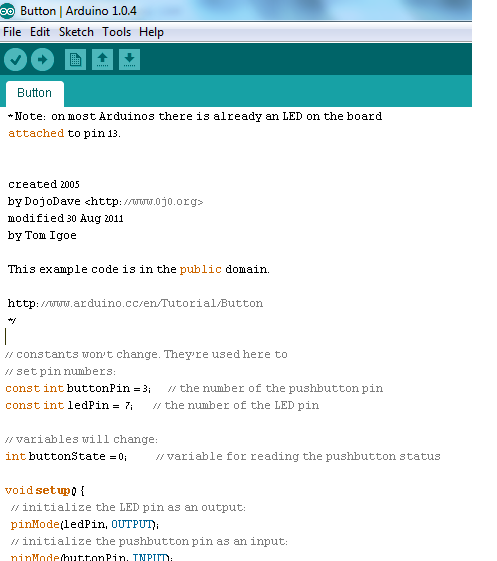
I uploaded the code to the board and the LED & Button program run successfuly

Eclipse + AVR Pluggin:
Eclipse is my favorite IDE (and the one I’m most familiar with …), so obviesly I checked it out for the board programming.
First I downlowded and installed the AVR pluggin for Eclipse


This Eclipse Plugin provides some tools and settings for developing C programs for the ATMEL AVR series of embedded processors with the Eclipse IDE. It is open source and freely available under the terms of the
Eclipse AVR Pluggin for Windows uses WinAvr.
WinAVR is a set of tools that include avr-gcc (the command line compiler), avr-libc (the compiler library that is essential for avrgcc), avr-as (the assembler), avrdude (the programming interface), avarice (JTAG ICE interface), avr-gdb (the de-bugger), programmers notepad (editor) and a few others…
Look here for Downloading, Installing and Configuring WinAVR
Very Important!!!
When installing WinAvr make sure that you install it to a path that contains no spaces (don’t install it under Program Files for instance).
After the plugin instalation Eclipse will restart, and when it come up again – open the c/c++ perspective (if it is not allready open):


Mow you can start a new avr c project:

Name your project and choose AVR Cross Target Application

Choose the right AVR Target Hardware

I imported the hello.ftdi.44.echo.c code file with its Makefile to the new project.
(I’ve changed the make file name to “Makefile” so I won’t have to explicitly write its name in the configuration)
In order for Eclipse to use your own Makefile (and not genarating one automaticaly) set Project Properties

Uncheck the Generate Makefiles Automatically box.
Make sure that you make file is in the specified Build Directory and name it Makefile.
When I first tried to build my project I got an error

So I added a line to the Makefile

Then I got a build error saying that variable message need be a constant so I added const to its declaration:

and was able to build the project (at last!!)
For the programming:
Choose the right programmer
Right click on your project –>Properties–>AVR–>AVRDude
Under Programmer tab click on New and choose from the list:


Then – connect the programmer and the board and upload the code to the board.

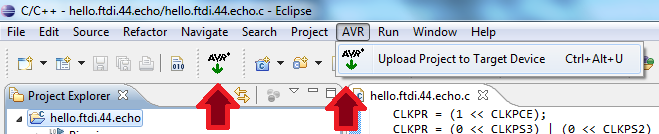
To run the program and interact with the board I used the Arduino Serial Monitor (couldn’t find – yet – a way to open a console to the board from Eclipse)

Hello Board ![]()

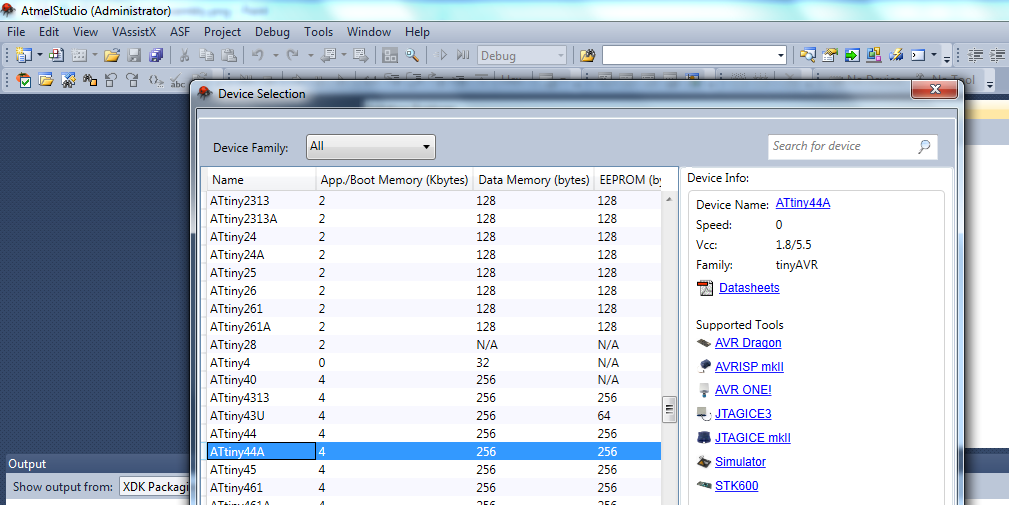
Atmel Studio:
The last IDE (for now) that I played with is Atmel Studio.
It is a great environment for coding to devices. Lot of tools, easy and streight forward configuration. I loved it.
At the I managed to use the same C code I used with eclipse and the same makefile.
I compiled the code and not yet uploaded to a board.
Next – I started an Assembly Project. I will investigate this IDE farther more.
Creating a new project with Atmel Studio:
Choose the type of project you want

Choose the right device
Start programming

And That is it…