WEEK 16
- 1.-Introduction
- 2.-What will it do?
- 3.-Who's done what beforehand?
- 4.-What will you design?
- 5.-What materials and components will be used?
- 6.-How much will they cost? / Where will come from?
- 7.-What parts and systems will be made? What processes will be used?
- 8.-What questions need to be answered?
- 9.-How will it be evaluated?
- 6.-Experience and conclusions of the week 14
Applications & Implications:
Fab-Weeks
Are you looking for my assignments?
Links and notes
more information:
Week 16: Applications & Implications
1.- Introduction:
In this week, the work is oriented to the final project.
Through a series of questions, I will work the answers to mark a good line in the development of the final project.
It is a good week to clarify concepts and materials that are still undecided.
2.- What will it do?
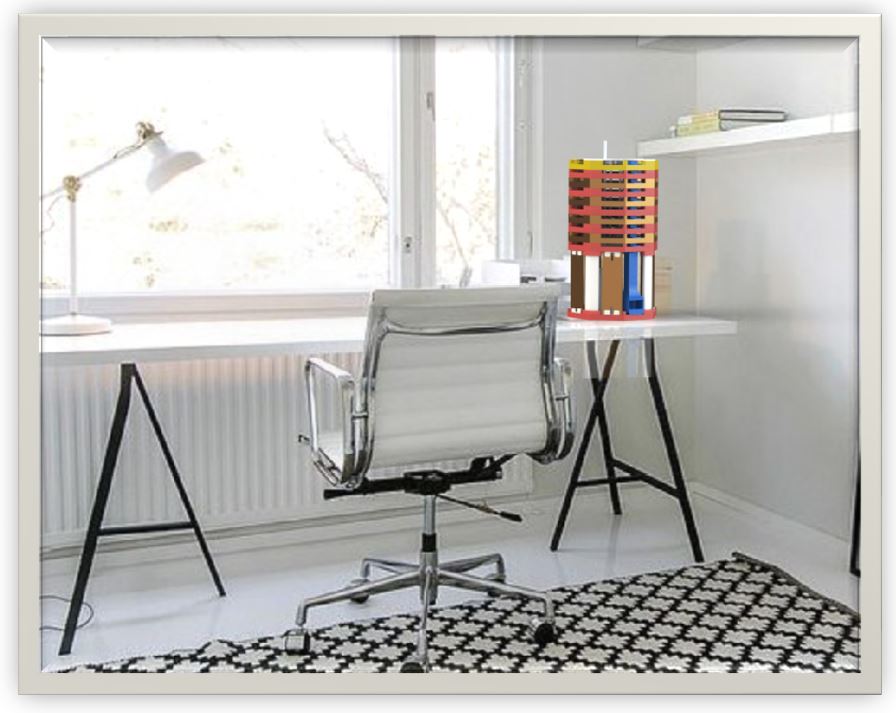
The main objective of the project is to create an automatic component dispenser, in my case for electronic components. In addition to dispensing components, I want you to count them, to see how many components are left of each type.
To control the dispenser in a less traditional way, it occurred to me to create a web server with the ESP32 microcontroller and in this way to be able to control the GiveMe Tronics dispenser with any device connected to the WiFi network, without the need to install any screen or buttons. This makes it a remote automatic dispenser that can be activated from any room.
As additional information to display on the control web page, I will include the code of each electronic component, its cost and a link with information to consult about each electronic component.
3.- Who's done what beforehand?
I have not found any project for a cylindrical type automatic dispenser, so most of the design I have created according to the ideas that I was having.
During the initial search on similar projects, I found projects for the storage of components in the form of rectangular furniture with boxes arranged in rows and columns, which automatically opened or closed the box with a specific component, by operating a system of motors that had at the back of the furniture.
http://archive.fabacademy.org/2018/labs/fablabecostudio/students/michael-qiu/week19.html
https://blog.bricogeek.com/noticias/diy/organizador-de-componentes-electronicos-controlado-por-voz-y-google-home/?fb_comment_id=2101466429939347_2268733216546000
For the programming part, one of the examples that have been useful for the project have been the Arduino programming codes to program an elevator, there are several examples on the internet, such as:
https://forum.arduino.cc/t/proyecto-de-ascensor-3-pisos/536460
https://github.com/Ivan1931/Arduino-Elevator
https://www.hackster.io/moreirarobotics/how-to-make-an-elevator-with-arduino-fbaf00
4.- What will you design?
■ Graphic or 2D design: The Project logo.
■ 3D design: Structure of the dispenser frame, in a modular way. In pieces as divisible as possible so that it can be replicated with small machines and equipment. The storage modules of each level with their rotating disks.
■ Integral electronic board, with the microcontroller, drivers, end stepper sensor and additional pins, powered by a single power supply, with a single cable.
■ Drivers for the motors, although finally I will use some prefabricated DRV8825 modules, because a driver was burned with the tests and the new spare parts do not arrive in time.
■ The lifting system for the trolley and the trolley with the rotating system to move the component storage disk, to dispense it mechanically.
■ A basic environment for machine control that can be improved in the future.
5.- What materials and components will be used?
o 3D printing materials: I have chosen PLA for being one of the cheapest and with good resistance, although the other types of thermoplastic material available can be chosen, ABS, ASA, PET, Nylon ... it depends on each user.
o 3mm acrylic sheets: for being a material with a very good surface finish and easy to cut with a laser cutter.
o Electronic components: the ESP32 microcontroller as a base, supported by the drivers for the motors, the end stepper and the other components that I will indicate in the table and in the development of the project.
o Screws and rods: two smooth rods and one threaded. In addition to M3 (3mm) metric screws with different lengths, depending on the piece to be fastened.
6.- How much will they cost? / Where will come from?
These two responses are defined in the following table
| Part | Material & Comments | Price | Source |
|---|---|---|---|
| Disc frame (octagonal) (4 pieces, 1 tier) | PLA (17h 39min) 163gr [Ender 3pro printer] | 4,08€ (per nivel) | Filament2print |
| First level structure (octagonal) | PLA (19h 32min) 175gr [Ender 3pro printer] | 4,38€ | Filament2print |
| Frame base (octagonal) 1unit (4 required) | PLA (4h 23min) 45gr [Ender 3pro printer] | 1,13€ | Filament2print |
| Pillars the 4 units | PLA (11h 22min) 137gr [Ender 3pro printer] | 3,43€ | Filament2print |
| Fixing base 1 | PLA (9h 3min) 106gr [Ender 3pro printer] | 2,65€ | Filament2print |
| Disk1 | PLA (6h) 47gr [Ender 3pro printer] | 1,18€ | Filament2print |
| Base for 1st Nema17 and trolley for 2nd Nema17 | PLA (13h 47min) 146gr [Ender 3pro printer] | 3,65€ | Filament2print |
| Gear | PLA (1h 38min) 17gr [Ender 3pro printer] | 0,48€ | Filament2print |
| Top cover | PLA (6h) 58gr [Ender 3pro printer] | 1,45€ | Filament2print |
| End stepper support | PLA (39min) 6gr [Ender 3pro printer] | 0,15€ | Filament2print |
| 14 pieces for protection wall bracket | PLA (5h 27min) 40gr [Ender 3pro printer] | 1€ | Filament2print |
| Wall pack x2 (necesitan 4pack) | PLA (1h 20min) 20gr [Ender 3pro printer] | 0,50€ | Filament2print |
| Dispenser output | PLA (6h 38min) 57gr [Ender 3pro printer] | 1,43€ | Filament2print |
| 9 ducts for outlet | PLA (2h 49min) 24gr [Ender 3pro printer] | 0,60€ | Filament2print |
| Electronic Board Support | PLA (50min) 6gr [Ender 3pro printer] | 0,15€ | Filament2print |
| Acrylic disc bases (1 per level) | Acrylic (2min) 50cm x 20cm a table of 50cm x 100cm | 8,47€ | PerezCamps |
| Milling | Copper Board (100 x 127)mm (3h milling) | 1,60€ | Digikey> |
| Nuts and bolts | M3 (3mm) pack diferent lenght | 12€ aprox | Amazon |
| 2 smooth rods | 2 x (8mm x 200mm) | 10€ (both) | Amazon |
| 1 threaded rod | 1 x (8mm x330mm) | 9,25€ | Amazon |
| 2 Nema17 engines | NEMA17 1.3A 40mm | 34€ (both) | Amazon |
| 1 Flexible fixation | (6 x 8 x 25) mm, Diameter: 19 mm | 1,80€ | Amazon |
| 3 bearings model1 | Diameter 8mm | 2,07€ (the three) | Amazon> |
| 2 bearings model2 | Diameter 8mm | 1,54€ (both) | Amazon |
| 1 ESP32-WROOM-32D | WIFI MODULE 32MBITS SPI FLASH | 3,44€ | Digikey |
| 1 5V regulator | 5 v ; 1 A | 0,34€ | Digikey |
| 1 3V regulator | 3,3 v ; 1 A | 0,39€ | Digikey |
| 2 DRV 8825 driver modules | DRV8825 18pins | 5€ (both) | Amazon |
| 2 100uF capacitors | Row:30 Cell:2 | 1,50€ (both) | Amazon |
| 3 0K resistors | RES SMD 0 OHM JUMPER 1/4W 1206 | 0,06€ (the three) | Digikey |
| 3 10K resistors | RES SMD 10K OHM 1% 1/4W 1206 | 0,09€ (the three) | Digikey |
| 2 1uF capacitors | CAP CER 1UF 50V X7R 1206 | 0,38€ (both) | Digikey |
| 1 10uF capacitor | CAP CER 10UF 35V X5R 1206 | 0,14€ | Digikey> |
| 1 1K resistor | RES SMD 1K OHM 1% 1/4W 1206 | 0,03€ | Digikey |
| 1 smd LED (blue) | LED BLUE CLEAR CHIP SMD | 0,36€ | Digikey |
| 1 reset button | SWITCH TACTILE SPST-NO 0.05A 24V | 0,92€ | Digikey |
| 1 switch | SWITCH SLIDE SPDT 100MA 12V | 0,87€ | Digikey |
| 39 Male connection pin | CONN HEADER SMD 40POS 2.54MM | 3,9€ | Digikey |
| 32 Pin female connection for driver | CONN HDR 8POS 0.1 TIN PCB | 3,2€ | Digikey |
| 1 square 2-pin power connector | TERM BLK 2POS SIDE ENT 3.5MM PCB | 0,54€ | Digikey |
| TOTAL | 166,00€ |
7.- What parts and systems will be made? What processes will be used?
Practically all the parts of the structure, around 80% of the dispenser, I am going to make them with FFF with 3D printing.

The pieces such as the bases of the discs that need to be smooth, to improve the rotation, I am going to manufacture them with laser cutting.

The part of the electronic board, I am going to do it with the milling machine.

As extra manufacturing, the T-shirt with the vinyl cutter and the T-shirt printing iron.

8.- What questions need to be answered?
■ How am I going to create an interface or environment to control my electronic dispenser?
■ Will I have stability or problems with vibrations?
■ Will I get the discs to rotate correctly?
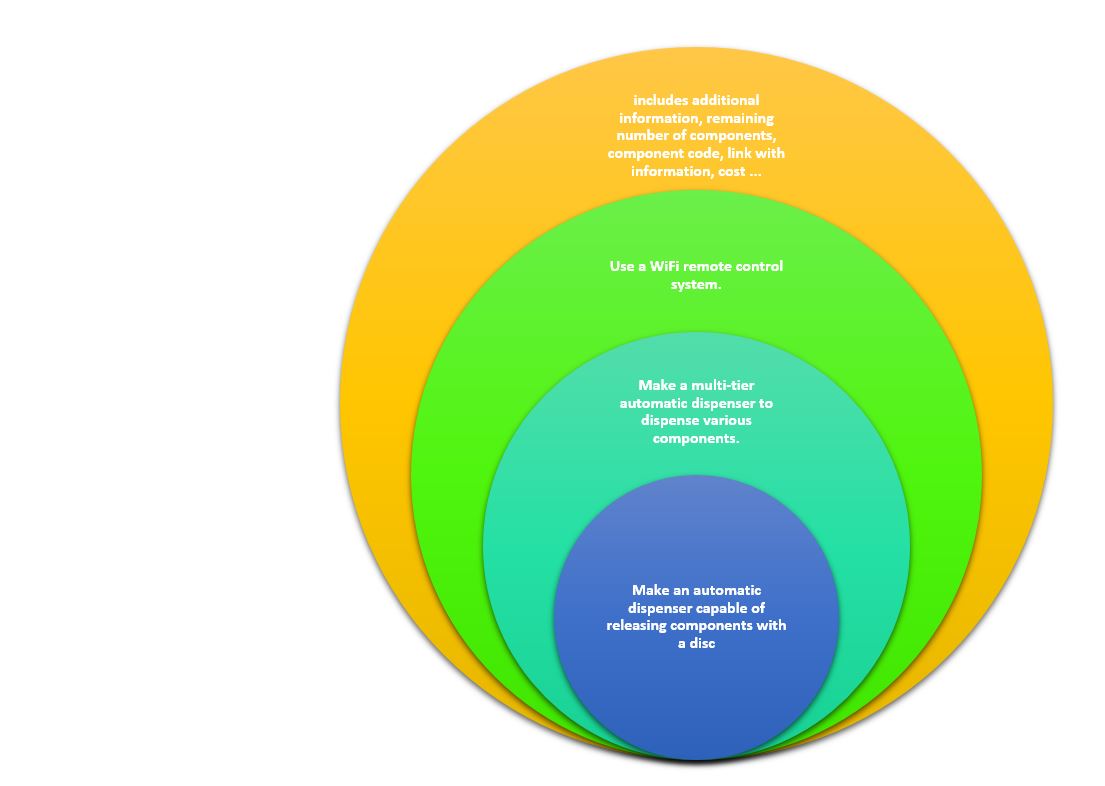
9.- How will it be evaluated?
1. Make an automatic dispenser capable of releasing components with a disc.
2. Make a multi-tier automatic dispenser to dispense various components.
3. Use a WiFi remote control system.
4. Create a control environment that, in addition to dispensing the components, includes additional information, remaining number of components, component code, link with information, cost ...
10.- Experience and conclusions of the week 14:
This week is quite interesting to focus on some ideas about the Final Project that are not yet very clear, such as what pieces are going to be made of one material or another, what manufacturing techniques are going to be used in some parts or what pieces are they are going to buy.
In the week before this, I burned a driver that I was going to use, I considered the possibility of using another type of driver with my instructors and it helped me to change to the DRV8825 module, which also makes my electronic board more compact.
It is a good week to make final touches and modifications on the final design, before starting to manufacture.