WEEK 15
Fab-Weeks
Are you looking for my assignments?
Links and notes
more information:
Week 15: Wildcard Week:
1.- Introduction:
This week I am going to work with a different technique than those worked so far in the other weeks of the FabAcademy.
The technique I have chosen is thermoforming. With this technique I am going to try to make a packaging for a figure of those obtained in the Molding and Casting week.
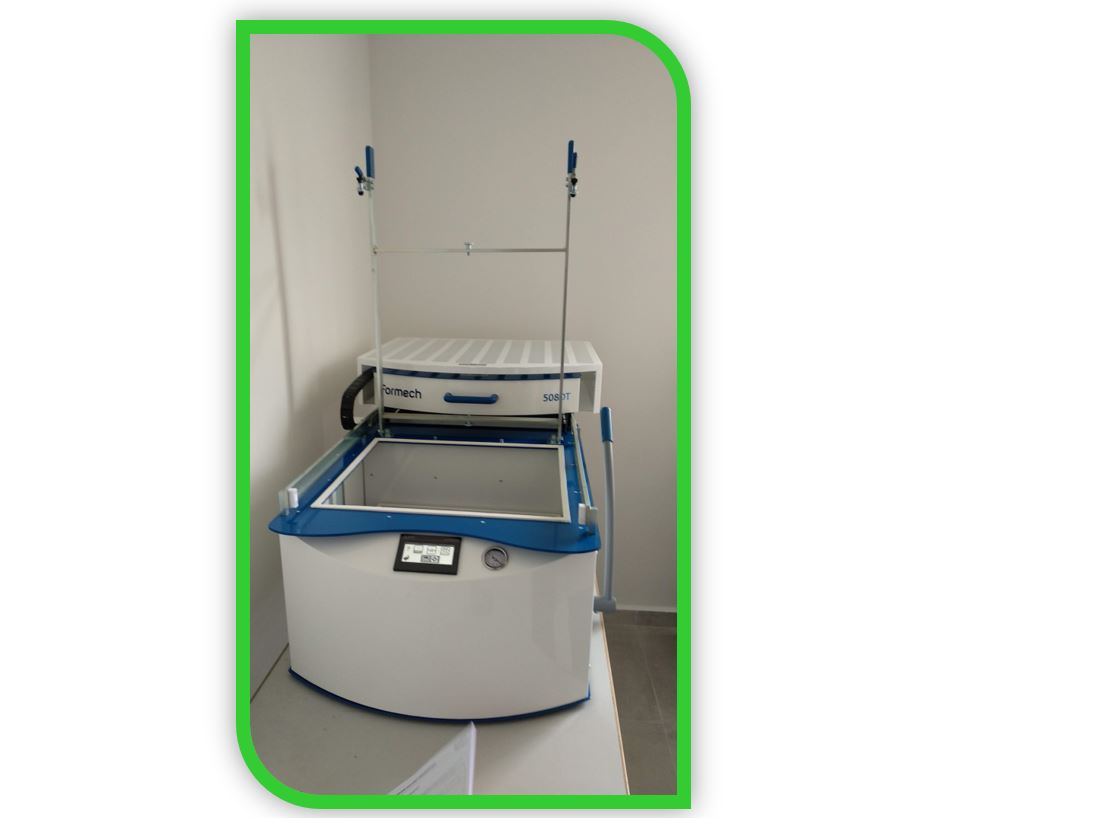
2.-The thermoforming machine
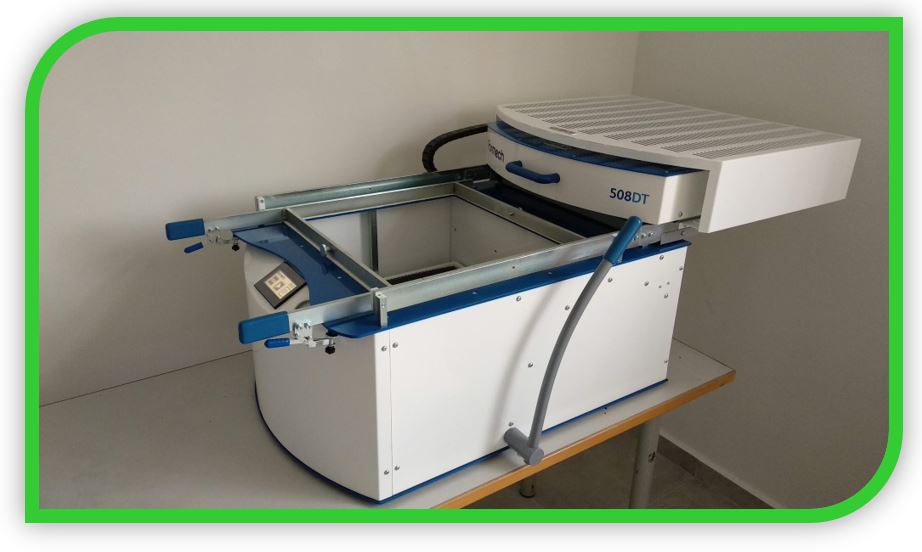
The Formech 508DT, a simple machine to operate, has a touch screen with programmable logic control and Plug and play system.
It has the ability to thermoform demanding materials and shapes, and its fast and energy efficient quartz heaters with variable standby function make the 508DT ready to thermoform in less than 5 minutes.
It has 20 storage memories to which you can assign a name to save the settings of each project for future work. Also, if you wish, you can have a cart that allows you to transport the machine and work in the most optimal way for each user.
Example materials proposed by the manufacturer to work with this machine:
• Black HIPS (Panels – 20 x 18 x 0.04″)
• White HIPS (Panels – 20 x 18 x 0.04″)
• Assorted Color HIPS (Panels – 20 x 18 x 0.06″)
• Black Pinseal ABS (Panels – 20 x 18 x 0.06″)
• Clear PETG (Panels – 20 x 18 x 0.04″)
Technical Details:
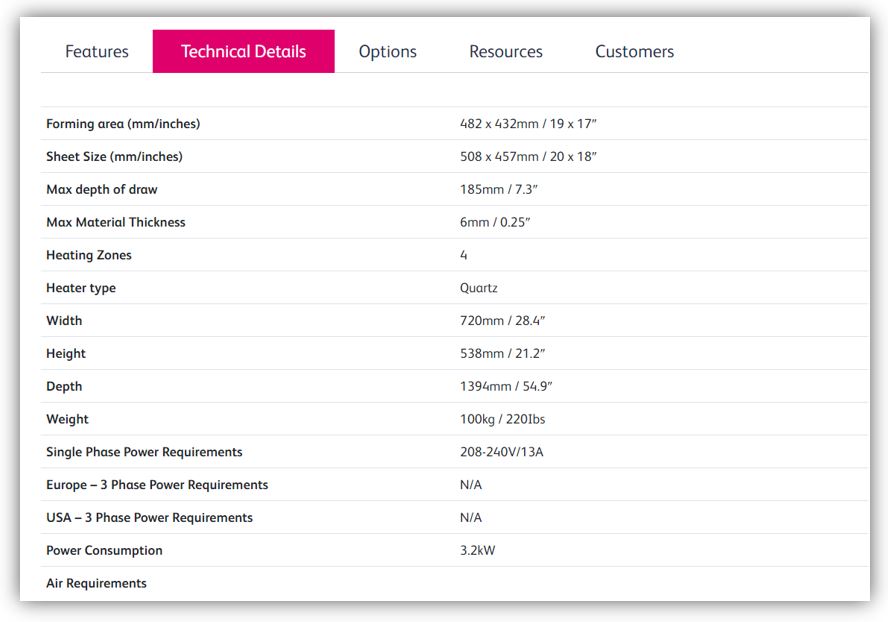
The manufacturer's website in Spain is: https://formech.es/product/508/
The manufacturer's website in International is: https://formech.com/product/508/
the machine's datasheet, in Spanish: https://formech.es/wp-content/uploads/Hoja-tecnica-508DT-2021.pdf
in English: https://formech.wpengine.com/wp-content/uploads/2020/03/Spec-sheet-508DTFS.pdf
3.- The creation of the model to make the mold by thermoforming:
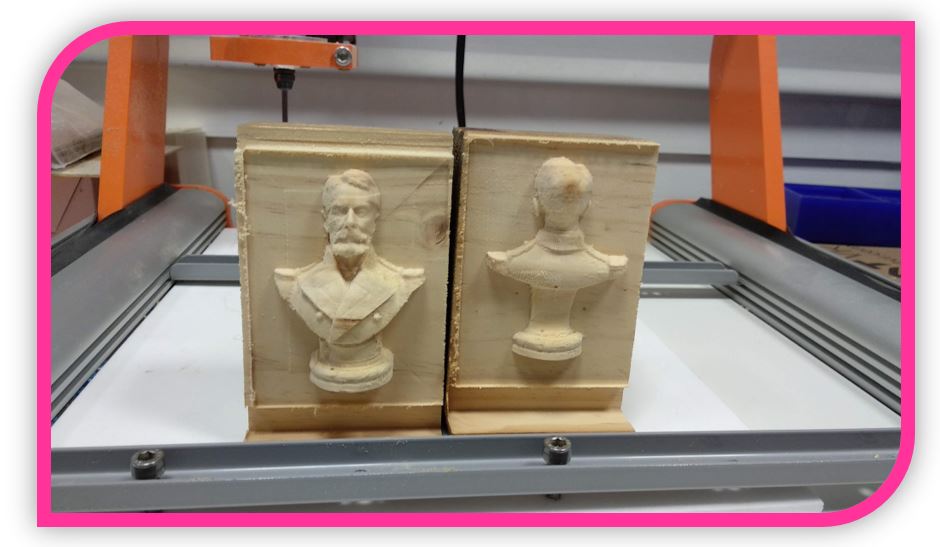
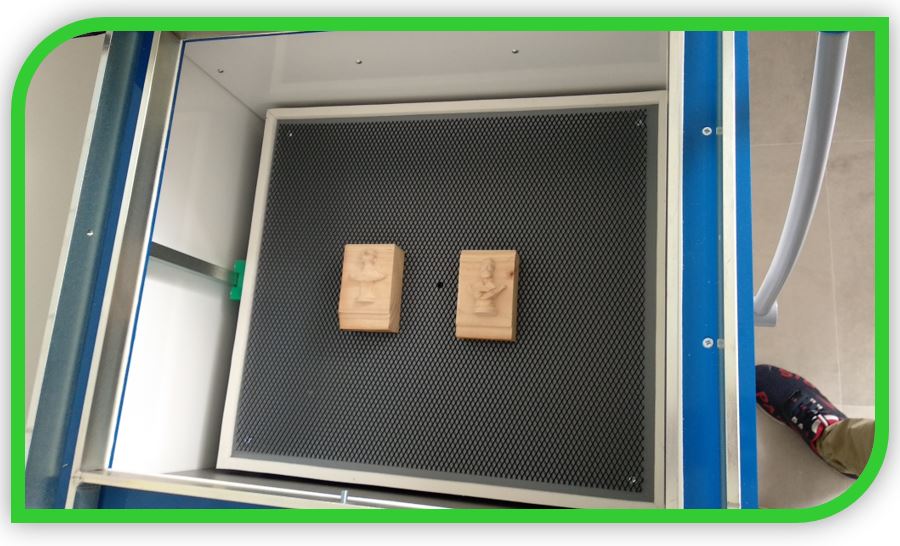
To generate the negative model to make the thermoforming mold, I am going to use two wooden pallet blocks with the approximate dimensions for my design.
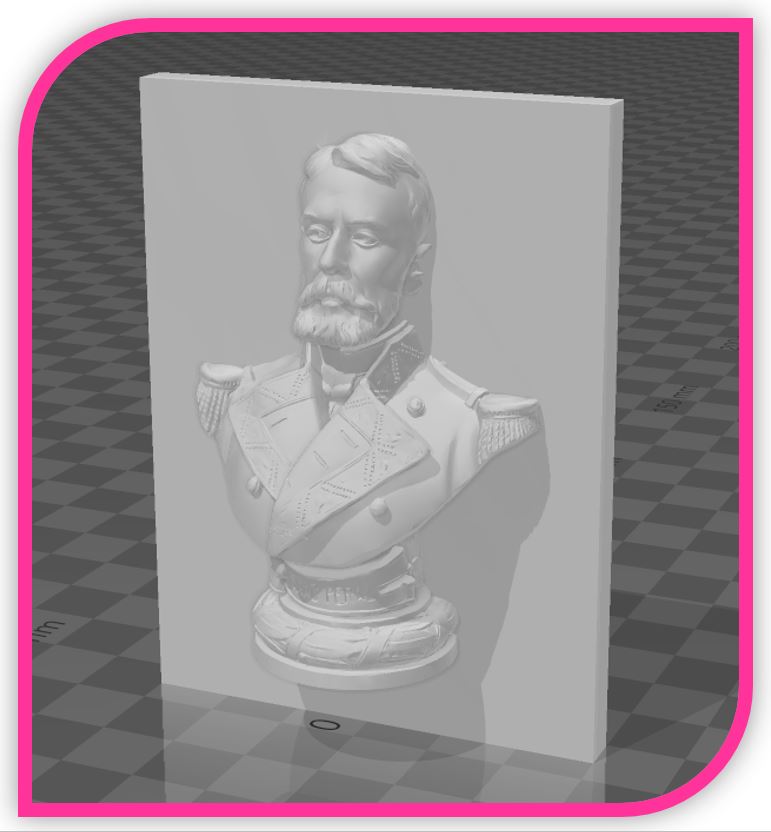
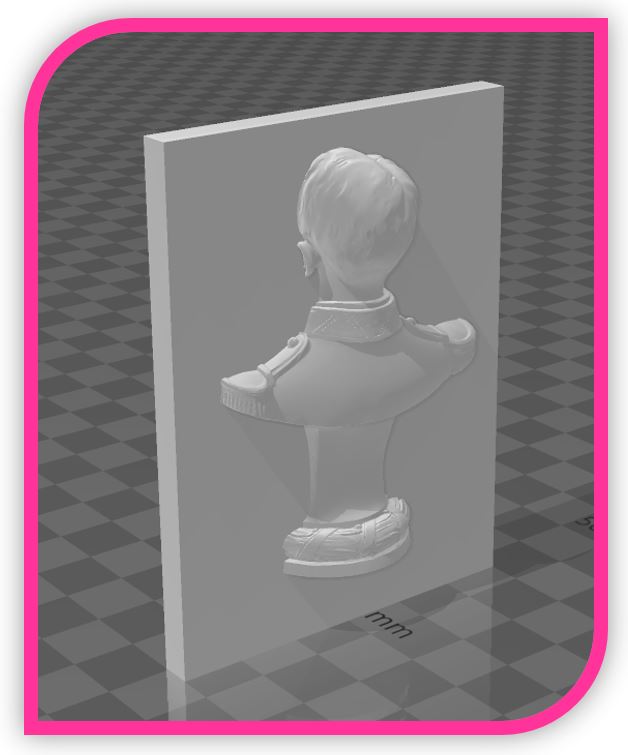
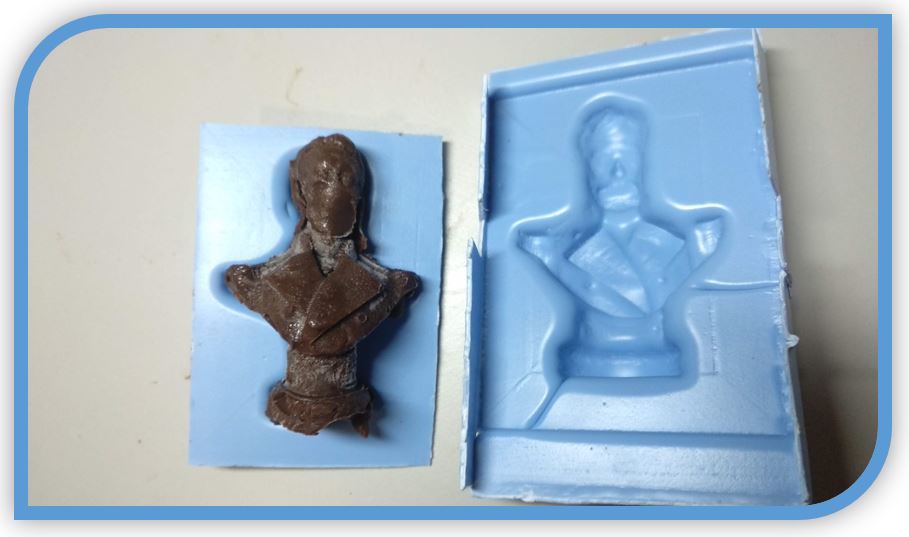
The model that I am going to mill, I have rescued from the model used in the Molding & Casting week, in which I made a mold for a bust of Isaac Peral.
In this case I do not need ducts or walls, so the model for milling is simpler:
Front part (STL):
Back Part (STL):
In the same way as in the Molding & Casting week, with the Aspire software I generate the G-code for each of the Peral parts and launch it with the Stepcraft milling machine software.
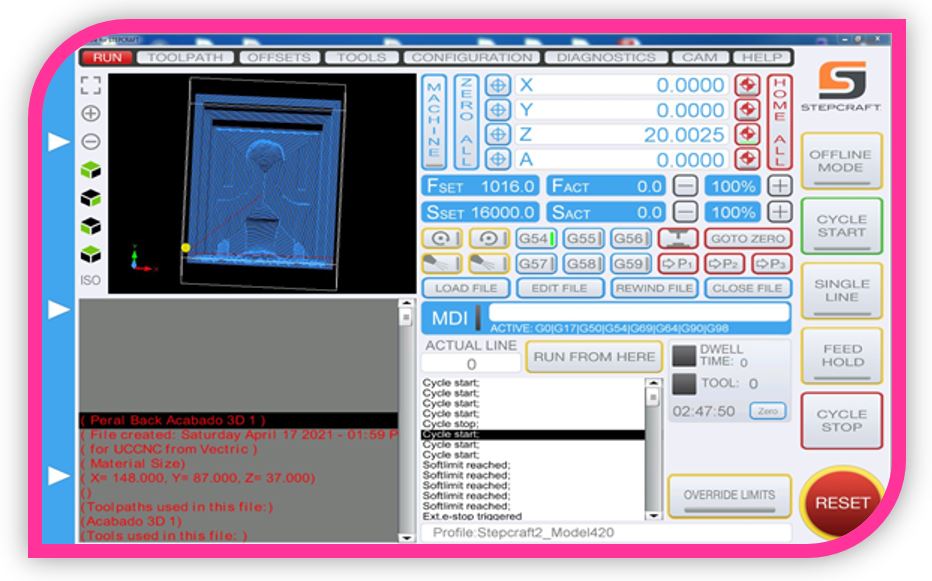
Image of the roughing process, front:
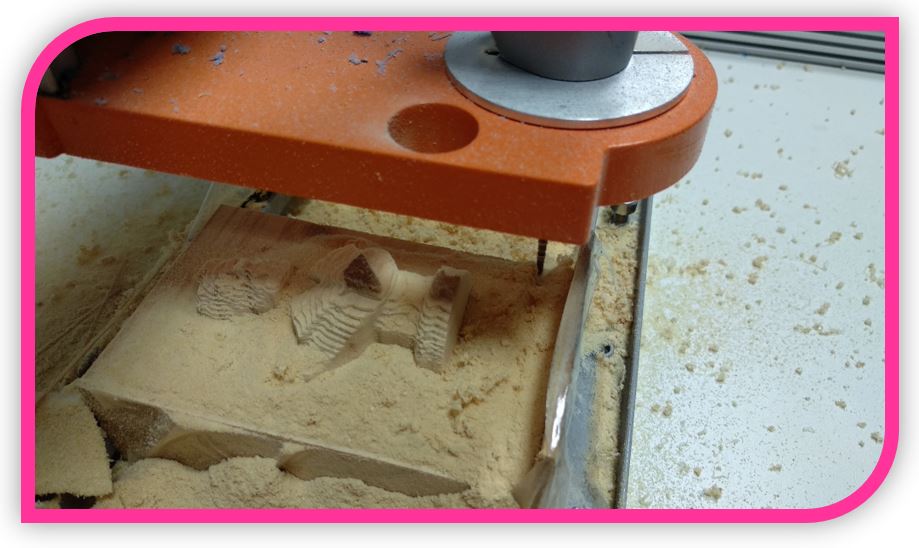
Image of the finishing process, front:
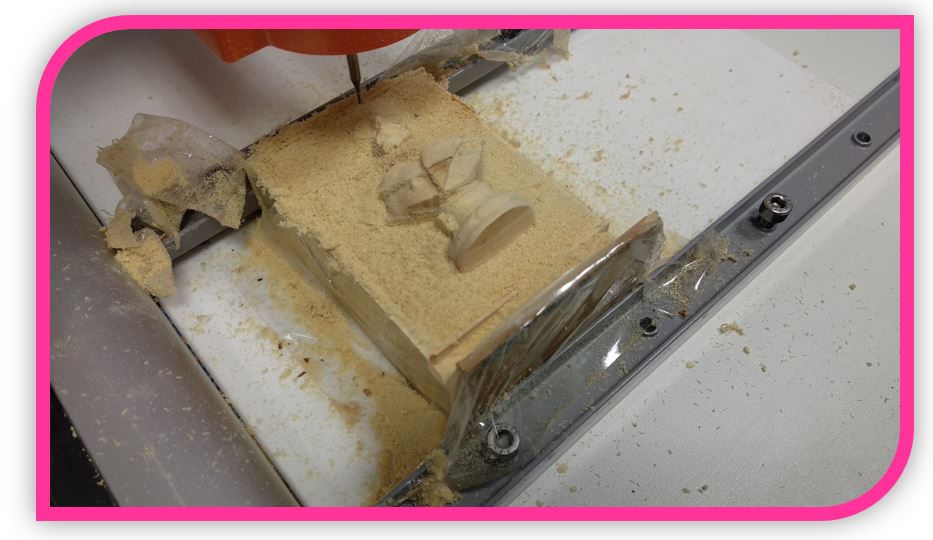
Image of roughing, back part:
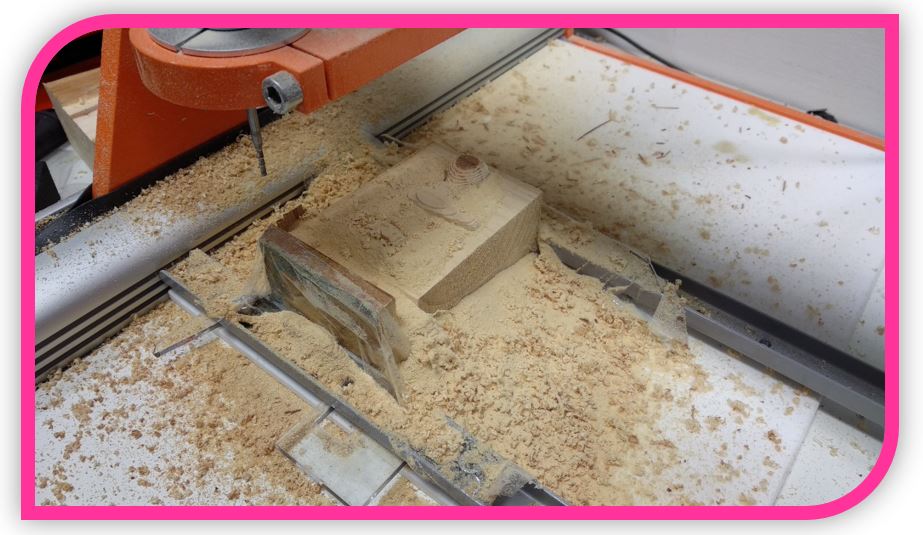
Image of the finish, back:
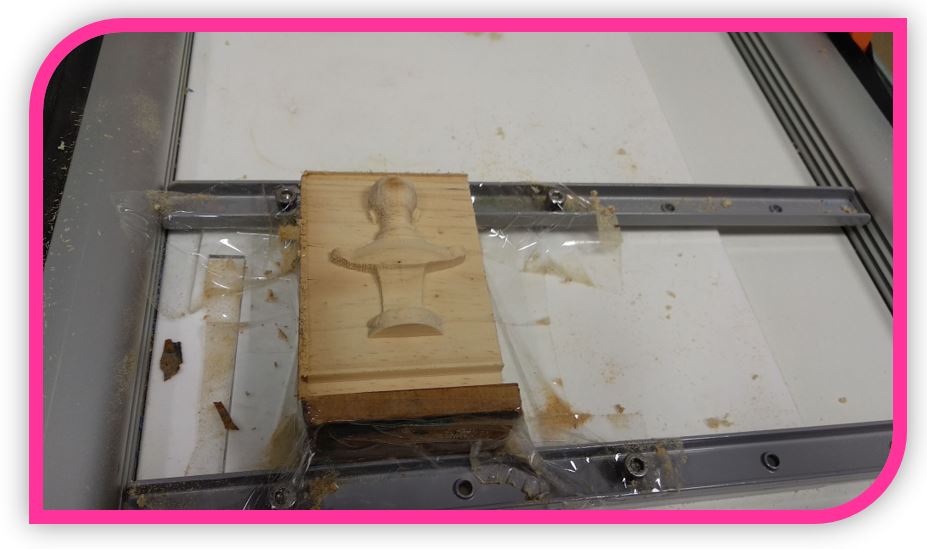
The result in wood for the two parts of the bust of Isaac Peral has been very good:
4.- Using thermoforming:
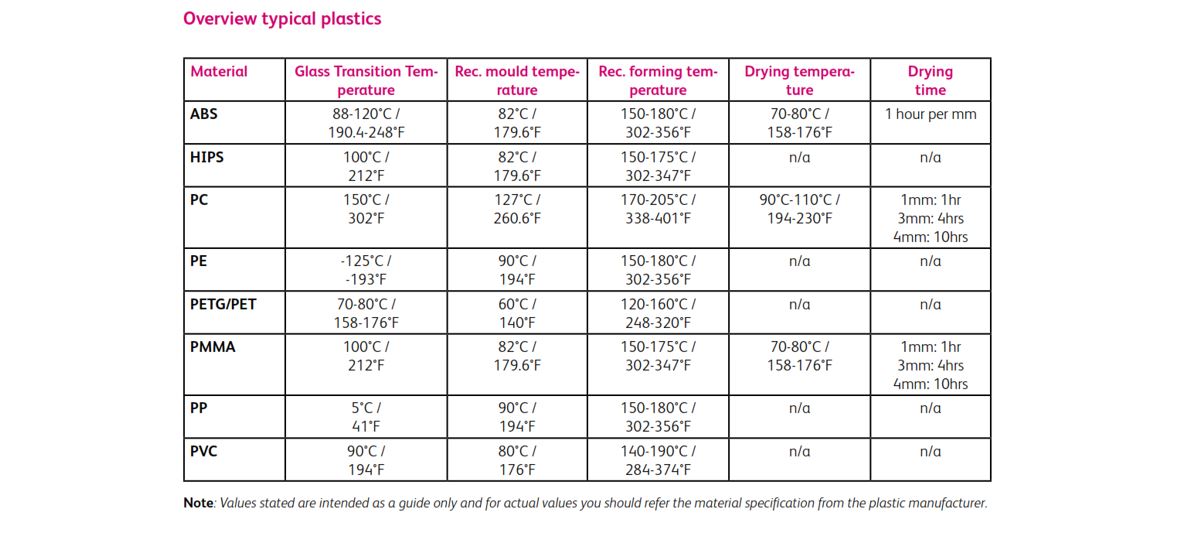
To configure the temperatures to work with the different sheets of material, it is convenient to know some of the main characteristics of the possible ones with respect to their behavior with temperature. The main general ranges depending on the material, are indicated in the following table:
Plastics materials and characteristics:
It is also important to know the thickness of the sheets, since depending on the thickness it is necessary to use more or less time in the heating process.
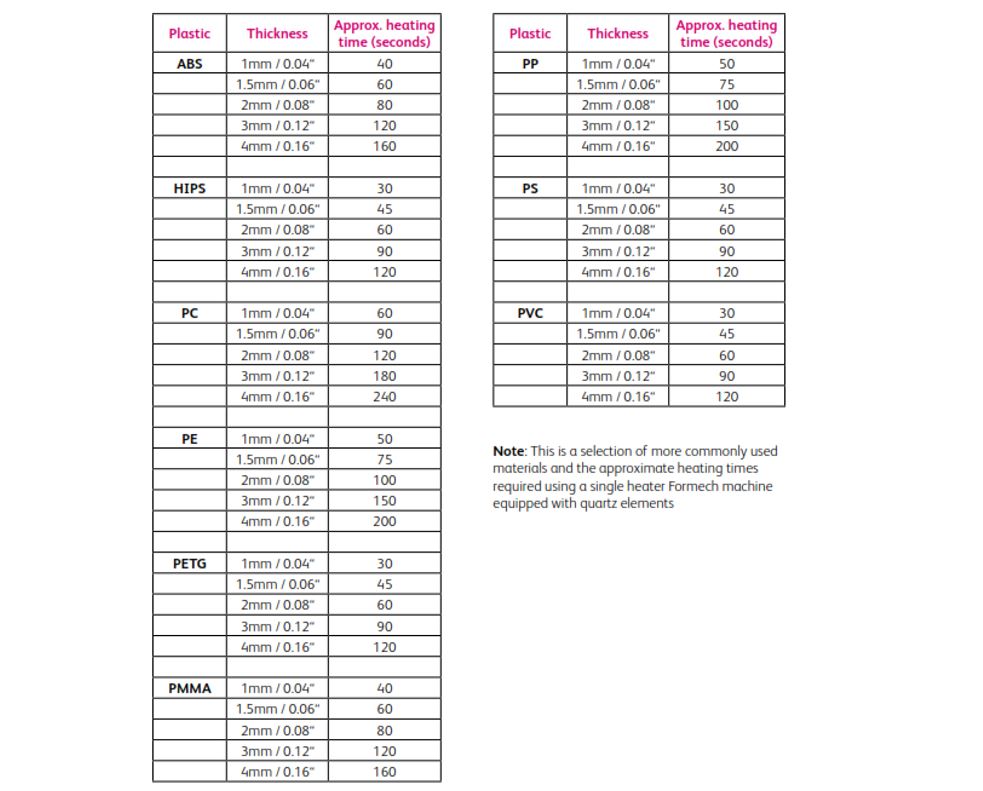
■ In my case: I have used ABS material heated to 170 degrees. As the thickness of my ABS sheet is 1mm, I have heated it for 40 seconds, then I have pressed the lever and created the vacuum as I have indicated in the next steps, leaving an approximate time of 10 seconds. Then it is to let it cool a little more and remove the pieces of wood.
With the wood blocks milled and ready, now it is only necessary to take them to the Formech machine, for thermoforming.
The summary of the steps to perform the thermoforming are:
■ I turn on the machine and wait about 15 minutes for it to heat up.
■ Raise the holding bars for the thermoplastic sheet.
■ Using the touch panel, I press the button that activates the heater:

■ Then I press the button with the play symbol:

■ I take this opportunity to explain the following symbols. There are two options here, the first, a hand symbol, is to use manual settings for temperature and hold time. The second button, a folder, is for loading a configured setting.

■ I use the reconfigured settings option. Then the following panel opens:
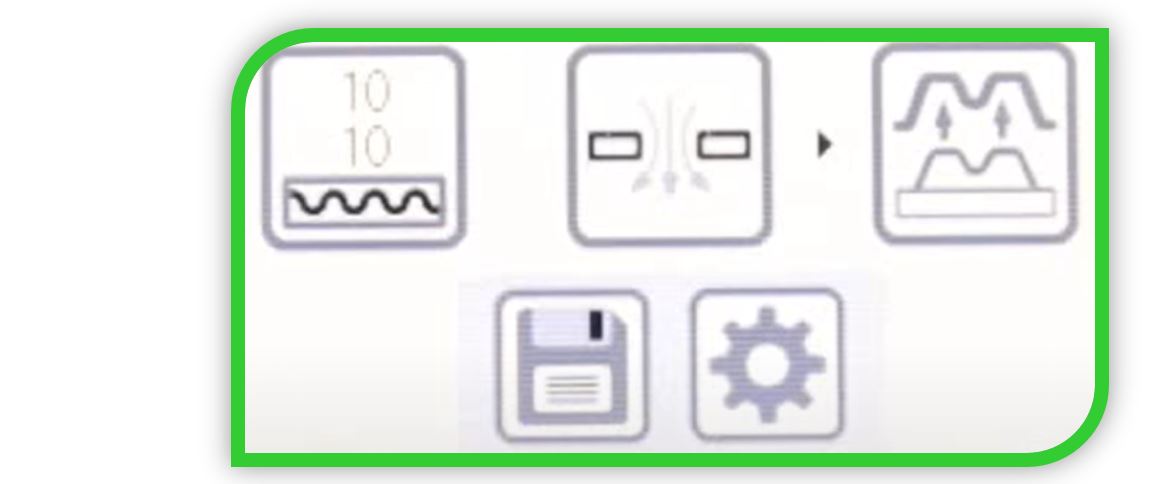
When you close the lid of the machine, on the button with the drawing of the heater and two numbers, the upper number that is the time counter will begin to decrease. The number below indicates the total seconds:

The button with the arrows pointing down must be activated when the milled part is raised against the hot foil. What it does is activate the suction pump to create the vacuum.

The last button is used for when the thermoplastic has cooled sufficiently, activate the pump to expel air and be able to release the part.

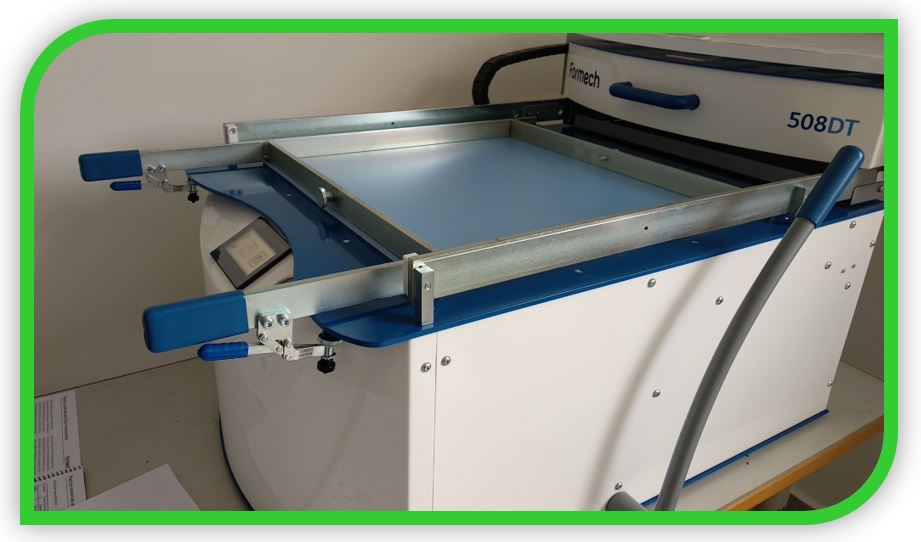
■ When I have already pressed play to configure the parameters, I put the wooden pieces, in the part of the base of the machine.
■ Then on top I place the thermoplastic sheet.
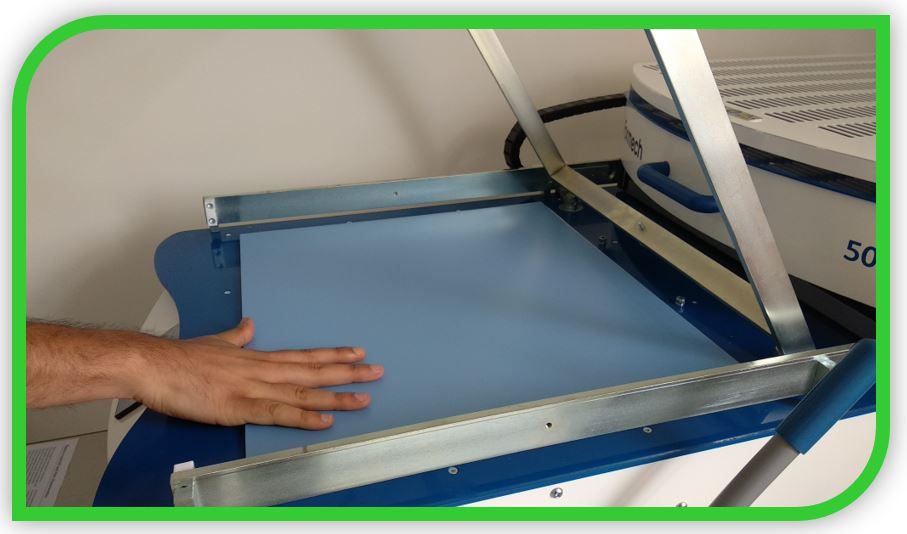
■ Under the metal holding bars.
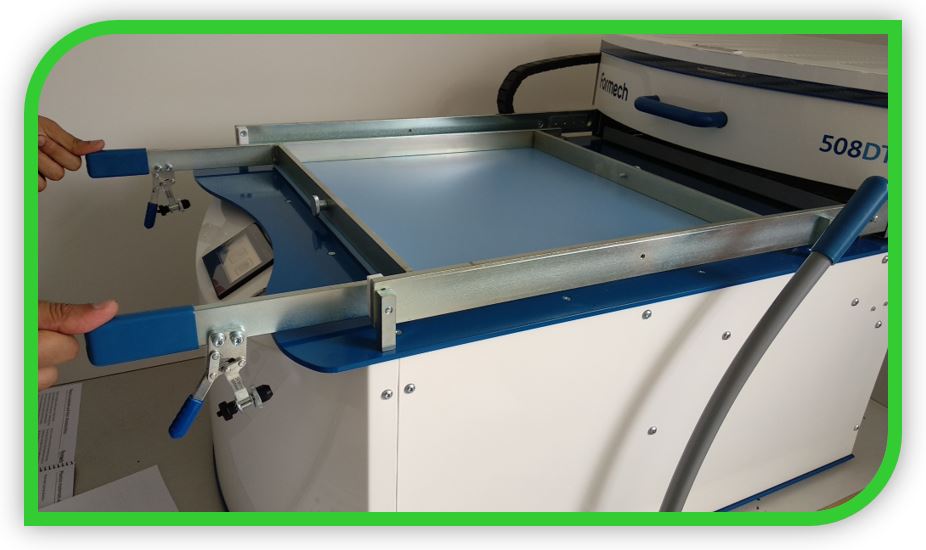
■ Fixed the closing of the bars, with the two blue levers.
■ I close the lid and verify that the counter starts to go down.
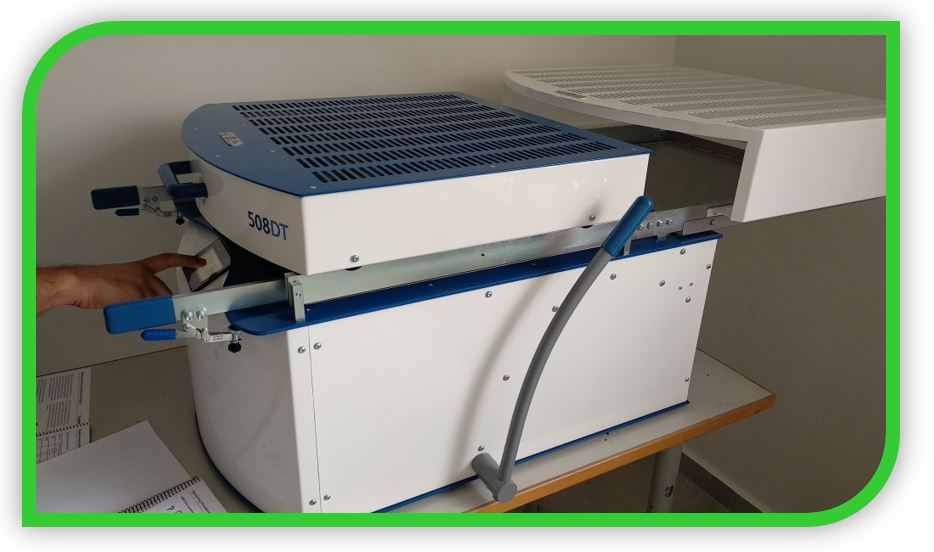
■ when he has finished counting the time (he emits sound) I carry out the process as in the video. I go up with the lever, activating the suction button on the vacuum pump.
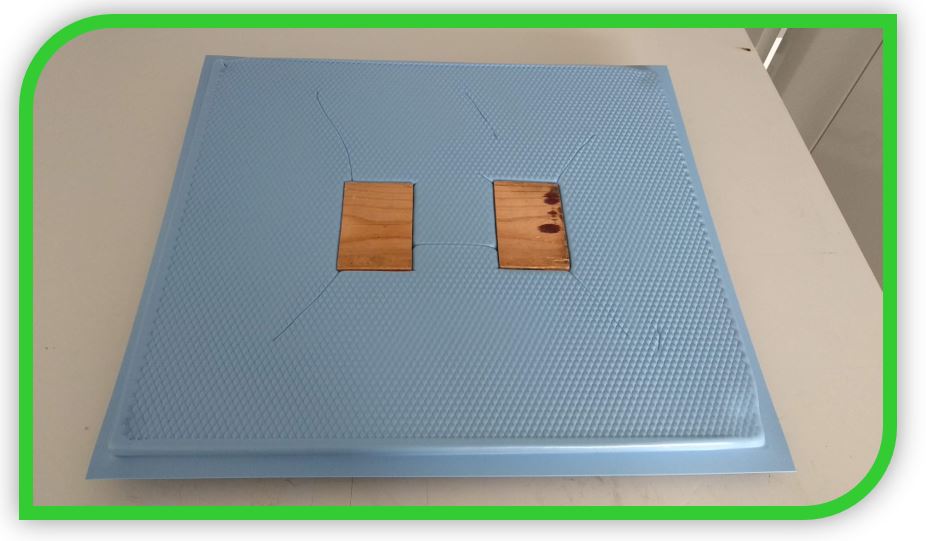
■ When it has cooled down, I press the air release button to try to extract the wood. But it does not work.
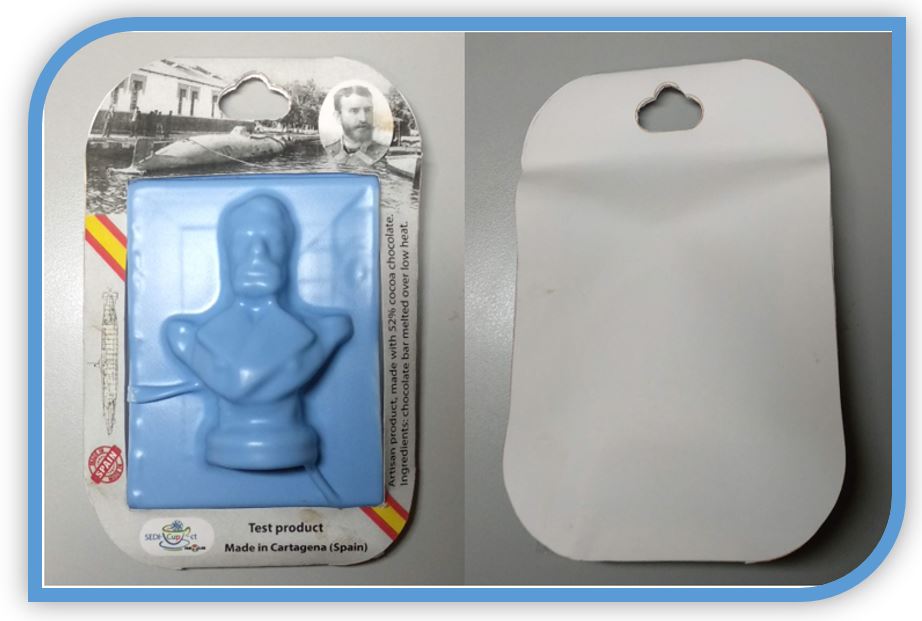
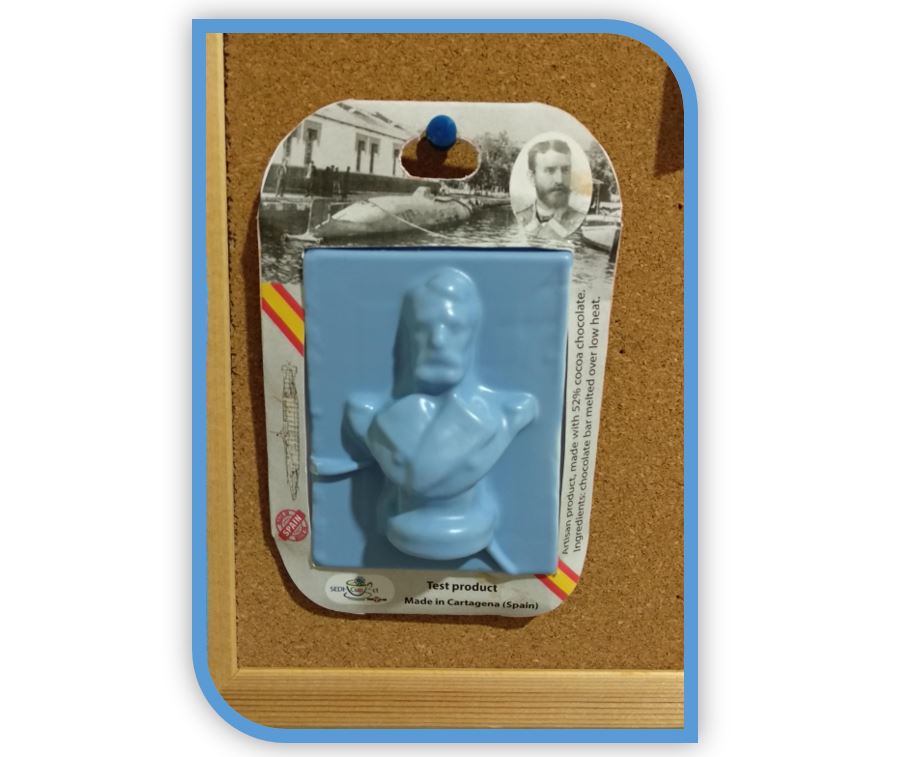
5. Final Result:
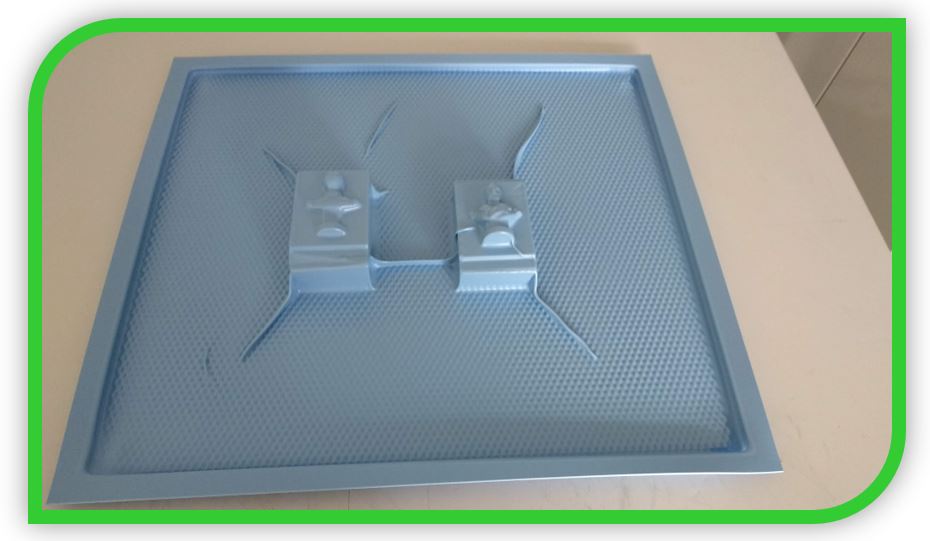
The result has been a little wrinkled in the Fontal part of the model.

The first thing I had to do was remove the pieces of wood.
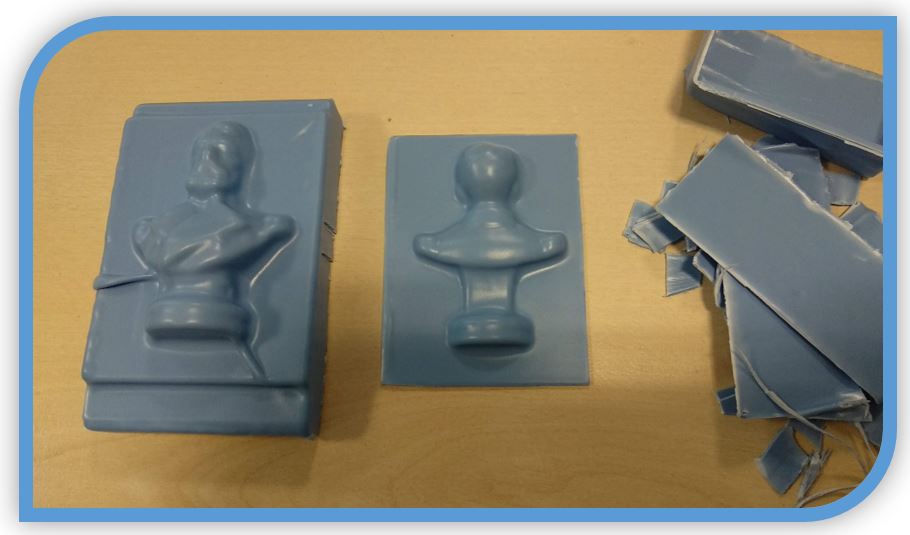
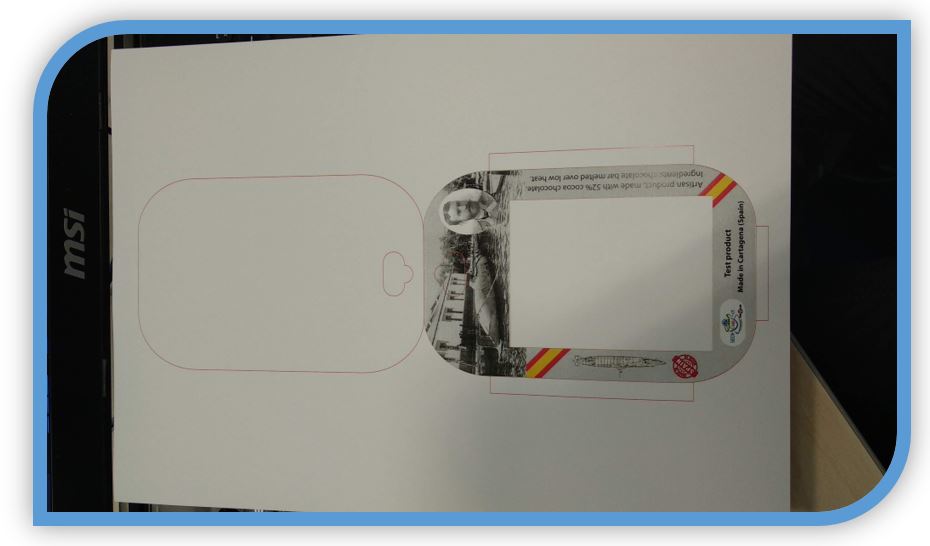
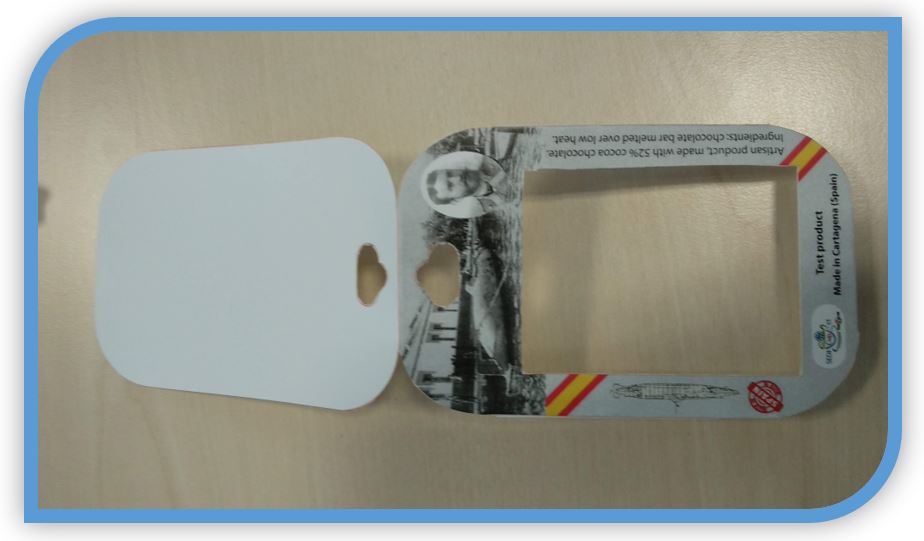
Then trim the thermoplastic:
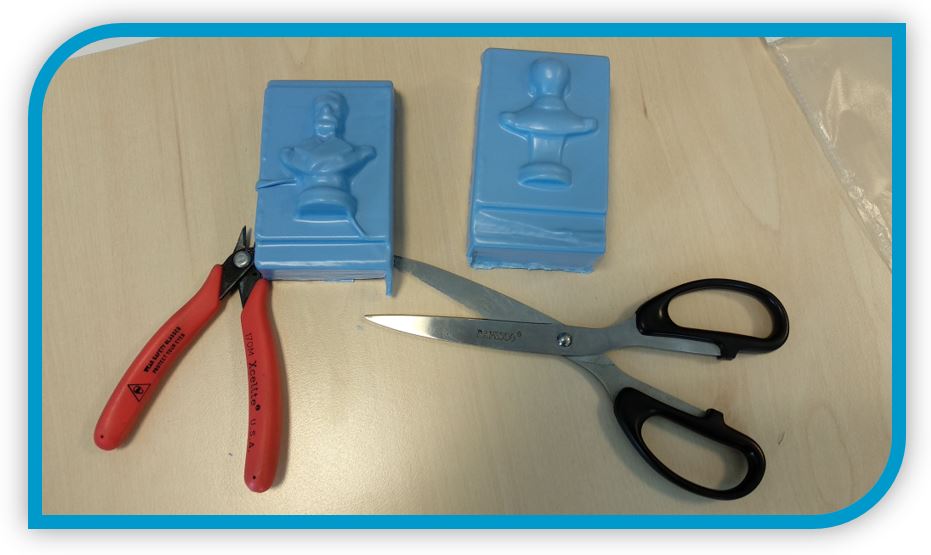
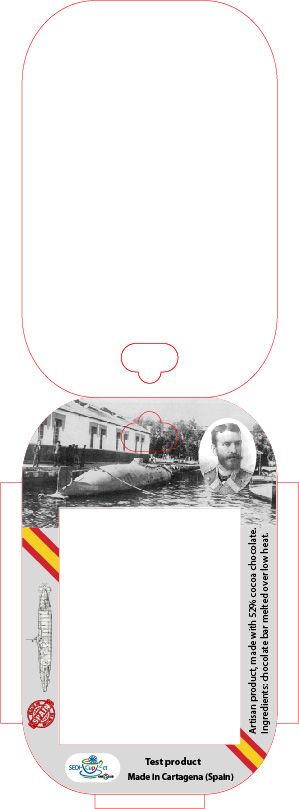
Adapt the cutouts for packaging:
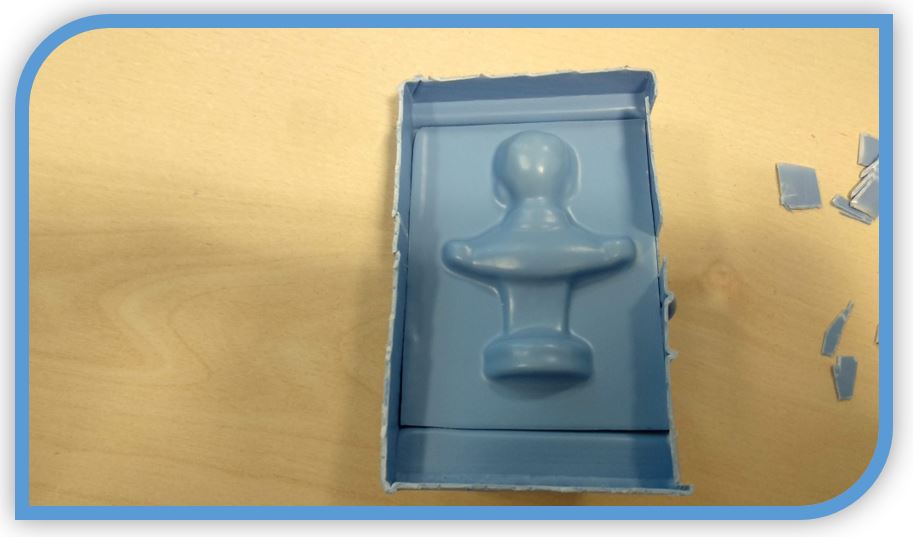
Place the worked figure in Molding & Casting:
Finish off the final details of the packaging:
■ Design and cut out the cardboard wrapper.
■ Assembling the packaging for the final result.
6.- Experience and conclusions from week 15:
This week I liked it, it was fun and I also learned a new technique that I had never used.
I have had problems with the front, because I have wrinkled during the process, but as an example result it may be valid.
It is possible that the plastic is too thick for this very small figure, so the result is acceptable but not the best that could be obtained, when using thinner sheets.
This week, I could not present the work in the Regional Review, because the machine was in the process of installation.
“What went wrong”: In principle, nothing relevant. But maybe using a thinner and more transparent thermoplastic the result would be perfect.
“What went well”: The wooden mold did not warp or break. The machine gave no problems and did what it should.
“What will you do differently next time”: I would try using a thinner thermoplastic. I would also design something like a box for chocolates.
7.- FILES
Isaac Peral Termoformer STL
Peral milling machine files
Cardboard Packaging