WEEK 01
- 1.-Introduction
- 2.-Beginning lesson
- 3.-Conclusion
- 4.-To select a template
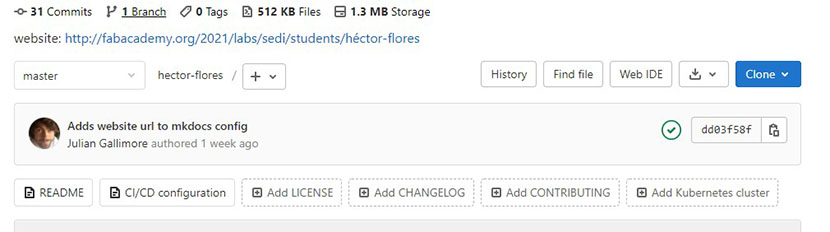
- 5.-Upload to repository: Using Git
- 6.-An ideas's birth
- 7.-The sketches
- 8.-Spiral model diagram
Project management
Principles and practices
Fab-Weeks
Are you looking for my assignments?
Links and notes
more information:
Week 01: Project management
1.-Introduction:
To start the first week of FabAcademy, I started reading the course structure and writing the essential days in my personal diary. Before of this, I connected at bootcamp and take some ideas and concepts around the instruction.
The instructors of my fablab (Sedi Cup CT) Álvaro and Lola also provided me with information to begin to adapt and we established a weekly work model to follow the homework.
We also made the first connection with the fablabs network assigned to my area and we talked about ourselves, we talked about the beginning of the course and we had a first contact. (In my case, everything between the Fablabs of Spain).
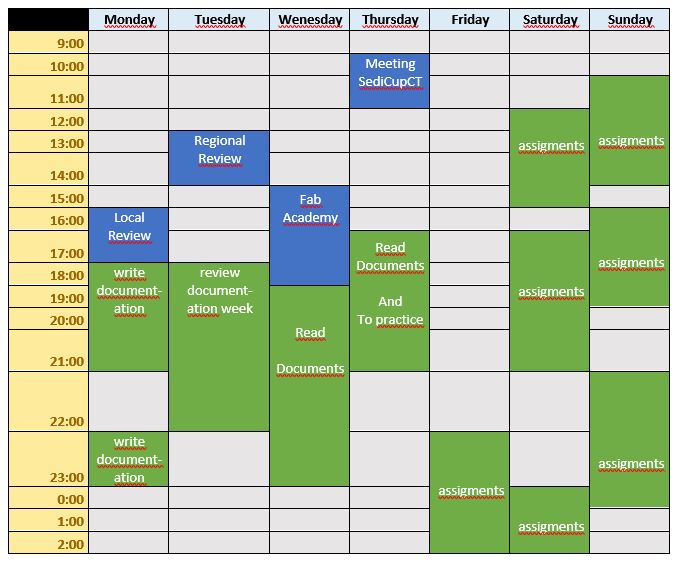
Week Journal:
2.-Beginning lesson:
During the firts week I will start working on my website of Fablab. To do this I start little by little with Html5 documentation, because I have never touched it.
Amoung the main resources that I have used from the FabAcademy repository, I will highlight: https://developer.mozilla.org/es/docs/HTML/HTML5
One of the most important sources for me, because being the one with the translation into Spanish, my mother language, I was able to move forward quickly. In my opinion, a pretty comprehensive guide (considering I am not an expert about web pages).
Also, I find it interesting, as a summary: FabAcademy html basic tutorial
And the videos of the classmate Krisjanis Rijnieks, wich provided visualization in real time (shows in time the modifications that he is making). https://www.youtube.com/playlist?list=PLruSKIDLbfPw_FpKiUghLMHLKA9-zSo8j
Also, I have been doing other searches on the web and youtube to see more code examples, which I will not mention because they are less relevant.
First steps after documentation
After reading the documentation, I choose the program to work with the code. I choose the Visual Studio Code.
To do this, I went to the webpage, I selected my versión of OS (Operating System), in my
case Windows.
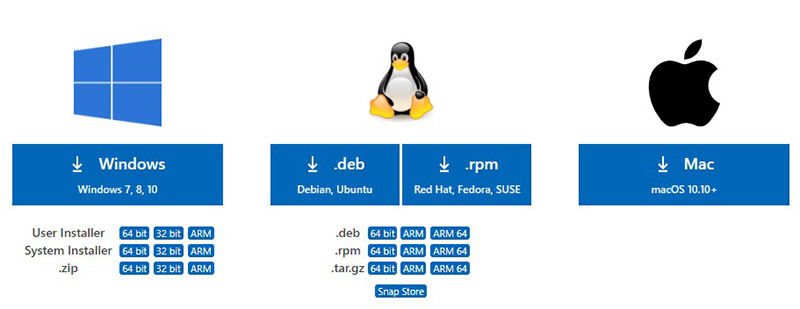
When I finished dounloading the setup file, I execute de file to install the program and
run it.

Next steps: To do test:
I started testing with code to create a simple and basic webpage, to see how the
commands work. Its name: “Prueba” (test in English).
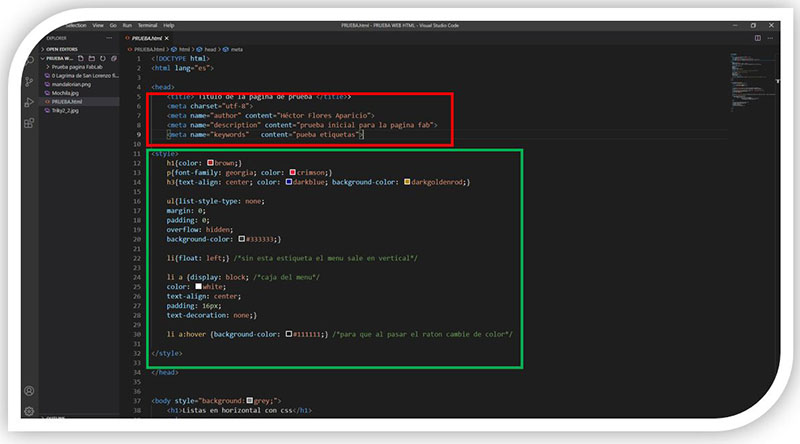
In this image, there is the configuration of the head of the webpage in Html. In the red
rectangle there is, in first place the Title on the page, then the encoding in utf-8, in the
next line the name of the author (in this case my name), the description of the content
and the keywords.

This image contains the title of my test webpage, and the header
Following my code, there are examples of how to use the styles: I have created the styles for titles with hierarchy h1 and I have given them brown color, for the paragraphs I have assigned a Georgia font and a crimson color.
A list without aligning to margins and with a gray background, which I have made horizontal using a "float left". Then I have assigned a white color to the letters and that they are contained within a rectangle and centered.
In addition, I have put a black hover, so when the mouse pointer is passed over, the rectangle changes color

image of the effect applying "hover".
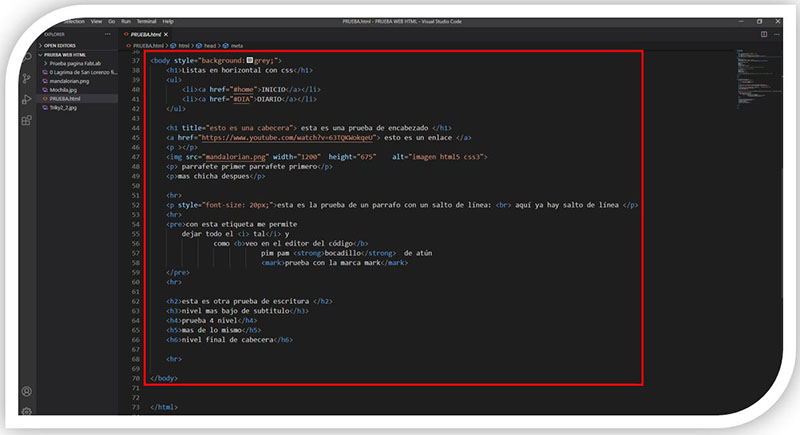
The next part of the test page make up the body. Here I have tested the code to add lists, headings of different sizes,
mark words, highlight text, put paragraph breaks and separators, etc.
to watch the sample in the navigator:
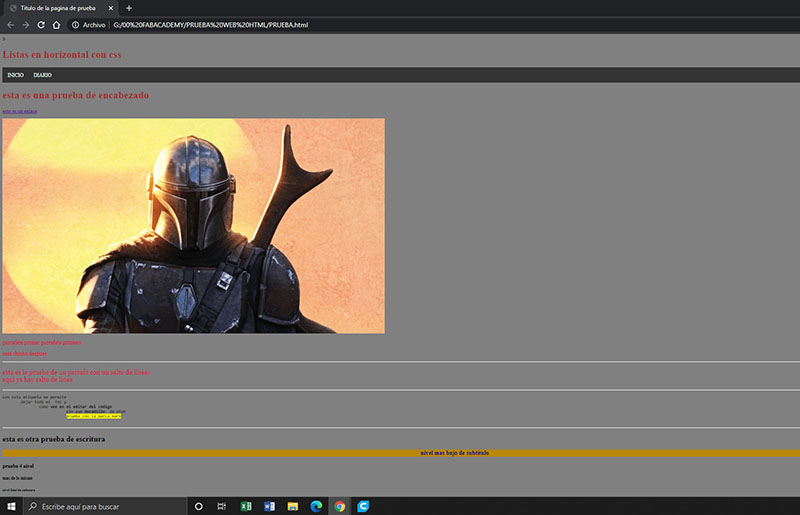
Result of the first tests practicing with the html code for the web page.
After the first few tests, I continued to practice with more code, to do something a little more complex. In this practice,
create folders associated with the test page, one for images, another for the text fonts and another for the CSS code used
to configure the page styles and a txt for notes.
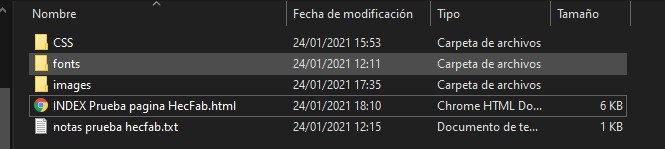
Image of the folders and files for the test web.
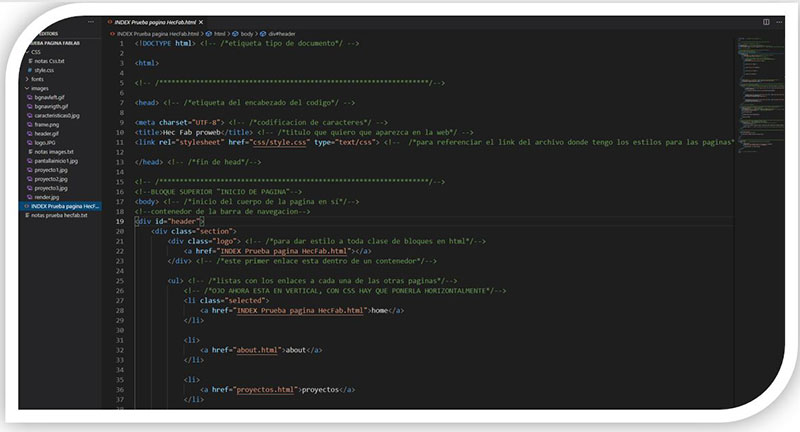
Capture 1 of the code of the new test page, referring to the head part and the beginning of the body.
Image the next code.
Final part.
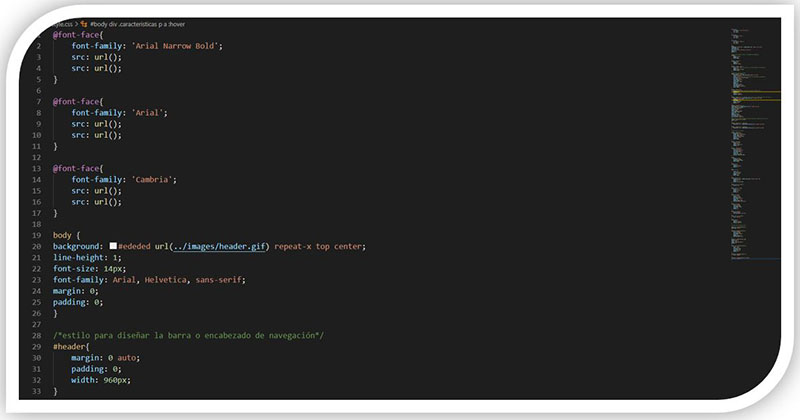
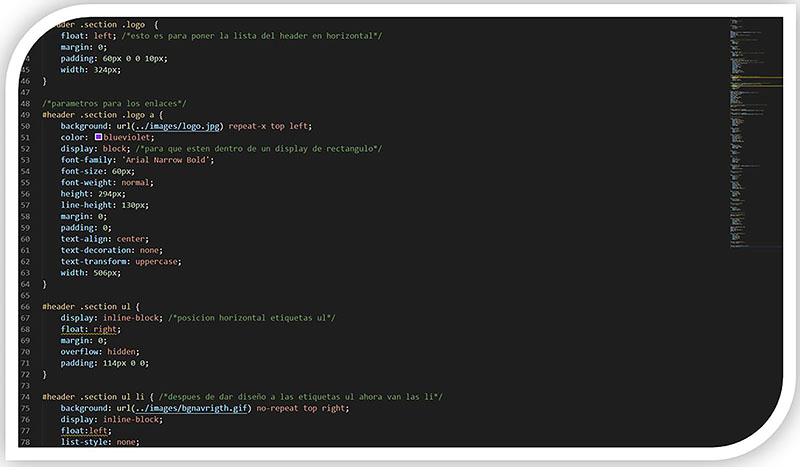
images CSS code for styles.
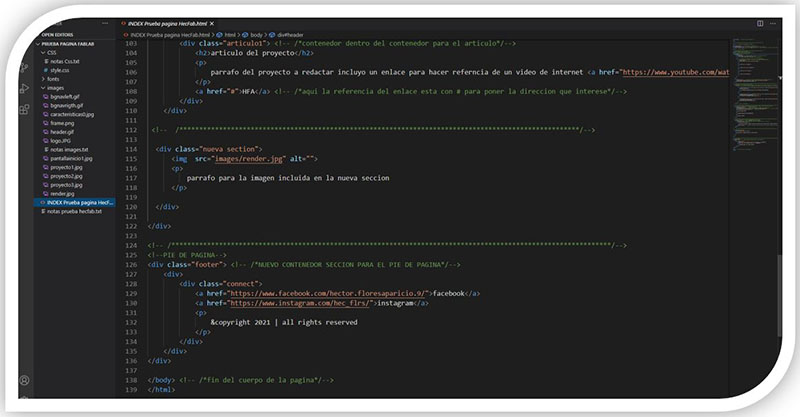
Testing code to create another new webpage
With this page I tried to create a more complex head. I added a gif image, a logo and a menu to go to other
pages related to the course. It also has a body, to add documentation.
It also contains links to web pages in the paragraphs and words that lead to other links or points on the page (use of anchors).

finally, I added a footer, to put the links to my personal pages, copyright, etc.
3.-Conclusion
After having been practicing with the lines of code to make a page, from the beginning. I have chosen to use a template, because the result of obtaining something visual is faster and more stable when formatting the pages, without making mistakes that move the elements, which has happened to me practicing.
4.-To select a template
For this I use the reference provided in the documentation: https://html5up.net/
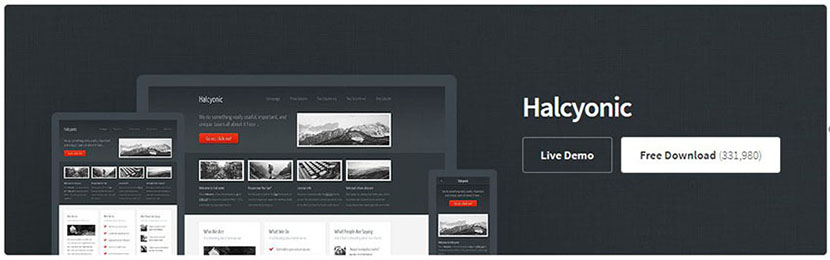
I choose the Halcyonic pack.
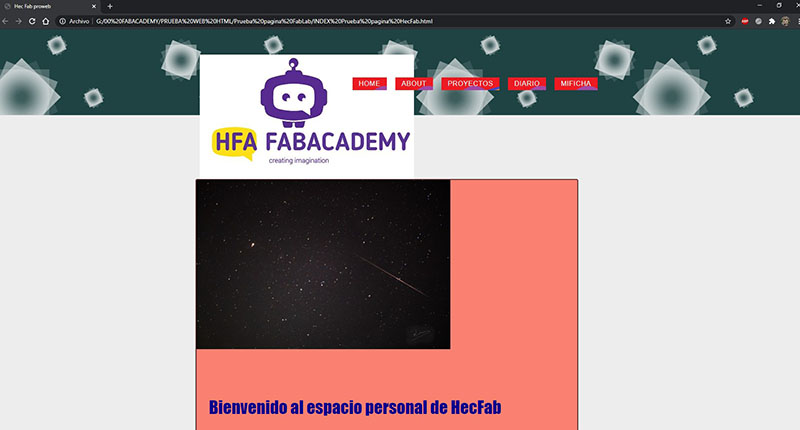
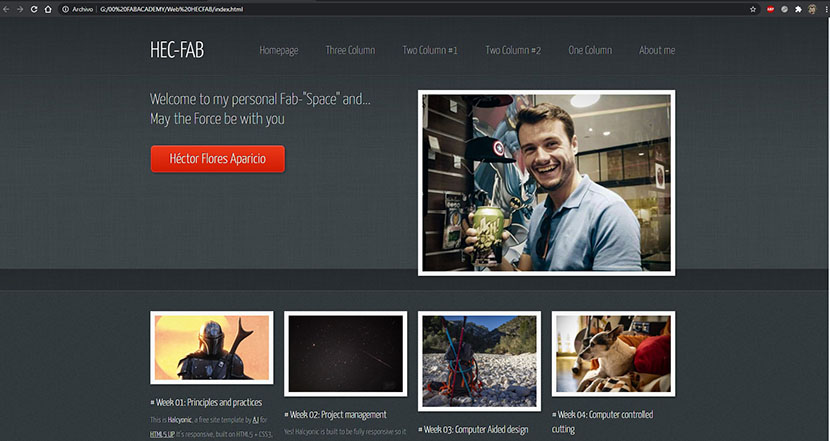
About the template, I begin to modify the code for the main page. The result of the first adaptations is that of the image.
It will continue to improve.
I create the About me page, to fill in little by little in this first week.
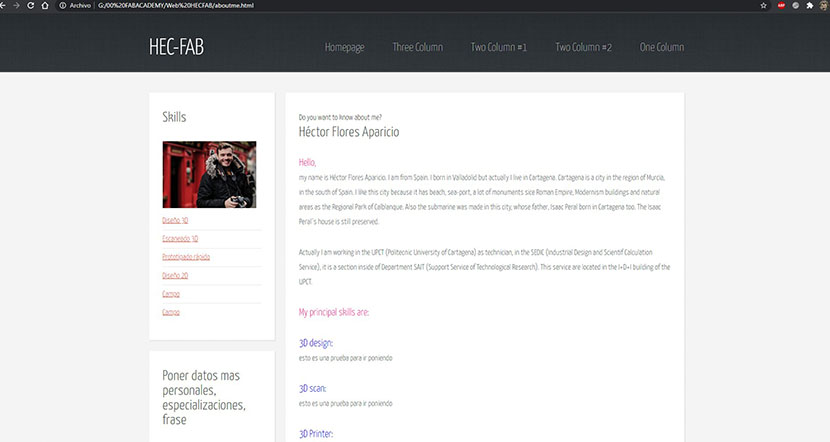
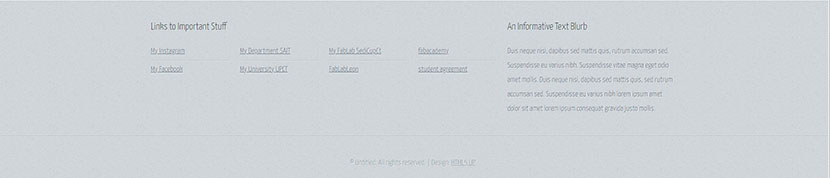
I adapt the website footers, to add the most important, personal, fablab, fabacademy links, the link to student agreement ...
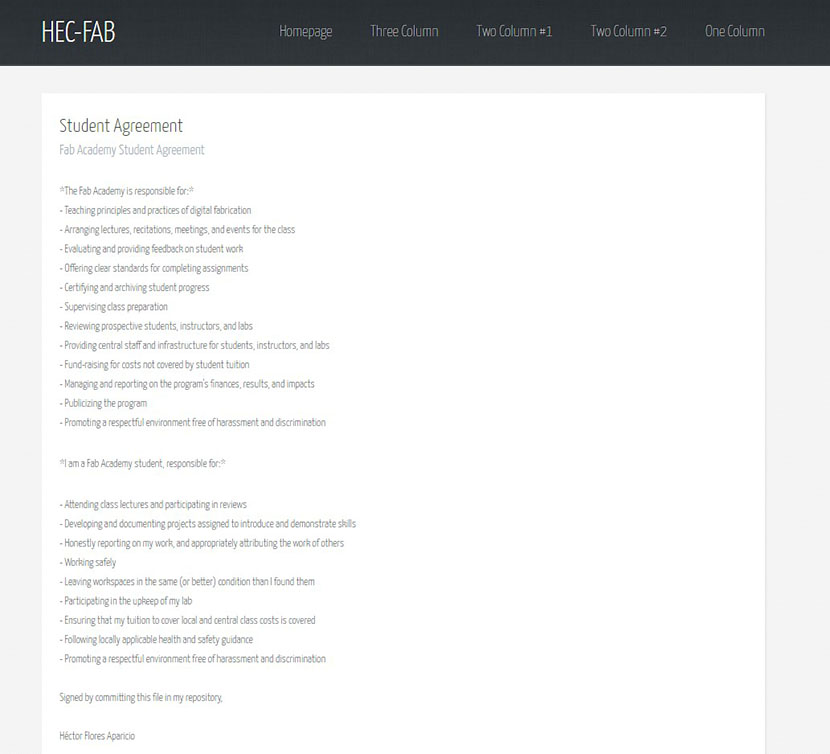
Page of Student Agreement.
5.-Upload to repository: using Git
The first step is download the Git. To do this, I used this link: https://git-scm.com/download/win

I selected my OS option (Windows) and setup the program in my computer.
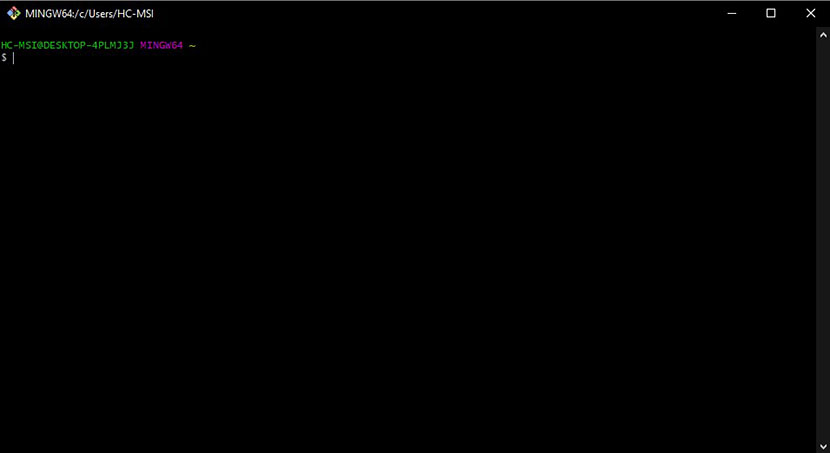
This image is the console of Git. The Git Hub.

I configured my user and my e-mail.
** An important advice is to have near the asci code, I needed some of its characters for example, one of the most important is using the key alt+126. Is this symbol ~.**

I wrote my password.
And the git gived me the keys.
Later, I upload the keys in my repository.

All ready.
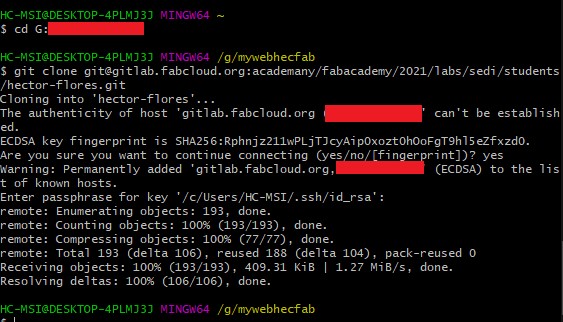
Next I configured the directory in my computer, and check it.
Repository’s image. Is the place where I pull the files of my web.

I logged as master.
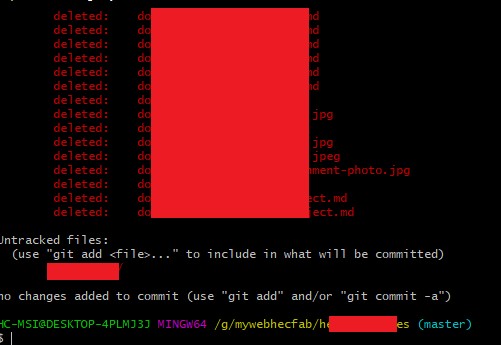
I done git status to show the status of my repository files.

Then a git pull.
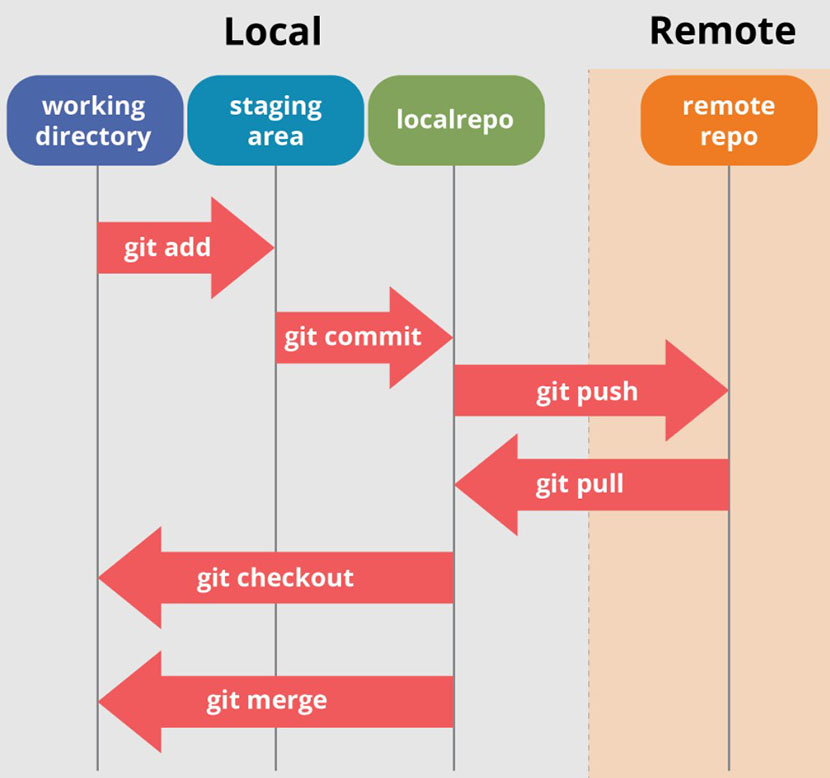
After completing the initial setup, the following steps from here are similar and follow the following flow.
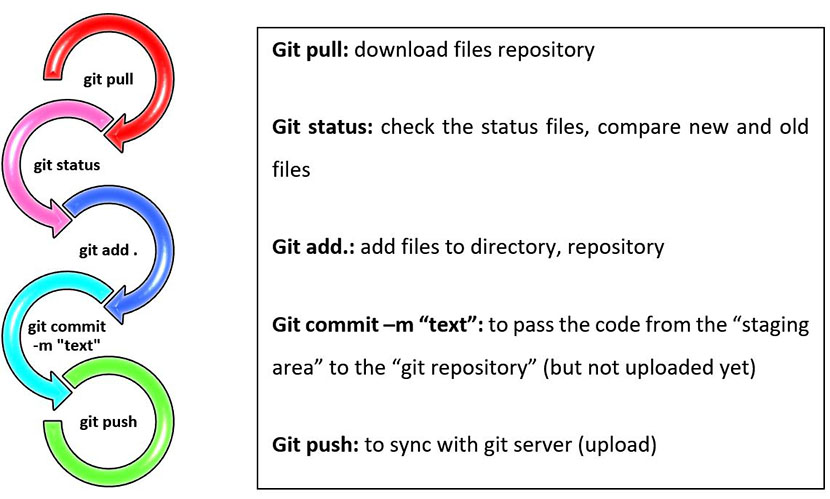
As a support, I put the next image (down) to better understand how the git works. Is extract to website
https://www.edureka.co/blog/git-tutorial/.
Week 01: Principles and practices
6.-An ideas's birth
One sunny morning, my instructor Álvaro was fighting with the electronics components. He said it would be interesting to have an automatic system to select the electronic components in the FabLab. So me, who I was with him in the laboratory, I told him: no problem, I take your problem and idea to work on an automatic system.
Was a Good idea? I don't know, I'll know soon…
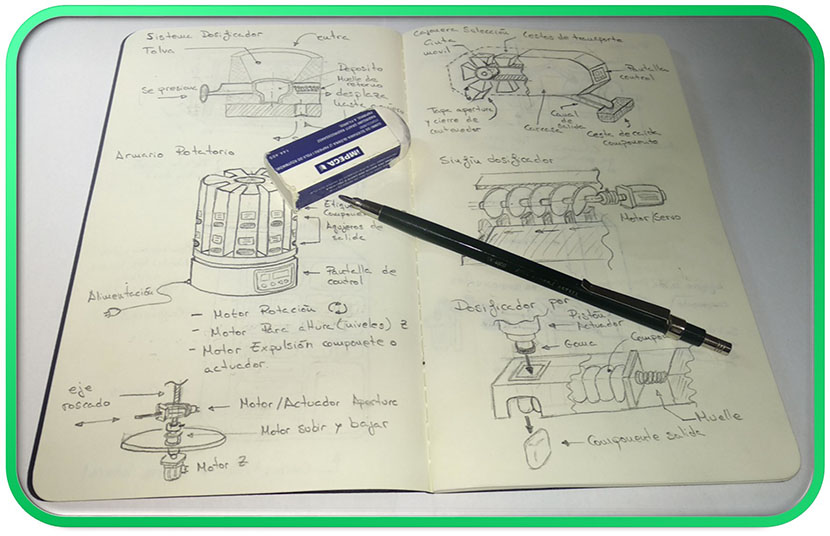
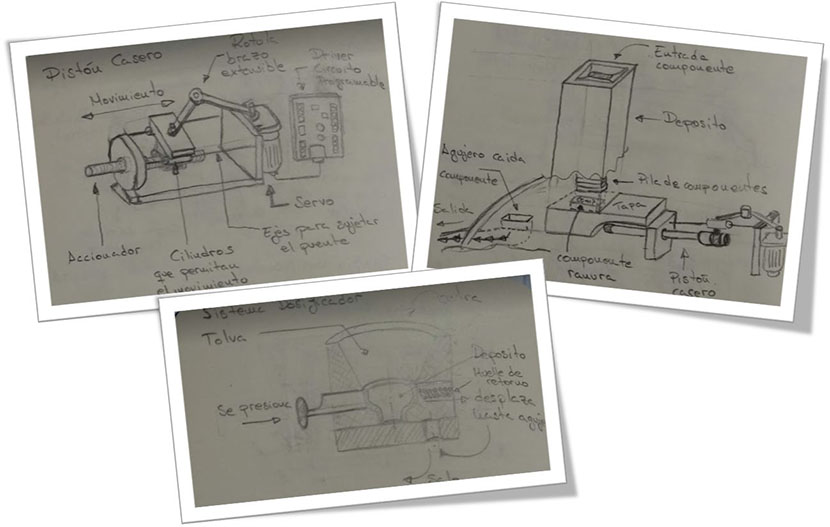
7.-The sketches
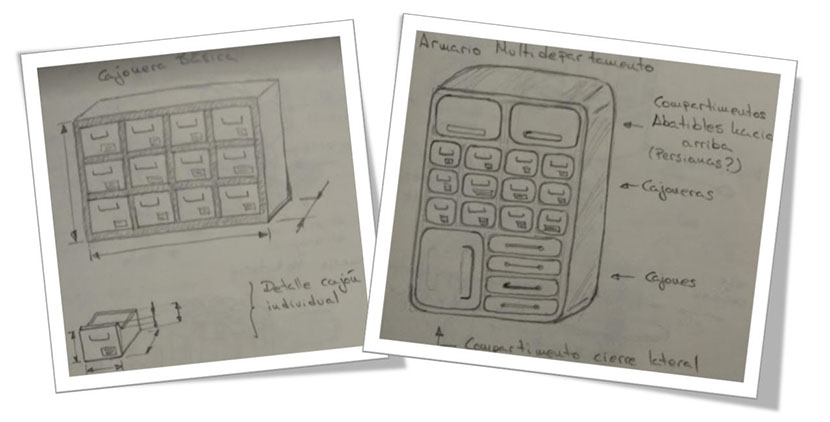
To start, I wrote an elementary idea about the storage furniture.
Then I had the idea to change the standard form, and I thought in a cylindrical form for the furniture.
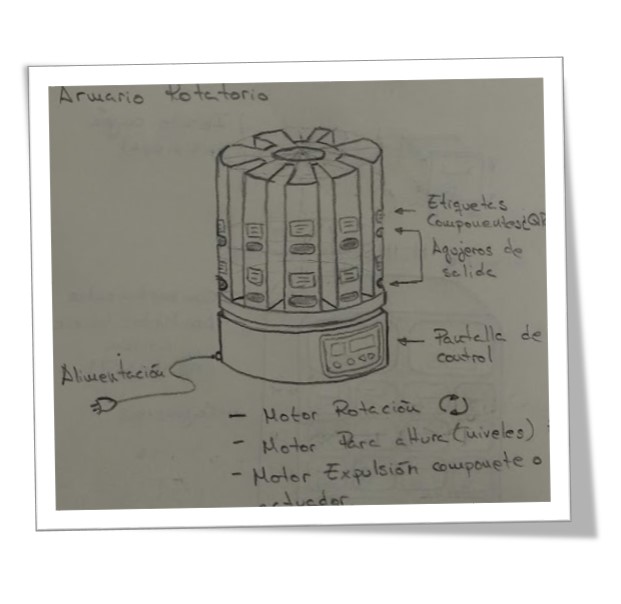
This design has the advantage to permit rotate the different box of components to select the component that I want. This selection system will be automatic, to do easier to take components.
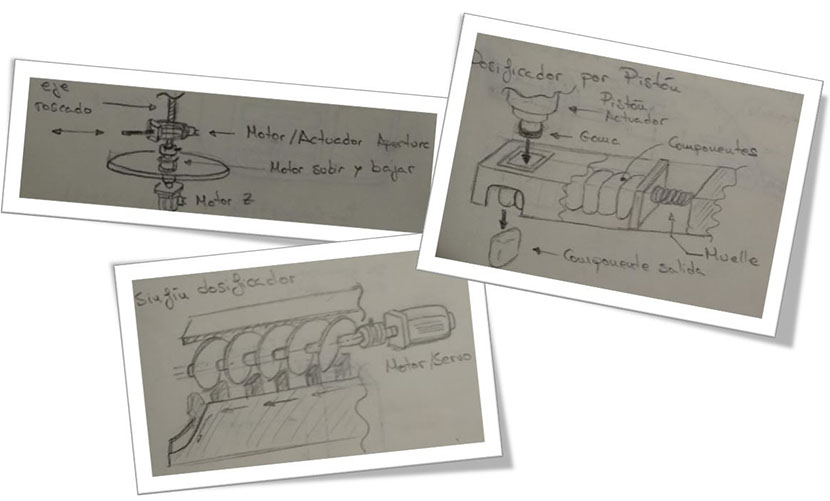
Later I thought that the storage furniture could discharge the electronics components automatically. Then I draw the next sketch.
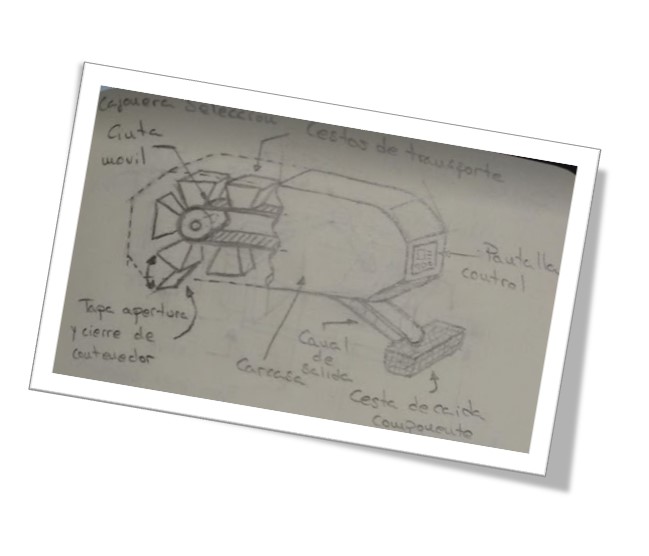
The other one sketch are ideas about actuators systems to discharge components or select the boxes automatically.
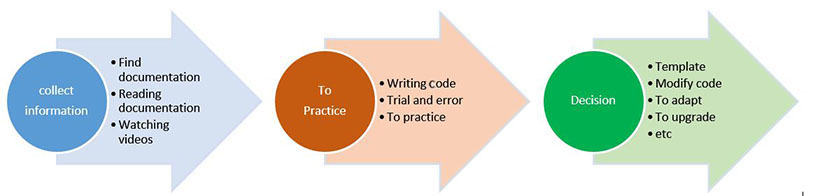
8.-Spiral model diagram
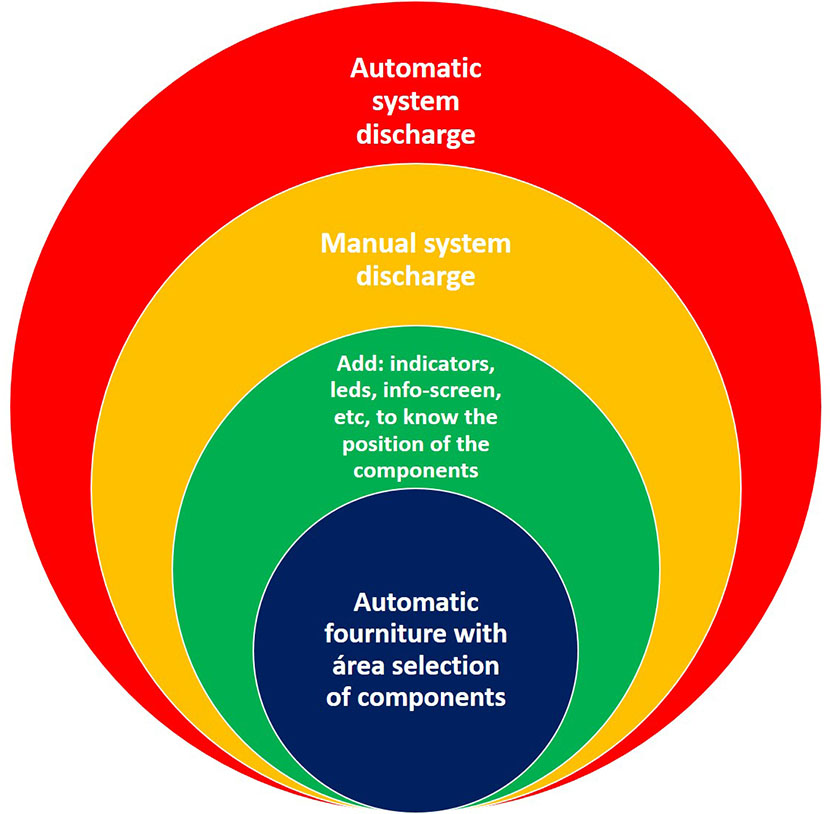
1.-Level: To design a furniture that it indicates the area or region where are the component selected
(row, column, boxes...).
2.-Level: include items to see the exact box where the component is.
3.- to create a manual system to discharge the components.
4.- to create an automatic system to discharge the components.