3. Computer Aided Design
In this assignment, I designed 2D and 3D models. In my view, I think “Fusion 360” suitable in designing a 3D model more than it is suitable for 2D designations due to the presence of the three axes in it and because of the multi-features found in it, unlike “Inkscape”, which is more suitable for 2D designs.
2D Models Using Inkscape
To install Inkscape click here.
To export the file:
- as vector project (File / save as)
- as images (File / Export PNG Image…)
Flower Line Art Logo

How to draw your own line art logo? The idea drawing Linr Art Logo is to mainly Outline the main boarders and characteristic of whatever subject you’re trying to draw; It’s very easy steps, all you have to do is to :
1. Upload your image in Inkscape for which you want to draw the logo.
2. Click on “Objects” >> “Fill and Stroke” >> “Opacity” , Change the Opacity so you can see what you are drawing on; That’s will make drawing easier.

3. Click on “Draw Bezier curves and straight lines” >> “Create regular Bezier path” >> “Ellipse” Shape; That’s to start drawing lines.
Press “Enter” after drawing each line.
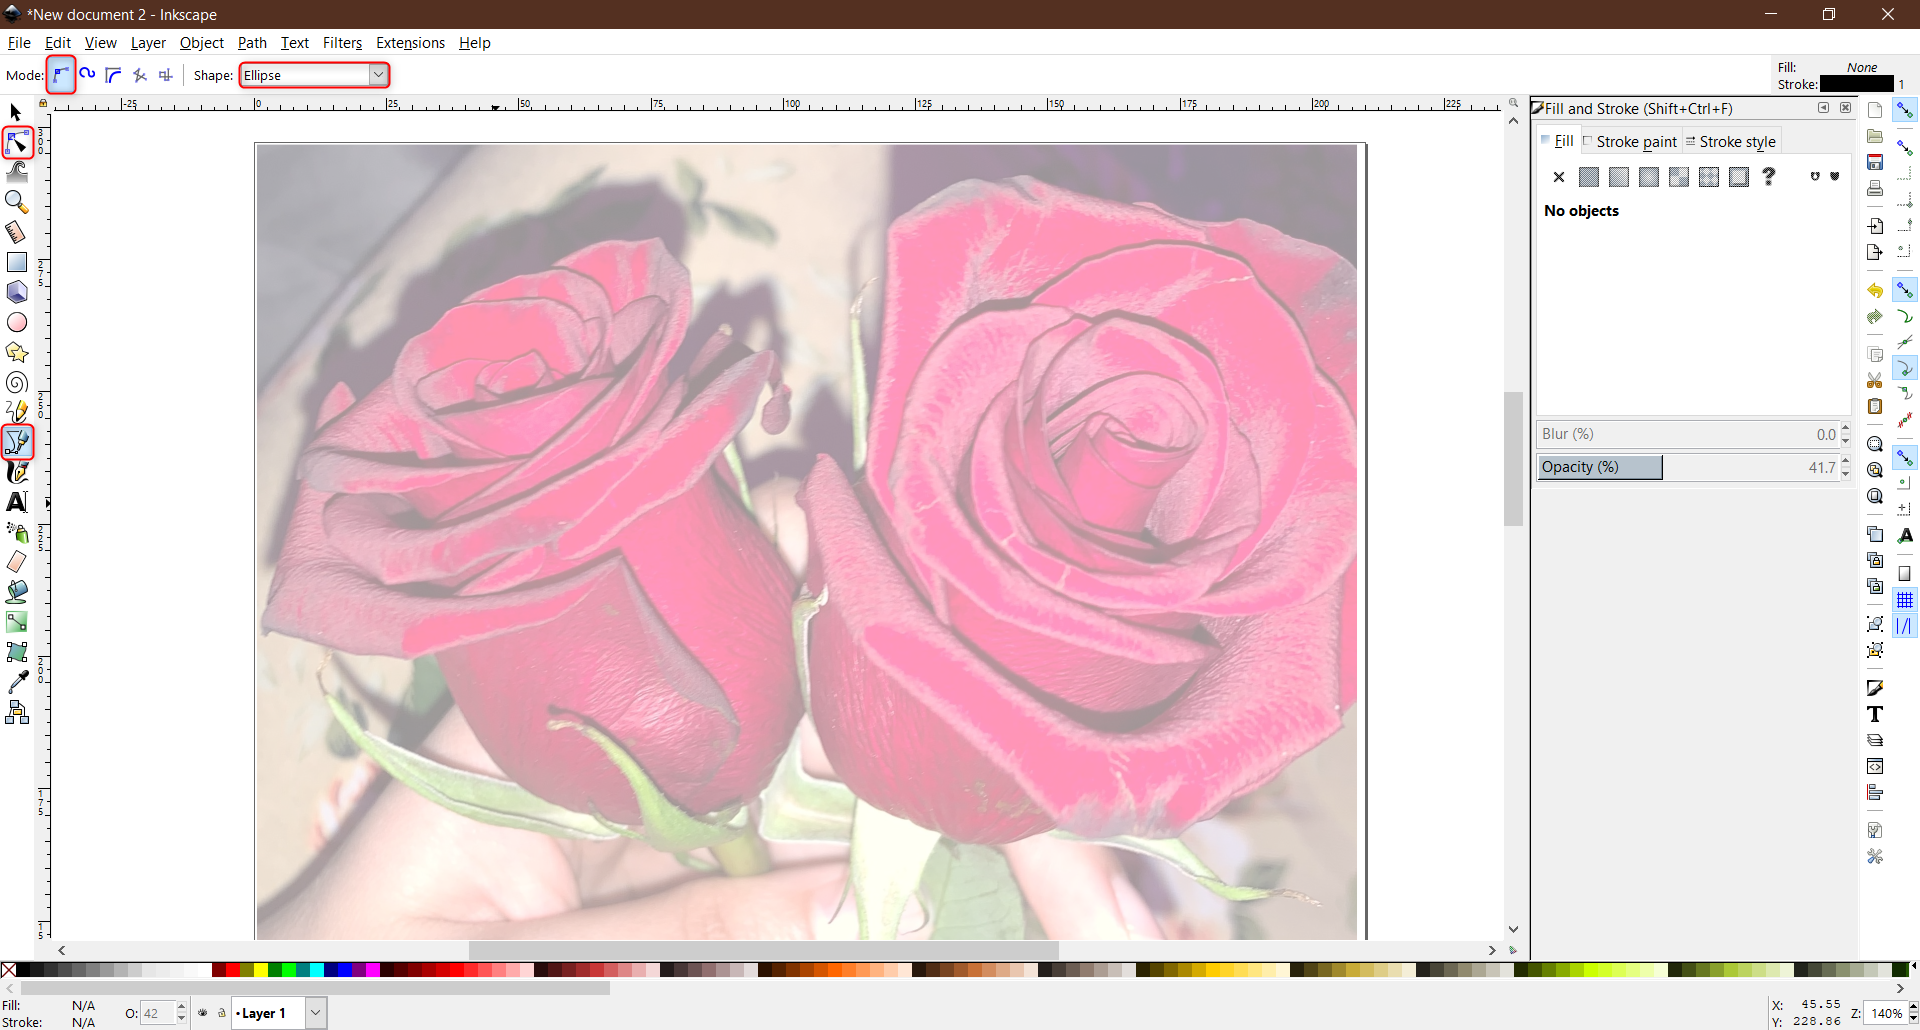
4. Drag the line down so it takes the shape of the object using “Edit paths by nodes”. Apply this for each line.
5. After finishing drawing the lines, remove the actual photo.

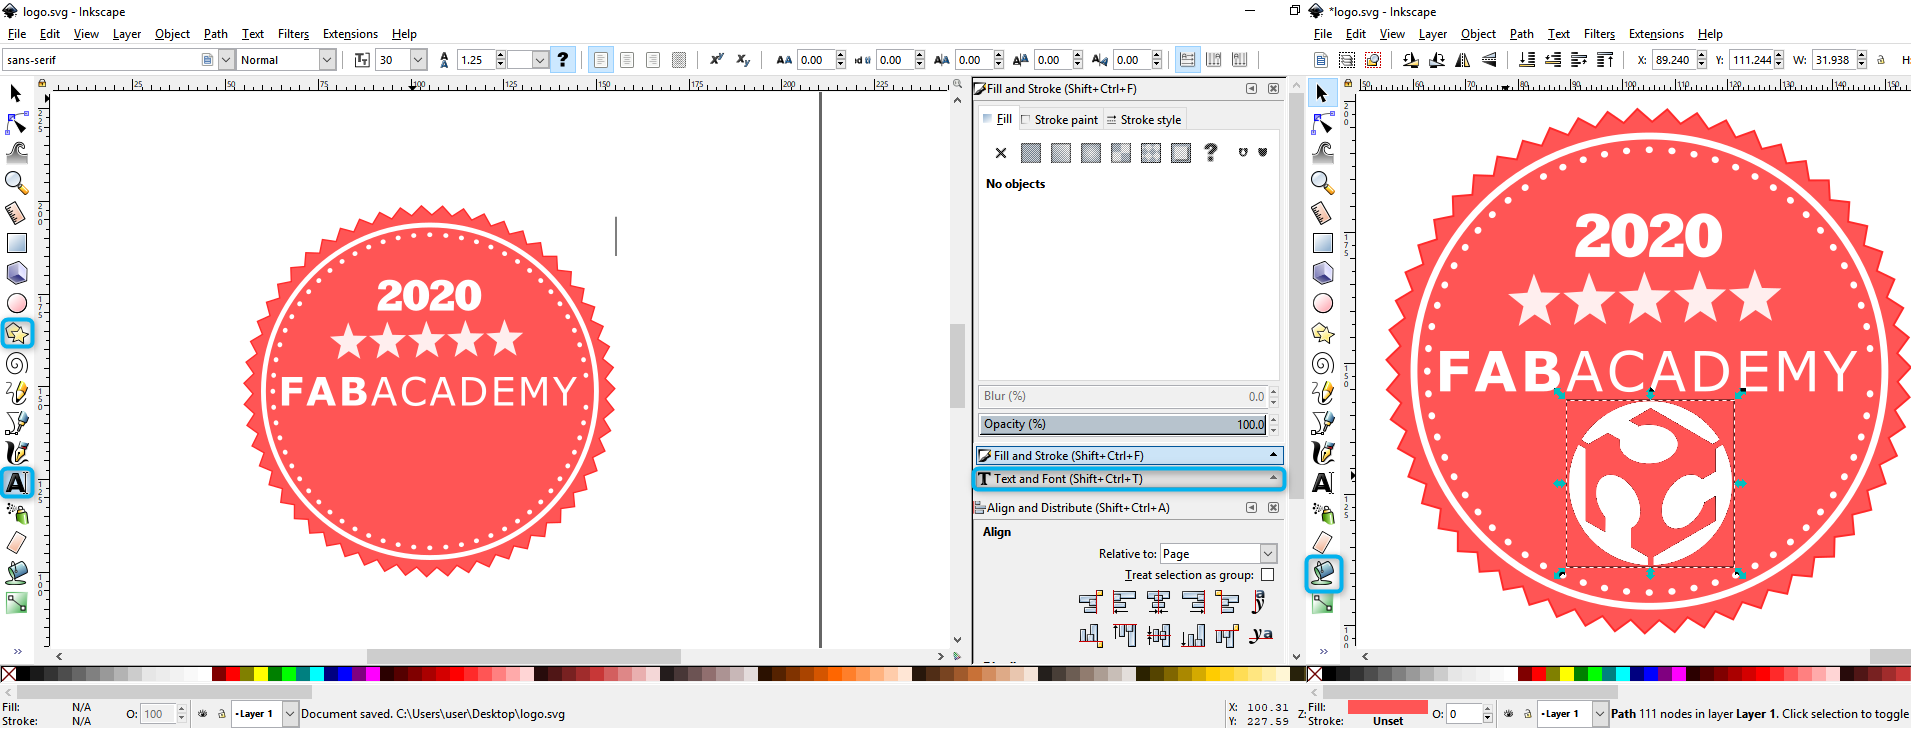
Fabacademy Logo
![]()
Using Inkscape Draw a star with multi corners & use the “Align” feature to place the star in the center of the page .. Also draw two inner circles & use “Fill and Stroke” feature to design it..
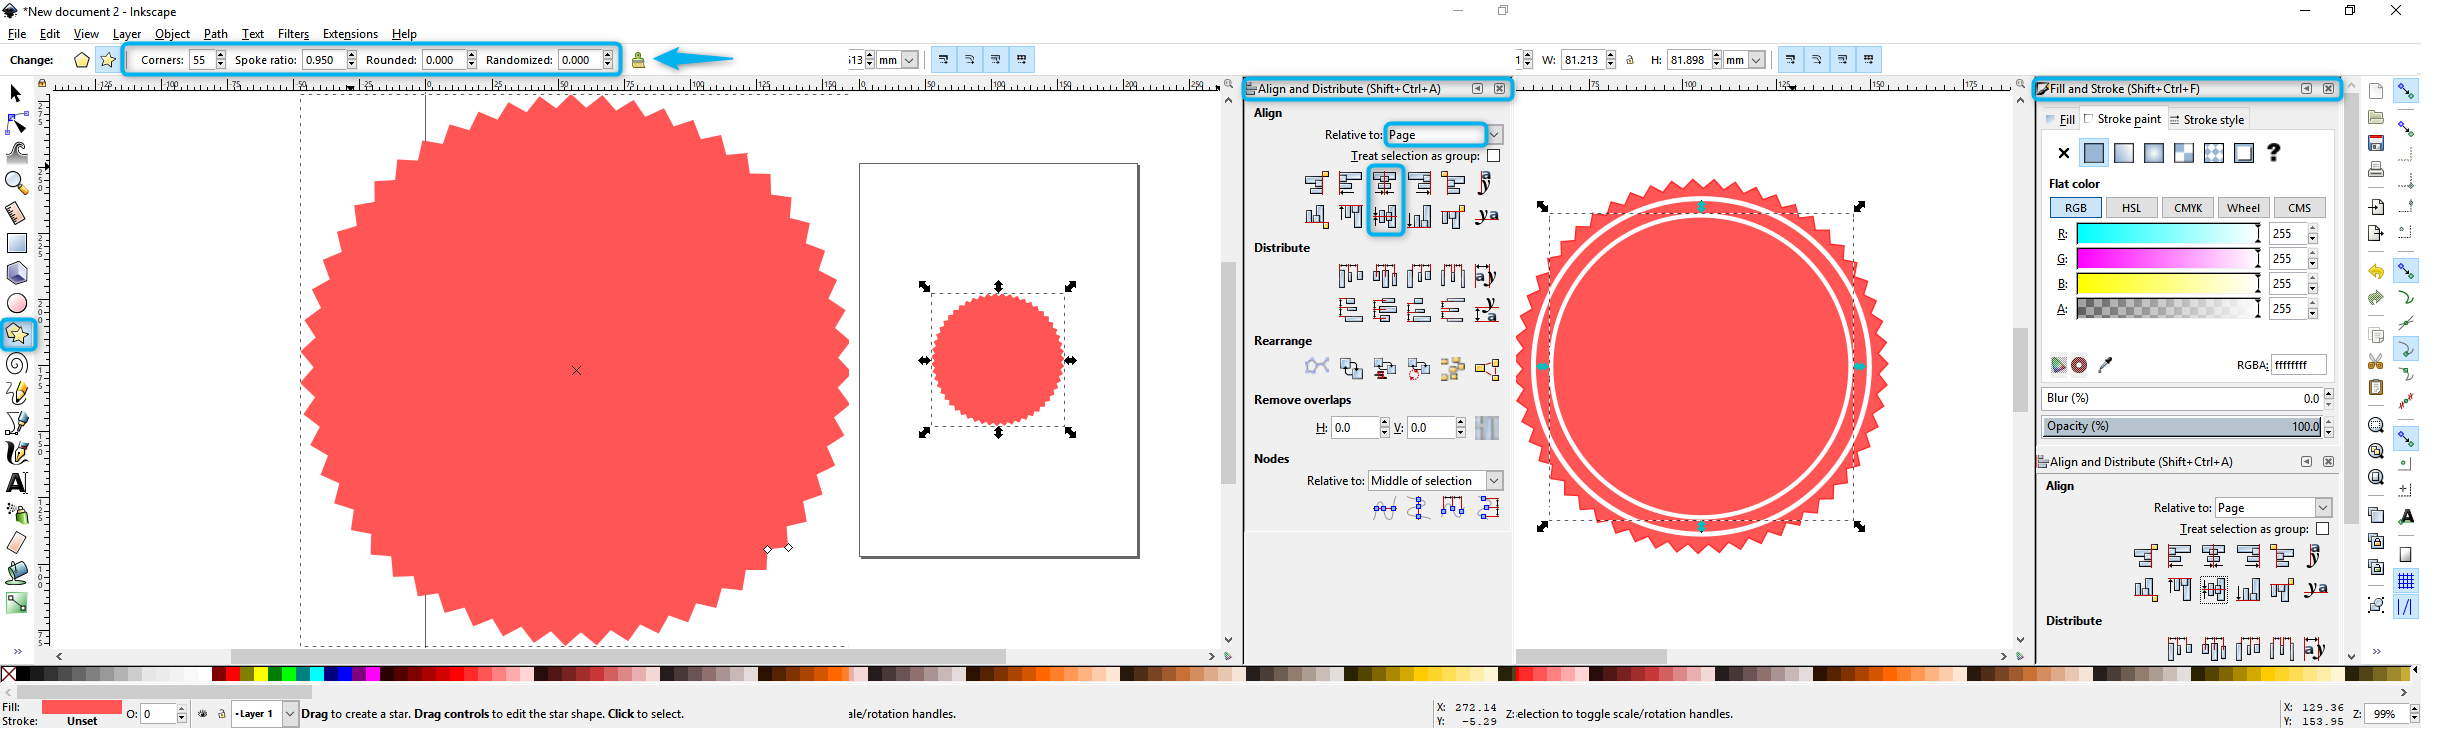
Draw a small circle and add it to the markers using “Objects to Marker”
Select the inner circle and choose “Object to Path” & choose the drawn circle marker
To increase the circles number “Edit paths by nodes” then “Insert new nodes into selected segments”
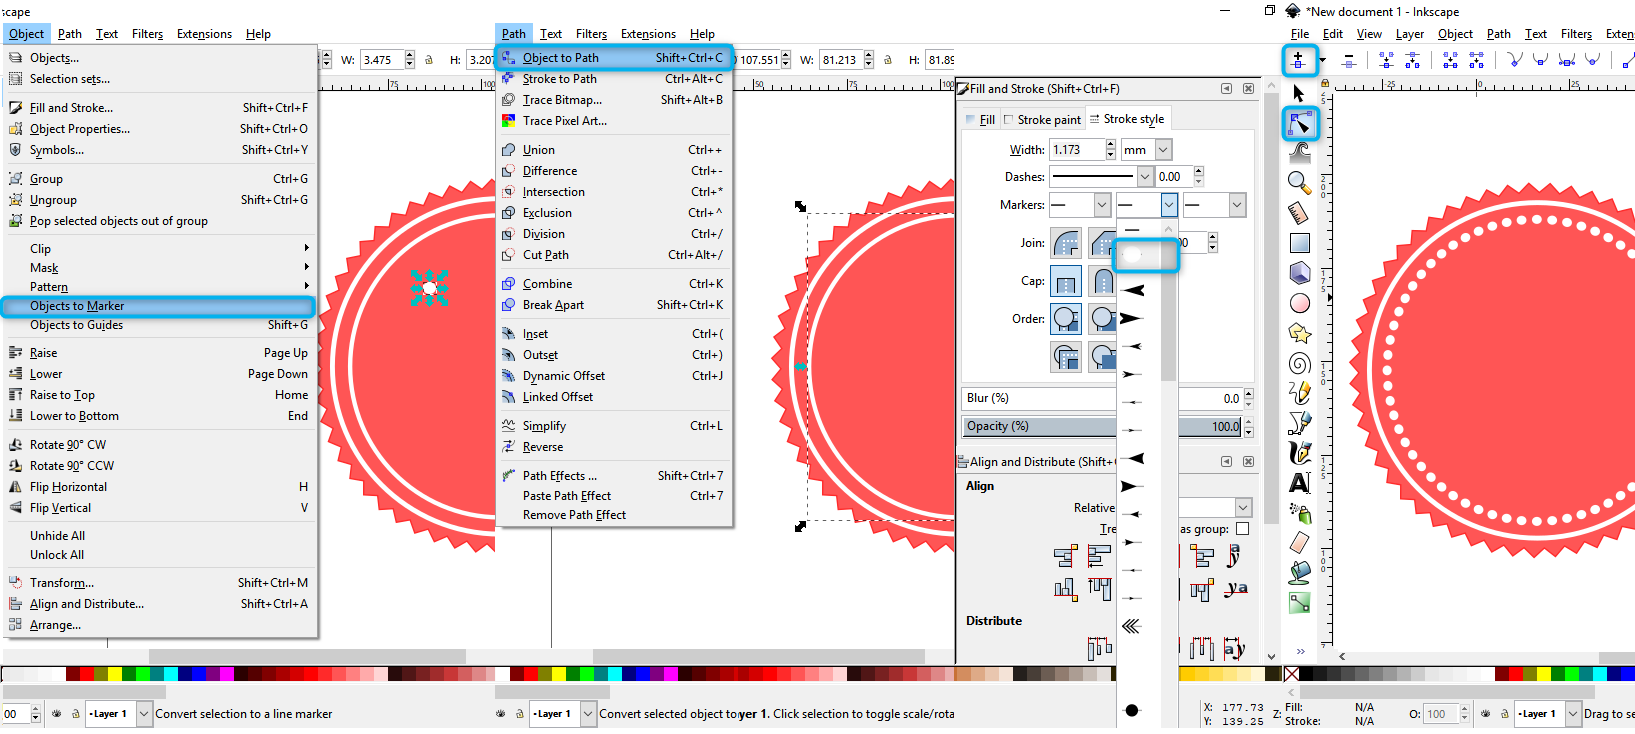 Fill the design using texts, stars & Fablab logo (Paste the logo picture)..
Useful Links
3D Models Using Fusion 360
To export the file
- “File” >> “Save”
- “File” >> “Export”
- Save it as STL by right click on the name of the body >> “Save as STL”
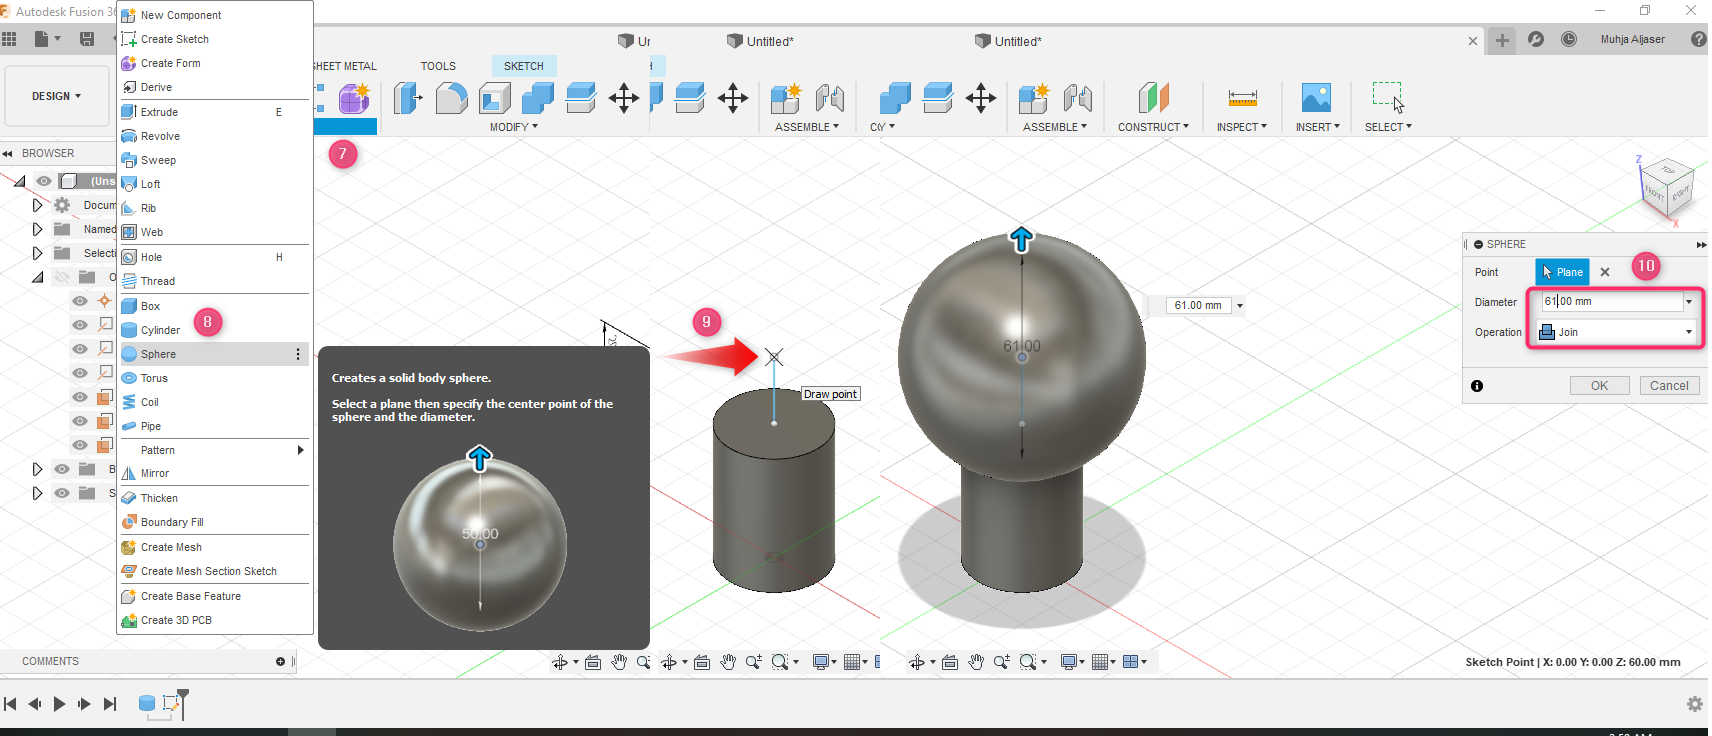
LED Light Ball
-
I used in the LED Light Ball the Cylinder Feature; Click on the top of the cylinder and draw the line up 20mm
-
Activate the Sphere tool and click on the end point of the construction line and type 61mm for the width of the sphere; Make sure that the operation is set to “join”.
-
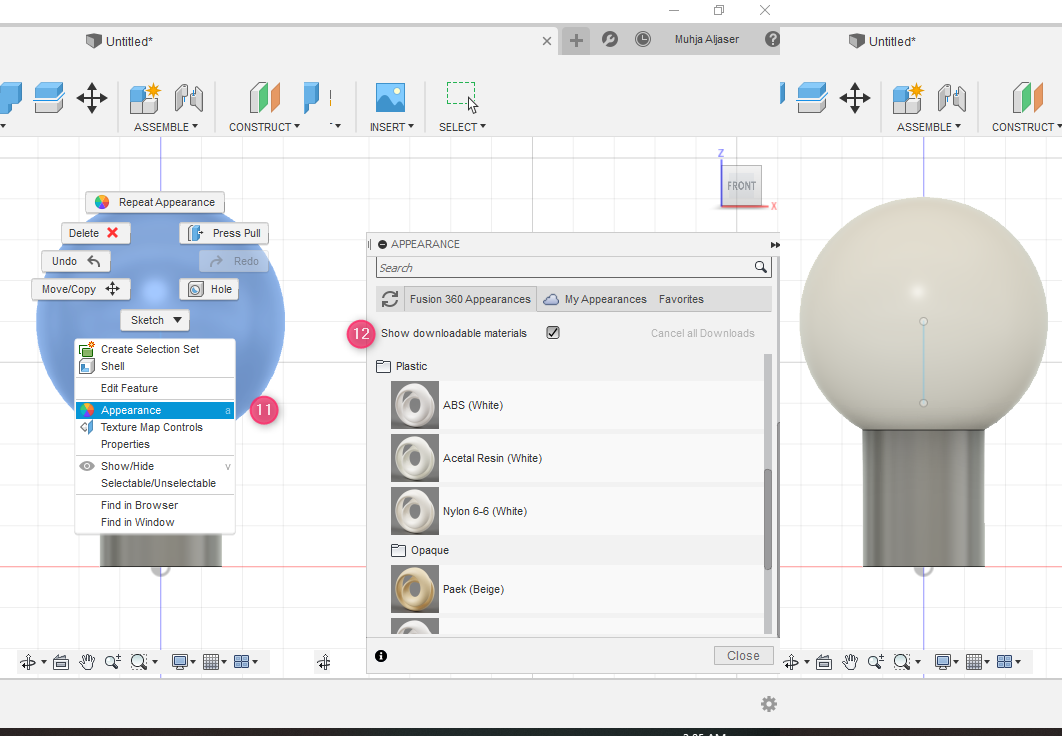
Use the Appearances Feature to show the different; With a right click on the object >> “Appearances” >> choose the suitable material.
-
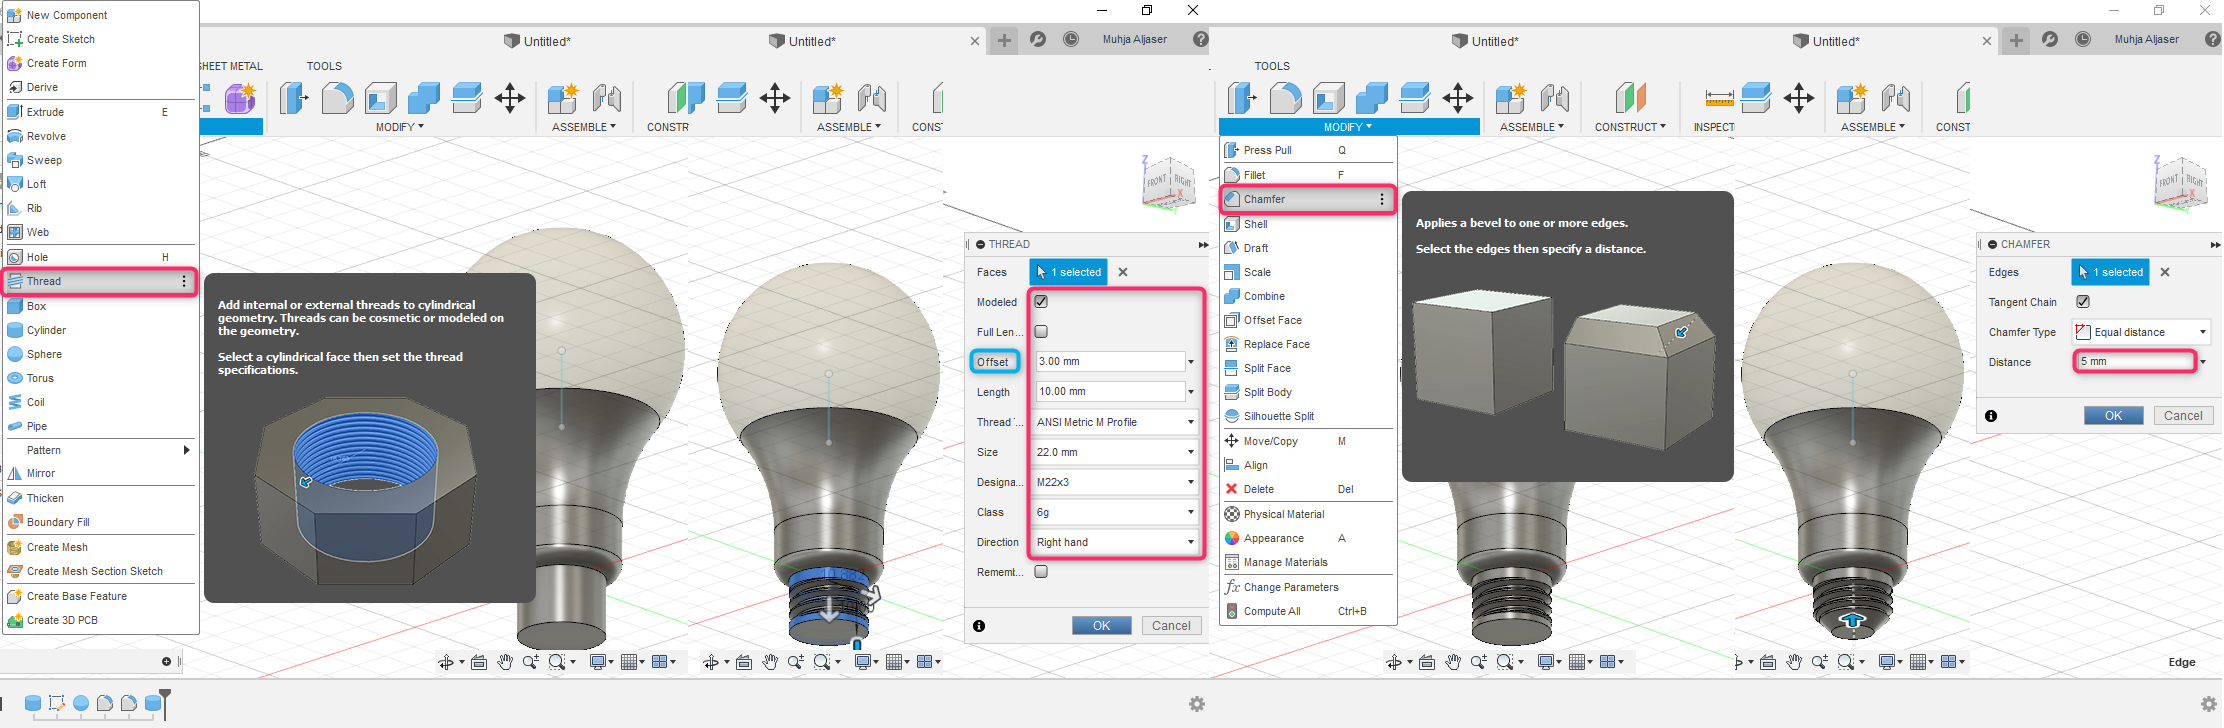
Fillet, Thread & Chamfer tools
Select the line in the middle and press the letter “F” , Type the Fillet Repeat the steps for the bottom of the LED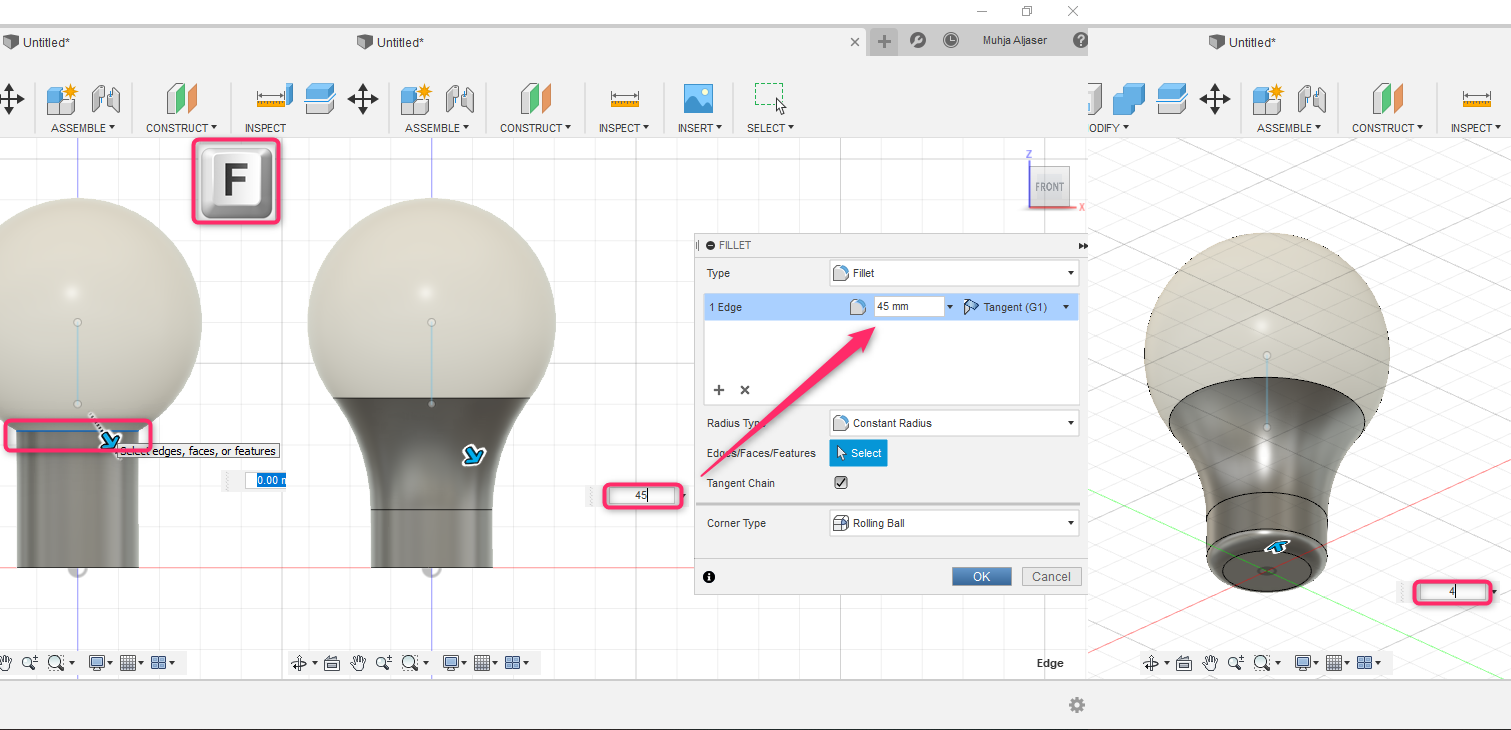 To create the threaded area in the bottom, activate the cylinder feature , to add the thread select the thread from Create menu.
The reason to add an offset is to add a chamfer to the end of the thread.
To create the threaded area in the bottom, activate the cylinder feature , to add the thread select the thread from Create menu.
The reason to add an offset is to add a chamfer to the end of the thread.
Butterfly Valve
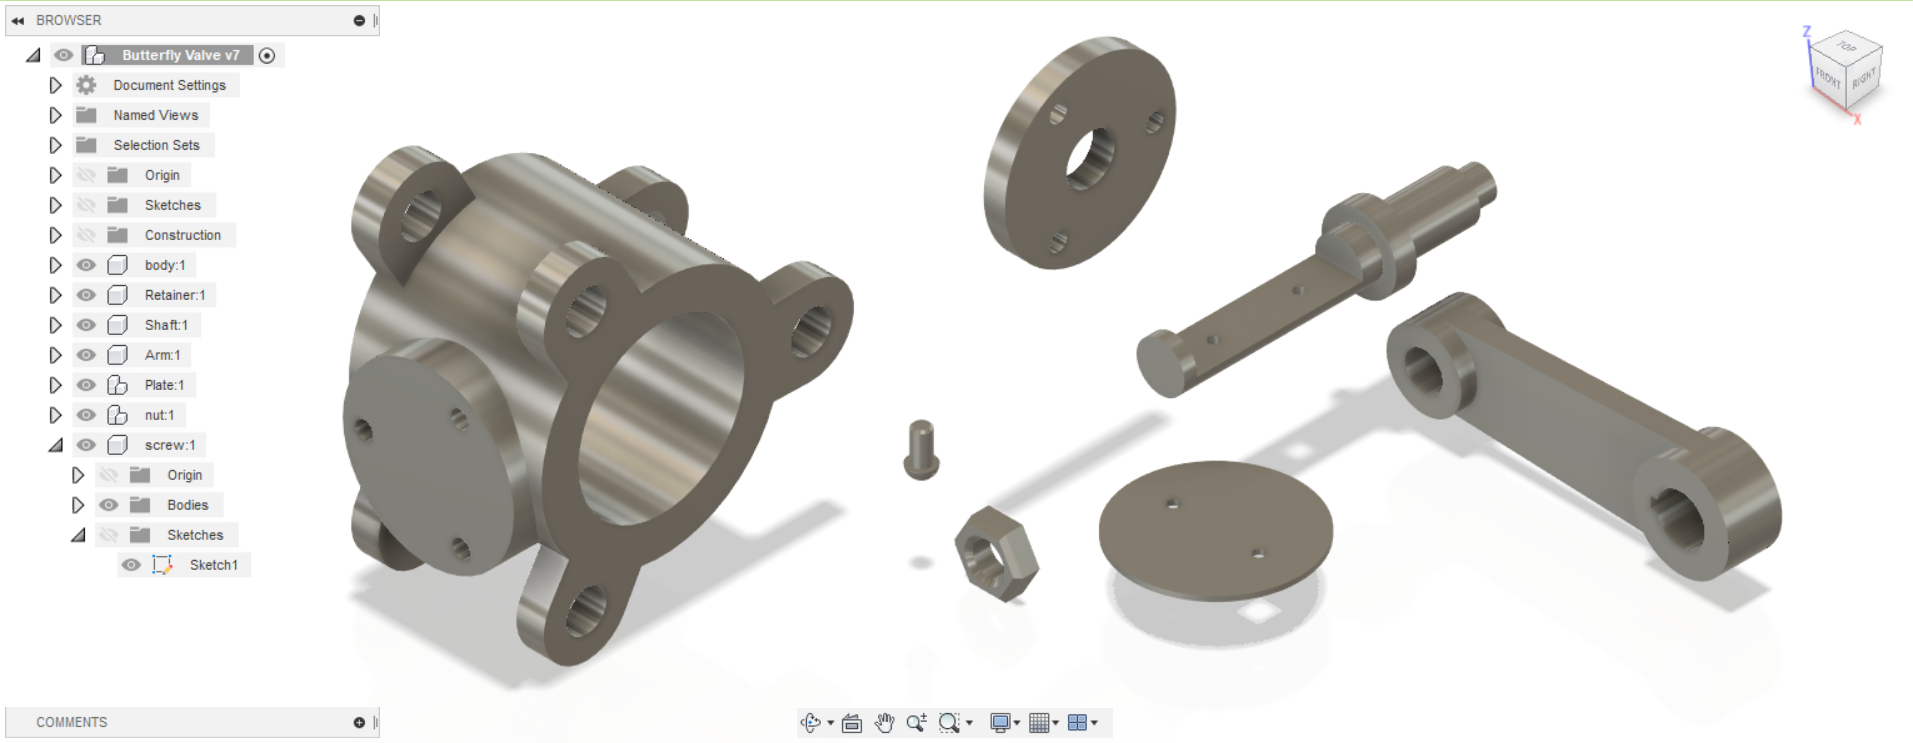
To make this design, I followed the steps in the Butterfly Valve Tutorial In addition to this Tutorial in How To Make Threads In Fusion 360. I am thinking to use this design in Machine Design week to help in making a Coffee Machine.
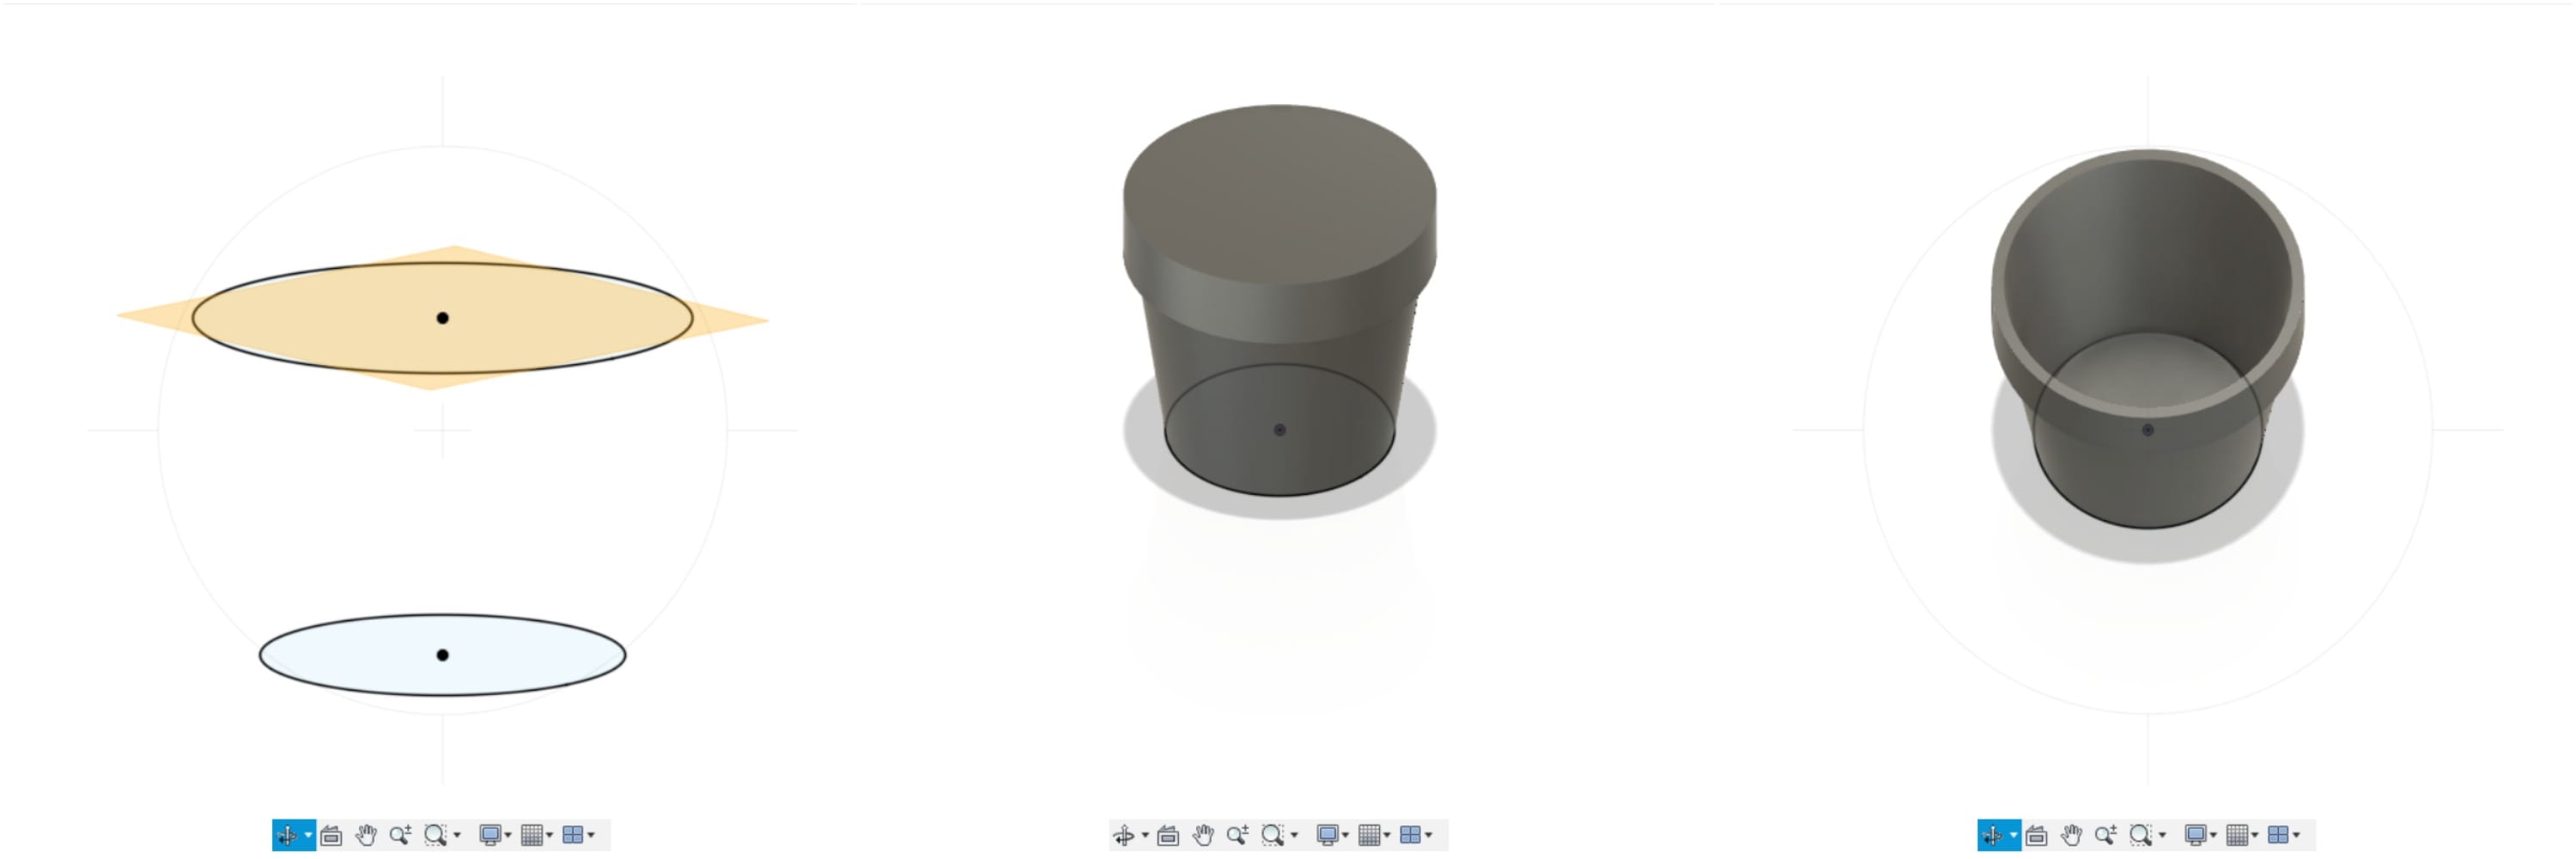
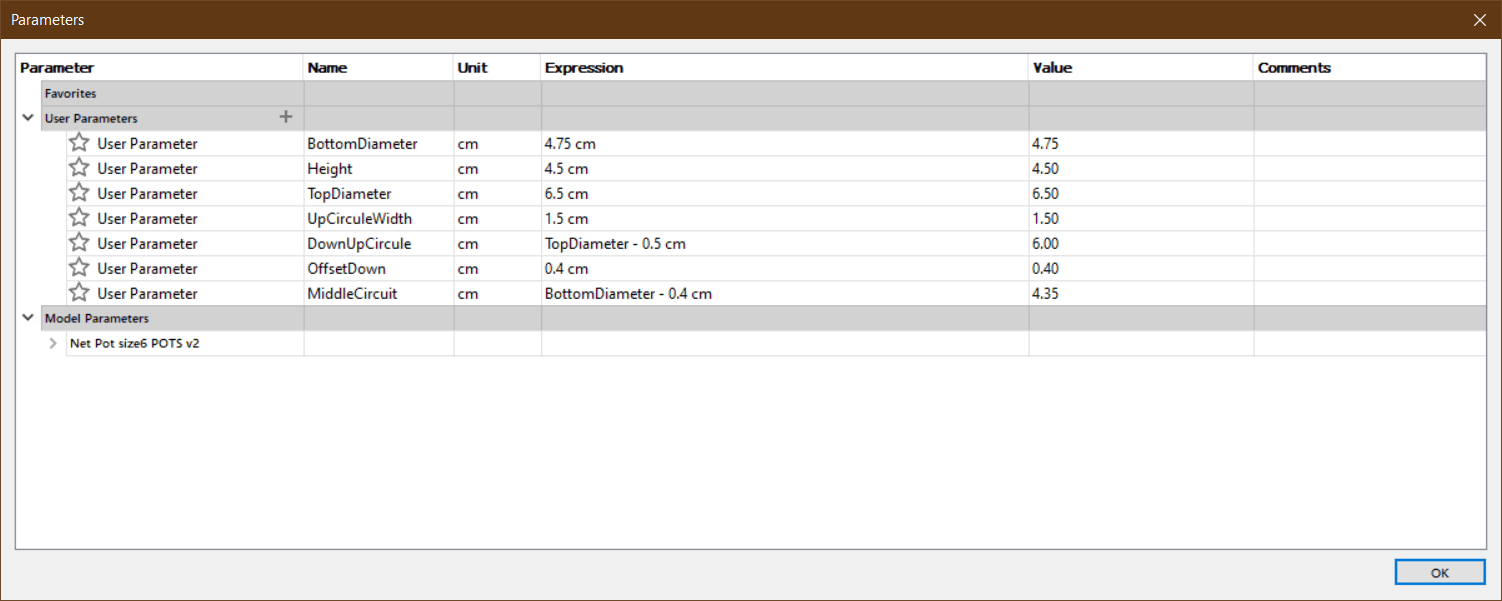
3D Net Pot to my Final Project
I will design a net pot to hold the plants that will be sprayed with water. Four specific features were used in this design:
- “Offset Plane” which is to select a face or plane and specify offset distance to create a construction plane.
- “Loft” which is to select a series of faces to create a transitional shape between them.
- “Extrude”
- “Circular Pattern” by selecting faces, feature or body to arrange them in an circular pattern.
Also, I used the “Fillet” feature to round the net pot angles.
First I will draw the pot, using the “Offset” feature, I drew another circular base. To draw the upper part of it, I used the “Extrude” feature, while for the lower part, I used the “Loft” feature.
To empty the pot from inside, I also used the Loft feature.
To cut the net from the pots, I drew one net on a plane, and then I cut it from the pot using “Extrude”. To repeat the net around the pot I used the “Circular Pattern”.
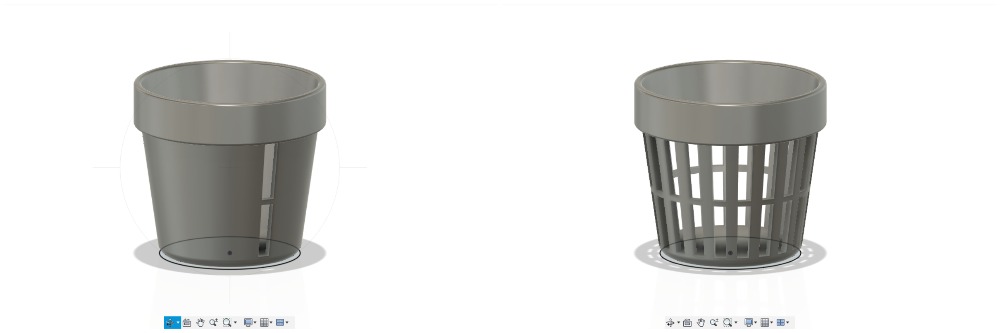 I drew the holes for the bottom base and using an “Extrude” cut them.
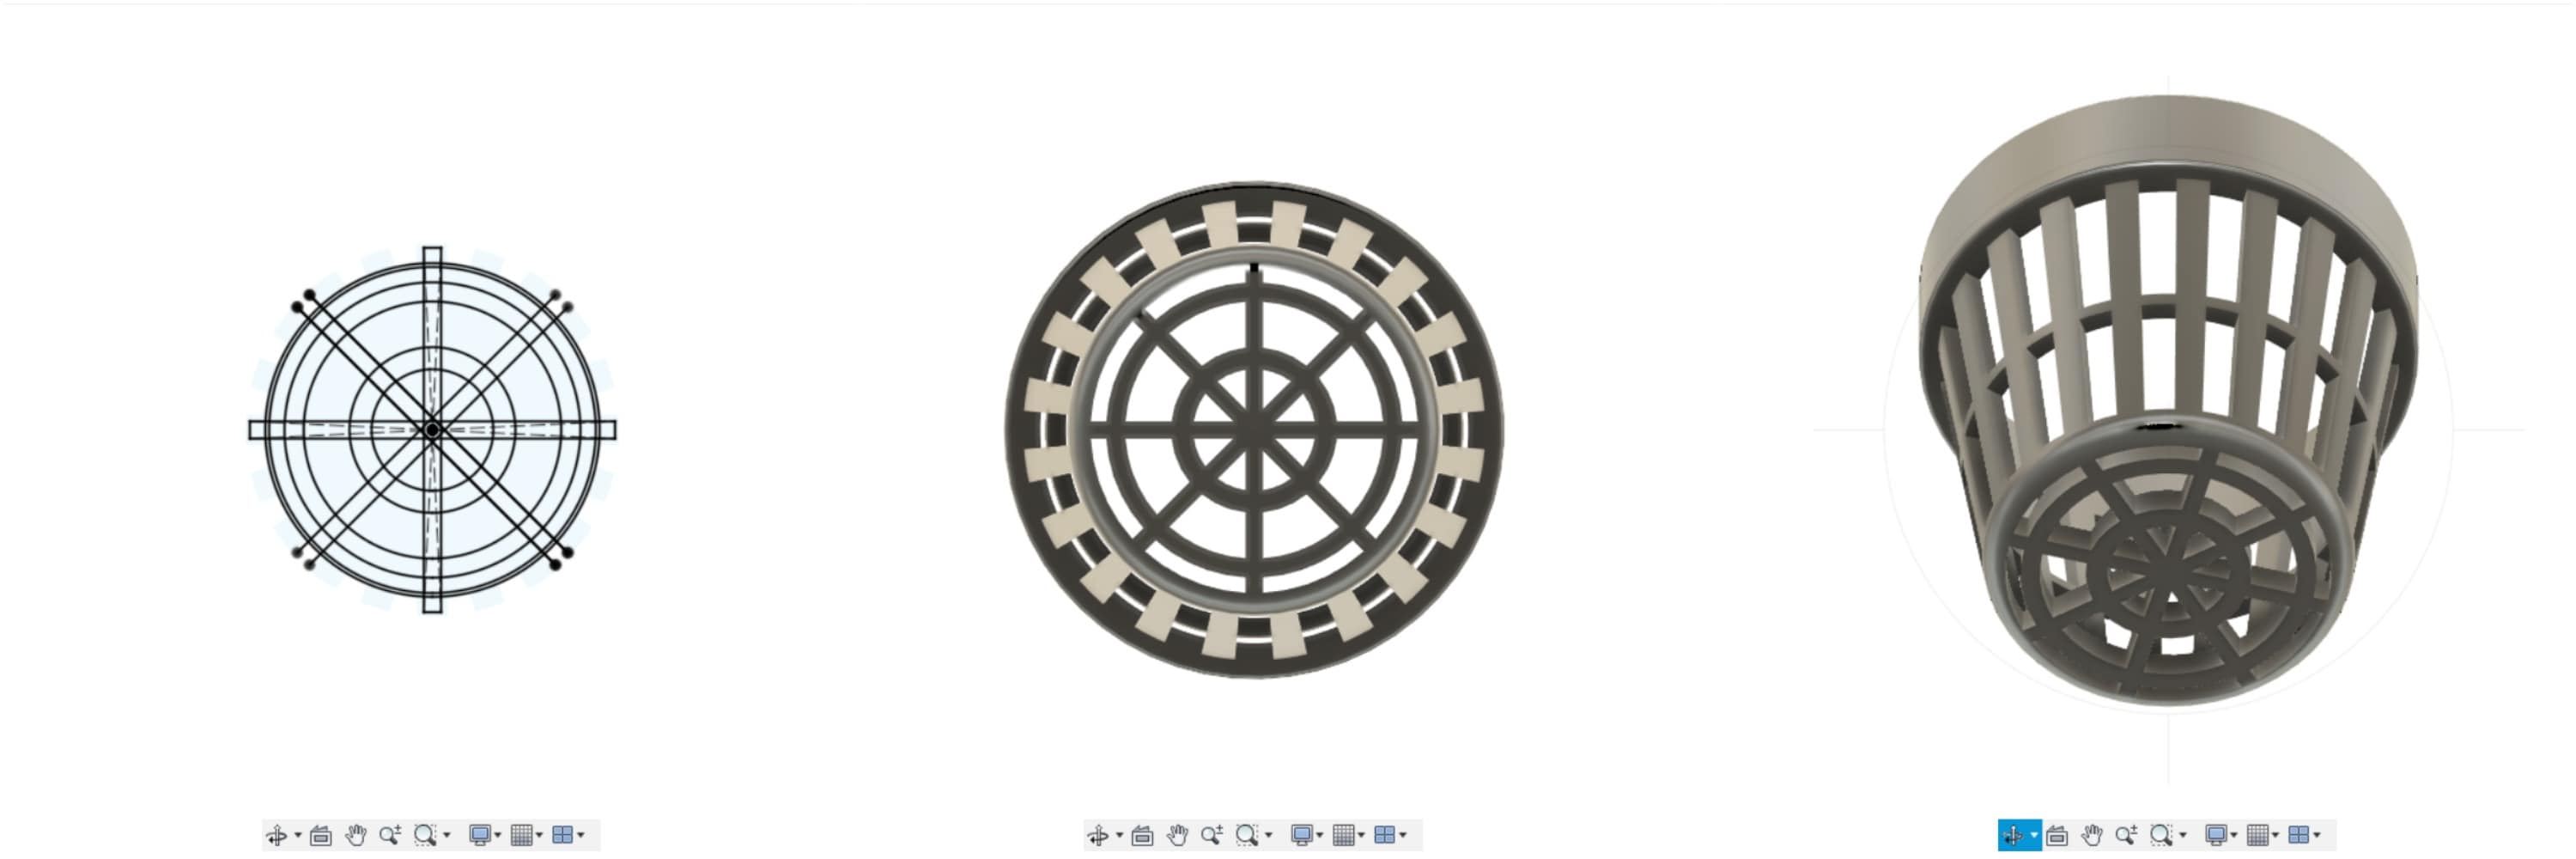
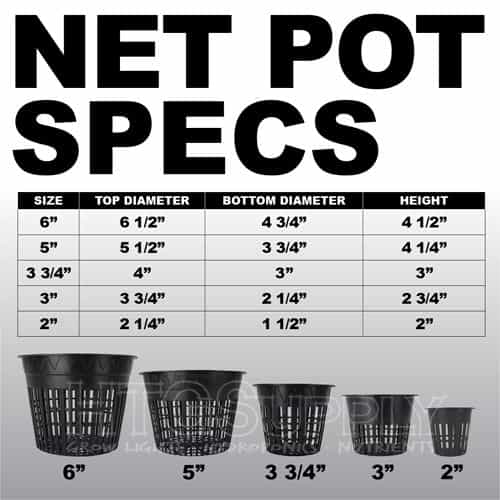
As for the size of the net pot, I designed 6cm in size based on these sizes.
I used a “parameter” to be able to change its size to the size I want whenever I want.
Useful Links
Problems
- When uploading pictures, they were shown to me on “Atom” program, but when pushing them to my FabAcademy site, they do not appear. It became clear to me after that, that the uppercase letter differs from the small letter of the site; When writing “flower” with the lowercase letter, the pictures do not appear on the site because the real filename is “Flower”, in the capital letter.