2. Project Management
Make a Website

Overview
MkDocs Project documentation with Markdown
What is MkDocs?
MkDocs is a fast, simple and downright gorgeous static site generator that’s geared towards building project documentation. Documentation source files are written in Markdown.
What is Markdown?
Markdown is a lightweight markup language with plain-text-formatting syntax. Its design allows it to be converted to many output formats, but the original tool by the same name only supports HTML. Markdown is often used to format readme files, for writing messages in online discussion forums, and to create rich text using a plain text editor.
What Are HTML & CSS?
“HTML” and “CSS” go hand-in-hand in building a webpage, but each serve a very unique purpose. HTML and CSS are actually not technically programming languages.
HTML, HyperText Markup Language, gives content structure and meaning by defining that content as, for example, headings, paragraphs, or images. CSS, or Cascading Style Sheets, is a presentation language created to style the appearance of content—using, for example, fonts or colors.
The two languages—HTML and CSS—are independent of one another and should remain that way. CSS should not be written inside of an HTML document and vice versa. As a rule, HTML will always represent content, and CSS will always represent the appearance of that content.
Steps
-
Download Brackets or use any text editor
-
Choose a background and logo for your website
I chose these two (background.jpg & logo.png )

-
Create a new text editor for html + Save it as “index.html” + Write this code :
<html>
<head>
    <title>Muhja Website</title>
    <link href="style.css" rel="stylesheet" type="text/css">
</head>
<body>
    <header>

    <div class="row">
        <div class="logo">
        <img src="logo.png"
        </div>

    <ul class="main-nav">
        <li class="active"><a href=""> HOME </a></li>
        <li><a href=""> ABOUT </a></li>
        <li><a href=""> ASSIGNMENTS </a></li>
        <li><a href=""> PROJECTS </a></li>

    </ul>

    </div>

    <div class="hero">
    <h1>MAKE ALMOST ANYTHING !</h1>

    <div class="button">
        <a href="" class="btn btn-one"> STUDENT AGREEMENT </a>
        <a href="" class="btn btn-two"> FINAL PROJECT </a>
    </div>

    </div>

    </header>
</body>
</html>
4 . Create a new text editor for css + Save it as “style.css” + Write this code :
*
{
    margin: 0;
    padding: 0;
}

body
{
    font-family: monospace;
}
.row
{
    max-width: 1200px;
    margin: auto;
}

.main-nav
{
    float: right;
    list-style: none;
    margin-top: 30px;
}
.main-nav li
{
    display: inline-block;
}

.main-nav li.active a
{
    border: 1px solid white;

}

.main-nav li a:hover
{
    border: 1px solid white;
}


.main-nav li a
{
    color: white;
    text-decoration: none;
    padding: 5px 20px;
    font-family: "Roboto", sans-serif;
    font-size: 15px;
}

.hero
{
    position: absolute;
    width: 1200px;
    margin-left: 0px;
    margin-top: 0px;

}


h1
{
    color: white;
    text-transform: uppercase;
    font-size: 70px;
    text-align: center;
    margin-top: 275px;

}
header
{
    background-image:linear-gradient(rgba(0,0,0,0.5),rgba(0,0,0,0.5)),url(background.jpg);
    height: 100vh;
    background-size: cover;
    background-position: center;
}
.button
{
    margin-top: 30px;
    margin-left: 440px;
}

.btn
{
    border: 1px solid white;
    padding: 10px 30px;
    color: white;
    text-decoration: none;
    margin-right: 5px;
    font-size: 13px;
    text-transform: uppercase;
}
.btn-one
{
    background-color: darkorange;
    font-family: "Roboto", sans-serif;
}

.btn-two
{
    font-family: "Roboto", sans-serif;
}


.btn-two:hover
{
    background-color: darkorange;
    transition: all 0.5s ease-in;


}

.logo img
{
    width: 250px;
    height: auto;
}
5 . Open “index.html” with “Internet Explorer” to see your website .. This is My Website
(NOTE: YOU CAN CHANGE THE IMAGES, THE PAGE TITLE AND WHAT INSIDE IT)
Problem
- “This is My Website” link is broken , Don’t copy the page link ..
 But put it as if you would put a picture, but without putting ![] ..

Useful links
- Building Your First Web Page
- How To Create A Website Using HTML And CSS Website Tutorial
- WIX Logo Maker
- VectorStock Pictures
Git Tutorial
SSH Key
Steps to Generate Your New SSH Key :
-
Install Git Git Bash for windows users Gitbash
-
Open Git Bash by ‘ Right Click & Git Bash Here ‘ on Desktop or in your folder
-
Paste the text bellow (Note: type your e-mail)
ssh-keygen -t rsa -b 4096 -C "your_email@example.com"
(NOTE: PRESS ENTER FOR THE QUESTIONS) - Ensure the ssh-agent is running, Type :
eval $(ssh-agent -s) - Add your SSH private key to the ssh-agent. If you created your key with a different name, or if you are adding an existing key that has a different name, replace id_rsa in the command with the name of your private key file, Type :
ssh-add ~/.ssh/id_rsa - Copy the SSH key using the bellow text:
clip < ~/.ssh/id_rsa.pub - Paste the SSH key to your GitHub account.
Clone
Steps to Create Your Own Folder on Your PC :
- Copy URL
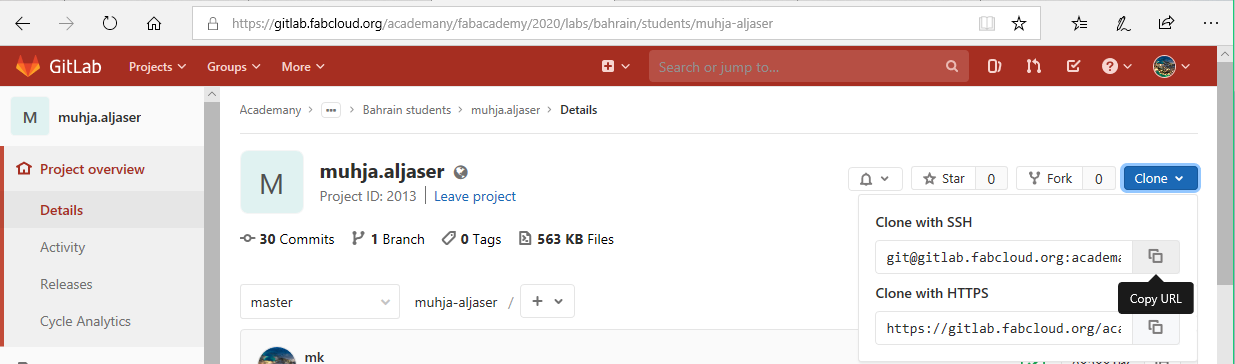
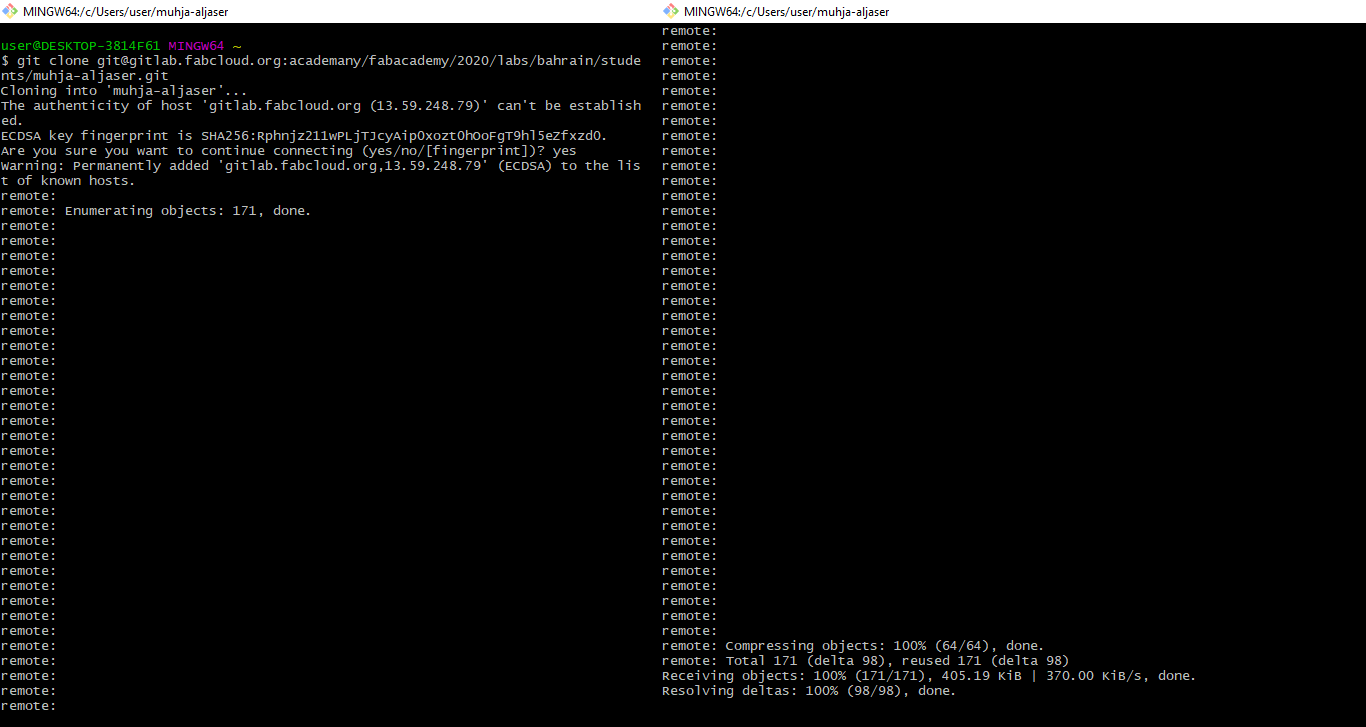
- Type (Note: Paste your URL)
git clone PASTEURLfor the Question Are you sure you want to continue connecting (yes/no/[fingerprint])? Type :yes
Useful links
Uploading and Pushing Files
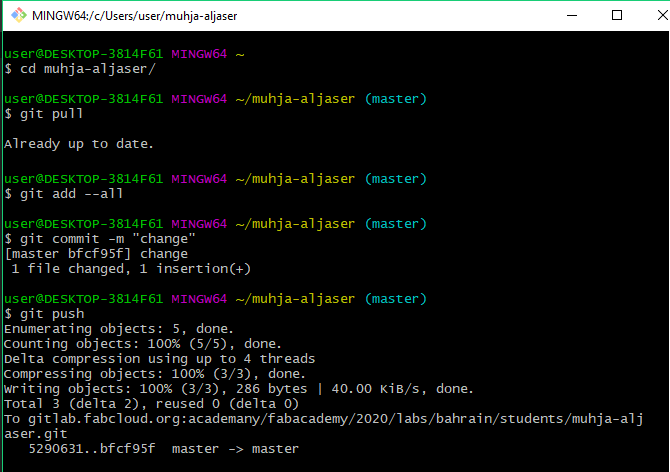
Steps to Save Any Change to Your Documents :
-
Call your folder ( EXAMPLE: my folder name muhja-aljaser)
cd muhja-aljaser/(NOTE: WRITE THE FIRST LETTERS OF YOUR FOLDER NAME & PRESS ‘TAB’ LOCK, THE PC WILL COMPLETE THE NAME)
-
To pull changes , type:
git pull - To add changes, type:
git add --all
OR
git add . - To add a comment to the change, type:
git commit -m "TYPE THE NAME OF CHANGE" - To push the work, type:
git push
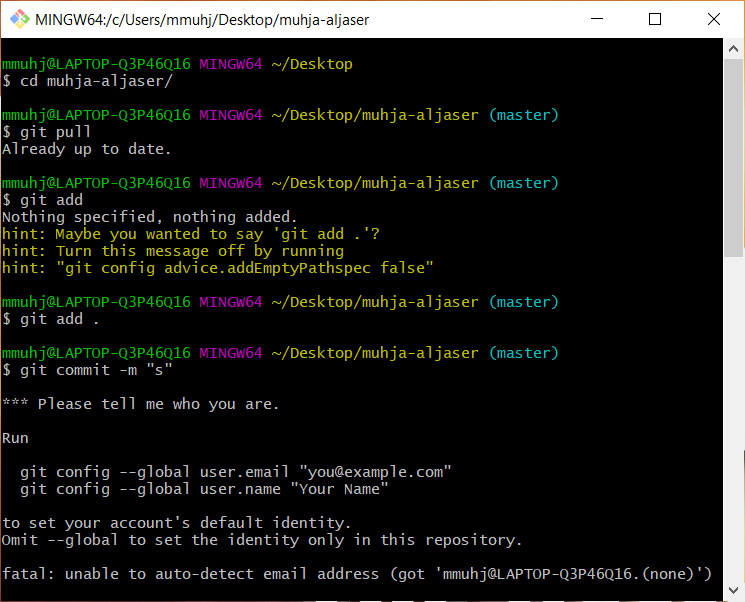
When Changing the Laptop
If you changed the used laptop and wanted to download the file again, you should repeat the previous steps in addition to this step :
- Run (NOTE : CHANGE WHAT IS INSIDE THE DOUBLE QOUTE)
git config --global user.email "you@example.com"
git config --global user.name "Your Name"
git config --global push.default simple
(NOTE : THIS STEP MUST BE DONE BEFOR PULLING ANY CHANGE):
<<<<<<< HEAD
Removing a big file wrongly committed
I uploaded a file that exceeds the size of a file I can upload; after I delete it whenever I try to push, it tells me that I am trying to push a file that is too large and none of my files get pushed.
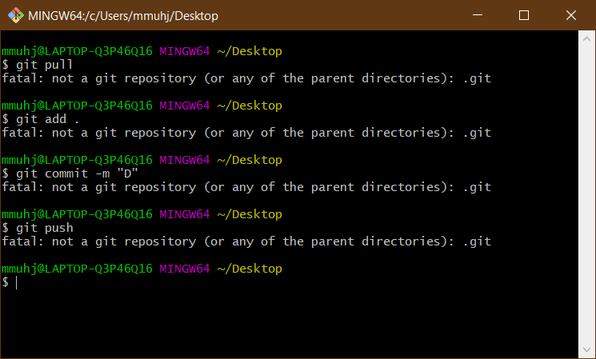
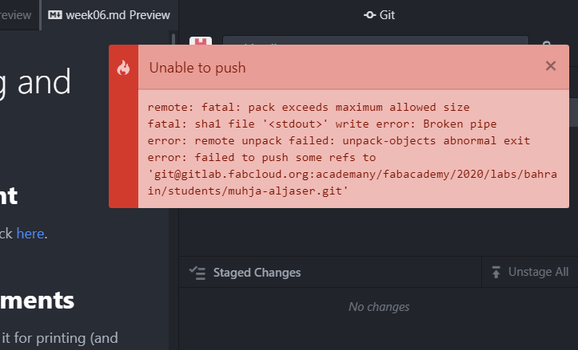
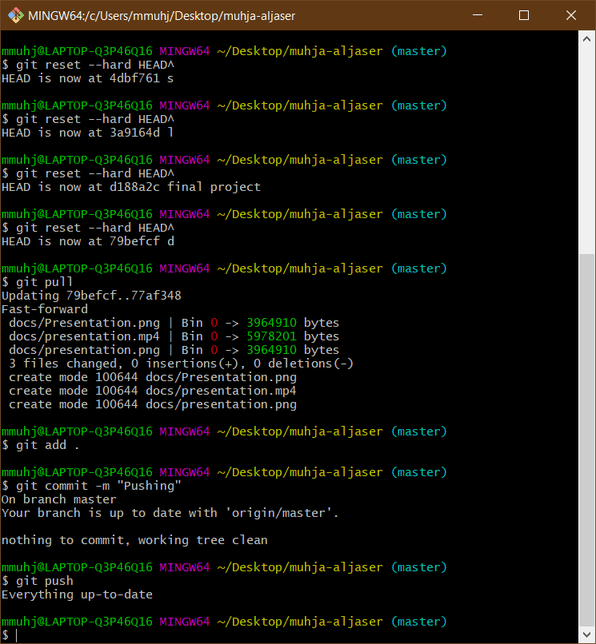
So, to remove it from the history I wrote this code as many as I try to push it and it didn’t push:
git reset --hard HEAD^
ATOM for Easier Work
- Install ATOM Click here
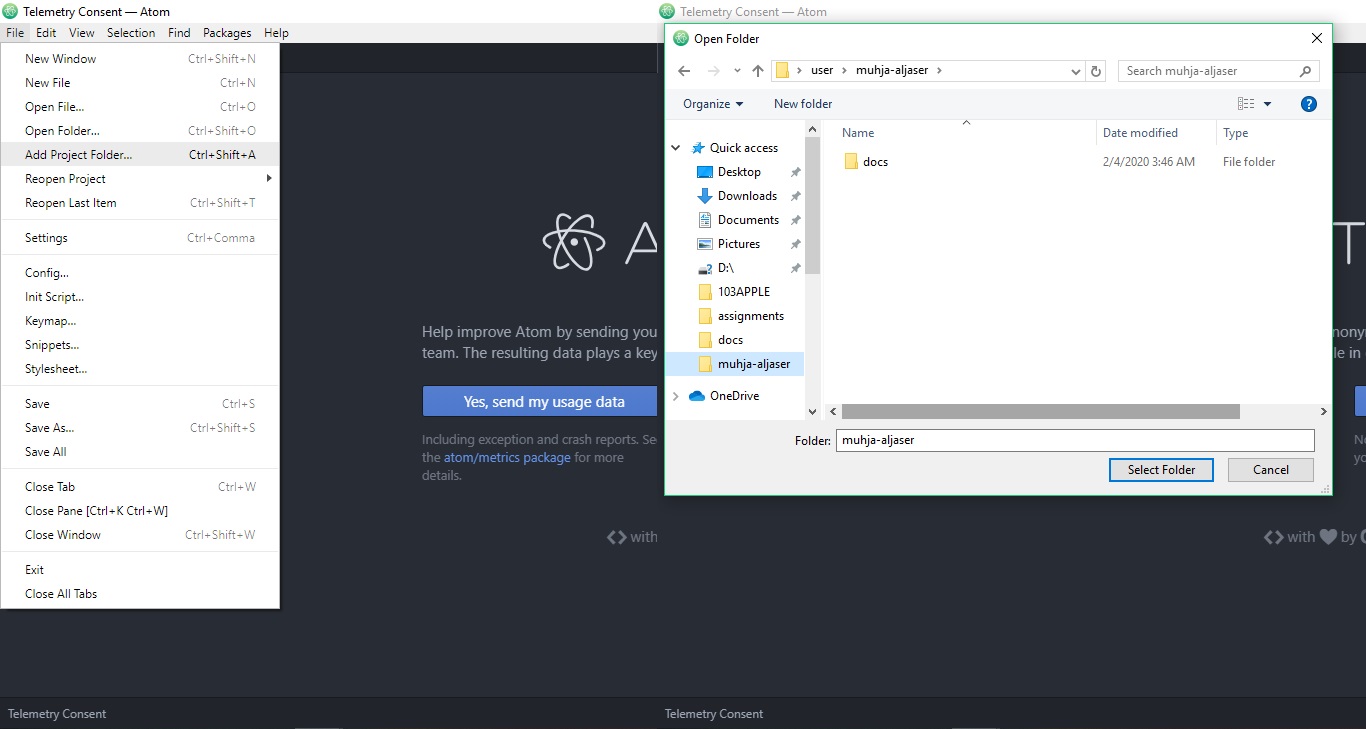
- Open ATOM
- Open your Fablab folder
- Click on (Ctrl+Shift+m) to brows your work on the website.
Click on (Ctrl+s) to save your work
NOTE: THE BLUE BLISTER ABOVE IS A SIGN THAT THE CHANGES HAVE NOT BEEN SAVED

- Follow the previous steps to save changes to your website.
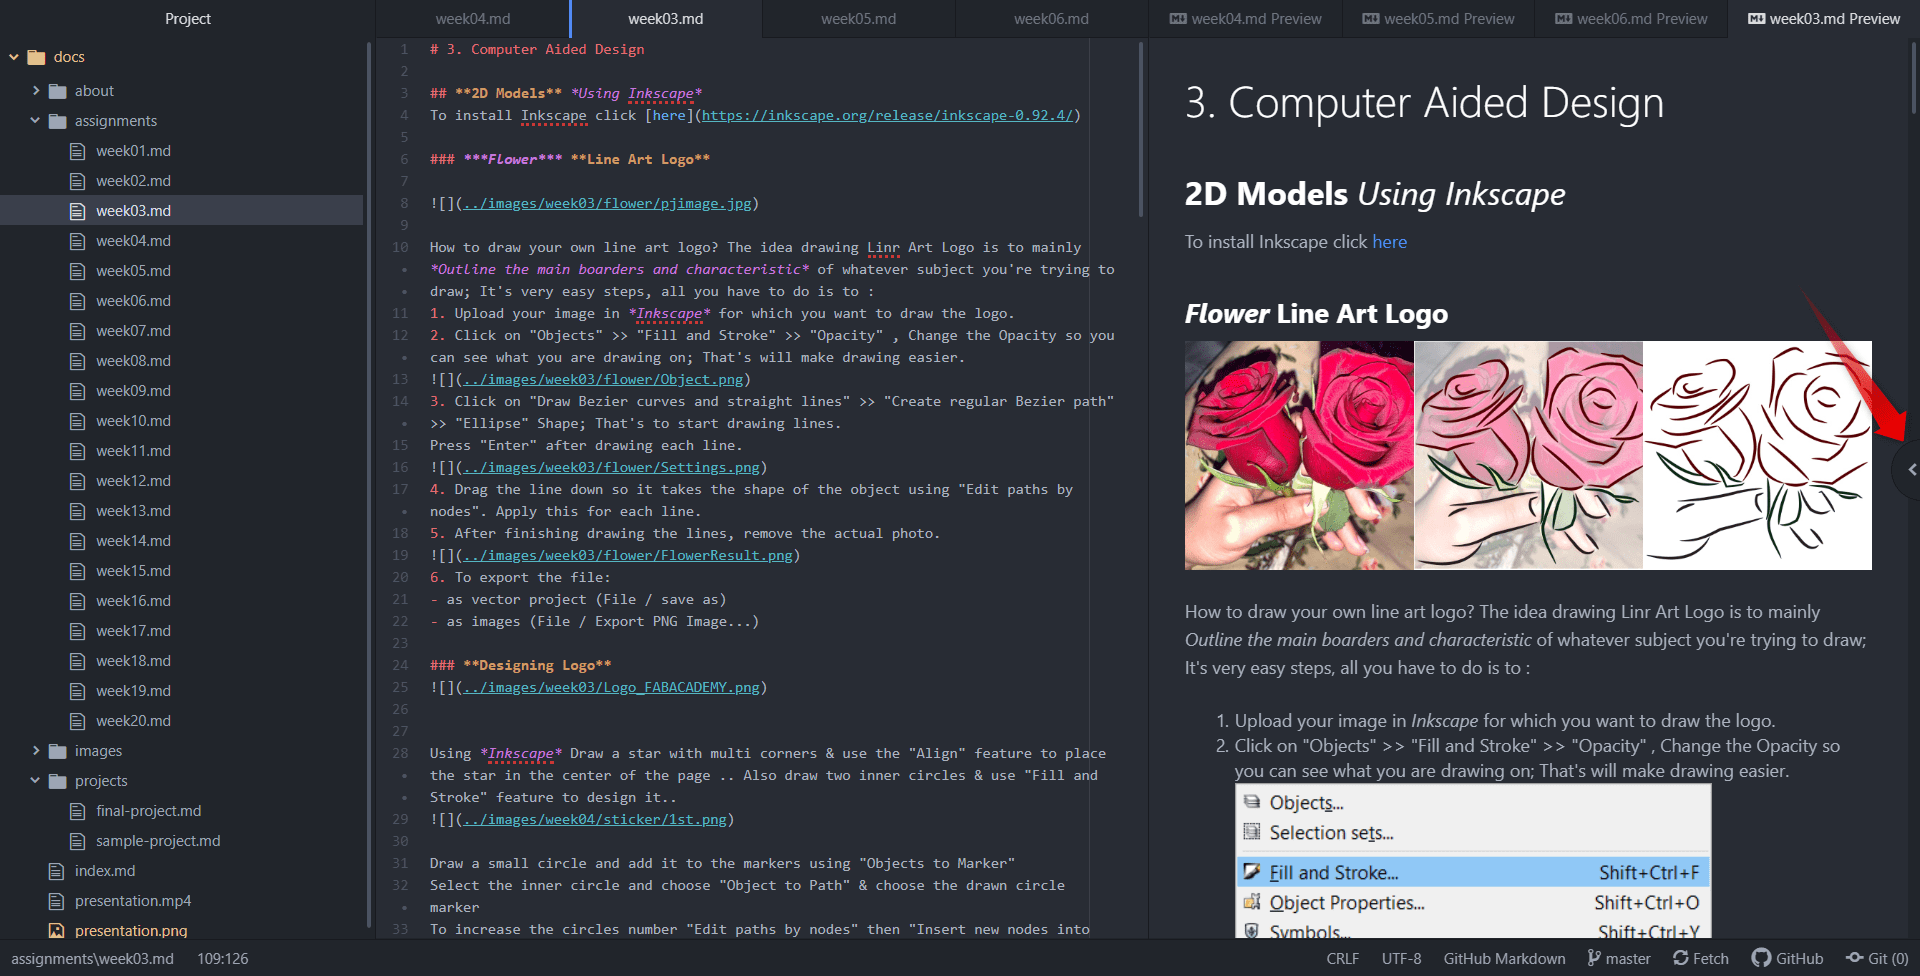
To avoid these steps with direct steps from Atom, as well as easier: - Click on this arrow.
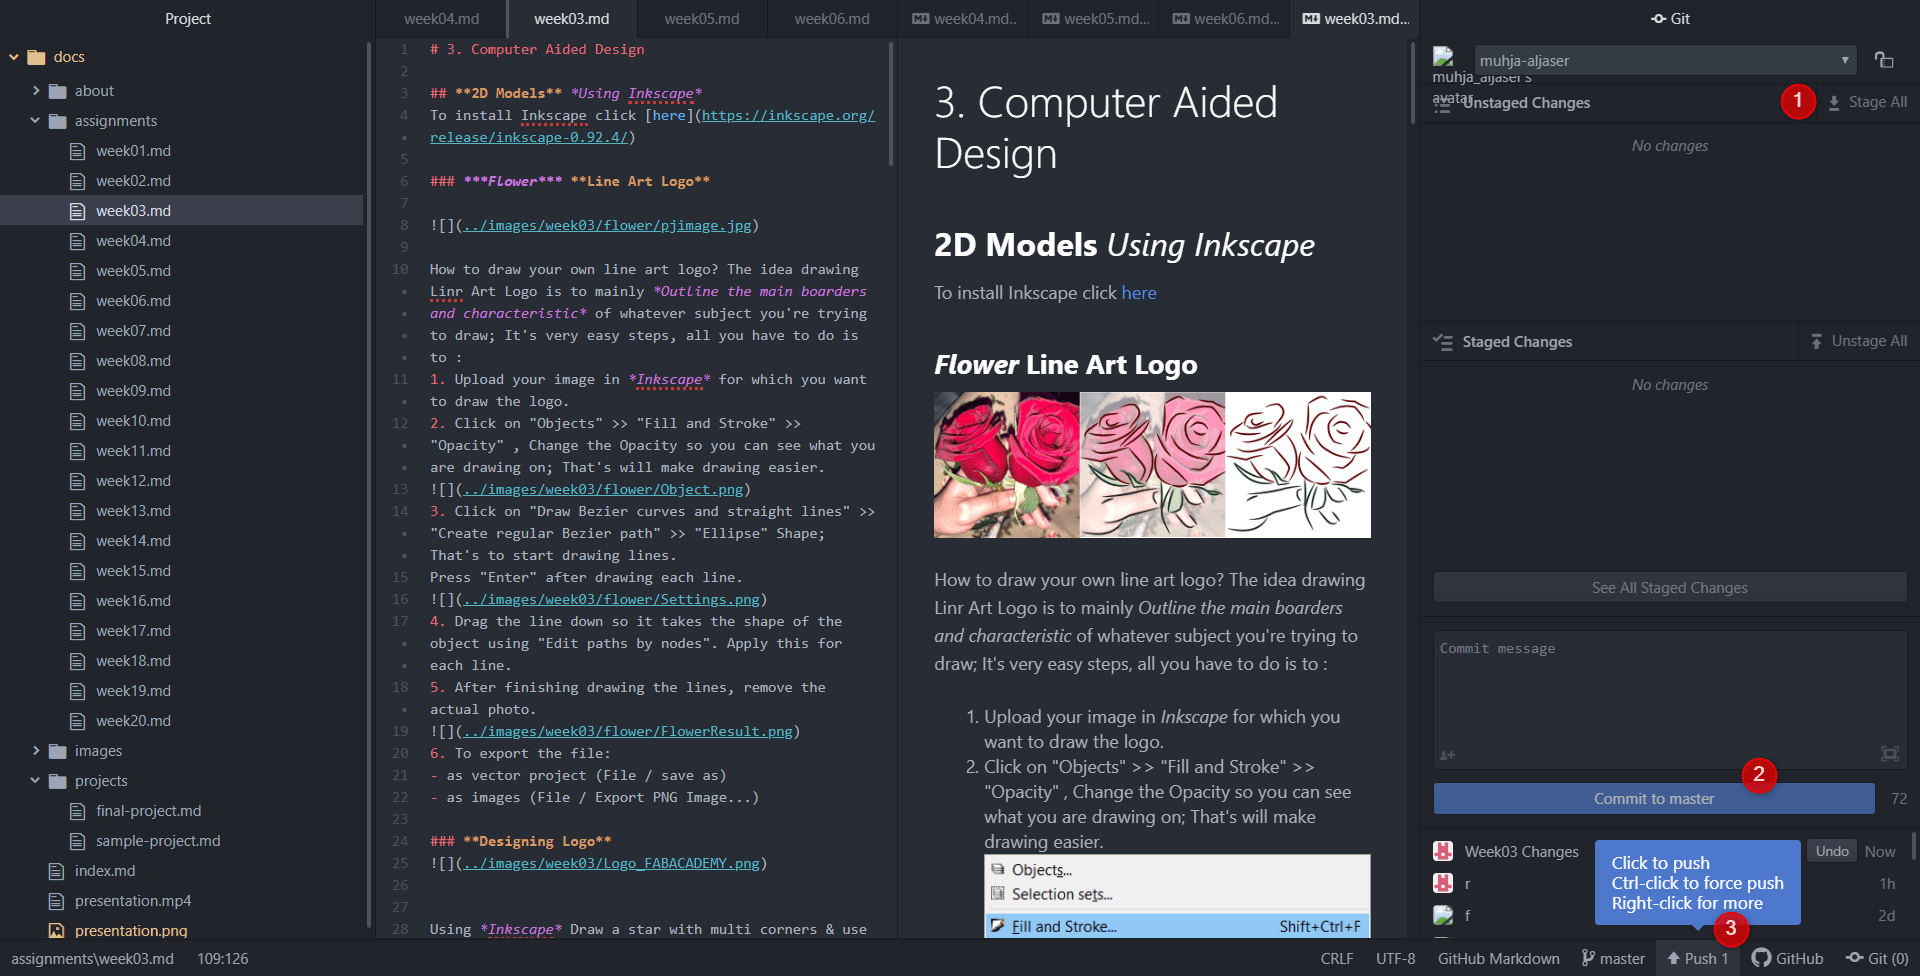
- This window will opened to you, “Stage All” the changes, write a “Commit message” and “Commit to master”. After that “Push” the changes.
Markdown Cheat Sheet
NOTE: Use Markdown Cheat Sheet to write in ATOM.
EXAMPLE:
Link
[title](https://www.example.com)
Picture

To import file
[click here to download](../images/week02/file.dxf)