10. Molding and casting
This week we tried molding and casting.
I just found the whole diagram explaining the whole process. Whoever who has did it has made it beautiful and simple !
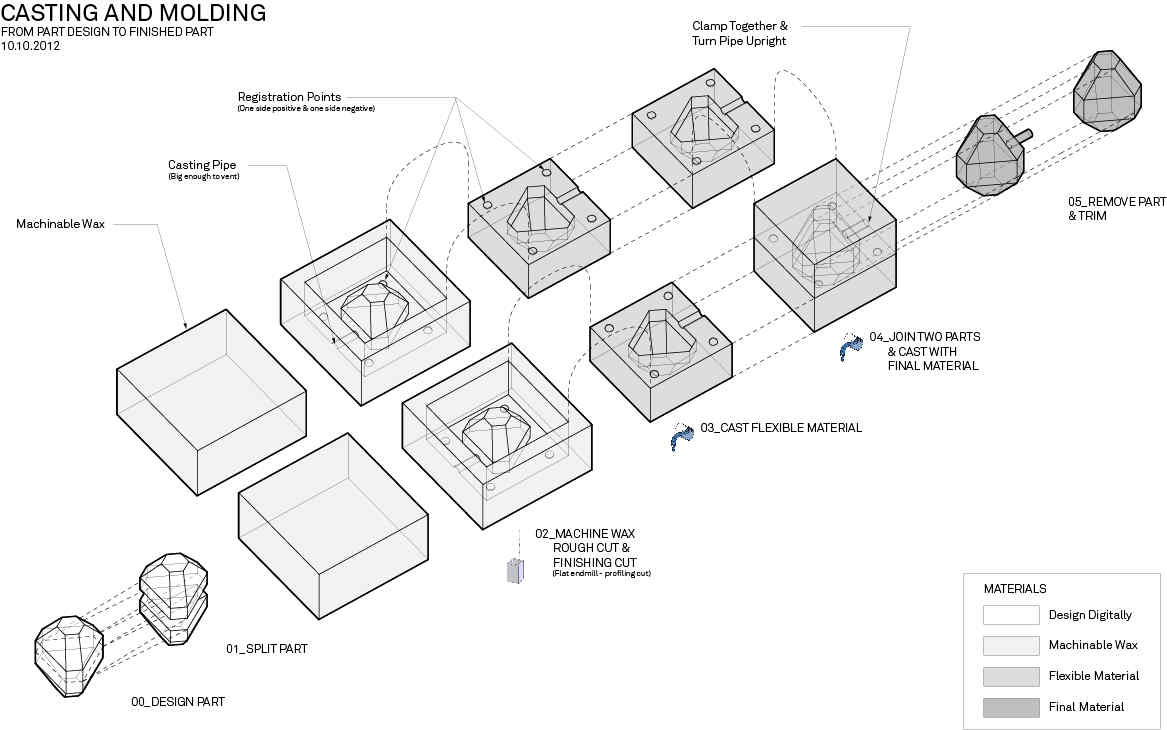 Source : http://fab.cba.mit.edu/classes/863.12/people/krista.palen/week6.html
Molding Materials
Machinable Wax :
Machinable wax is a mixture of wax and plastic. It’s very easy to machine/mill and doesn’t deform unlike regular castable wax. It burns out completely, making it ideal for lost wax casting, investment casting and prototyping, and is commonly used in the aerospace industry, healthcare, jewelry, and many more. The wax is milled off to our desired shape and profile and then molding material is poured into it to get the desired mold.
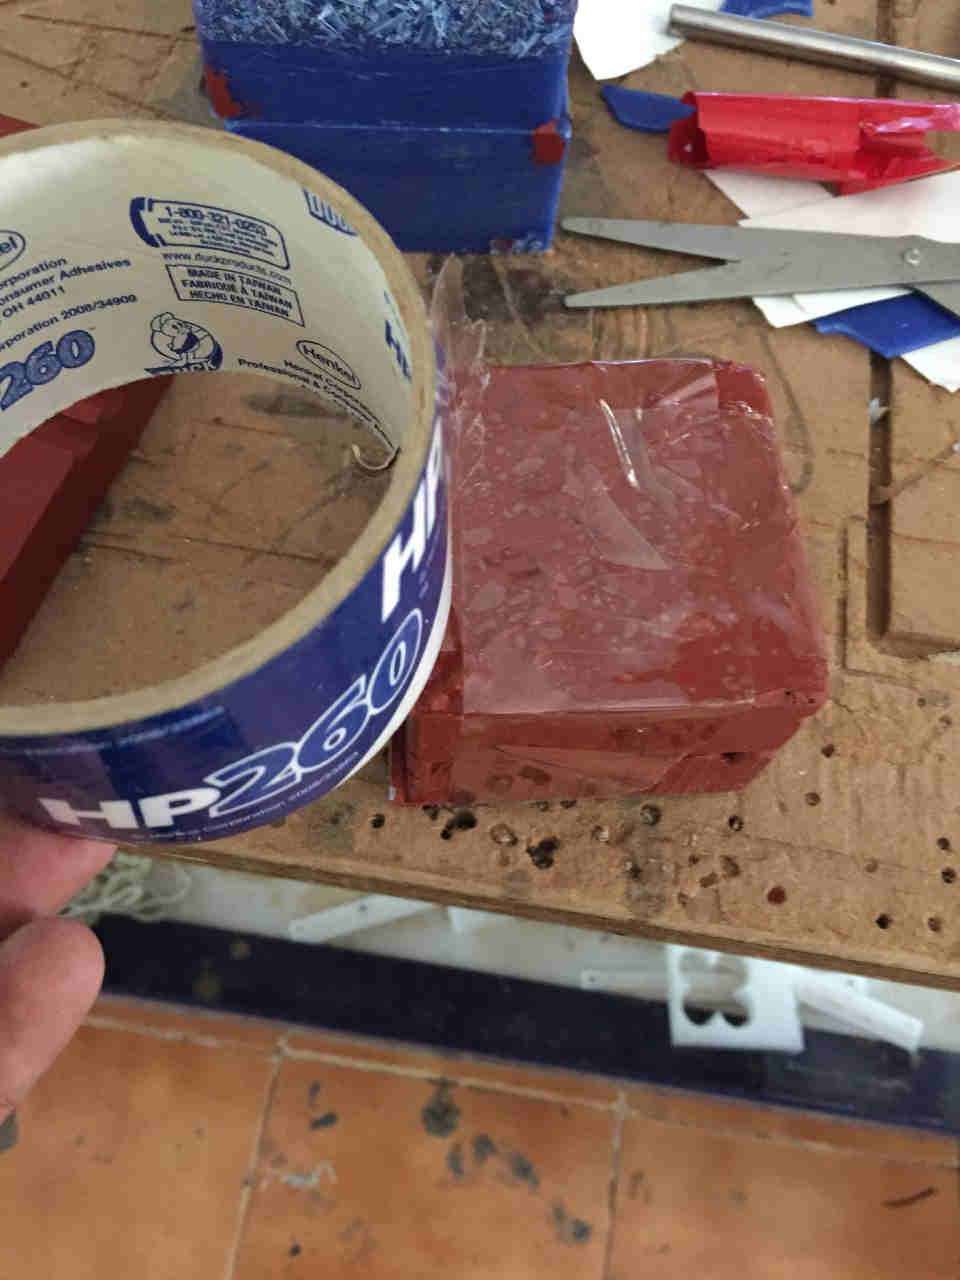
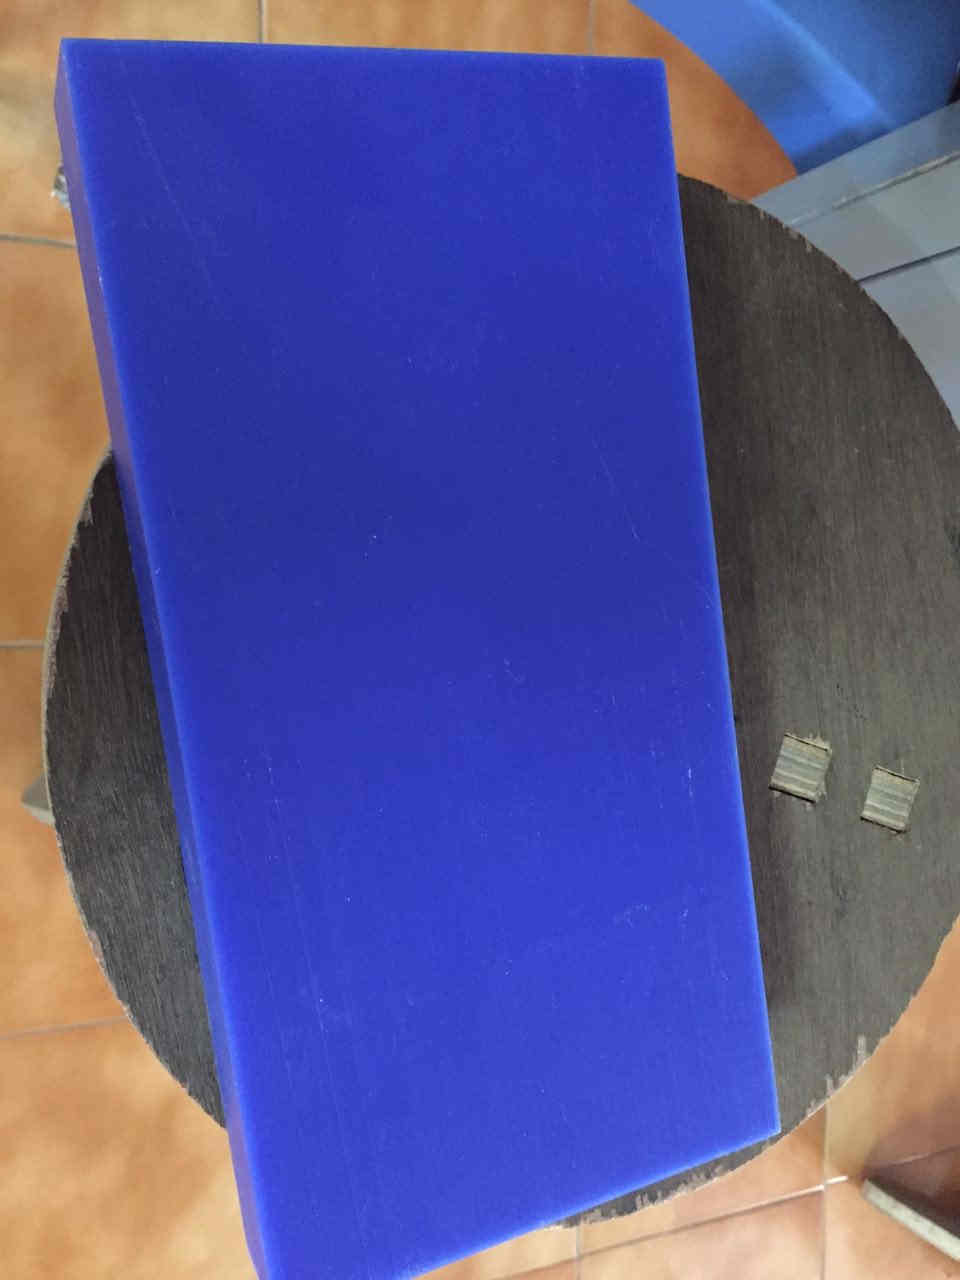 A smooth block of machinable wax
- Mold Max 60
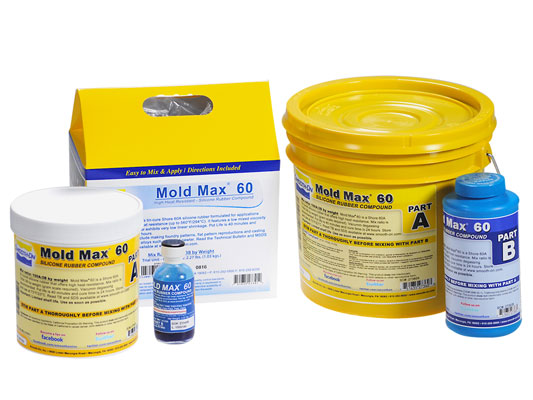 https://www.smooth-on.com/products/mold-max-60/
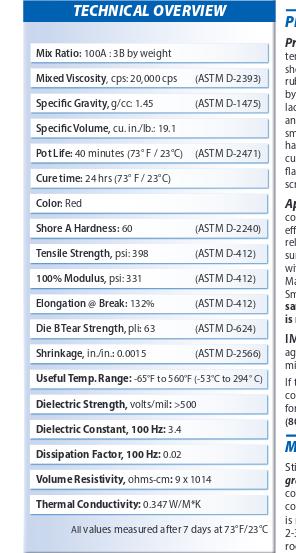
Mold Max™ 60 is a Shore 60A tin catalyzed silicone mold rubber formulated for applications requiring high heat resistance (up to 560°F/294°C). It features a low mixed viscosity and cured rubber exhibits very low linear shrinkage. Parts A & B are mixed 100A & 3B by weight. Pot life is 40 minutes and cure time is 24 hours.
The safety data sheet was referred Mold Max 60 SDS
It consisted of 15 sections. First aid measures, Handling and Storage measures are detailed in sections 4 and 7 respectively.
- Liquid Silicone Rubber LSR-1
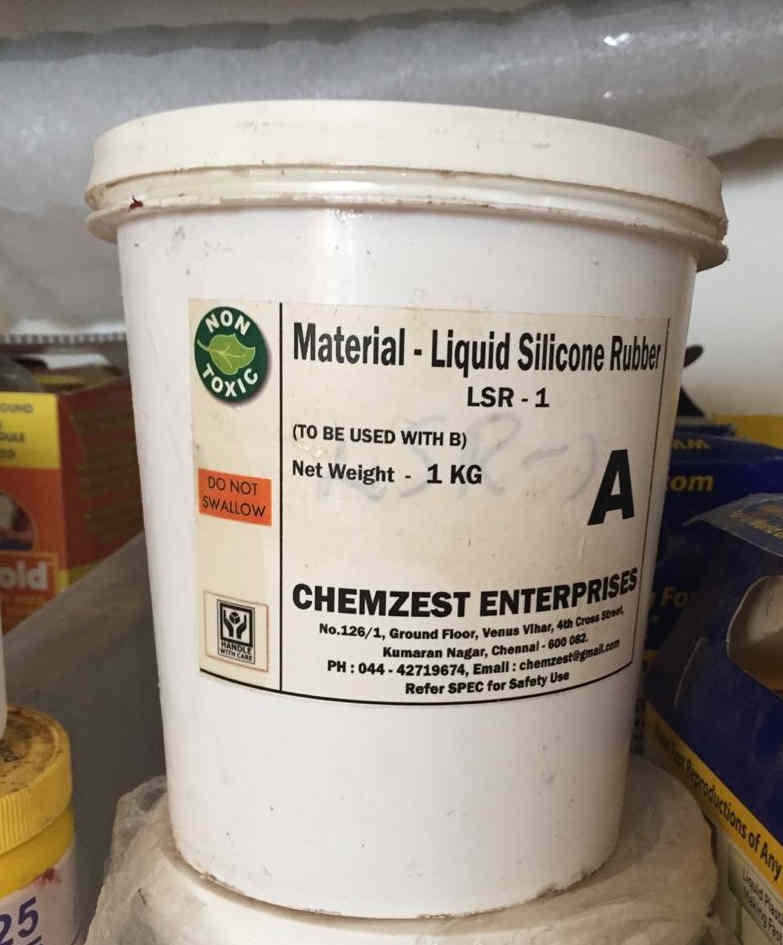 LSR-1is a two-component, addition cure liquid silicone rubber designed for mold making. LSR-1 cures at room temperature to a translucent high strength elastic rubber with the addition of curing agents. The safety precautions were reviewed in the link below.
SPEC
- High Gloss & Transparent Epoxy Resin
This is a two part epoxy system (Resin & Hardner) with High Glossy, Transparent, low viscosity and UV stable liquid epoxy resin for casting, coatings, and adhesive applications. The resin and hardner is to be mixed in the ratio of 10:6 by weight.The safety precautions were reviewed from the link below.
SPEC
Casting Materials
-
Liquid plastic
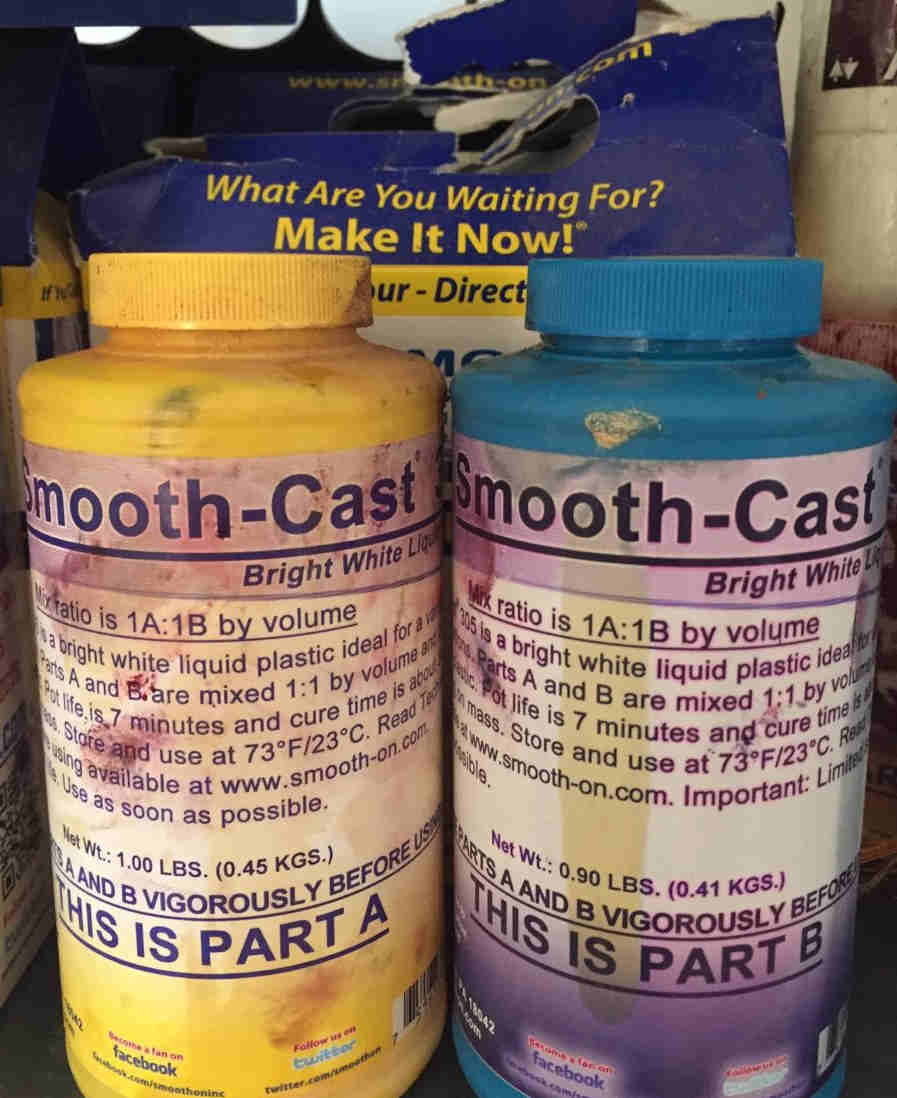 The Smooth-Cast® 300 Series of liquid plastics are ultra-low viscosity casting resins that yield castings that are bright white and virtually bubble free. Vacuum degassing is not necessary. Fully cured castings are tough, durable, machinable and paintable. They resist moisture and mild solvents. The safety data sheet was reviewed from the link below.
SDS
The Smooth-Cast® 300 Series of liquid plastics are ultra-low viscosity casting resins that yield castings that are bright white and virtually bubble free. Vacuum degassing is not necessary. Fully cured castings are tough, durable, machinable and paintable. They resist moisture and mild solvents. The safety data sheet was reviewed from the link below.
SDS -
Babbit Babbitt, also called Babbitt metal or bearing metal, is any of several alloys used for the bearing surface in a plain bearing. A piece of which was available here was used for casting. It was used once as a bearing metal. Melting point around 450 degree celsius. So thermal protection is really recommended while handling this.
Designing the mould
I wanted to make something for my 18 month old daughter. ! I decided to make a plastic Tippie Top a craft that when spun will change its axis in course of its revolution.
https://www.youtube.com/watch?v=AyAgeUneFds
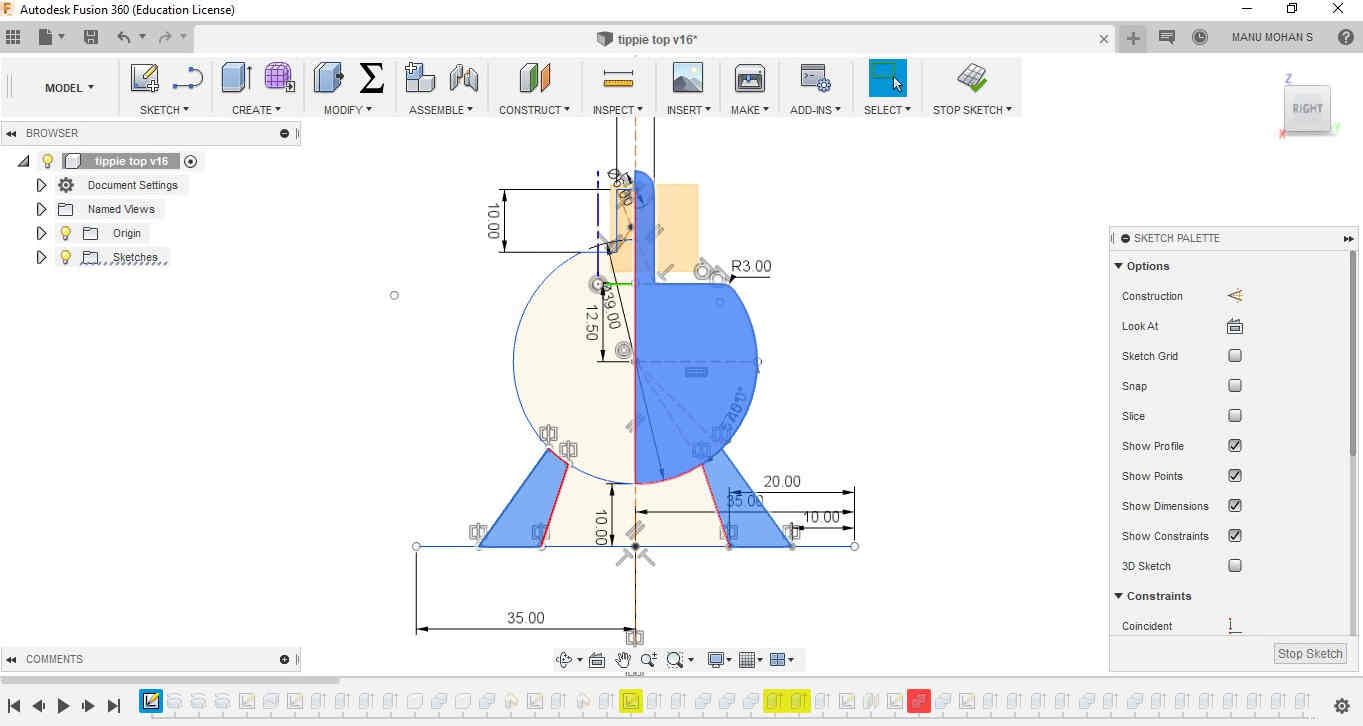 1. Creating the sketch. The basic dimensions were chosen arbitrarily. What I really want is a frustum of a sphere. I managed to build it with few construction lines.
The conical portions at the base are the ports for pouring the cast and for air escape. The base sketch is revolved 180 degrees to get a half of the desired shape.
1. Creating the sketch. The basic dimensions were chosen arbitrarily. What I really want is a frustum of a sphere. I managed to build it with few construction lines.
The conical portions at the base are the ports for pouring the cast and for air escape. The base sketch is revolved 180 degrees to get a half of the desired shape.
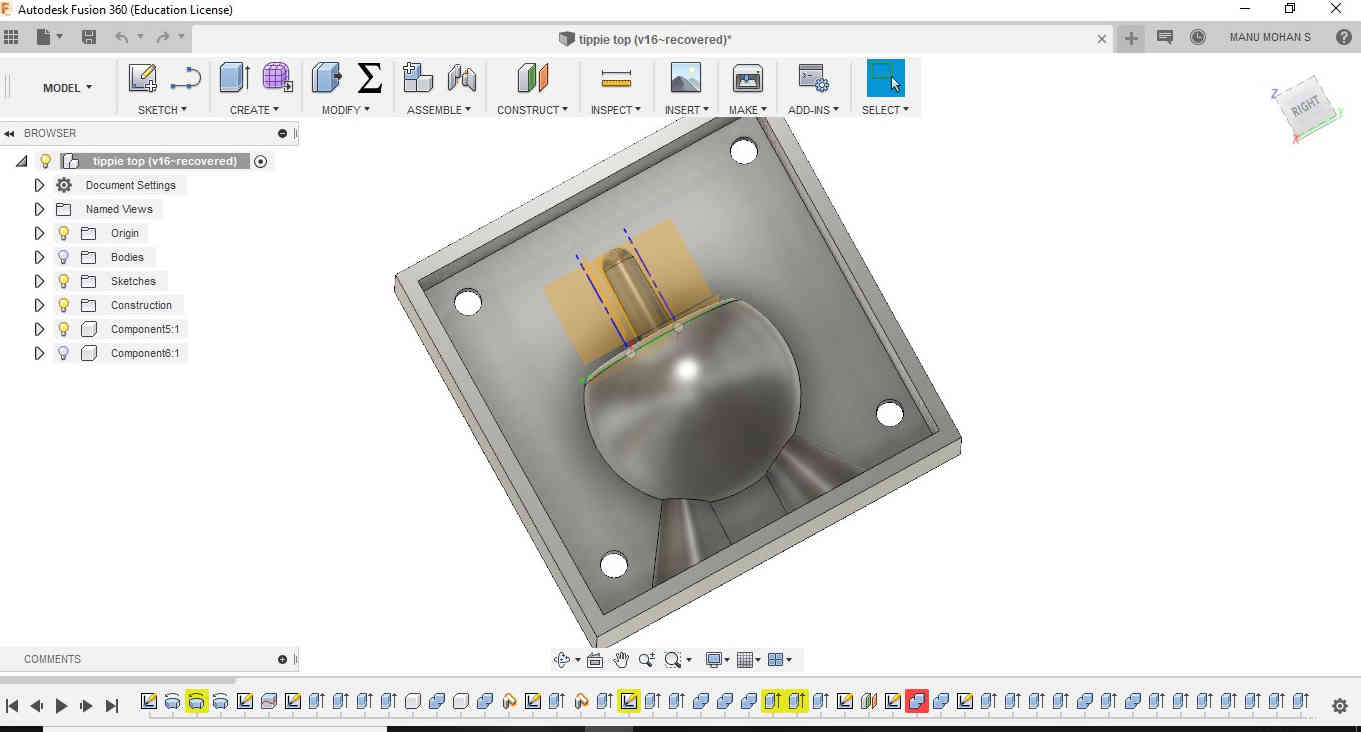
- Boxed inside the shape. Here comes the trickier part. The box height was kept a little 3mm above the top surface of the sphere to ensure the proper retaining of the cast material poured. Sufficient clearances were kept around so that the endmill can conveniently work around milling off the wax. The length of the endmill from the collet is noted during this process. (here we used Roland MX 20 for milling). Registration points were kept for alignment of the mould parts. The same design was used to design male and female parts to avoid errors.
STL files here
Milling the mould
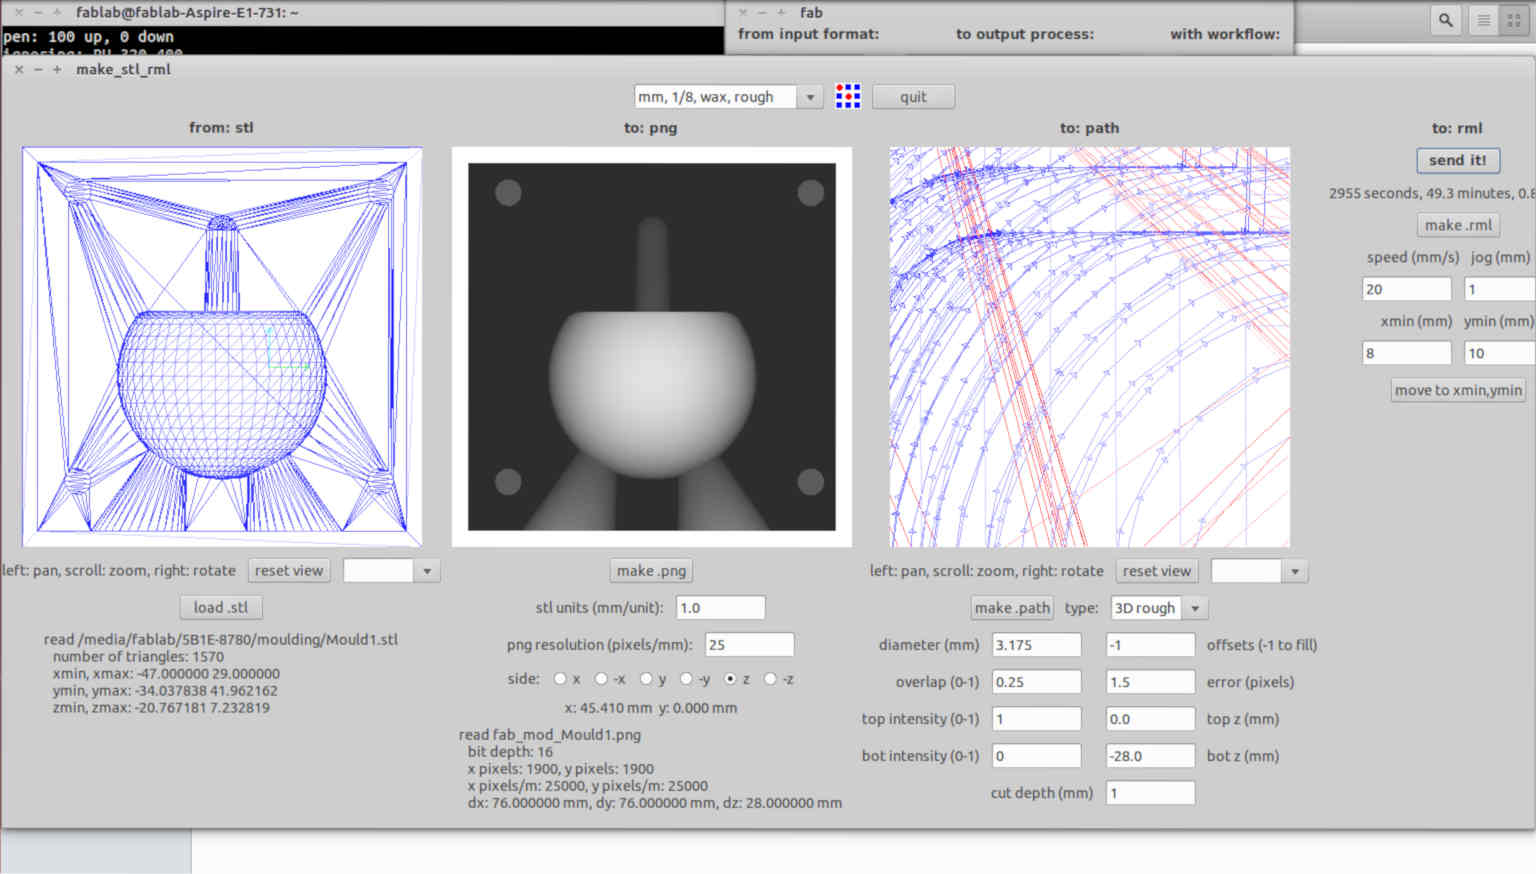
The stl files were imported to fab module to convert it to the rml file for the Roland MX 20 milling machine. The milling operation consisted of initially cutting using rough cut (using 3mm 2 flute endmill) and finally smoothening it with finish cut(using 3mm ball nose endmill).
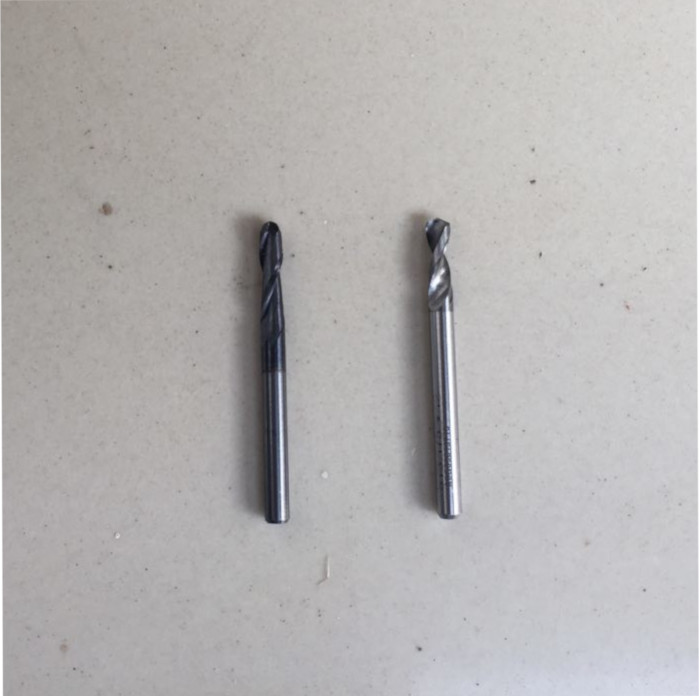 A 3mm ballnose and 3mm two flute endmill for smooth finish and rough cut respectively.
 Rough cut
 Finish cut
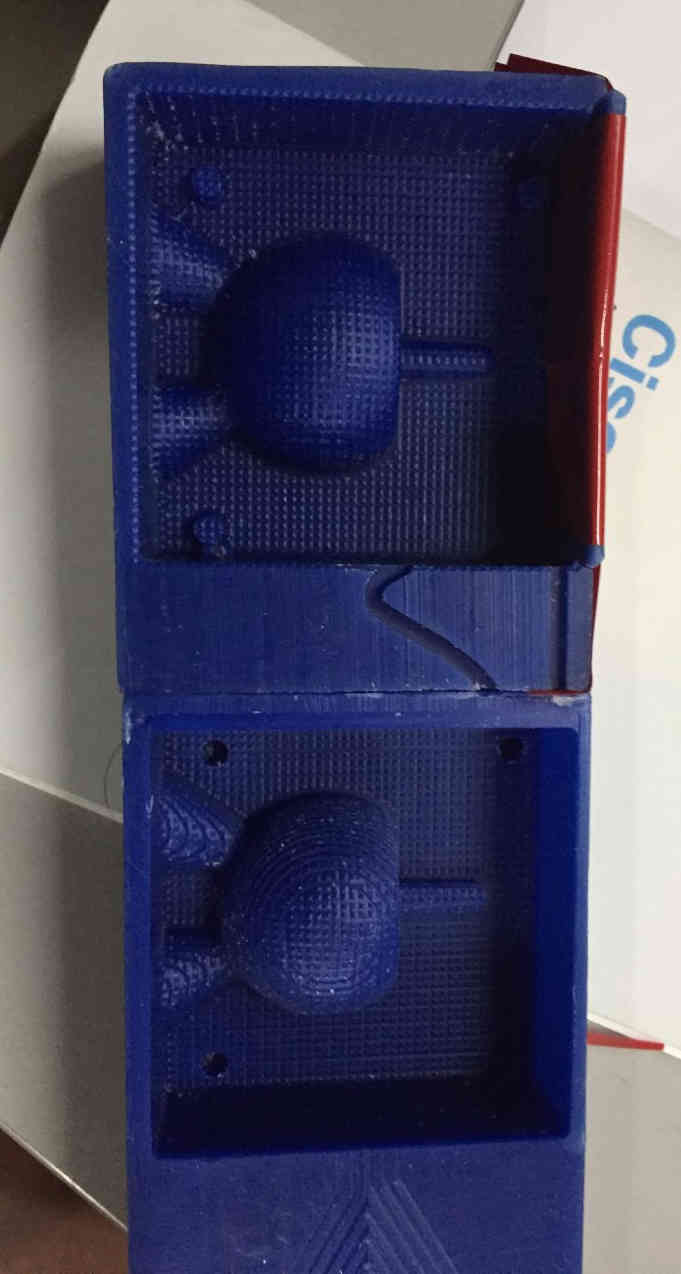
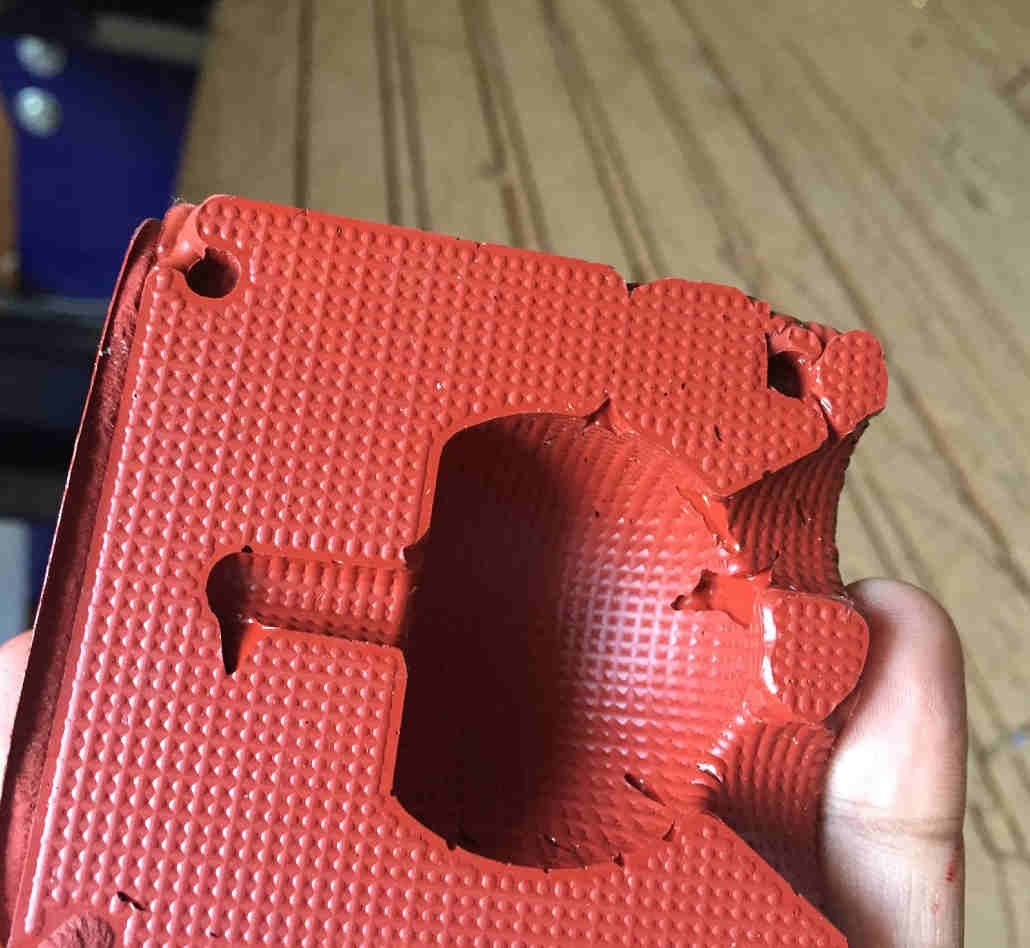
The milled sample came out good except at the edges the side broke off. The issue was in the initial zero setting. Also the overlap in case of finish cut too could have been adjusted to improve the finish.
Now I am gonna pour the mold.
Molding with Moldmax 60
Calculated quantity of Moldmax 60 is weighed and mixed. Required (100:3) quantities of Part A and Part B are mixed to get the mold mix. It is suggested to mix the contents well before pouring it out.
 Adding Part A
 Adding Part B
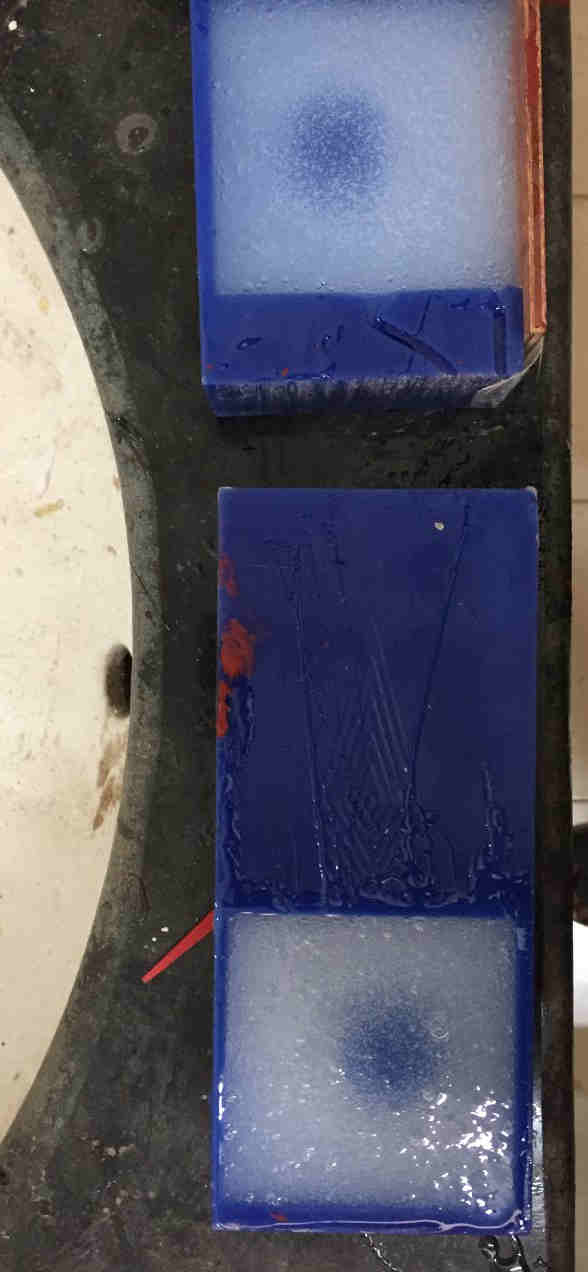
The mix is stirred slowly without creating air bubbles and slowly poured onto the mold. After pouring the mold is shaken/tapped to release air bubbles.
 The mold mix is set for curing. See you tommorow !
Issues
-
Air bubbles ruined the mold. ! I should have been more careful while pouring the mix.
-
The connecting pins didn’t come out good. I fixed it by cutting it away with razor and joining the two pieces by fixing tape.
-
There was a slight offset between the two mold pieces by a millimeter. Though I worked on the same design and edited something went wrong. I just couldn’t figure out what went wrong.
Lessons Learnt :
1)Pour always from a height slowly.
2) Shake well after the process for the mold to settle.The mold mix was taken from two containers. The mix from the second one I felt to be of different consistency (more tighter) even after stirring well. I guess it must be reason. It must have entrapped air inside of it.
Casting
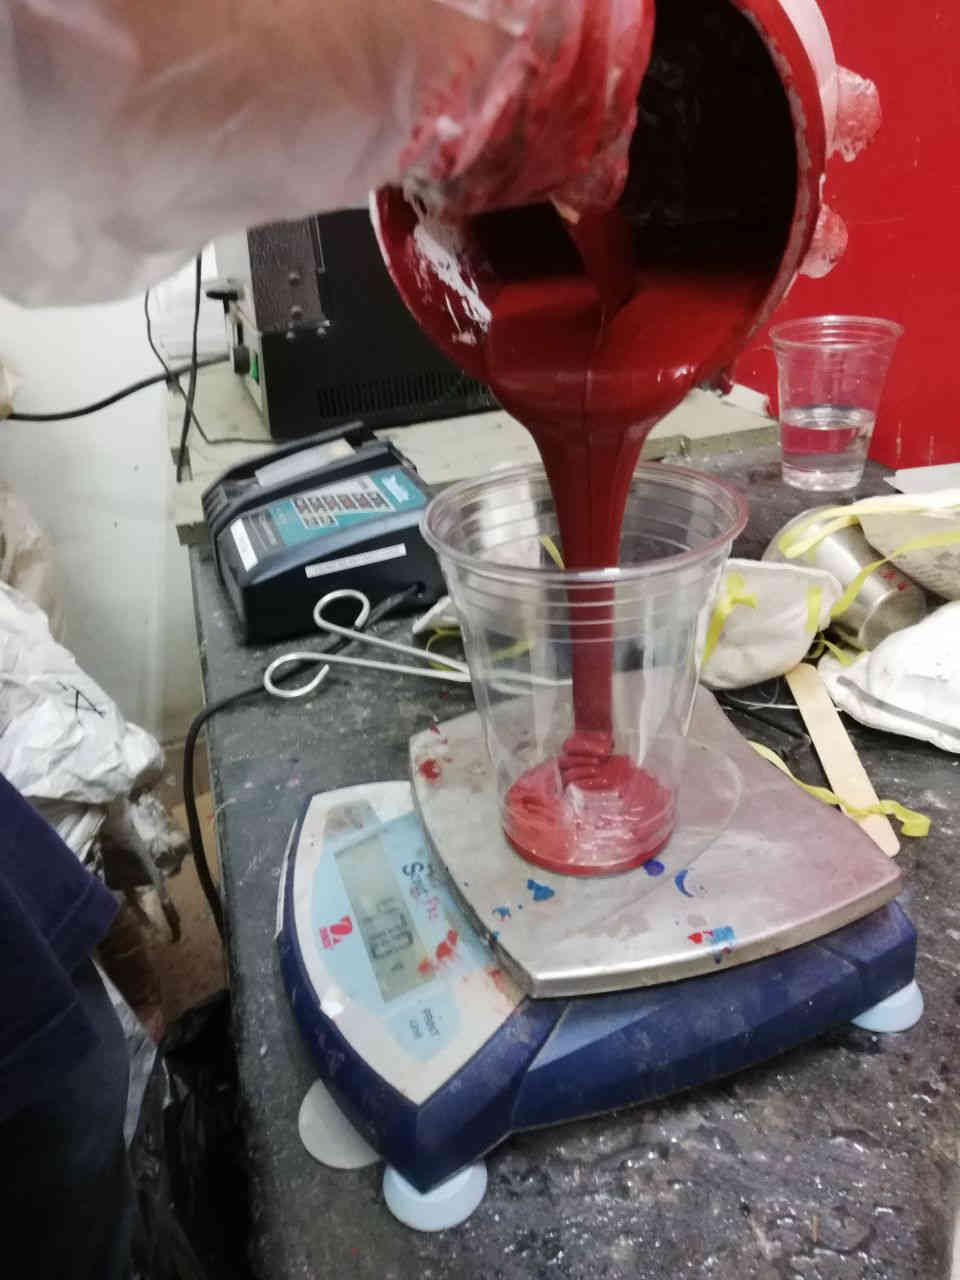
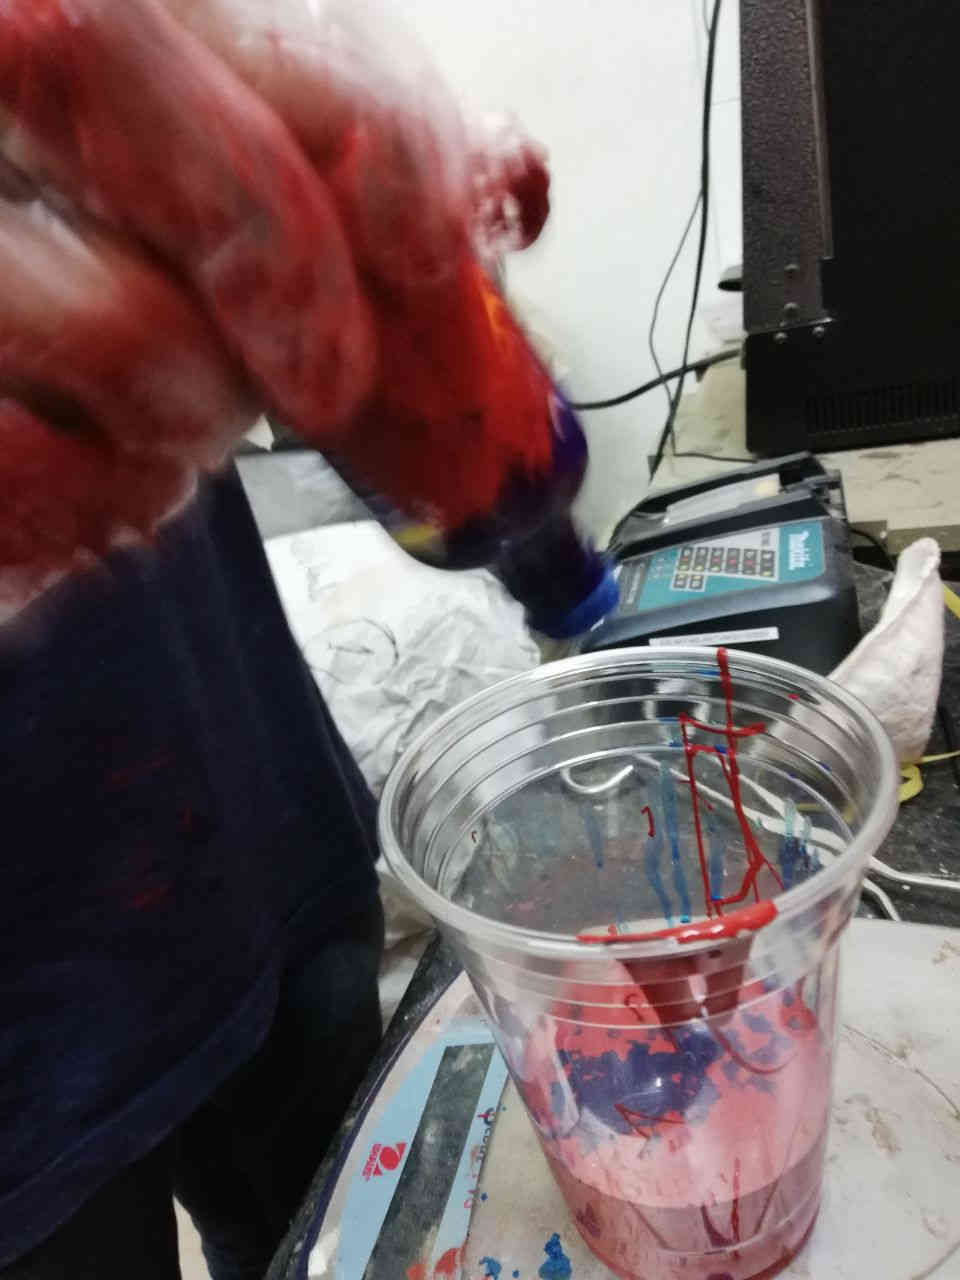
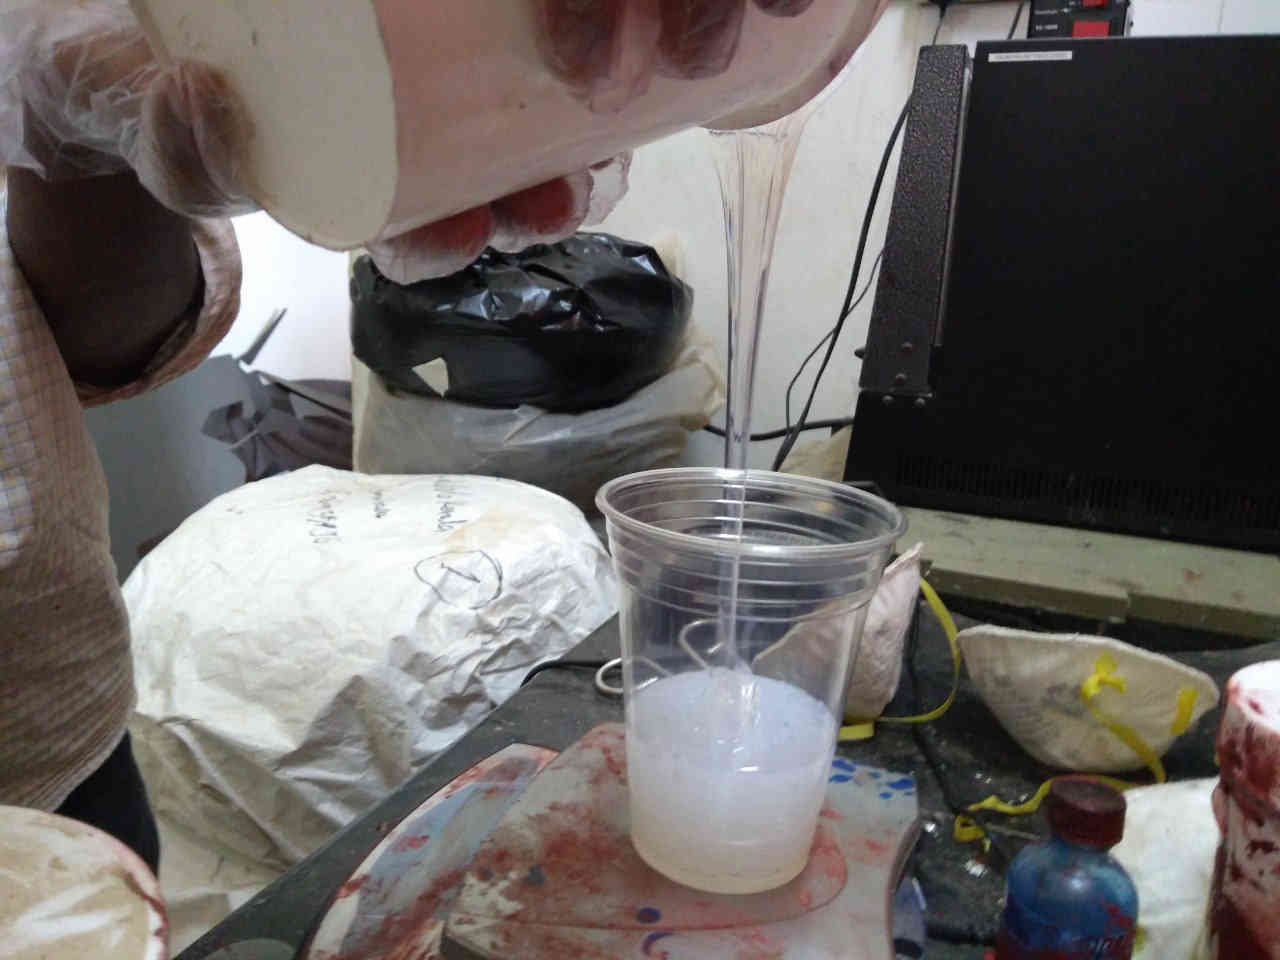
Liquid plastic molding solutions from the two containers was mixed in equal proportions.
Pigment was also added a drop to give colour.
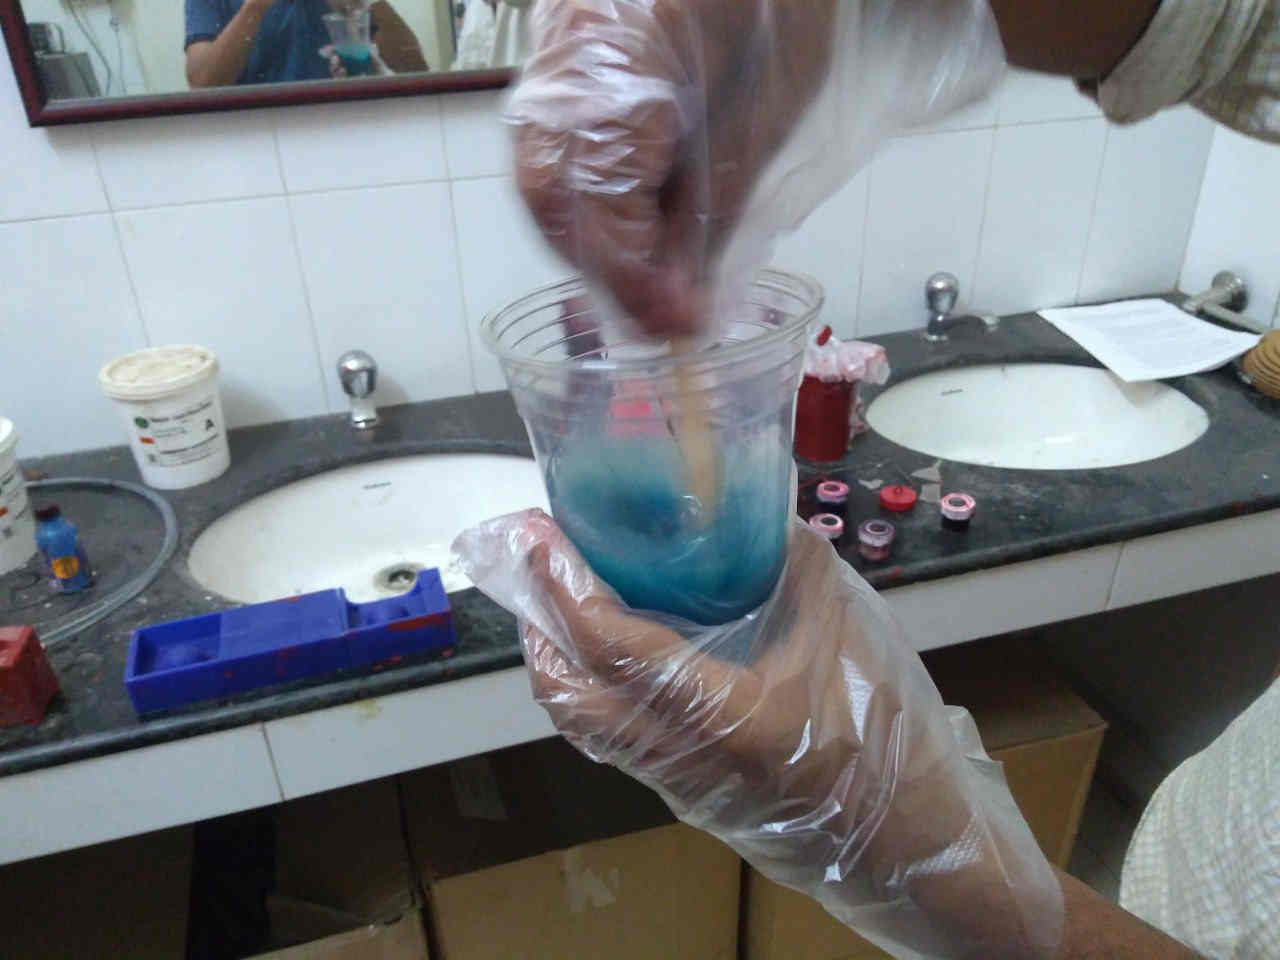 The mixing was really fast as the pot life was only 7 minutes. As you mix you will notice that the reaction between the two additives is exothermic and its getting heated.
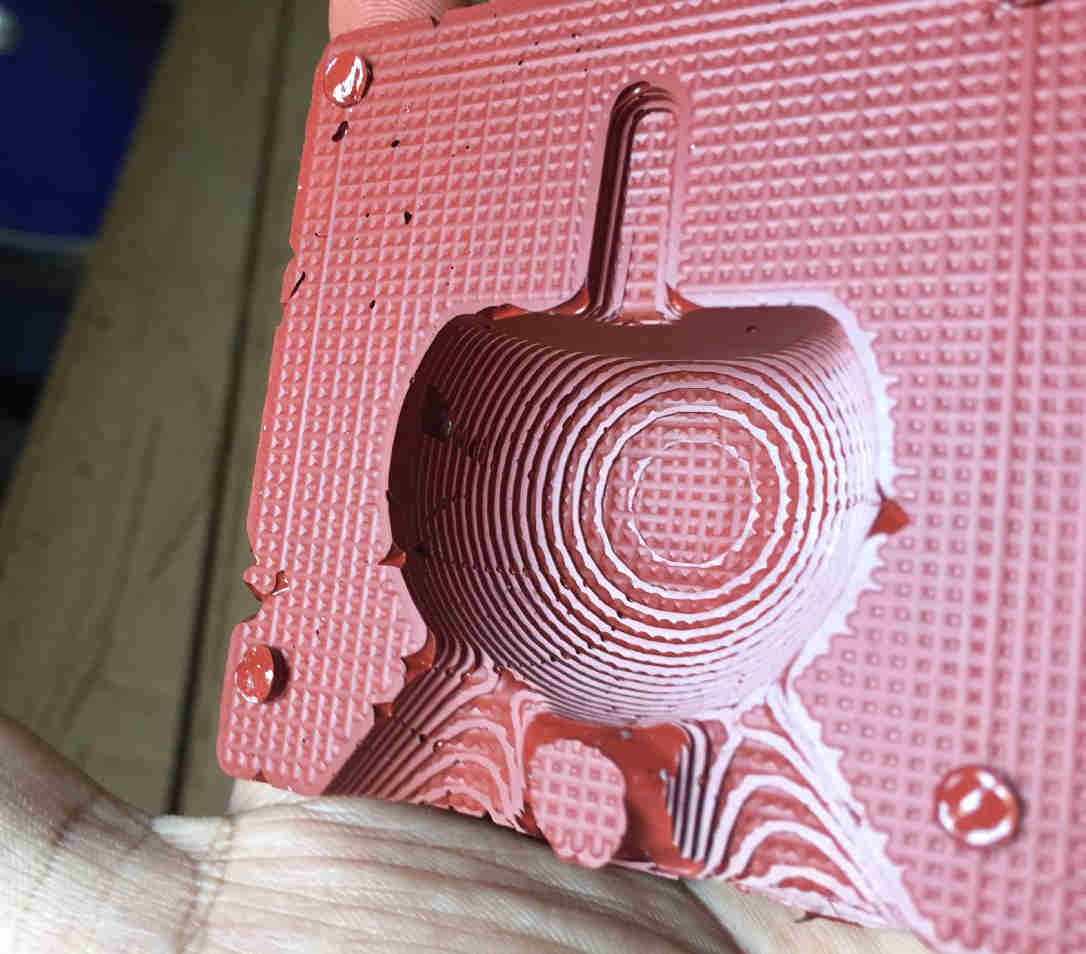
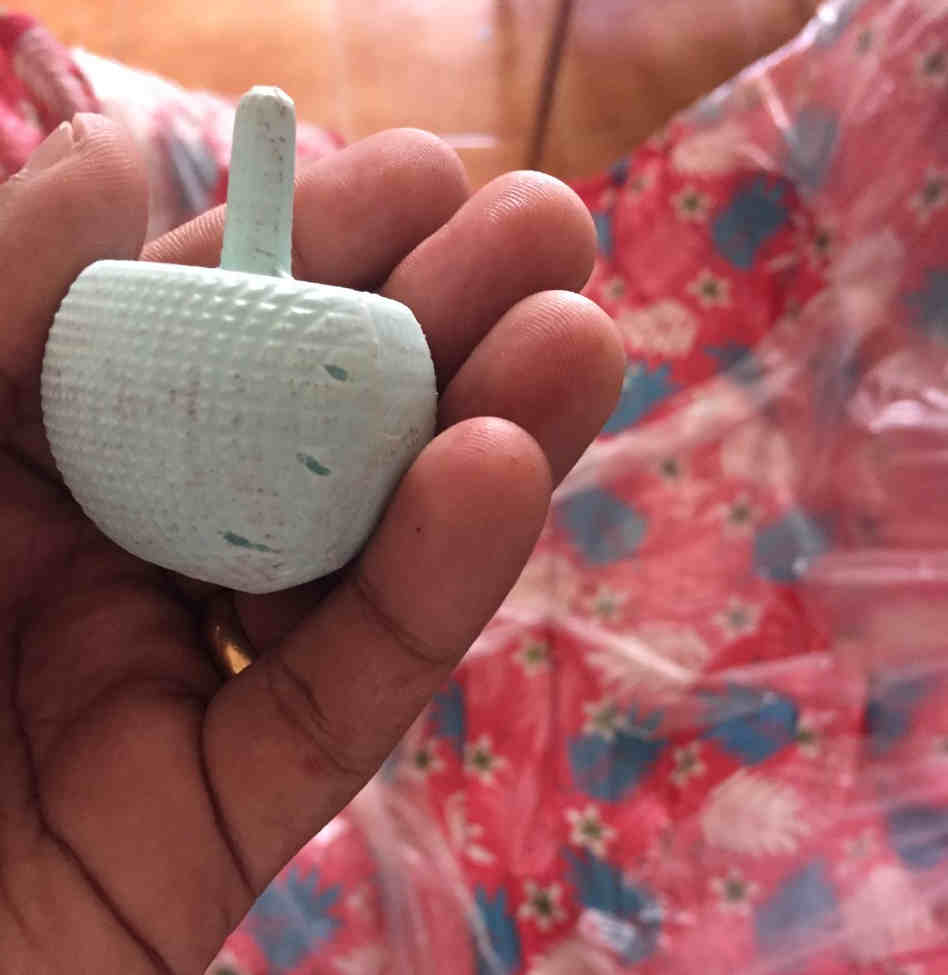
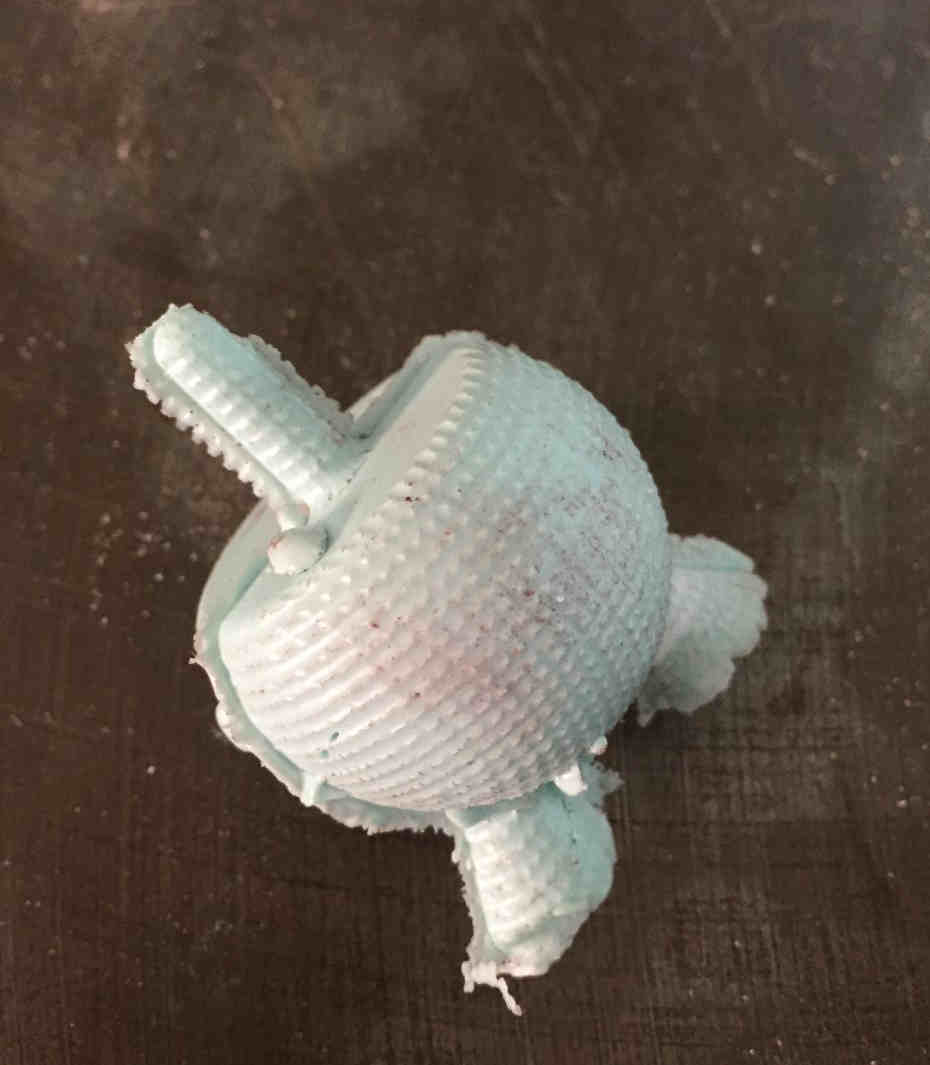 Finished mold and happy :). The pigment proved to be a bit less. But it came out well.
The finished tippie was worked well with drummel to trim off the edges and smoothen it with sand paper.
Unfortunately the tippie didn’t tip as I expected. But still it was a good experience.
I think it should have been made hollow near the stem for it to tip.Gotto debug on it.
Molding with Liquid Silicone Rubber LSR-1
The part A and part B are weighed and mixed smoothly. It was left for curing for a day.
 Mixing
This time I was really careful for not to repeat the mistakes.
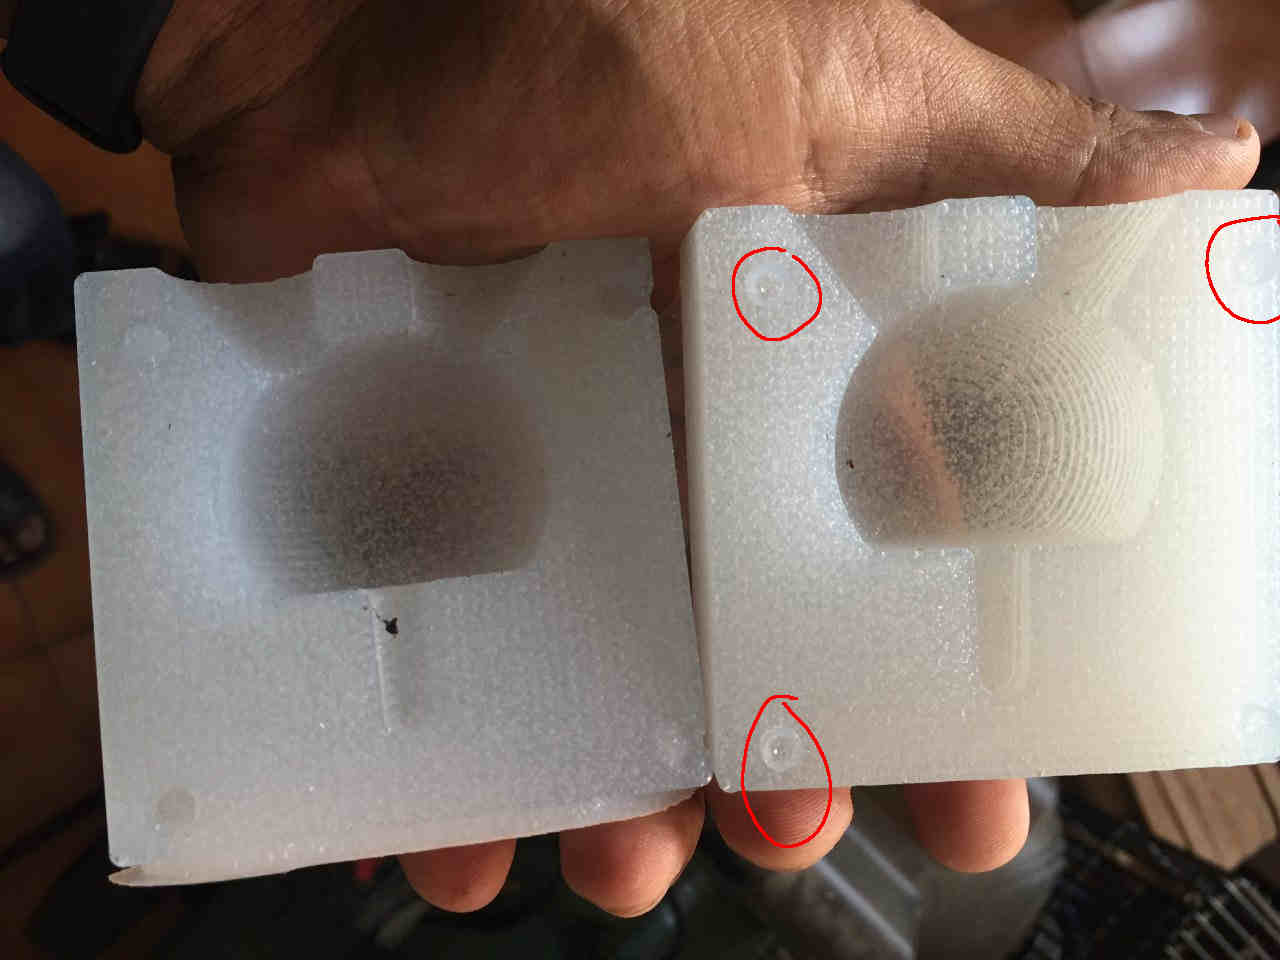 This time it was better than the last time. Air got trapped only at the pins shown in red circles.
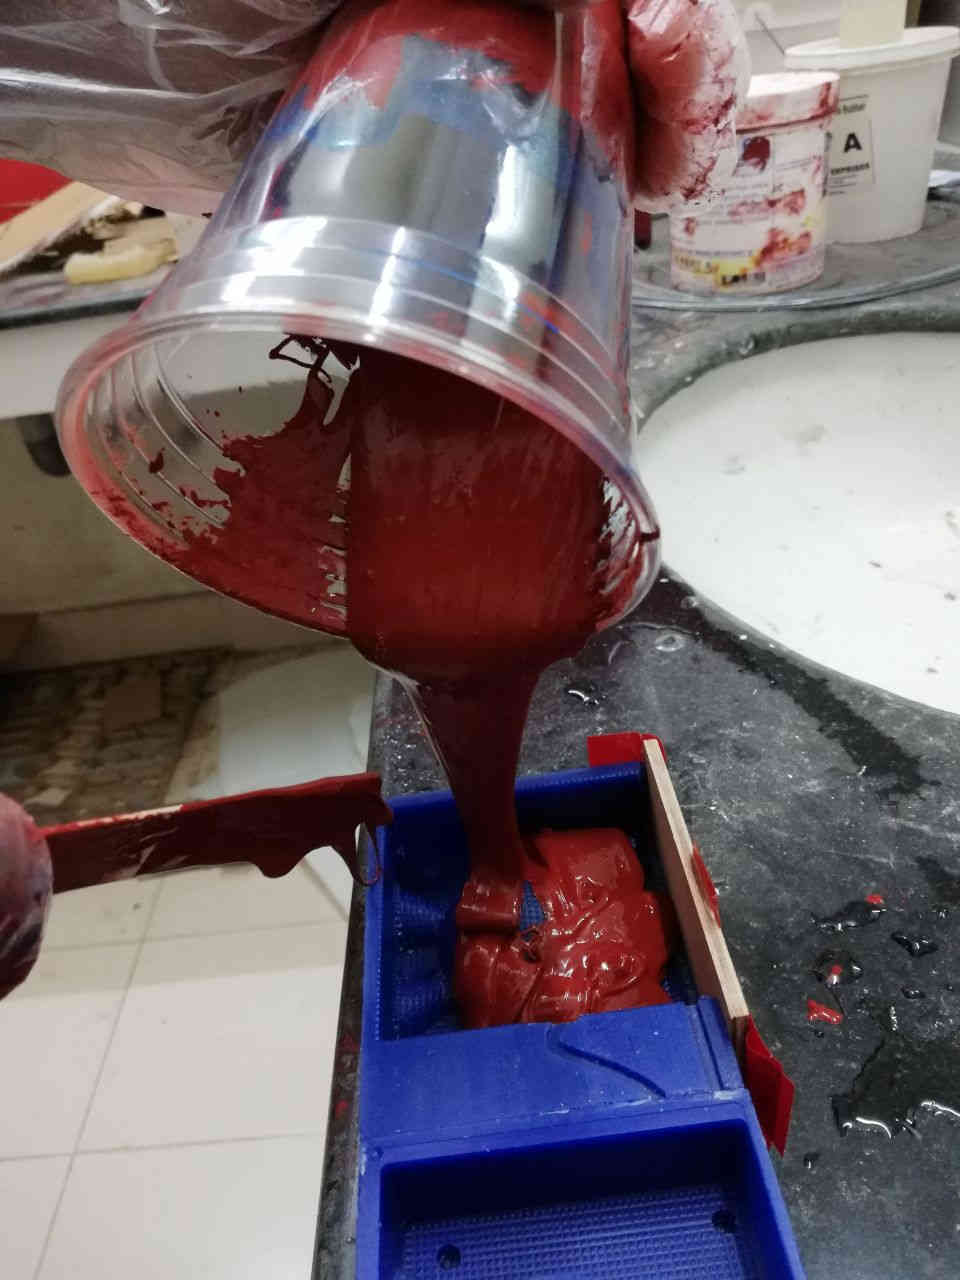
Casting
I used a new alloy called Babbit. First the babbit was melted in the furnace in a crucible. The melting point was around 450 Degree faranheit.
It was poured into it using the tongs and thermal protection gloves.
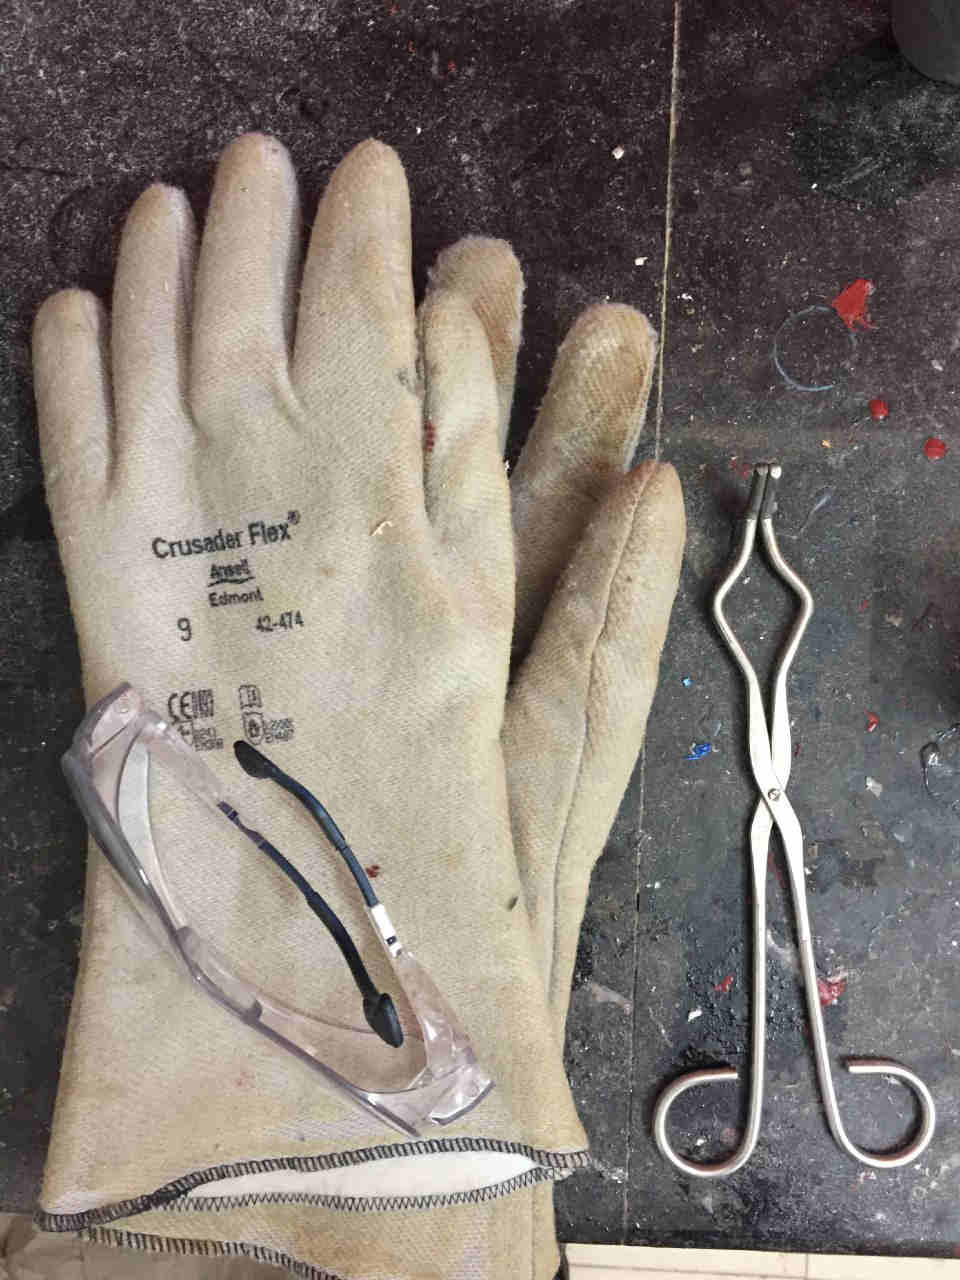
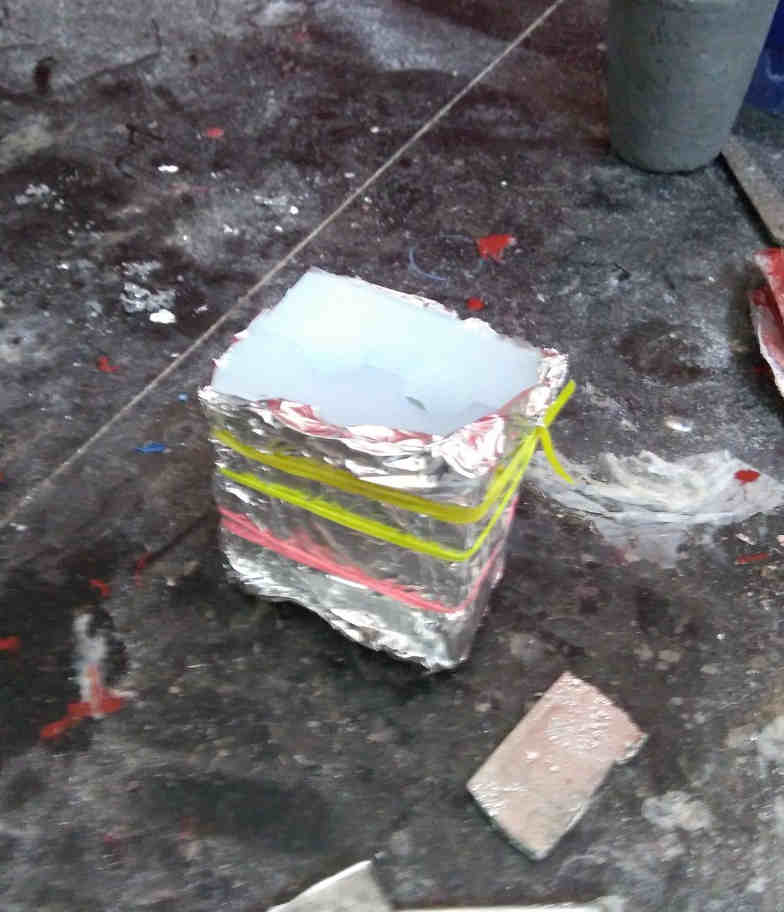 Though silicone rubber is heat resistant I decided to wrap it with aluminium foil and wind it with rubber band.
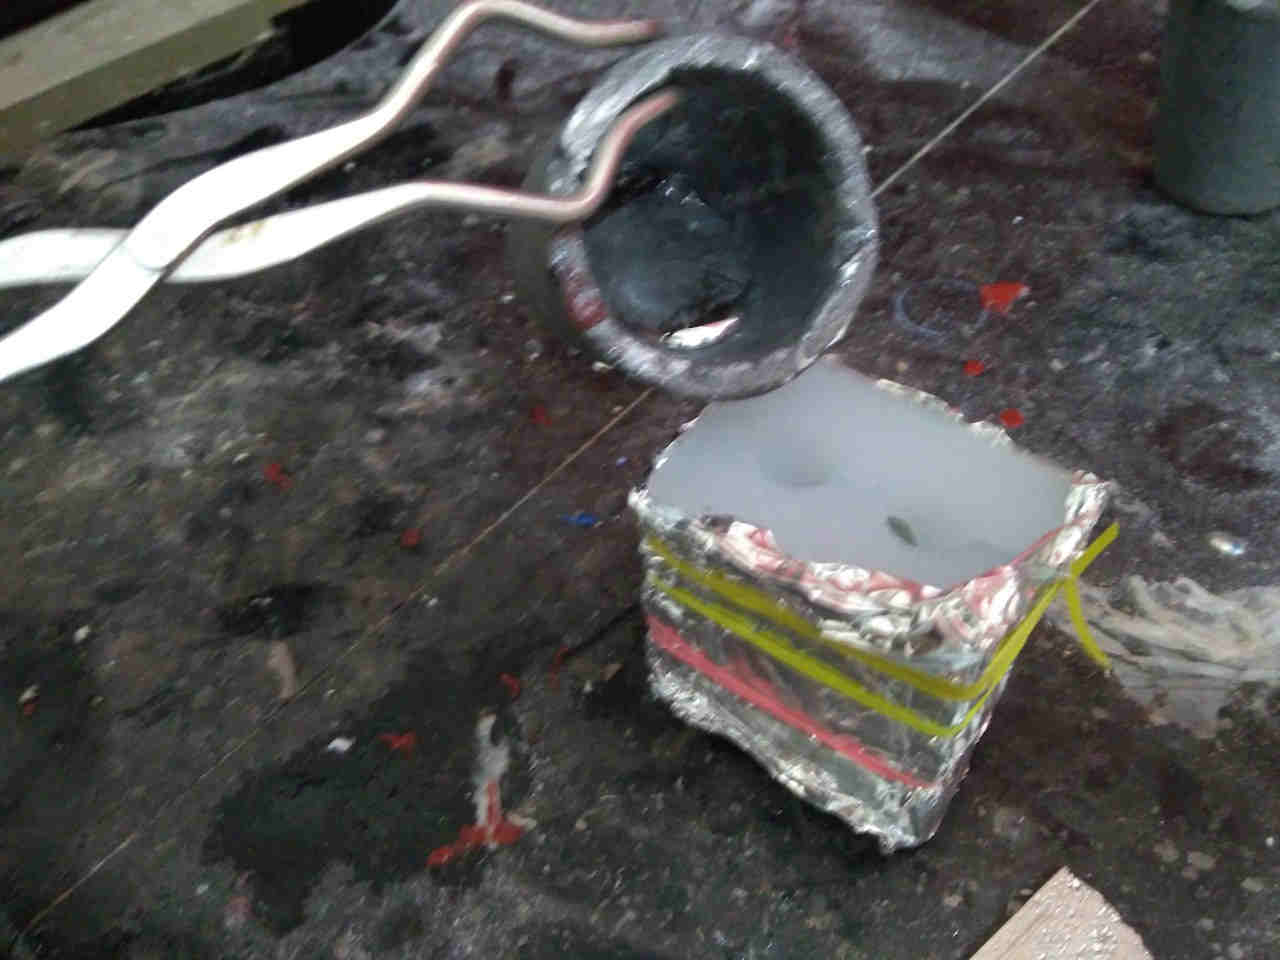 Pouring
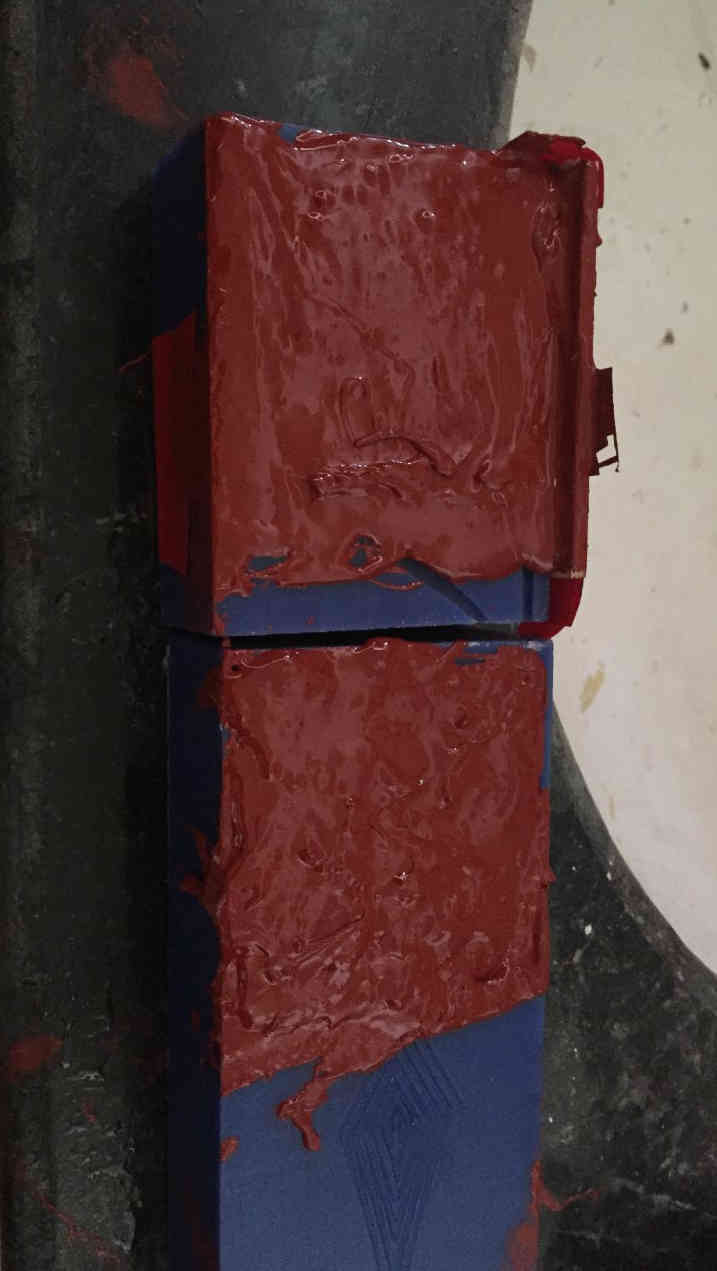
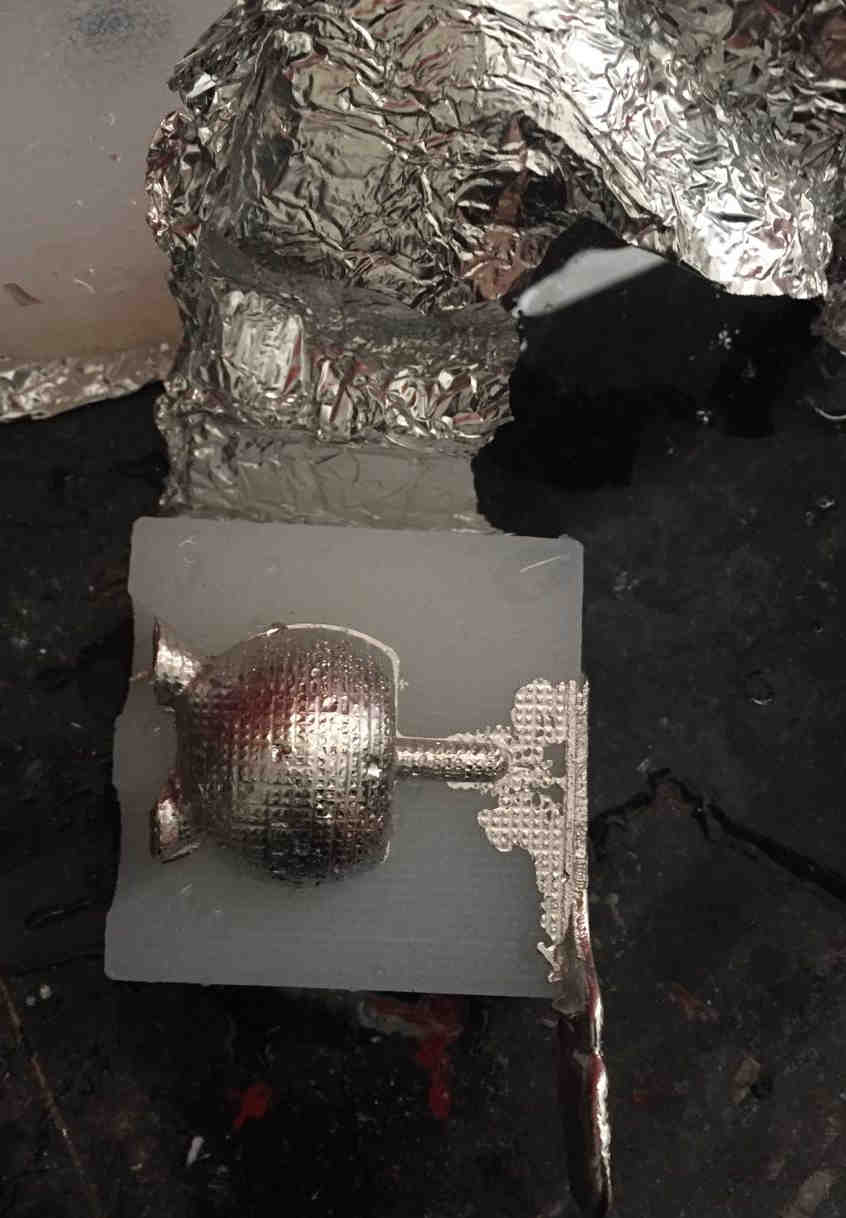 Unmolding

Heroshot !
Lessons learnt
Molding is a great way to additively manufacture things. All we need is the same patience and temparment to achieve desired accuracy.