
Lingyu Yue @ FAB LAB Szoil · 2019
© 2018 Lingyu Yue · Template by Bootstrapious

This work is licensed under a Creative Commons Attribution-NonCommercial-ShareAlike 4.0 International License.
Computer-Controlled Machining
- Test runout, alignment, speeds, feeds, and toolpaths for your machine (Group Project)
- Make something big (on a CNC machine) (Individual Project)
For maching week, my initial idea is to design a shelf for my livingroom to cover the cleaning tools in the balcony.
I draw the sketch with inkscape and tried to cut with CNC machine, but the set original point part confused me, it seems like the mirror look to me.
Then it turned out that someone changed the switch on the board, to let the motor to roll to the opposite direction.
But I am totally thrilled to use CNC router, I finally could use thicker wood board to make some really furniture.
My pity is cause the time limited, I didn't finish my shelf but to make a stool instead.
And at the time I wrote the ducomentation, I rent my apartment to an American who is also in education career , I don't need to make the shelf anymore and I could take the stool with me.
It also turned out as a lucky part, so , who knows.
2D design with Inkscape
I draw my first shelf sketch with Inkscape. And use two of the parts to test cut.
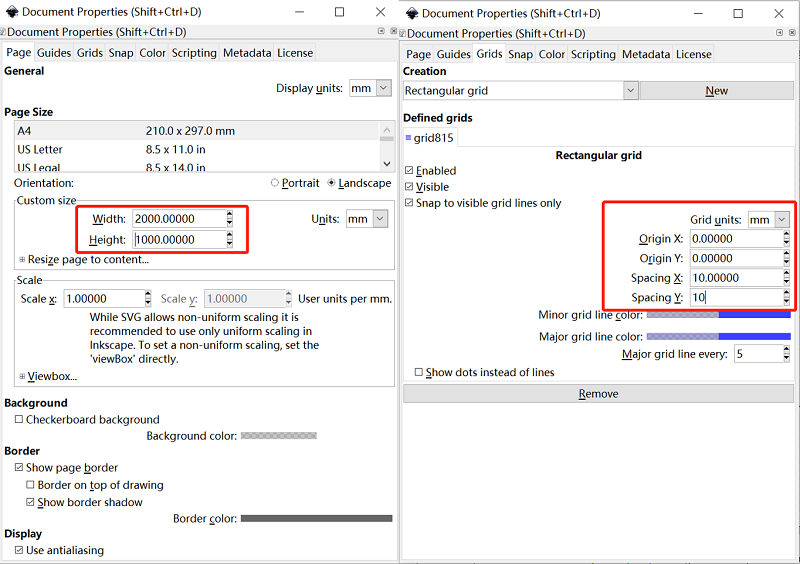
First, I set document propeties as the CNC router could cut, and I set grid units spacing Y as 10mm to help me sketch.
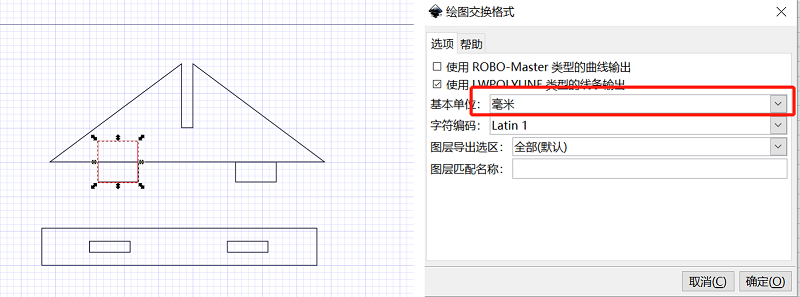
Then after a few times modifications, I finish the file and save as dxf format. For this part, don't forget to choose the unit as mm.
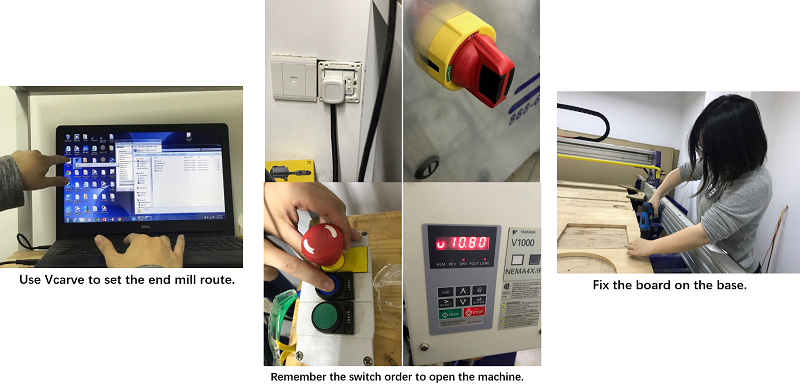
Cut with the CNC router
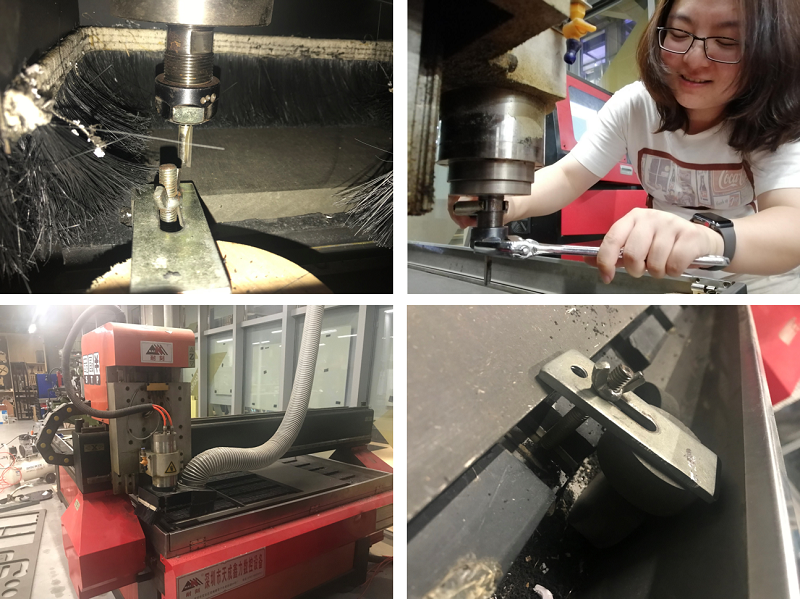
Prepare for the CNC
After instructor Yufei Ma tell us how to use the CNC router, I use part of the parten to test. The tool bit didn't cut through the wood, need to reset the settings.
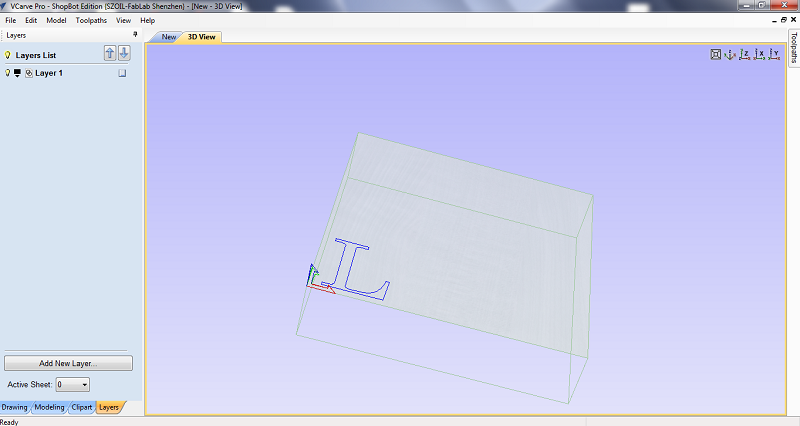
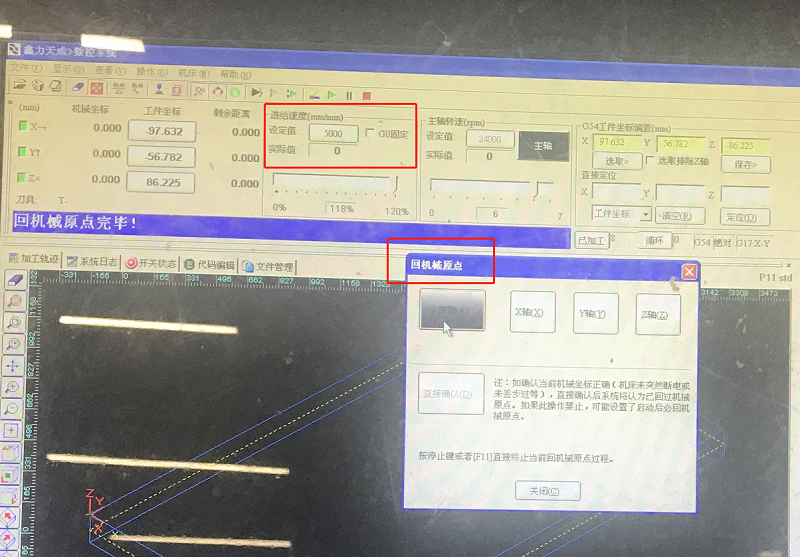
And I failed to set the original point, I tried to set it on the left , on the right or in the middle, but it always went to a unpredictable directions.
Then I tried some tests to figure it out.
I typed letter L to test. For the first three times , the letter L shows like mirror, when you move x axle to right , it went left.
Finally, instructor Yufei Ma found that the switch of the board was on the wrong position.
So we adjusted it and we got the letter L on the right position.
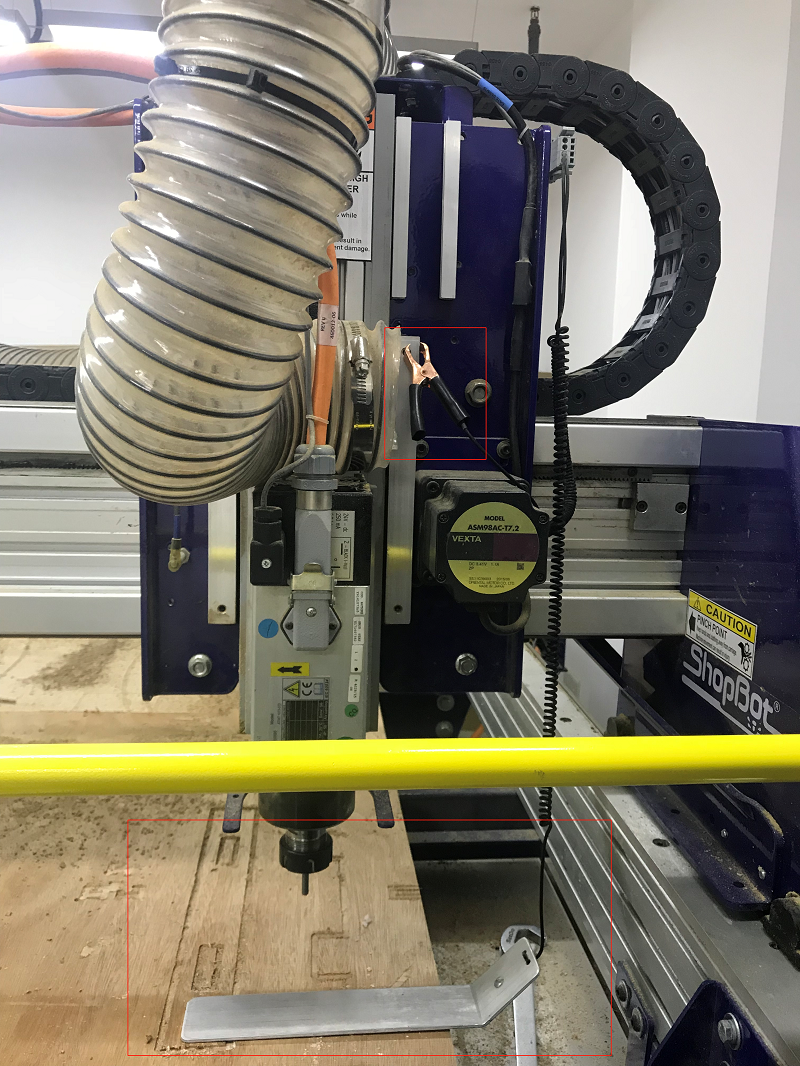
Move the panel to set the x-,y- origin.

Use the tools to set the z- axle, click the clip to to first hole position and put the meatal tool underneath the endmill of CNC machine.
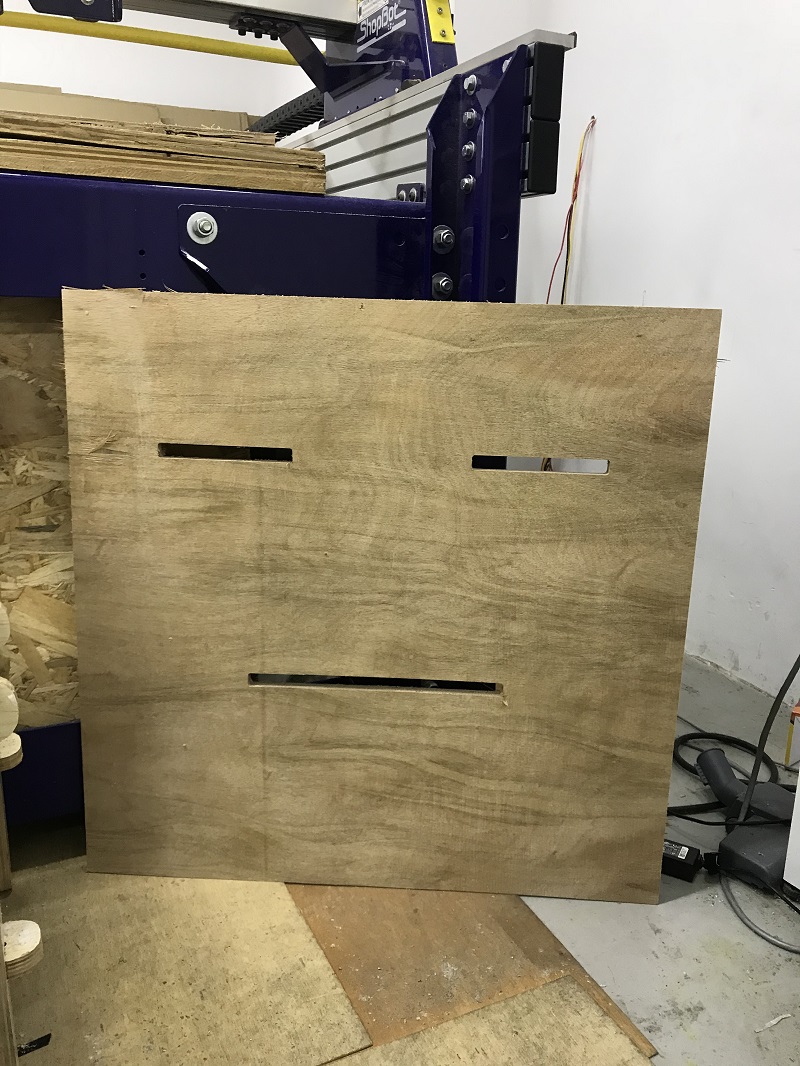
I chage my origin file to a small version to test cutting.
Open VCarve Pro-Shopbot Edution - Open my shelf design dxf file - Job setup

I set the job size / haterial / XY position / units /, and then click OK
I got the back board of my shelf.
when I get there, I found that the wood is expensive, 400yuan per board, so I decided to make something smaller than the shelf but good to use. An idea came up to me, I attended a workshop in the museum before, and a platform named Opendesk, teach people how to make CNC furniture, so I followed on of the designs and redraw a stool.
And I went back to MG to assemble the pieces.

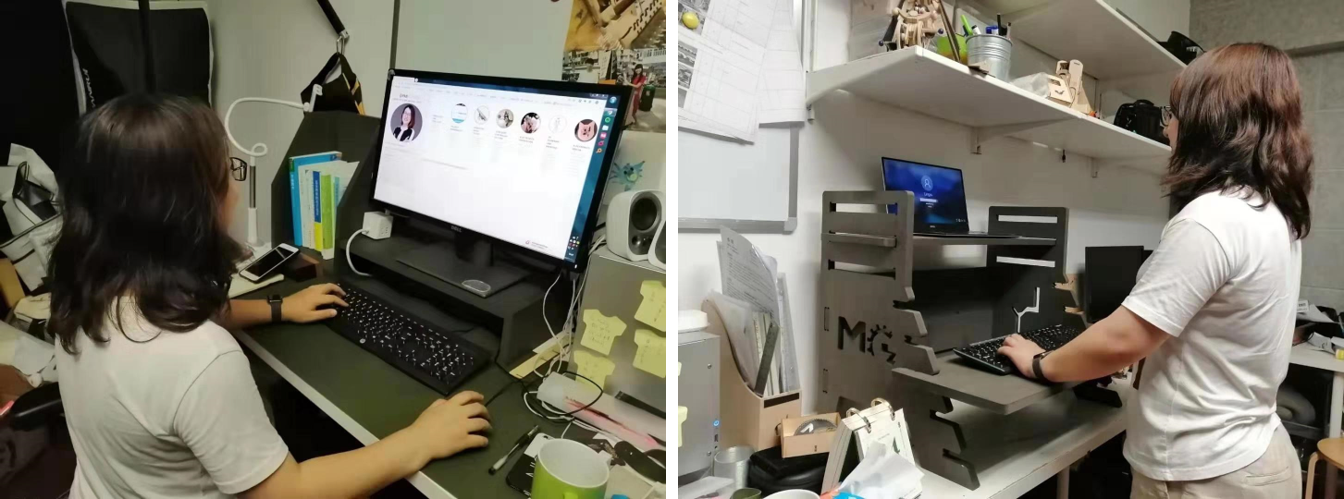
Design a stand-up stand
My Global instructor Pablo told me that I need to make my own design and cut completely, can't just copy a design and cut.
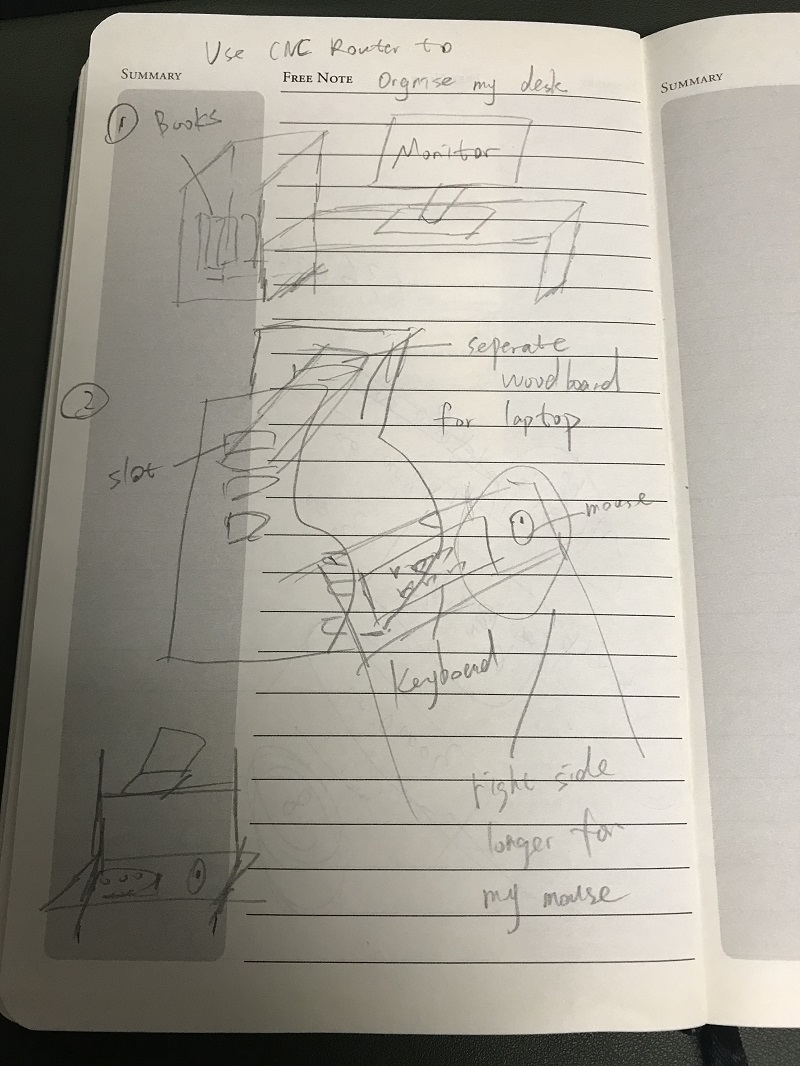
So I wanted to make something useful for my office. The fisrt idea is a stand-up working stand.
I sketched it roughly.
And try to design it with fusion 360.
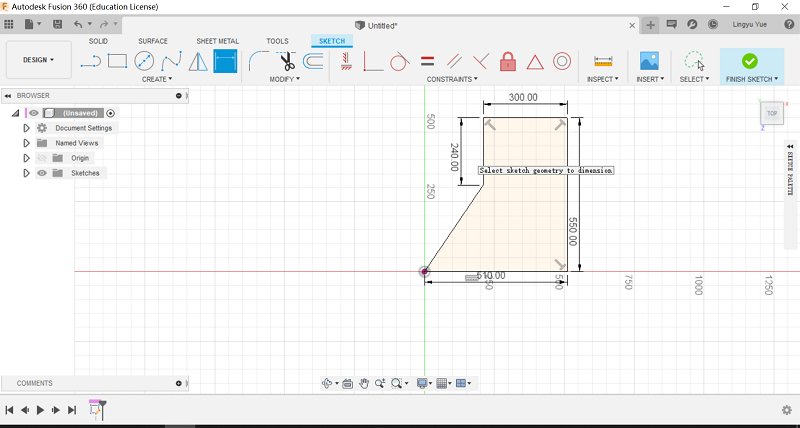
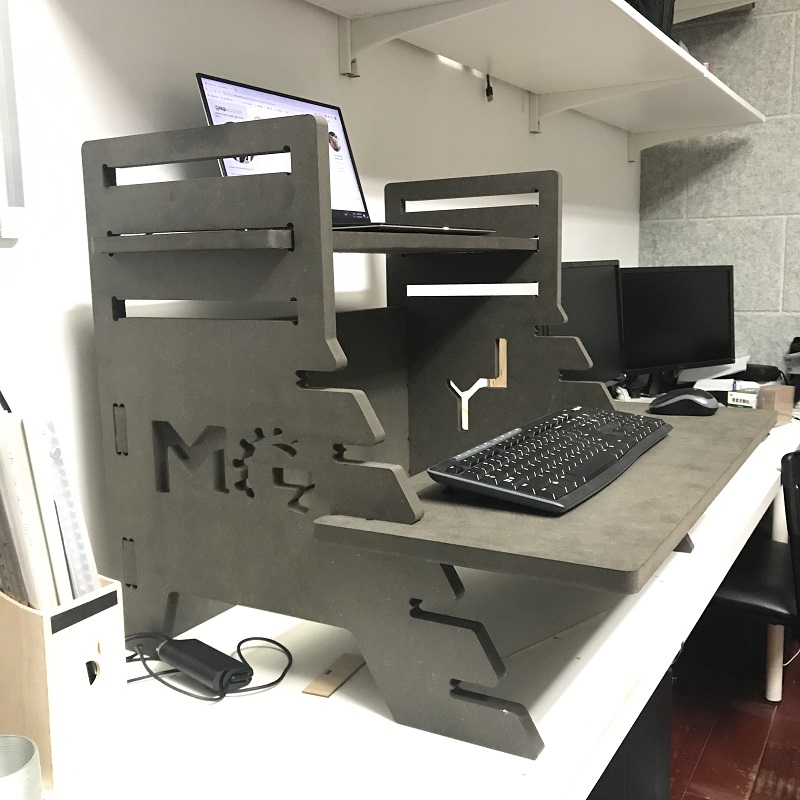
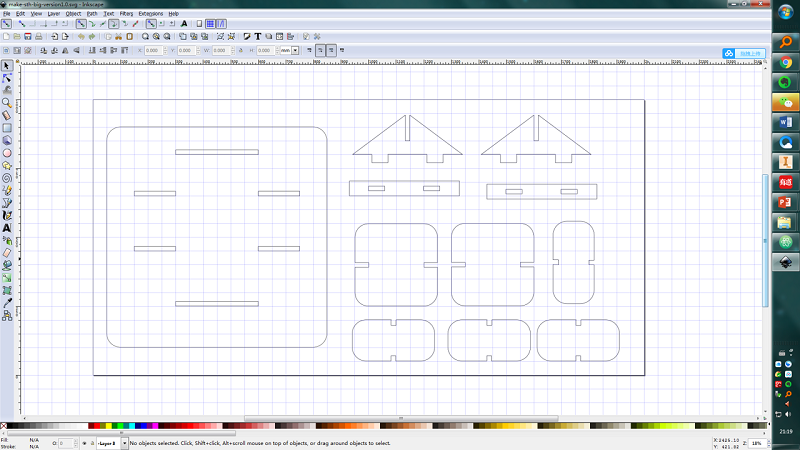
Here's my design for the stand-up stand.
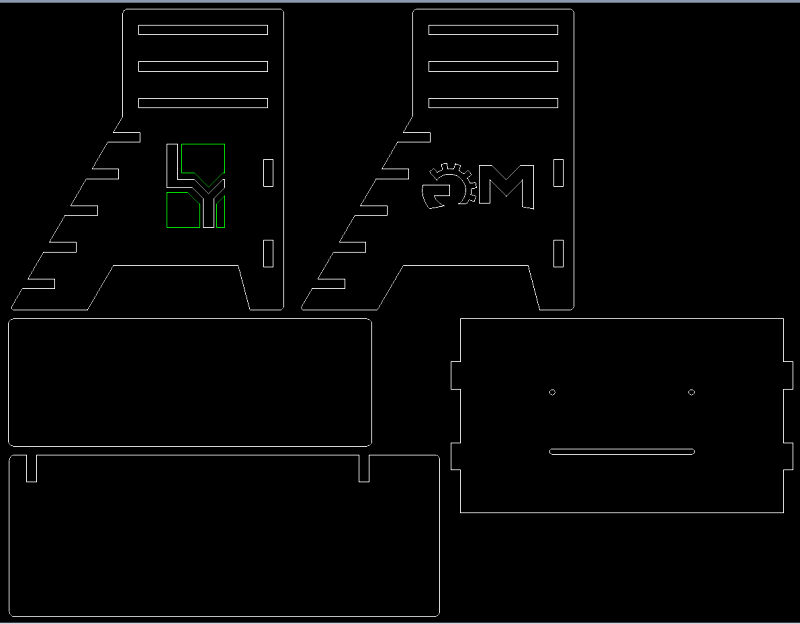
When I finished, I found that for one board , there are still some extra space, so I decide to make a bookshelf and monitor holder.
When I arrived , the Chaihuo instructor CY told me that I forget to make the dogbones part to allow the CNc end mill to go around.
He suggested me to use 8mm end mill, and teach me to usre AI on his computer to adjust the design.
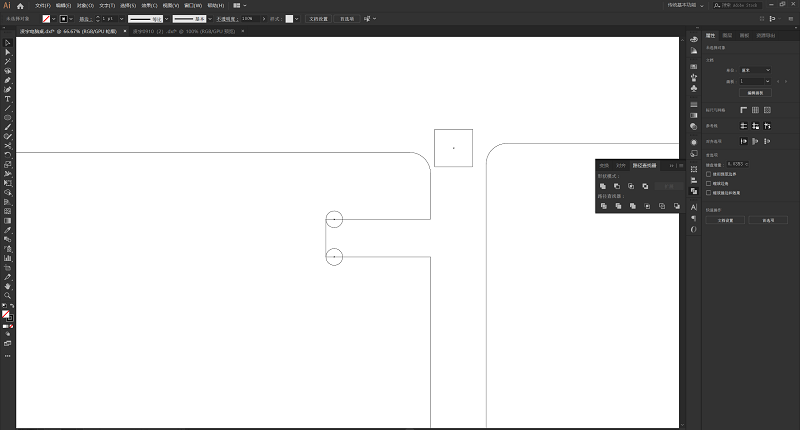
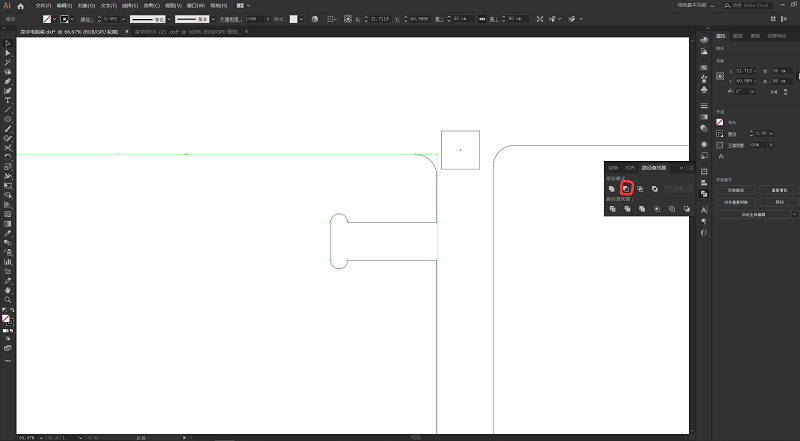
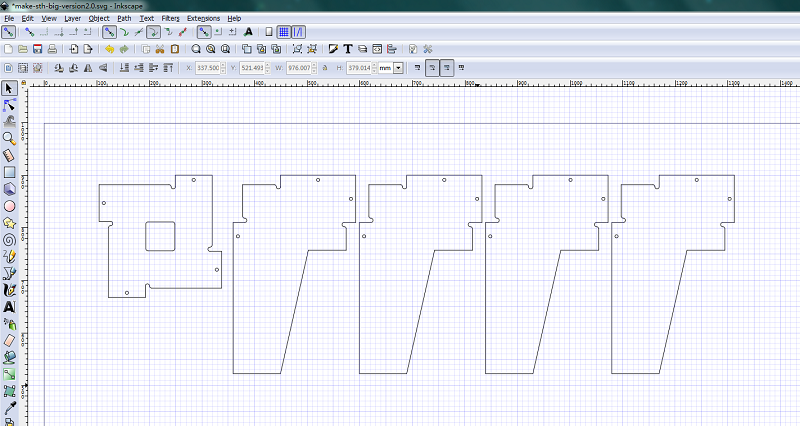
I created a 8mm circle to make the dogbone parts. Then I got this.
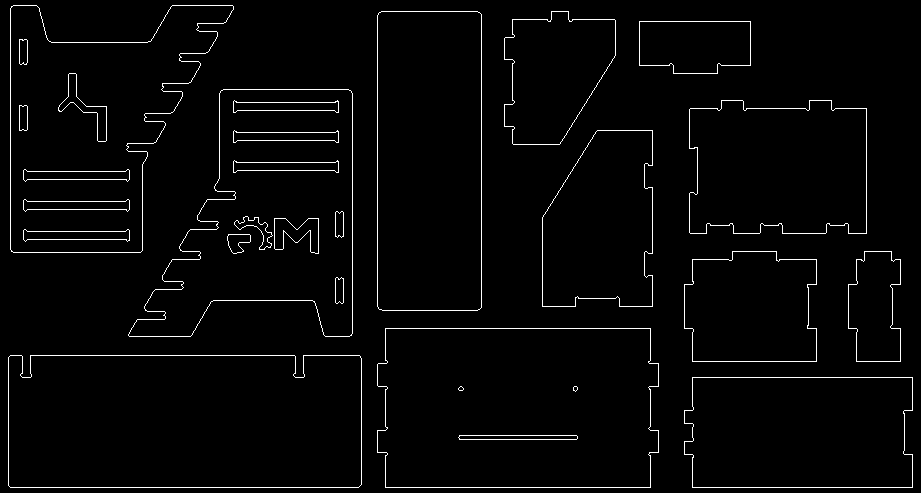
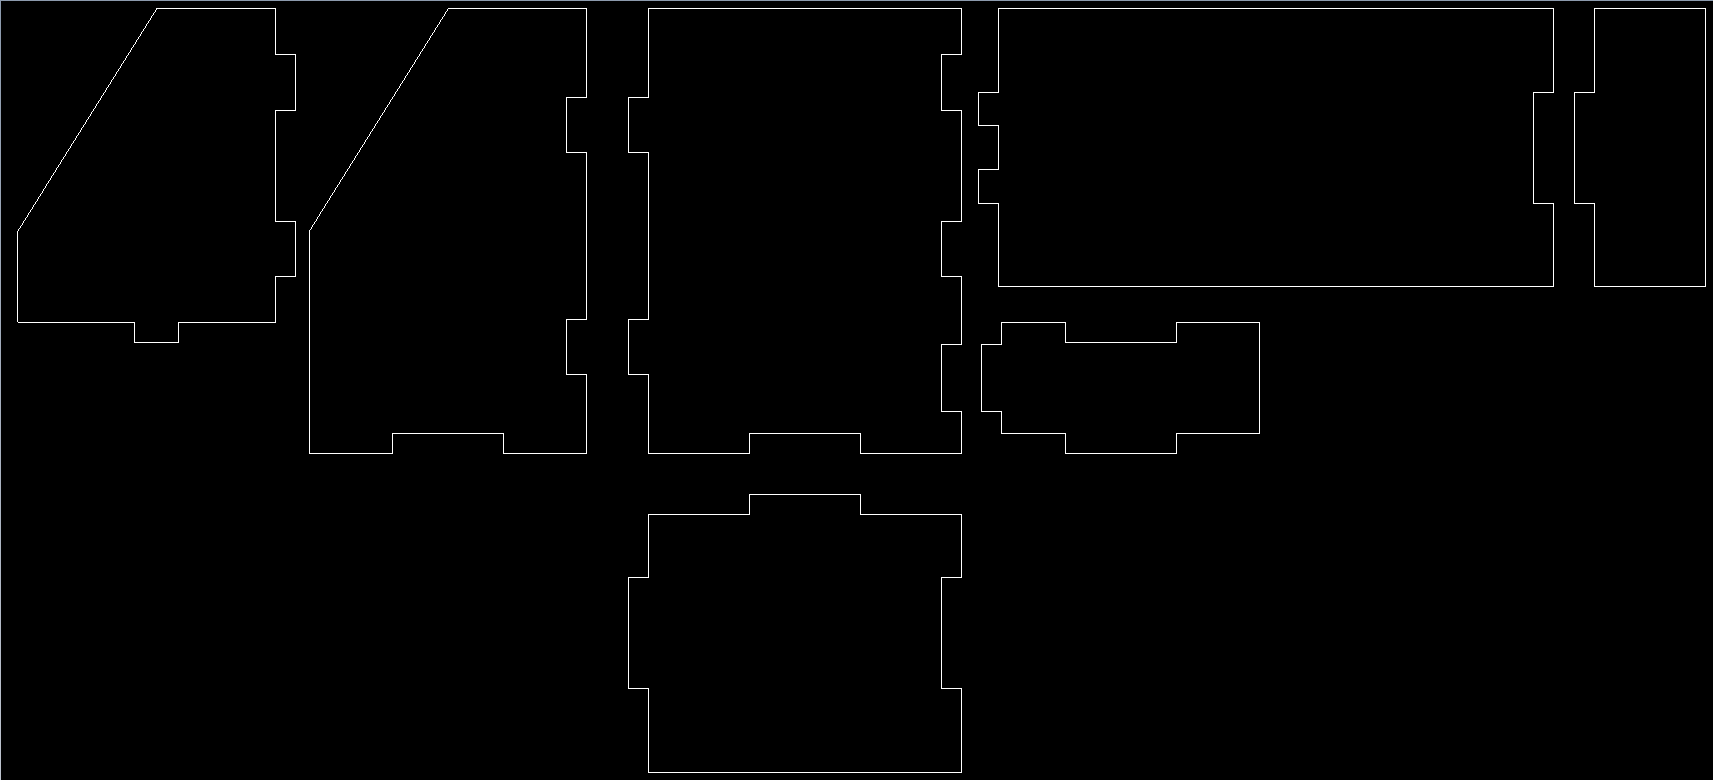
Import the dxf file to Mastercam Mill V9.1 for the CNC machine.
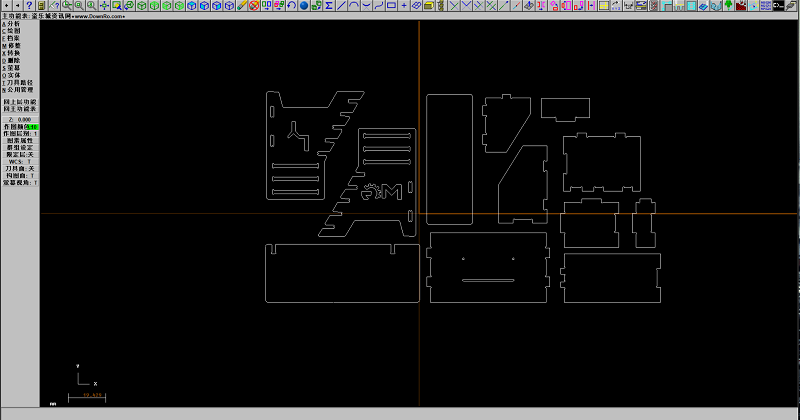
Set the end mill and mill height.
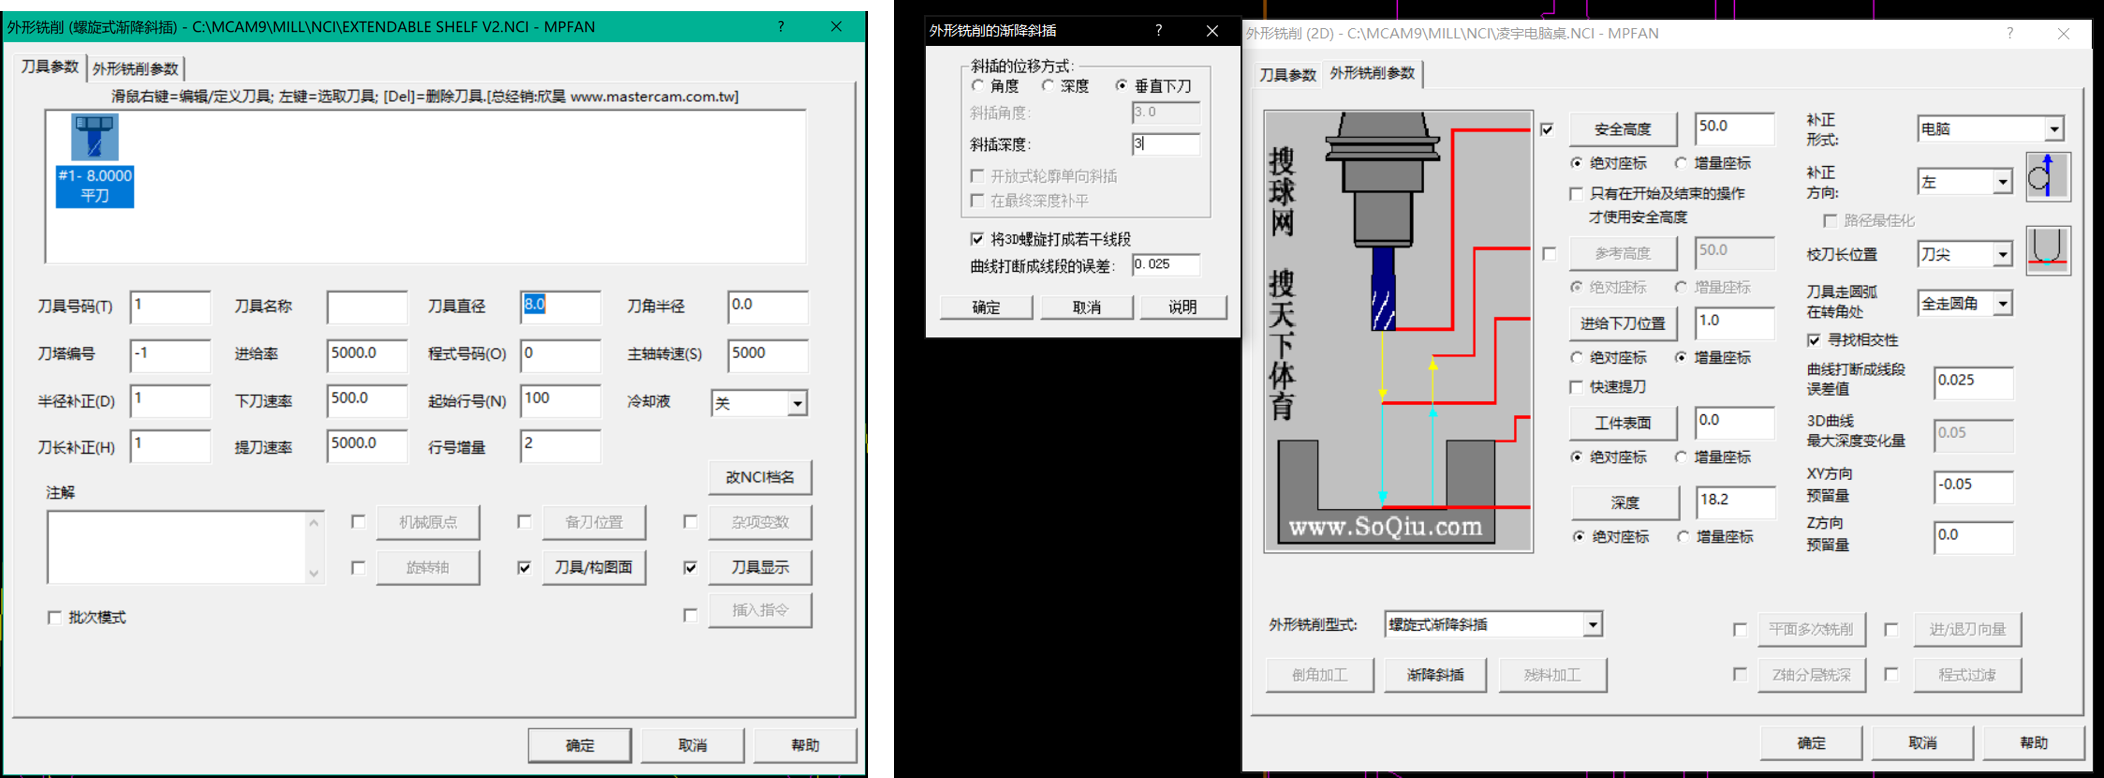
Set the router.
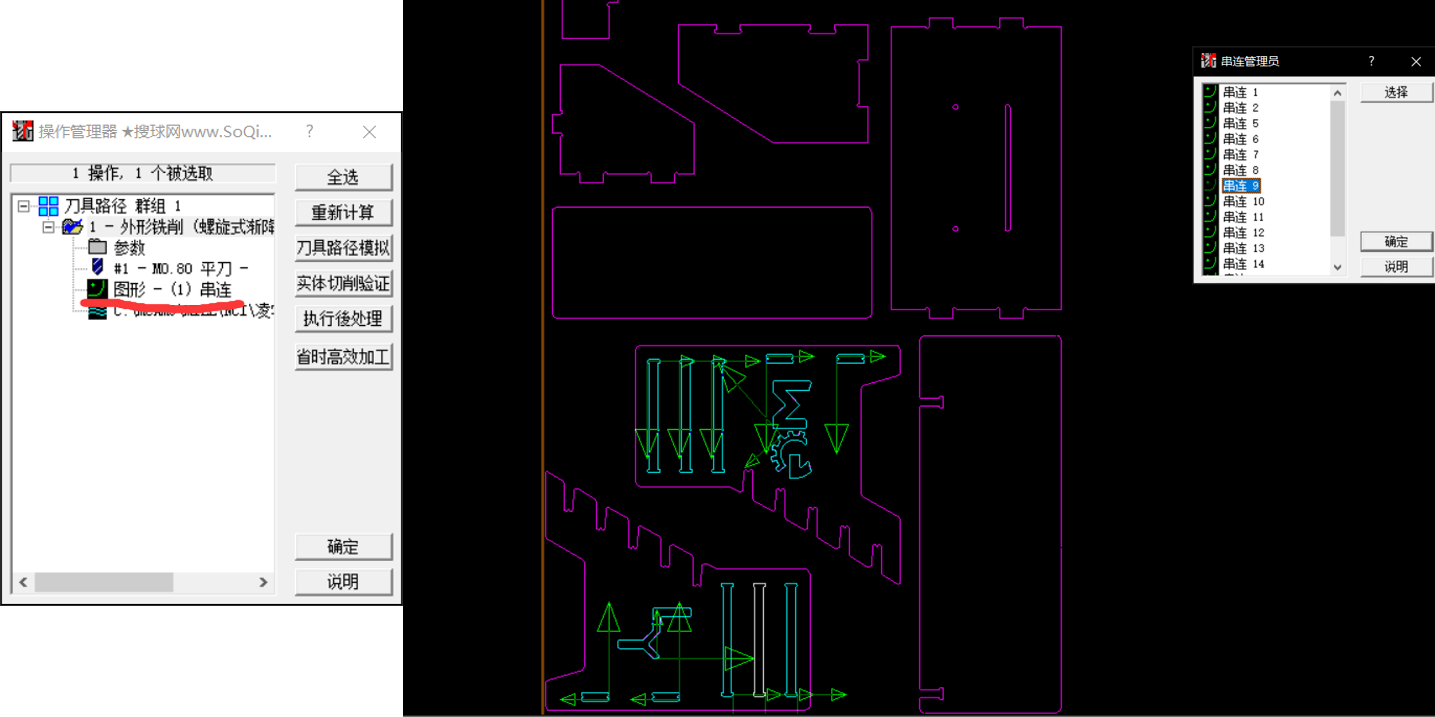
I set the route, first to cut the inside part, then outside, and for the edge, cut along the outer edge, for the inside parts , cut along the inner edge.
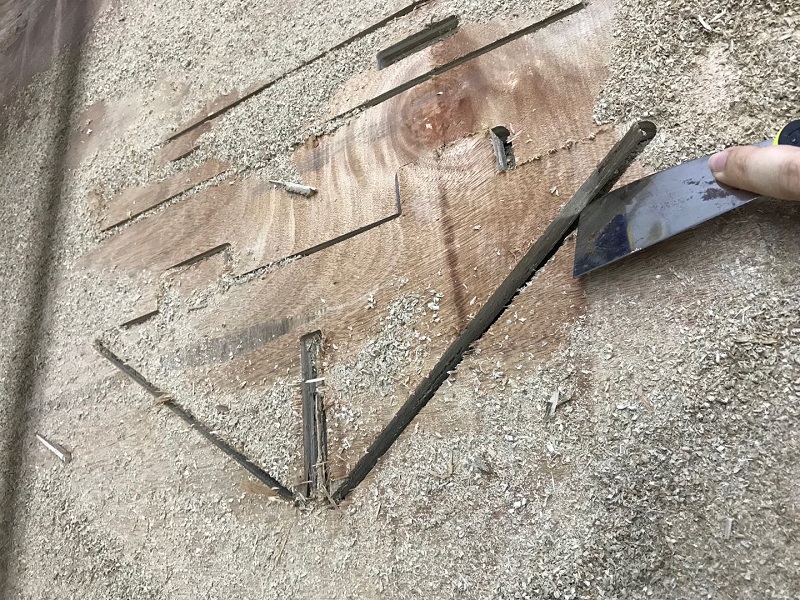
But we need to check carefully, for the first trial, I chose to cut position wrongly. It ended up as below.
The upper piece was cut along the innner edge and the lower piece was cut along the outer edge.
Chage the end mill - open the machine - change board- move the end mill to origin
Then set the milling speed, I use 5000mm/min to cut the wooden board.
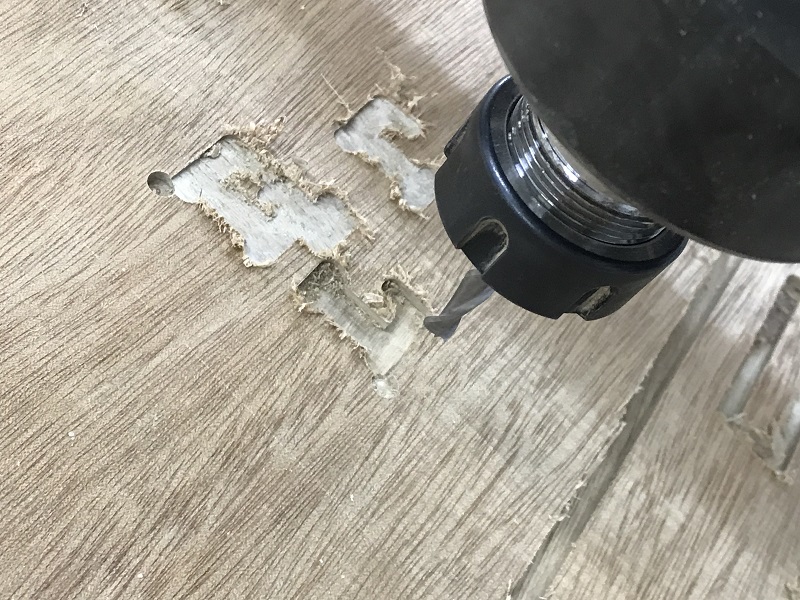
But the first simulation image was strange, I barely found it.
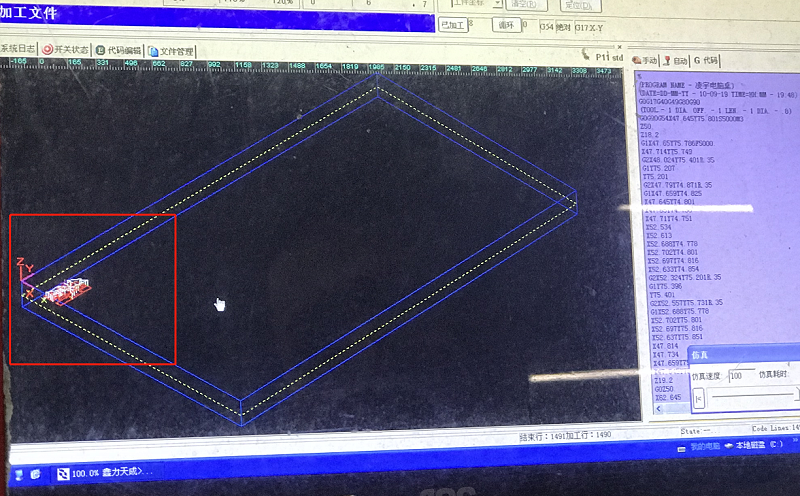
I checked the dxf file and found that when I used AI to add the dogbone milling corner, I exported the wrong scale, the first file is only the 10% of the normal one.
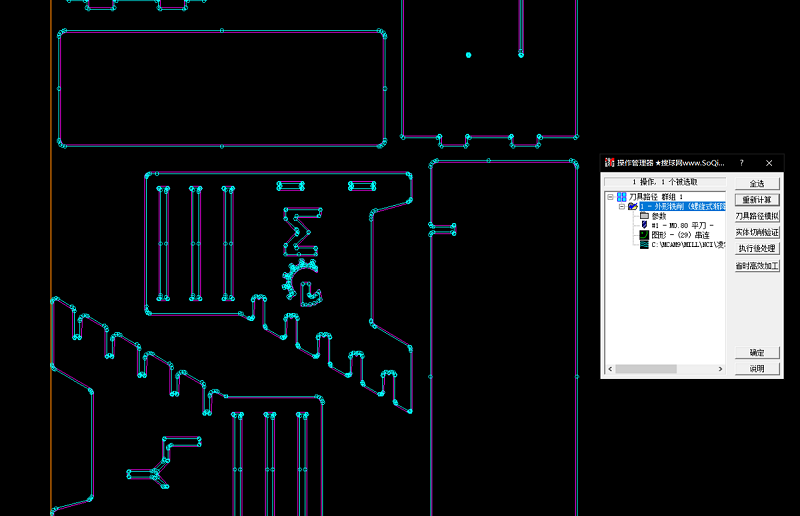
I used the normal dxf file to test again.
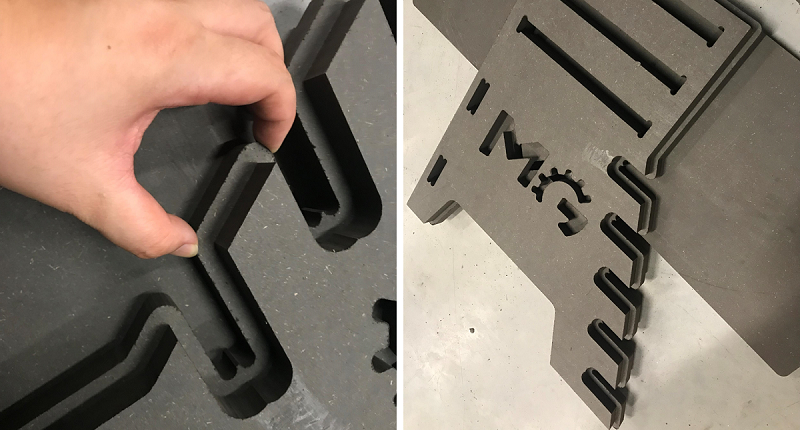
Assemble the parts
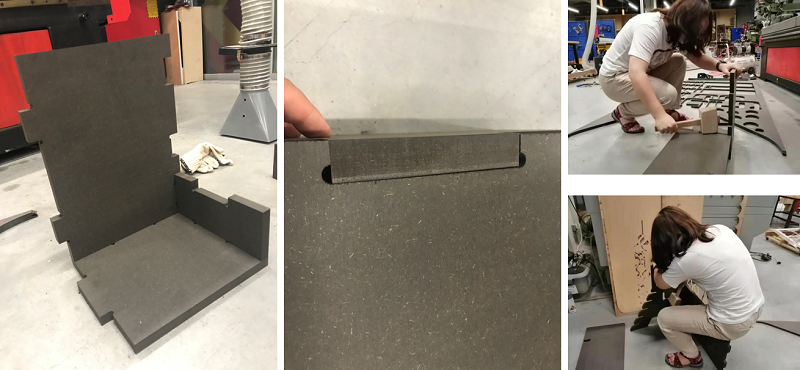
During the assemble, I found it diffecult to insert the board into the slot I left which is 18mm as the board thickness.
I use hammer and also polish to make the board thinner, but still not enough , the instructor CY help me to use CNC end mill to milling the board and we assemble successfully.
Before cutting , you need to fasten the end mill and wear goggle, the CNC router might be degerous. And the thickness of different wood isn't accurate, you'd beeter measure them every time before cutting.
Here are the design -files I made :
- The shelf (.svg) // The first shelf
- The Stool (.svg) // The second stool
- The Stand & Shelf (.dxf) // The third stand