3D Scanning and Printing
Group assignement
- test the design rules for your 3D printer(s)
Individual Assignement
- design and 3D print an object (small, few cm3, limited by printer time) that could not be made subtractively
- 3D scan an object (and optionally print it)
Gruop work
Because of I am the only student I 've done every test alone:
Test of Ultimaker 2+
The main setting that I am going to test are:
- Quality: Layer Height
- Speed
- Another setting
A Printer error
Unfortunately, almost in every print I have had the some printer error:
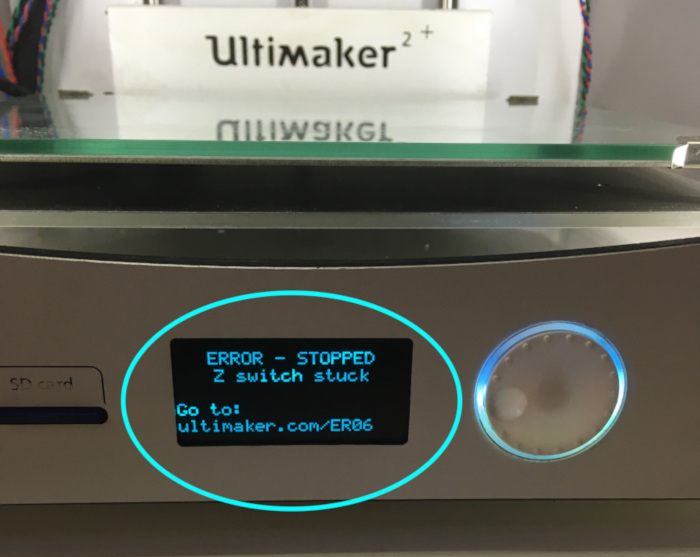
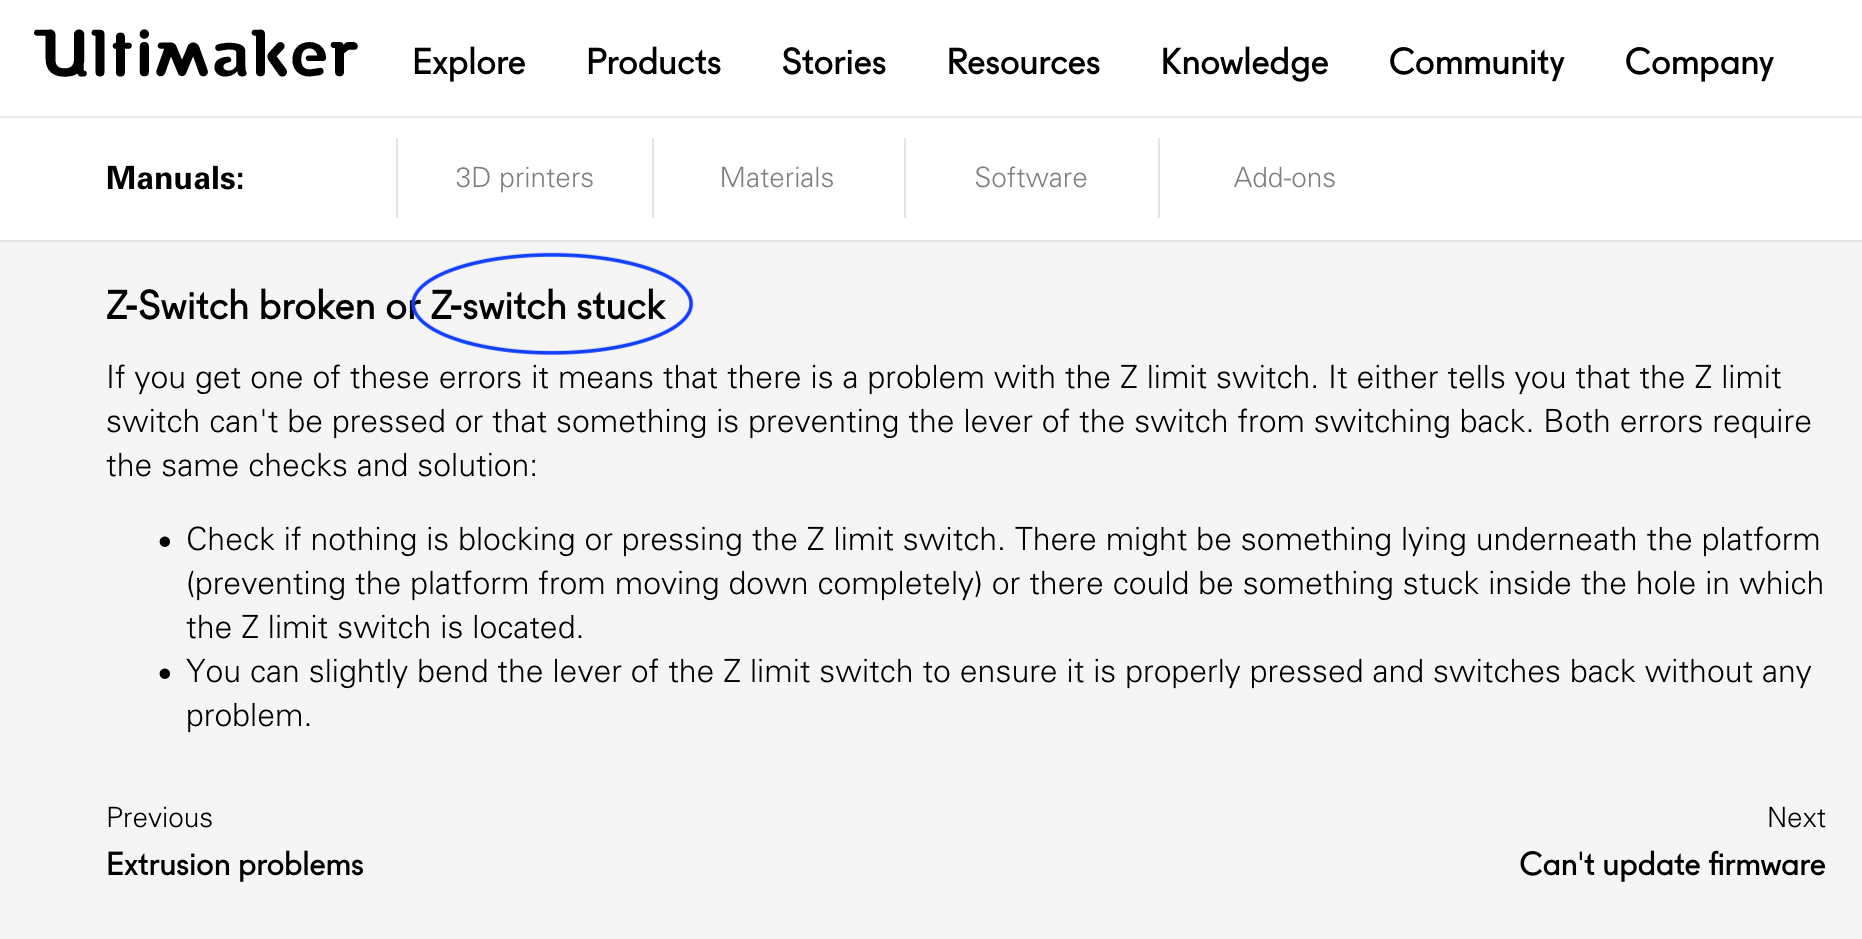
with this link recommended by the printer I manage to know the reasons of the error.
In my case the error print is Z-switch stuck
To solve my problem I see if there is someting under the plate but there isn't anything so every time that this error appeared , I tried to switch off and switch on again the printer . In this way I manage to solve the problem and I continue to print my things.
Quality test
I print a cube to see the diffrences of the print changing the setting layer height.
The base setting that I maintain to test the layer height:
| Settings: | Value: |
|---|---|
| Quality: | |
| Layer Height: | 0.2 |
| Shell: | |
| wall thickness: | 1.05 |
| wall line count: | 3 |
| top/bottom thickness: | 0.8 |
| top thickenss: | 0.8 |
| Infill: | |
| Infill Density: | 10% |
| Infill Pattern: | Zig Zag |
| Speed: | |
| Printf Speed : | 70 mm/s |
| Infill Speed : | 85 mm/s |
| Top/Bottom Speed: | 35 mm/s |
| Travel Speed : | 120 mm/s |
| Support : | |
| Generate Support : | on |
| Support Overhang Angle: | 50° |
| Build Plate Adhesion: | |
| Build Plate Adhesion Type : | Brim |
| Brim Width : | 8.0 mm |
| Cooling: | |
| Enable print Cooling: | on |
| Fan Speed: | 100.0 |
In this table we can see the main setting;in order to check the quality of the settings I check some of this.
- The first cube
The first Cube I' ve printed has the setting of the quality:
| Quality setting | value |
|---|---|
| Layer Height: | 0.2 |
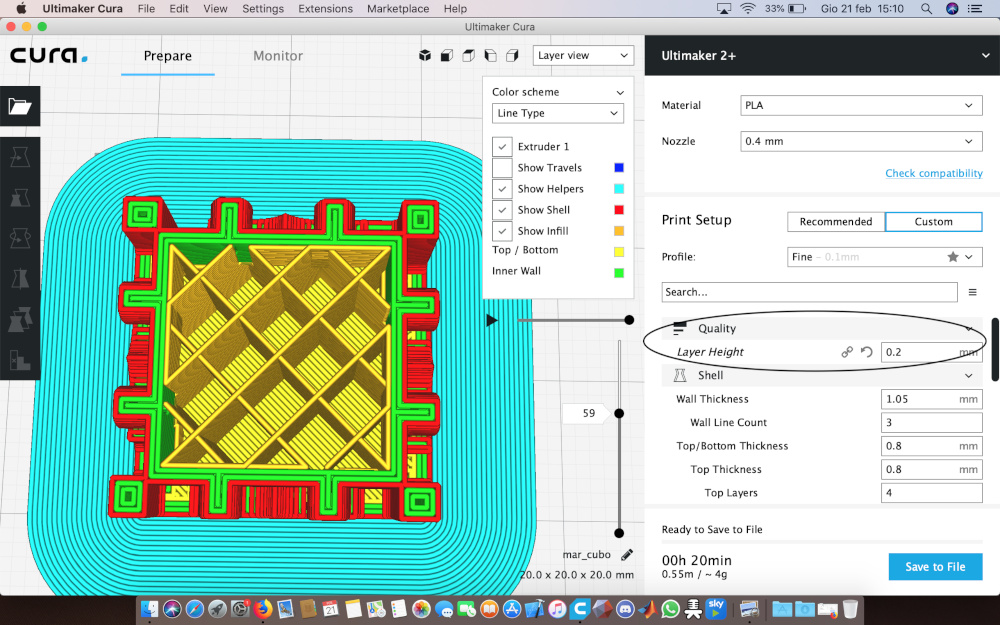
With this setting our print take 20 minutes of time
- The second cube
The second cube has the setting on:
| Quality | value |
|---|---|
| Layer Height: | 0.1 |
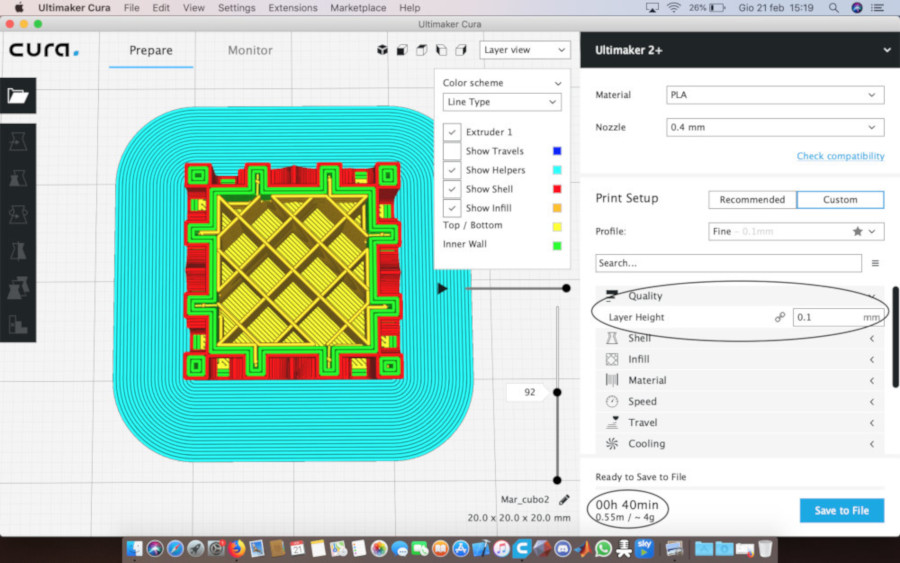 I have a more detailed print but It take twice the time of the first print
- The third Cube
In my opinion the best setting is on :
| Quality | Value |
|---|---|
| Layer Height : | 0.15 |
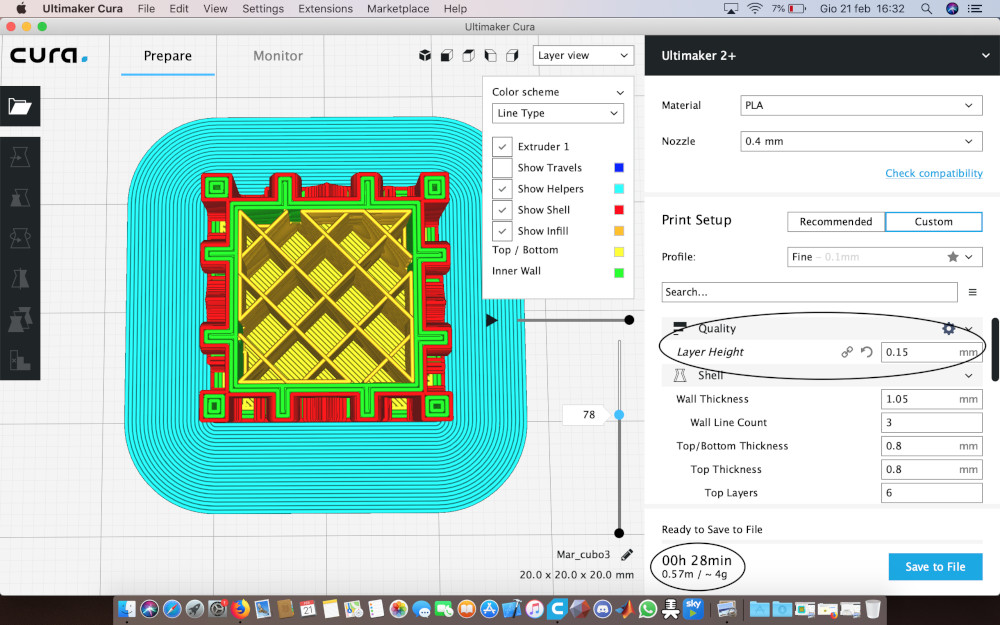
In fact , this setting do a quite detailed print in not very much time.
Here below, we can see the three cube:

The Speed test
For the test of the speed setting I use a bridge test.In this test I want to see the difference performance of the bridge print changing the speed. Differently of the base setting of the other test , I am going to change the setting of the support because I want to see the effect of the print without the support.
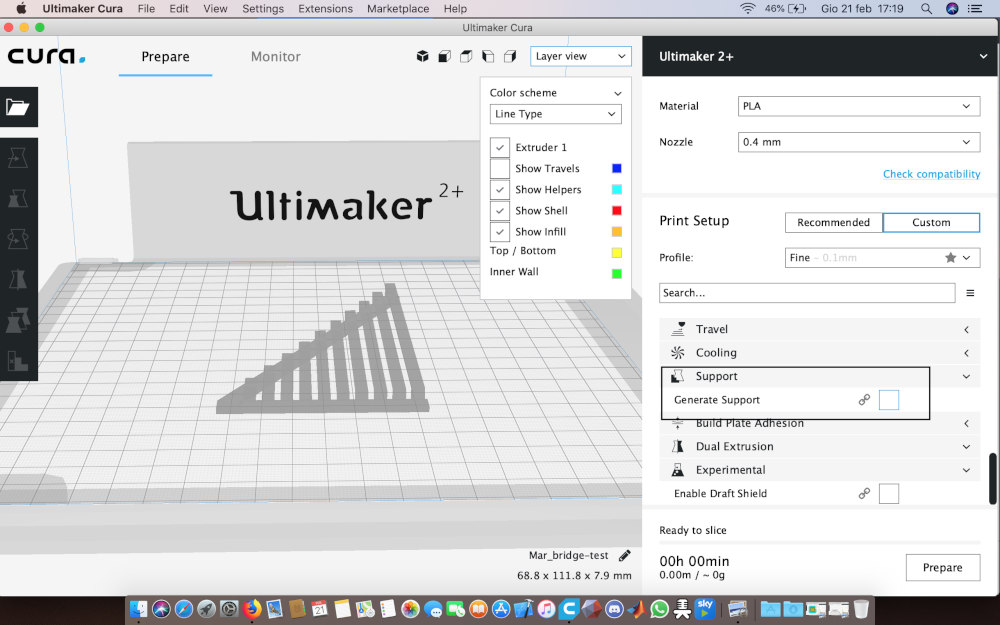
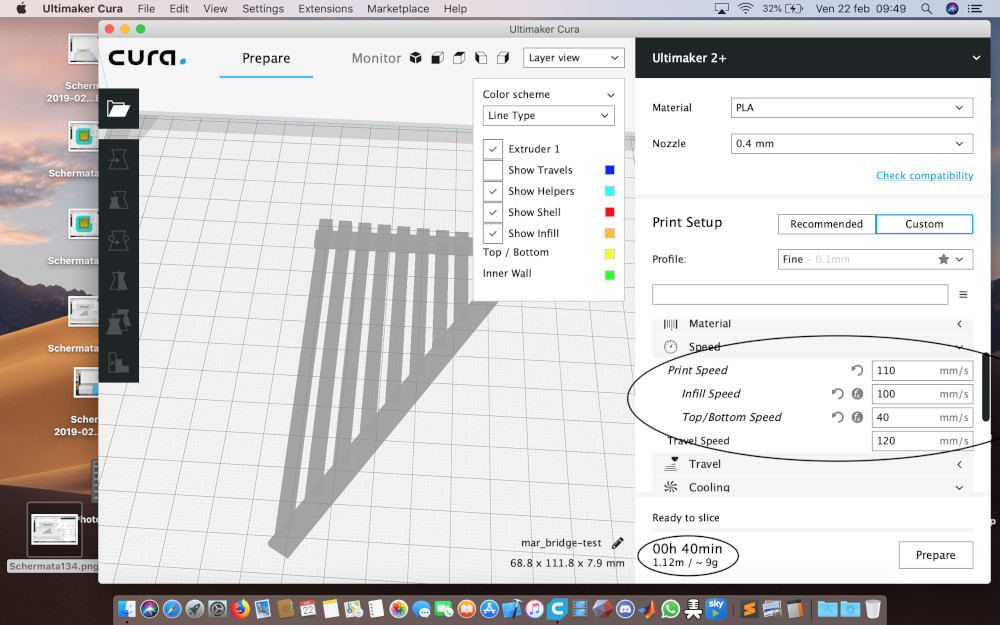
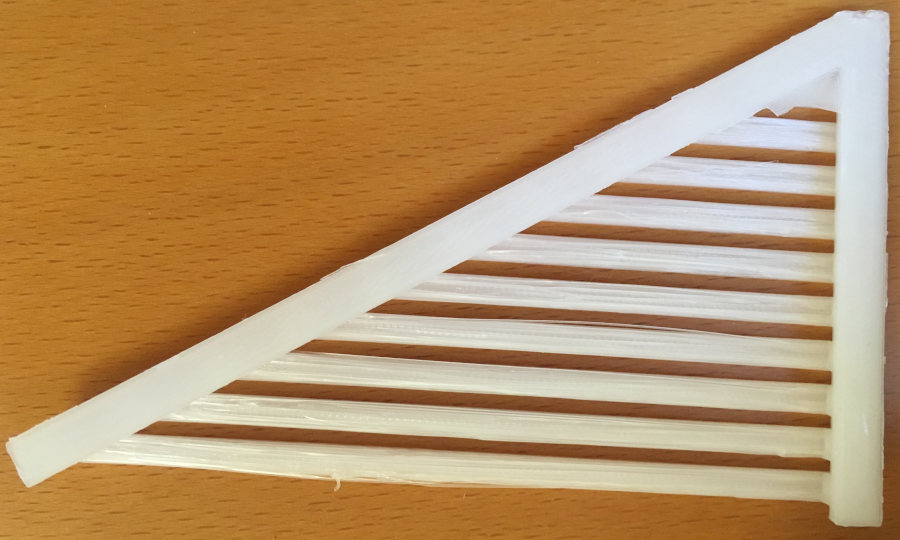
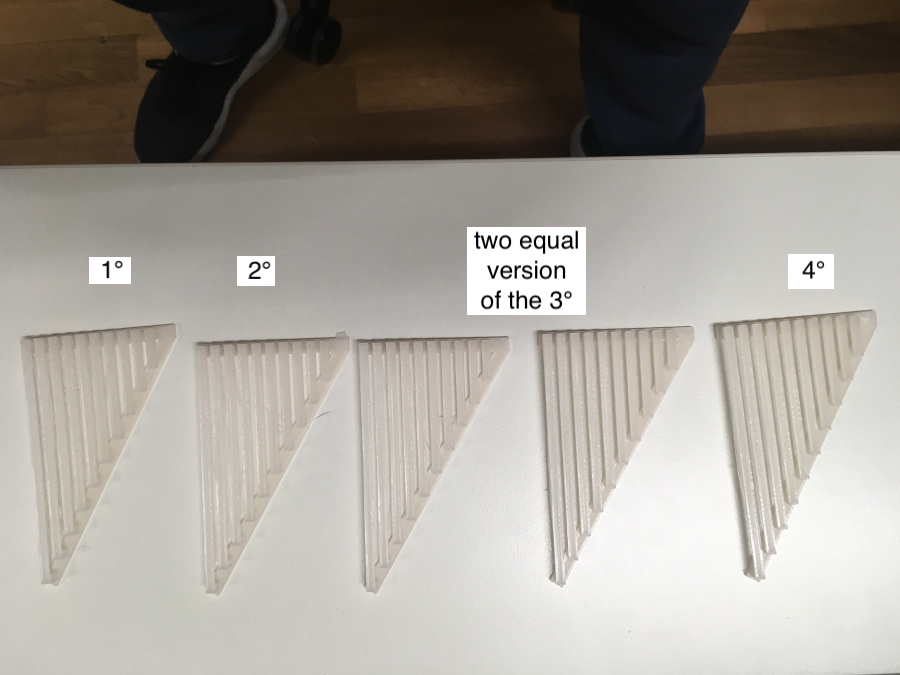
- The first Bridge
In the first bridge I set the higher speed in this test:
| Setting tested | value |
|---|---|
| Print Speed : | 110 mm/s |
| Infill Speed : | 110 mm/s |
| Top/Bottom Speed : | 40 mm/s |
| Travel Speed : | 120 (it is only the setting of the speed when the printer are moving from an area to another one without printing). |
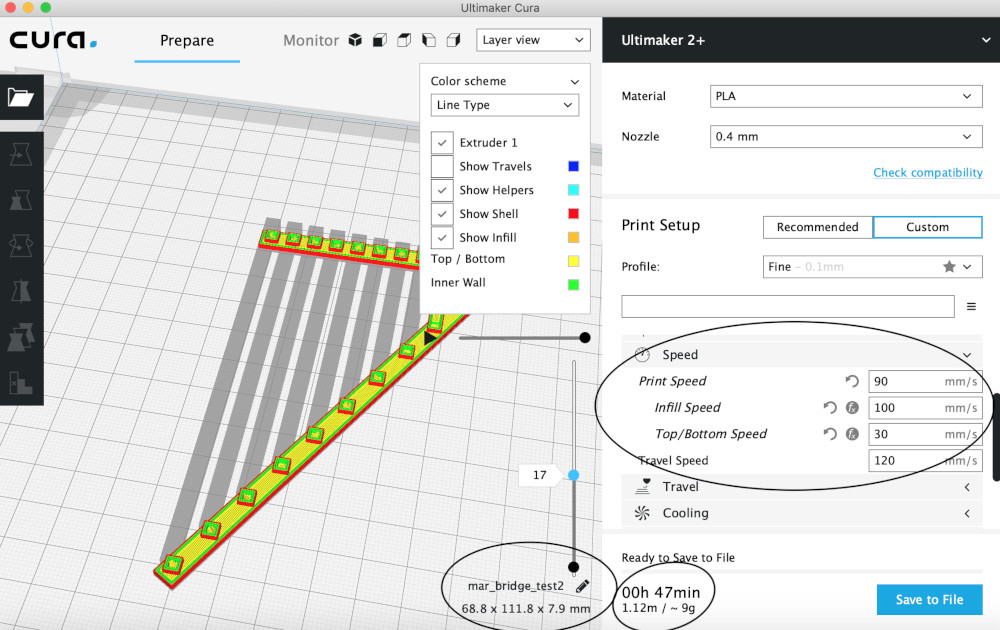
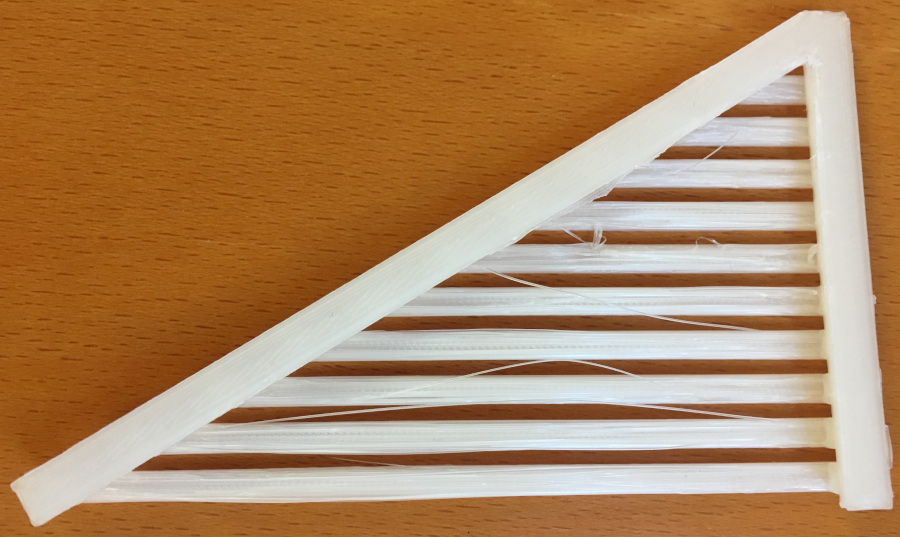
- The second Bridge
In the second bridge I decreased the speed :
| Setting tested | value |
|---|---|
| Print Speed : | 90 mm/s |
| Infill Speed : | 100 mm/s |
| Top/Bottom Speed : | 30 mm/s |
| Travel Speed : | 120 (it is only the setting of the speed when the printer are moving from an area to another one without printing). |
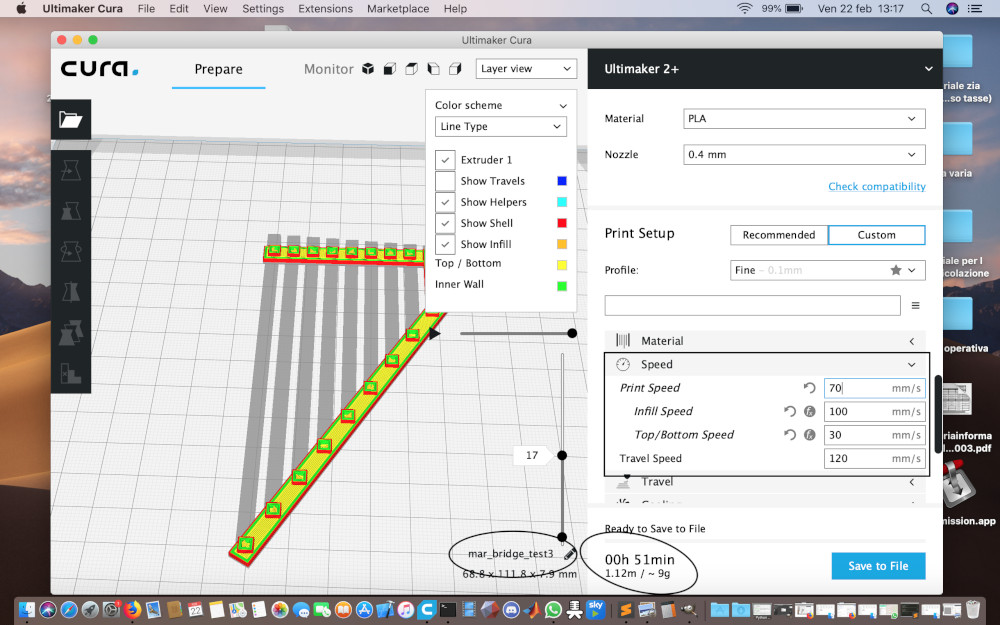
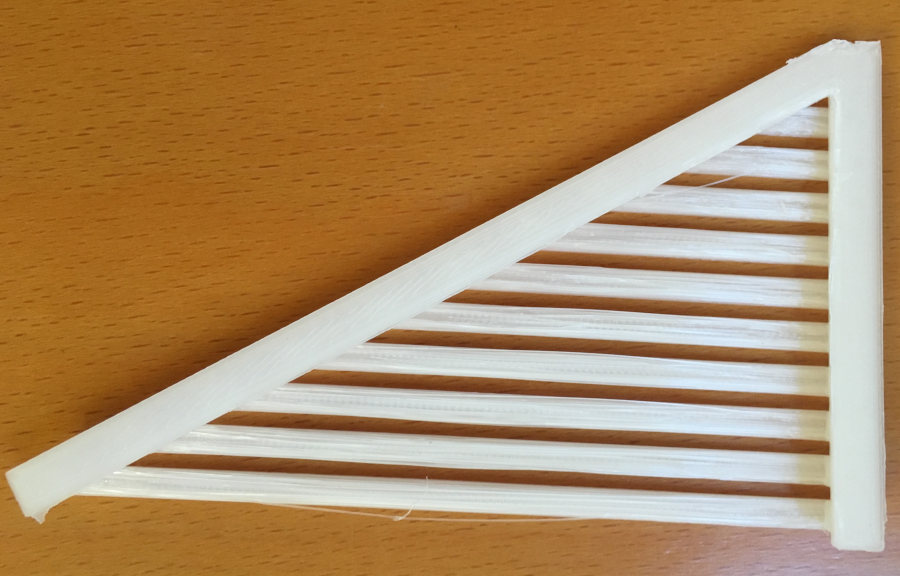
- The third Bridge
In the third bridge I set :
| Setting tested | value |
|---|---|
| Print Speed : | 70 mm/s |
| Infill Speed : | 100 mm/s |
| Top/Bottom Speed : | 30 mm/s |
| Travel Speed : | 120 (it is only the setting of the speed when the printer are moving from an area to another one without printing). |
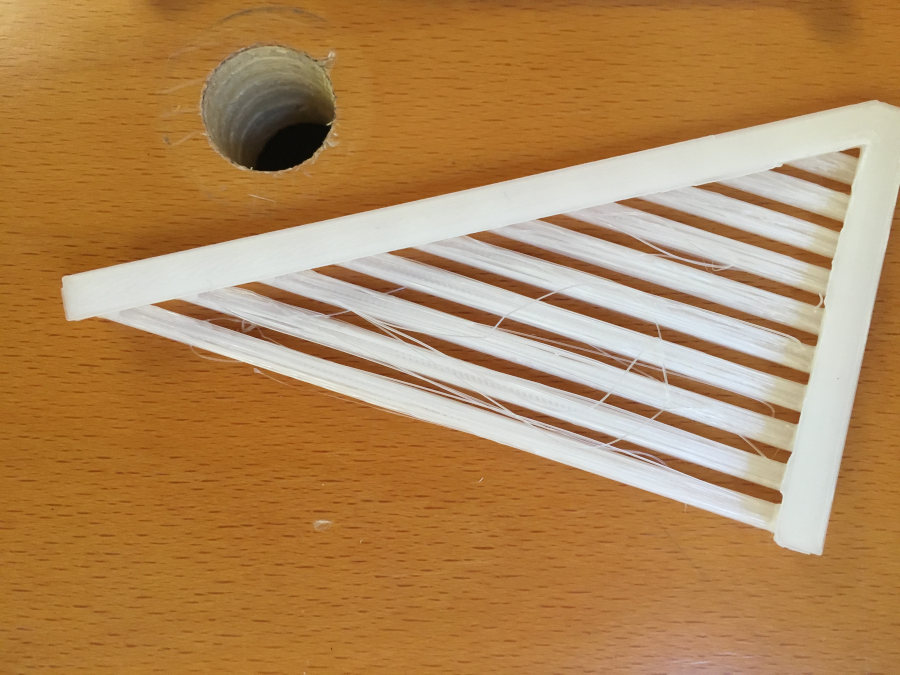
- The last Bridge
In the fourth bridge I set:
| Setting tested | value |
|---|---|
| Print Speed : | 60 mm/s |
| Infill Speed : | 100 mm/s |
| Top/Bottom Speed : | 30 mm/s |
| Travel Speed : | 120 (it is only the setting of the speed when the printer are moving from an area to another one without printing). |
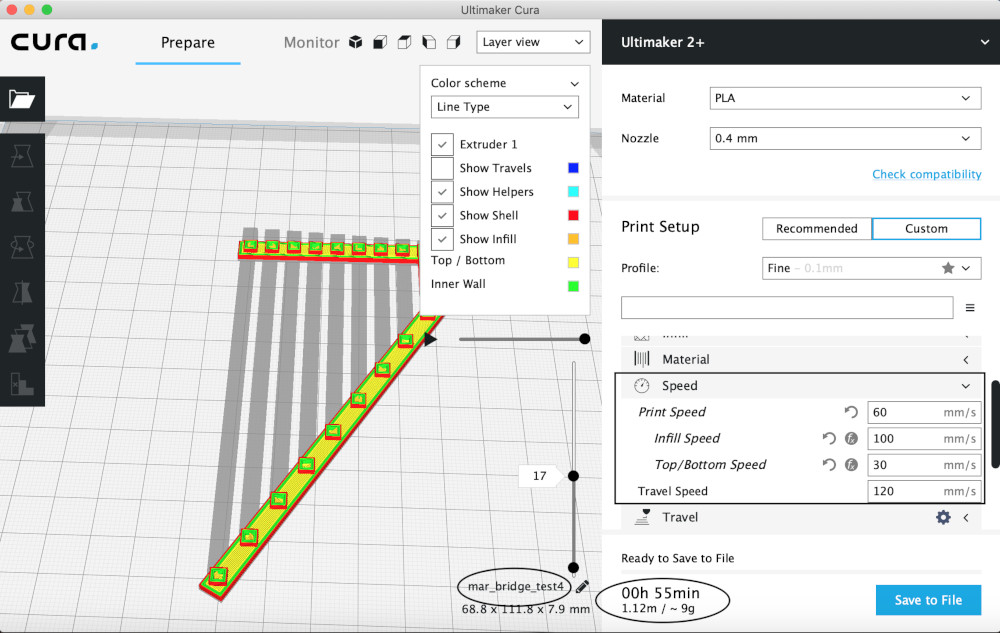
In this screenshot we can see the bridge in a different view:
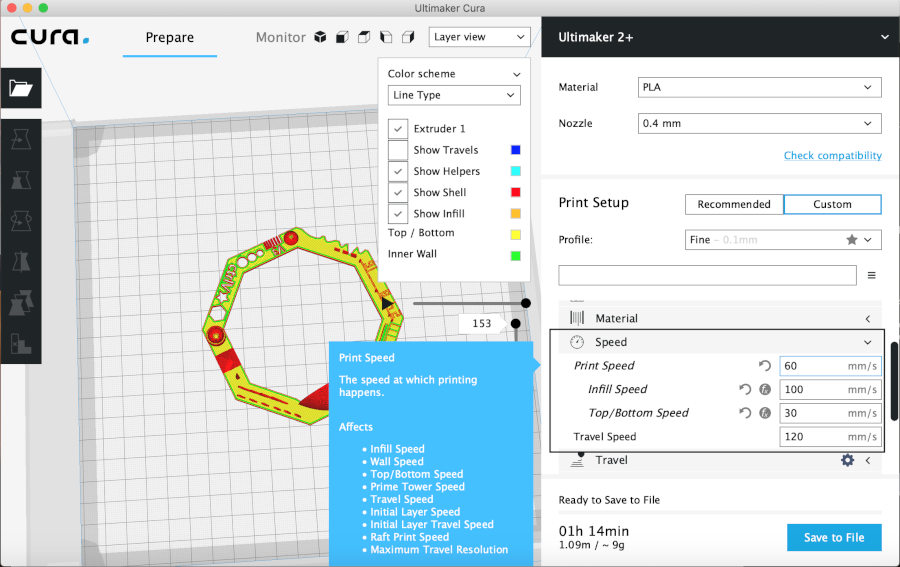
The control V test
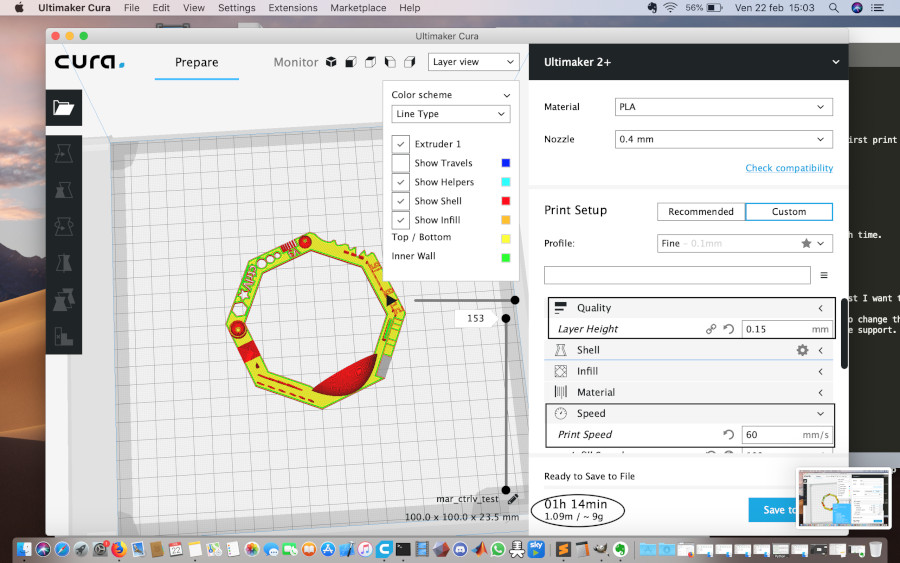
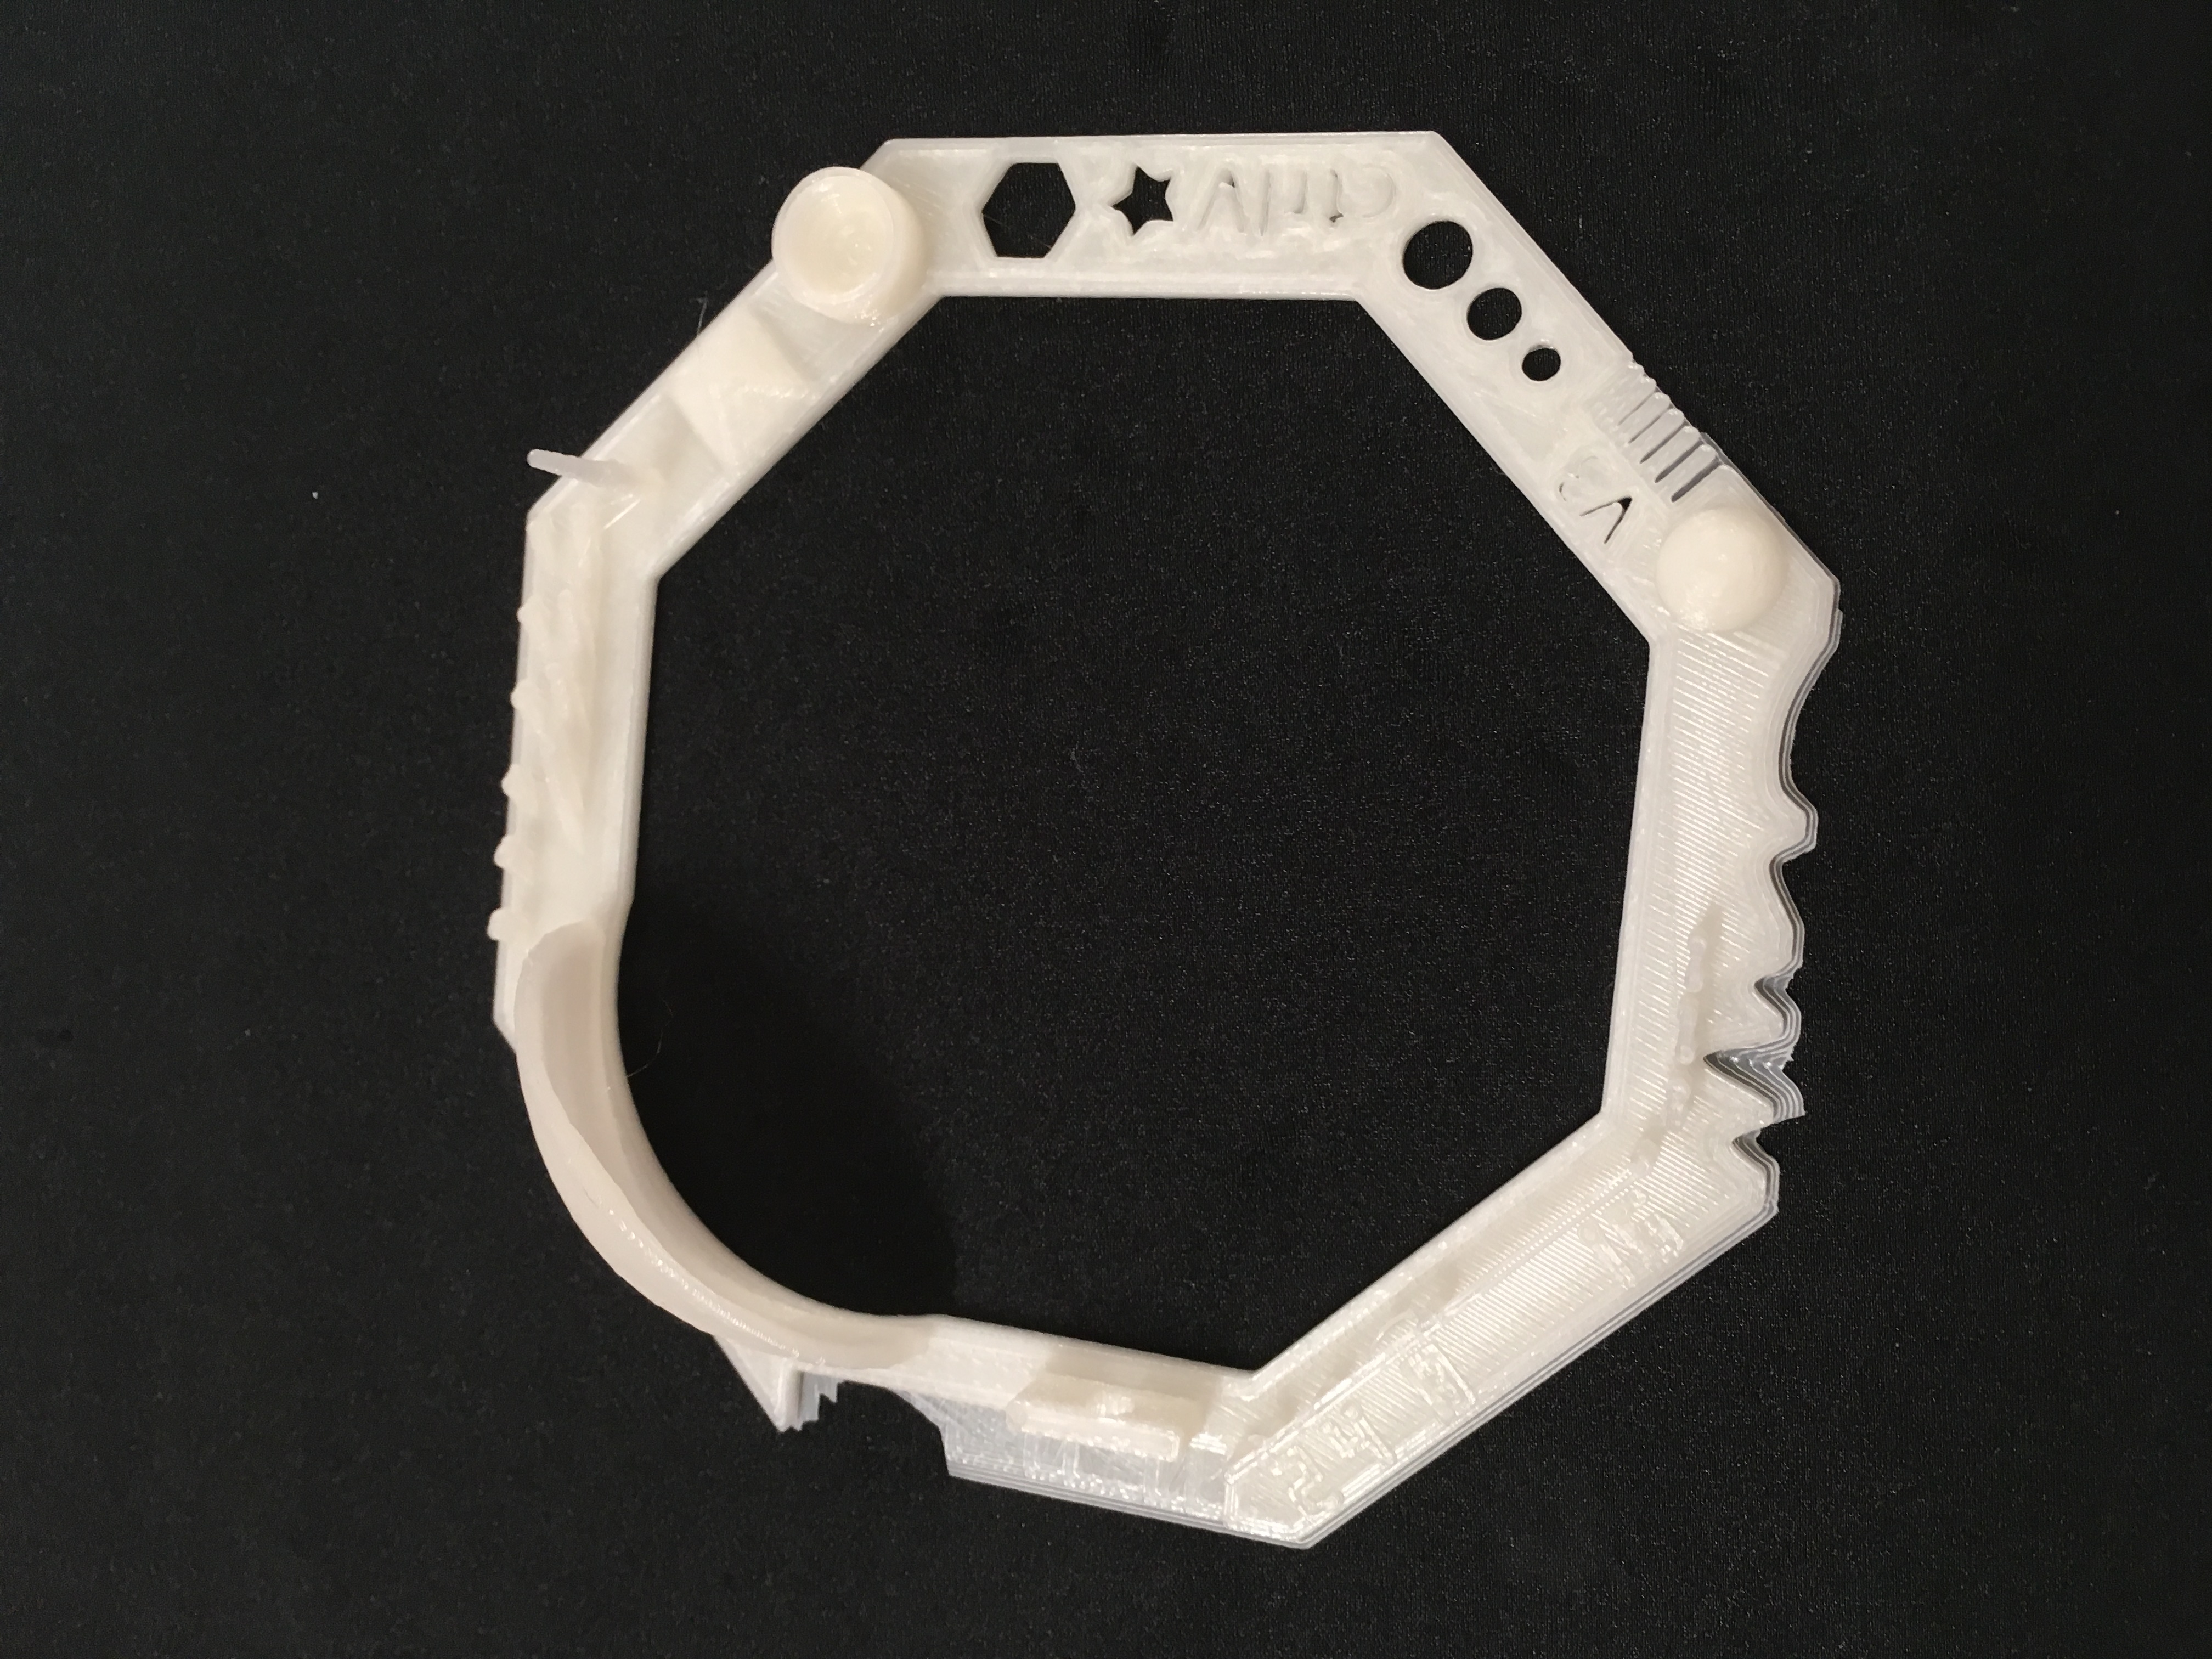
The final test I am going to do is the control-v-test. I do it in order to check the setting ,calculated in tho others two test and see the effect of these in a more particulary print with many critical points.
- The first Ctrl-V test
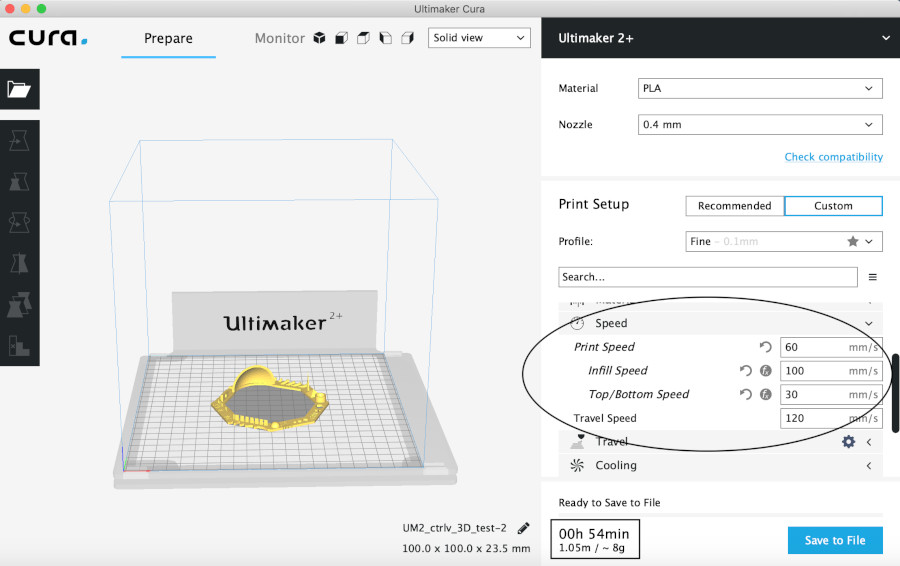
In the first test I set the best setting of the other tests:
| Speed setting | value |
|---|---|
| Print Speed : | 60 mm/s |
| Infill Speed : | 100 mm/ss |
| Top/Bottom Speed : | 30 mm/s |
| Travel Speed : | 120 |
| Quality setting | value |
|---|---|
| layer height: | 0.15 |
- The second Ctrl-v test
In the second test I only edit the quality
| Quality setting | value |
|---|---|
| layer height: | 0.2 |
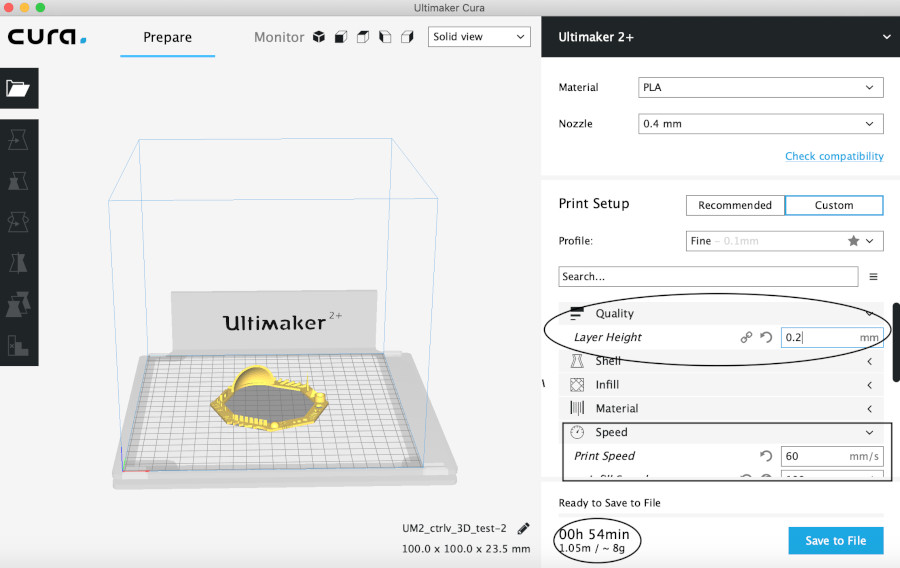

For the ctrl-v test my conclusion is that the second setting is better because it take less time and the quality is enough good. But in the second ctrl-v-test I have used a new black Pla so I have seen little (but not insignificant) difference in the final performance.
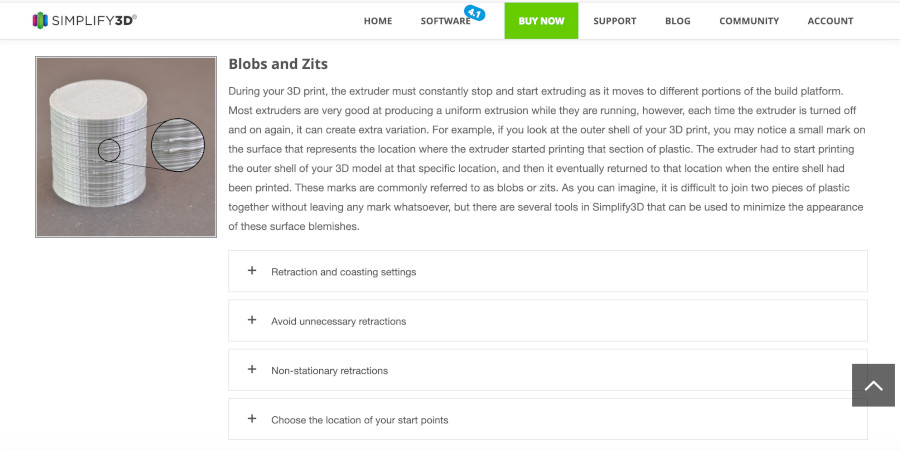
I try to search this print error in a tutorial and I have found my error.
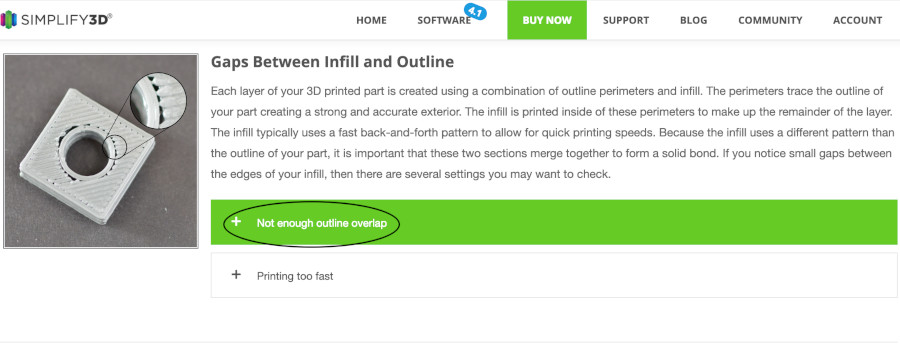
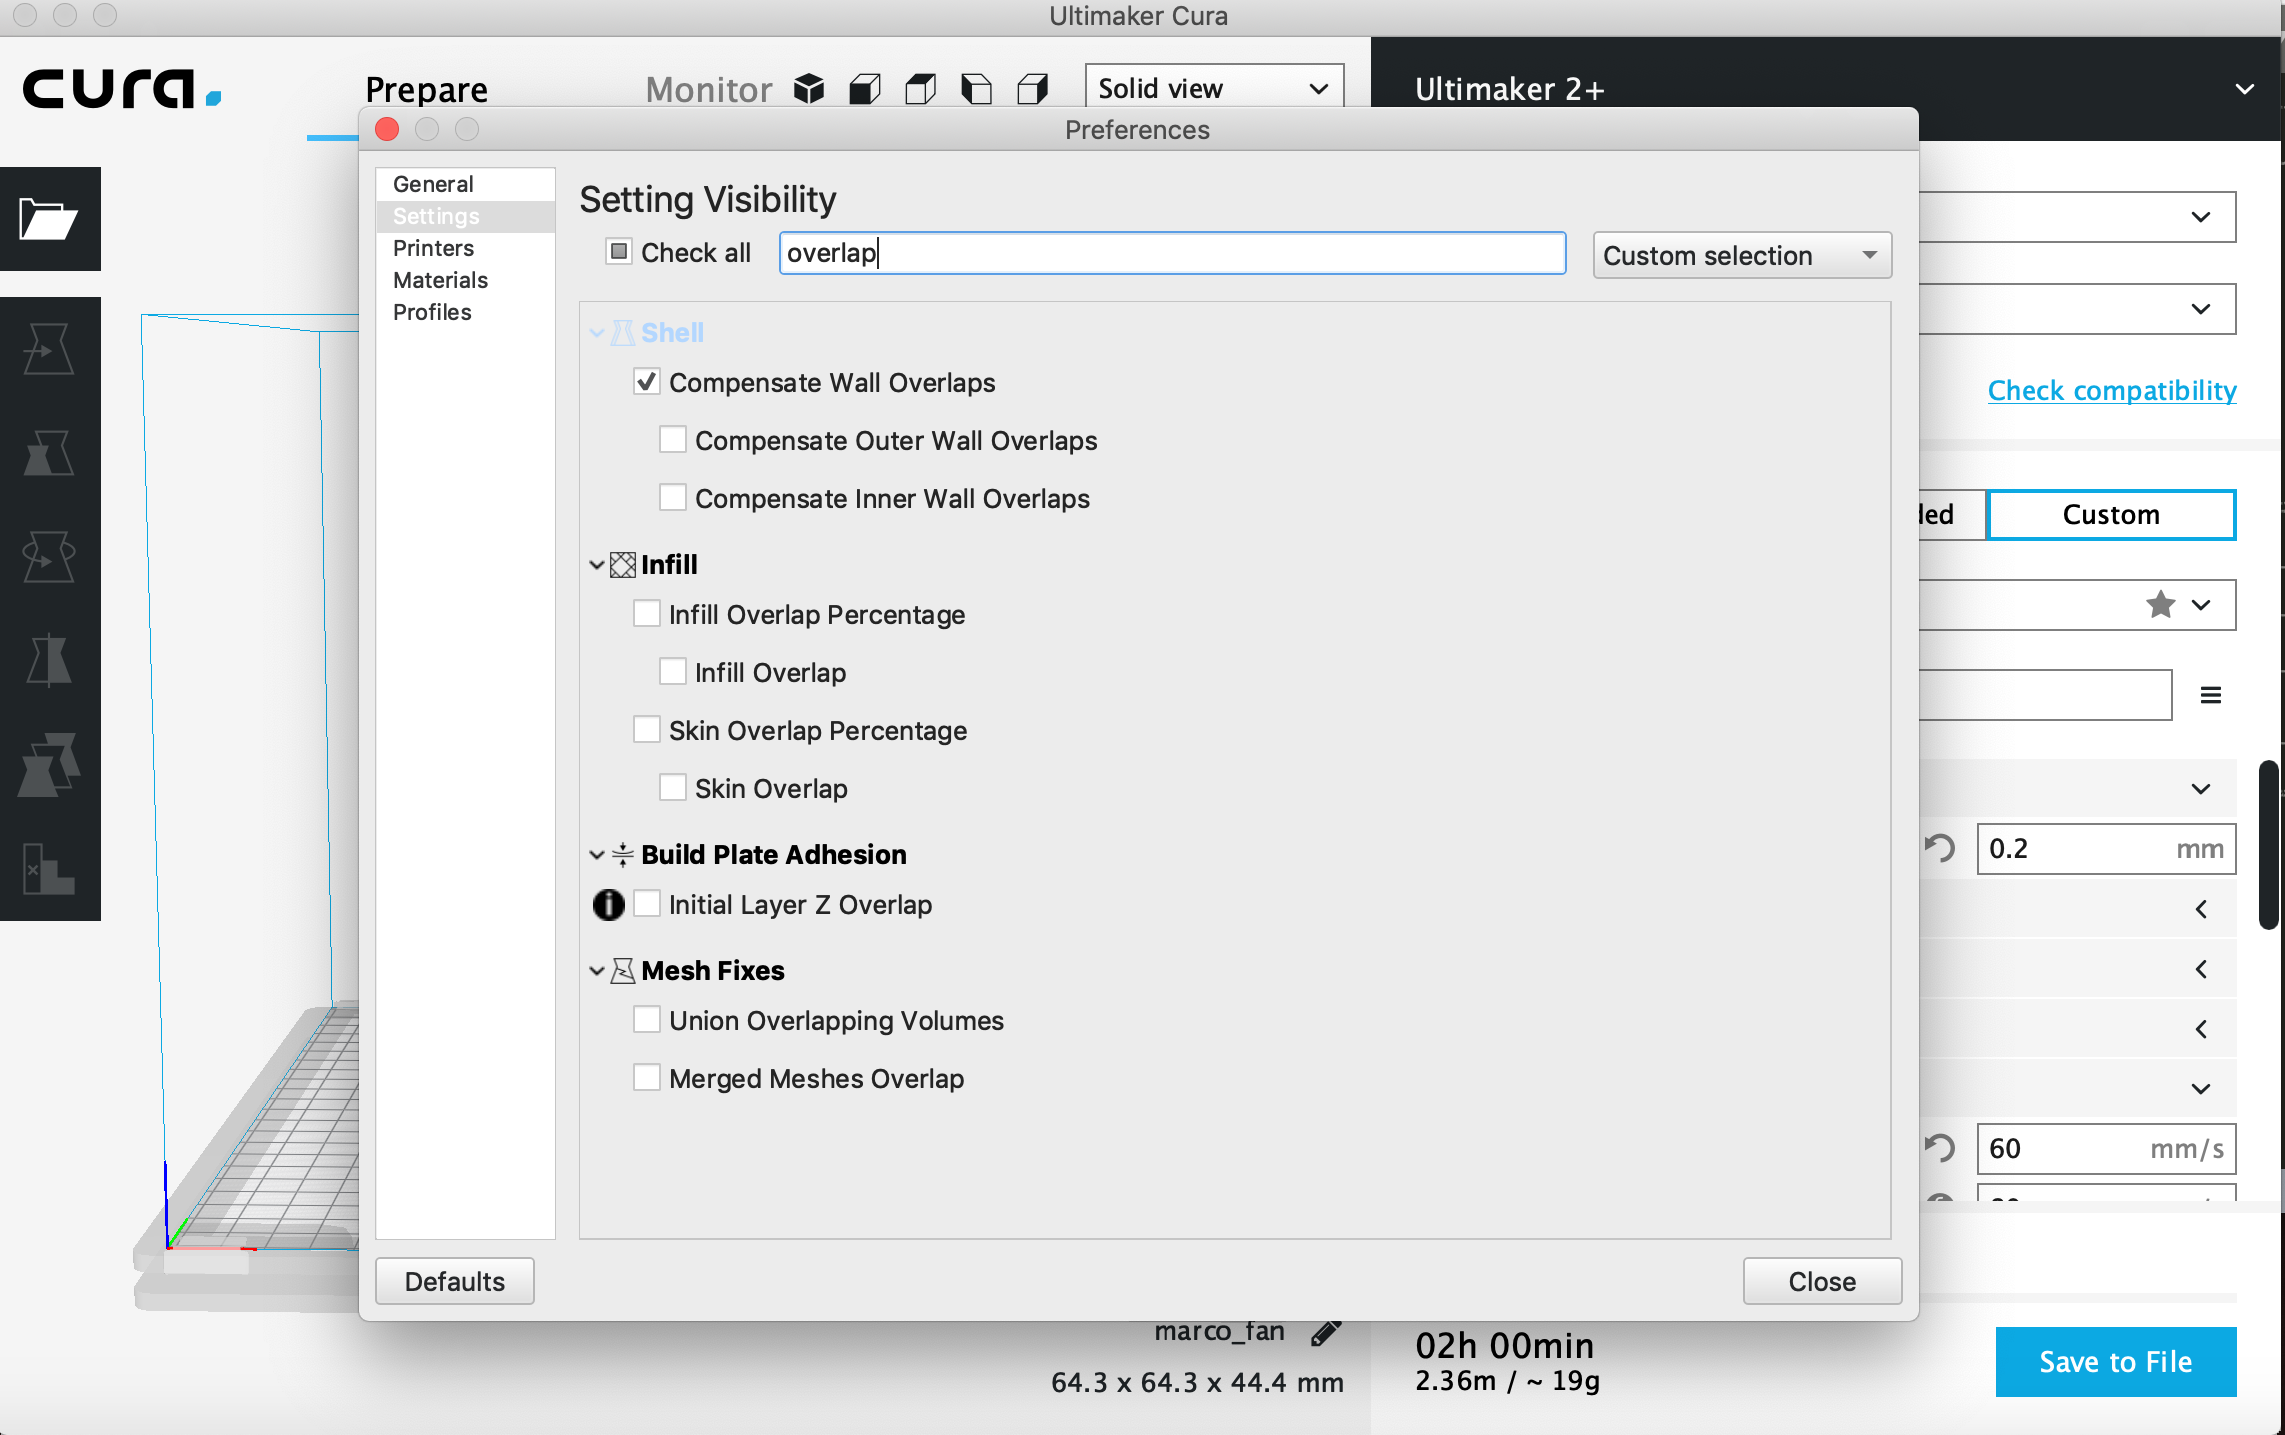
I have seen that I haven't used the setting overlap so I've decided to add it in my cura settings
In my opinion I have seen some imperfection in the black Pla and not in the white one because the black colour reflects the light better than the white. Anyway I maintain this setting because the imperfection are very very tiny to change it but I am going to see the effect of this setting(not perfect) printing my fan.
Individual assignement
Fan model
I' ve decided to print a fan in this week because its form totally sadisfied the required of the assignement and I would like to use it for my final project.(you can see my final project)and know the reson why I need a fire-fan for it). For this week I print only a prototype of my fan of the final project because in this week I am going to print only a small thing.
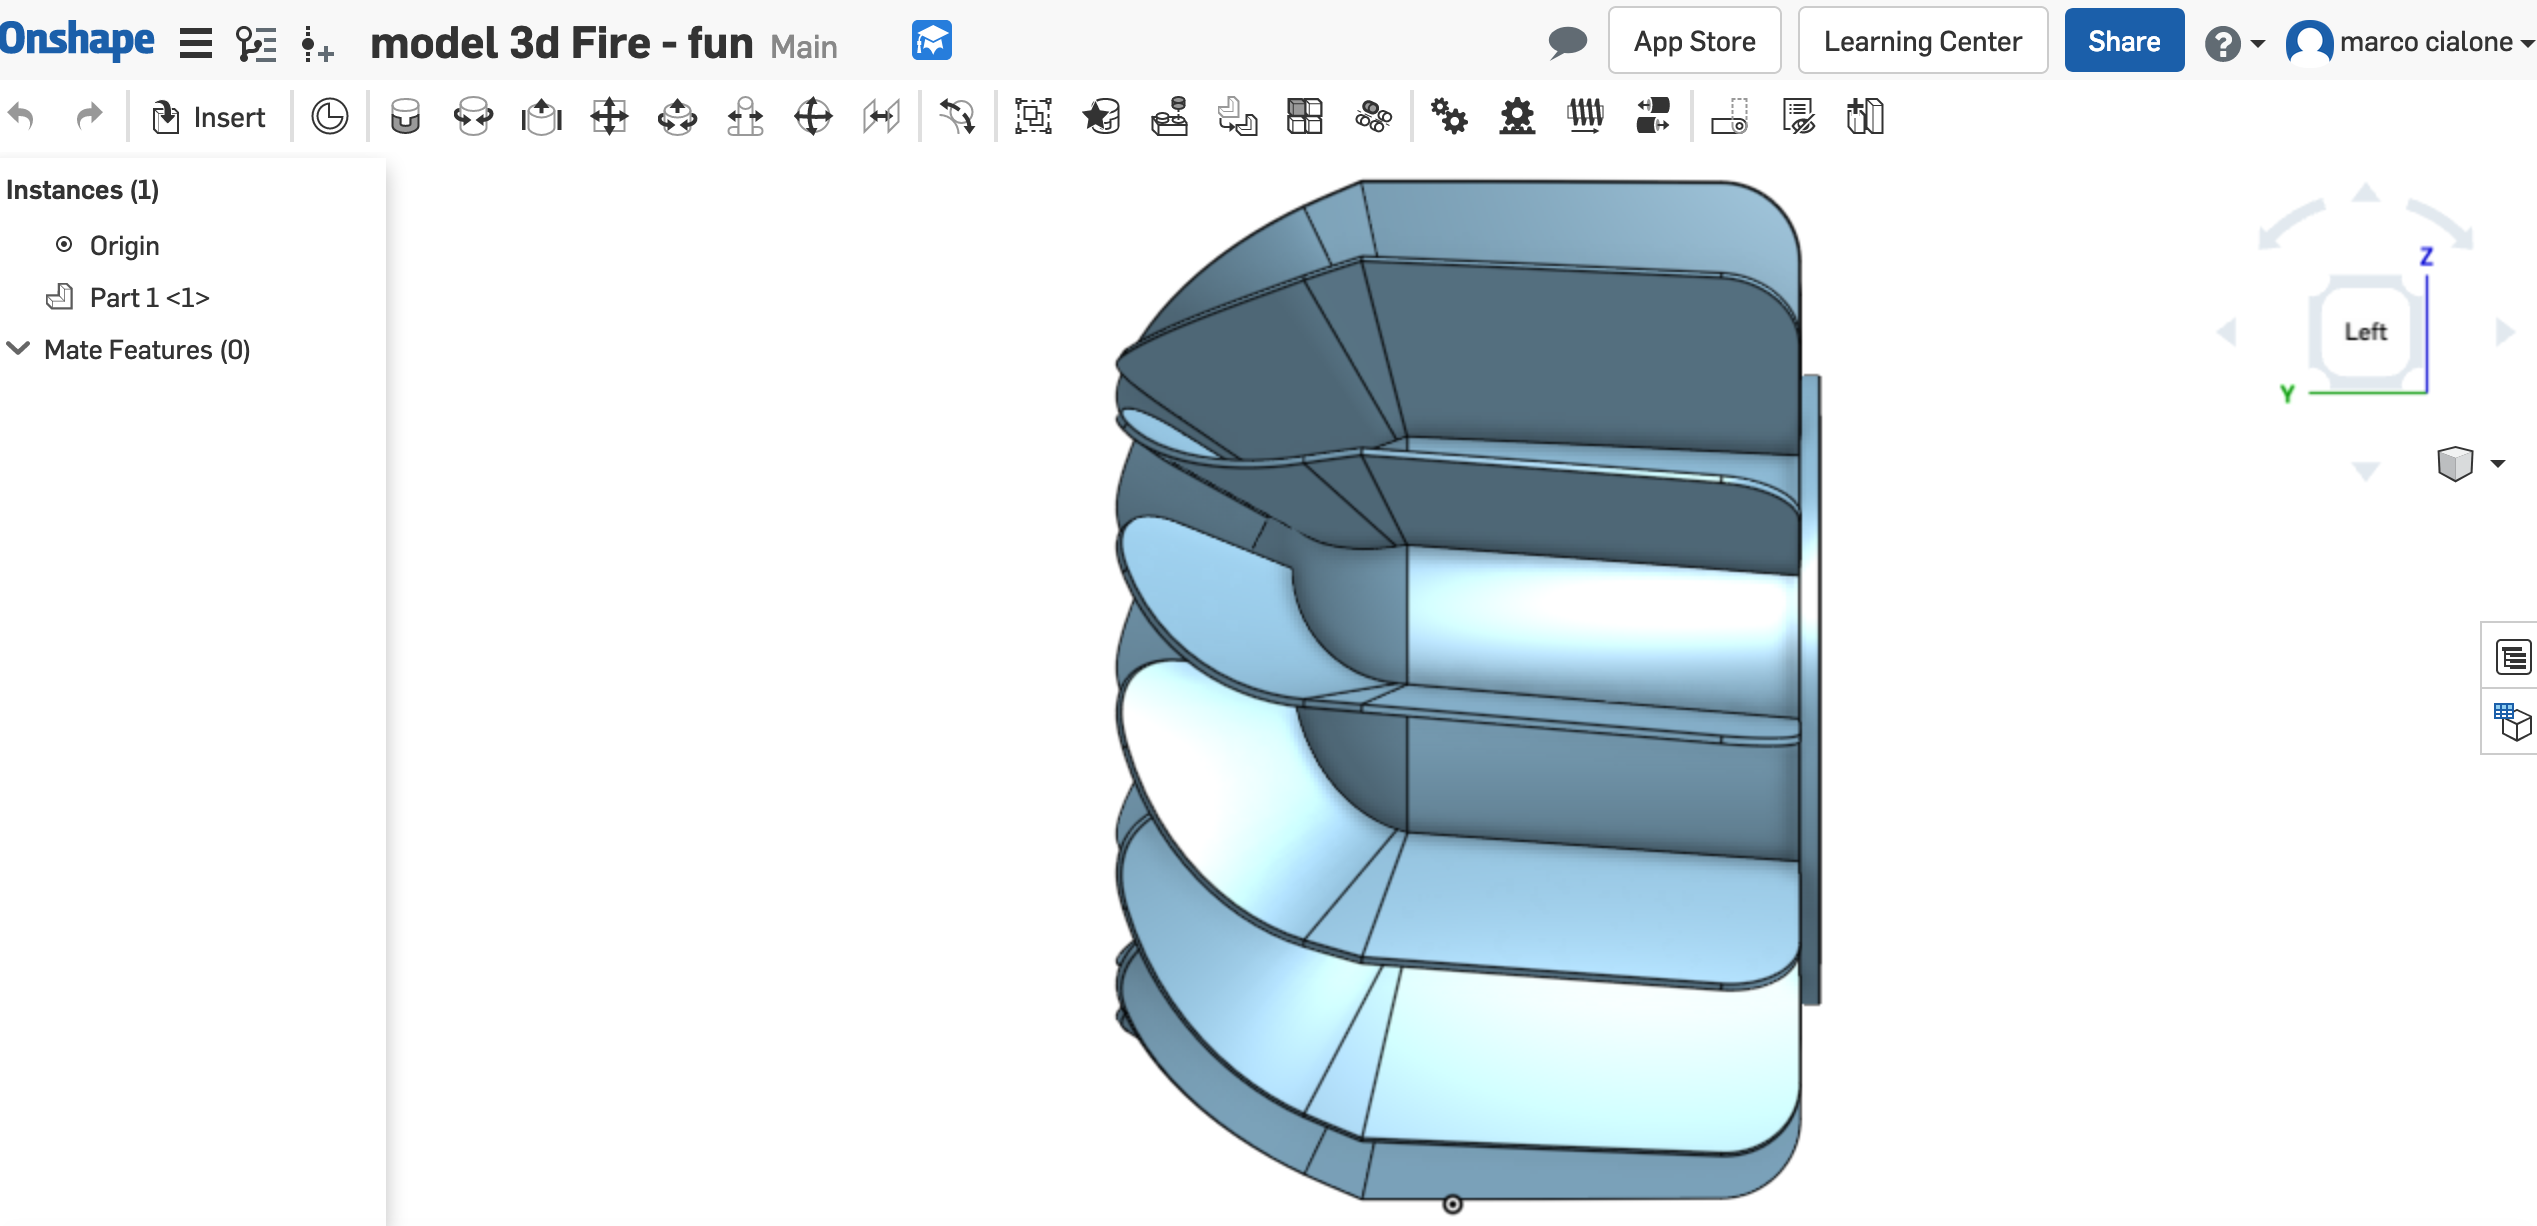
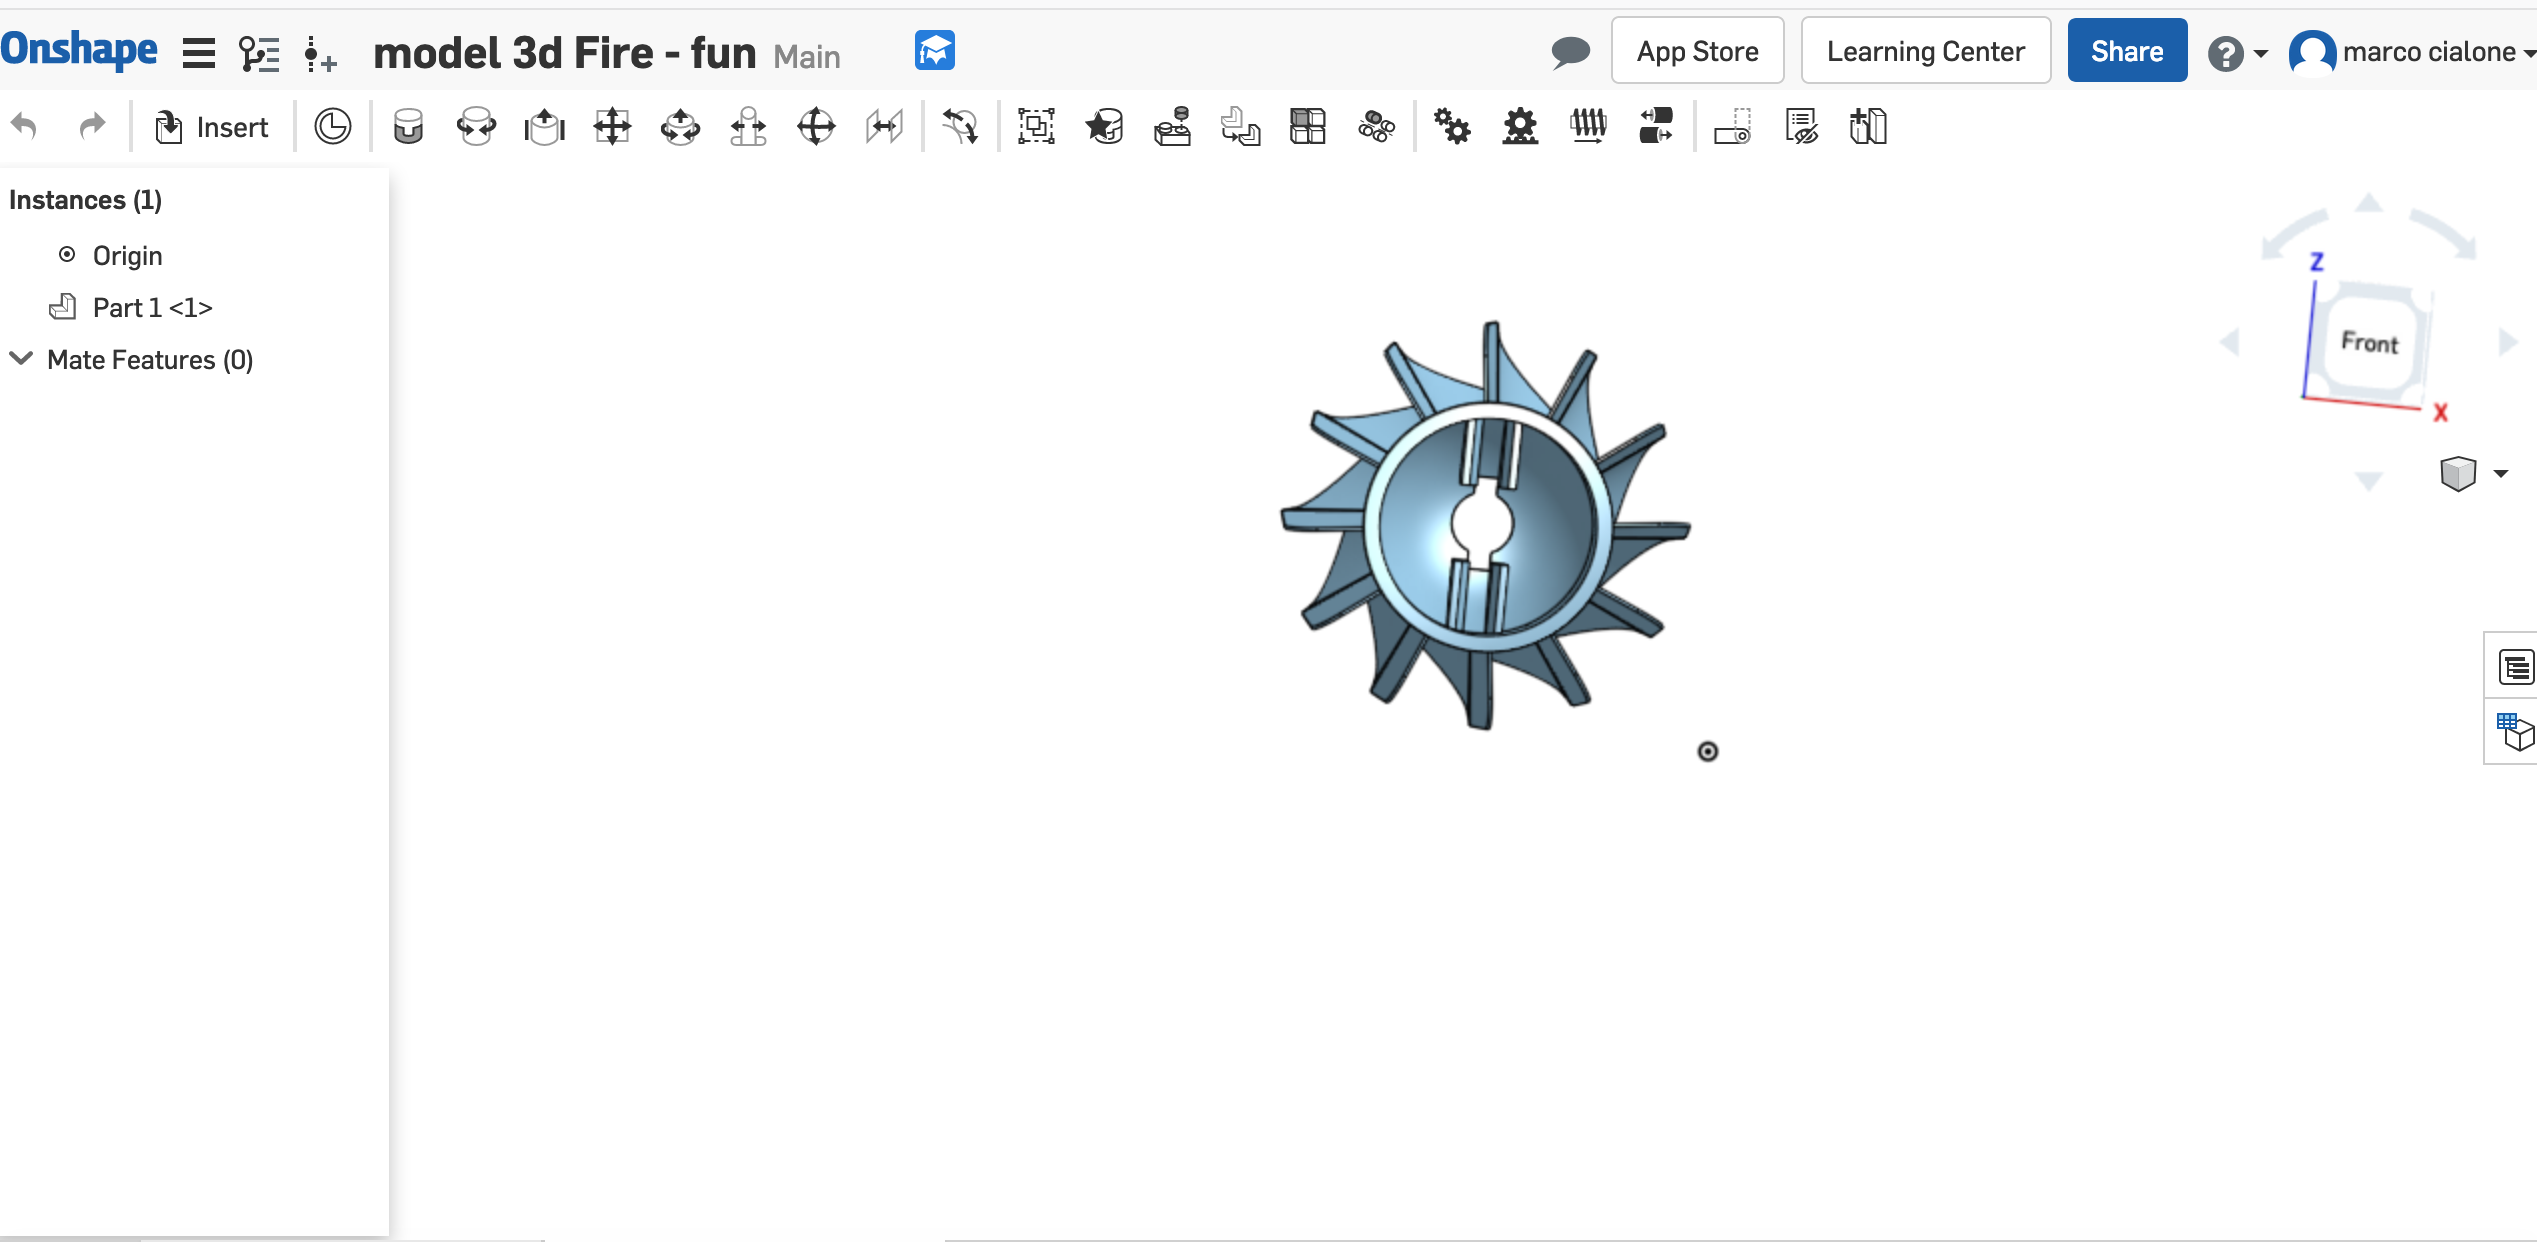
I do the 3D model of this fan in OnShape seeing a tutorial online
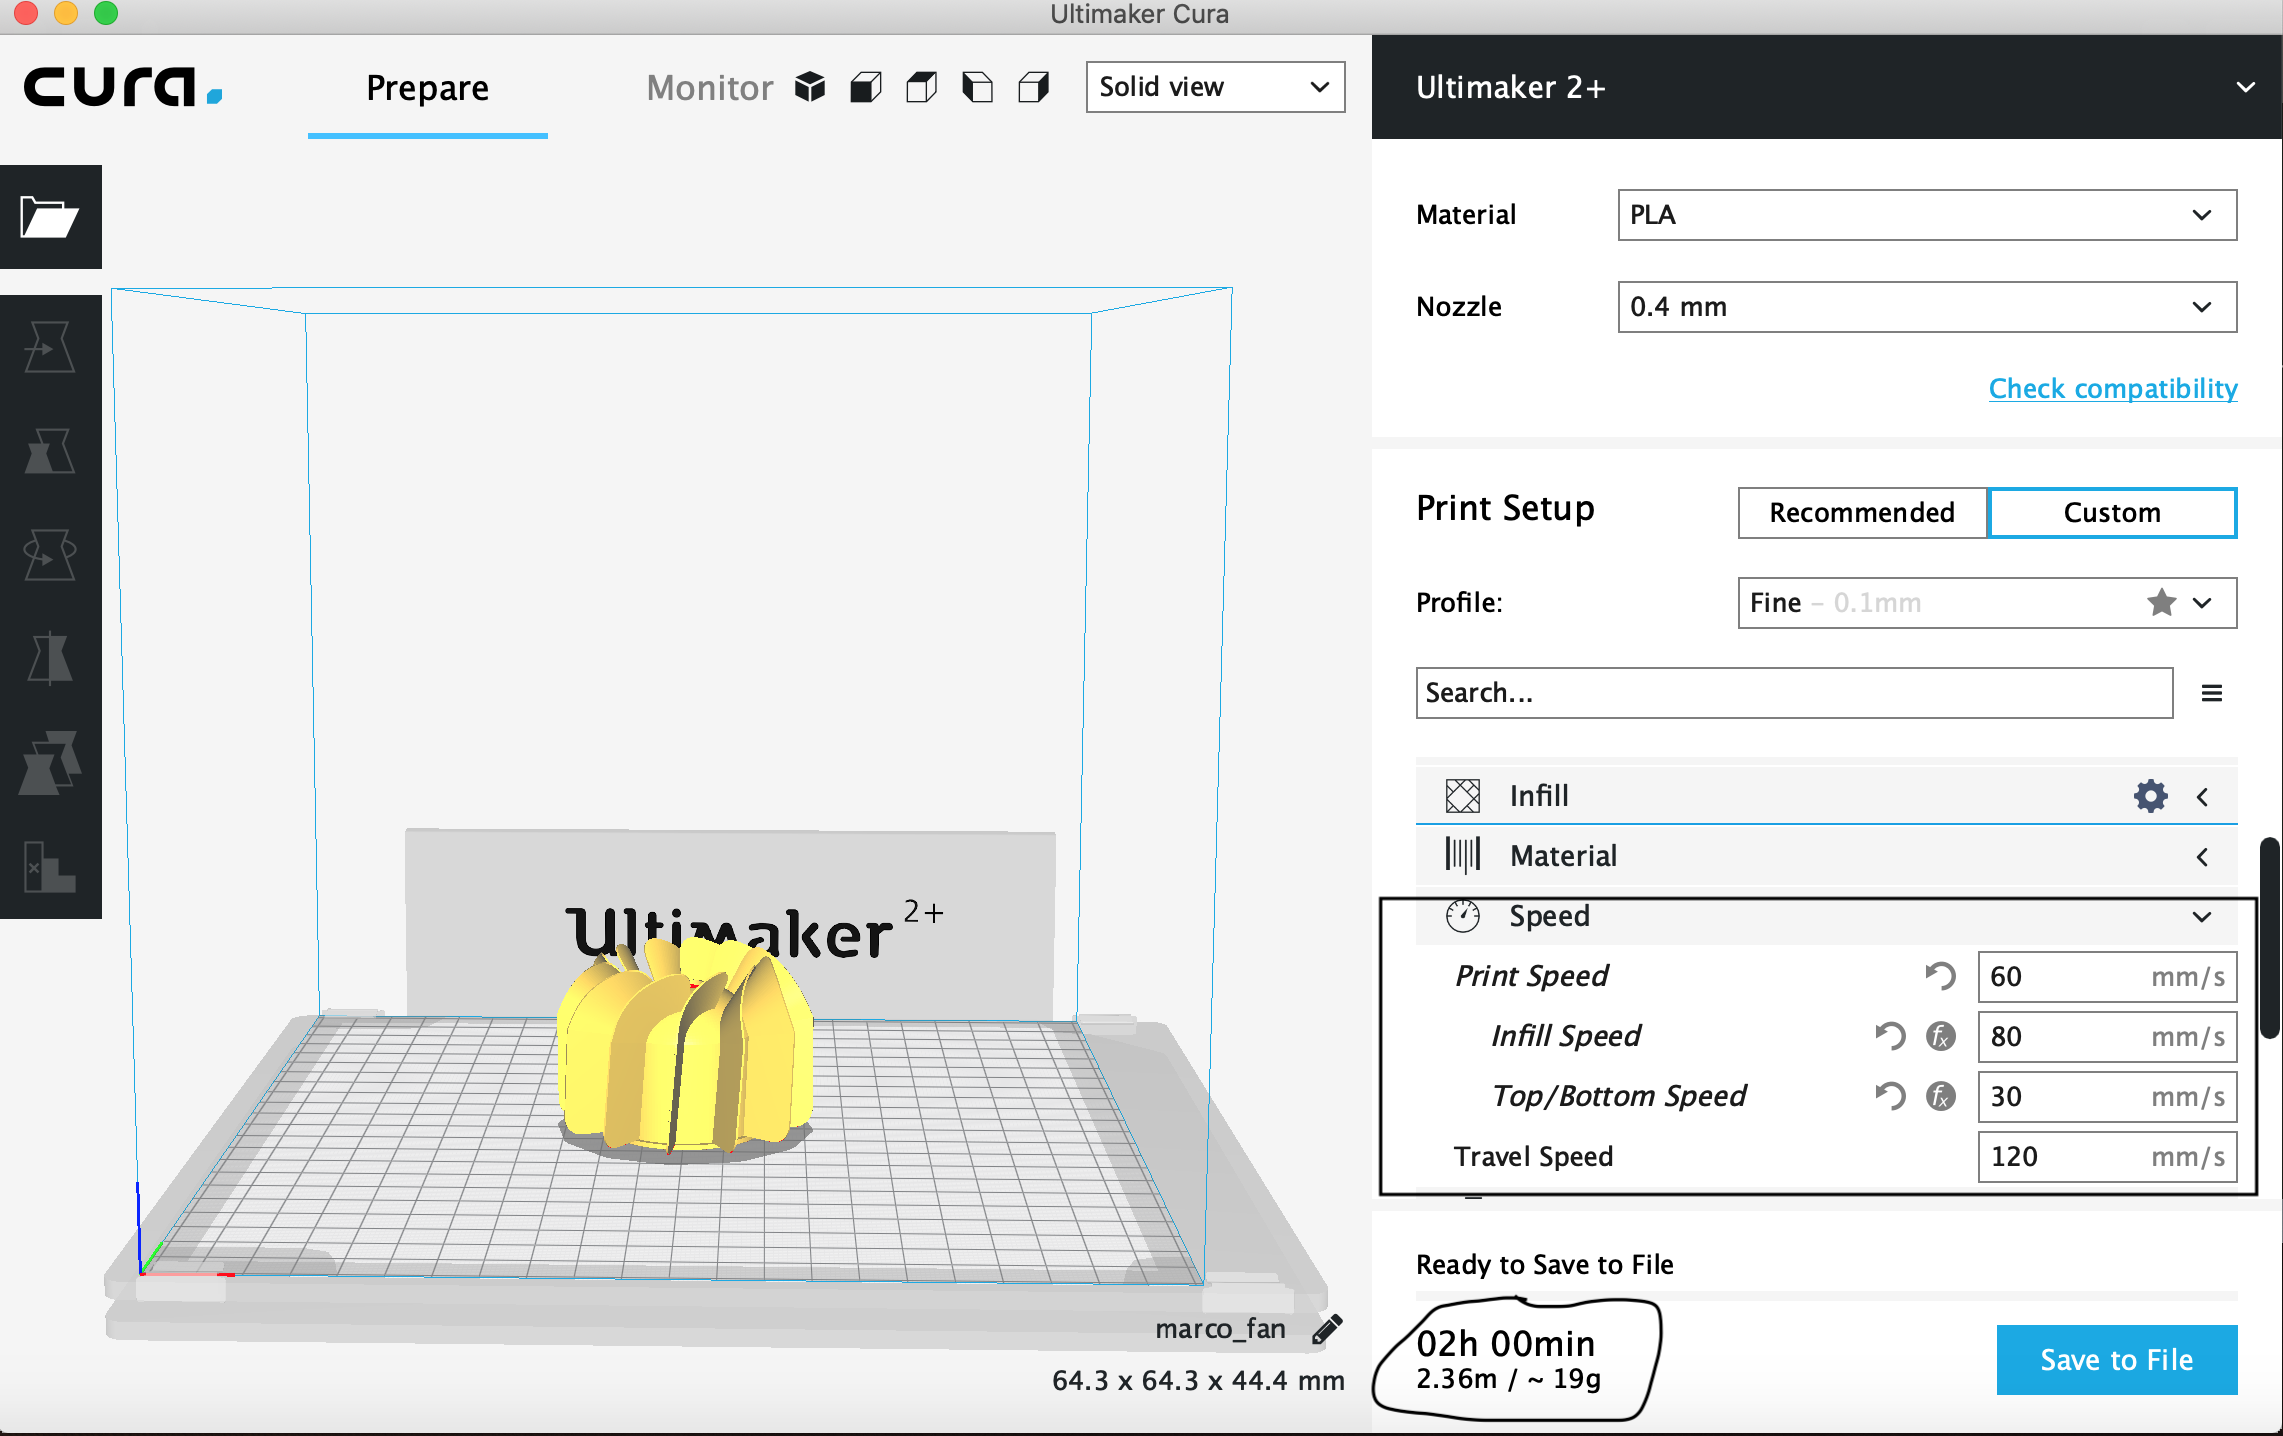
To printing my fan I used the setting tested before :
| Setting fan | value |
|---|---|
| Quality: | |
| Layer Height | 0.2 |
| Speed: | |
| Print Speed : | 60 mm/s |
| Infill Speed : | 80 mm/ss |
| Top/Bottom Speed: | 30 mm/s |
| Travel Speed : | 120 |
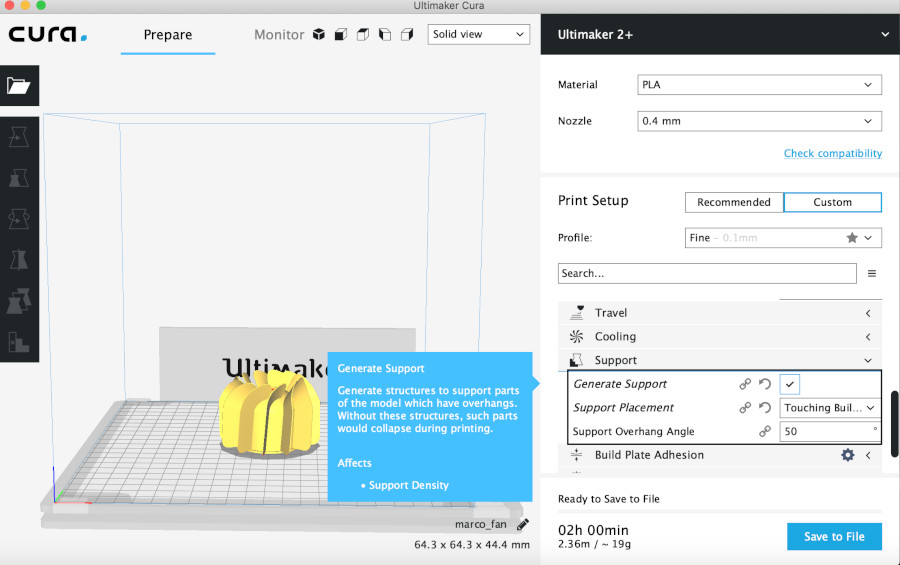
| Generate support | on |

here below are visibile the photos of the fan from different view:
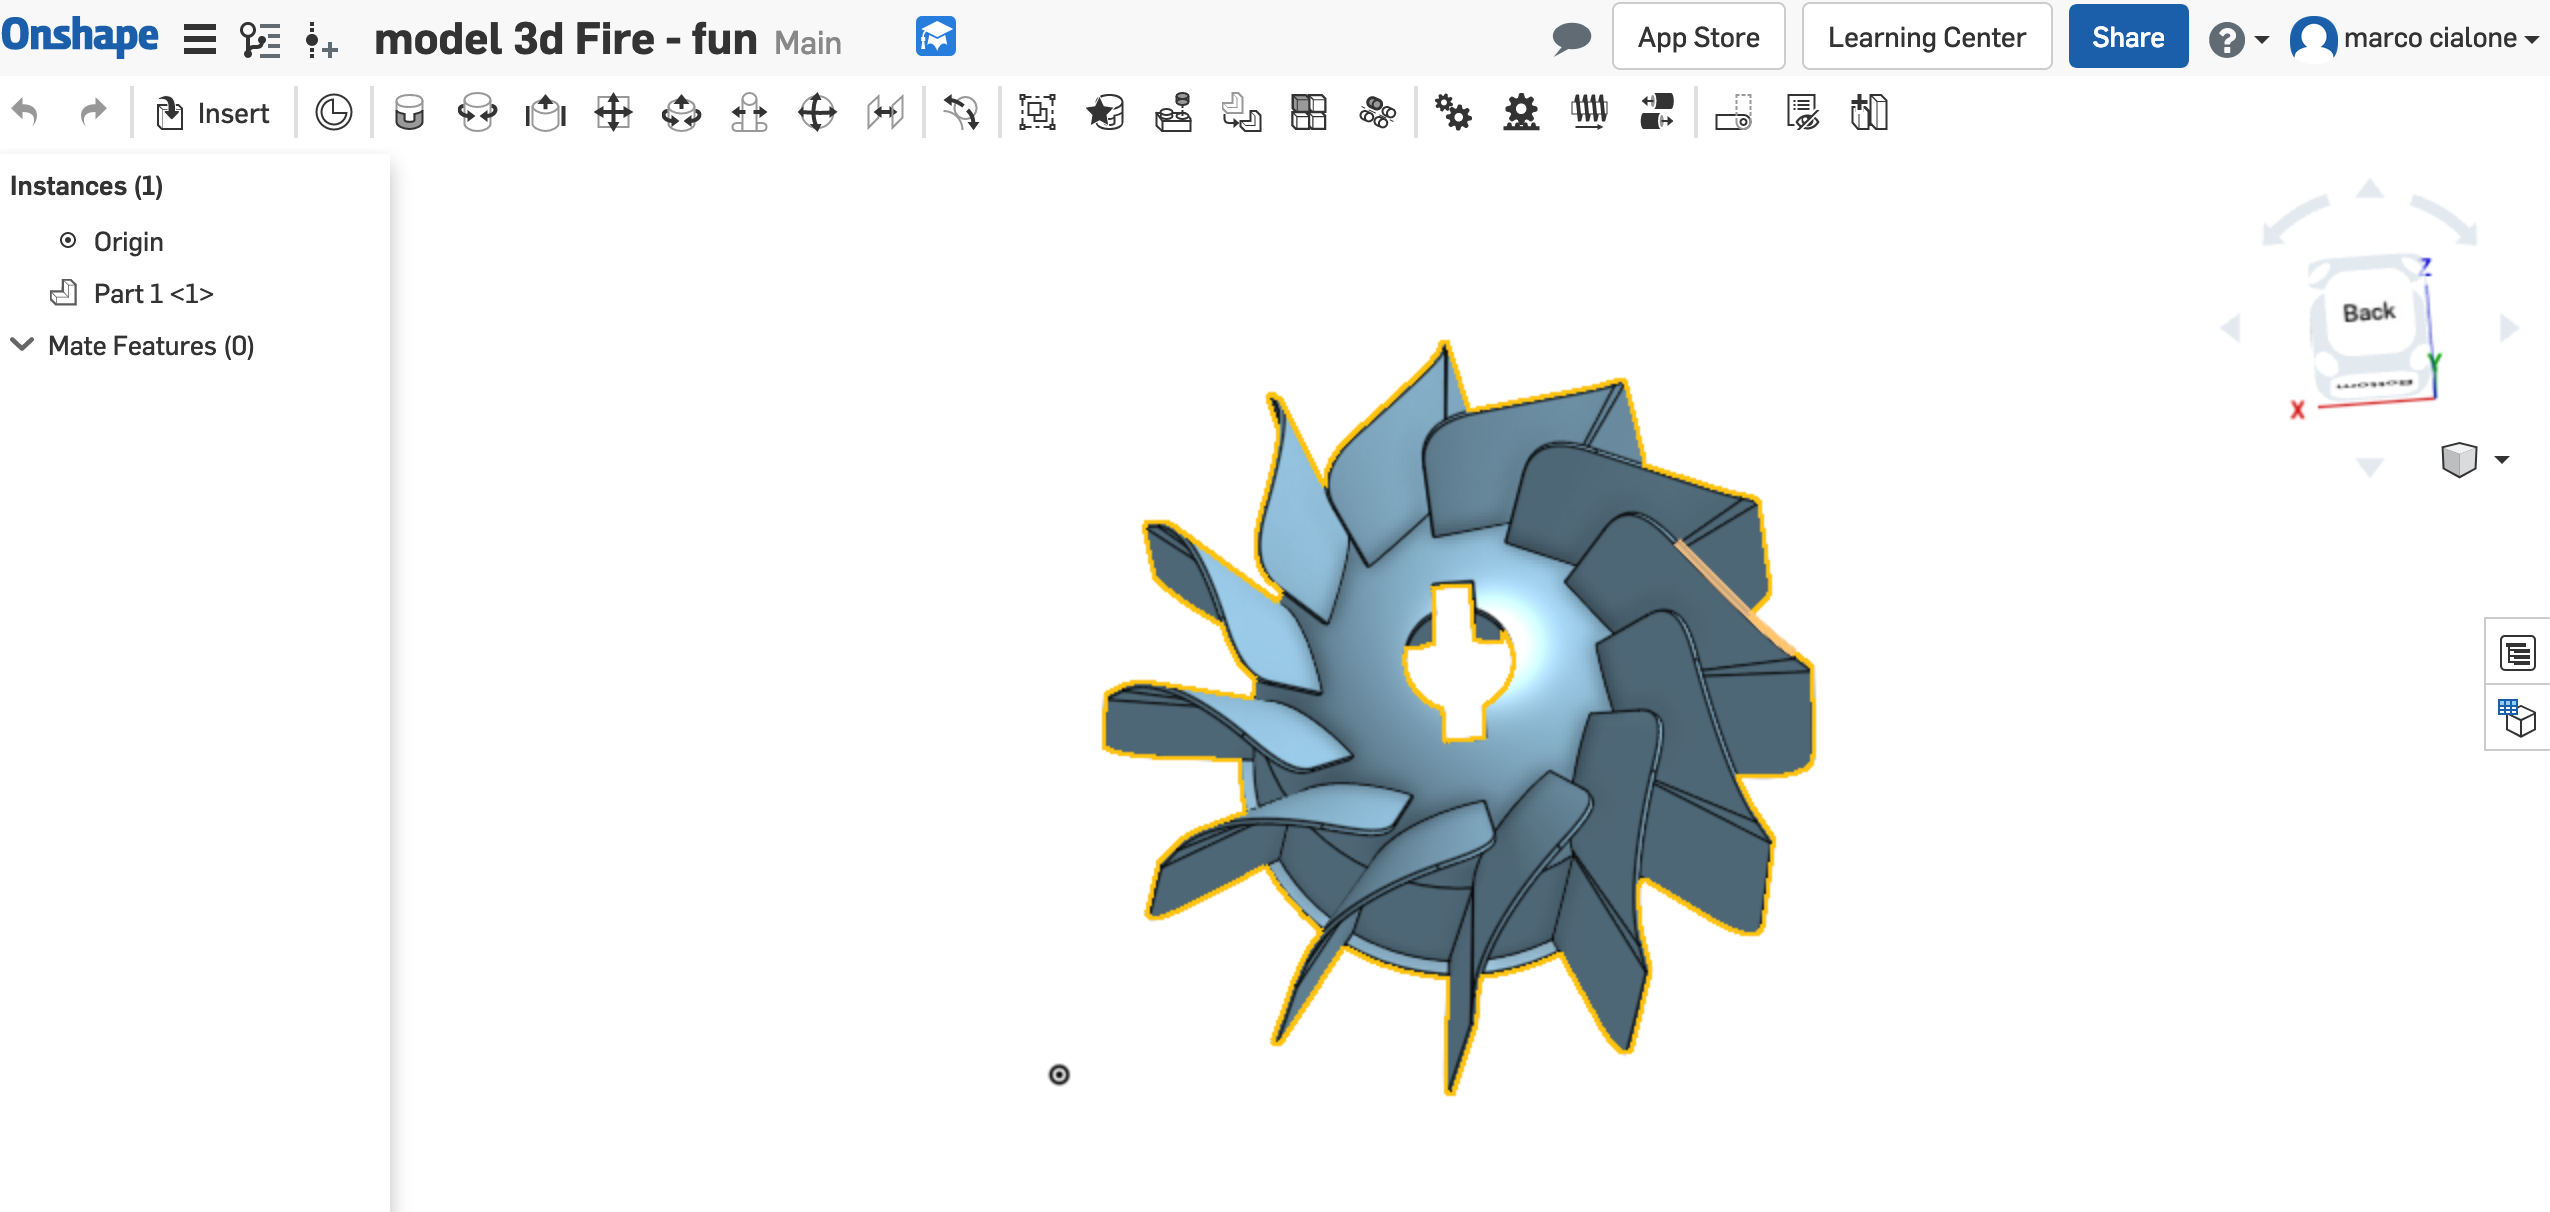
My fan printed is here below:

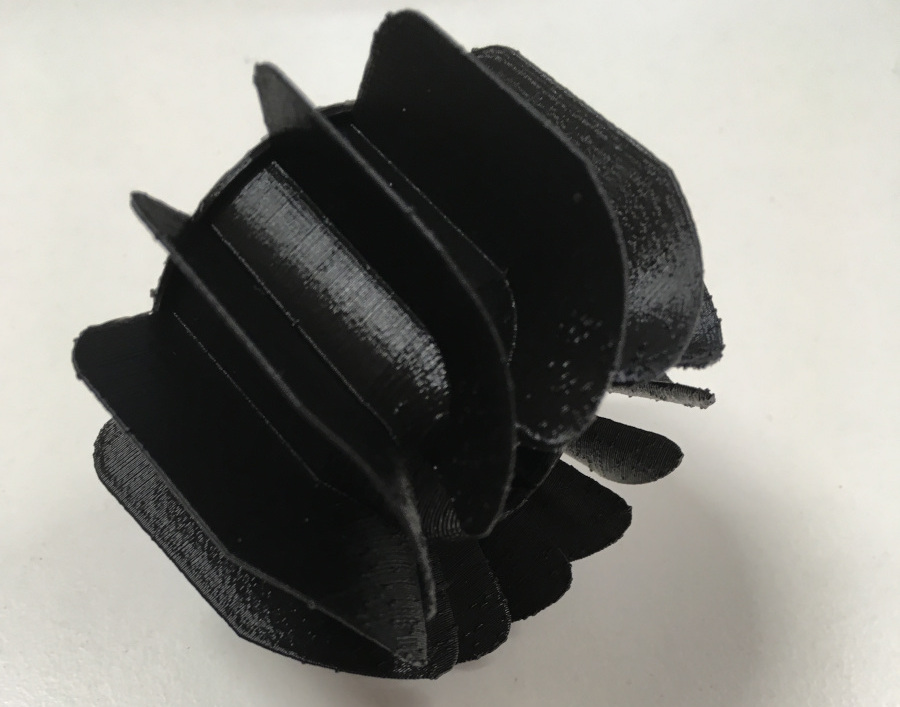
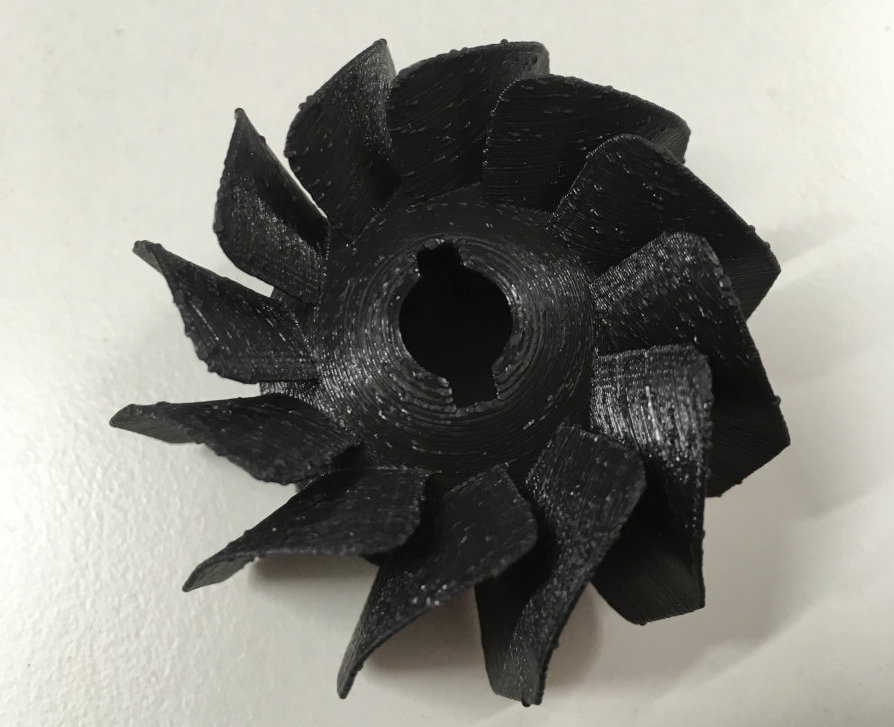
In my fan print I've seen a little error and I search it in the same tutorial.
I check that I have had the setting recommended in the tutorial. Since I have seen that I have this setting and the error don't compromise my print , I have decided to maintain my print because It is quite good for being a prototype.
When I am going to print my fan for the final project I improve my settings in order to have a perfect print of my final model.
The advantages and limitations of 3D printing and scanning technology
the 3d printing has revolutionize the digital making of the object but sometimes the time of printing is very long for a detailed print so in the future,in my opinion the improvements points could be the faster time and a better accuracy in the printing. For the scanning the limitation is that some material reflected the lights a lot of disturbing the quality of the 3d acquisition, consequently the scanning too.
3D scan
I 've done my 3D scan by the fotogrammetry:
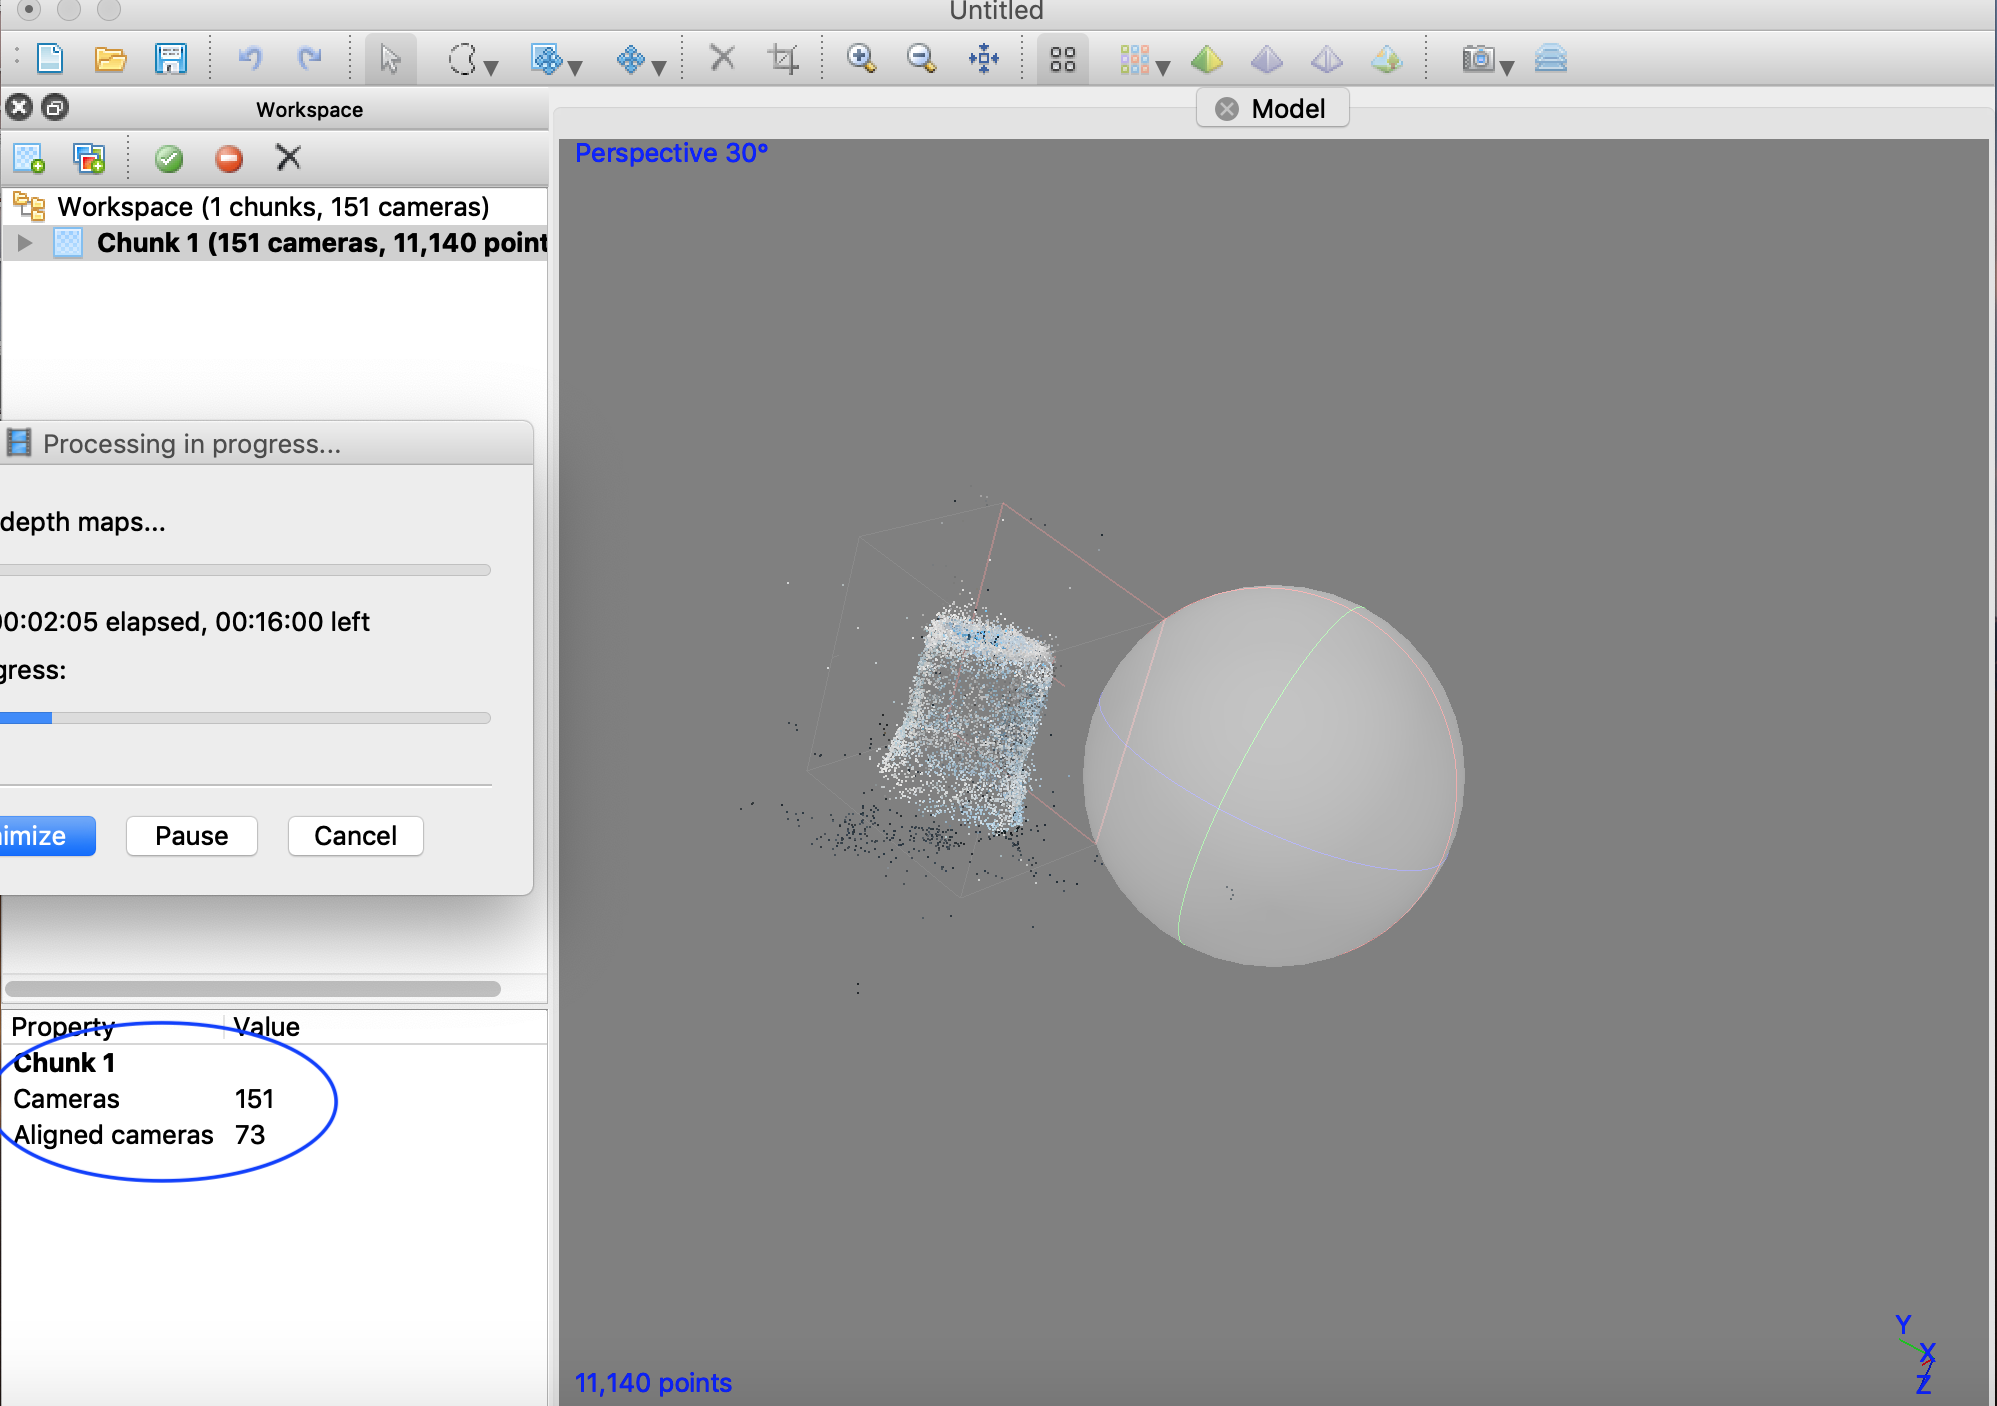
I decide to scan a cup; the particularity of this cup is its glossy colour. In fact when I do the fotogrammetry I' ve had some problem because the cup reflect the light and in my programm I haven't managed to have the scanning of a part of the cup. I try to solve this problem putting a tape(with opaque colour) around the cup.
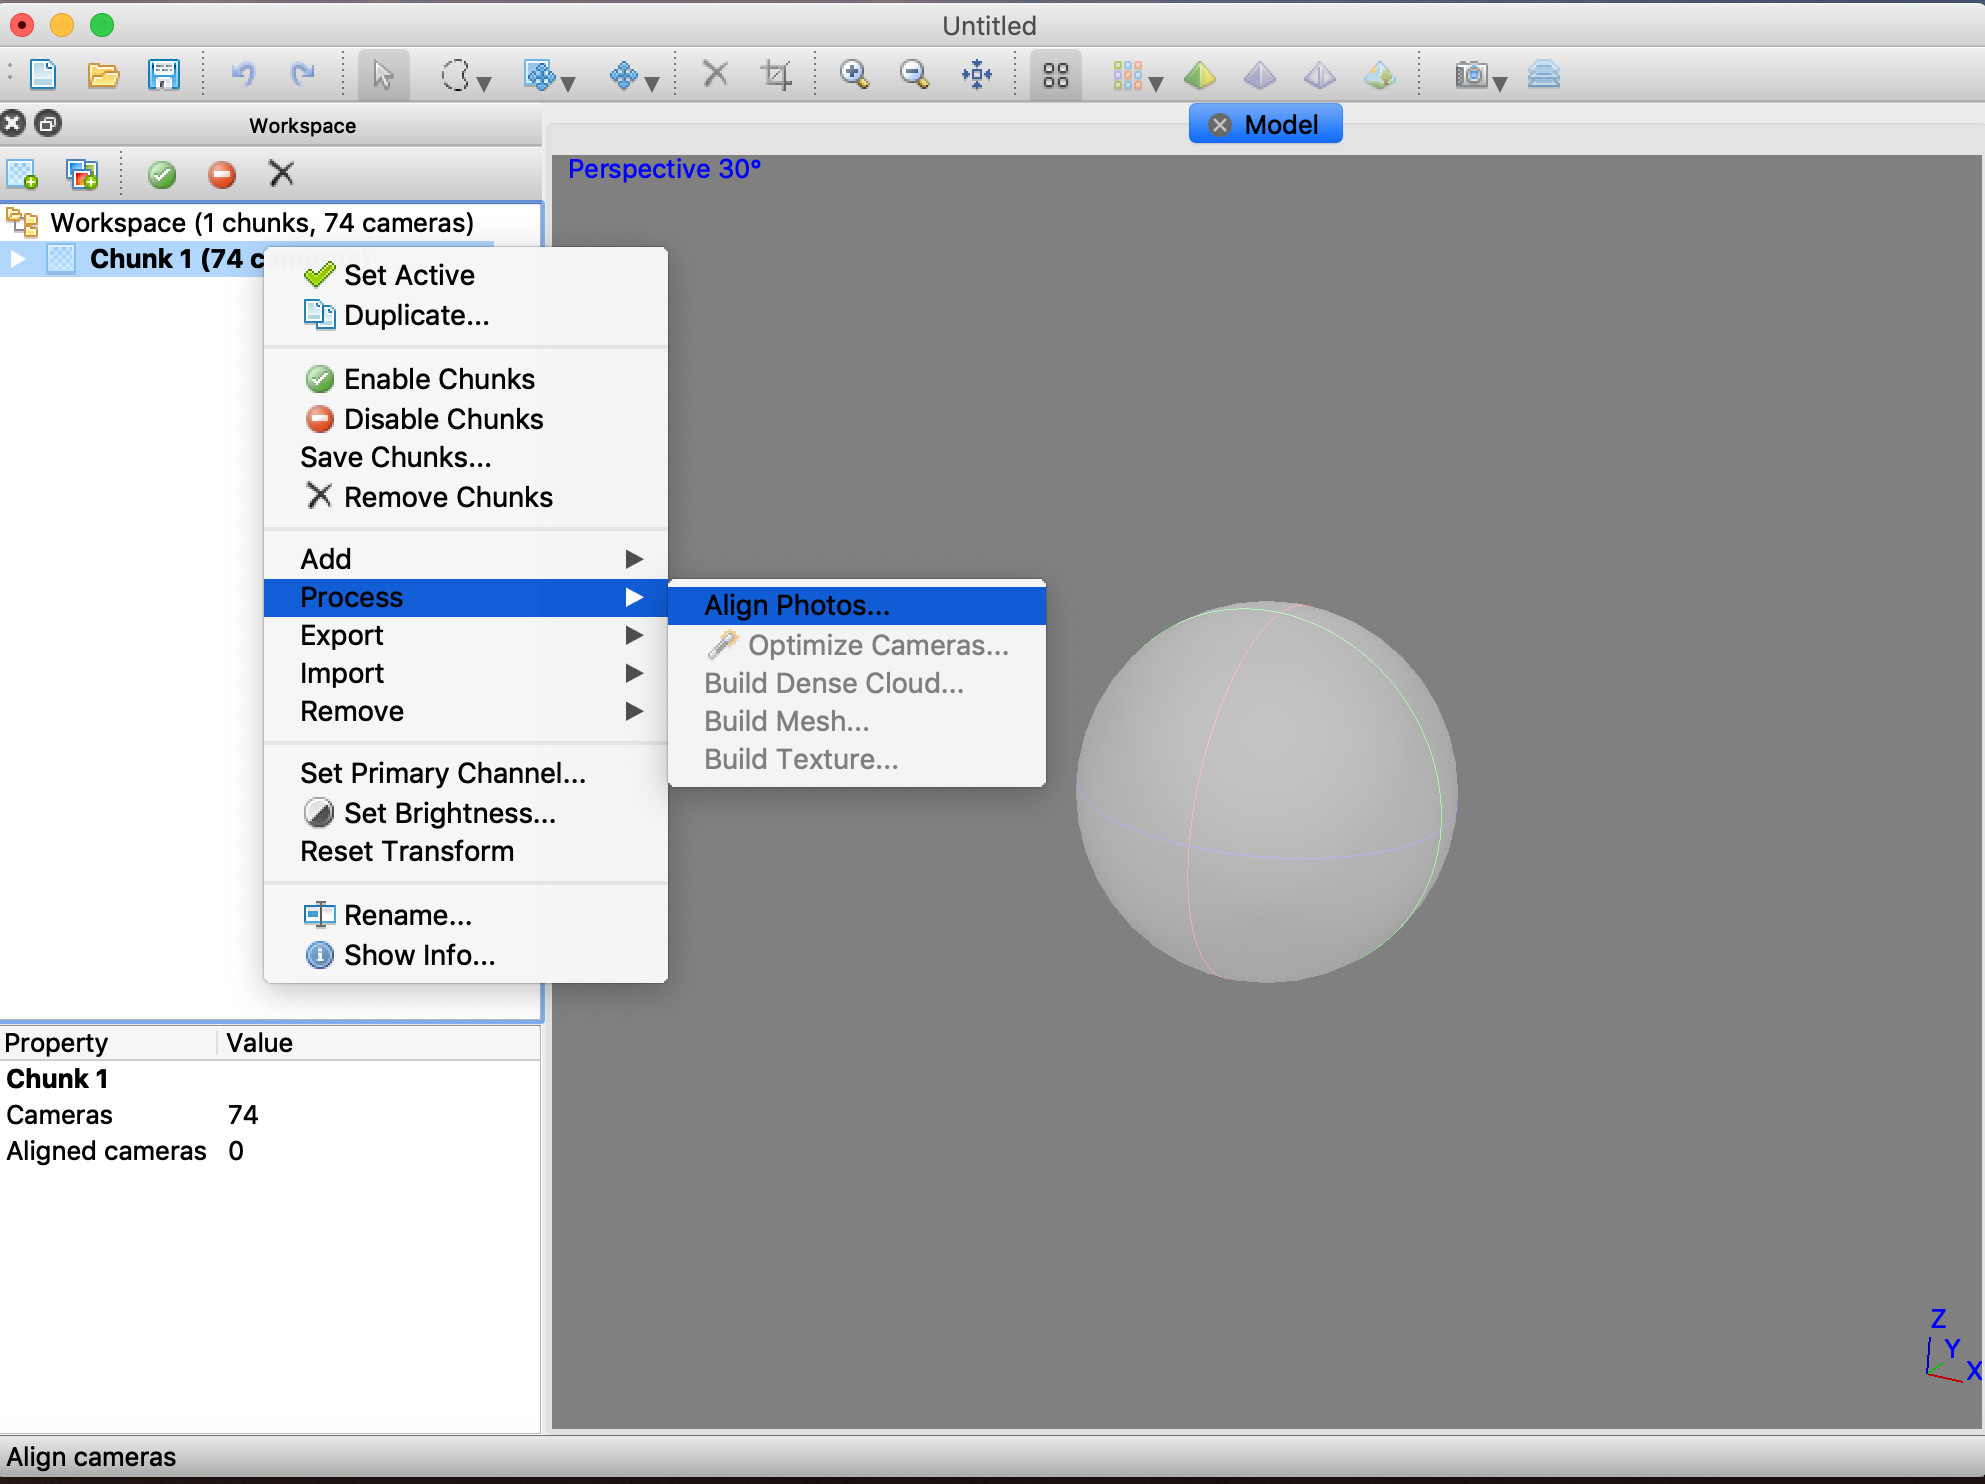
For the scanning of my cup I used Photoscan:
the process to scan an object is:
- add a chunk
- add photos
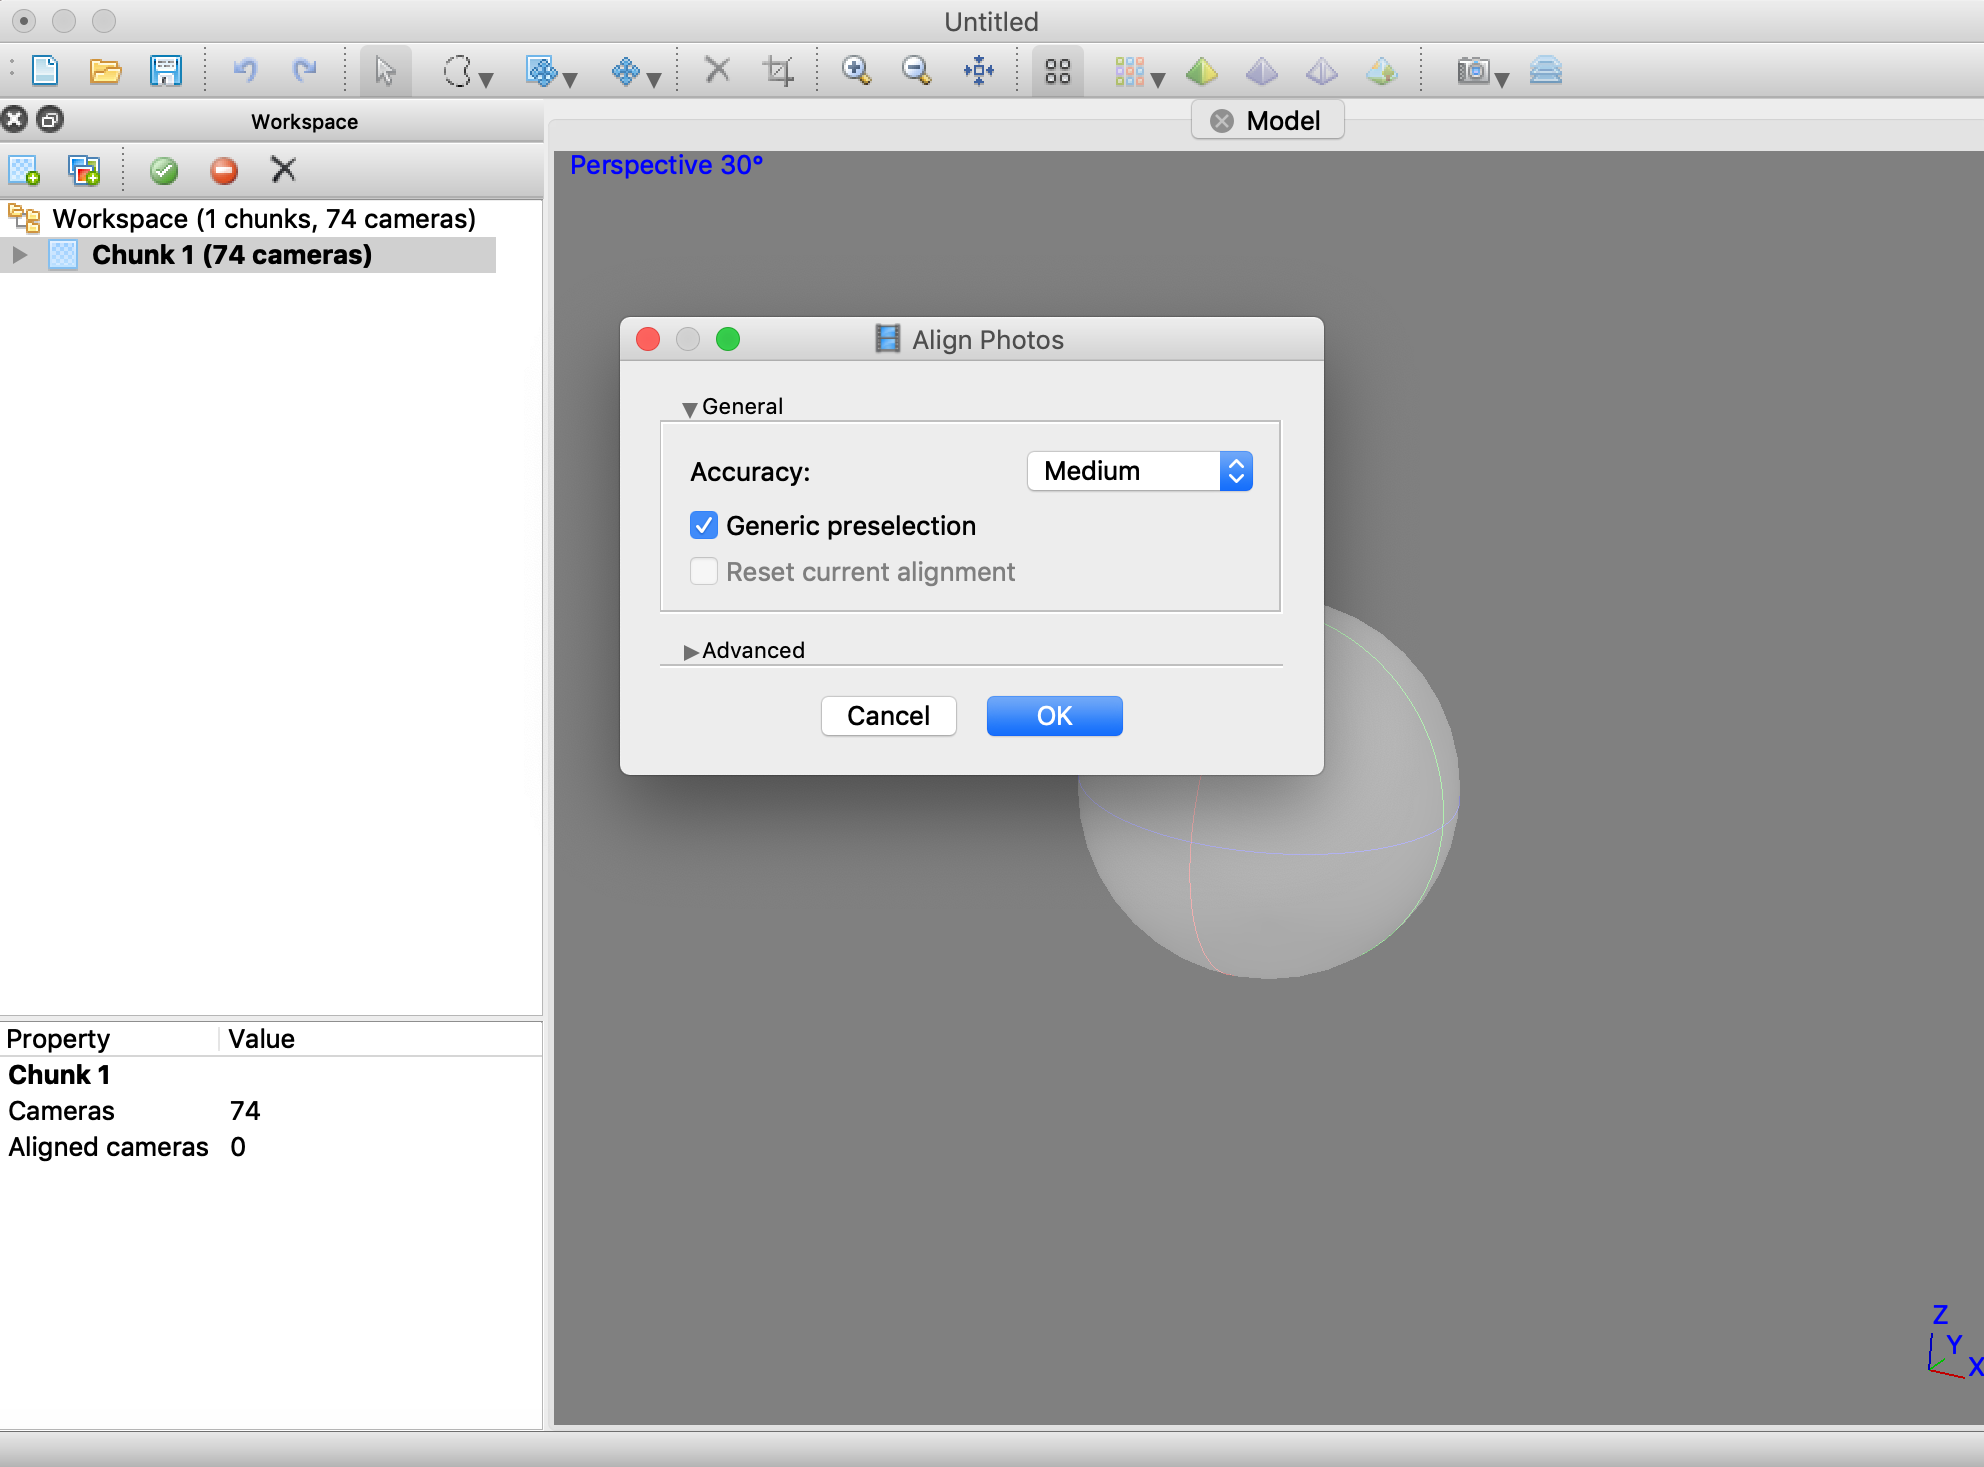
- go to process and align photos
- build dense cloud
- build mesh
- build texture
- first photogrammetry
after add the photos I align them:
then I have my dense cloud and my mesh :
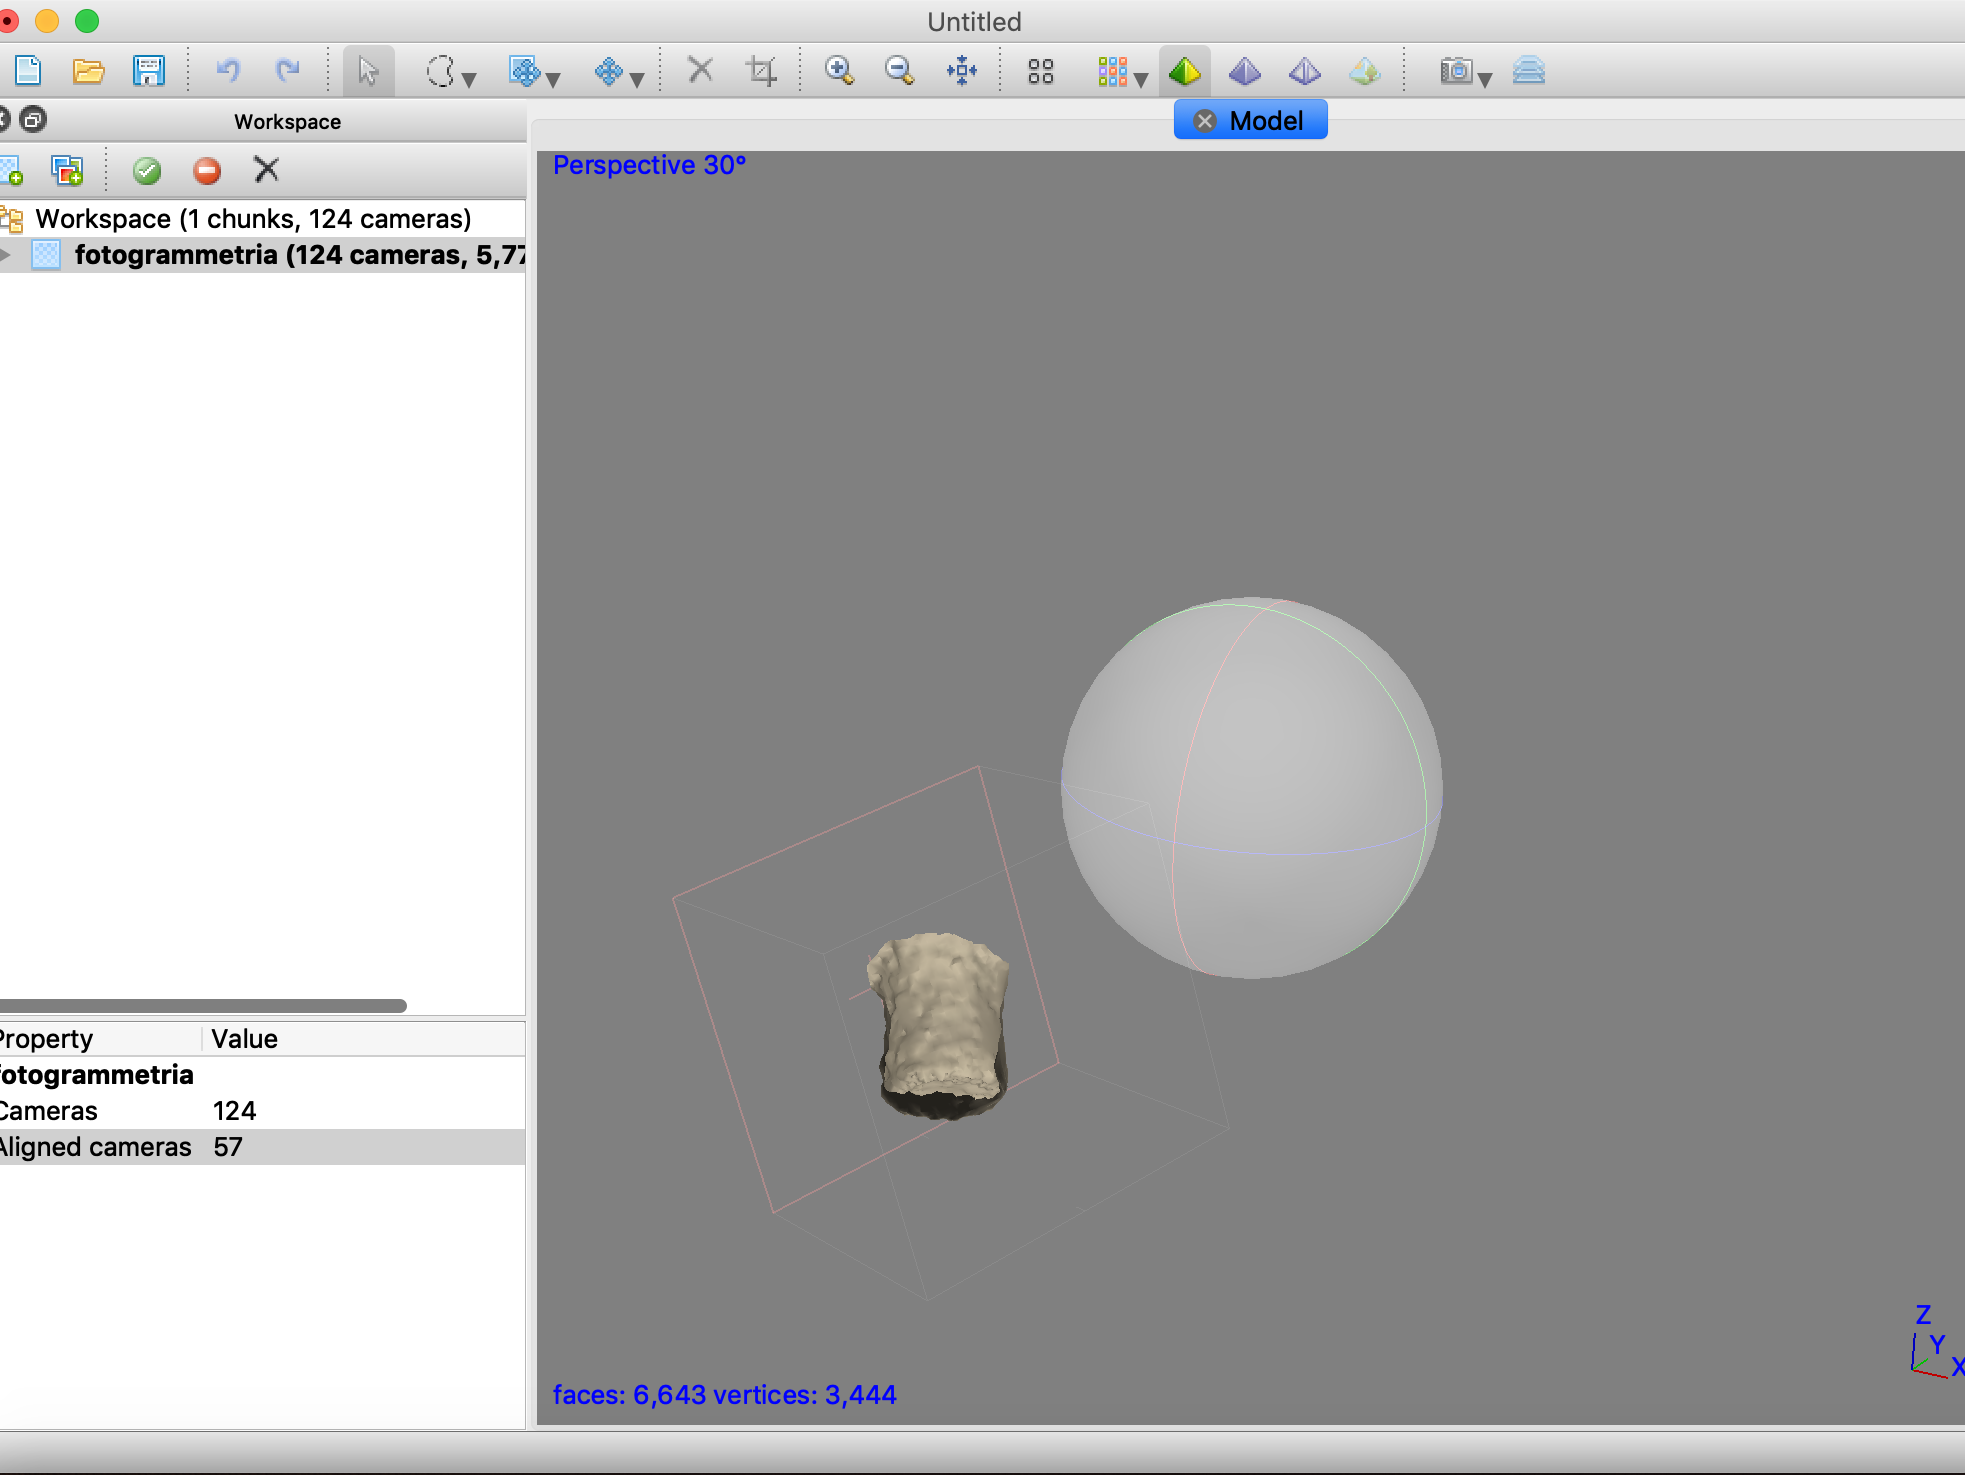
but is visible the part not scanned:
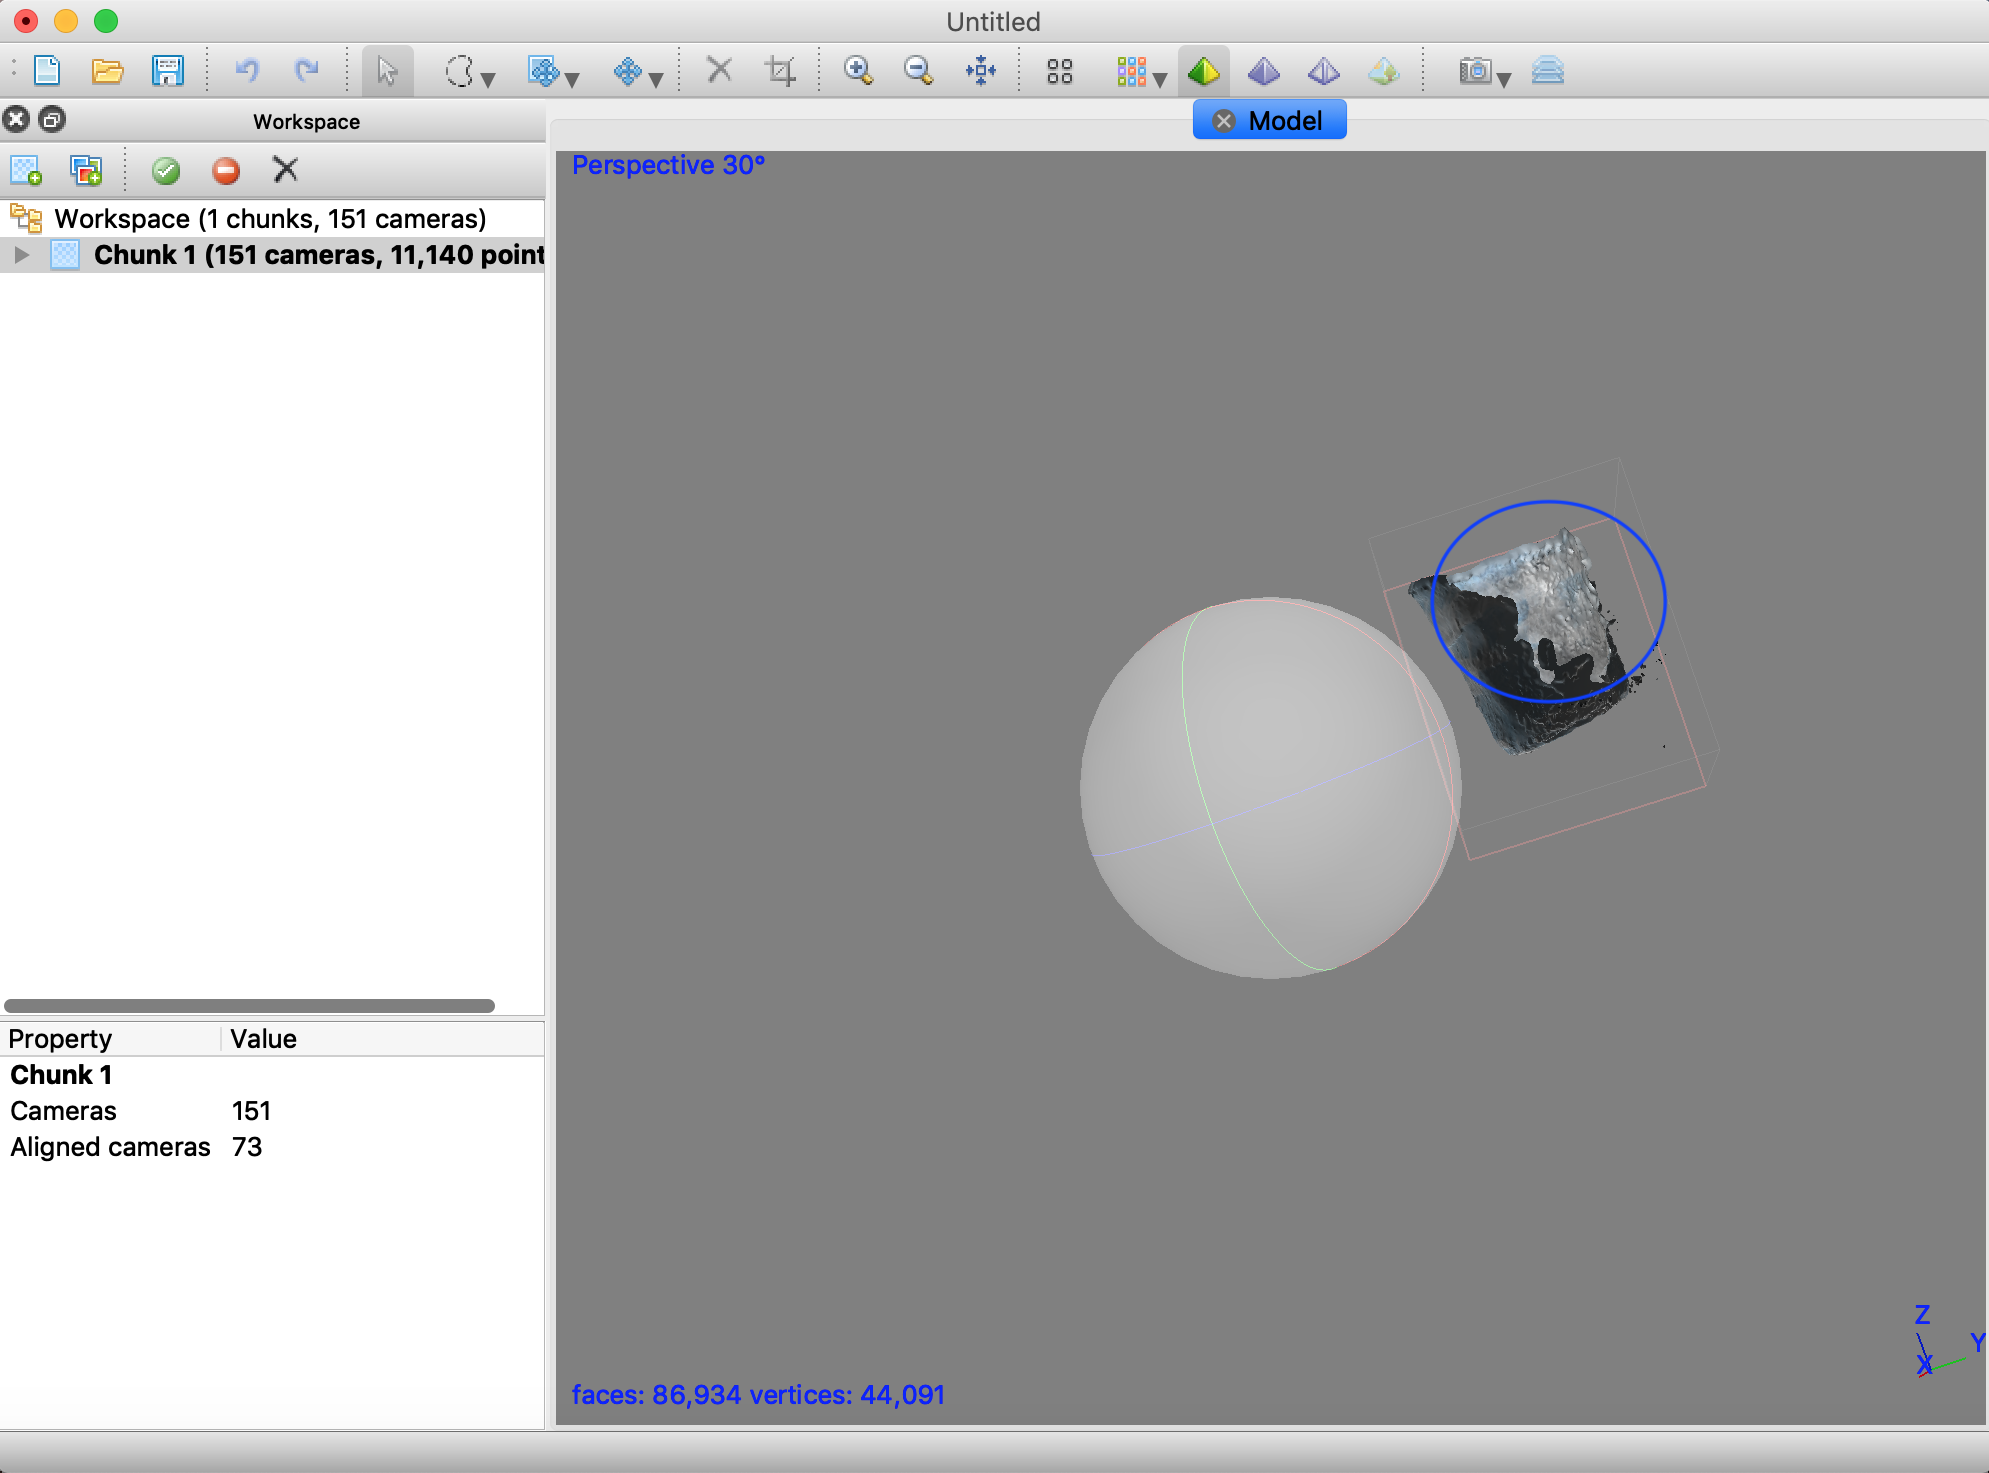
- Second photogrammetry
the second photogrammetry is better than the first one but I didn' t solve the problem totally.

File
link of the stl:
On shape document:
stl files:
3D scan: