Interface and Application Programming
Goal of the week
- individual assignment: write an application that interfaces with an input &/or output device that you made
- group assignment: compare as many tool options as possible
Work Assignement
In this week I would like to programm an interface that I am going to use for my machine and then an other with a different language in order to have different choice for the implementation of the interface of my final project.
I've decided to programm in Javascript language because I want to have an interface in my web page and I want to discover this new language (for me).
Interface (and a small update of embedeed programming)
My interface have to controll a led rgb that I have done in output device and see the value of a sonar sensor. For the basic concept of the use of node.js I have seen a tutorial and for the programming in javascript I have find this documentation; then I have installated node.js from the official siteor by this terminal command:
npm install npm -g //update npm first
then I have installed the library:
npm install johnny-five //install jhonny-five
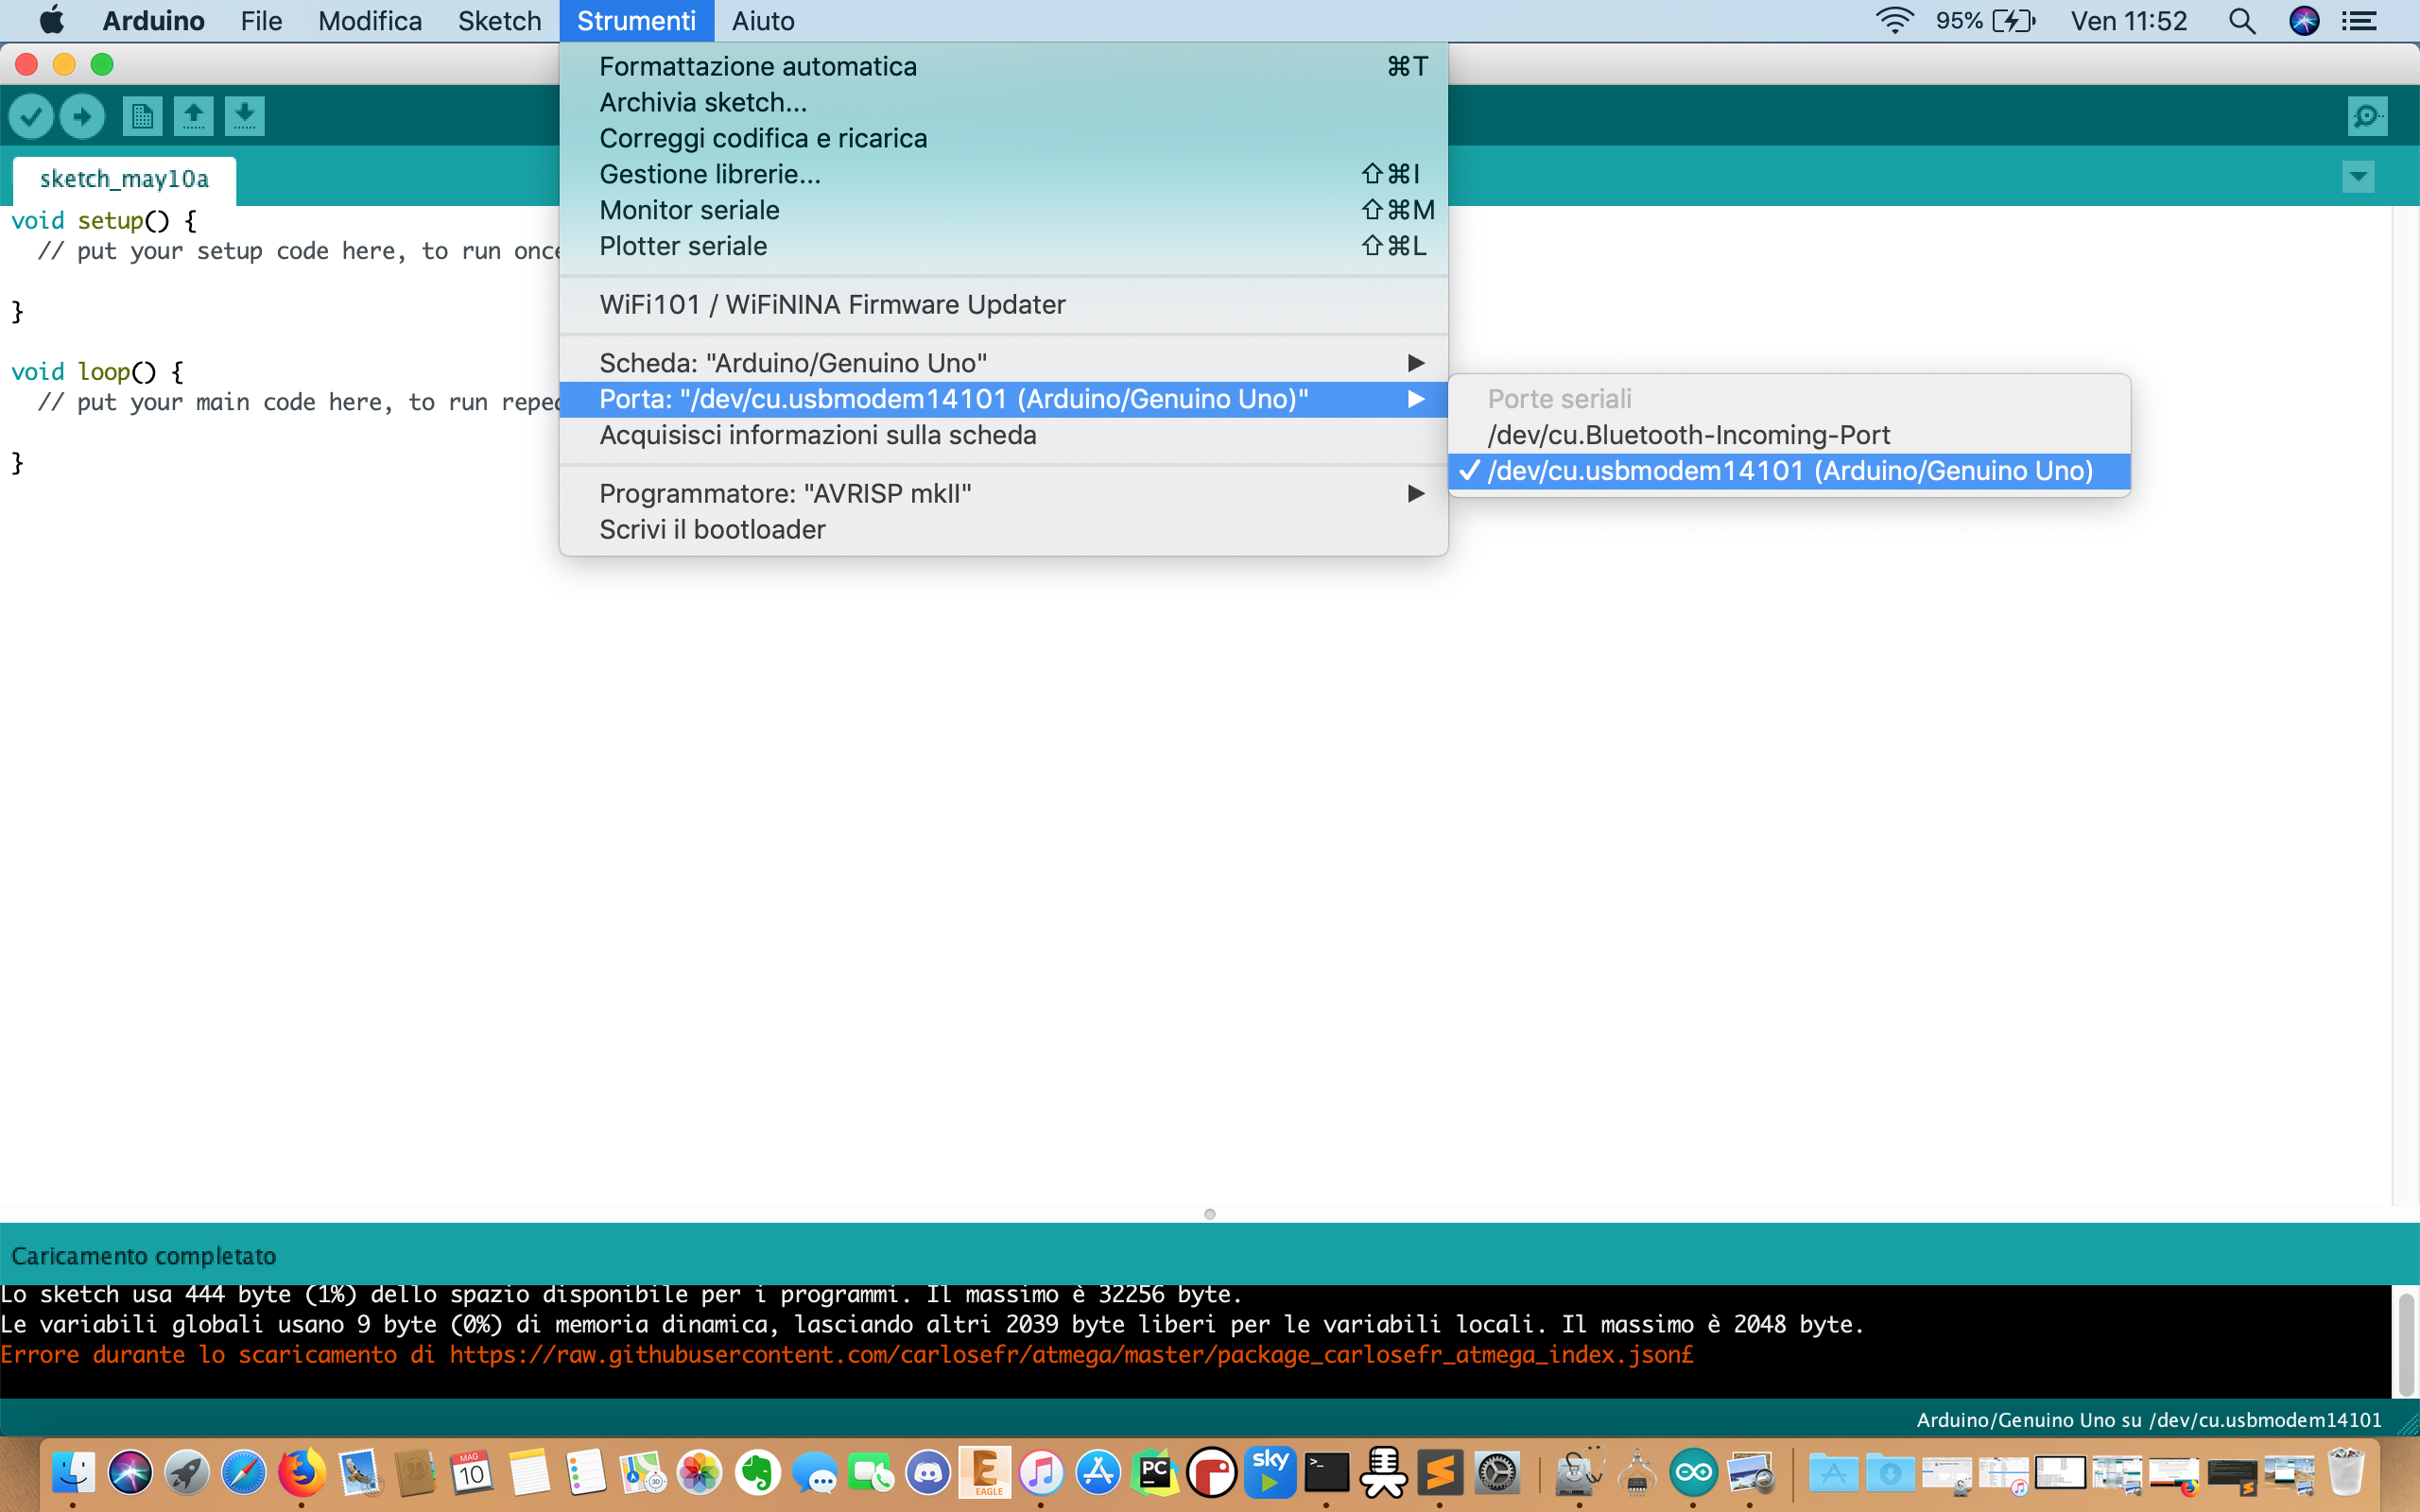
To load my simple first programm with javascript I have to upload the standard firmware data on my arduino selecting my port and arduino:
my file esempio.js where I programmed the scketch to blink the led 13 of my arduino is this:
 var five = require("johnny-five");
 var board = new five.Board({
 port:  '/dev/cu.usbmodem14101'
 });
 board.on("ready", function() {
 // Create a standard `led` component instance
 var led = new five.Led(13);
 // "blink" the led in 500ms
 // on-off phase periods
 led.blink(500);
 });
It's very important select the righy port of our arduino because without this we can't load the sketch :
port: '/dev/cu.usbmodem14101'
to load the skecth I used this command after go in my path where I have my file.js:
node namefile.js
Now that I have understood how use the language javascript for the programmation ,I am going to do my interface which controll the color of my rgb led. As data stream I use thePubNuband then I am going to see a tutorial
But in this tutorial,this tools are used for an interface which comunicate with an arduino but in my case I have to controll an input or an output board that I have done in this course so I have to try an other solution if I want to programm with javascript languages. I am going to try to comunicate my interface with the board of the led rgb output by an other solution.
The building of my Interface
At the first of all , I controll that the board I've done in the week of output has the right design for what I want to do:
- ops! there is a problem: I see that in the board I haven't any exposed pin useful fo the serial connection ,one for rx and an other for tx; but this is normal because when I have done this board I didn't need to serial communication but I had also to programm it in order to do something. To solve this problem I have re-done the board with some modification: I see that are unused two pin of the microcontroller so I exposed it in order to have 6 pin exposed to the fdti cave (used fo the serial communication);
the png used for the toolpath are this :

now my board is able to connect to the serial port.
I need the serial port because I am going to take the value high or low of the pins red, green,blue in the serial port because it is a good tools to communicate with my "web" interface:
- the first step is the programmation of the board: this is an important step because here we choose the logic of the led rgb brightness and in particular the reading of the serial data which controll the color of the led rgb:
I load this simple sketch with arduino:
    #include <SoftwareSerial.h>
    int led_red=1;
    int led_green=0;
    int led_blue=2;
    SoftwareSerial mySerial(4,3);
    void setup() {
    // put your setup code here, to run once:
    mySerial.begin(9600);
    delay(100);
    pinMode(led_red,OUTPUT);
    pinMode(led_green,OUTPUT);
    pinMode(led_blue,OUTPUT);
    //delay(10000);
    //mySerial.println("setup");
    }
    void loop() {
    while(mySerial.available()>0){
    int value_red=mySerial.parseInt();
    int value_green=mySerial.parseInt();
    int value_blue=mySerial.parseInt();
    if(mySerial.read()=='*'){
    digitalWrite(led_red,value_red);
    digitalWrite(led_green,value_green);
    digitalWrite(led_blue,value_blue);
    }
    }
    }
the new function that i've used are: parseInt which allow to read the int until we search a character
- the second step: to building of the interface(html files): it is composite by 3 sliders which controll the pins red,green and blue of my led rgb: my first idea was that of select with the sliders the value (analogical) in the pin pwm: but only the pin of the red and green are of that kind: in fact the pin relative to the blue color is not configurable like a pwm pin. So I've decided to controll only the combination of the color red, green and blue in their max value and not the combination of their middle value(particulary colors).
the third step: the communication between the interface and the serial port(file js): composition need of a file html where I have the sliders and something that allows the communication between the html input and the serial (so the led rgb brightness). This tutorial allows me to pass this step: in this fase I have installate the serial port library with this command
npm install serial port
with this tutorial I have learned the workflow of my interface:
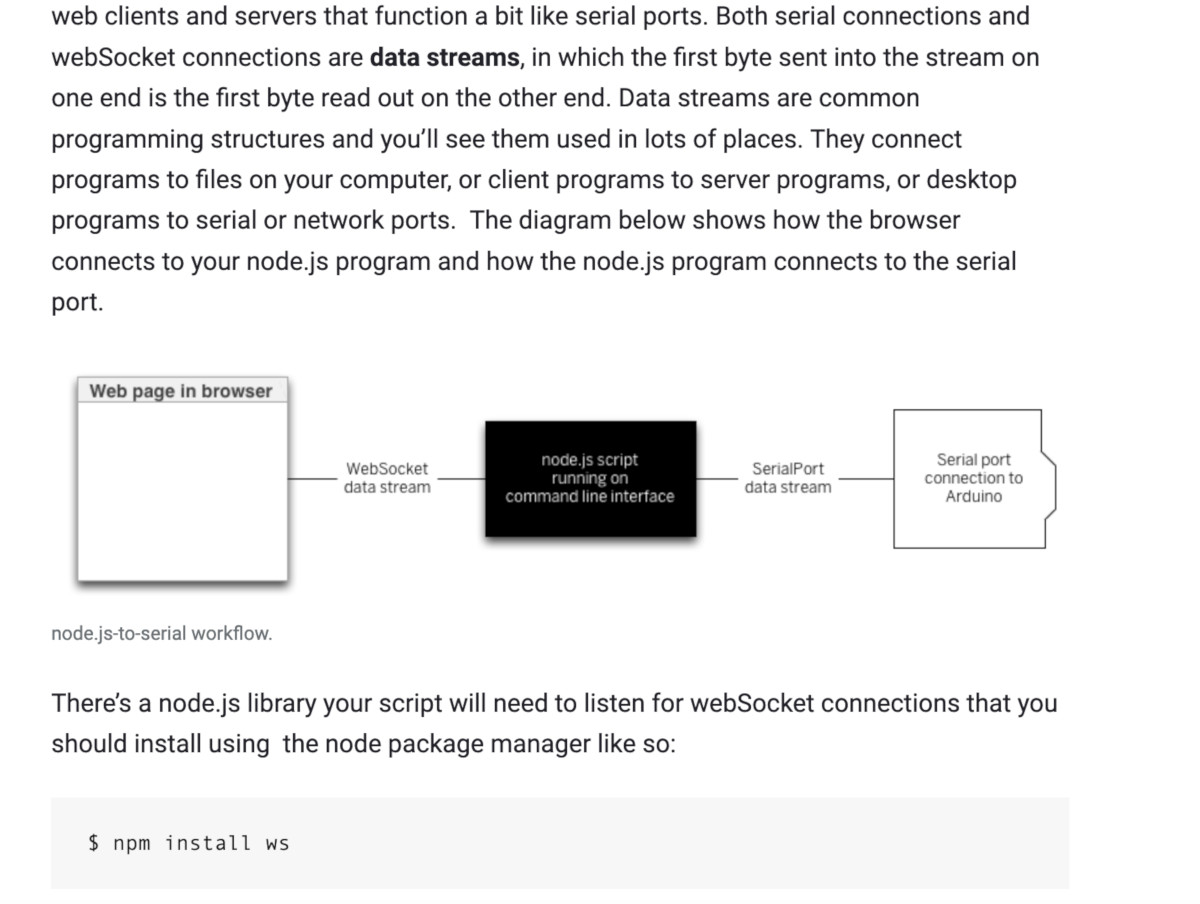
the websocket is important because allow to exchange data between the two file.js(the client.js and the server.js): the workflow is this:
1) take the value of the red,green,blue from the sliders with client.js put in the html file:
is important add the file client.js in the html of the interface adding this script:
<script src="client.js"></script> //or <script> writing the whole code here </script> as in the neil's html
2) send these data to the server.js with websocket connection:
var server ="127.0.0.1:1234"
var socket = new WebSocket("ws://"+server)
socket.onopen= function (event){
console.log("me so connesso")
}
socket.onerror= function(event){
console.log("can't connect to: " +server)
}
var value_led = new Array(3);
var led_r_value = 0;
var led_g_value = 0;
var led_b_value = 0;
function set_red(){
led_r_value = document.getElementById("intensity_red").value;
console.log("ho settato rosso: %s", led_r_value)
if(led_r_value>140){
led_r_value=1;
}
else{
led_r_value=0;
}
console.log("ho settato rosso: %s", led_r_value)
value_led[0]=led_r_value;
value_led[1]=led_g_value;
value_led[2]=led_b_value;
socket.send(value_led);
console.log(value_led);
}
function set_green(){
led_g_value = document.getElementById("intensity_green").value;
console.log("ho settato verde: %s", led_g_value);
if(led_g_value>140){
led_g_value=1;
}
else{
led_g_value=0;
}
console.log("ho settato verde: %s", led_g_value);
value_led[0]=led_r_value;
value_led[1]=led_g_value;
value_led[2]=led_b_value;
socket.send(value_led);
console.log(value_led);
}
function set_blue(){
led_b_value = document.getElementById("intensity_blue").value;
console.log("ho settato blu: %s", led_b_value);
if(led_b_value>140){
led_b_value=1;
}
else{
led_b_value=0;
}
console.log("ho settato blu: %s", led_b_value);
value_led[0]=led_r_value;
value_led[1]=led_g_value;
value_led[2]=led_b_value;
socket.send(value_led);
console.log(value_led);
}
3) send these data from the server.js to the serial port
var server_port = '1234'
var client_address = '::ffff:127.0.0.1'
var SerialPort =require('serialport');
SerialPort.list(function (err, ports) {
ports.forEach(function(port) {
console.log(port.comName);
});
});
//SerialPort= serialport.SerialPort,   //bisogna fornire la porta in input dopo il nome file .js
portName = process.argv[2];
var myPort = new SerialPort(portName, 9600);
myPort.on('open',function(){
console.log('port is open');
});
myPort.on('close',function(){
console.log('port is closed');
});
myPort.on('error',function(err){
console.log(err.message);
});

//websocket connection
console.log("listening for connections from "+client_address+" on "+server_port)
var Server = require('ws').Server
wss = new Server({port:server_port})
wss.on('connection', function(ws) {
if (ws._socket.remoteAddress != client_address) {
  console.log("error: client address "+ws._socket.remoteAddress+" doesn't match")
  return
  }
console.log("connected to "+client_address+" on port "+server_port);
ws.on('message', function ricezione(messaggio) {
//console.log('ricevuto: %s', messaggio);
//console.log(messaggio[0] + ',' + messaggio[2] + ',' + messaggio[4] + '*');
console.log(messaggio + '*');
var da_inviare = messaggio + '*';
myPort.write(da_inviare);
});
});
From how I programmed the codes, to launch my interface I am going to write this command terminal:
node server.js <name serial port>
and then I open the html file and I check in the console if I receive the value (that I am sending to the server) and then see that in the terminal window I have the same value but in this format: ('value_red,value_green,value_blue* ' ); this much important that the format is this because only in that way I manage to read it and controll my color led.
At the end in order to show my interface in the documentation I have copied and pasted the html in the html of the week documentation.
Led RgB Controller
IMG_6015 from Marco Cialone on Vimeo.
file: