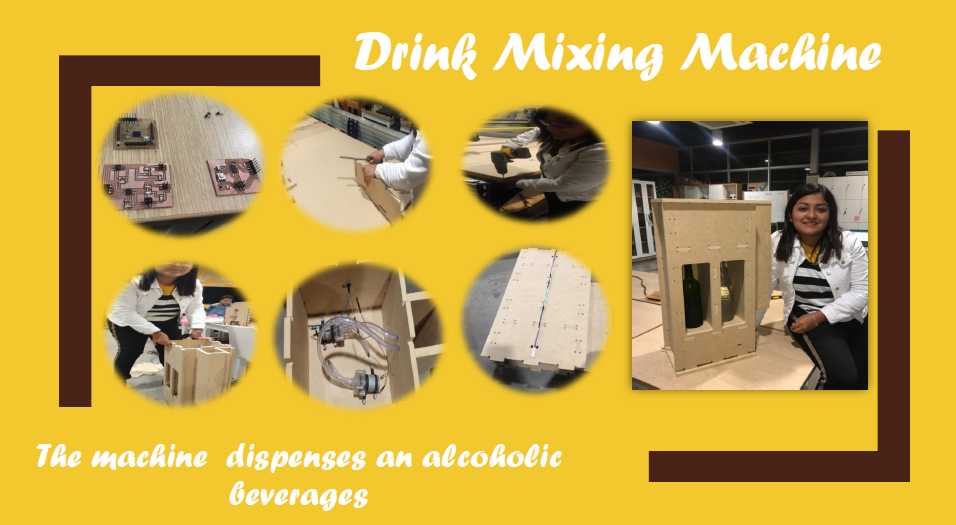
DRINK MIXING MACHINE
For this assignment we will divide into 7 parts, which will be:
- Design
- Making off
- Electronic part
- Assembly
- Testing
- Costs
It’s the steps of my project
Design
From the beginning of FabAcademy I knew that I wanted to make a machine as final project. In the last weeks I decided how it would be the structure machine.
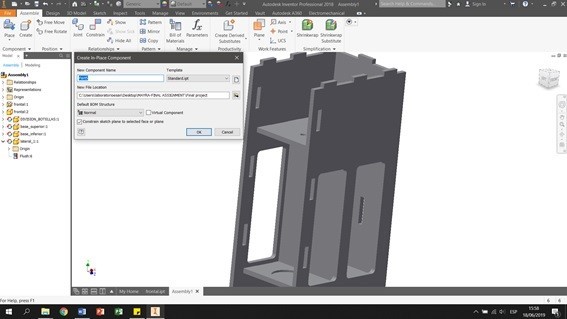
The design and structure of my final project is done in assignment 8- COMPUTER CONTROLLED MACHINING
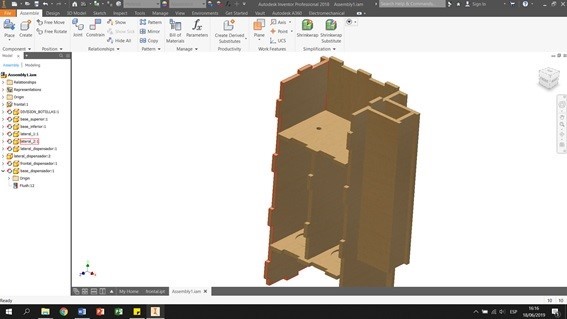
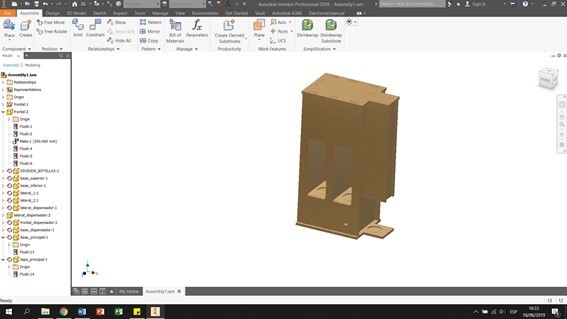
I use Autodesk Inventor to design the structure of the machine,I used as a reference the measurement of a glass bottle.
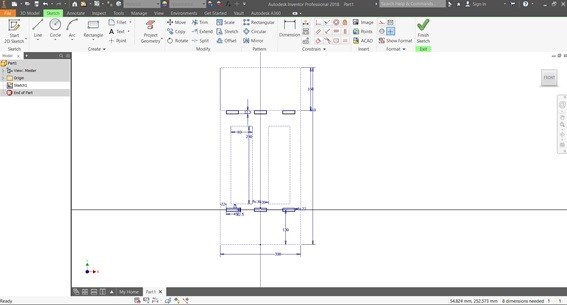
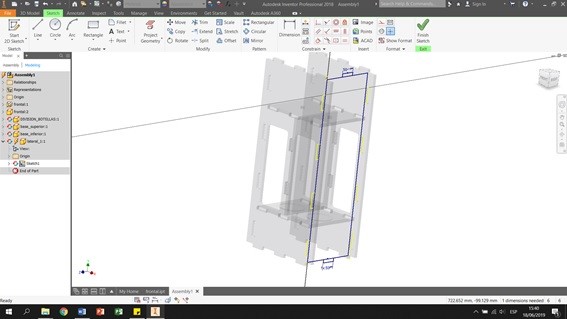
As you can see, with the option ASSEMBLY, we can see how the structure looks according to the advanced.
Making off
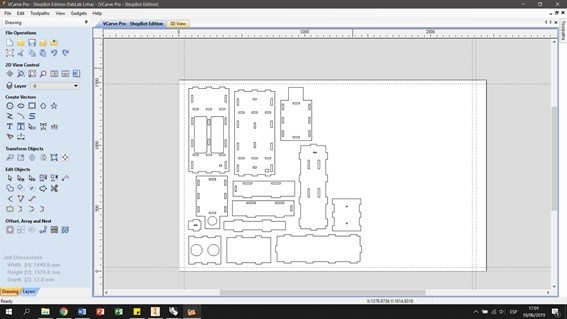
VCARVE PRO
Then I use the program VCARVE PRO, which allows you to load your designs by exporting the face in DXF or DWG format, and configure the milling characteristics. For the operation I use a 1/4 inch.
As you can see, I set the characteristics of milling, cutting depth (1mm more than thickness), number of passes, type of milling cutter, internal cut, external cut, etc. In the first configuration I use the PROFILE option (internal) to perform internal milling of the design.
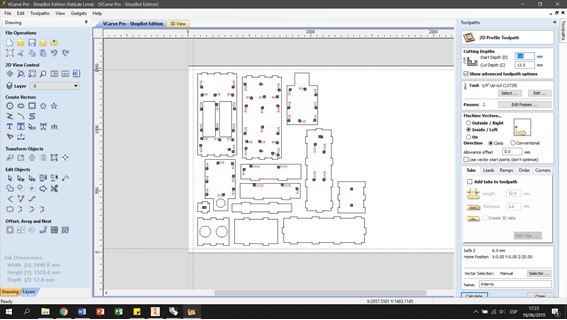
In the second configuration I use the POCKET option that allows you to make a recess of the material or “cajeado” according to the depth that is designated in the design, In this case apply 5 mm of depth to simulate the blocks of wood.
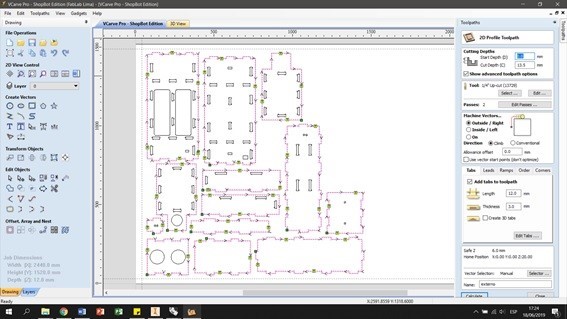
PARAMETERS MILLING¶ For the machining process, the following milling parameters must be set: - SPINDLE SPEED:
14000 RPM
-
TOOL: mill 1/4 inch Up cut, this tool will be used as it will work with MDF 12 mm and a higher resistance of the material is required.
-
PASSES: 3 passes, each time the mill makes one pass, it will reduce 5 mm of material, which is within the limits of the tool
-
FEED : The feed used is 2 inch / sec The speed of descent (height) the spindle each time you make a pass is 1 inch / sec.
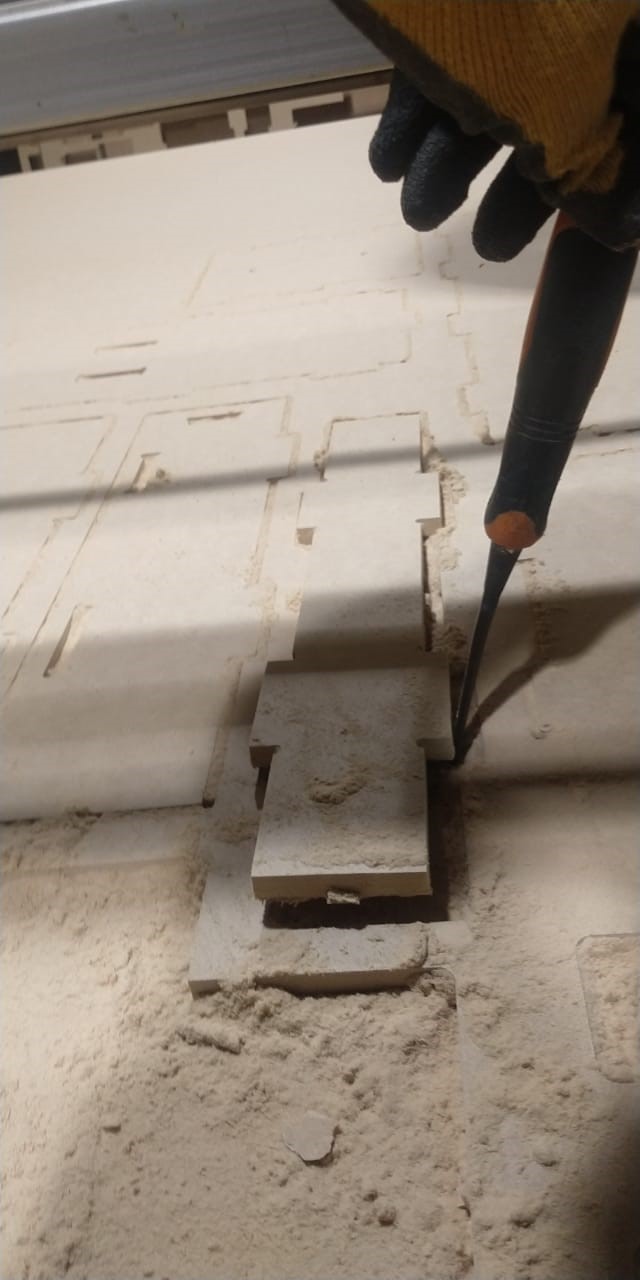
I had to adjust the mdf plate with the drill and bolts

Before starting the milling process, it is necessary to calibrate the machine, for this we first perform the zero “Z”.
Which is where the spindle regulates the height and detects the cut start point.
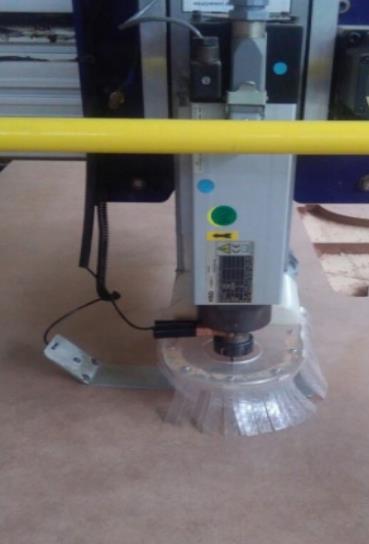
Then, the zero “XY” is done, which is where the machine places the spindle in the corner of the bed.
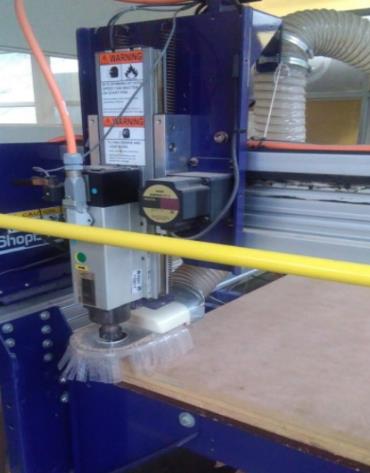
As a lesson learned, it is important to note that the file is loaded first, then the spindle is turned on, then the extractor is turned on and finally the command is executed.
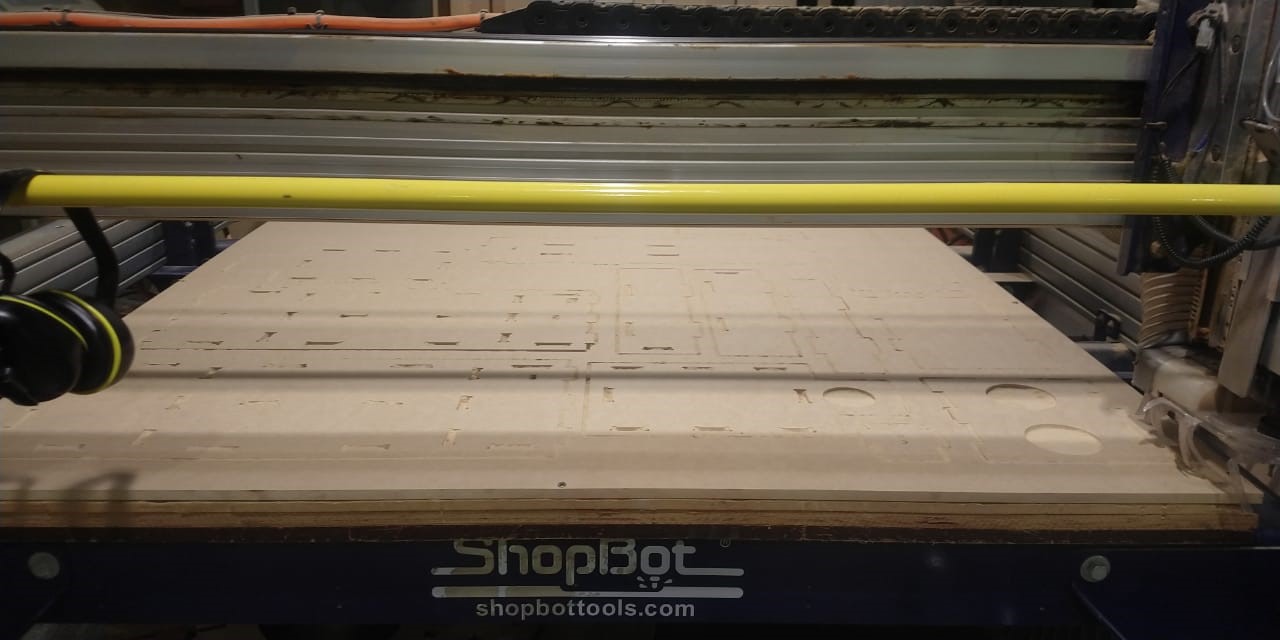
Then remove the milled parts.
Also use a rubber hammer to assemble the PRESSFIT.
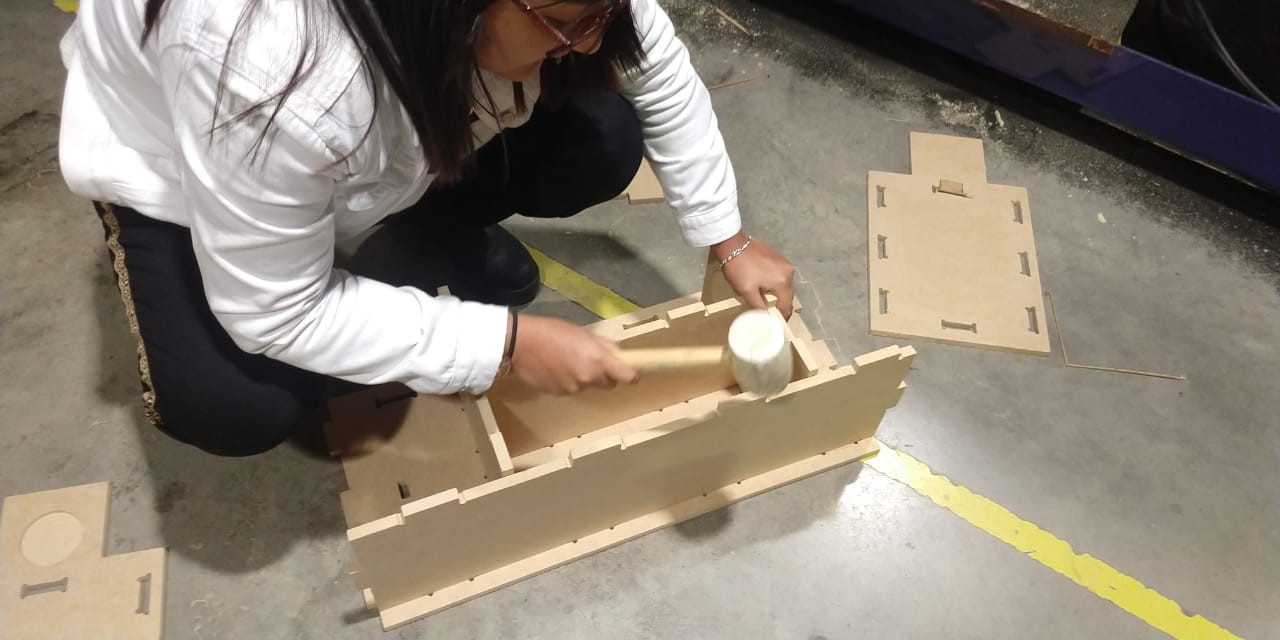
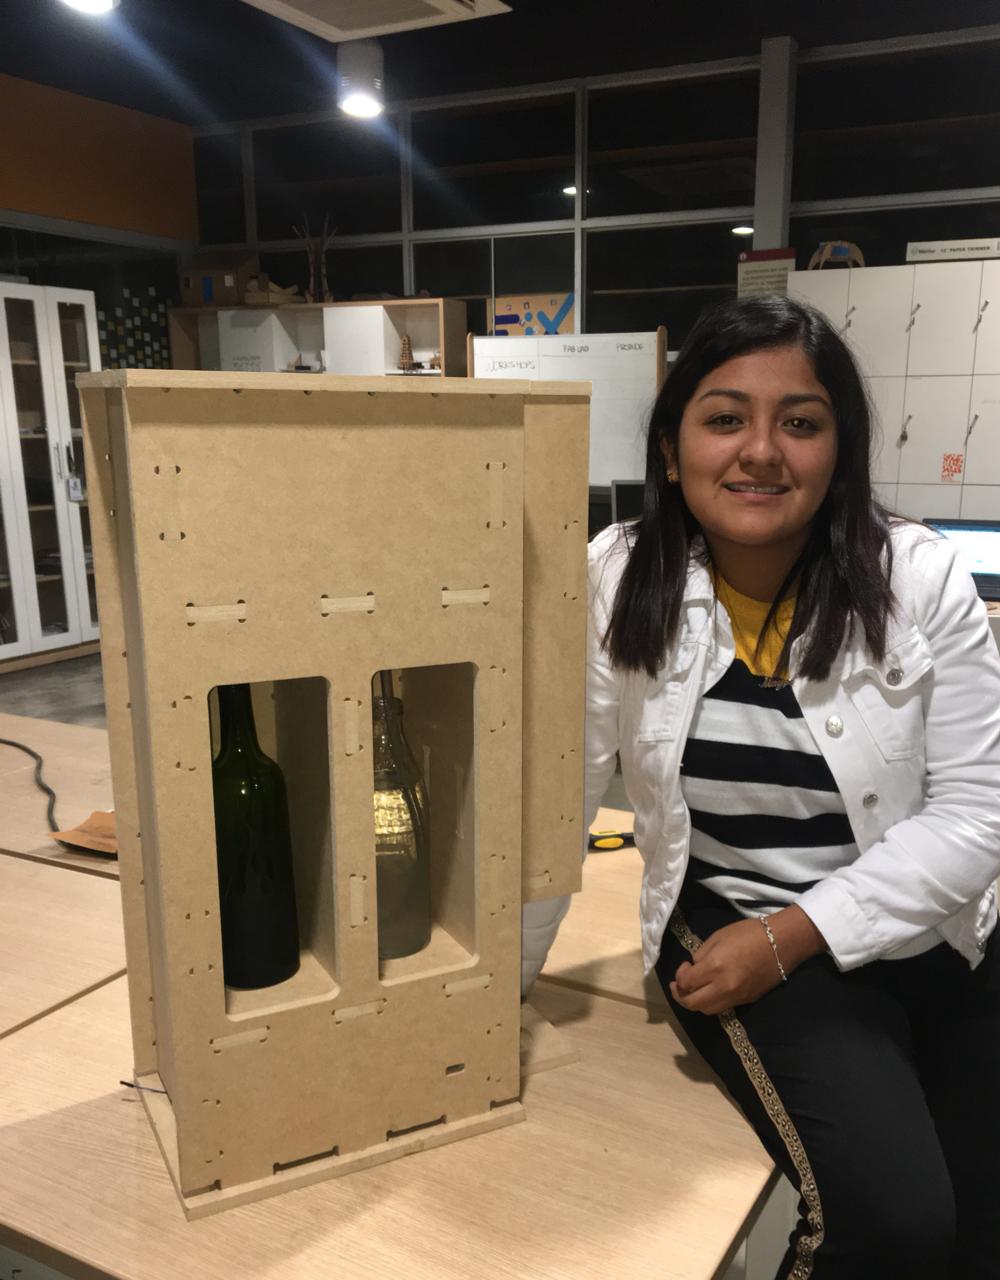
The structure of my final project

Also I used the trotec laser for support of the board.
As you can see in the image, I made a box
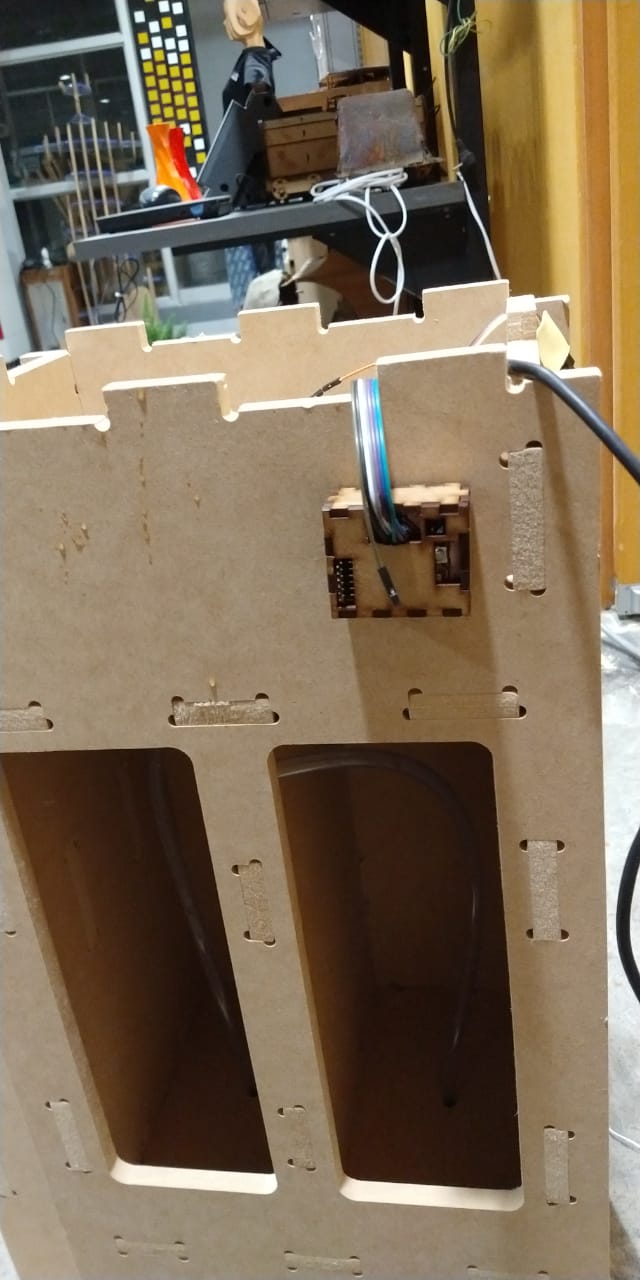
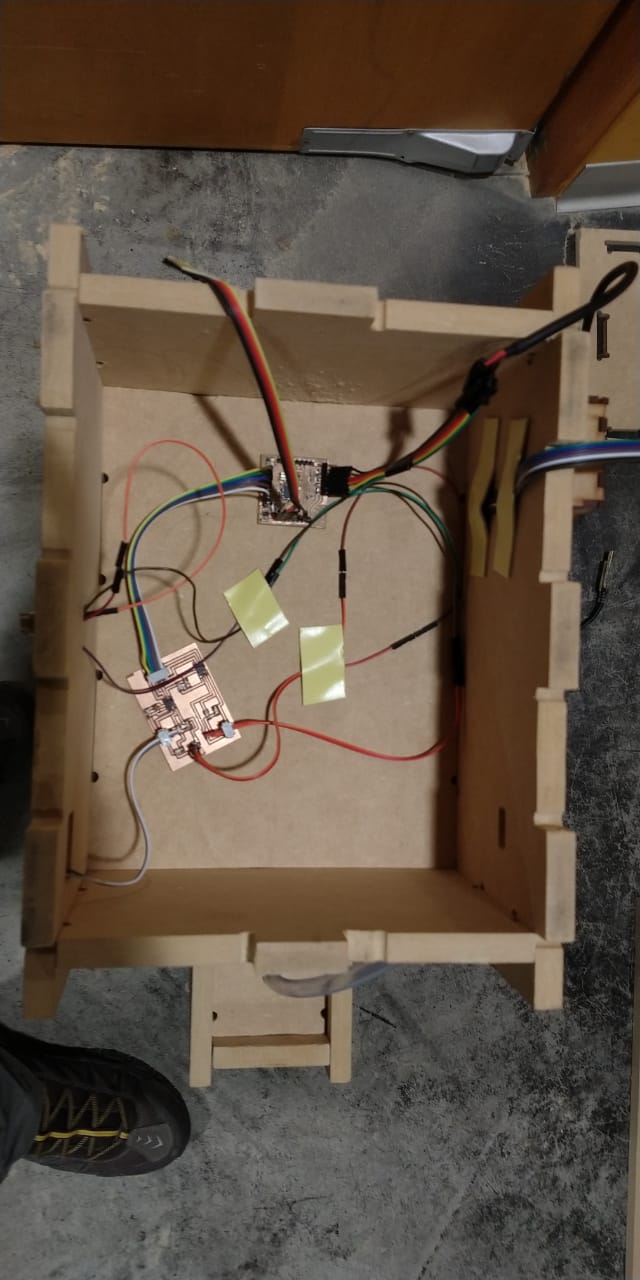
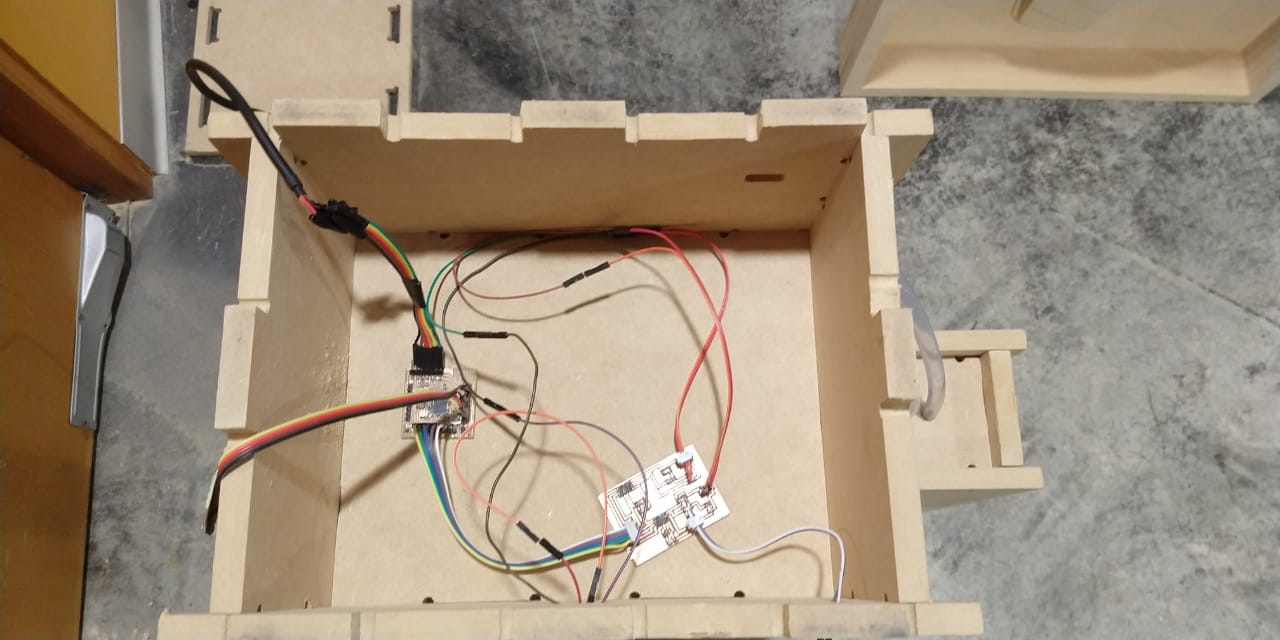
Electronic Part
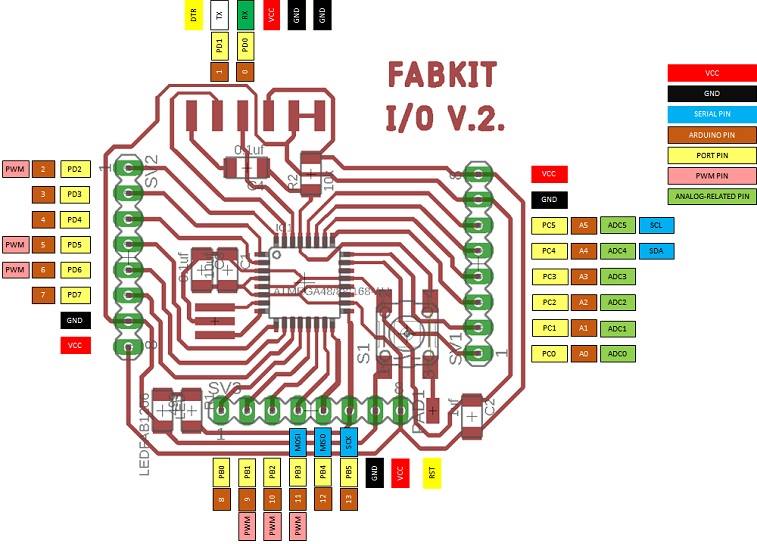
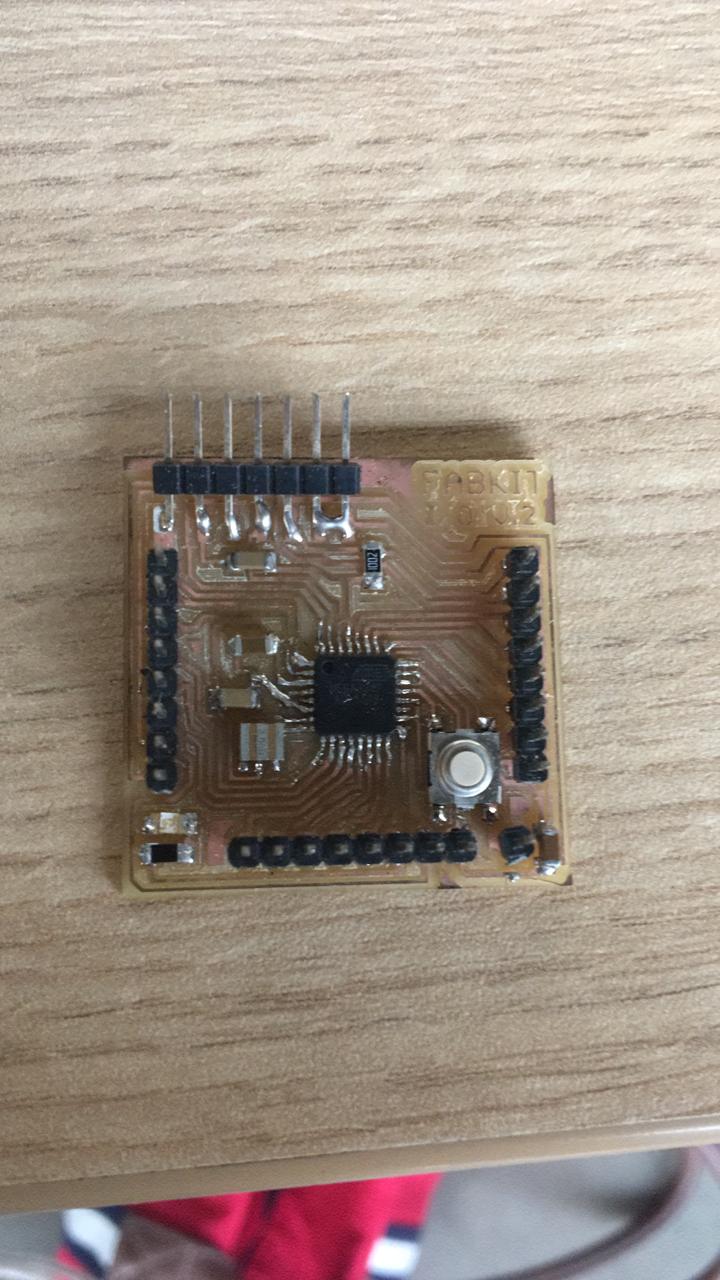
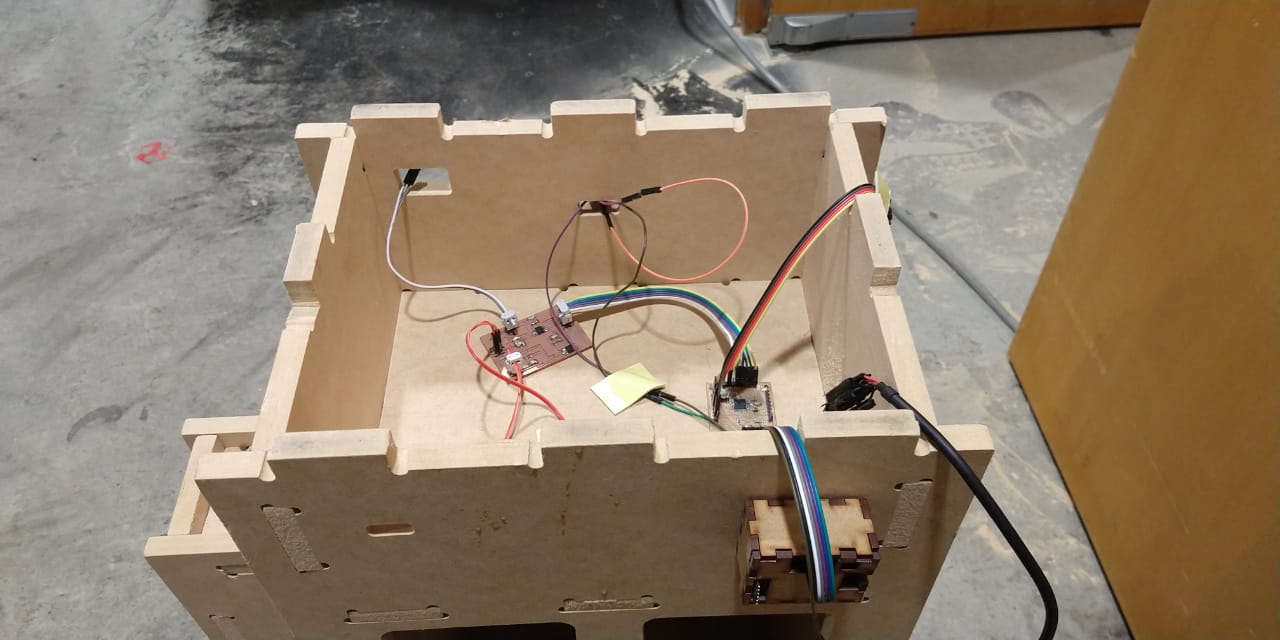
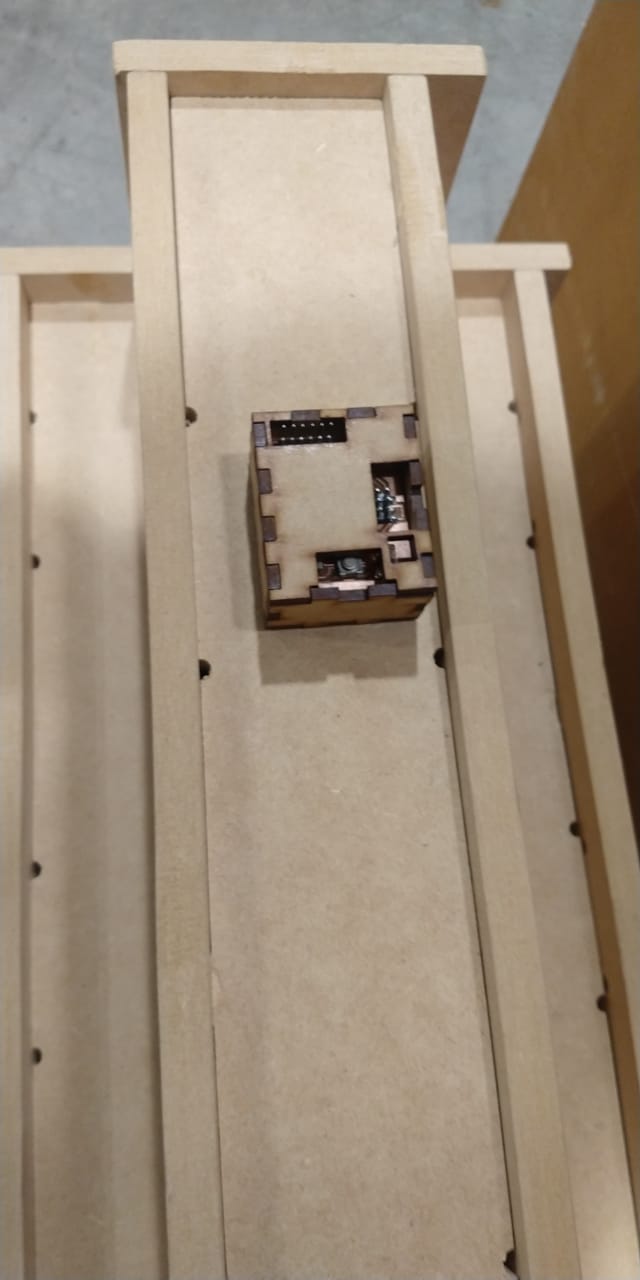
For this assignment, I made a FabKit v 2.0
I downloaded the files of my partner from the Fabacademy 2017 - Victor Pimentel
You can download the file by clicking on the bullet.
I used the MODELA to be able to mill my hello board.
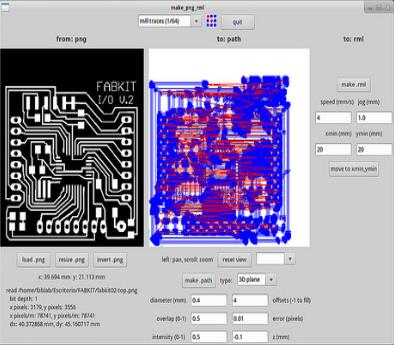
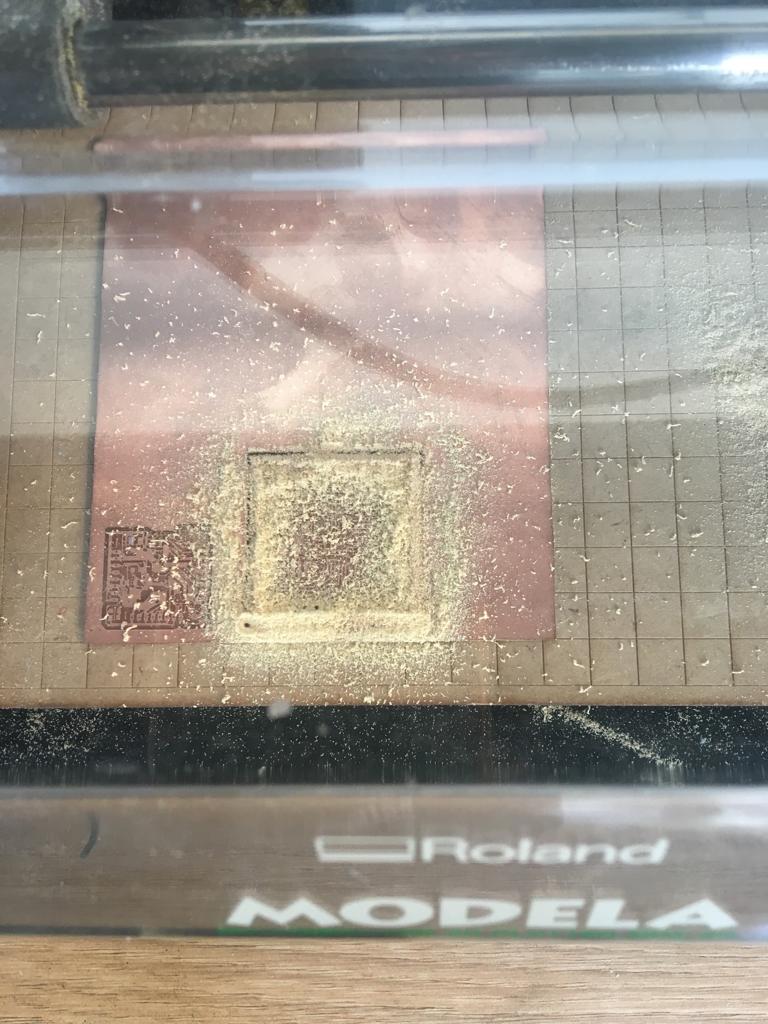
I used ATMEGA 328 MICROCONTROLLER and I read this microcontroller in the assignment 9 - EMBEDDED PROGRAMMING
Then I solder the components that are needed according to the SCHEMATIC
This is the board diagram.
For the installation of the bootloader, I guided myself from this page:
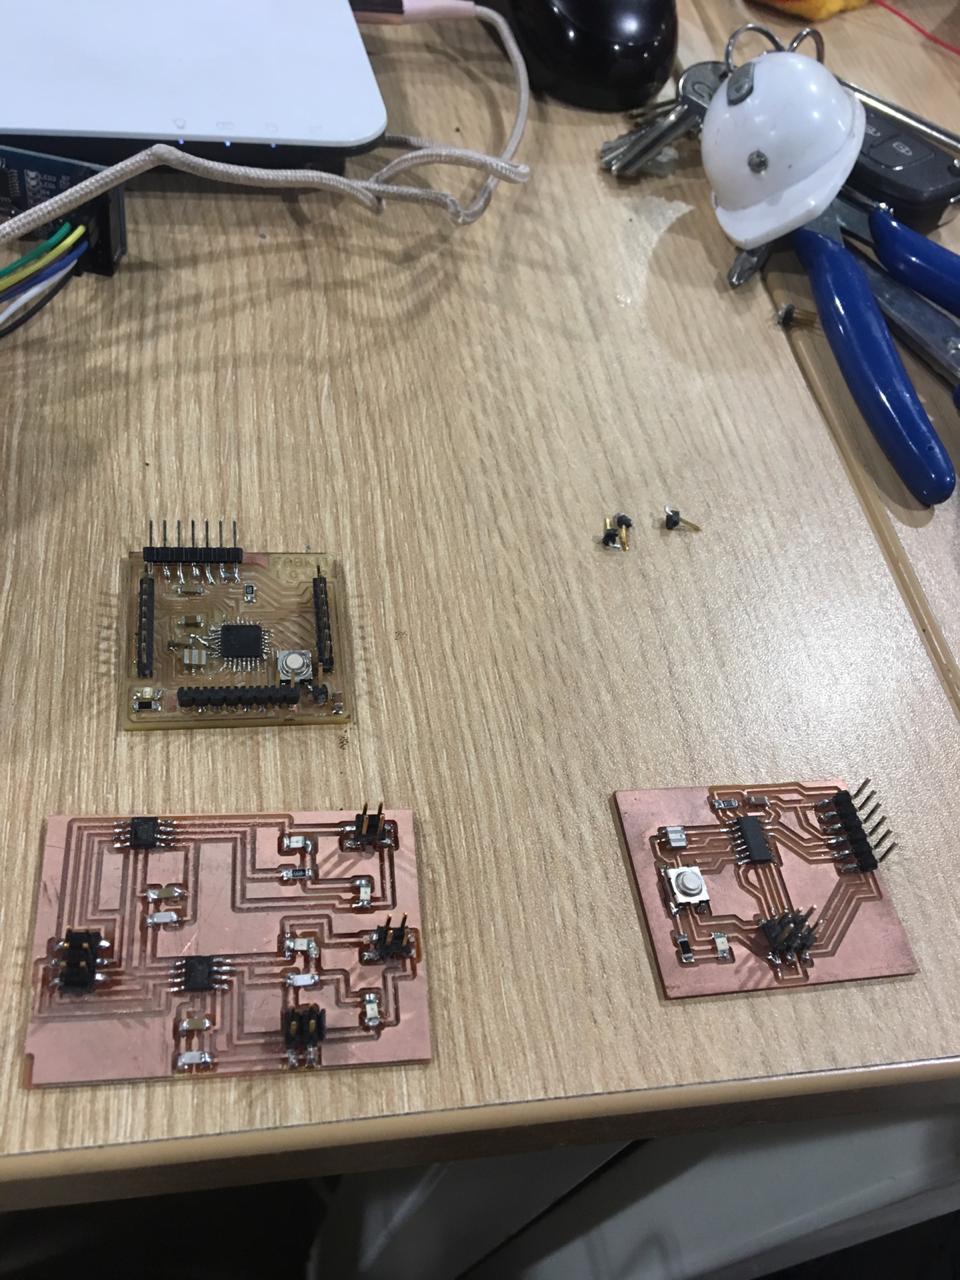
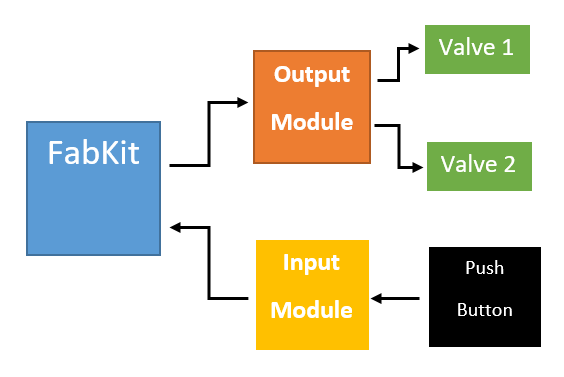
I used three board: FABKIT , INPUT BOARD, OUTPOUT BOARD.
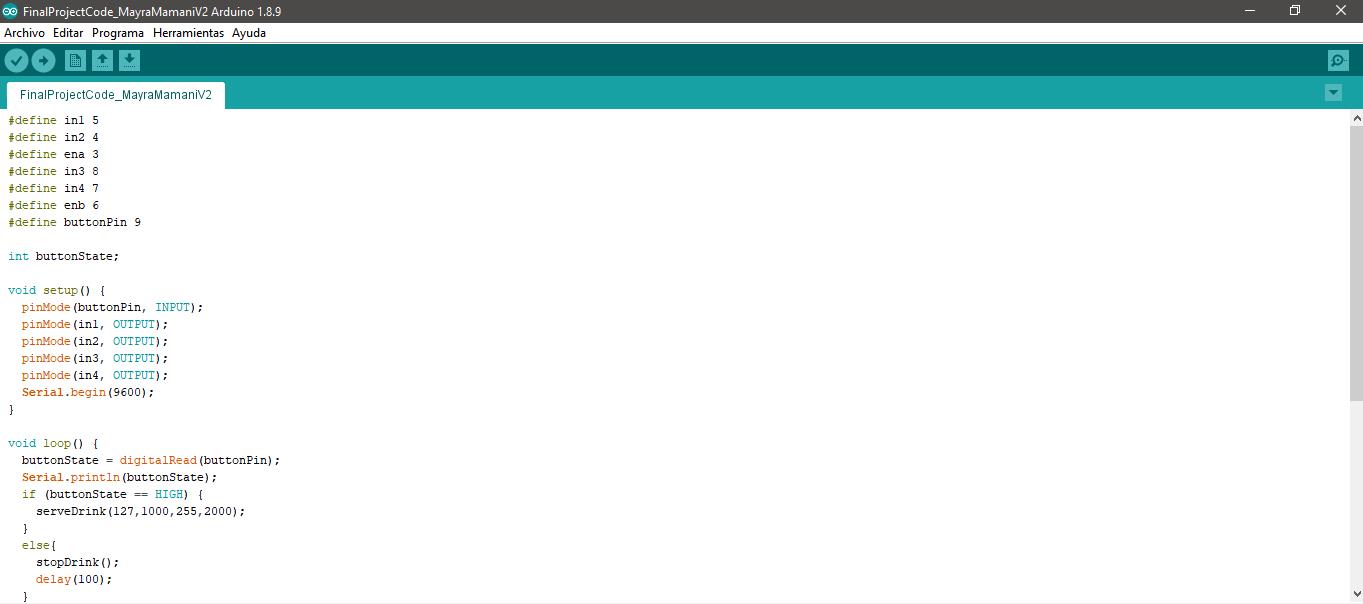
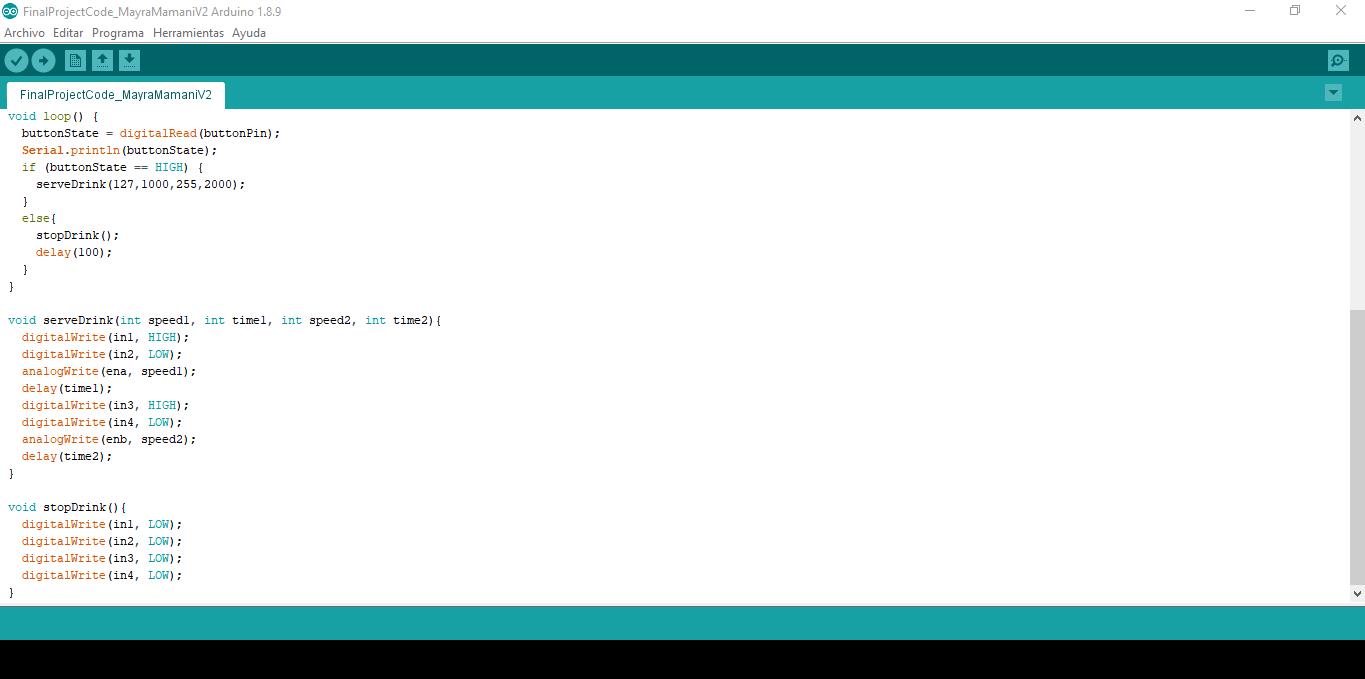
Working of the program
Code
Blocks diagram

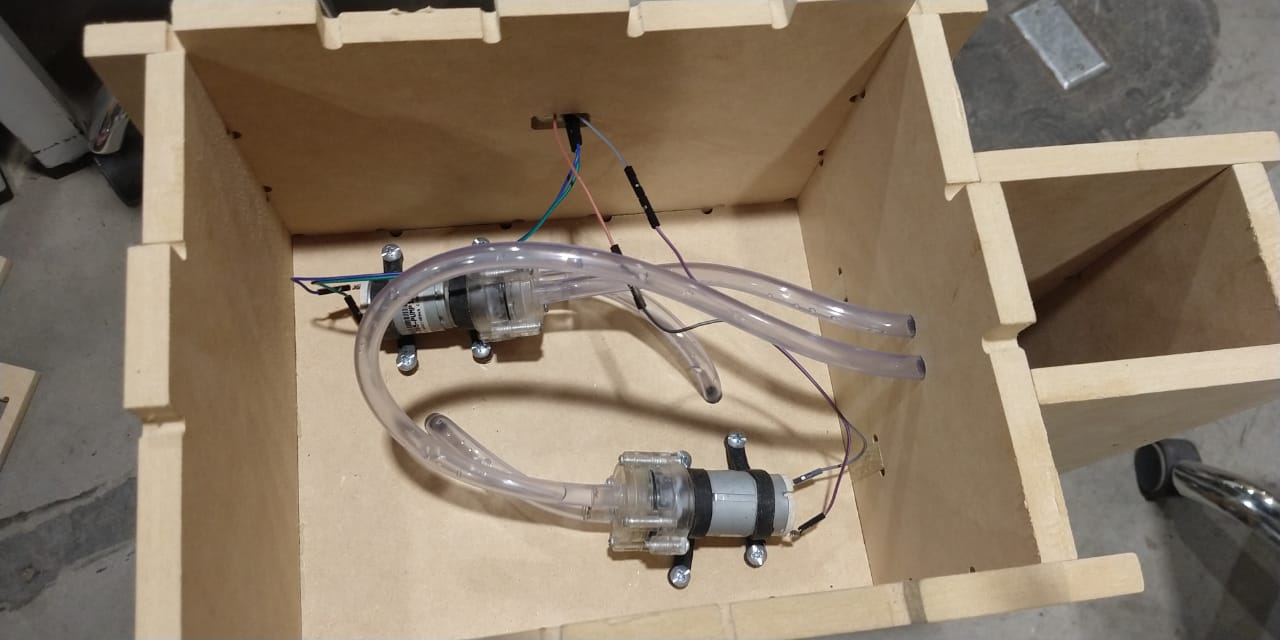
Assembly
Explain more :
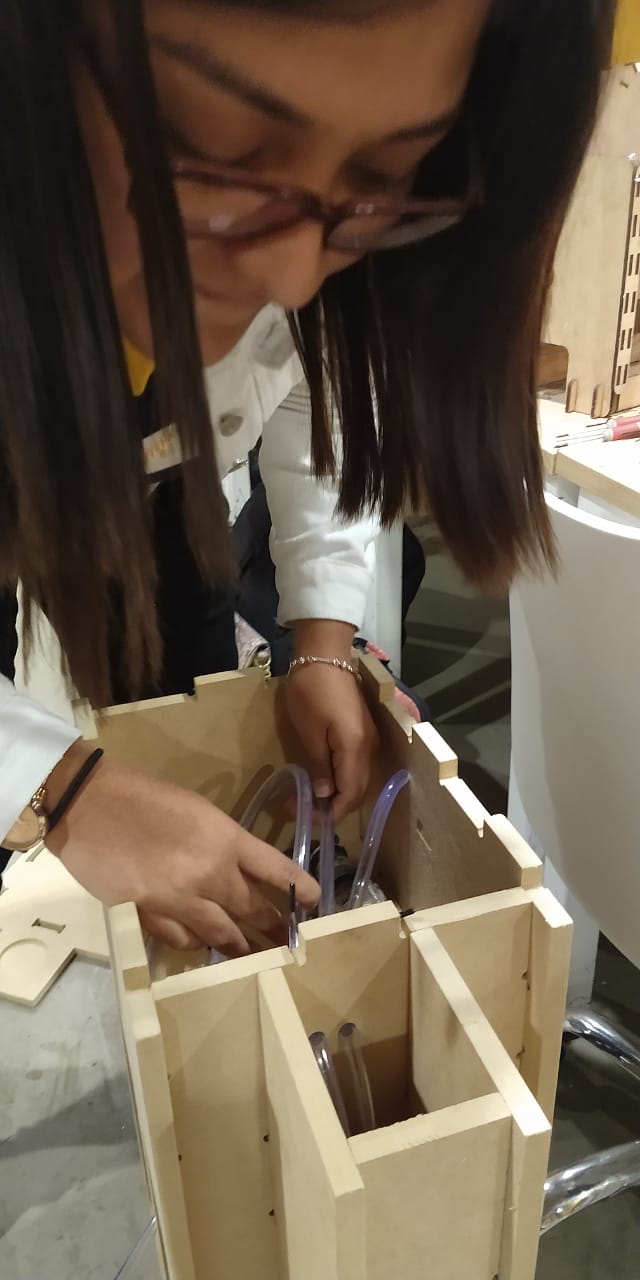
Since I already had all pieces I need started to assemble them
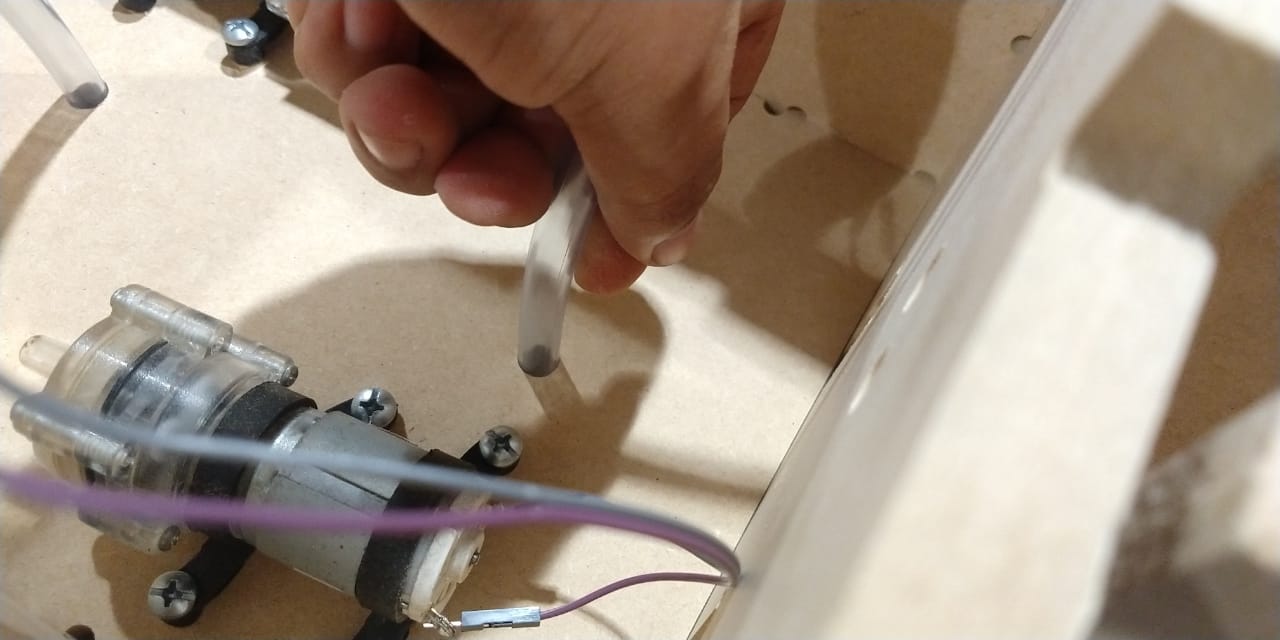
I used DC motors, which had a hydraulic valve system that allowed the liquid to be dispensed through two hose,
one of subtraction and another of outlet.
These motors were controlled by my output board, to control the motors with the help of fabkit,
the h-bridge helped me to give the motors an external power supply and my input board helped me with the ignition of the motors.
Testing
I tried the machine and the use of the valves with the programming that was carried out
You can download the files by clicking on the bullets.
Also you can check my video
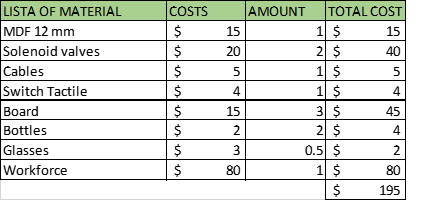
Costs
My costs in the realization of this machine were:

Este obra está bajo una licencia de Creative Commons Reconocimiento 4.0 Internacional