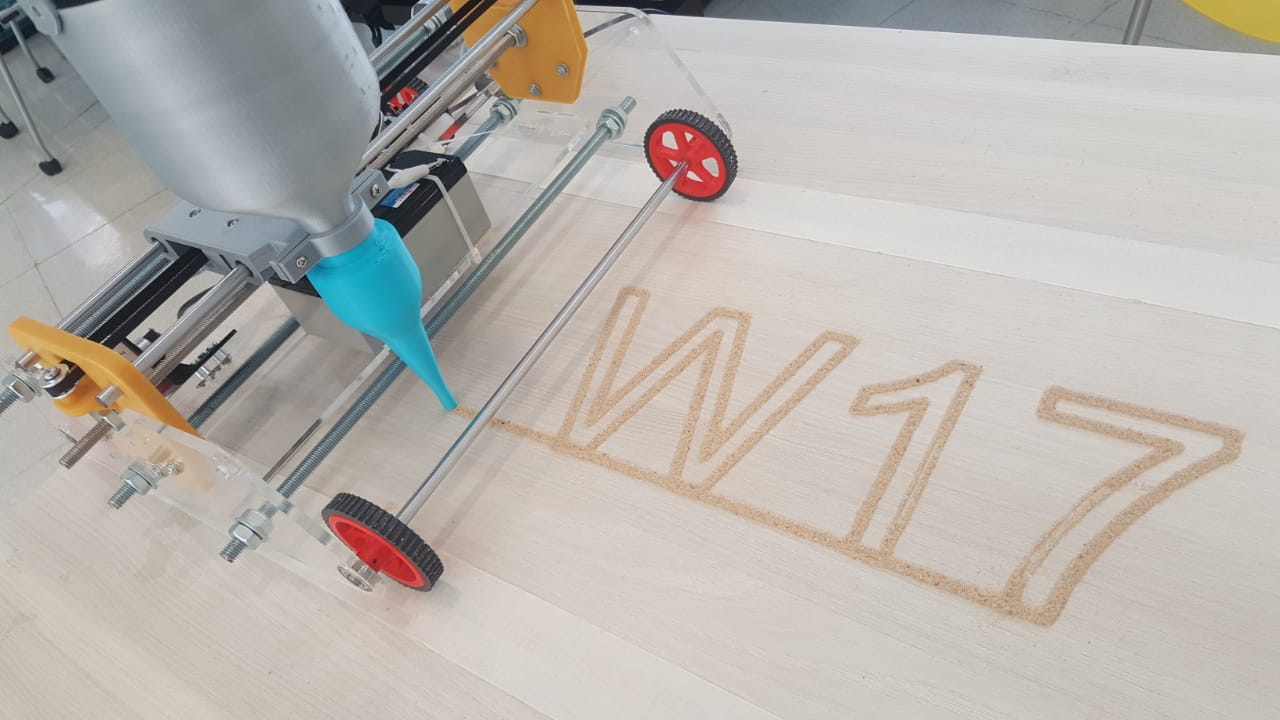
The machine we designed is a sand plotter. It's a machine on wheels that moves a sand tank on a linear rail. So the wheel move the machine in the x-direction, while the linear rail moves the tank in the y-direction, and there is a stepper that operates a valve in the sand tank. For the automation part we used the arduino cnc shield with the grbl library, the source rabbit g-code sender, and fab modules to generate the code. The diagram for connecting the CNC shield with the two stepper motors and the servo motor is the following.
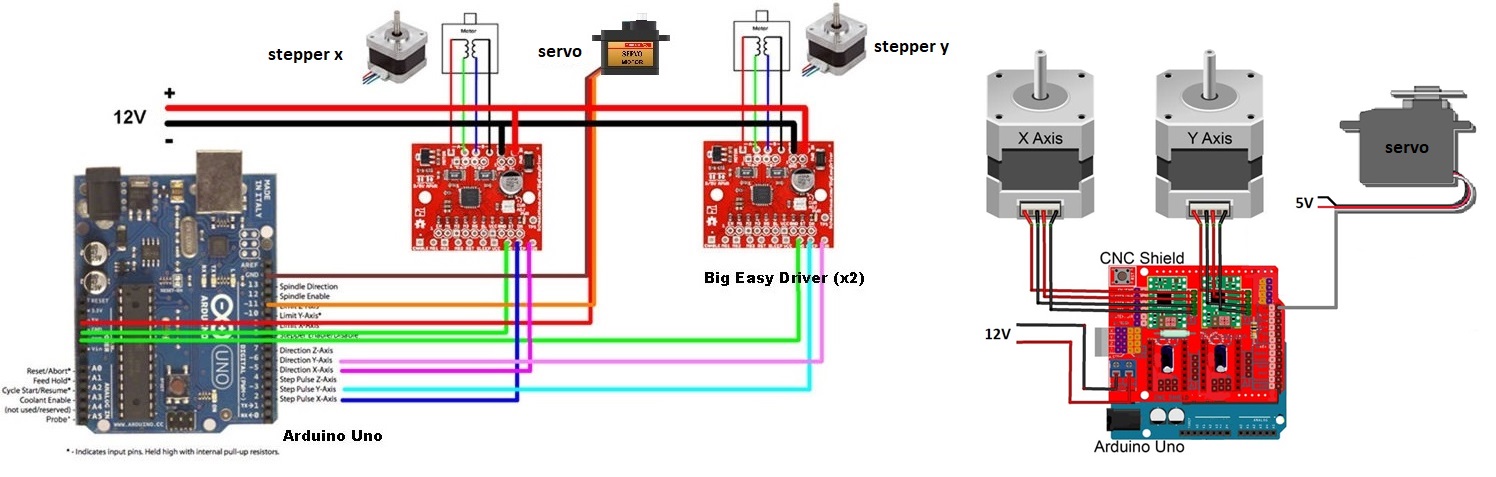
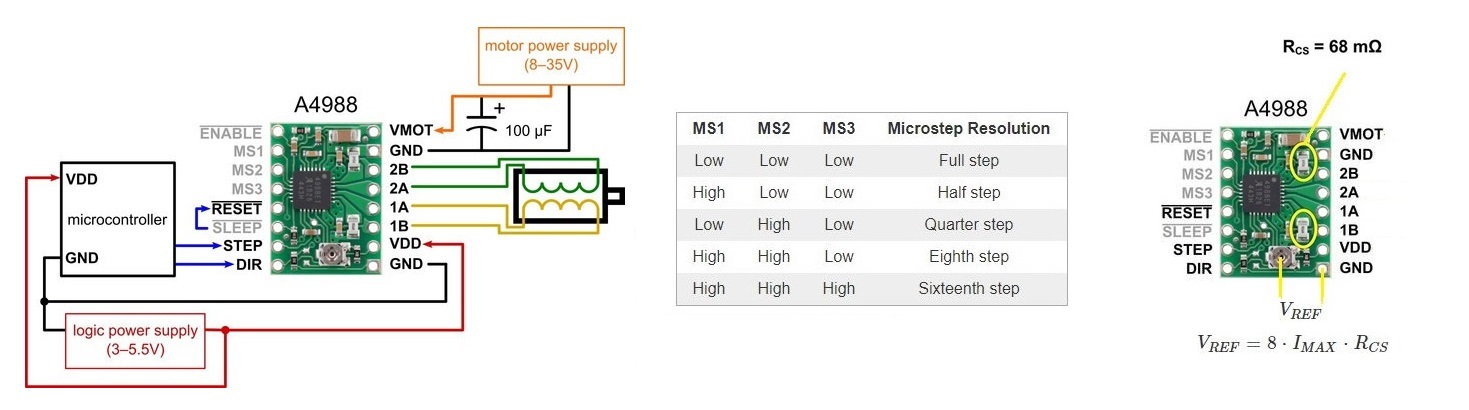
The arduino CNC shield uses the A4988 Pololu stepper motor driver. For full microstepping the three pins MS1,MS2,MS3 have to be set to 5V with jumpers. The stepper motor we used are 42HS48-1684 NEMA17 with 200 steps/rev with 1/16 microstep they give 16X200steps/rev. These motors have a current/phase rating of 1.68 Amps. The A4988 Pololu stepper motor driver can deliver up to 1A so it will never exceed the current/phase rating of the stepper. So there is no need to limit the current of the driver with the built in potentiometer. Otherwise, the way to do it would be to turn the potentiometer and measure a Vref voltage with a multimeter between the GND pin and the top of the potentiometer and deduce the current according to a formula provided by the manufacturer Pololu. The wiring diagram of the A4988 is as follows.
GRBL is an Arduino library used to control stepper motors. Given that our machine includes a servo motor we used a modified GRBL library which can be downloaded from github here
Once you download the grbl-servo library you paste it in the repository on the arduino library installed on your computer.
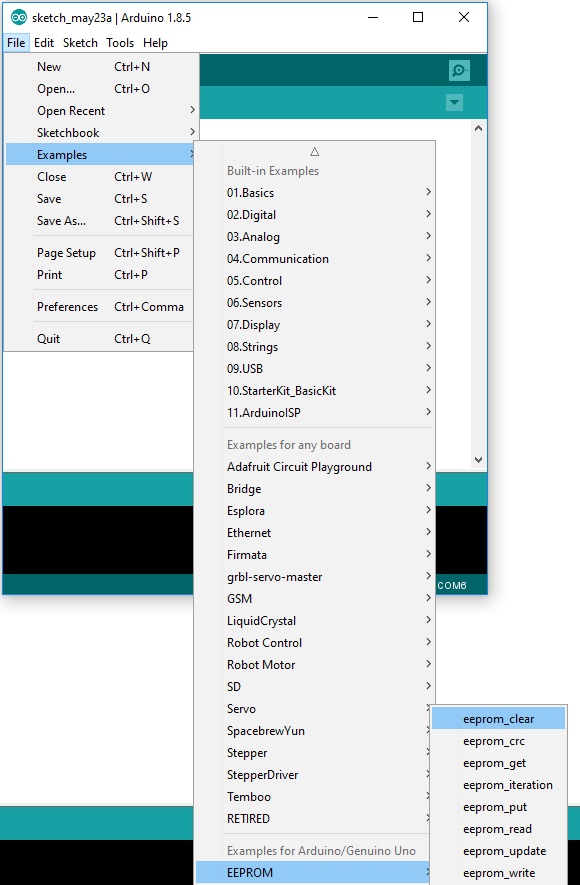
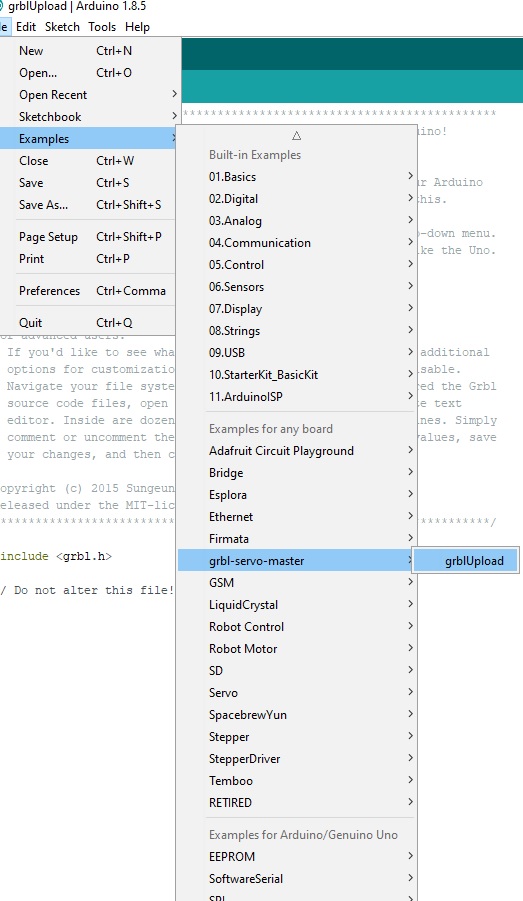
Then you have to upload the grbl library to the arduino board. Pior it is recommended to clear the EEPROM. This can be done by uploading the erase EEPROM sketch provided in the examples in the Arduino IDE. Next open the grbl upload sketch from the examples. This sketch is included in the files grbl downloaded from github.
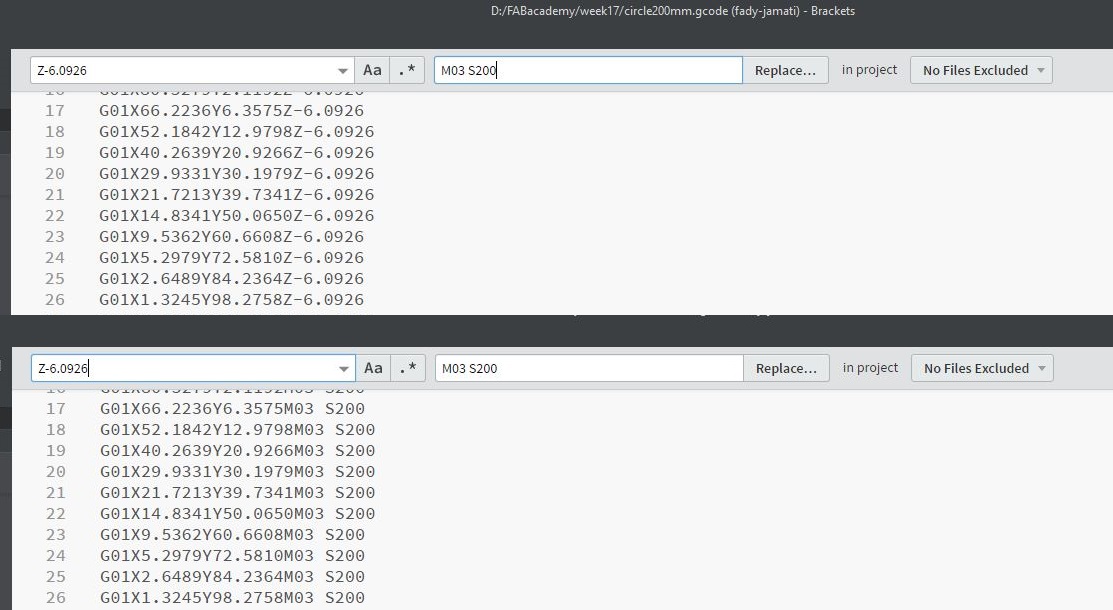
THe gcode can be generated with any gcode generator we used FabModules. However the gcode may need editing to be used with grbl-servo. Using grbl with a servo may be a bit tricky. The easiest way to go about it is to edit the gcode manually. The Z axis coordinates have to be replaced withe the command specifying the servo rotation degree between 0 and 180deg which is mapped to values ranging from 0 to 255. The command line for controlling the servo is M03 SXXX where XXX is a value between 0 and 255. This can be done easily with the Brackets edition with the function replace in file in the find menu. This replaces all the values identical values at once, and since there are only two Z values (up and down) in a 2D plot this just takes a few seconds.
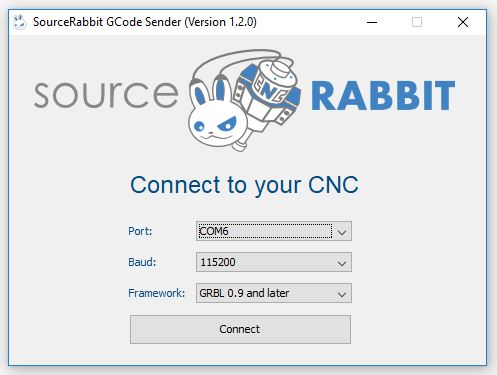
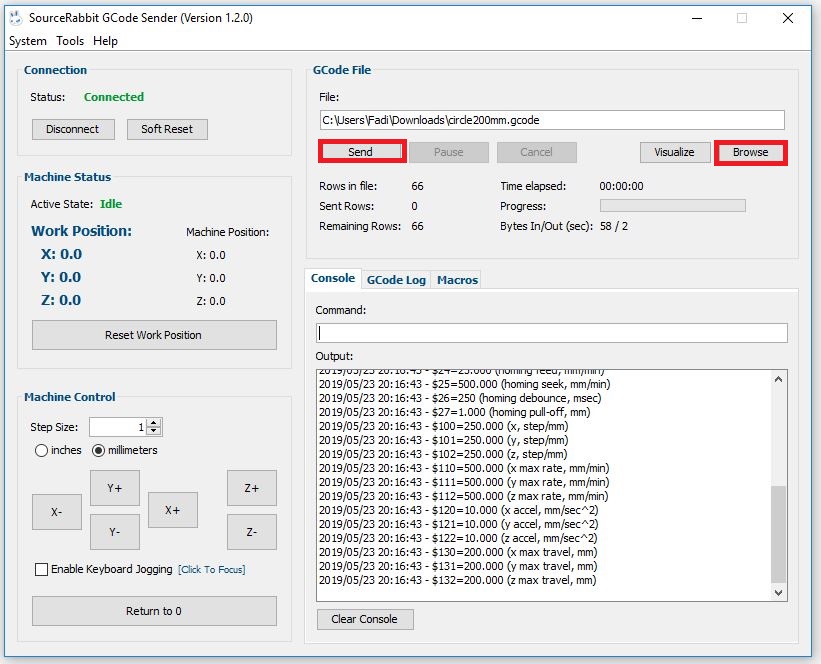
Once the grbl code is uploaded in the Arduino board, the cnc shield can be controlled by a g-code sender. Several free one are available online. I test Universal gcode sended available on github here. This gcode sender requires installing Java if you don't already have it. Another g-code sender I tested is Source Rabbit, it is simpler to install and to use.
Once our board is connected you just open SourceRabbit and select the port to connect to. There is a command prompt to enter single line commands. This is useful to test the servo to find the right rotation angles with the M02 S__ command. You can import a gcode file with the Browse button and run it with the send button. It accepts most of the g-code formats, we've use .gcode and .nc. The software also allows to visualise the gcode path. Grbl settings can be changed in the system menu of Source Rabbit. The only modification we made to the settings is the steps/mm for our two axis according to the design of our machine and the steppers we used
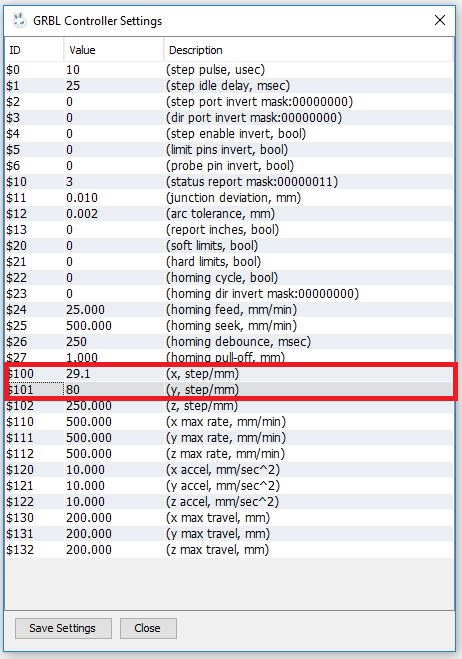
The steps/mm is related to the steps/revolution, the mm/revolution and the microsteps by the is related to
steps_per_mm = (steps_per_revolution*microsteps)/mm_per_rev
So for our machine the settings are: