
Computer Aided Design
- 1. Rastor 2D design by GIMP/PhotoShop
- 2. Vector 2D by InkScape/Illustrator/CorelDraw
- 3. 3D design by Fusion 360/SolidWorks/TinkerCAD
- 4. Gaming: Unity
- 5. Simulation
- 6. Audio/Video- CorelStudio(Trail)

Computer Aided Design
I'm using GIMP as alternate of PhotoShop, during using I find some cool think other than PhotoShop, like selection is easy and can move and after selection. PATH tools also good selection and after any mistake can easily come back by using UNDO command. But in PhotoShop it hard to select and Path tool are used from layer panel.
But Using PhotoShop is powerful software cause it is can easily play with color of photo and precisely change the color distortion on the images.
Selection of image by selection tool

Desaturated the color of the image using by color adjustment

Color balance detection by color curve adjustment

Adding text in layer by the deleting selection layer

Selection of the images by using path tool and from layer panel then the selection

Select the image by layer panel after completing the path selection

From image menu change the color from adjustment panel

From the image menu going the adjustment panel you can change the light

Compare with GIMP and Photoshop: Here I try to play with color suturation and desaturation on an image of mine, with light and hue. Here first i feel better to selection tools in GIPM, its easy to select the specific area and automatically select it, where in photoshop you need to select by using PEN tools, after selection of whole area then go in path panel here you select of circle as look like selection area. In other things like layer panel is also good in GIPM but I like to work on Photoshop cause layer management is easy and so manageable. In finally i saw one thing that was the saturation of light on image as good as looking in Photoshop than GIMP.
InkScape is the wonderful and light weight software for the vector design, when i using the InkScape i found some quit tool where i can create some awesome design. Like in isometric graph where you can make a 3D text design by using the pen tool
Actually I'm always use the illustrator for any vector design, I was design many vector graphic for my Fablab.
Before going to design I follow one tutorial from Youtube, If any one interested then follow this video Inkscape Tutorial: Isometric Numbers
Easy to use the path tool and from isometric grid line helps here to design

For cutting the shape in ones inner side by the selection of the difference option in path menu

Color fill option is good enough to visualize the shape according to you design

Here you go, the final isometric 3D text design

Before going to design in illustrator has no any option to make grid as Isometric, You need to make it by your own, I follow this tutorial for making isomatric guide on the illustrator. Follow this tutorials Click here


Compare with Inkscape and Illustrator: When I was designed same things in two different software where I found some interesting user friendly option and also some problem, Like when I'm going to design by using inkscape where so much easy to making isometric and making group selection with different color, Where in illustrator its so much annoying to making guide line in isometric and use pen tools for making different selection. I like most Inkscape to make 3D text in Isometric than Illustrator.
Fusion 360:For the first time I used fusion 360 for 3d modeling, but I'm not so good expert in 3d designing. So now i learn the 3d design for visualization, cutting and printing. As new student of the fusion 360 I'm trying to make a design using parameters tools. This is the wonderful tools for f 360 for making parametric design. I used one plugin for fusion 360 named slicer which is a great Apps or slicing solid design into different part for laser cutting.
Solidworks: Solidworks for 3d design which is for the first time I used here for fab academy, I have no idea about solidworks in the past, but now I understand solidworks which is great software for making big 3d design. Now I can able to make a 3d design in beginner level. Now I try to learn and make some 3d model, first i made design about a tower like structure which is exit in my University. Bangladesh. We called it Kishan Tower, at present the tower is not exit in the university but we had lots of memories in it.
In this tower there a six different parts are need for whole structure

For base to tower tip structure are made like this

This is the base which is bind all other structure in it

Six different part are attached in different place according to design, check it in the assembly for ensure that is correct or wrong

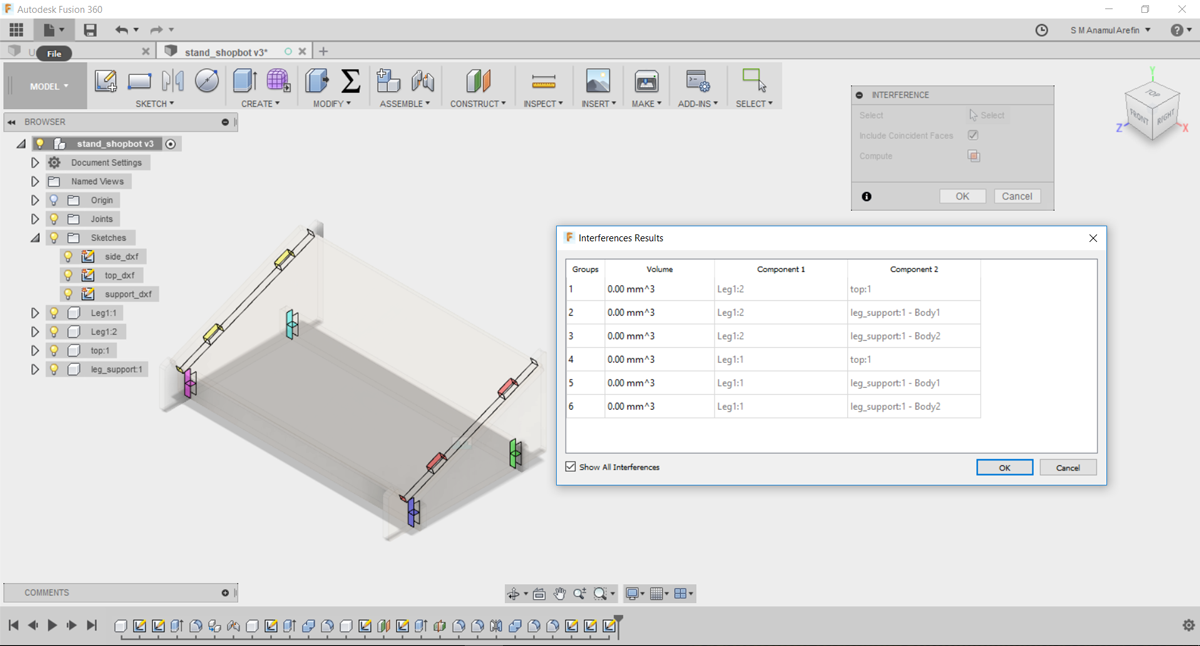
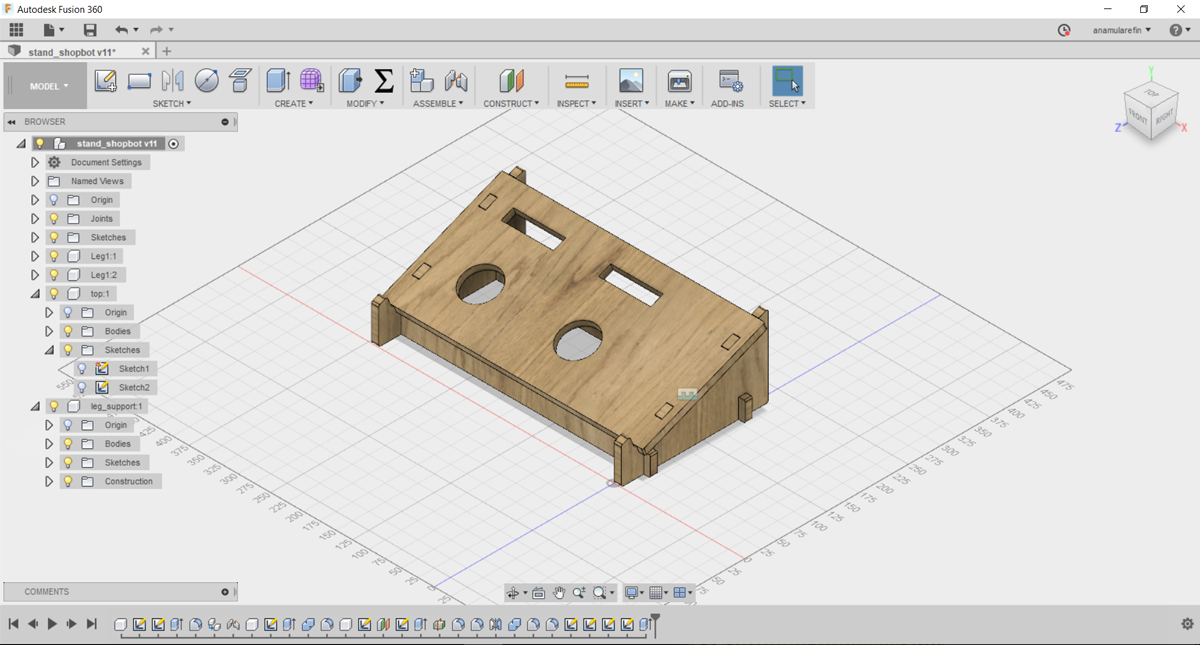
Here I design my shopbot assignment, Laptop stand, I share all thing here
1. First make top panel of stand and set up the unit in parametric in mm units

2. Add two side panel with attachment of top stand
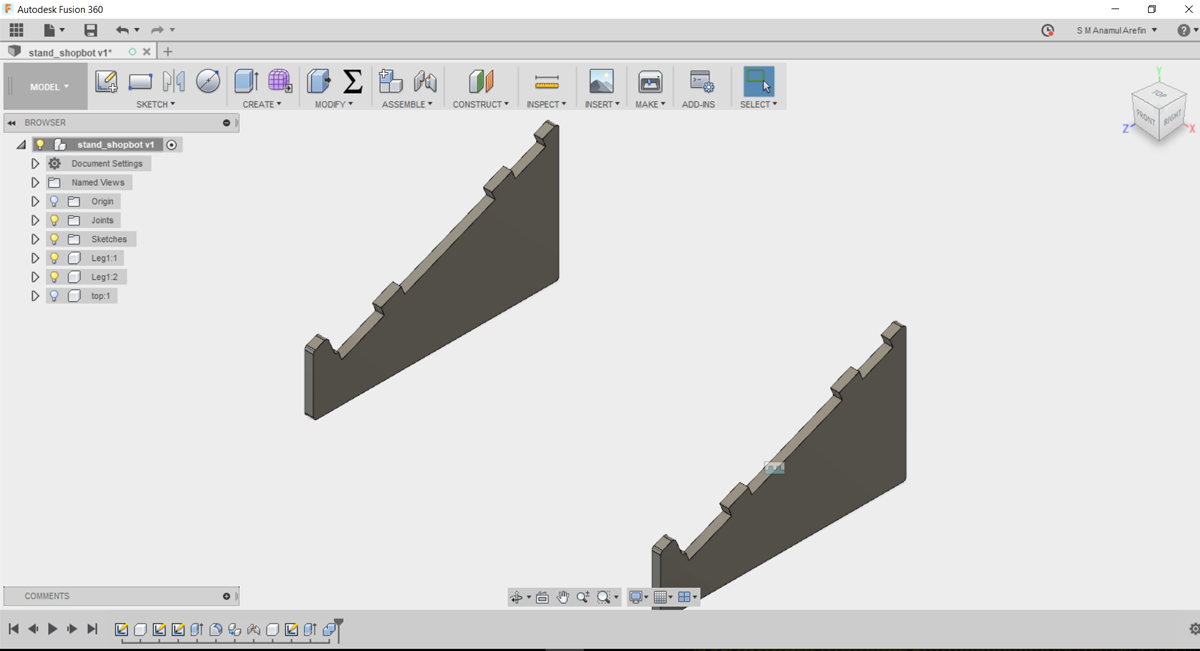
3. Making support in bottom of the stand
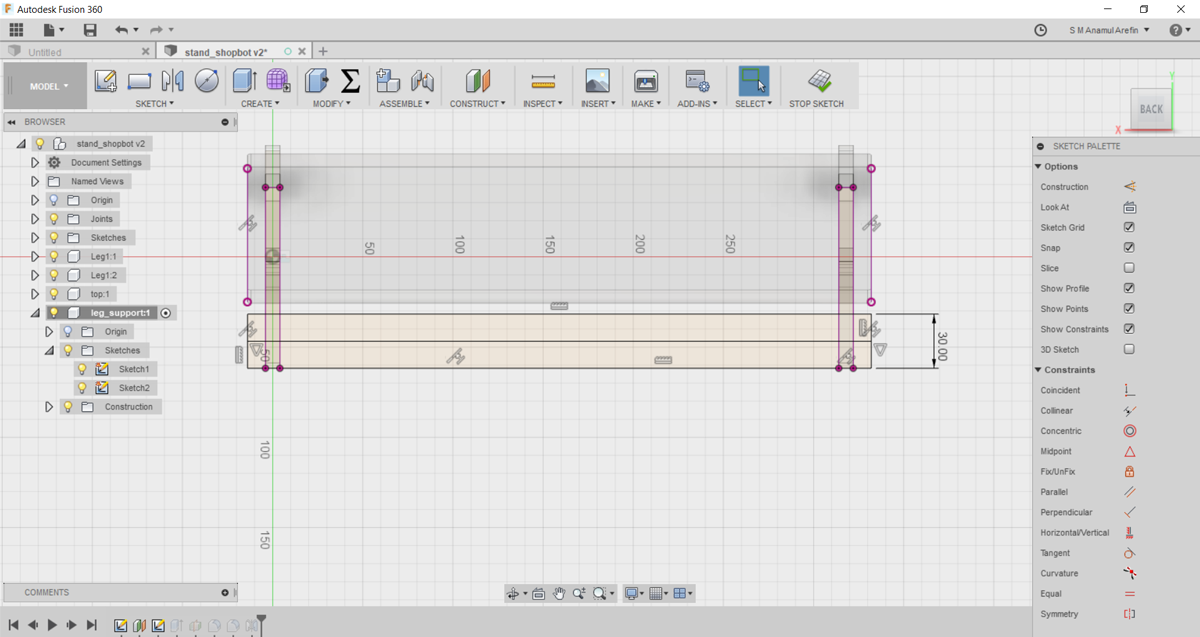
4. Upper construct for notch making in the stand
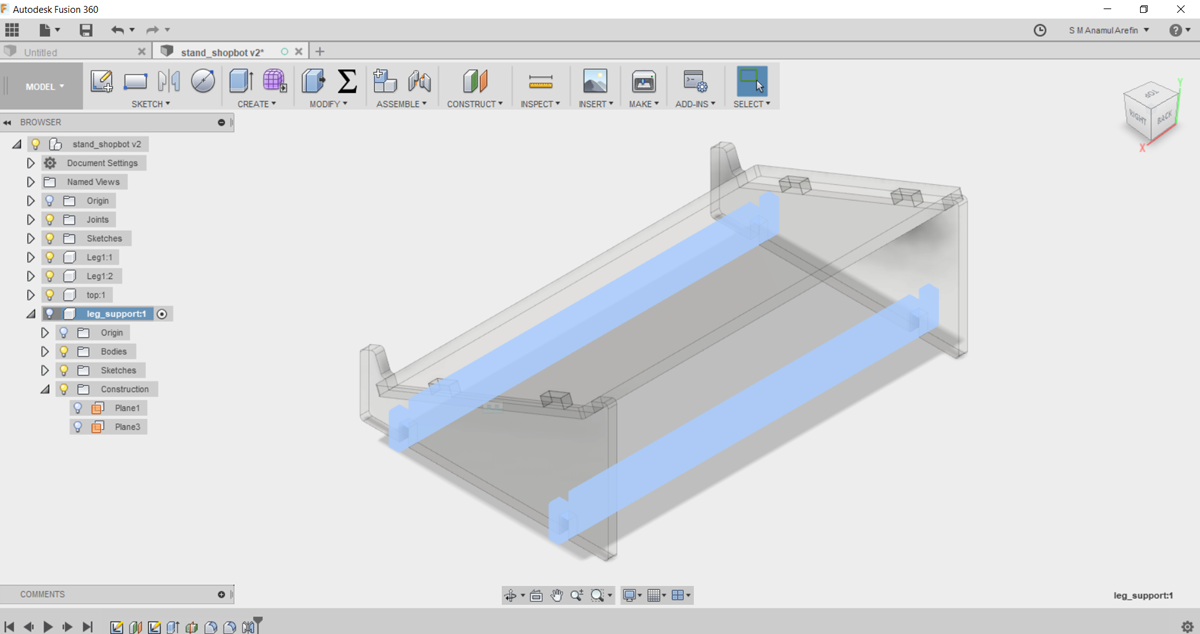
5. Interference with top and side panel
6. Final View of stand

7. Add extra cutting for fan and air ventilation
I'm also trying to edit video and audio, now for me it's learning for me. But last year I made a video about March for Science 2017
What this video where i edit it for a promotion activity of FABLAB SAU on March for science day.