Week 3: Computer-controlled Cutting
Special thank for support in this week goes to Aleksandra, Lana, Marcel and Lukas.
In this week we had following assesments:
Charactereizing of Our Lasercutter
My Part of Group Assignment: EngravingPress-Fit Kit Design
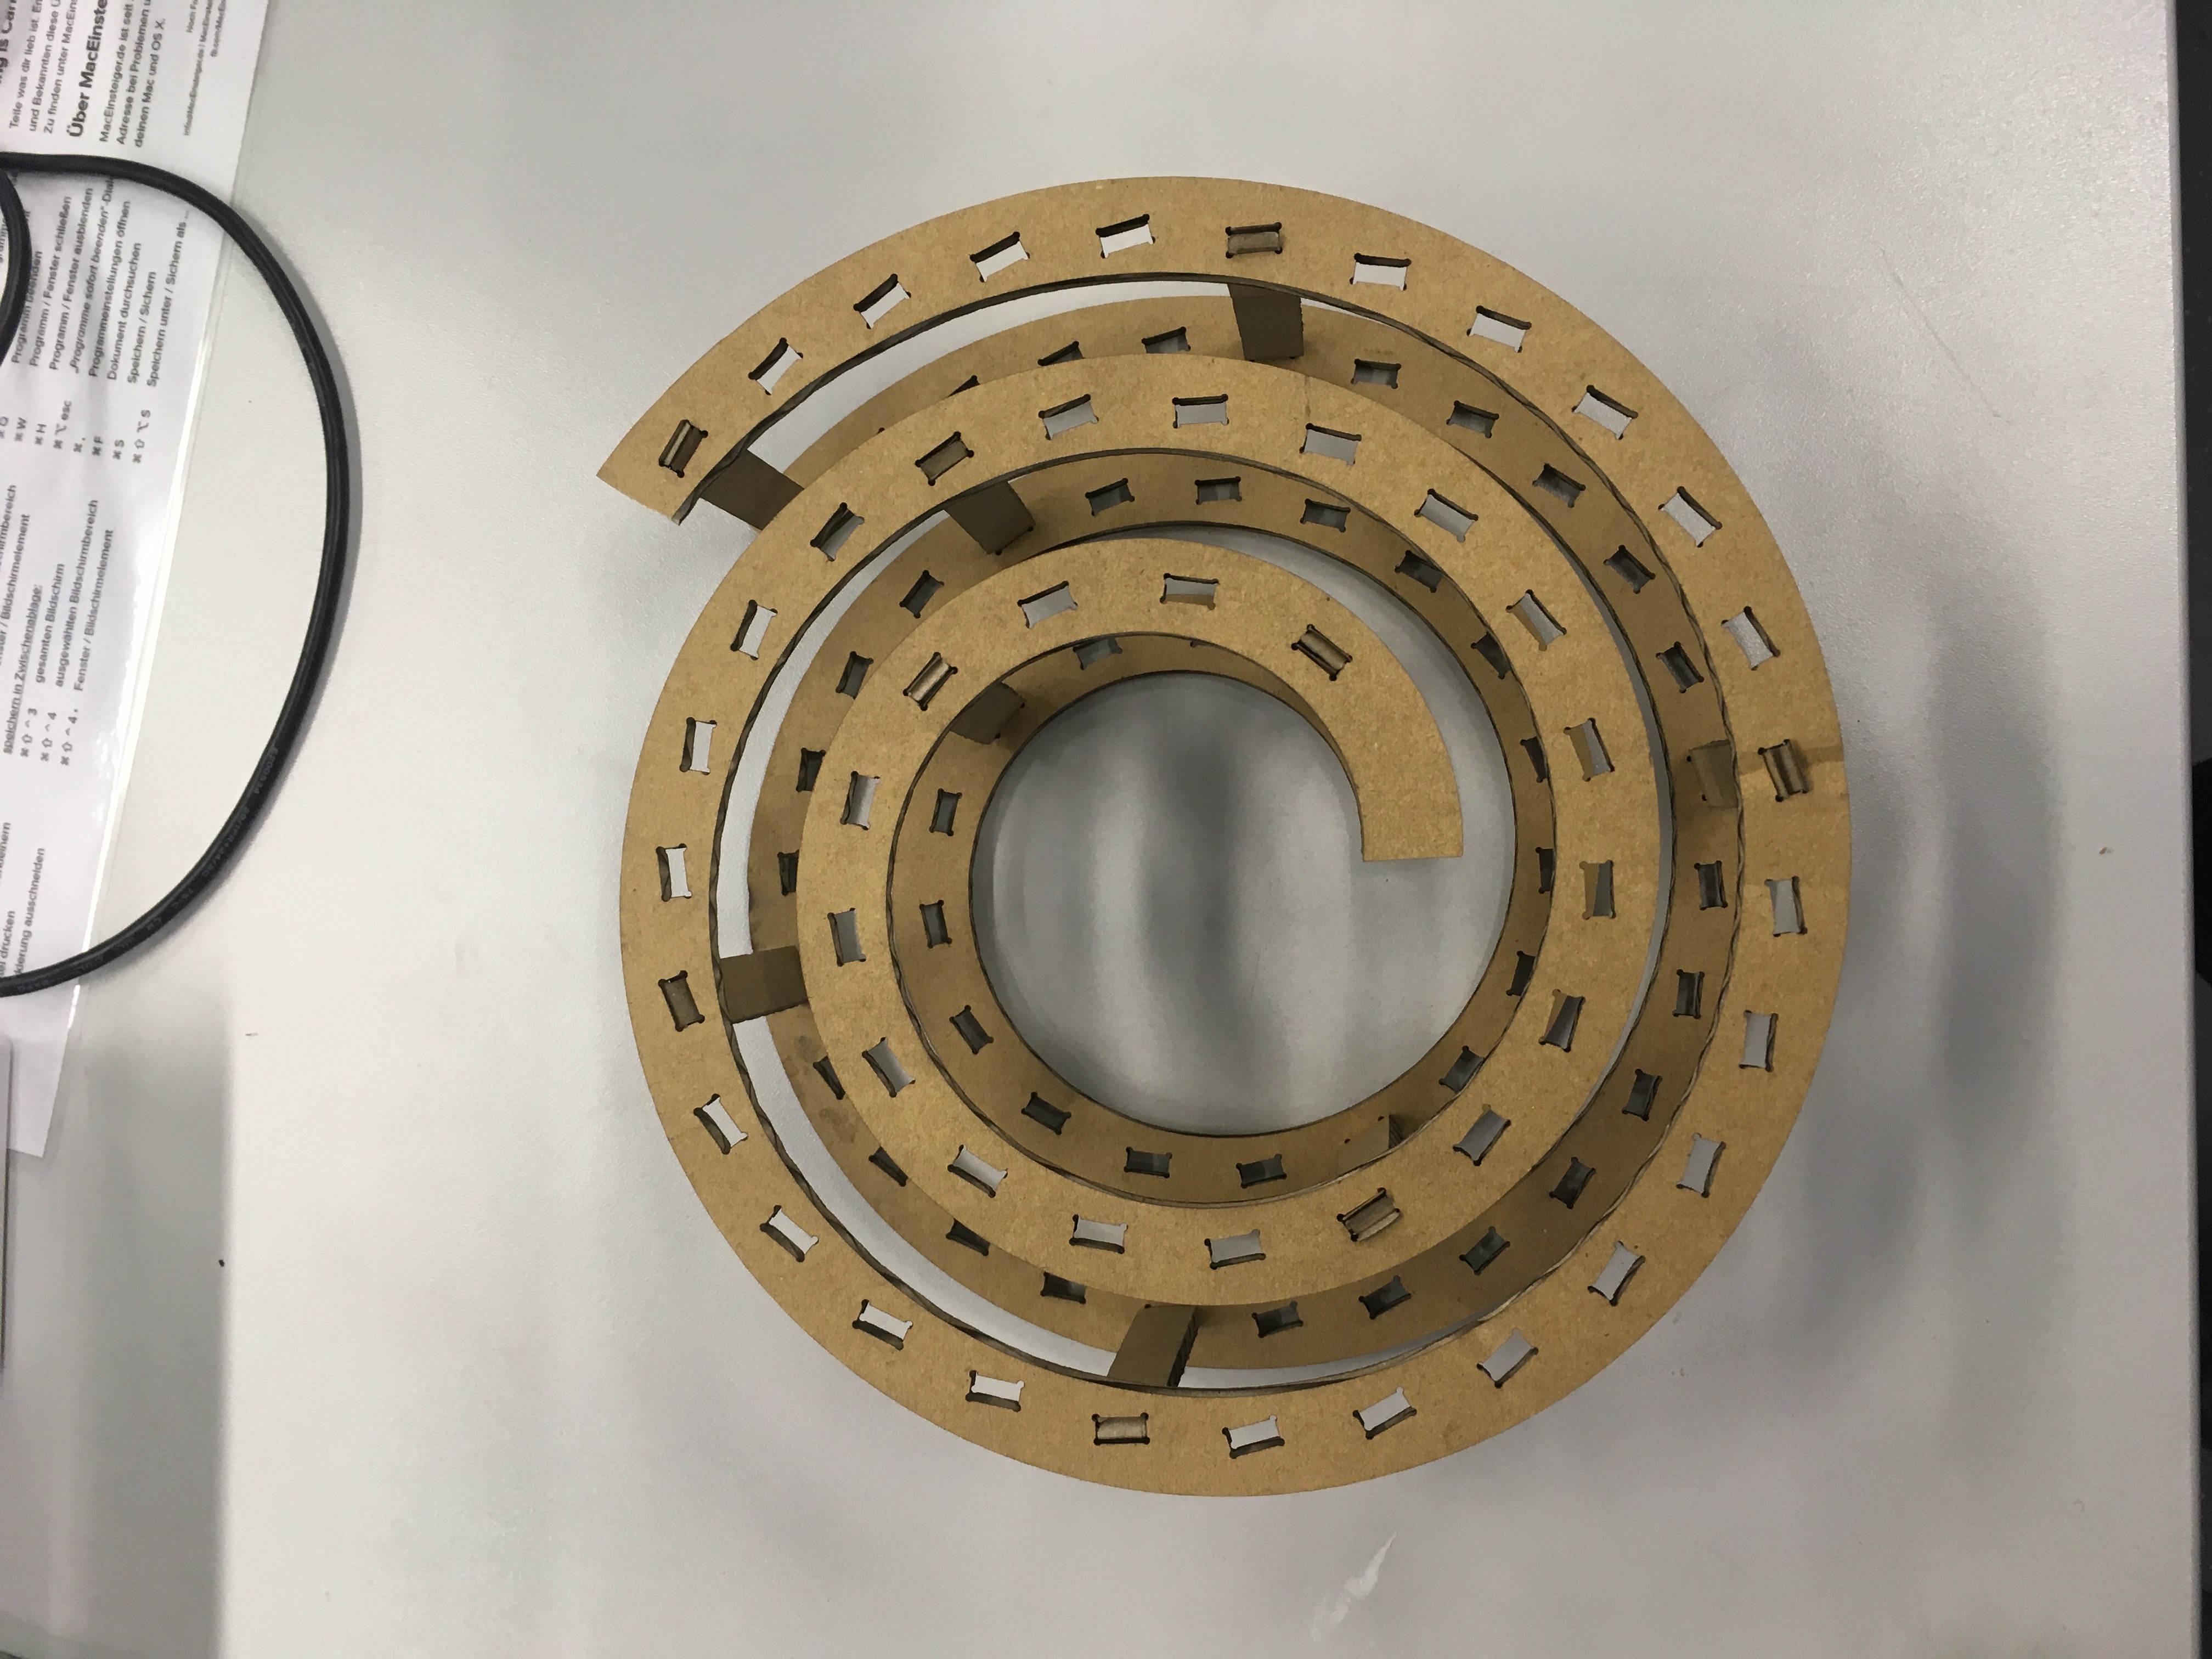
For the press-fit kit, we should design in this week I made some different sketches so far. Among them there were some which did not work for assembling. Following images show the parts of my press-fit kit. This press-fit kit was constructed with two different components. It was cut out of cardboard with the CO2 laser cutter Epilog Zing 24.
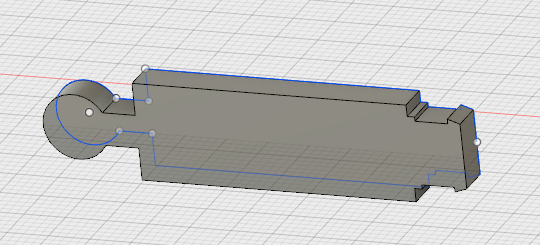
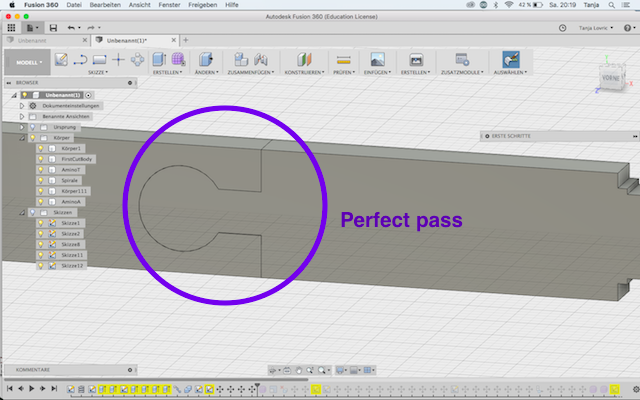
Following picture shows the first draft of the connecting part for two helixes.
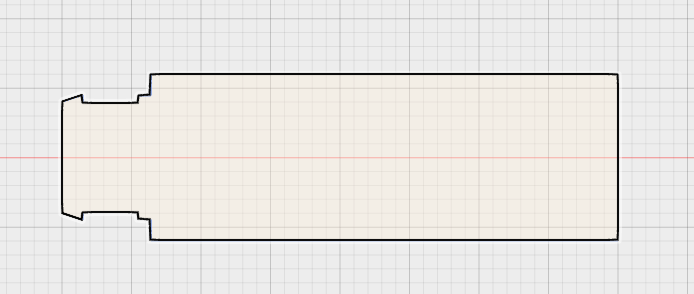
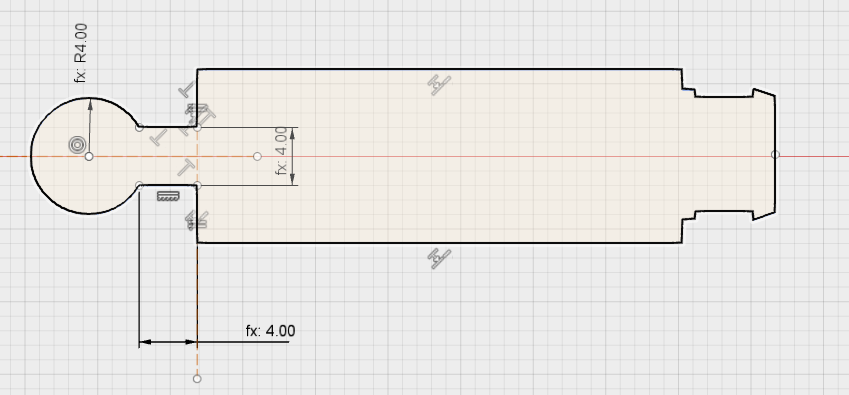
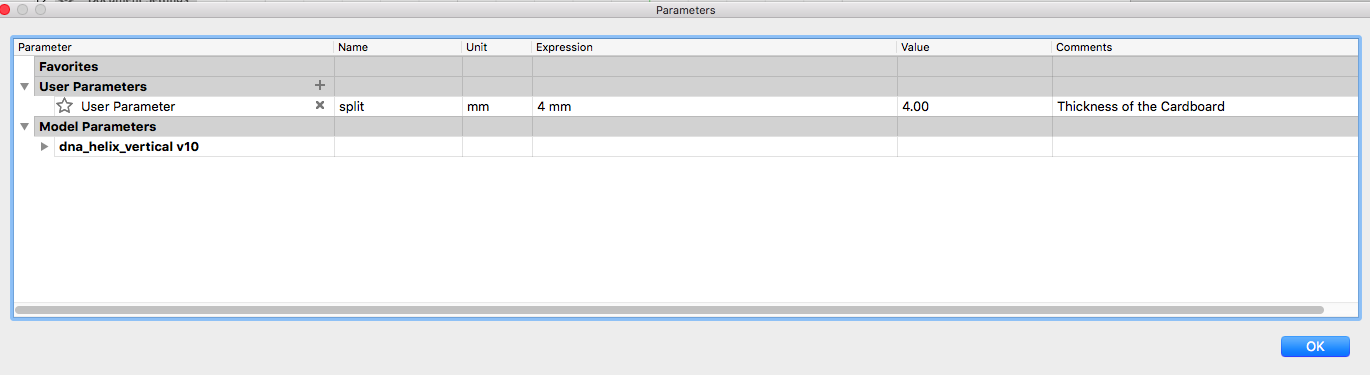
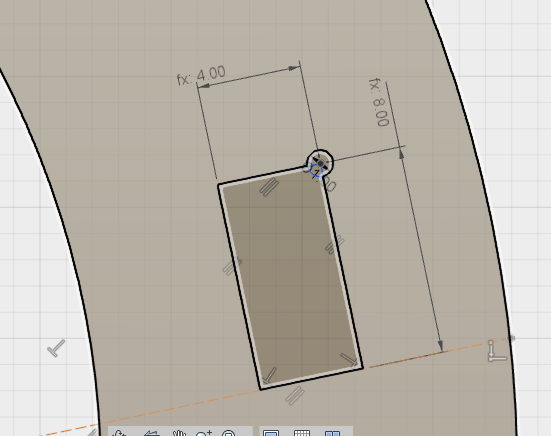
One dimension is parametric determined. It depends on the thickness of used cardboard. The split in the helix is rectangular with one side = thickness of the cardboard and the other side = 2* thickness of the cardboard. I determined with the same parameter also the dimensions of the connectors which should fit to the split of the helix.
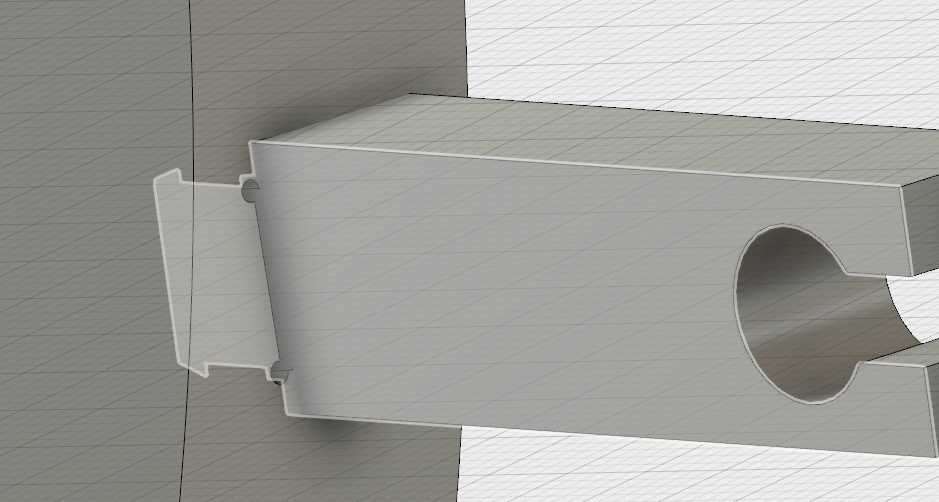
Next image shows 3D version of the connecting elements. Later I did not have much time for changing the press-fit connecting parts, so I assembled those two into one.
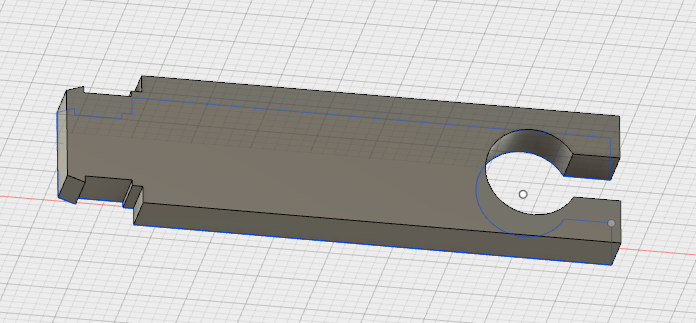
The rectangle cut in the helix body I modified by adding arcs on each corner.
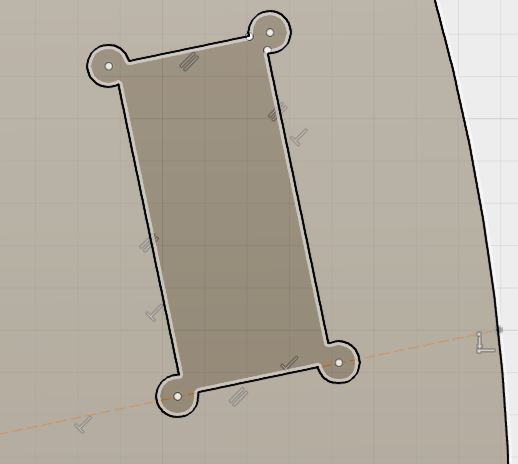
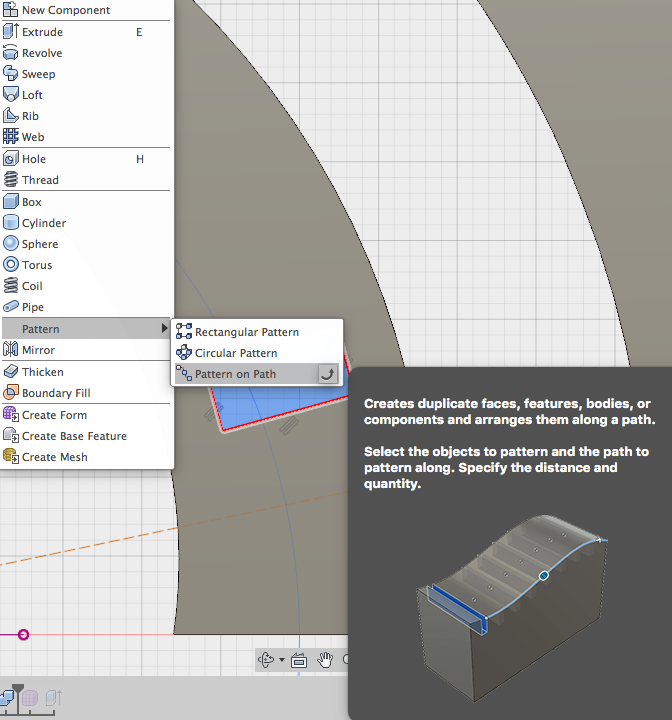
For the multiplying of the first cut I used Fusion 360 menue "Create" and the command pattern/pattern on path. For using this command the sketch had to be stopped.
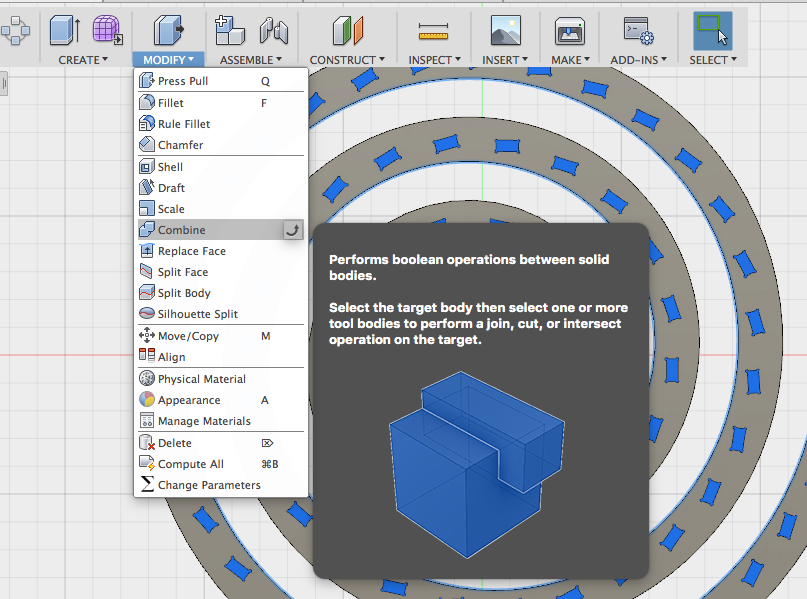
For creating of the first cut I decided to design a body which I merged with the helix using the command "combine" with the option cut in menue "Modify".
Before sending the sketch (dxf-file) to the cutter I wanted to test the connection. That is why I created the 3D model after the 2D sketch.
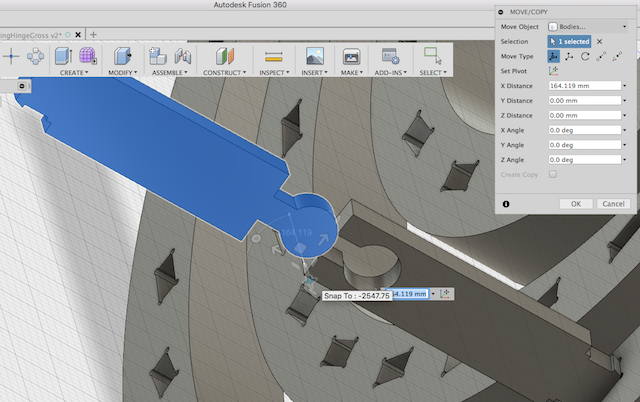
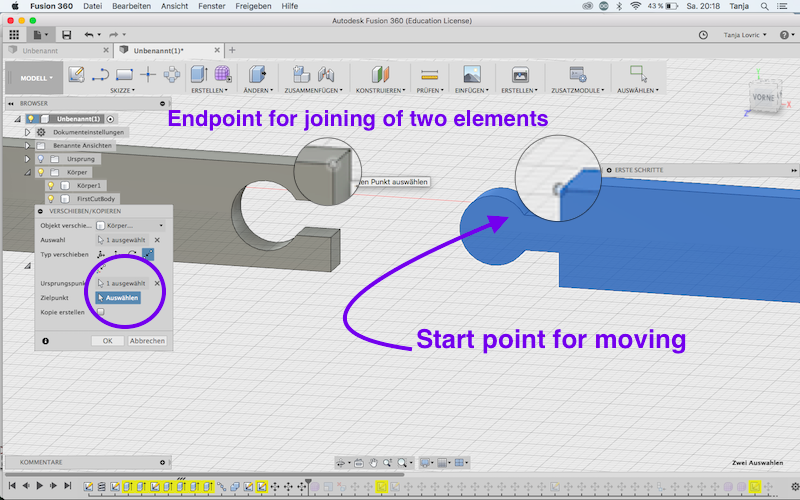
For connecting two elemnts in Fusion 360 there are construction points which can be used for precise connection. Below you can see one connecting sequence.

In order to increase the flexibility of the helix, I had planed to use the cutting technique, which is known from woodworking. This is known as living hinges. I have designed one of the used forms which can be seen in the following image and cutted it with cardboard.

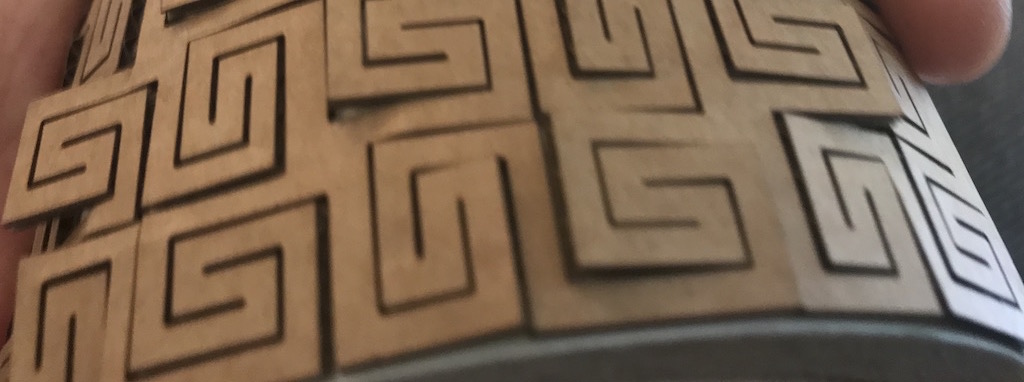
As the test of living hinges was finished I realized that it would not be possible to use it for flexibilisation of the helix because of the minimum distance of one hinge strip to the edge of the part, which exceeded the width of the helix strap.
Laser Cutting
When you work with a laser cutter, you have to notice many safety instructions. For this there are instructions which has to be considered in Fablab Bottrop: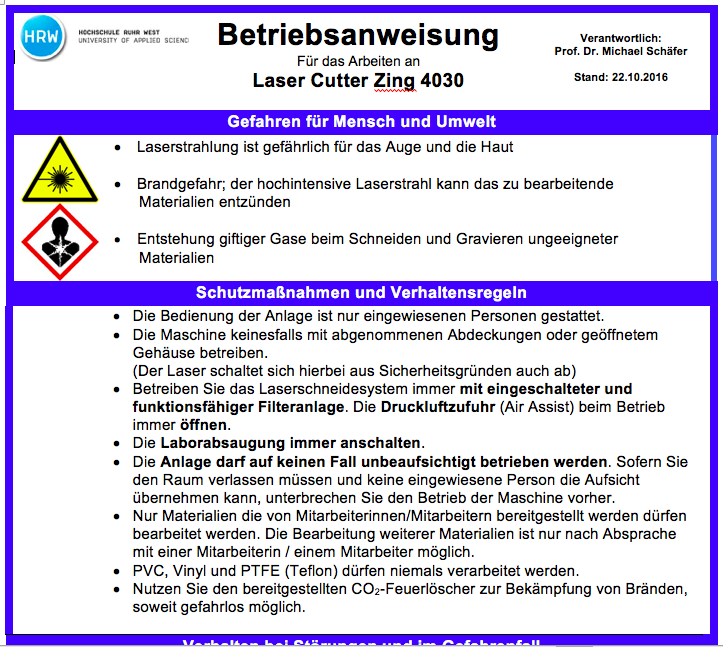
Safety Instructions for usage of laser cutter, Fablab Bottrop
Just the digest of those instructions here:
"• Always operate the laser cutting system with the filter system switched on and functioning. Always open the compressed air supply (Air Assist) during operation. • Always switch on the laboratory suction.
• Under no circumstances should the system be operated unattended. If you have to leave the room and no instructed person can take over the supervision, interrupt the operation of the machine beforehand.
• Only materials that are provided by employees may be processed. The processing of further materials is only possible after consultation with a member of staff.
• PVC, vinyl and PTFE (Teflon) must never be processed."
I also f found very good safety instructions here Santa Clara University (english) and here (german) for working with laser cutter.
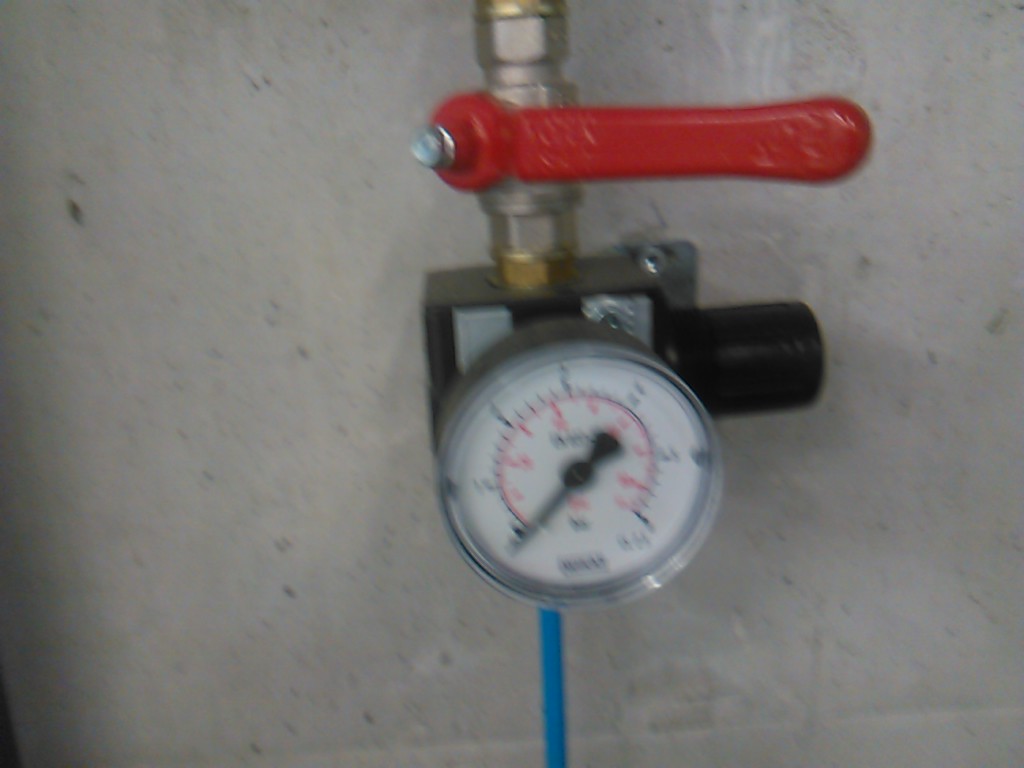
Plug Valve for supply of Airassist for Laser Cutter with commpressed air.
As I did not described the laser cutting software Visicut in my individual part, I am going to describe it in the following using the image which I designed for the Group Assignement.
For our laser Cutter Epilog Zing 24 we use AddIn for Inkscape made by RWTH Aachen called Visicut.
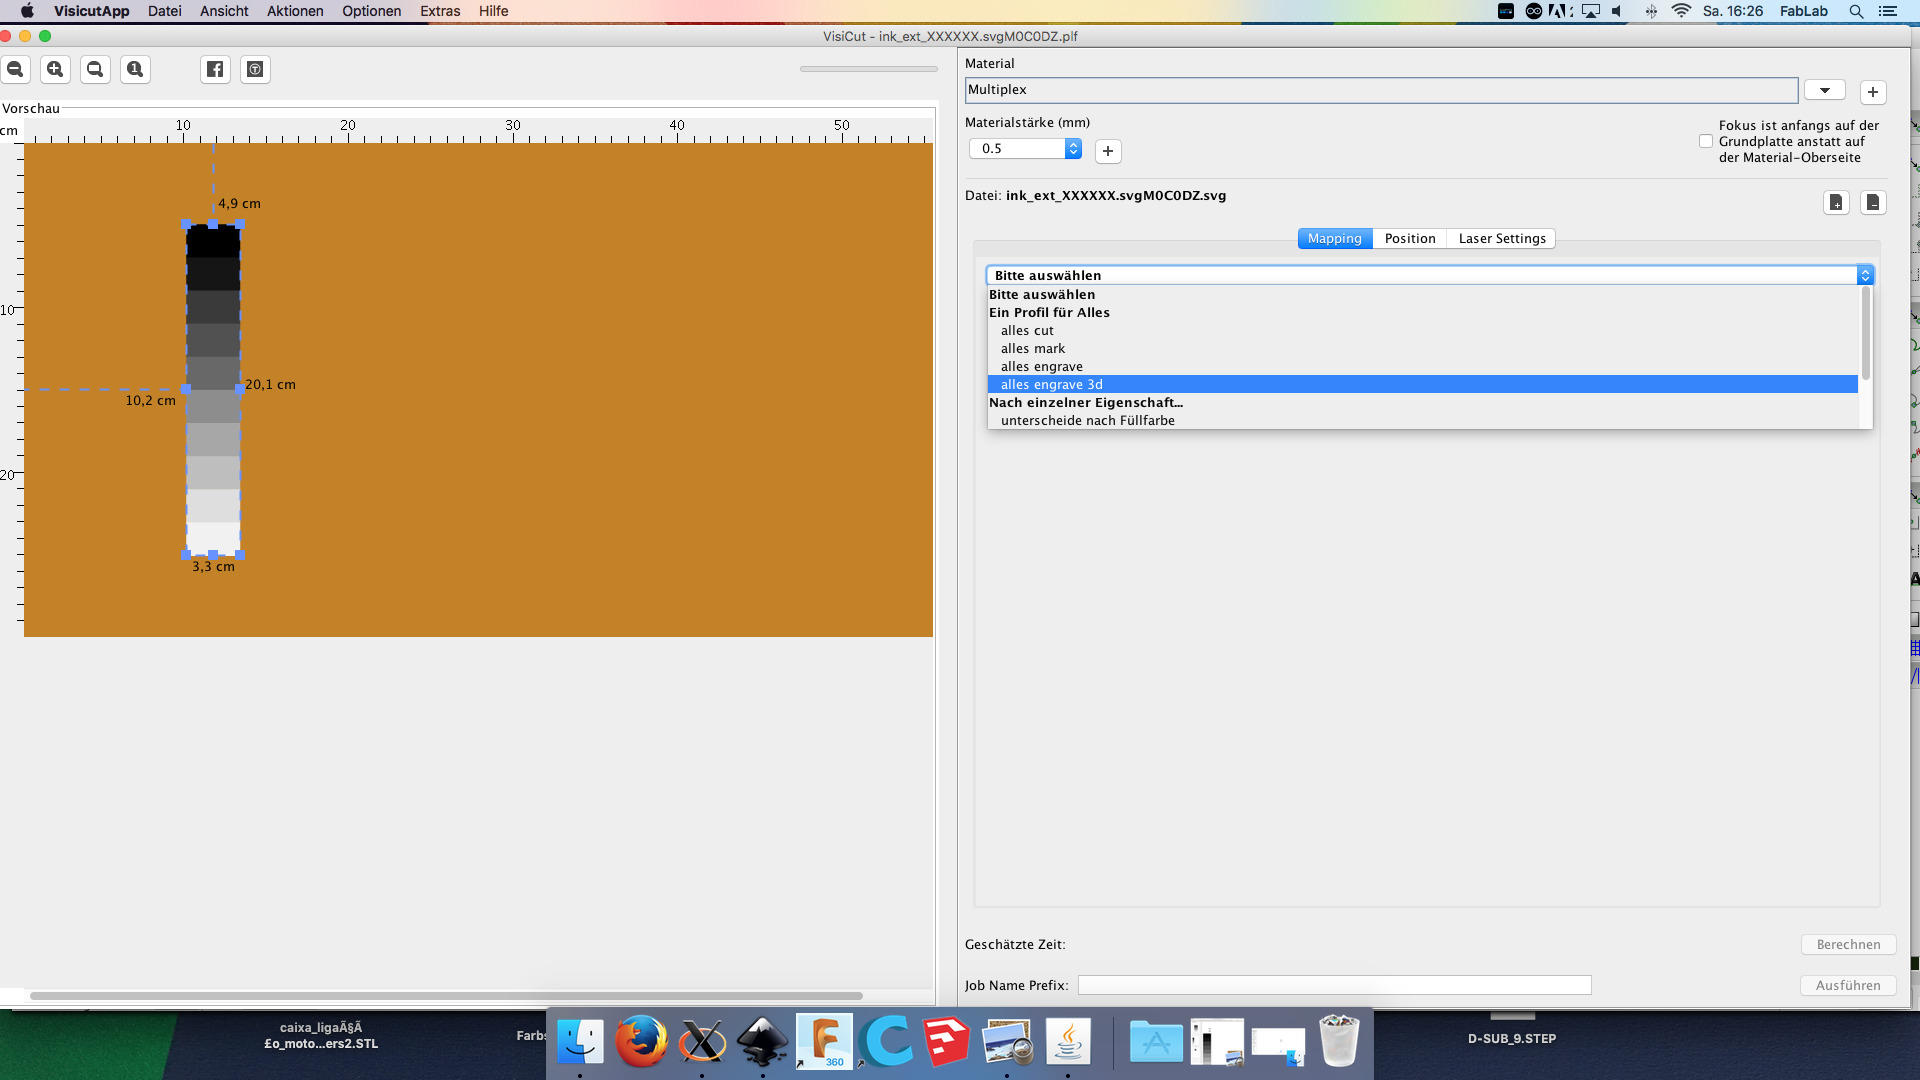
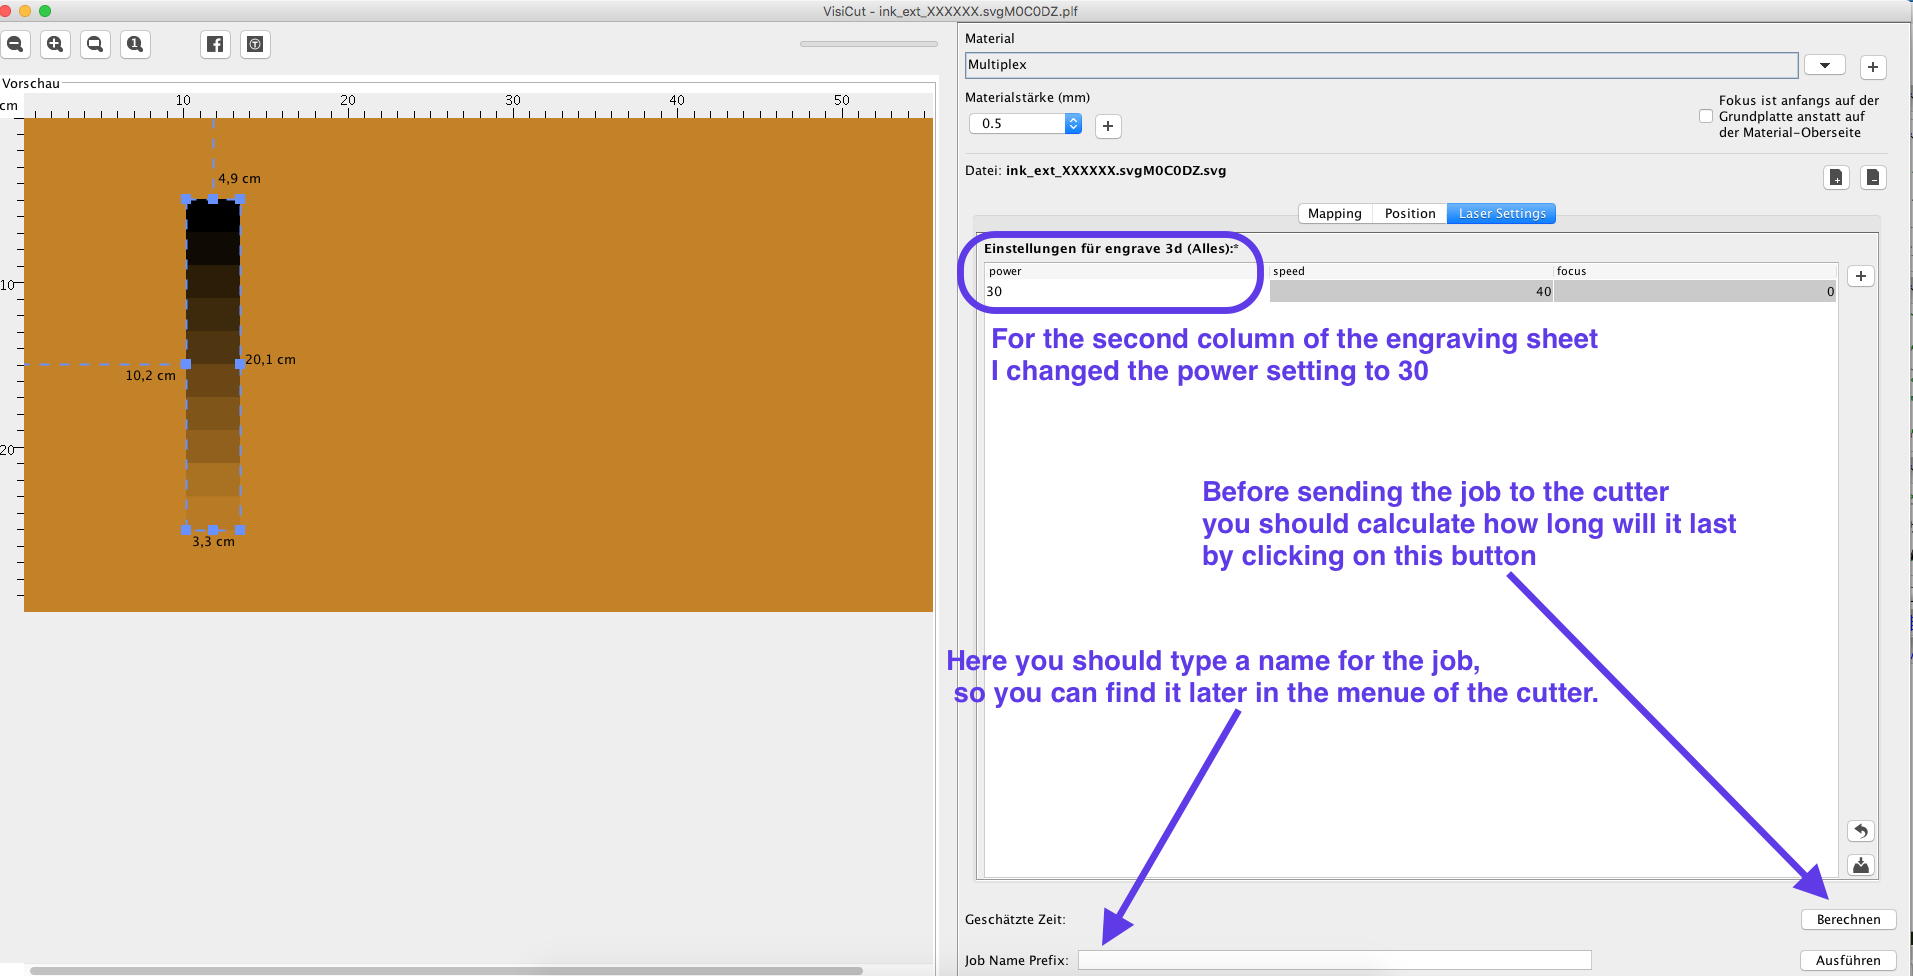
First I imported the svg-file into Incscape and sent it to Visicut. In Visicut I could do the settings such as position of the design, laser frequency, kind of material, power and speed.
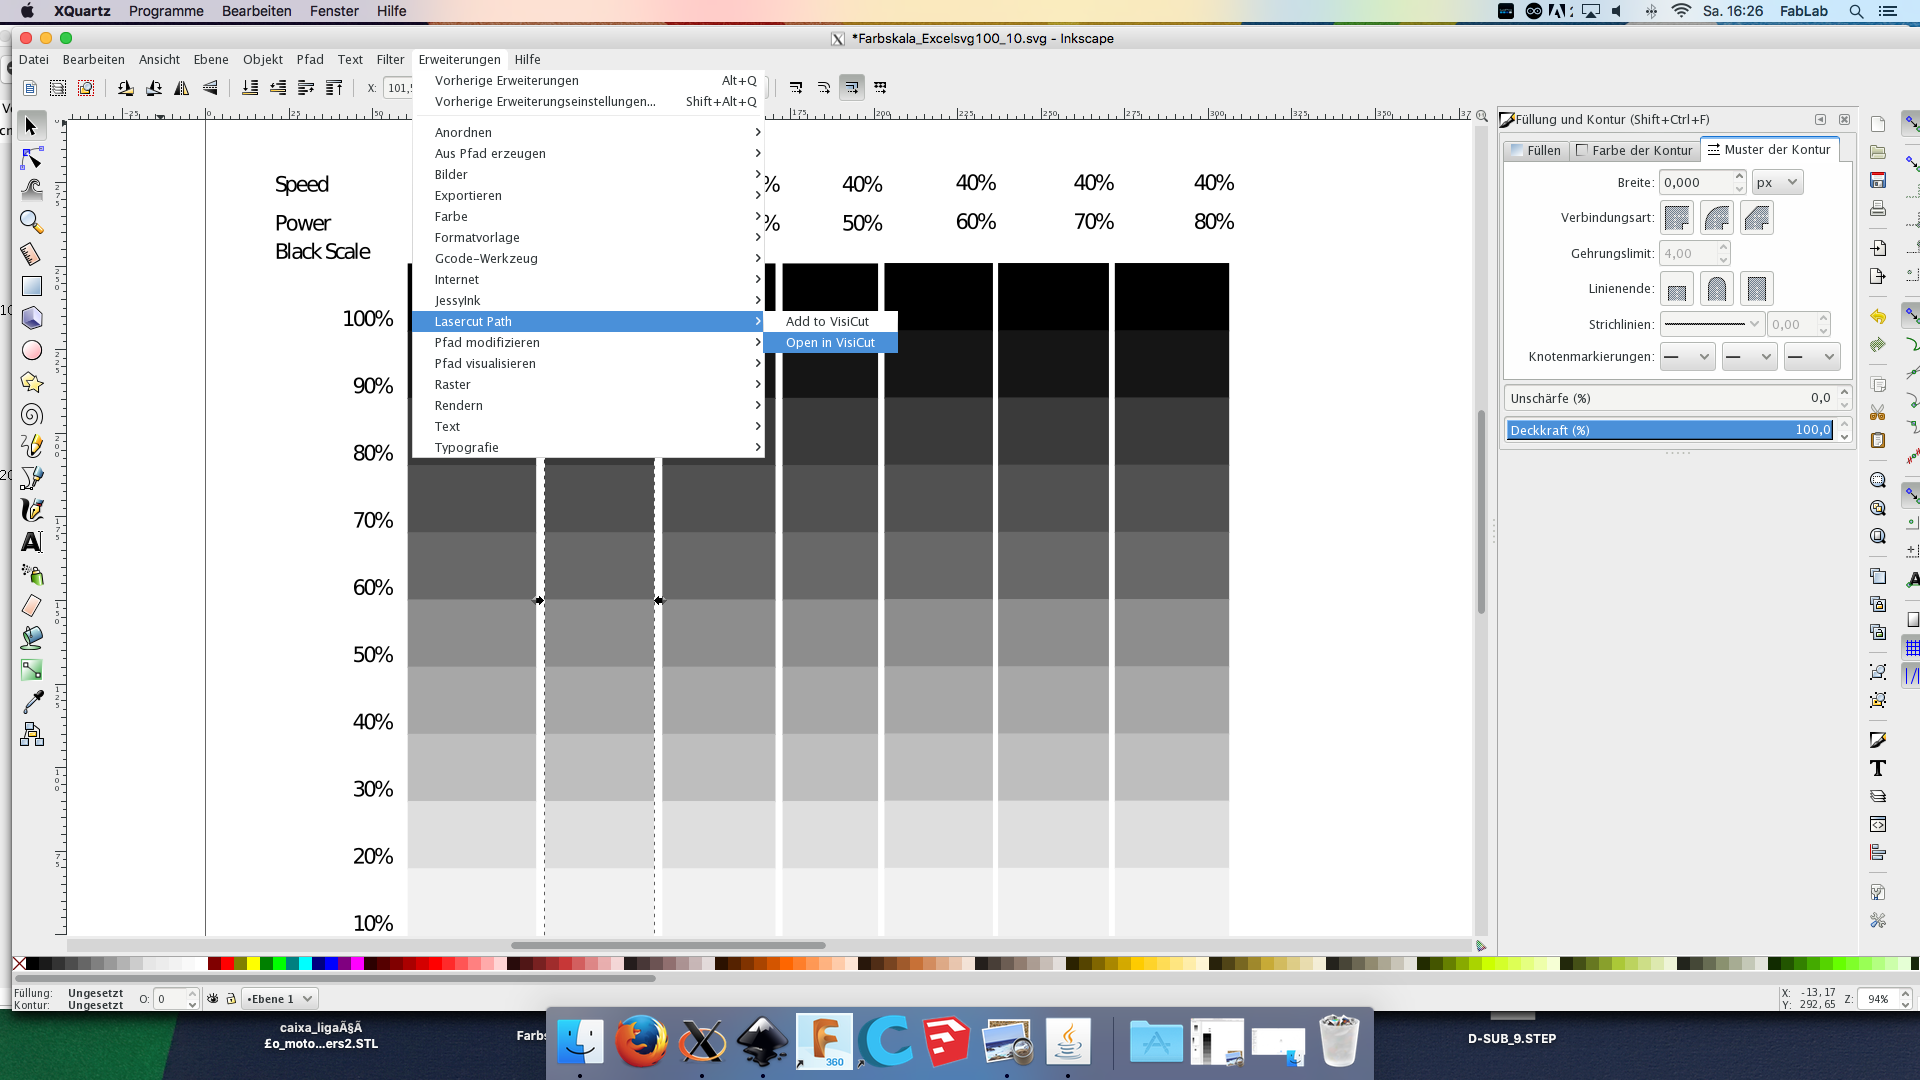
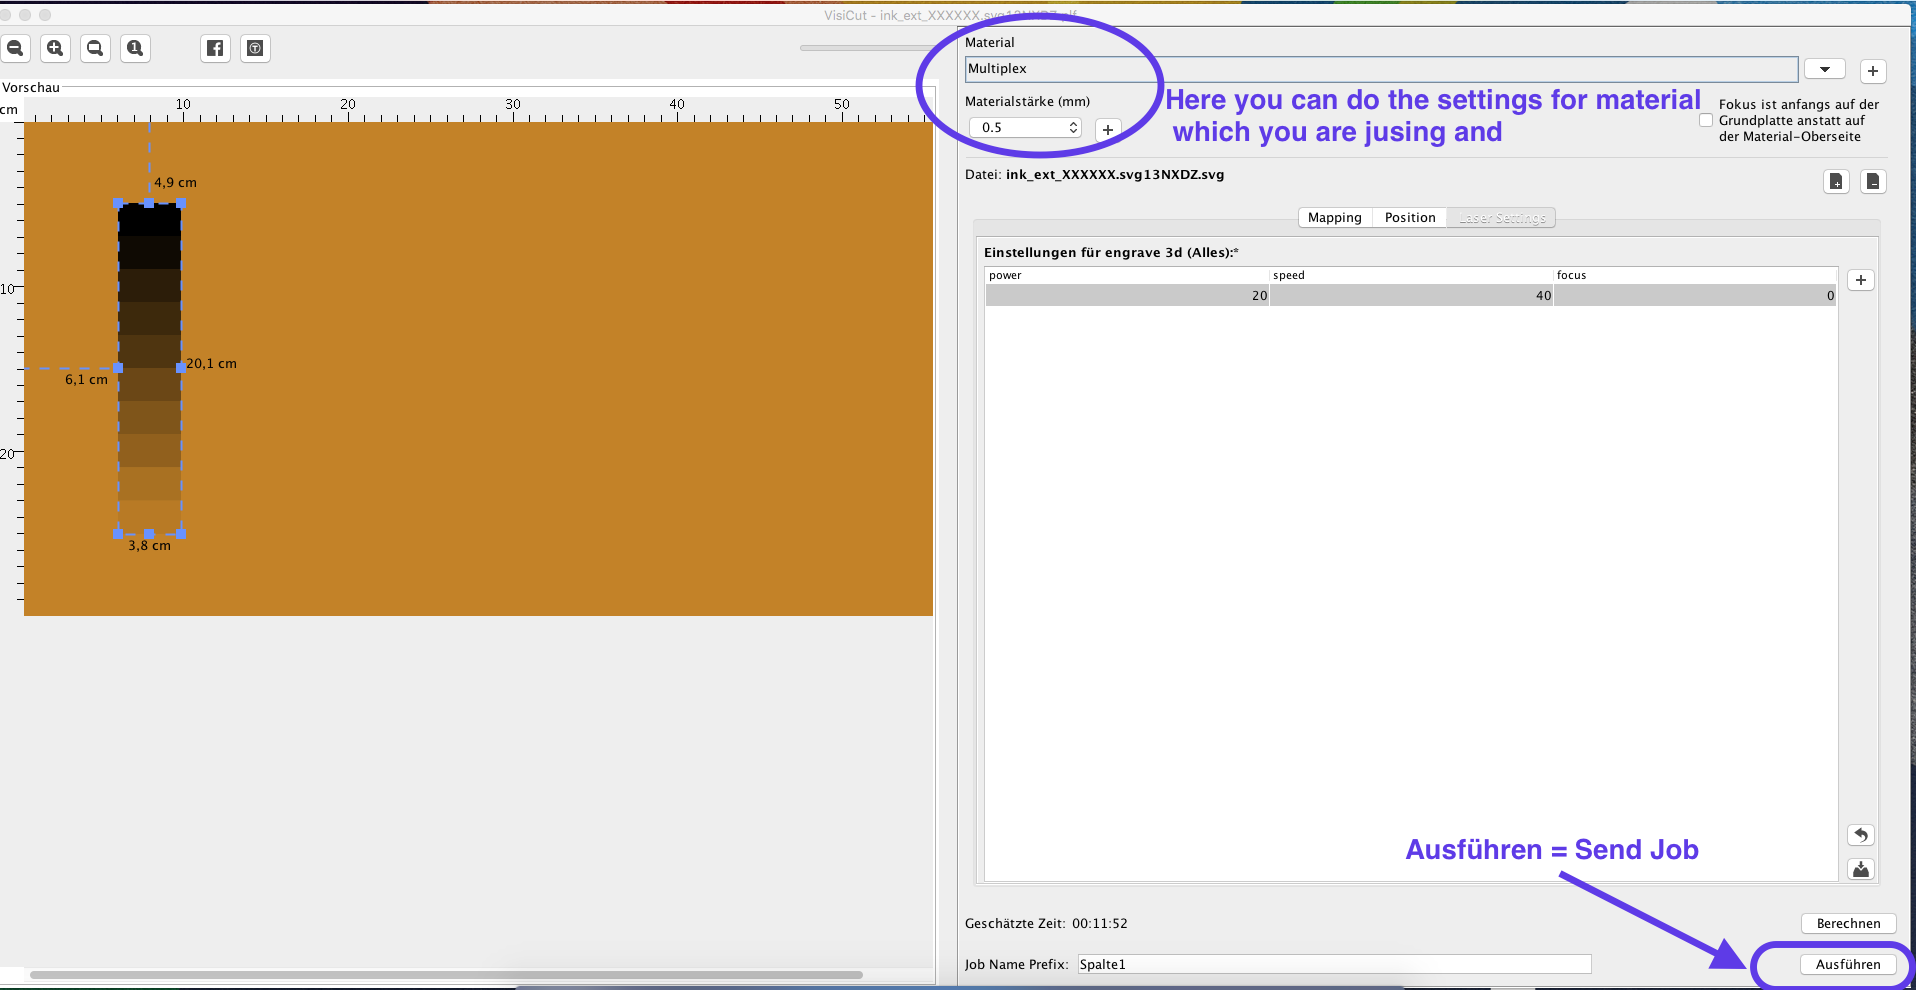
The following images show the settings for engraving of the group assignement where I had to import each column of the sheet separately.
This is how the finished press fit kit looks like:

In this video you can see just another moving direction of the same press-fit kit. At the end of this site you can download the Fusion 360 file for both living hinge and helix with the connectors. I tested the living hinge but I could not assemble it to the helix. This is what I have to catch up in next days.
Some moved images of the kit with a youtube video one can see below.
It also should be possible to make another construction with this kit. The following Video shows just higher amount of levels. I am going to add another art of assembling it as soon as our laser cutter is repaired.
.
.
Vinyl Cut
In FabLab Bottrop we use Cameo Silhouette 3 and Silhouette Studio® design software. It is appropriate for cutting of about 100 materials and pieces with size less than 30.48 x 30.48 cm (12-in. x 12 in.) Maximum media thickness is 78.75 mm.
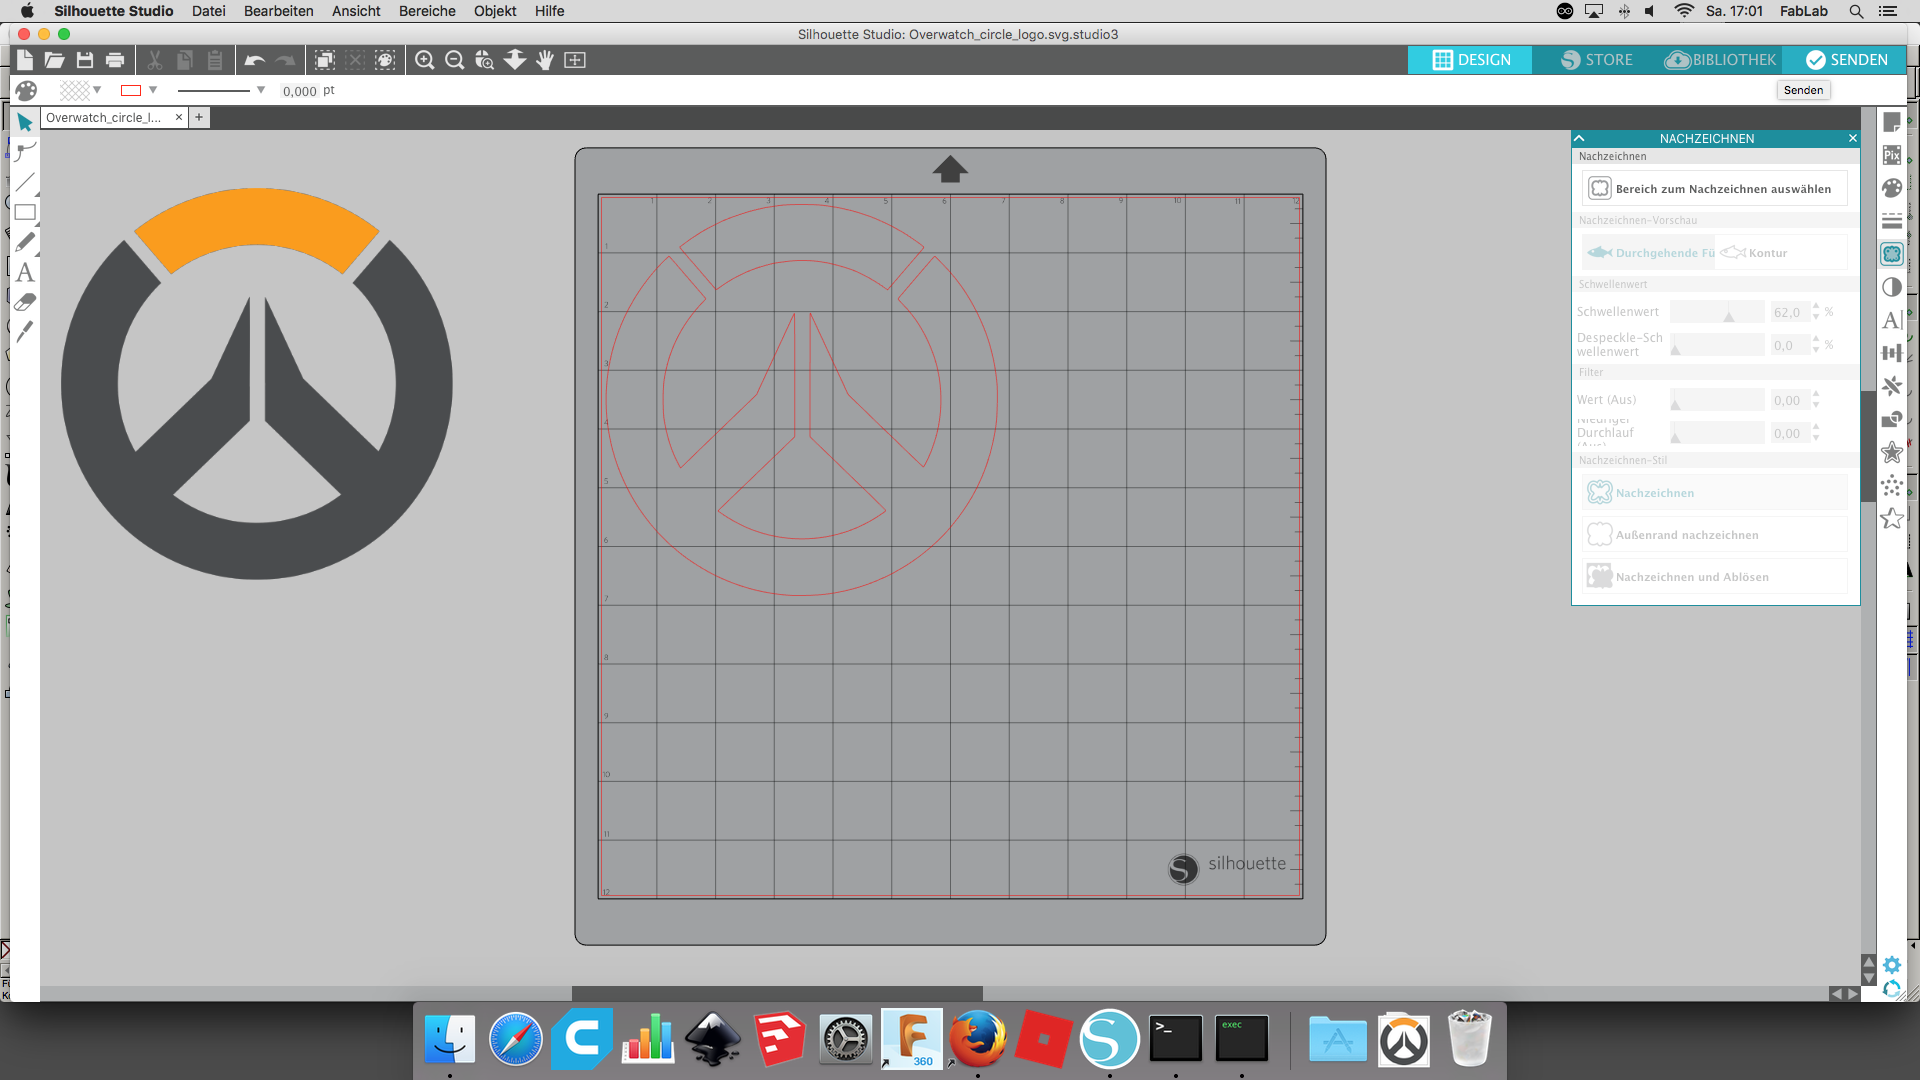
First I searched for appropriate image file with the logo. I had to download this logo here here and could not change it as my son wanted to have the original logo. Image file (svg) had to be imported into Shiloutte Studio software.
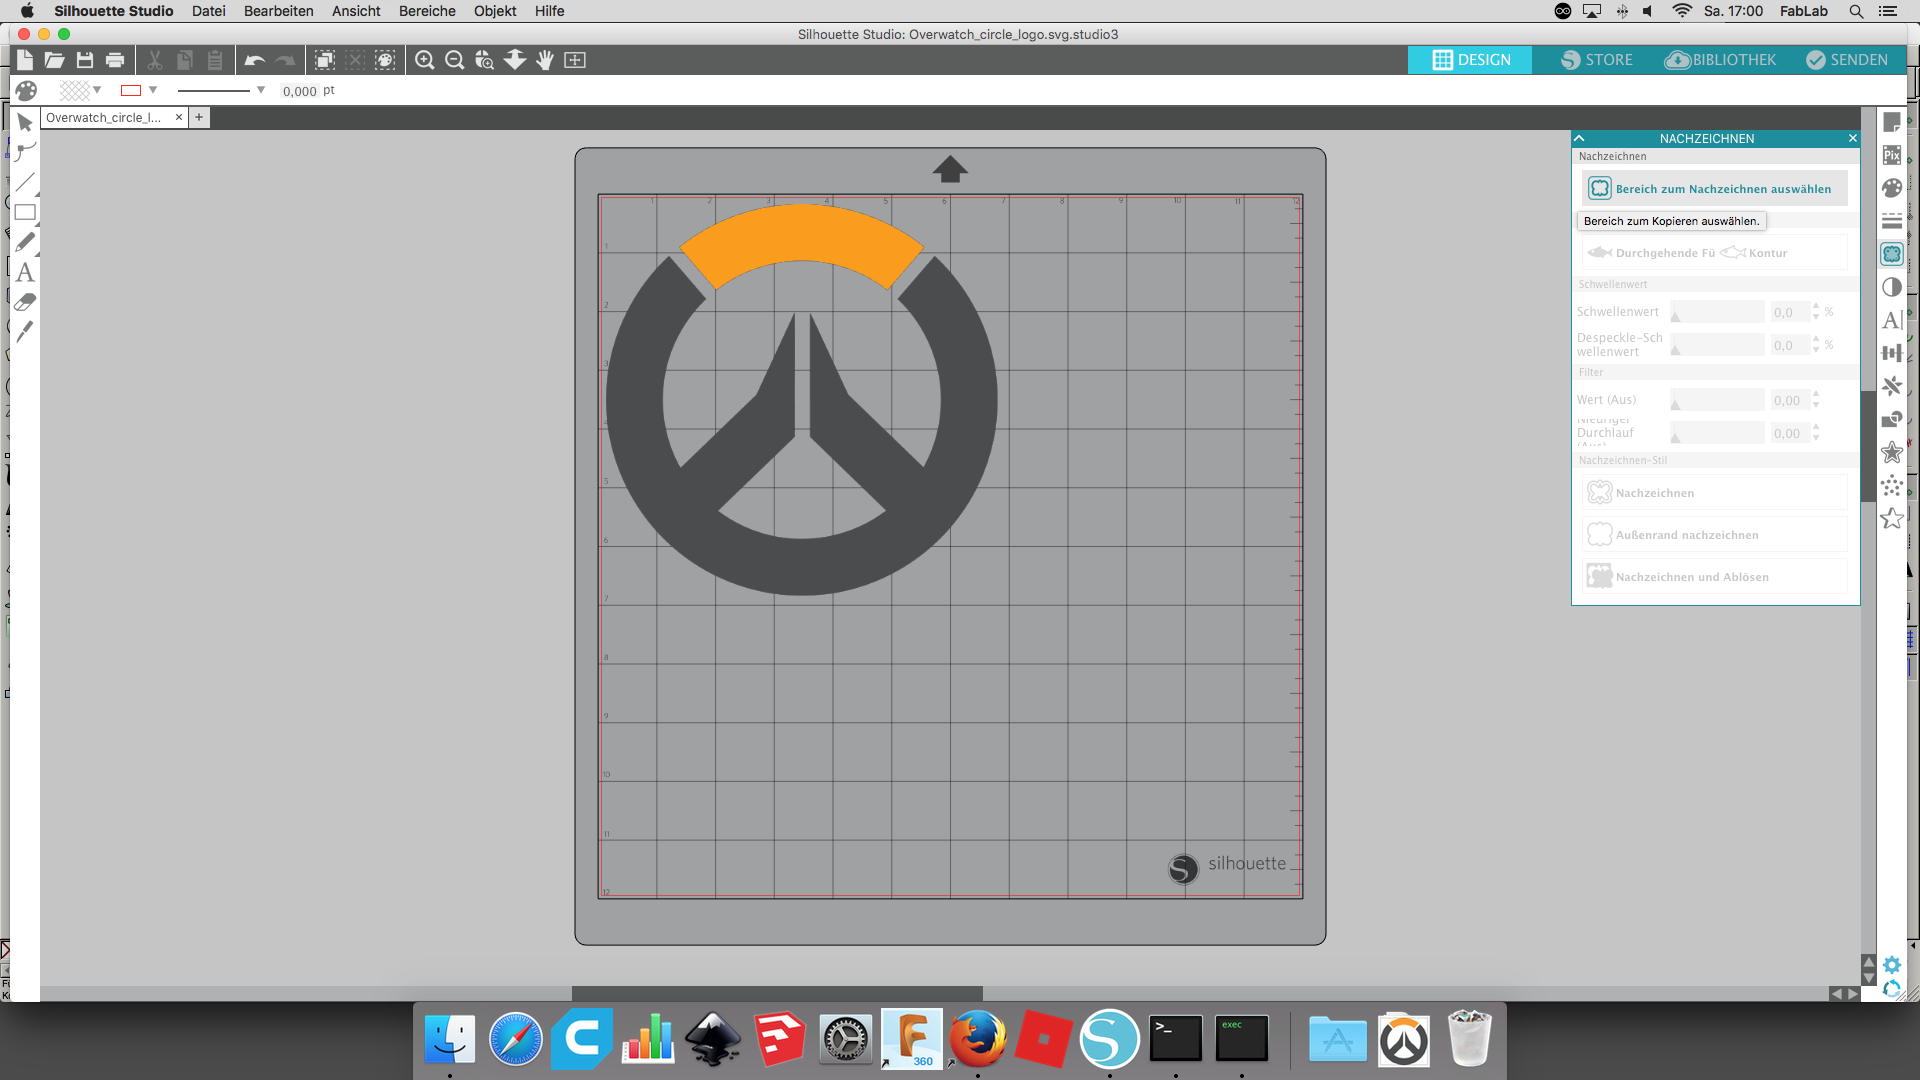

Using menue "Retrace" the image was reduced to vector paths (red line path).
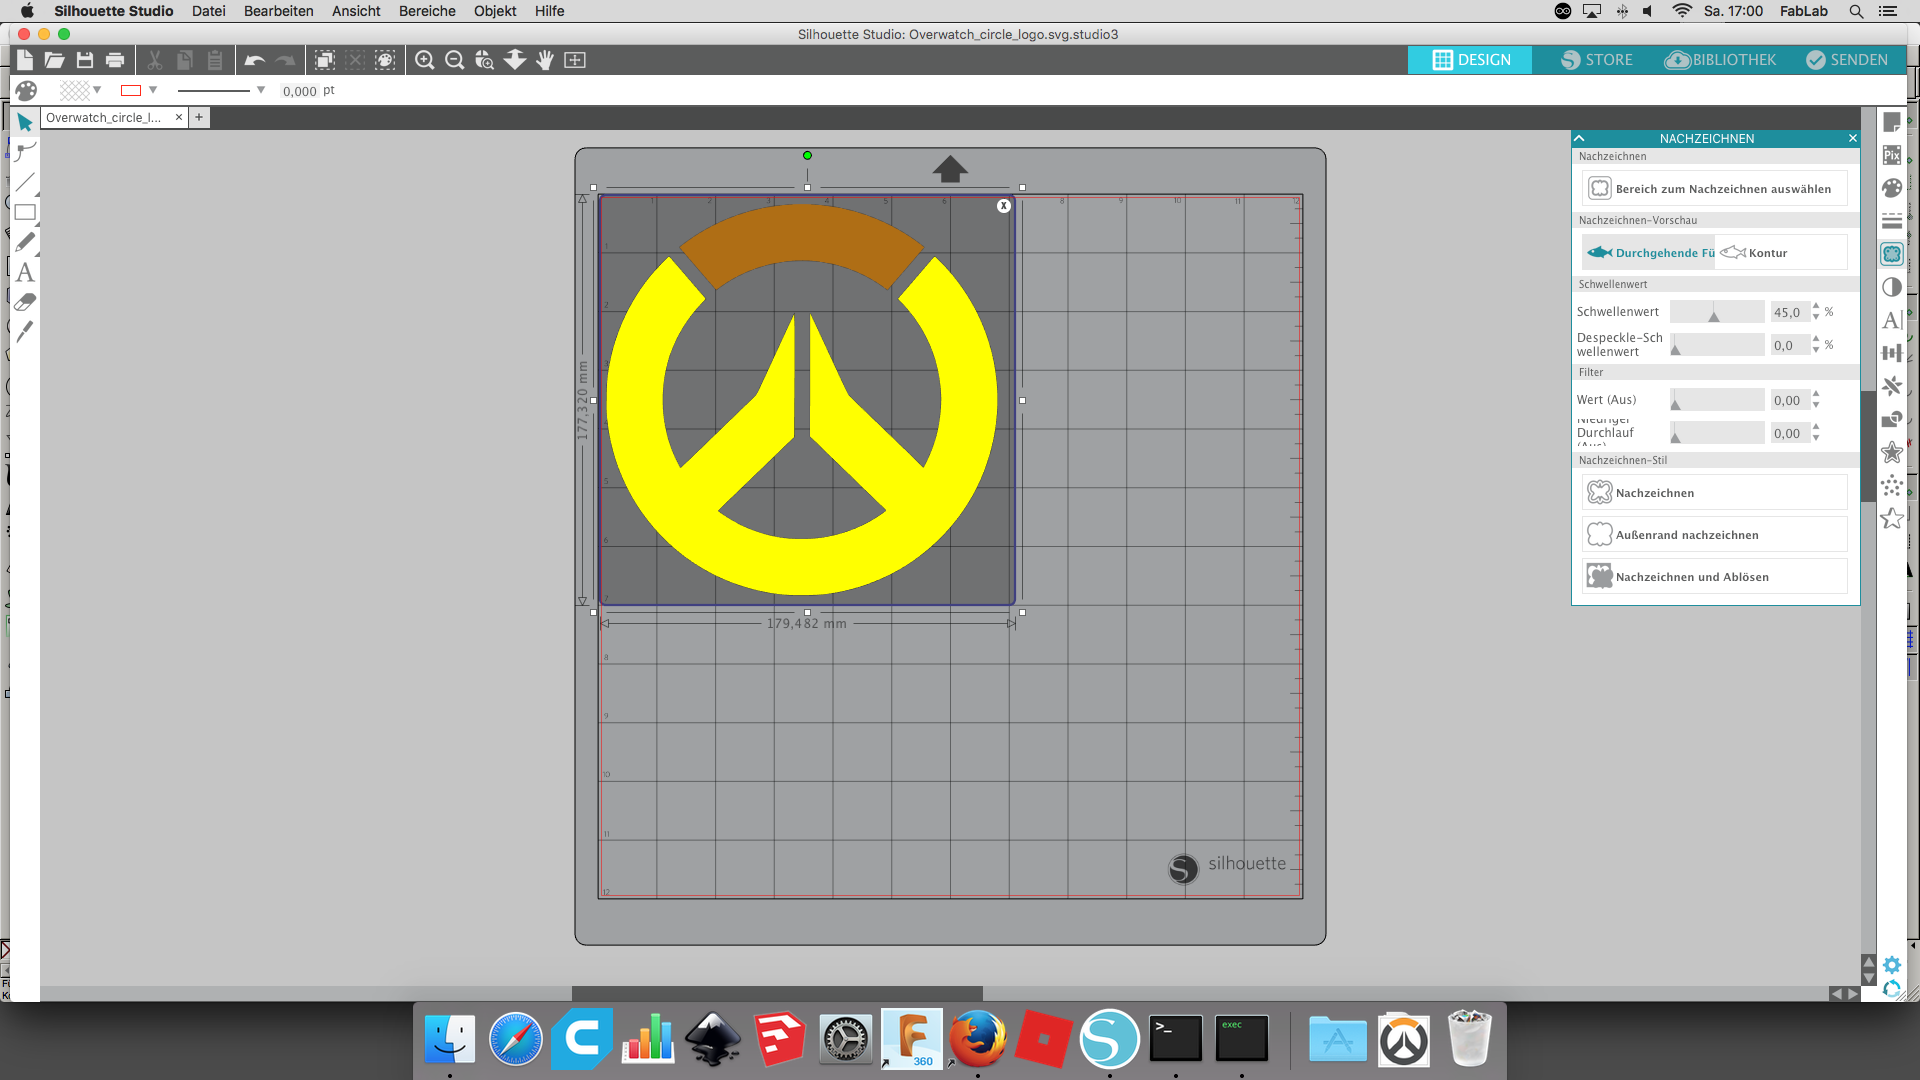
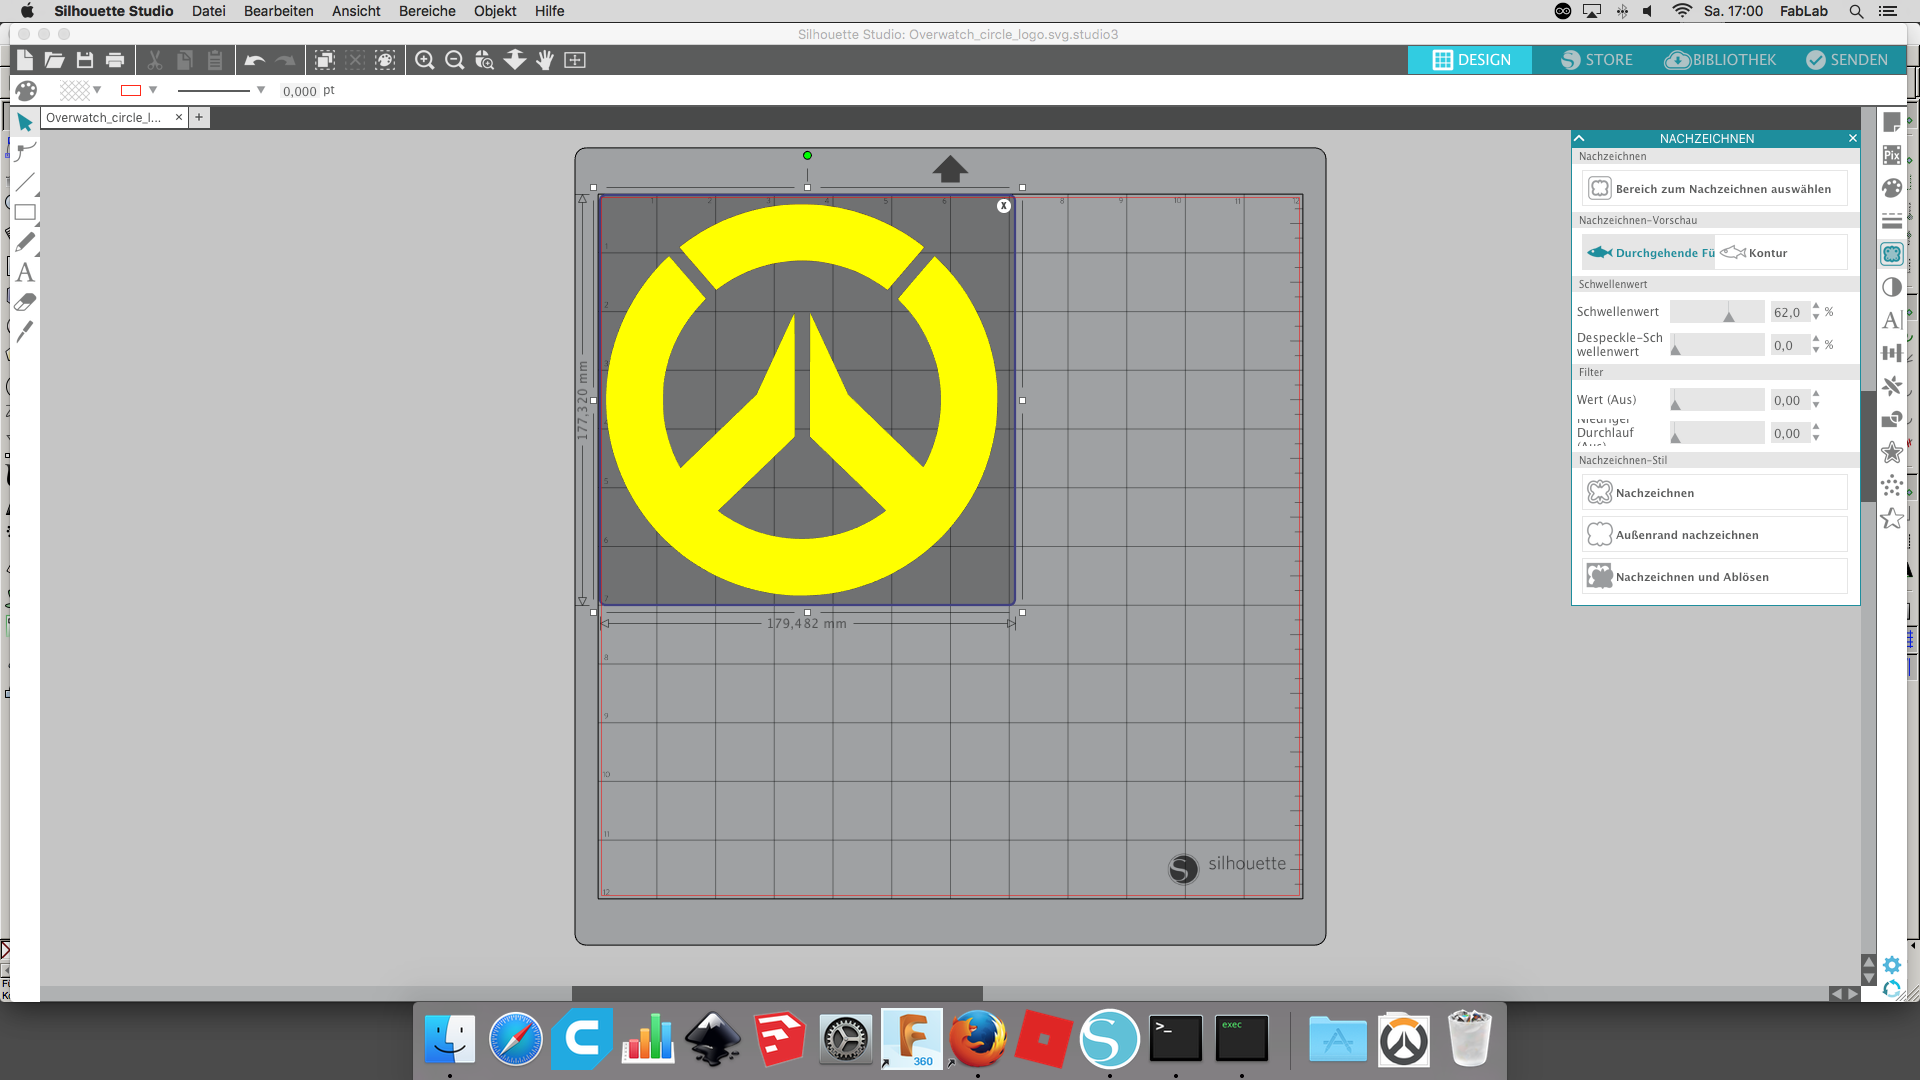
After retracing the image could be removed from the cutting surface and the red path could now be cutted separeted in two colour parts. For this purpose I took orange and silver foil and cutted those two parts of the logo.
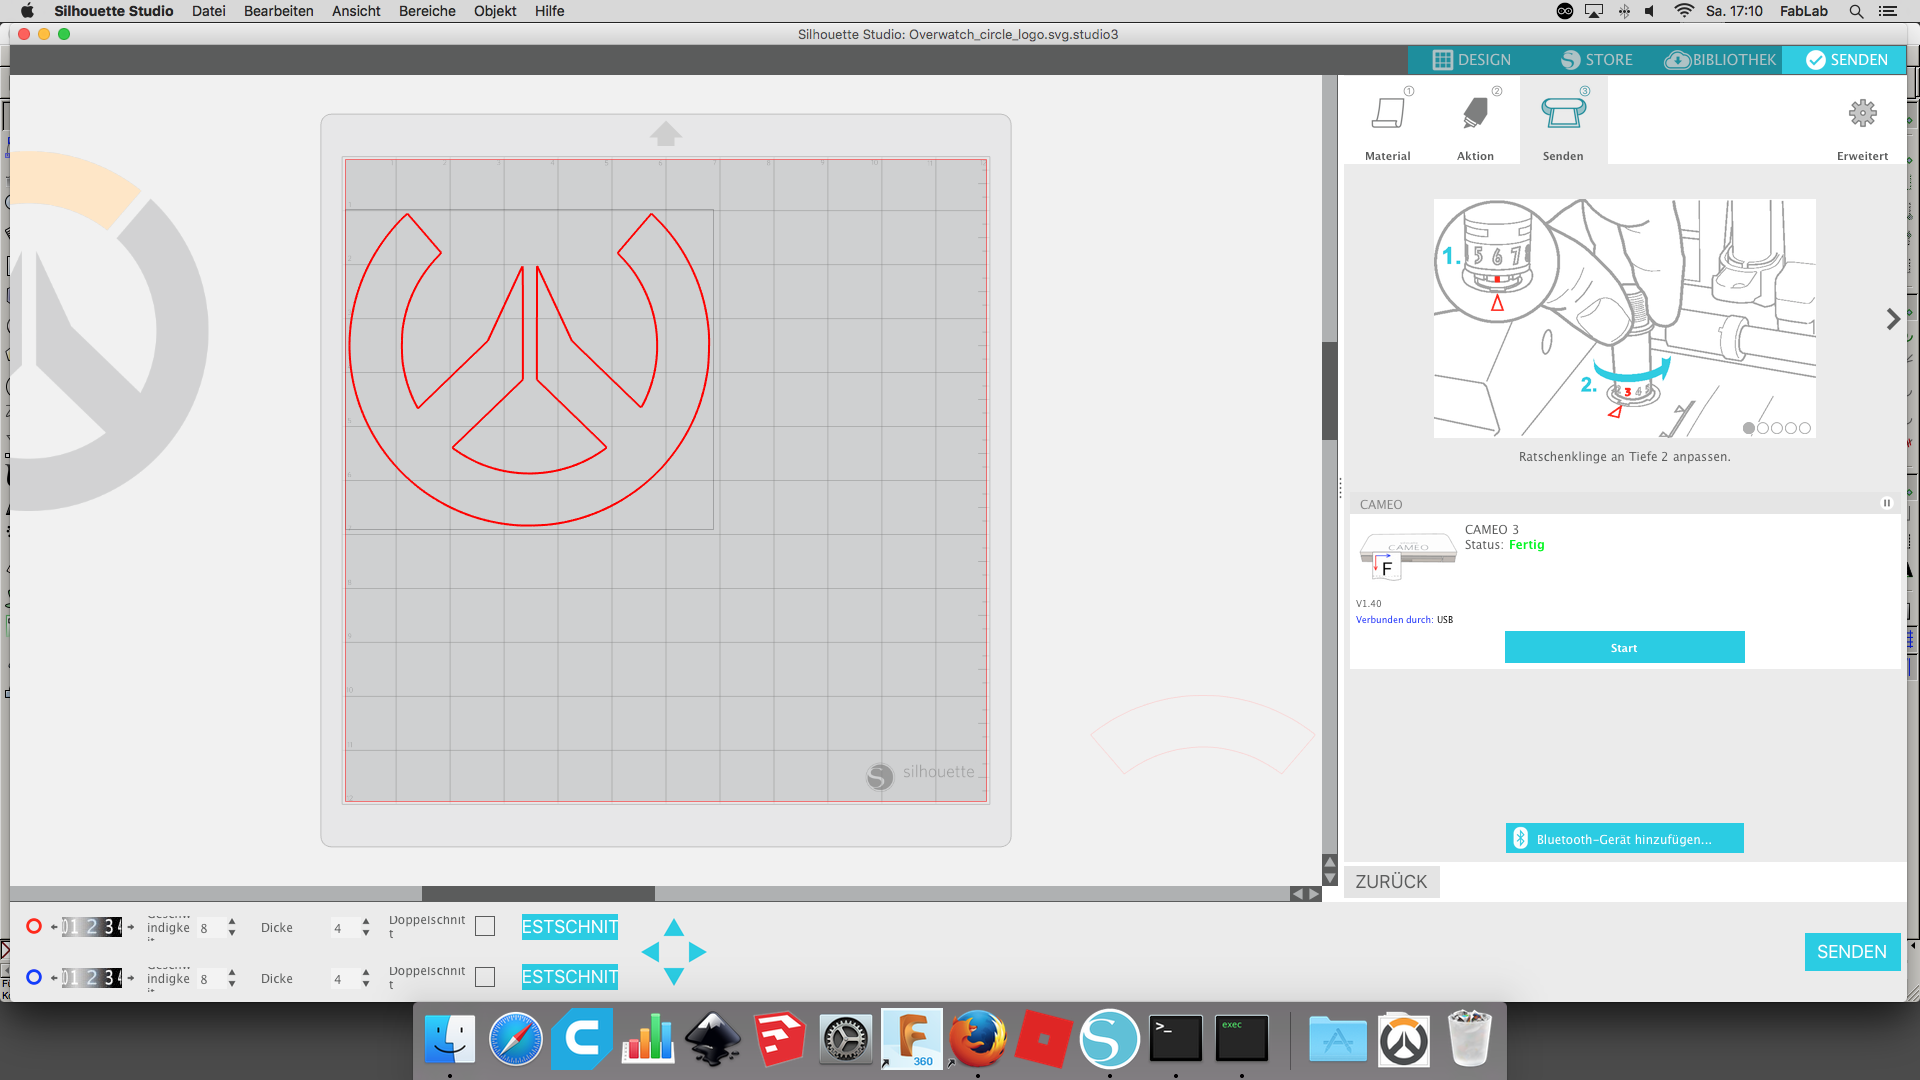
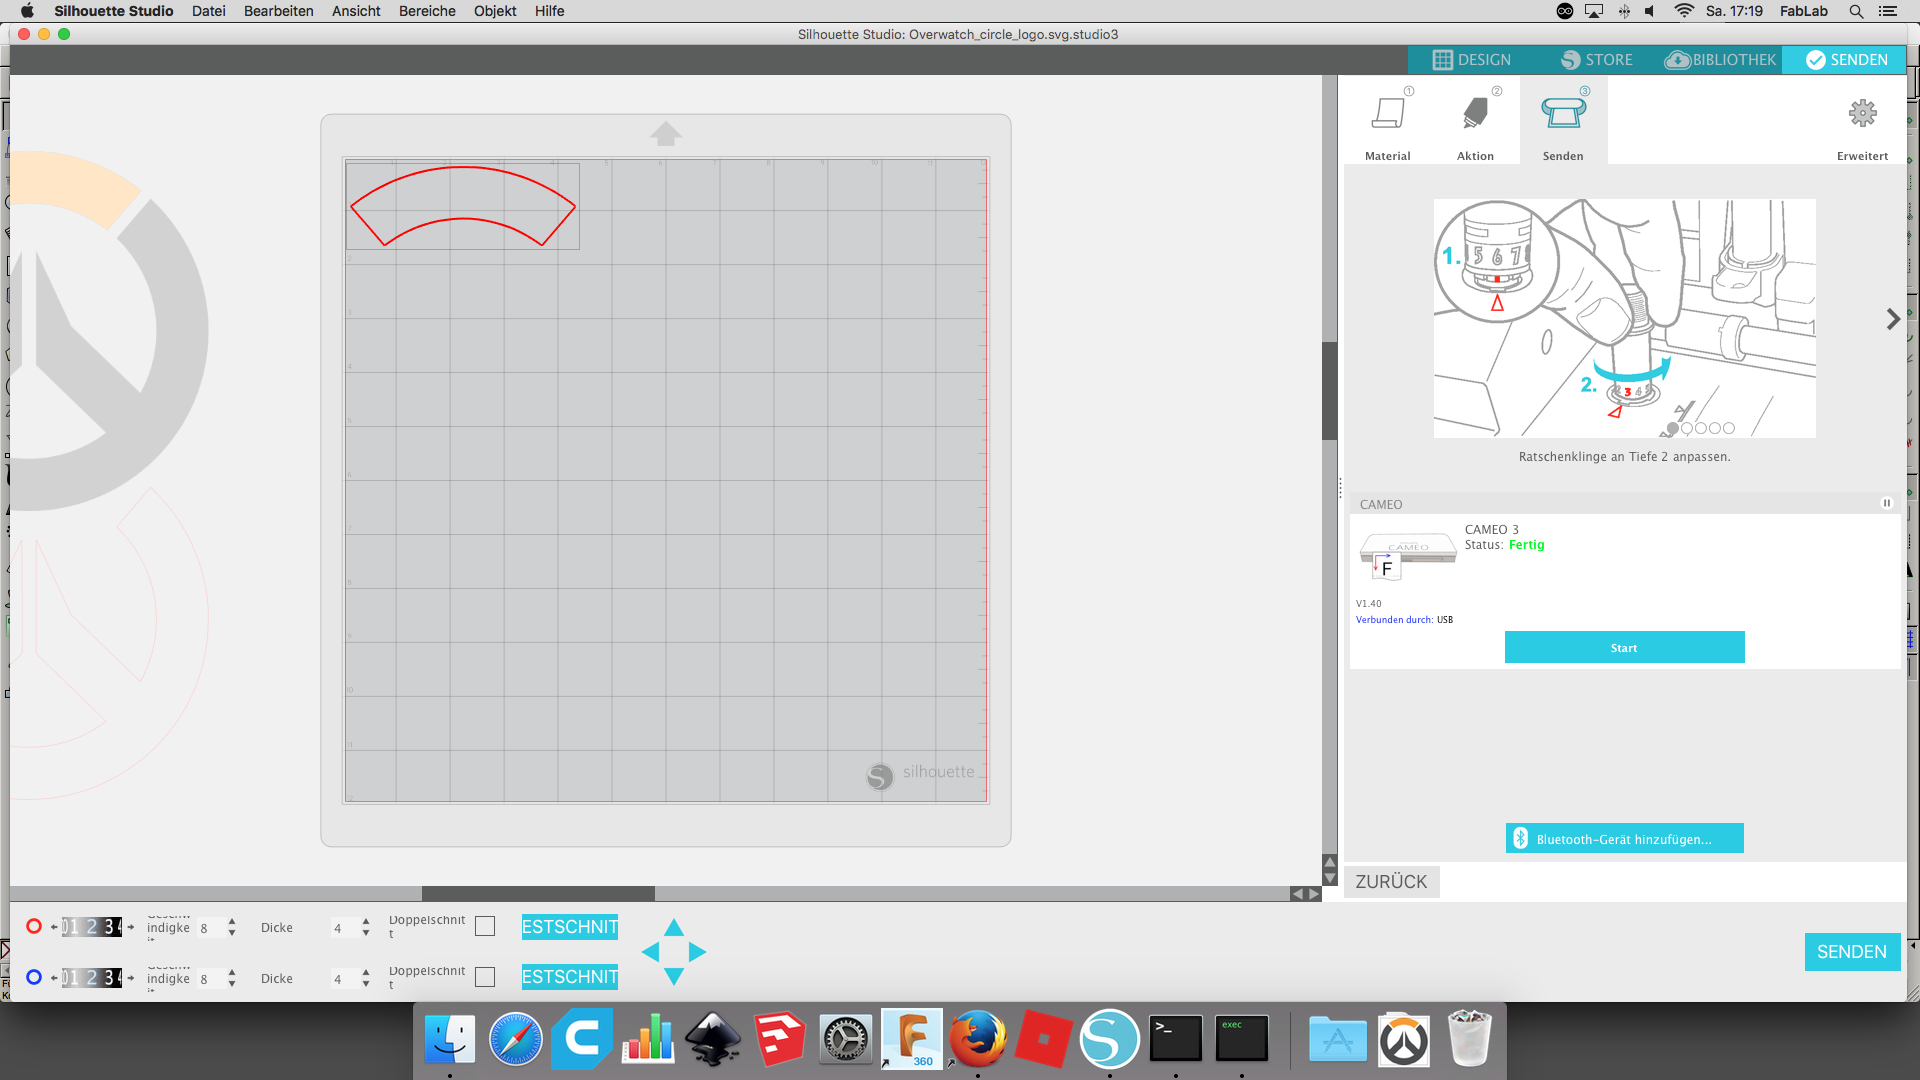
Now I coud load it to the vinyl cutter with the foil in two steps because of two colours of the image.
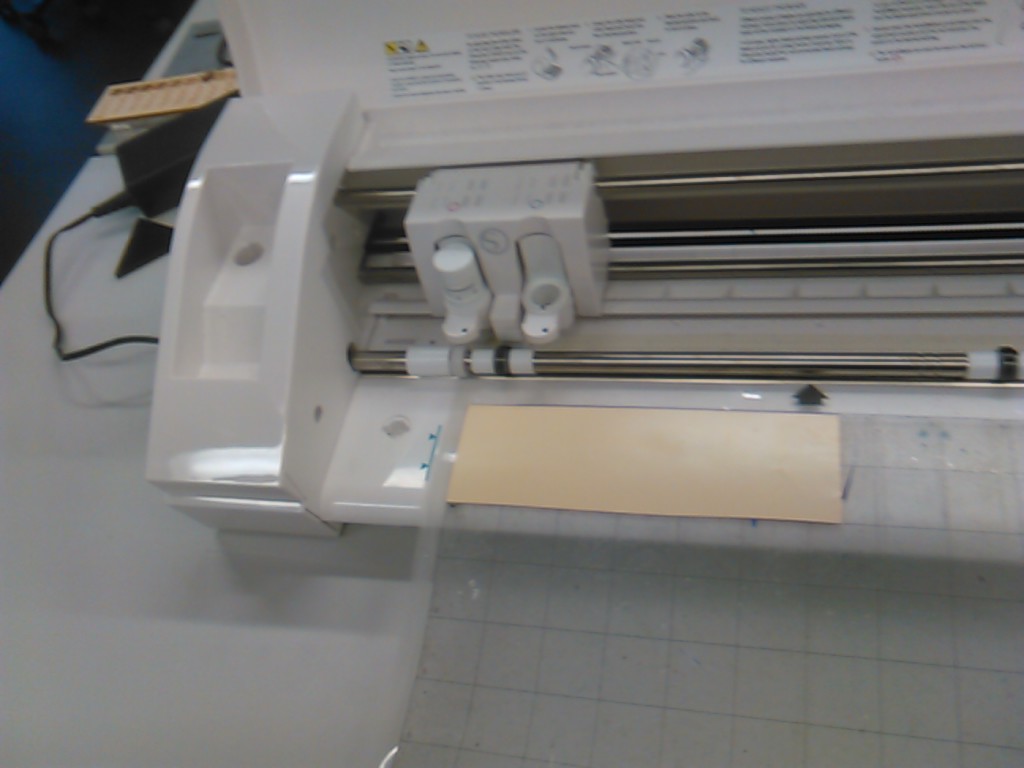
Vinyl cutting on Cameo Sillhouette 3 cutter

For applying the vinyl cut on the shirt I used heat press. For this part I forgot to save the cutting file. I am sorry!
Downloads
| Press-Fit Kit with Fusion 360 (fd3) | download |
| Living hinges | download |
| Vinyl Cut File (Silhouette Studio) | download |