Final Project Documentation
5. Lessons learned
From the following weekly tasks I could use knowledge or finished designs:
In the week 2: Computer-Aided Design I designed the wheel gear using OnShape.
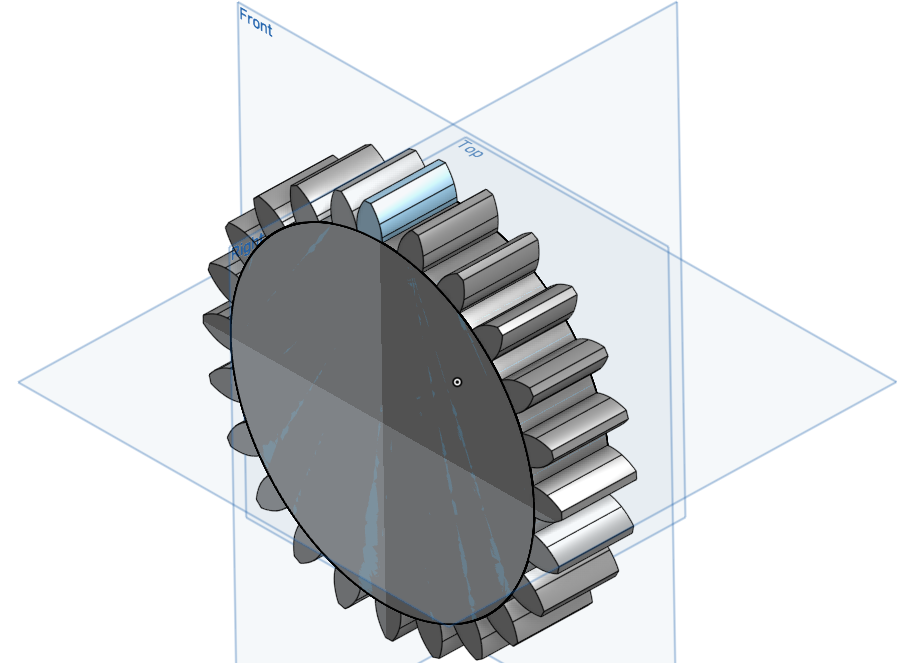
That was very helpful, because now I knew how I can make the design of the gear for the rotating mechanism between the mast and the stepper motor.
In the week 3: Computer-controlled Cutting I have learned vinyl cutting using Cameo Silhouette 3 and Silhouette Studio® design software.
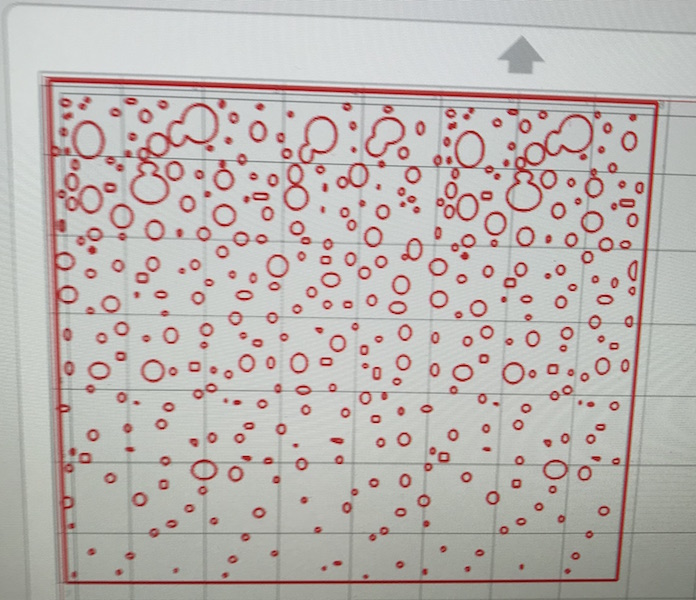
I used the vinyl cutter for the design of the sail. I used white heat transfer foil and cut a bubble pattern with it. First, I had the film glued on a thin white cotton fabric with the T-shirt press. Later, I only took the foil without separating the transparent protective foil from it, so it gave it more stability.
The sail should be air permeable so that the sensors installed inside can freely come into contact with the air from the room and thus they do not overheat in a possibly closed housing. The idea for the pattern on the sail came from my colleague Aleksandra Konopek. I had previously planned to print a netmasters in 3d, had not made it due to time constraints.
In the week 4: Electronics Production I have learned how to mill the PCB and to solder it. This I could use for my electronic production of the power adaptor.

In the week 5: 3D Scanning and Printing I have designed the ball joint which I used for my final project as a support for the mast.
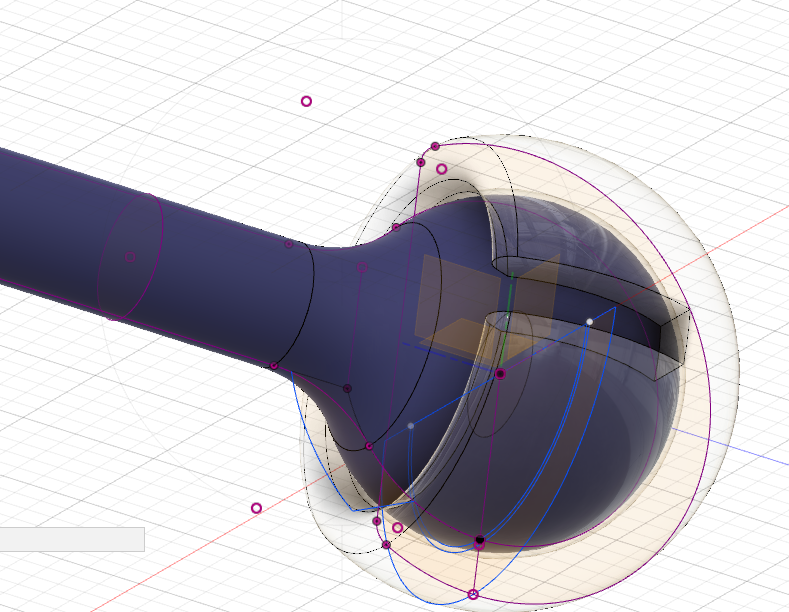
Originally, the mast should not only rotate, but also tilt, as the mast on a windsurfing board too. For this, the ball joint would have been ideal. I no longer printed the ball joint in one piece of 3d. I have developed it further and inserted cuts in the outer shell. This made it possible to press the inner ball into the shell. I was very pleased that it had worked so well. The interference fit in the ball joint was not as important as the grip came from passing through the housing. I would like to continue experimenting with this type of joint later and use the pressfit more.
In the week 6: Electronics Design I have learned how to use Eagle Software to design my own board.
I learned how to find the right parts from the Eagle Library and check if the footprints match the real parts. Once again the milling and soldering of the board is practiced. I milled ATmega328p in triplicate this week, because I was not sure if the soldering would work at first. I had learned during the soldering of the programmer in the week 4 that it is not so easy to solder a board properly if you are an absolute beginner in the field. Later I'll be able to use one of the three boards at my final because I could not create a new board due to time constraints.
Although I could not use anything directly from the week 7: Computer-Controlled Machining for my final, I learned in this week how to design a product and how the components fit together, I found this weekly task particularly interesting. Unfortunately, we could not do anything in this direction in our Fab Lab for the final, as we do not have a large portal milling machine yet. I am looking forward to it when our portal milling machine is delivered and we will be able to produce beautiful products with it.
In the week 8: Embeded Programming I studied the datasheet of the ATmega328p and learned a lot about the digital and analog inputs of the processor. I have learned about how to use PWM and what resonator is important for. I have used short programs with Arduino IDE to make an LED blink. I would like to have tested more programming platforms. With the knowledge from this week, I was able to do the programming of the sensors and actuators of my Final Product.
In the week 10: Input Devices I have learned how to use simple code to read a sensor and to visualize ID data in Arduino serial monitor (plotter) or using oscyloscope. Before that it was important to select the settings in the Arduino IDE for my ATmega328p board and to select the correct port.
In the week 11: Output Devices
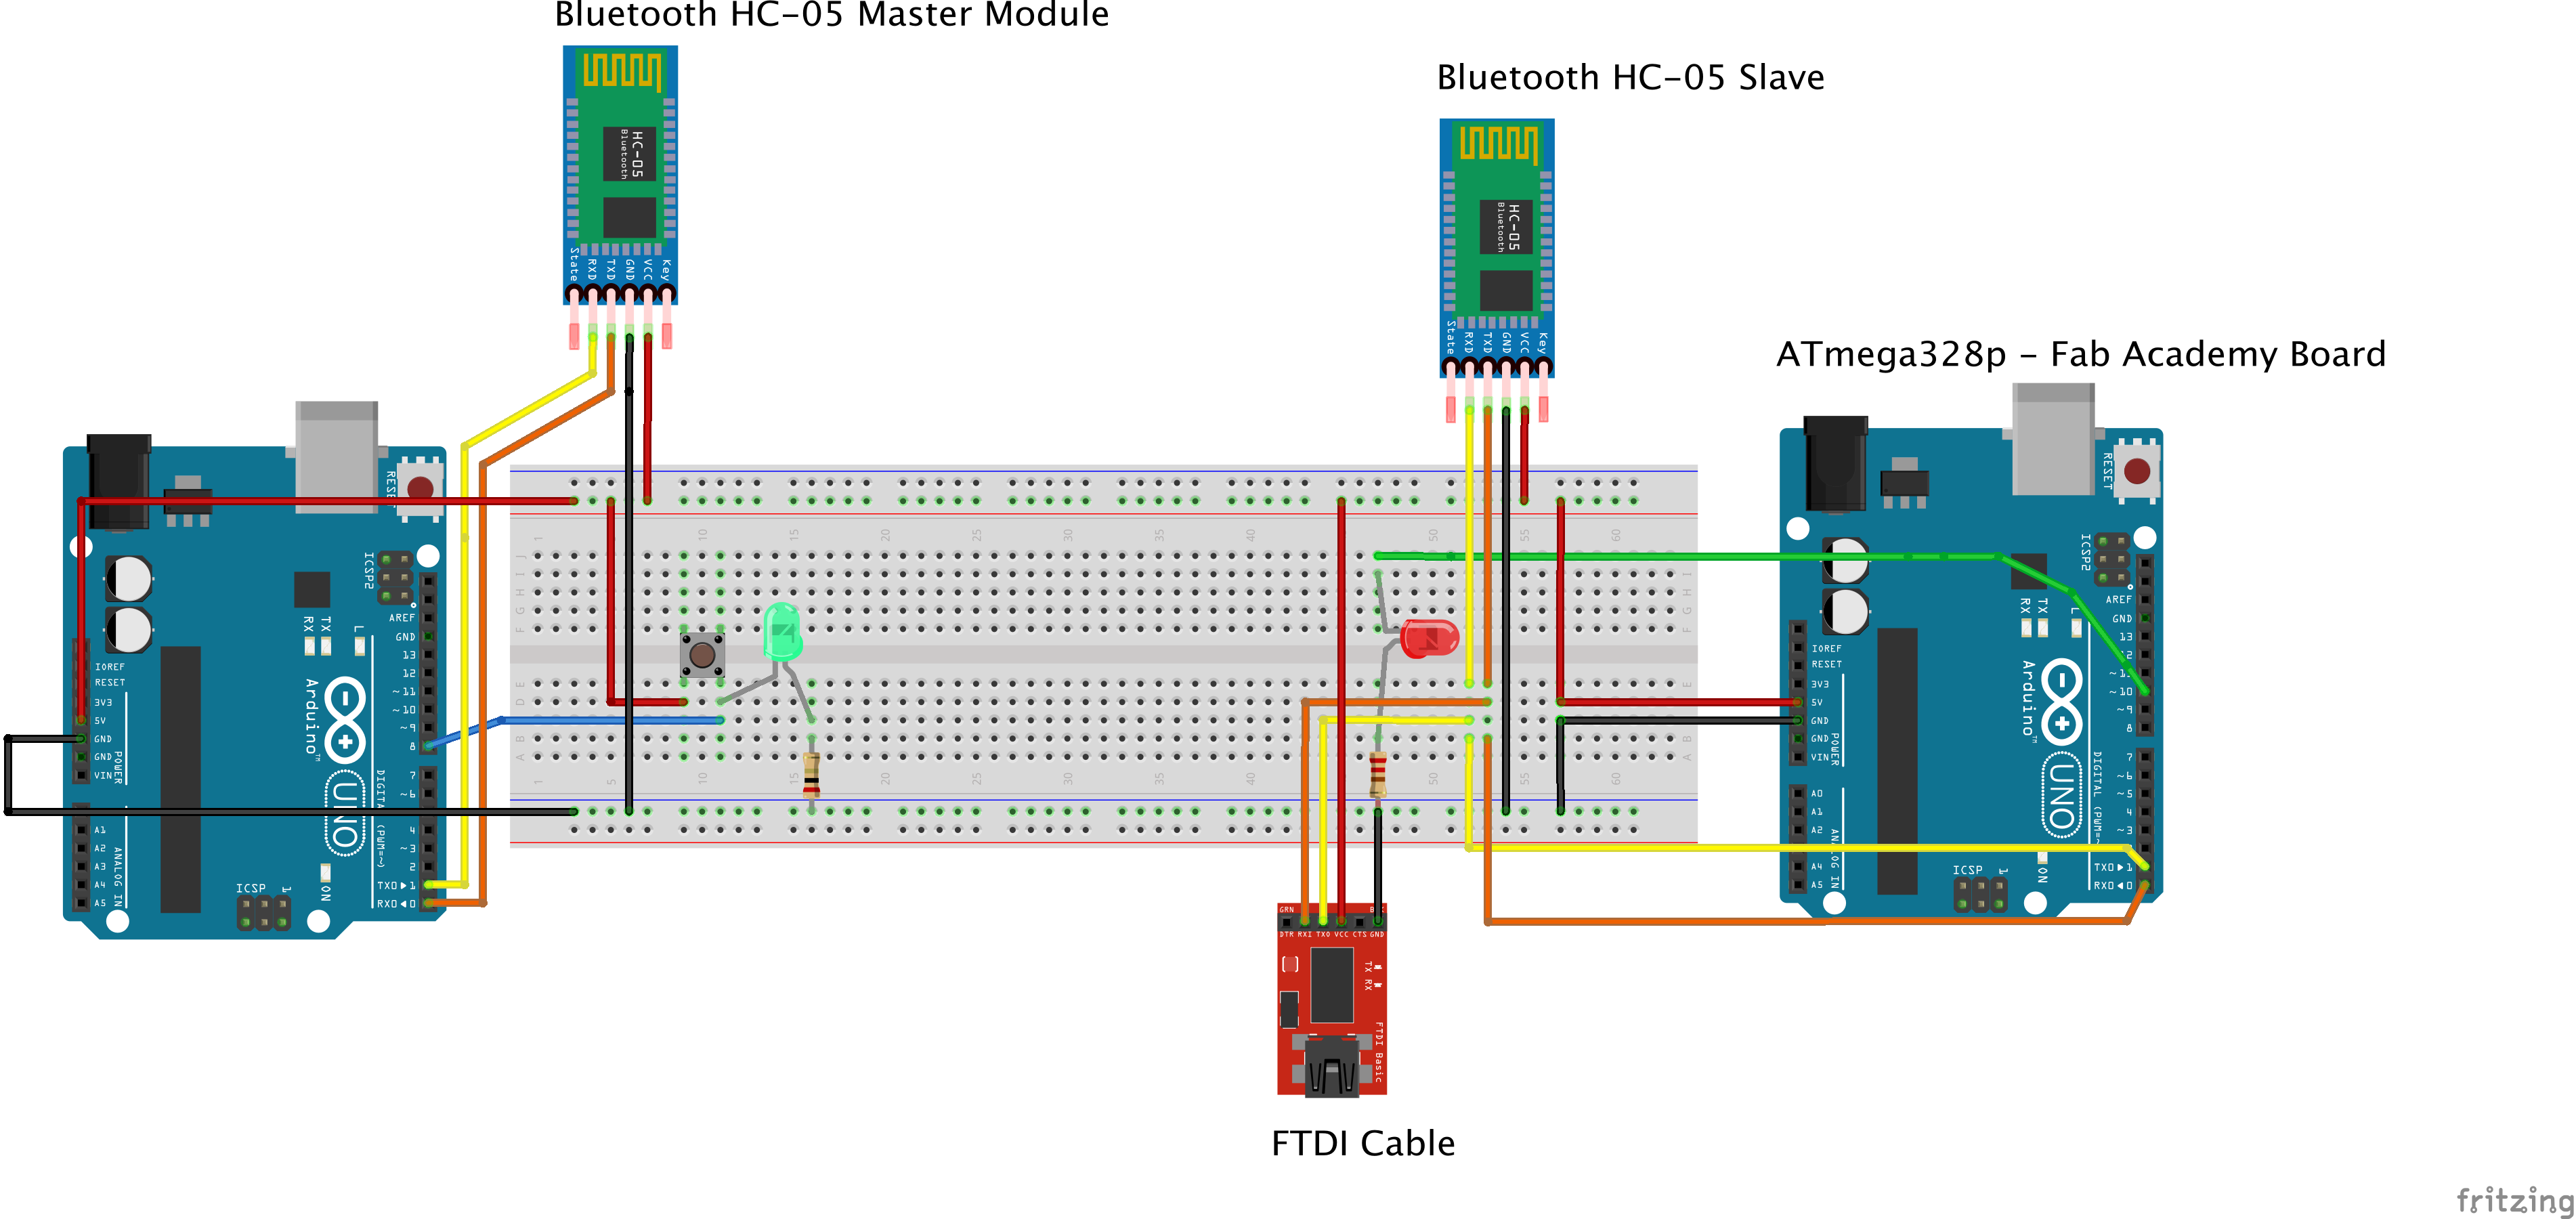
In the week 13: Embedded Networking and Communications
In the Week 18: Invention, Intellectual Property and Business Models I have choosen following license for my final project and all assignments:

which means:
You are free to:


     Share — copy and redistribute the material in any medium or format

     Adapt — remix, transform, and build upon the material
     for any purpose, even commercially.

     This license is acceptable for Free Cultural Works.
     The licensor cannot revoke these freedoms as long as you follow the license terms.