Input devices
For input device assignment I’m going to create and test capacitance sensor.
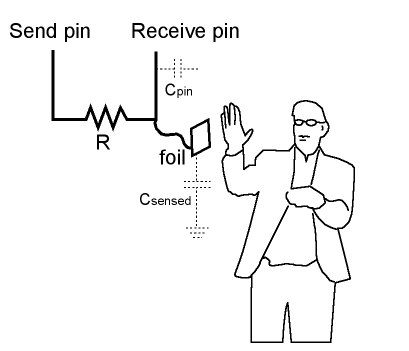
What will be measured is a change in electric charge in the circuit. Circuit contains a sensing pin through which this chamge is happening. To multiply the result one have to attatch a piece of conductive material to this pin.
This materials can be:
- copper (plate)
- aluminium (foil)
- water (plants, fruits, humans)
At its most sensitive point, the sensor will start to sense a hand or body centimeters away from the sensor.
For testing I’m using Capacitive Sensor example code uploaded on Arduino. I’m really new to coding and I feel somehow more welcome while working in Arduino Web Editor. Also as a designer I really appreciate the simple and aesthetical interface design.
I’m wiring everything following the schematic one can find in Arduino Capacitive Sensing Library Overwiev.
#include <CapacitiveSensor.h>

CapacitiveSensor   cs_4_2 = CapacitiveSensor(4,2);

void setup()

{
   cs_4_2.set_CS_AutocaL_Millis(0xFFFFFFFF);
   Serial.begin(9600);
}

void loop()

{
    long start = millis();
    long total1 =  cs_4_2.capacitiveSensor(30);

    Serial.print(millis() - start);
    Serial.print("\t");

    Serial.print(total1);

    delay(10);
}
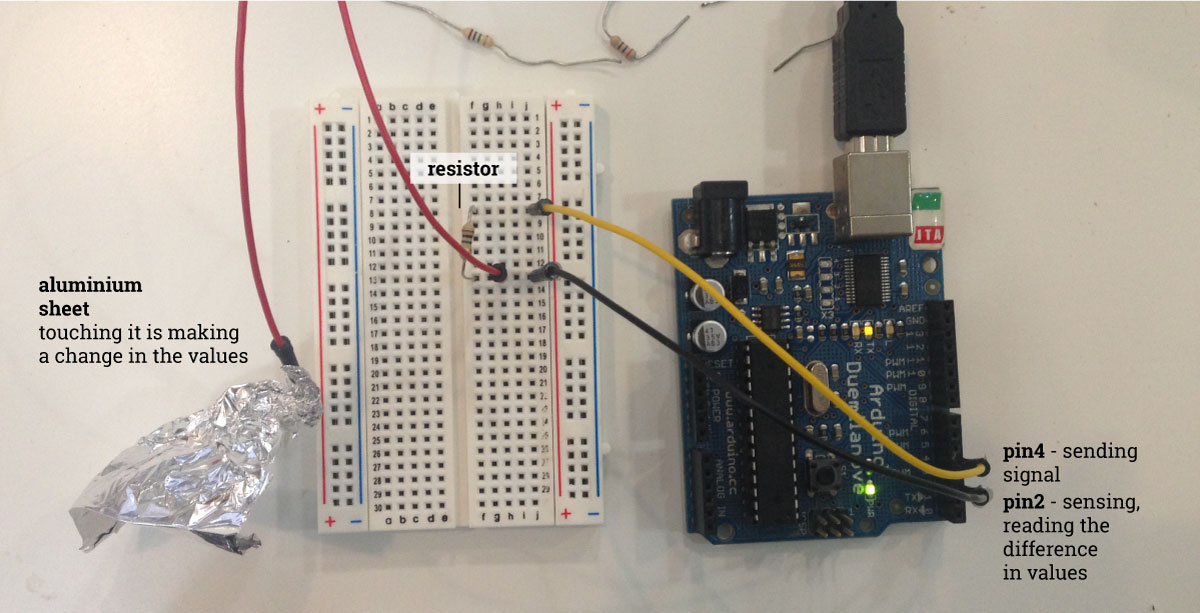
I’m doing a multiple test with Arduino and different materials, like orange, big aluminium sheet, paper or textile on top of aluminium sheet, copper plate, small aluminium sheet…
I’m also testing the sensing with different resistors: 1 Megohm, 10 Megohms, 28 Megohms.
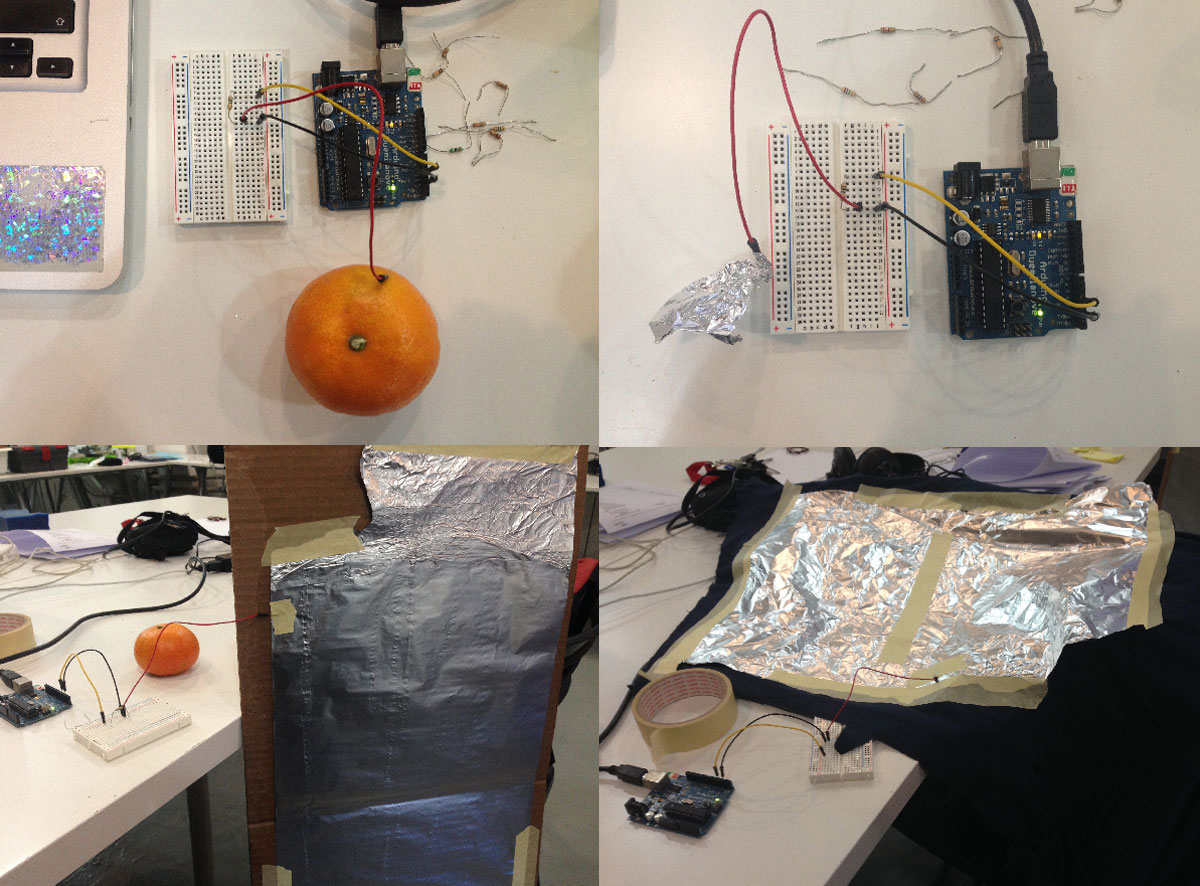
Conclusions: The bigger resistor I’m putting the morese nsible sensor is (higher values printed in Serial Monitor). It also feels the presence of a hand from a small distance. Orange is less conductve than aluminium foil, which is more conductive than copper plate. The values also depends on the size of the sensor.
IMPORTANT: every time after uploading the code or connecting the sensor after disconnecting, one have to wait few seconds so the sendor can establish 0 value.
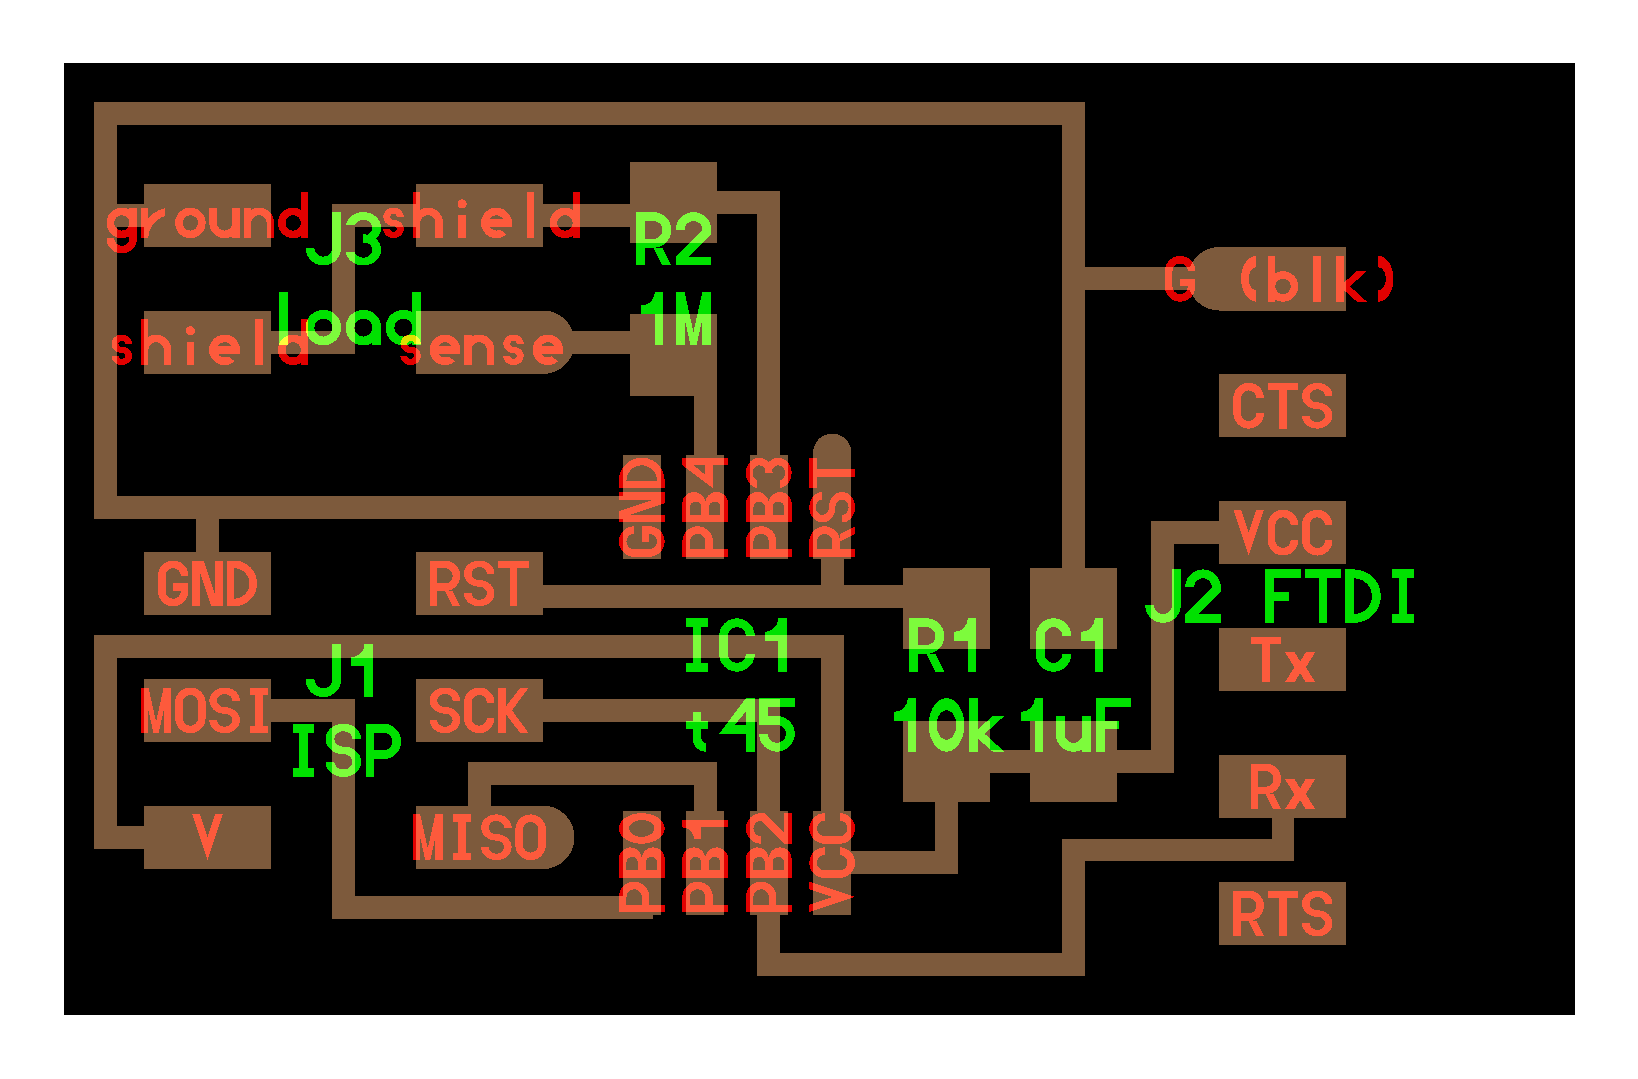
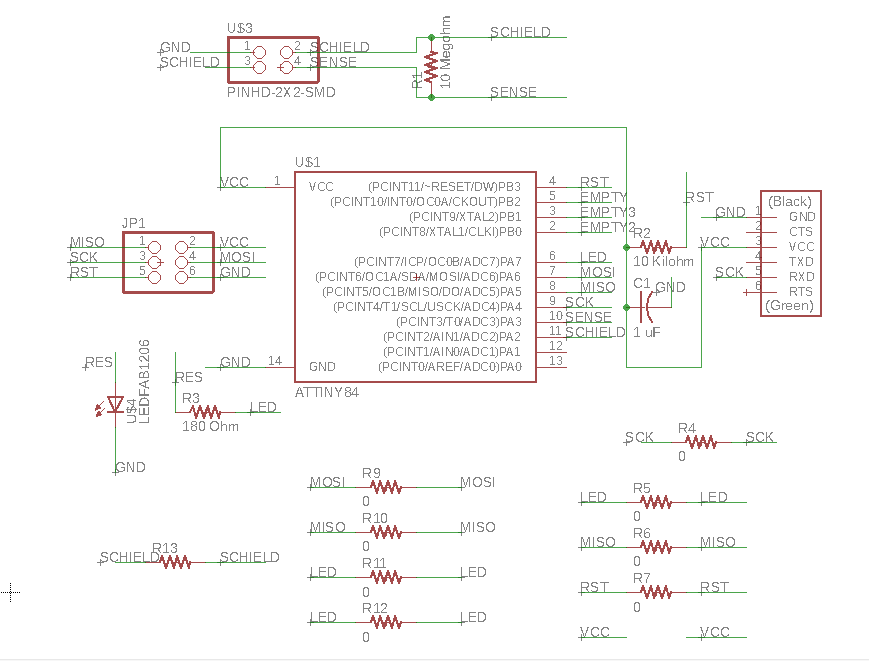
Designing the capacitance sensor board
Now it’s time to manufacture my own board! I’m basing my design on Neil’s input_devices/step/hello.load.45
Though I have to change one important componenet: nstead of AtTiny44 I’m goingto use AtTiny84. I need a bigger memory size on the microchip to upload twi libraries: CapacitiveSensor and SoftwareSerial. On top of that I’malso adding a LED.
I’m designing the file in Eagle. Seems like I have to puta lot of bridges to make a proper wiring!
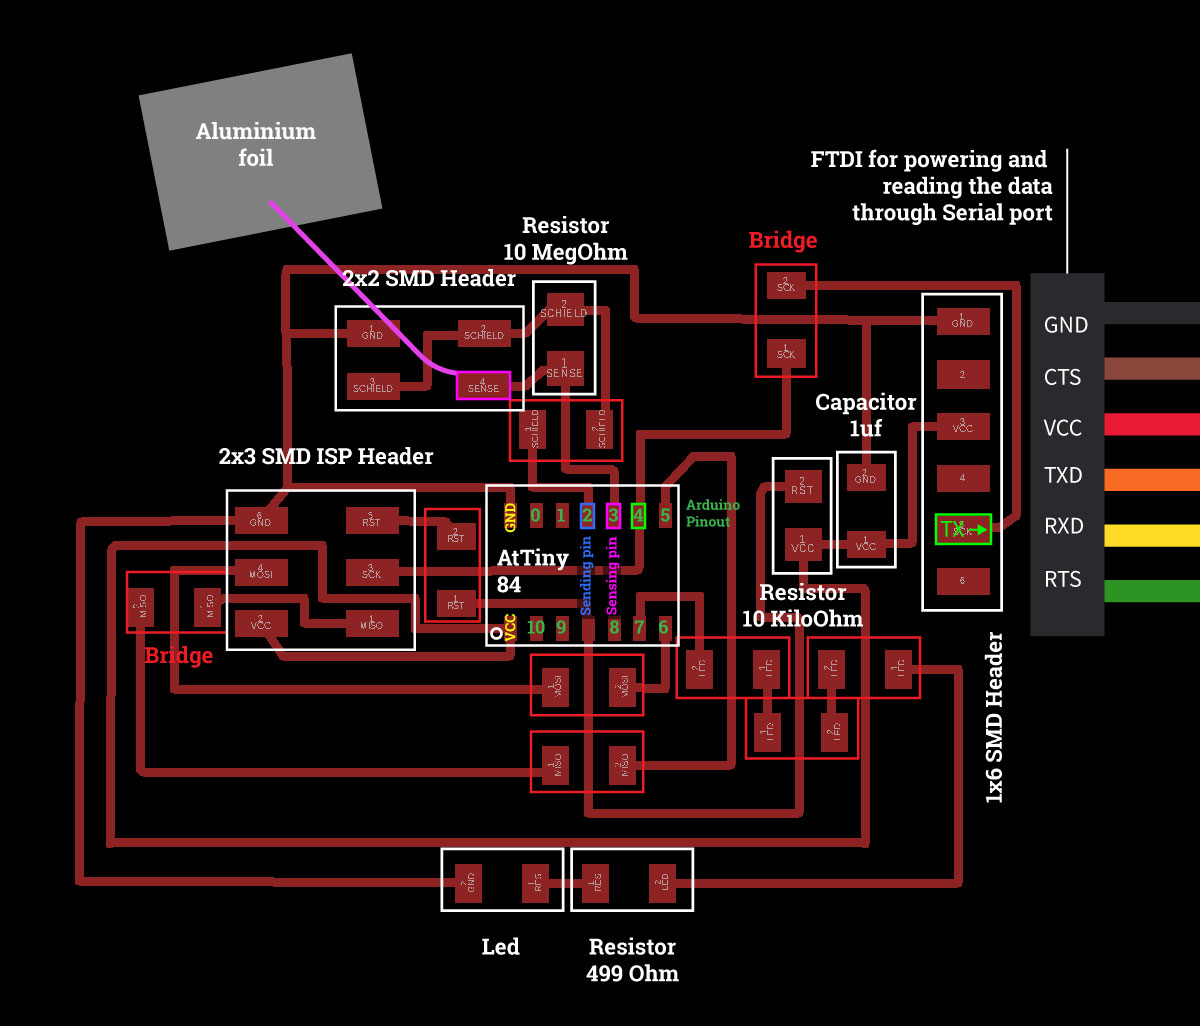
I’m exporting png file from Eagle. I’m cropping them in Photoshop and making a file for cut-out.

This files I’m going to use as an input files for creating rml files in MODS.
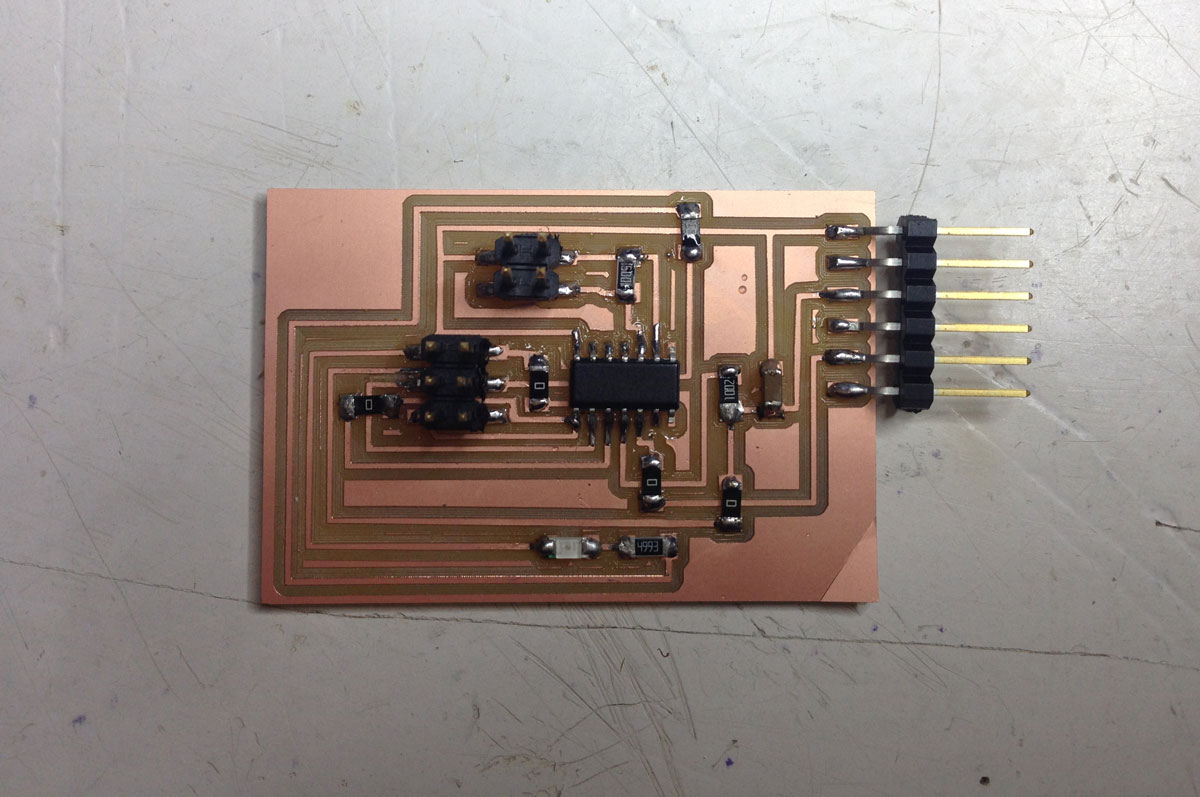
Now time form milling on Roland monoFab SRM-20, and soldering the components.
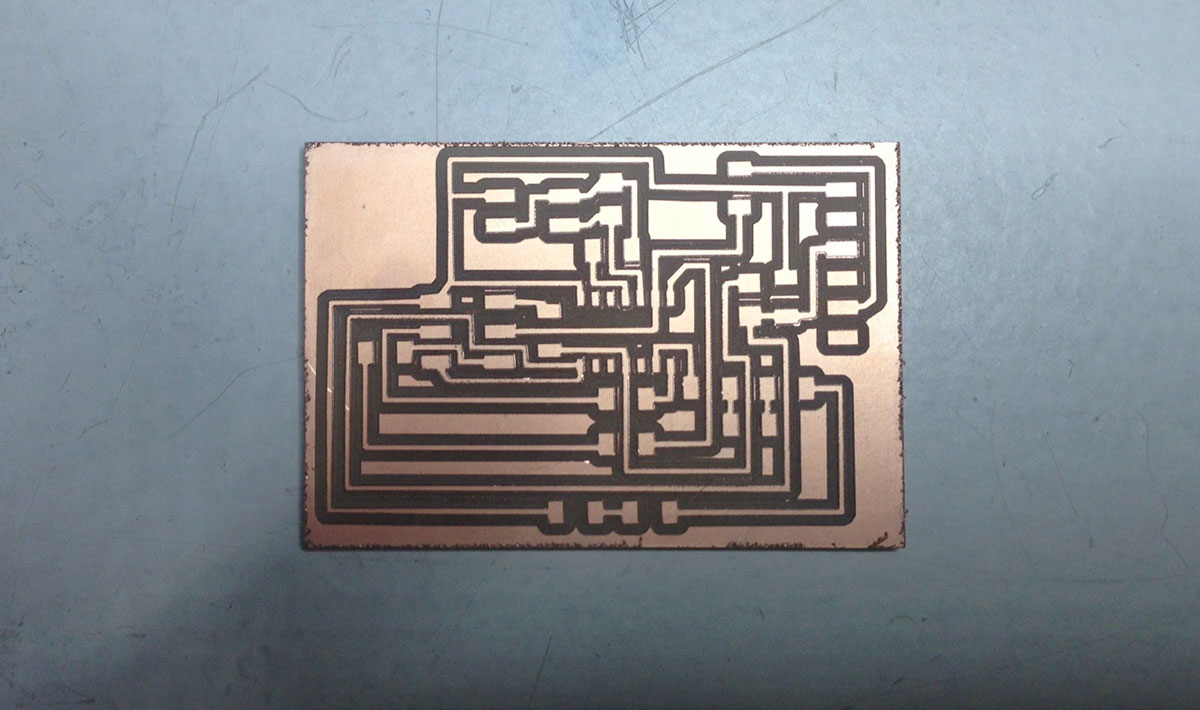
Detailed description of creating the rml files and milling process in Electronics Production Assignment
Now it’s time for upgrading Arduino code:
Including libraries:
#include <SoftwareSerial.h>
#include <CapacitiveSensor.h>
Defining pins for Serial Communication and Capacitive Sensor:
SoftwareSerial myCommunication(1, 4); // RX, TX

CapacitiveSensor   cs_2_3 = CapacitiveSensor(2, 3);
Defining pin for LED as an Output
int led = 7;
int brightness = 0;

void setup()
{
  cs_2_3.set_CS_AutocaL_Millis(0xFFFFFFFF);
  myCommunication.begin(9600);

  pinMode(led, OUTPUT);
}
Defining the behaviour: the values are going to be printed outin Serial Monitor (total1)
void loop()
{

  delay(10);

  long start = millis();
  long total1 = cs_2_3.capacitiveSensor(30);
  myCommunication.println(total1);
Setting up the brightness levels for different ranges of values
  if (total1 > 50000) {
    brightness = 255;
  }

  else if (total1 > 30000) {
    brightness = 100;
  }

   else if (total1 > 100) {
    brightness = 50;
  }

  else {

    myCommunication.println("lower");
    brightness = 0;
  }

  myCommunication.println(brightness);

  if ((brightness >= 0) && (brightness <= 255)) {
    analogWrite(led, brightness);
  }

  if (brightness <= 0)brightness = 0;
  if (brightness >= 255)brightness = 255;

  delay(500);
}
Burning the bootloader, uploading the code and it’s working!
Depending on that howI’m going to touch the sensor (one finger, whole hand etc.) the LED will lights up with different intensity.
Files made during this assignment:
sensor Eagle
png files for MODS
rml files for milling
Arduino test code
Capacitive Sensor code