3D scanning and printing
3D scanning
For this assignment I’mg oing to use Kinect to together with the software Skanect
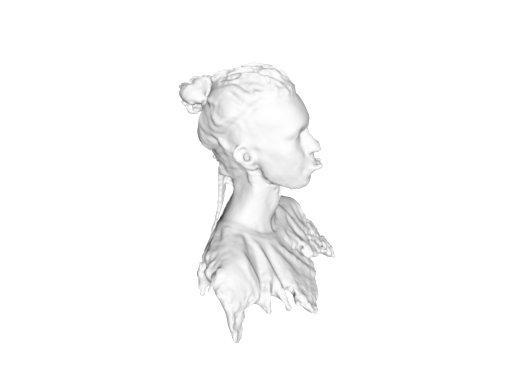
I was never scnning before so It’s pretty exciting. I’ve decided to scan myself, so I’ve asked a friend to wakl around me with the Kinecy and capture 360 degrees of my presence. I also had this funny idea to scan myself while showing the tongue as I’m doing often on the photos. When I saw the scan I’ve understood that it was not the best idea since I look like a mutant…
Anyways 3D scanningis cool. Underneath short description of Skanect layout and the process:
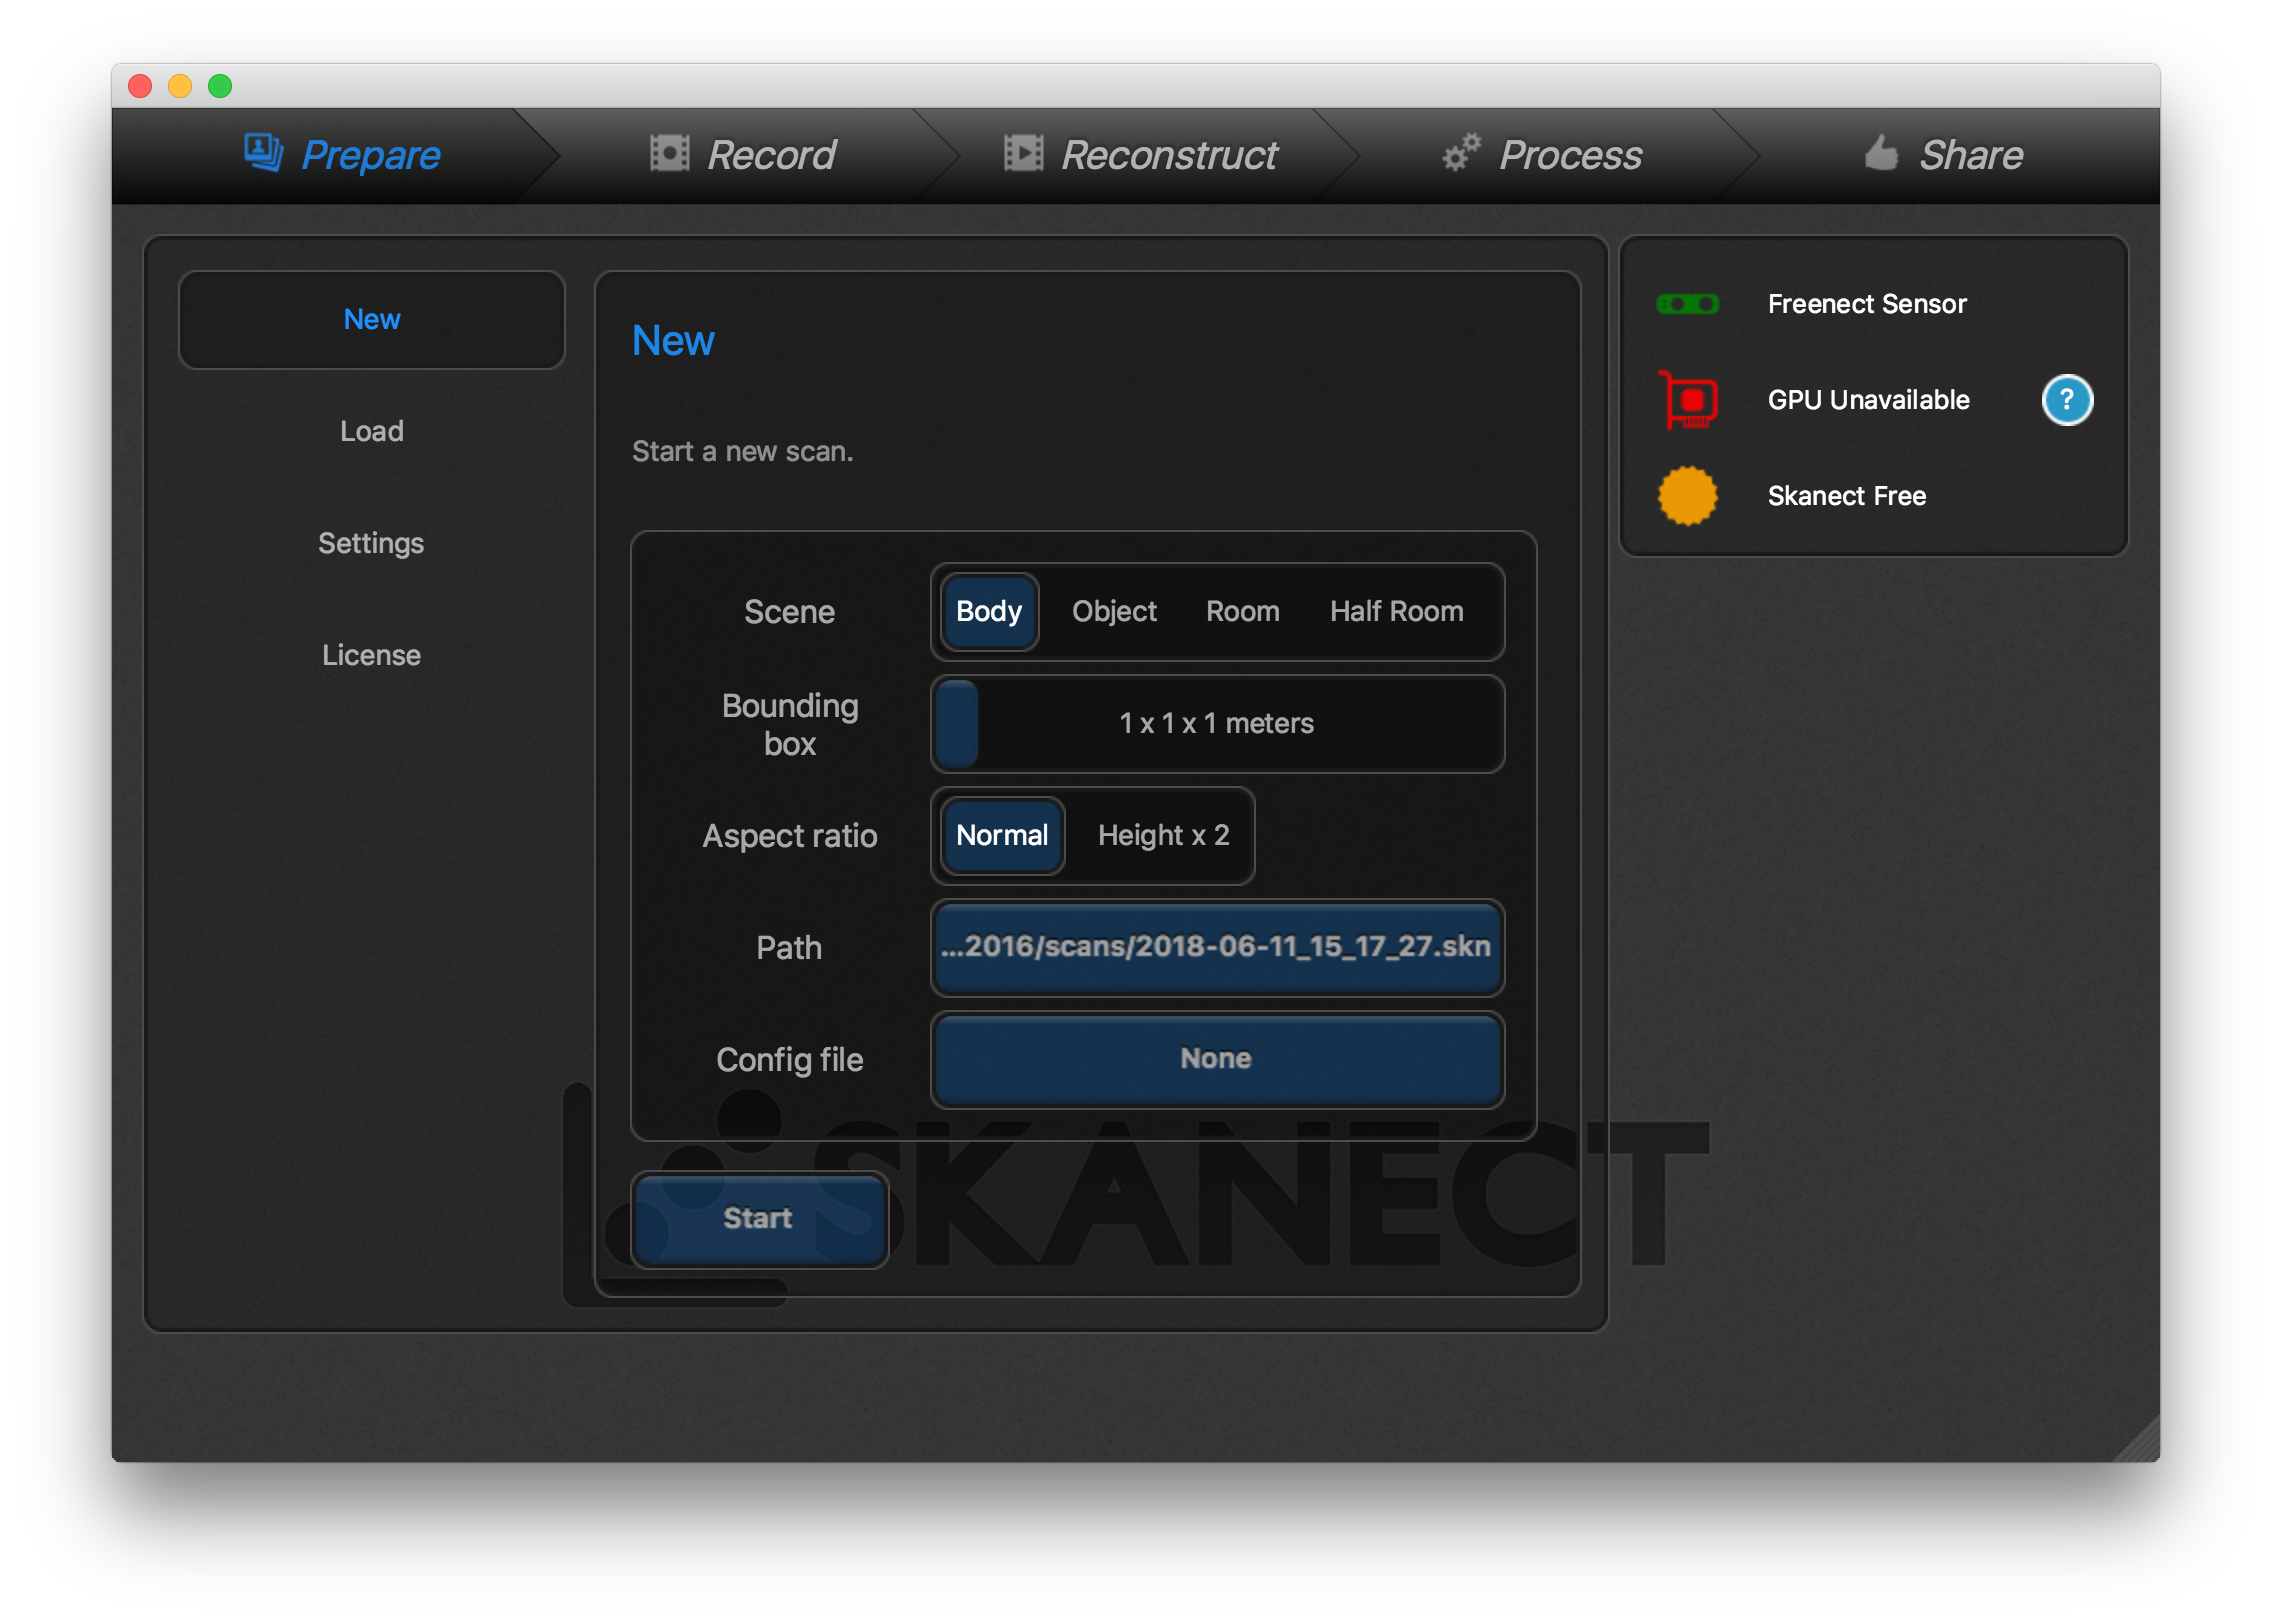
Setup the new file:
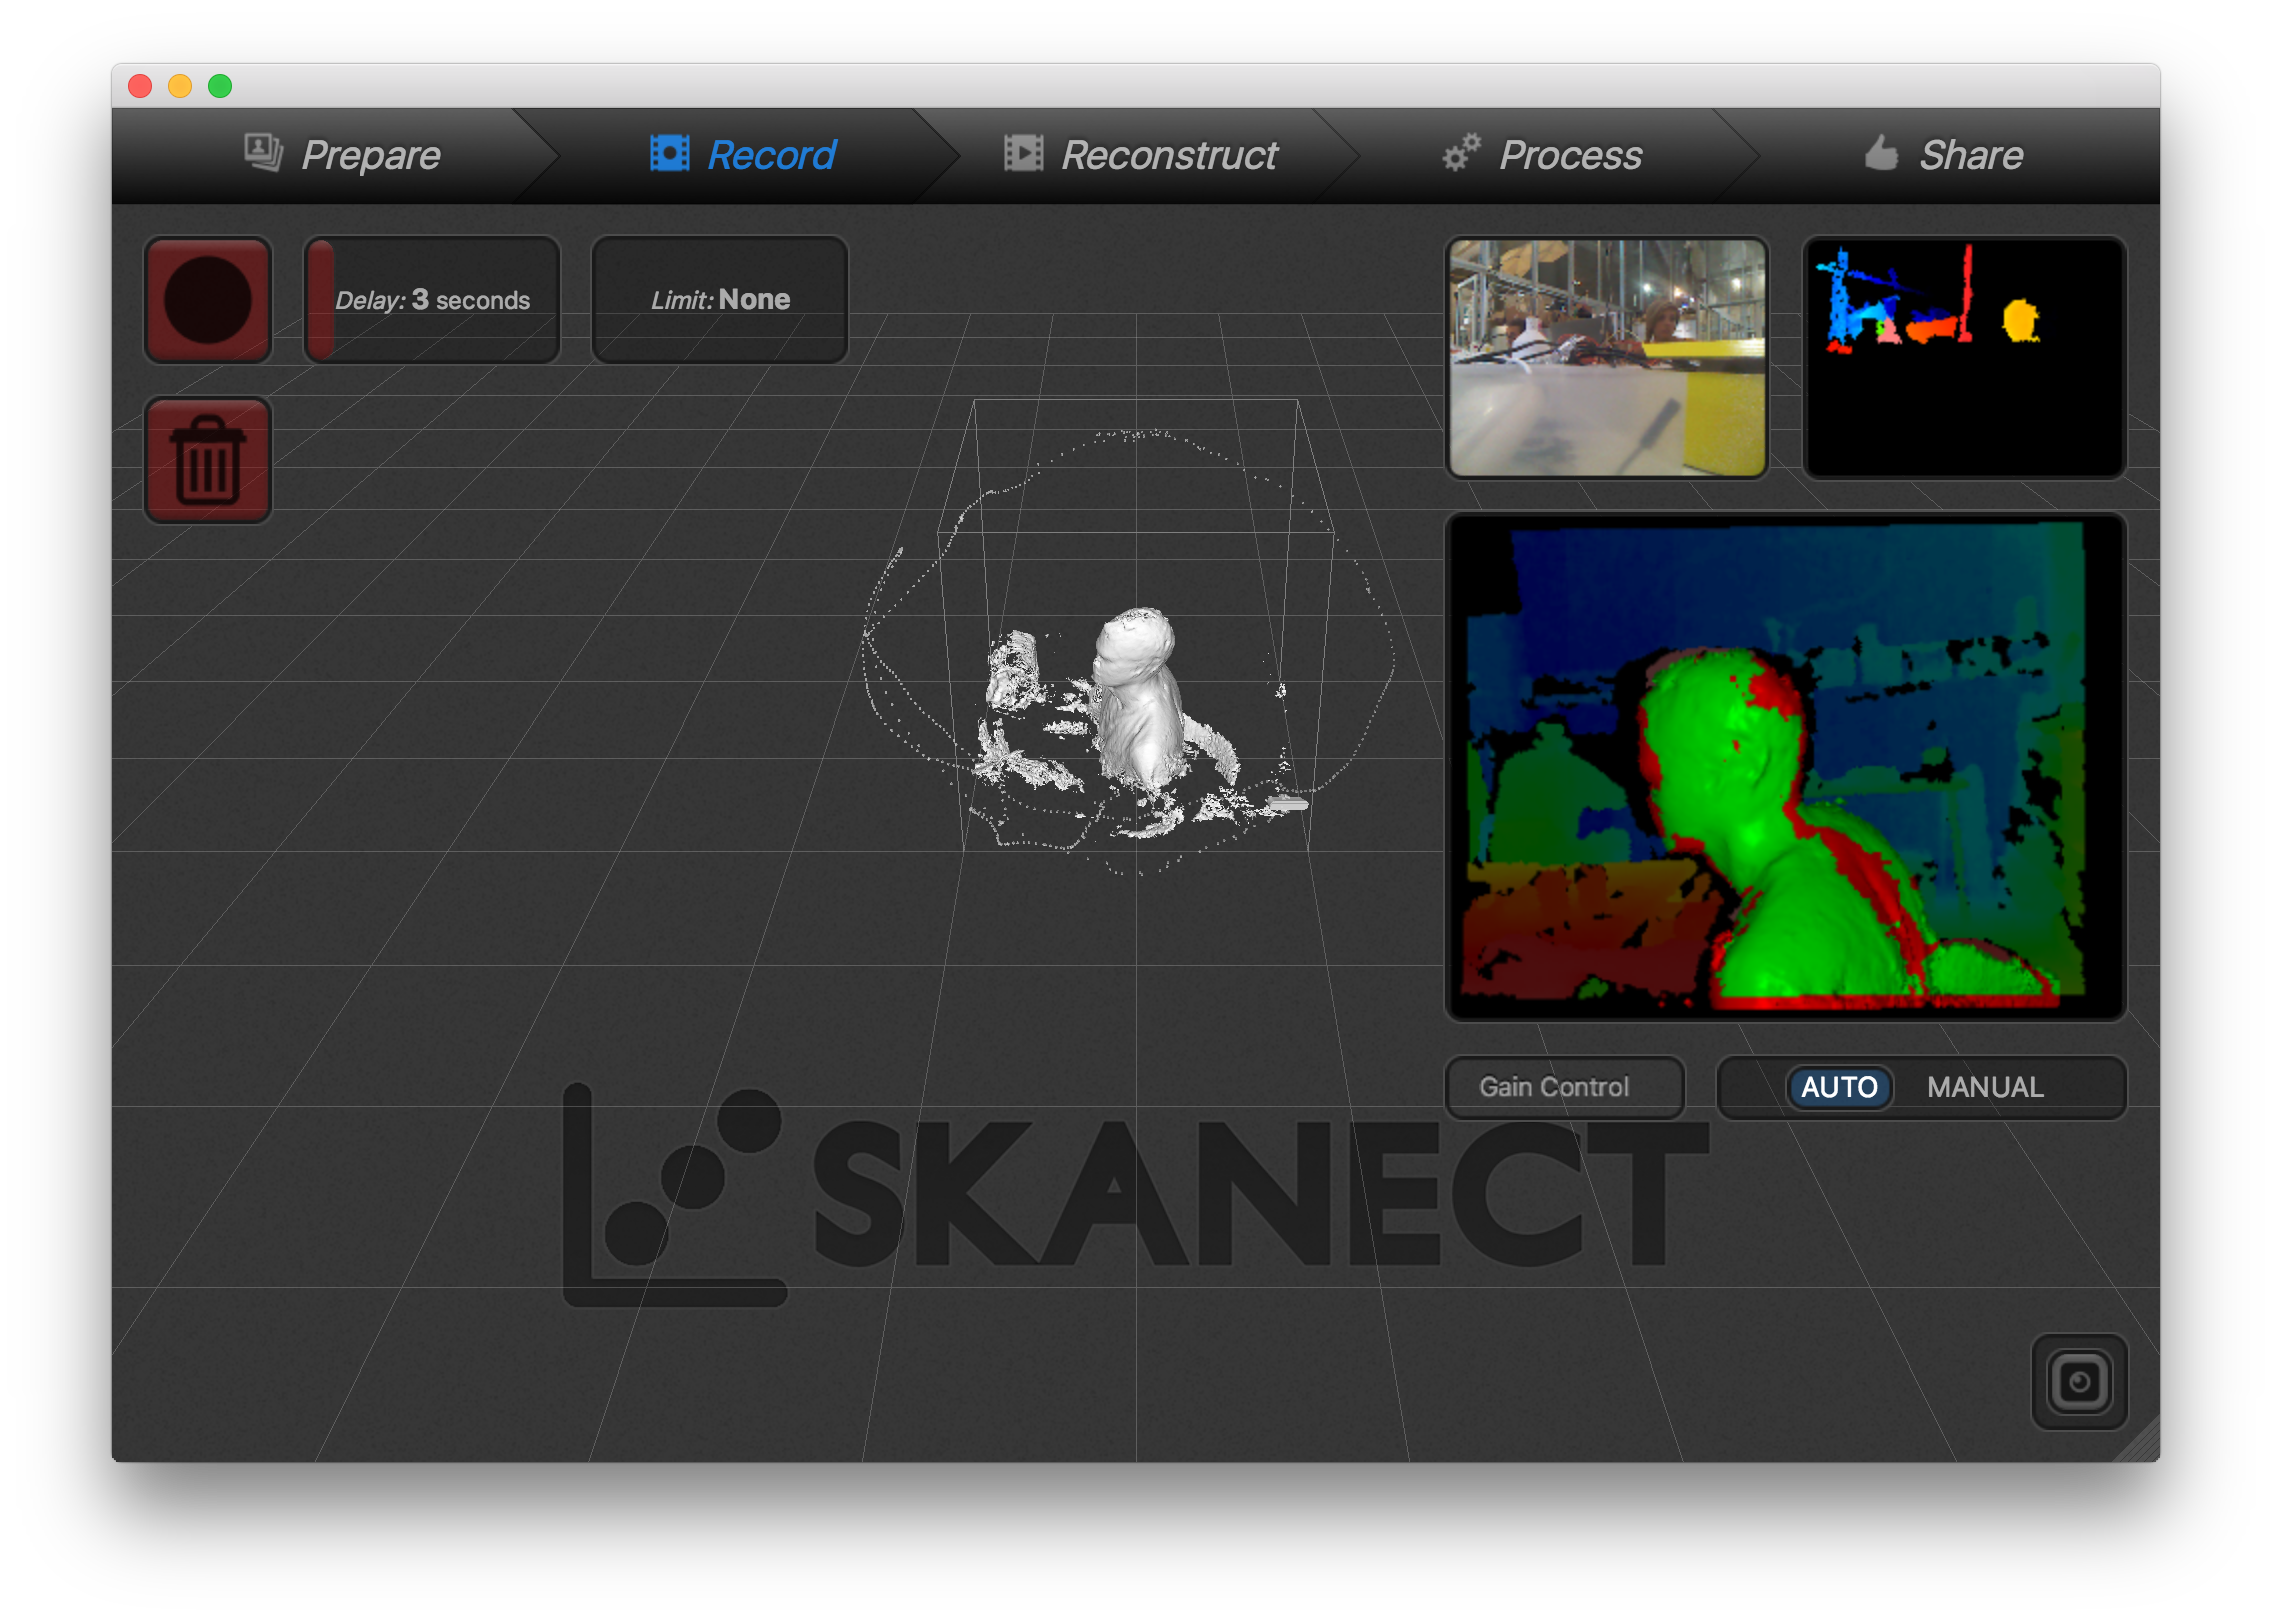
Scan your object - or you walk around or the object is turmning. You have to capture 360 degrees:
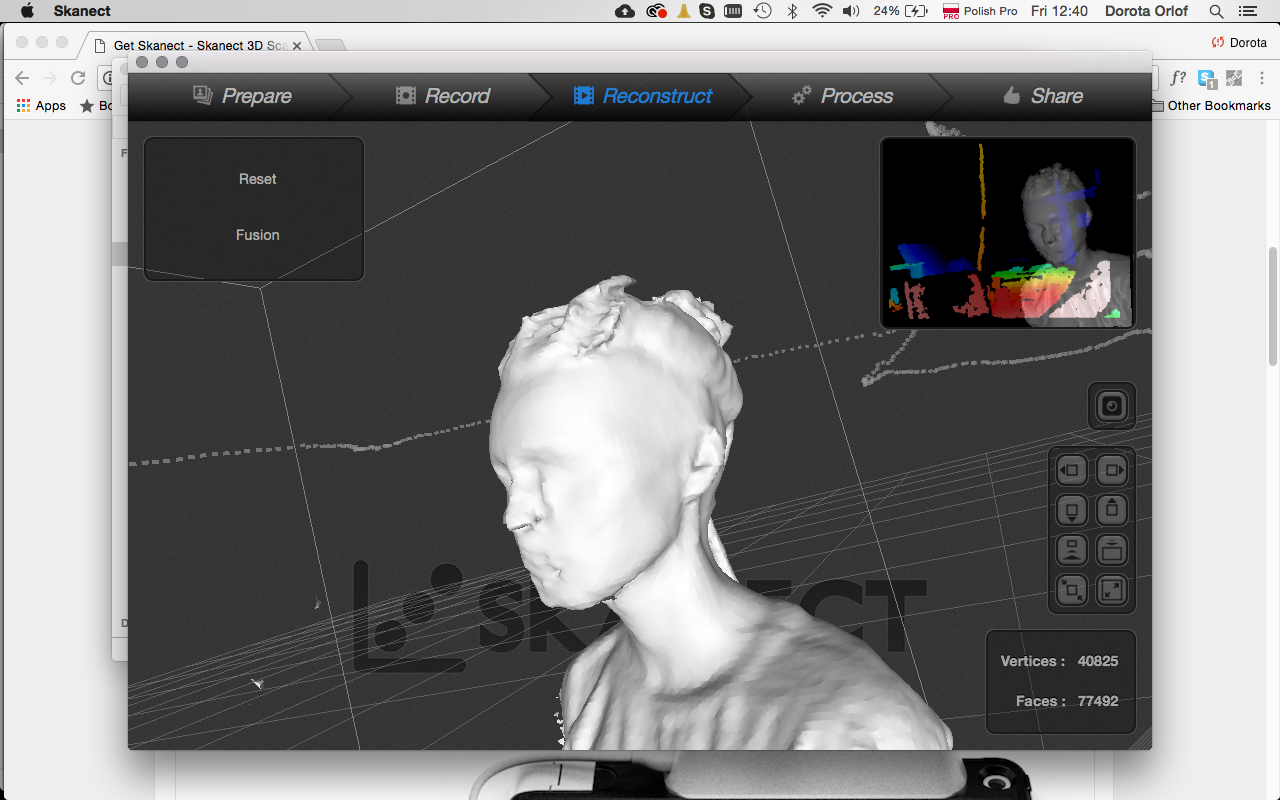
Afterwards you can reconstruct your object with higher or lower fidelity:

And process e.g remove small not wanted disattatched parts:

Conclusions:
Kinect is good with scanning bigger objects, in a good light. The best is to put Kinect in a stabile position and turn an object e.g. on a rotating chair. It’s also good to have as much homogenous background as it’s possible.
If you will deal with this things you could reach a good quality of the scanned object. The advantages of this technology are huge, one can scan even the interiors.
3D scanning technology can be applied in 3D graphics, film industry, virtual reality, modeling and 3D printing of the architectonical models and many others.
Anothr scanning technology is: Roland MDX-20 Milling mashine with a needle used with software dr.Picza.
Unfortunatelly I didn’t have time to try it out, still noted tipps for trying it in the future:
- one has to place an small object on the board by use of double side tape or simillar
- specify area which will be scanned
- specify the Z-bottom point (where the object starts) and Z-top point (the highest from your model)
3D printing - group assignment
We used for our test a RepRap (3) with a nozzle of 0.4mm. The material we are going to use is PLA 1.75mm filament (3mm filament is available for the bigger nozzle).
Preparng the file
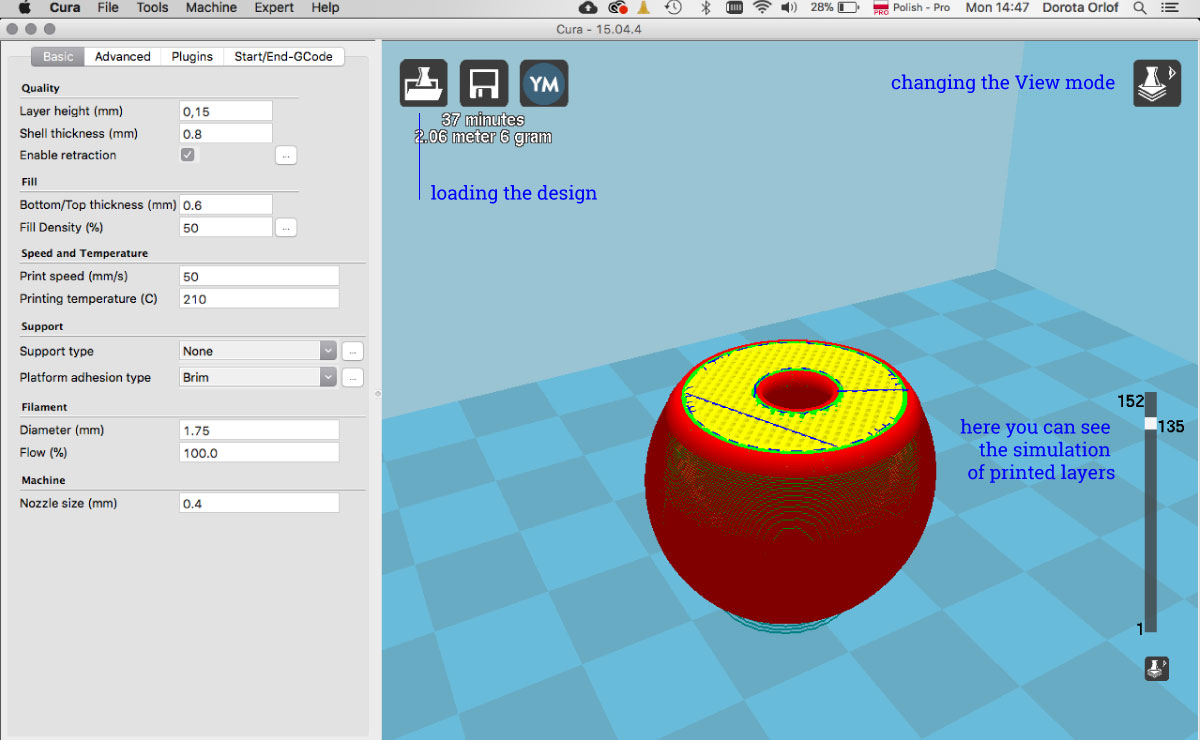
After opening the Cura we open our .STL file (https://www.thingiverse.com/thing:636363) and lay the part flat on the machine bed.
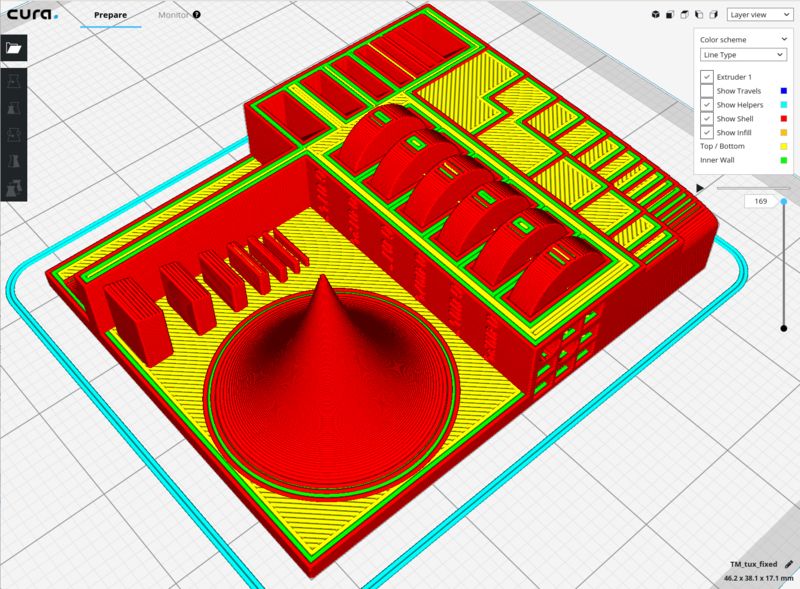
The cura in FabLab Barcelona has saved settings for each machine. Here the screenshot for RepRap 3.
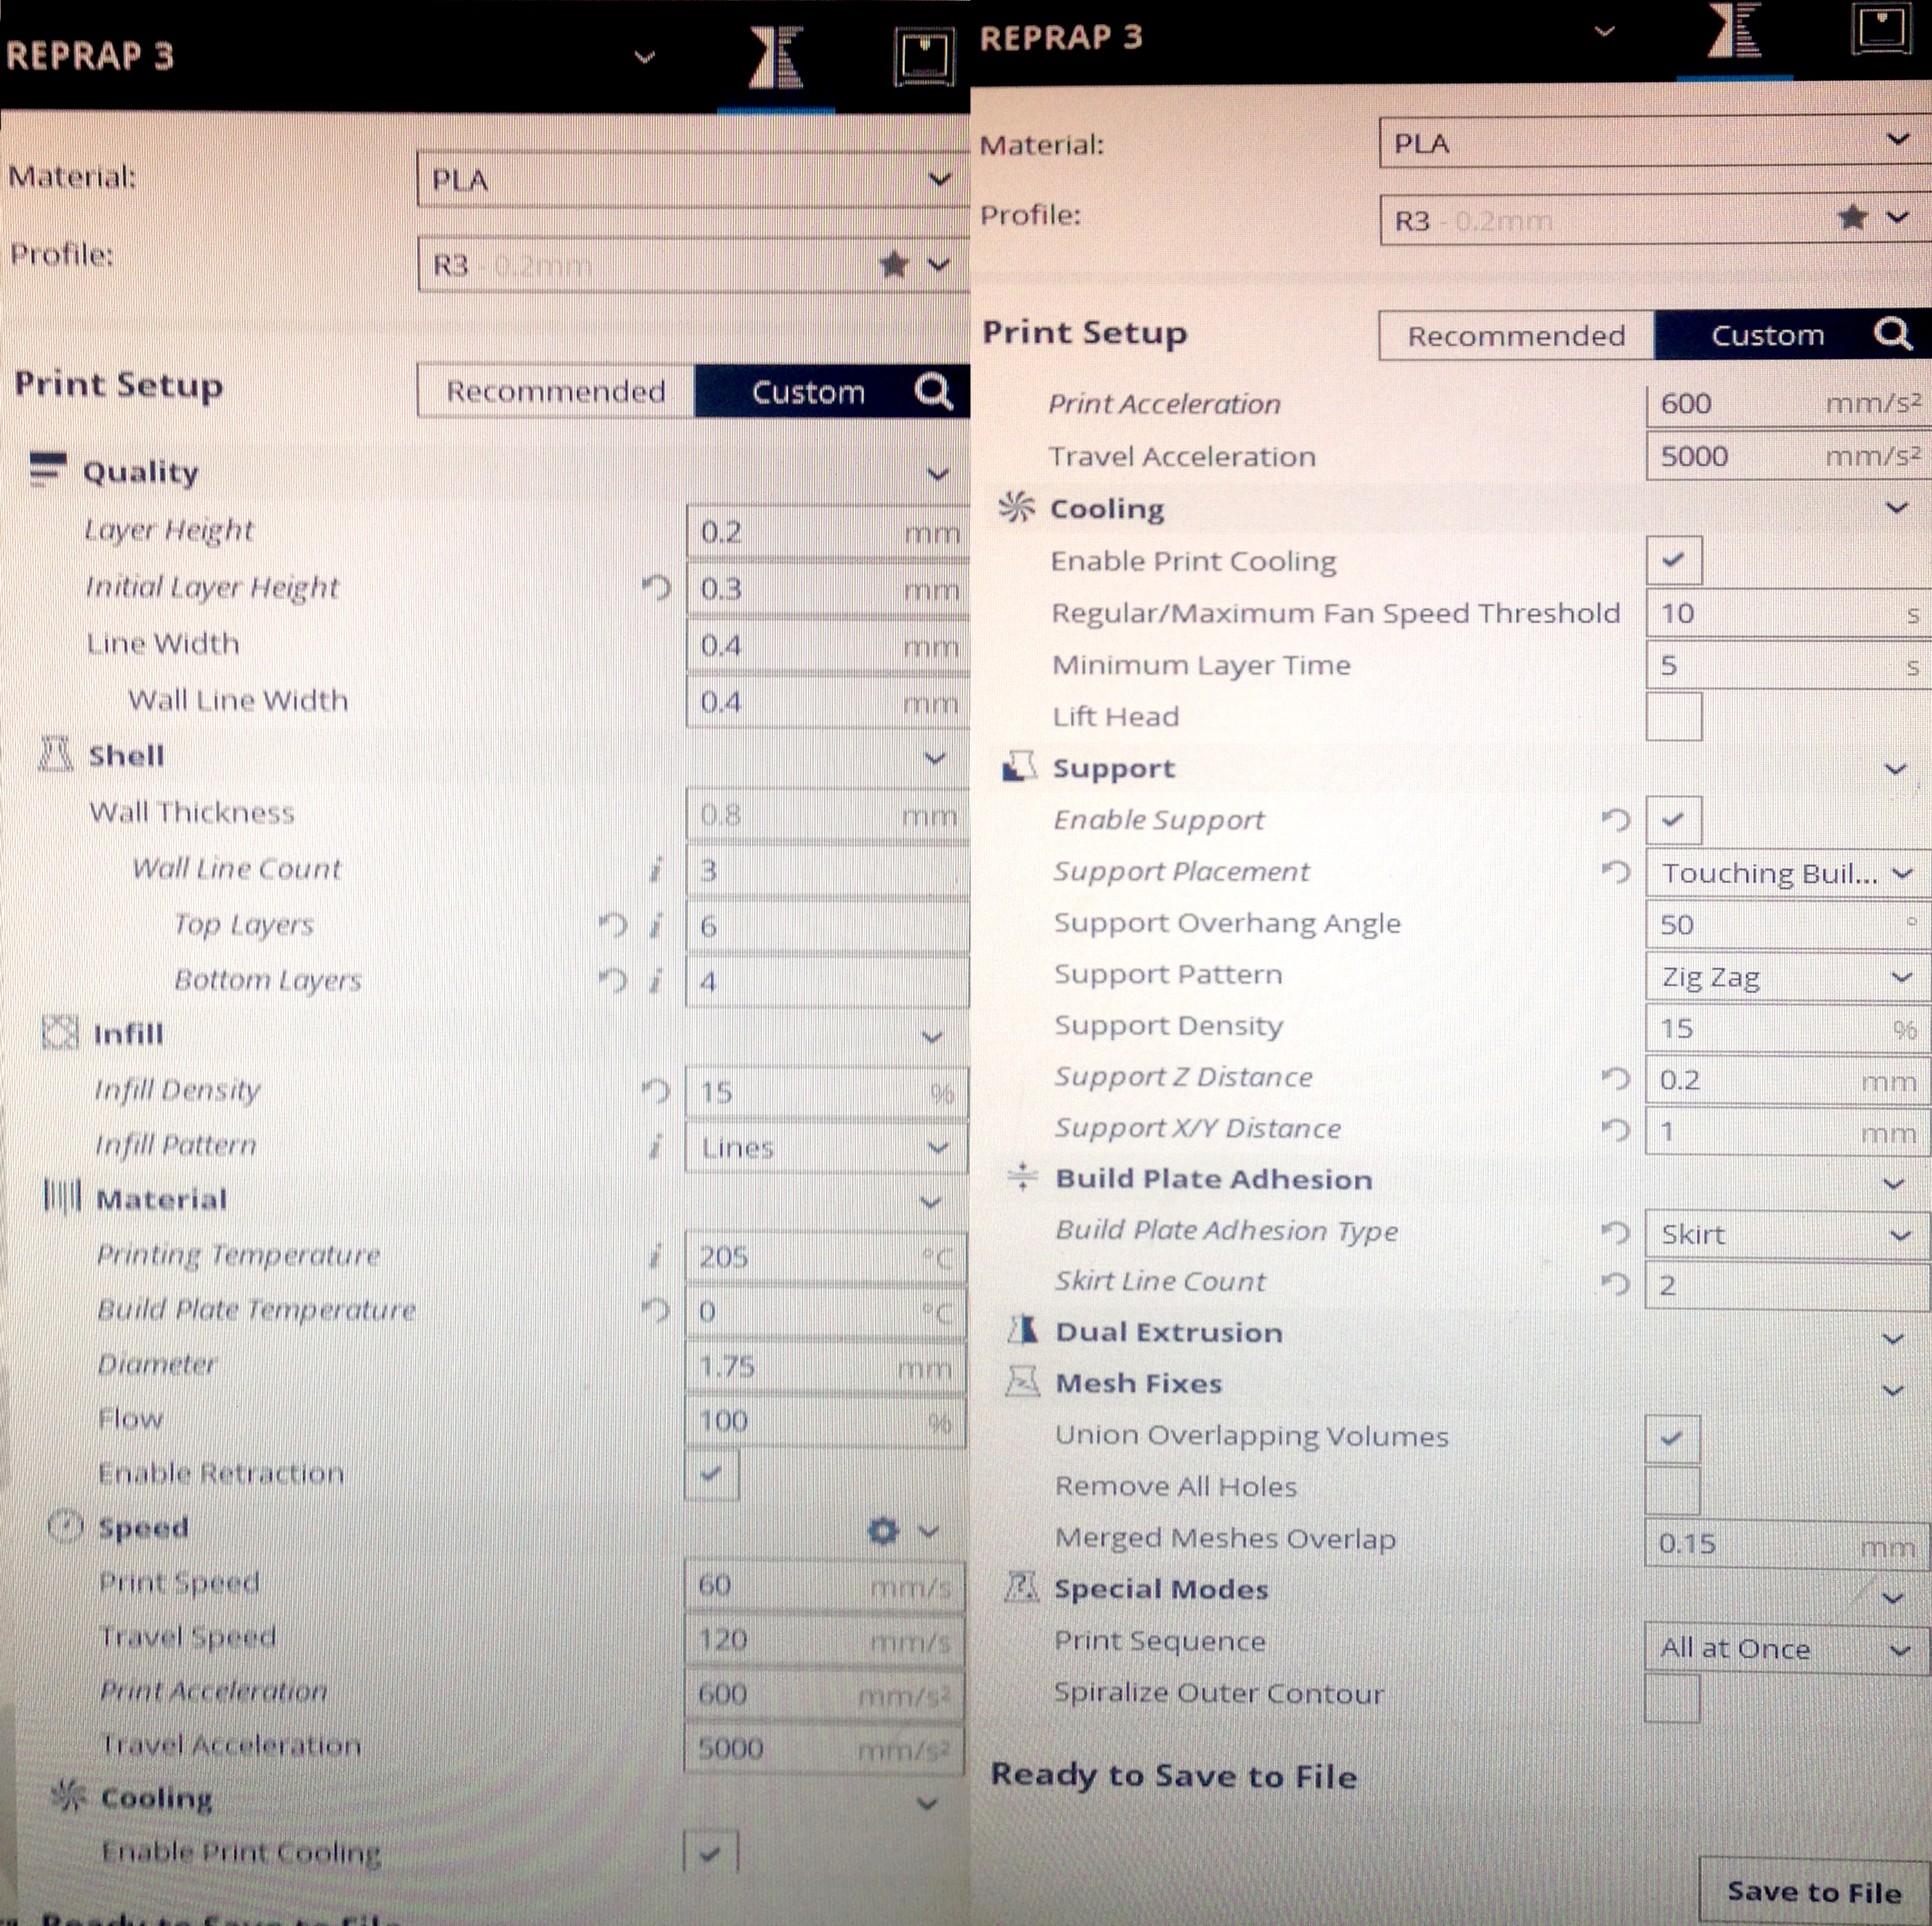
- Layer height: is the main setting influencing quality. Lower mean better resolution, but also longer printing time. Max layer height usually is around half the nozzle diameter.
- Line width: is usually similar ot the nozzle size.
- Wall thickness/line count: determines the thickness of the vertical walls. Bottom and top layers usually have higher thickness to avoid bending and appropriate support.
- Infill density: is the main setting that we can change based on the structural requirements of our part. Low infill (10-15%) is faster to print but will make our part less resistant. High infill (30-40%) is slow to print and makes our part more resistant. Low infill also requires more top layers to be added to the default values.
- Temperature: optimal temperature for PLA is between 205-215 C and can be varied adjusted based on the speed and need of cooling of the material.
- Support: is important to enable for structures that have hanging part that would otherwise fail to print or fall down.
- Build plate adhesion: to help the adhesion to the plate differnt support structures can be printed like ‘skirt’ (mainly to clean the nozzle before printing), a ‘brim’ or ‘raft’ (that give an increased level of support and help adhesion to the bottom layer)
- Retraction: is useful to adjust to avoid material to be extruded when the nozzle moves between separate parts of the piece
- Travel speed: default is fine. Too fast will resul in a failed print. For fiberflex material requires circa half speed of PLA.
- Cooling: should always be enable for better quality
The printing process (RepRap)
Once we have saved the GCode file in Cura we can send it to the printer via Octoprint https://octoprint.org/
- Open octoprint (bookmarks for each machine are saved in the browser).
- Upload the file to Octoprint: save the file locally to the machine.
- Prepare the printer:

- Remove the bottom plate, clean it from existing residual material and apply a little hairspray (helps the bottom layers stick to the plate)
- Extrude for a bit of material on a side of the plate to clean the nozzle (prepare > moxe axis > extrude).
- Press “Auto home”. If the plate is not aligned disable the stepper and move it to home manually to adjust and level it.
- Extrude a bit more of material before running the print job.
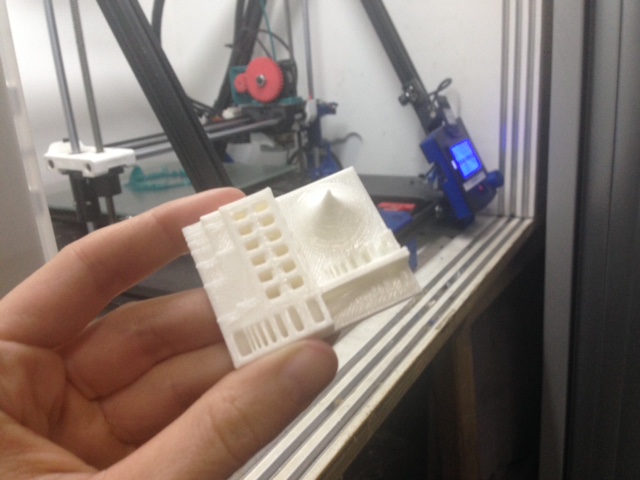
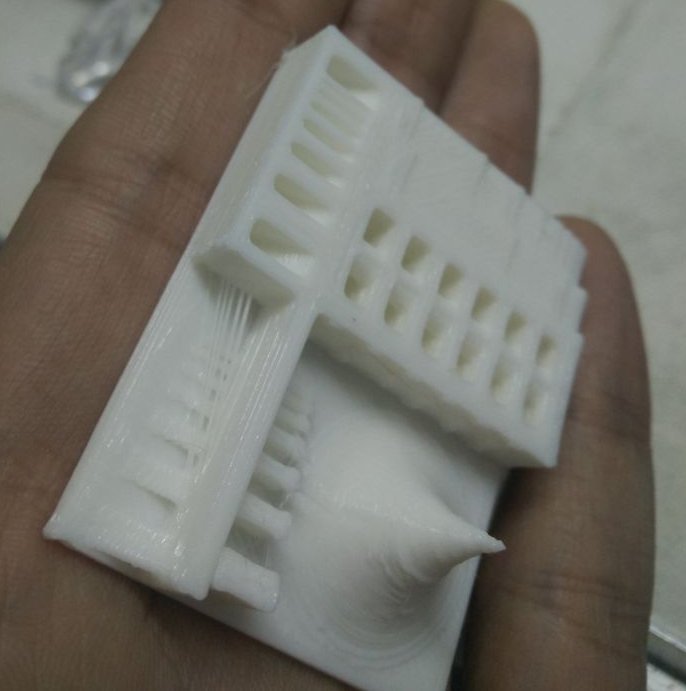
- On a side little extruded artifacts are present: in this case these are easy to cut with a knife. For optimal future results these can be fixed changing the retraction parameter.
- We have issues with missing details: thines holes, overhanging semicircle. These can be fixed by adjusting the line thickness if the nozzle resolution allows it.
- for troubleshooting one can check: http://reprap.org/wiki/Print_Troubleshooting_Pictorial_Guide
3D printing - individual assignment
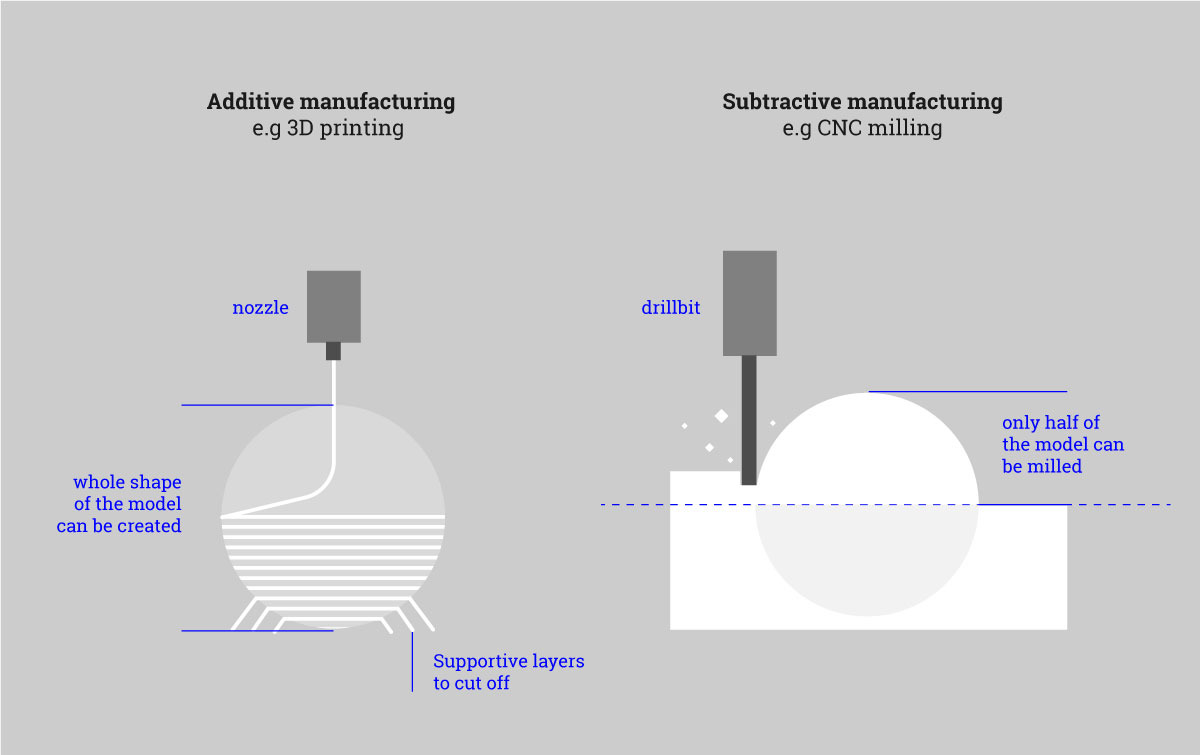
Substractive and addictive manufacturing
I’m going to model and print an eyeball - I’m curious how the 3D printer will deal with spheral object.
This object is a good example to try in this technology since it can not be easily made in a subtractive way. Theoretically it could be duble-side-milled, though it will be more tricky and will requires the positioning tricks.
Here I’m showing why it’s a good idea to 3D-print my eyeball:
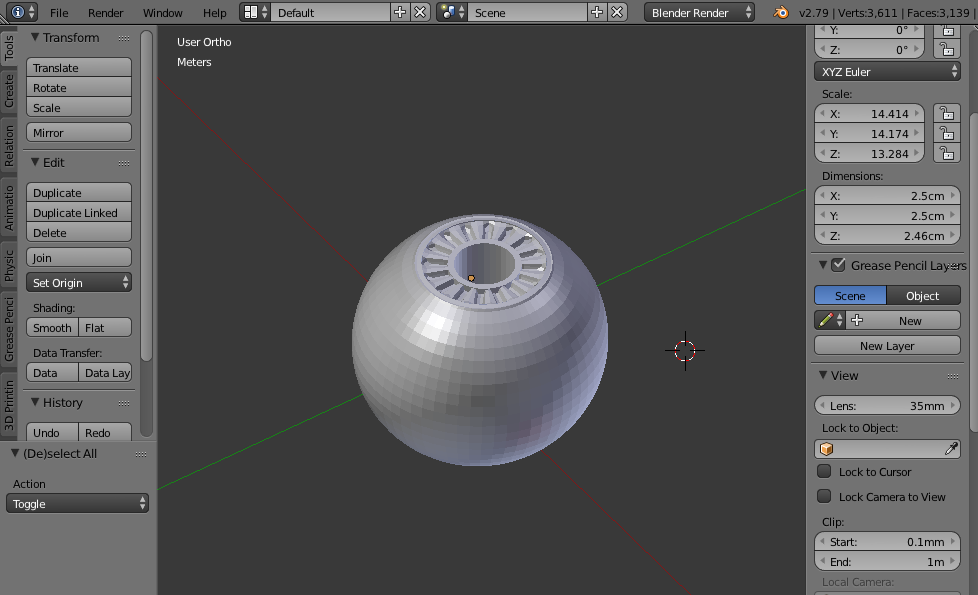
Preparing the model for 3D printing in Blender
I’m going to base my model on the UV sphere:
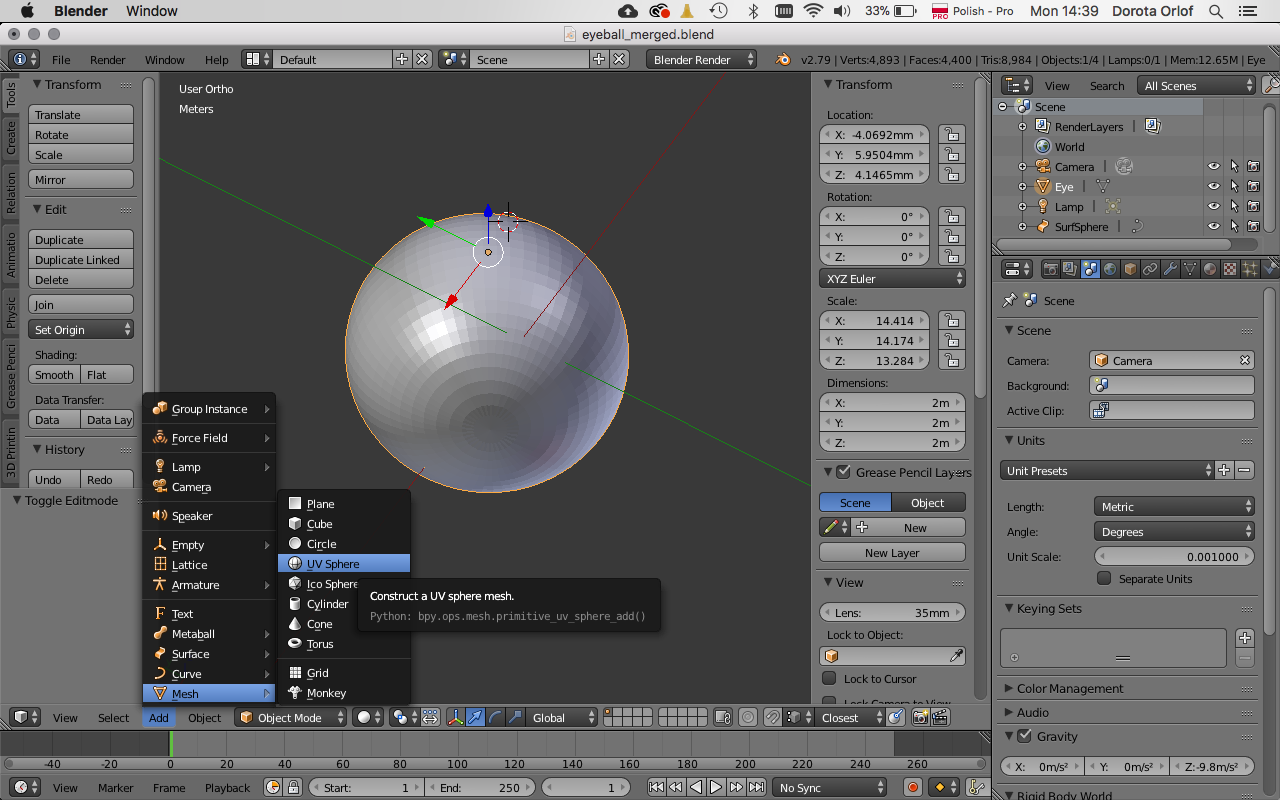
A sphere is made from segments, I’m going to work on faces and edges of this segmants.
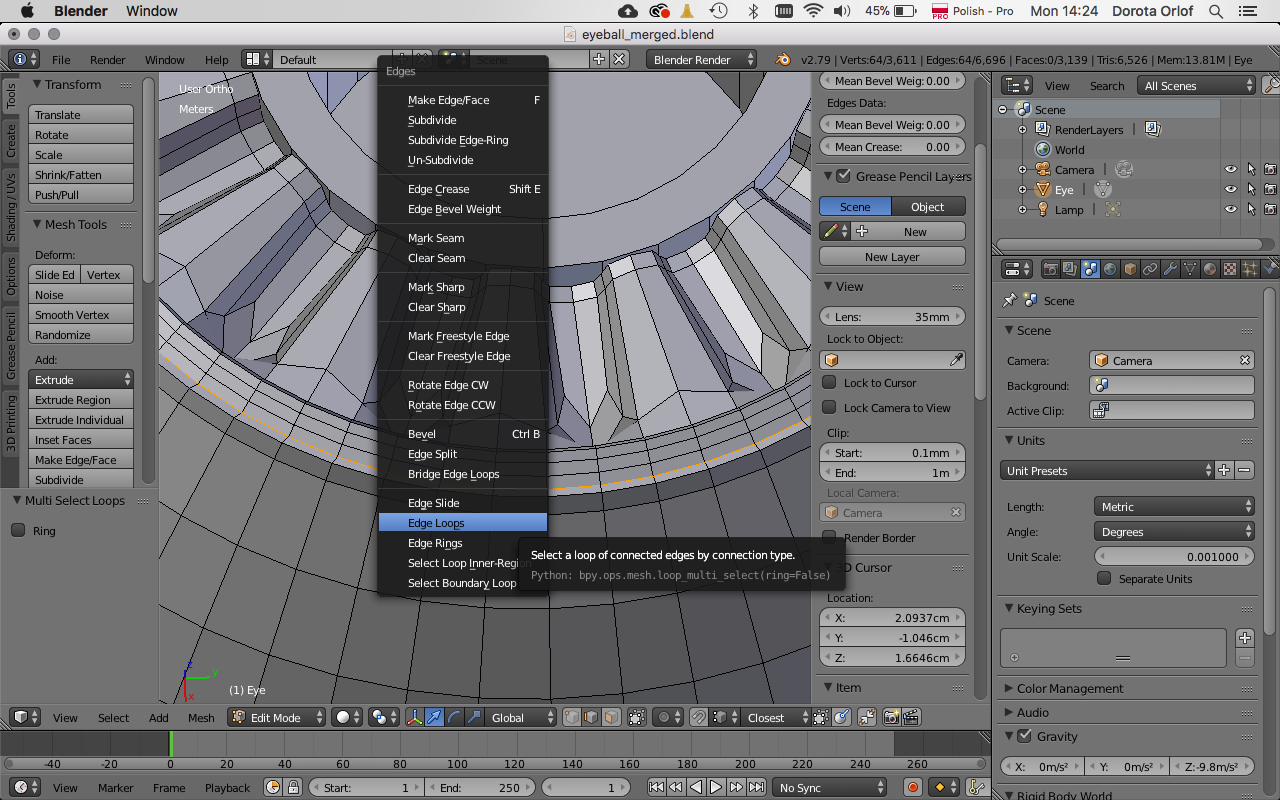
Very useful are loop selecting tools:
ctrl+e + select loop- selects the loop of edgesalt+shift + select another loop (by clicking)- adds another loopctrl+e + bridge edge loops- creates the connection between two edge loops
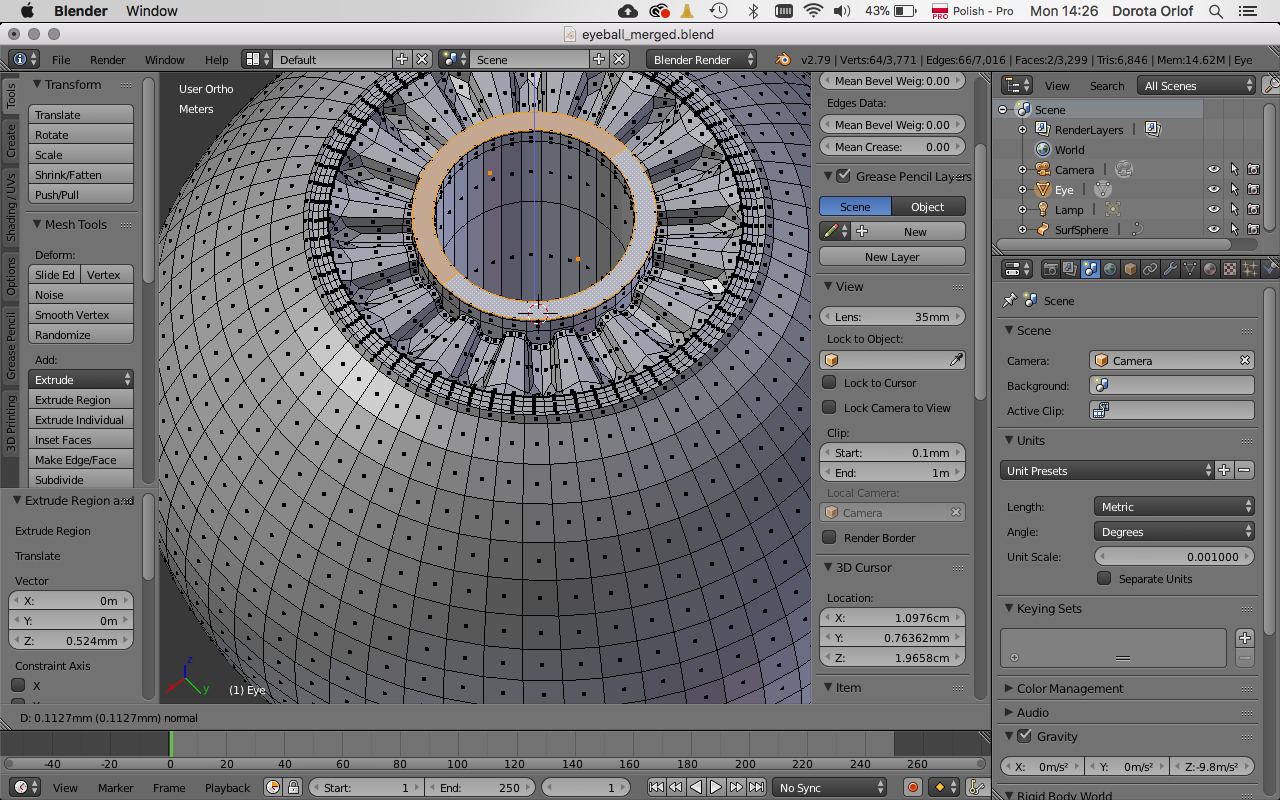
After selecting the areas I can run on them operations likeextrusions, subdivisions:
'e'- extrusion/copy - right click for keeping it in neutral position'ctrl+r'for adding the subdivision (lines, circles) to th squary surfaces
Another useful tricks and shortcuts that I’m using:
tfor menunfor menuspace- for search menu (different in objct and edit mode)- importing .stl or .obj
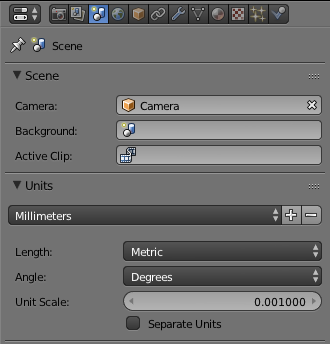
- set up the units for milimeters
- shading -matcap for checking the surface
- ambient occlusion
- select all (a), remove doubles (happening often while scanning)
- normals - perpendicular to the surfaceof of the mesh (mesh display in edit mode) > make normals consistent
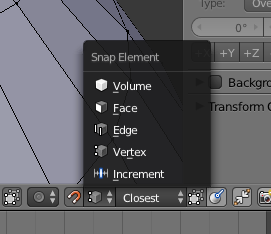
- snapping tool (to check out)
Mesh 3d printing toolbox:
- file -user preferences - addons - mesh 3d printing toolbox
fix intersections(choose all of them, execut command: smooth)solid(report of holes to fix to have a solid shape)ffor filling the hole (after choosing the vertexes)scale to bounds- setting the max length of the objectadd modifier - decimate
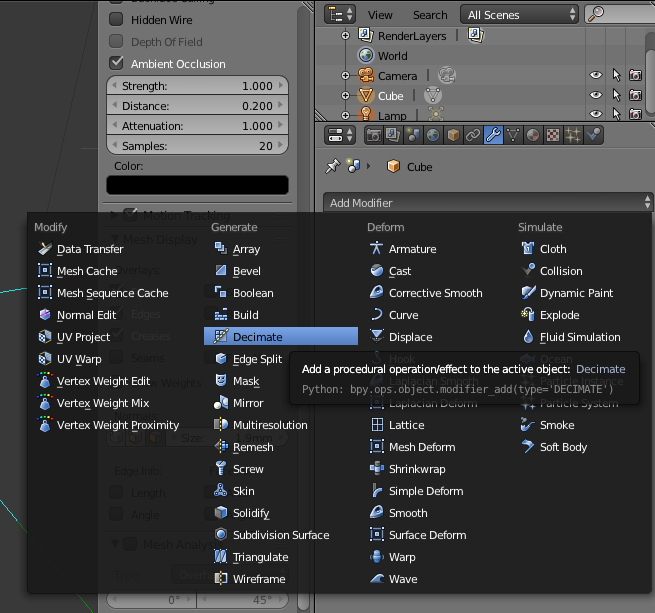
collapse- ratio - creates low polyplanar- simplifying the similarily positioned faces- one can apply modifier also to selected group of vertextes
- scale (
s) along z-axis (z) to (0) - boolian operations - difference
cfor circular selectionsculptdyntopo- creating details by subdividing, like a brush- symmetry (active by default)
- file - export -
stl apply modifiers(don’t forget to match this box)
For preparing the print / slicing one can use Sic3r Prusa Edition or Cura.
I’m going to use Cura. The file formats that this software reads are: 3MF, OBJ and STL.
I’m loading my stl file, setting up the parameters, checking the symulation and saving back.
For my individual assignment I’m going to print an eyeball. It will be smaller than in reality since I would like it to fit to the shell-shape metal case that I have.
I designed the shape in Blender. I was not sure how small details I can get, so I’ve decided to make a test. The size of the model was 25mm x 25mm x 25mm.
Since the shape is a sphere it has to be printed with a support on the bottom part (where the angle is less than 45 degrees).
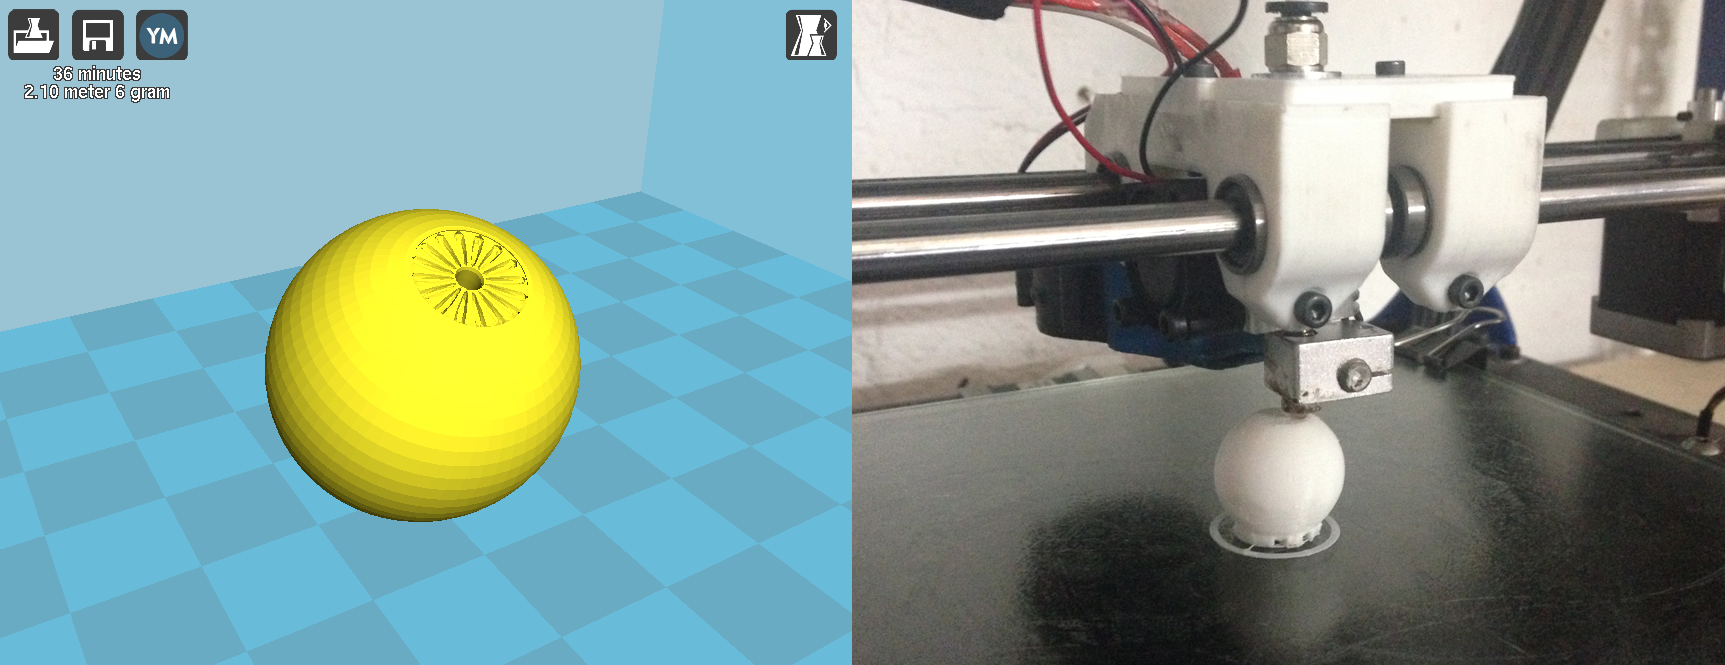
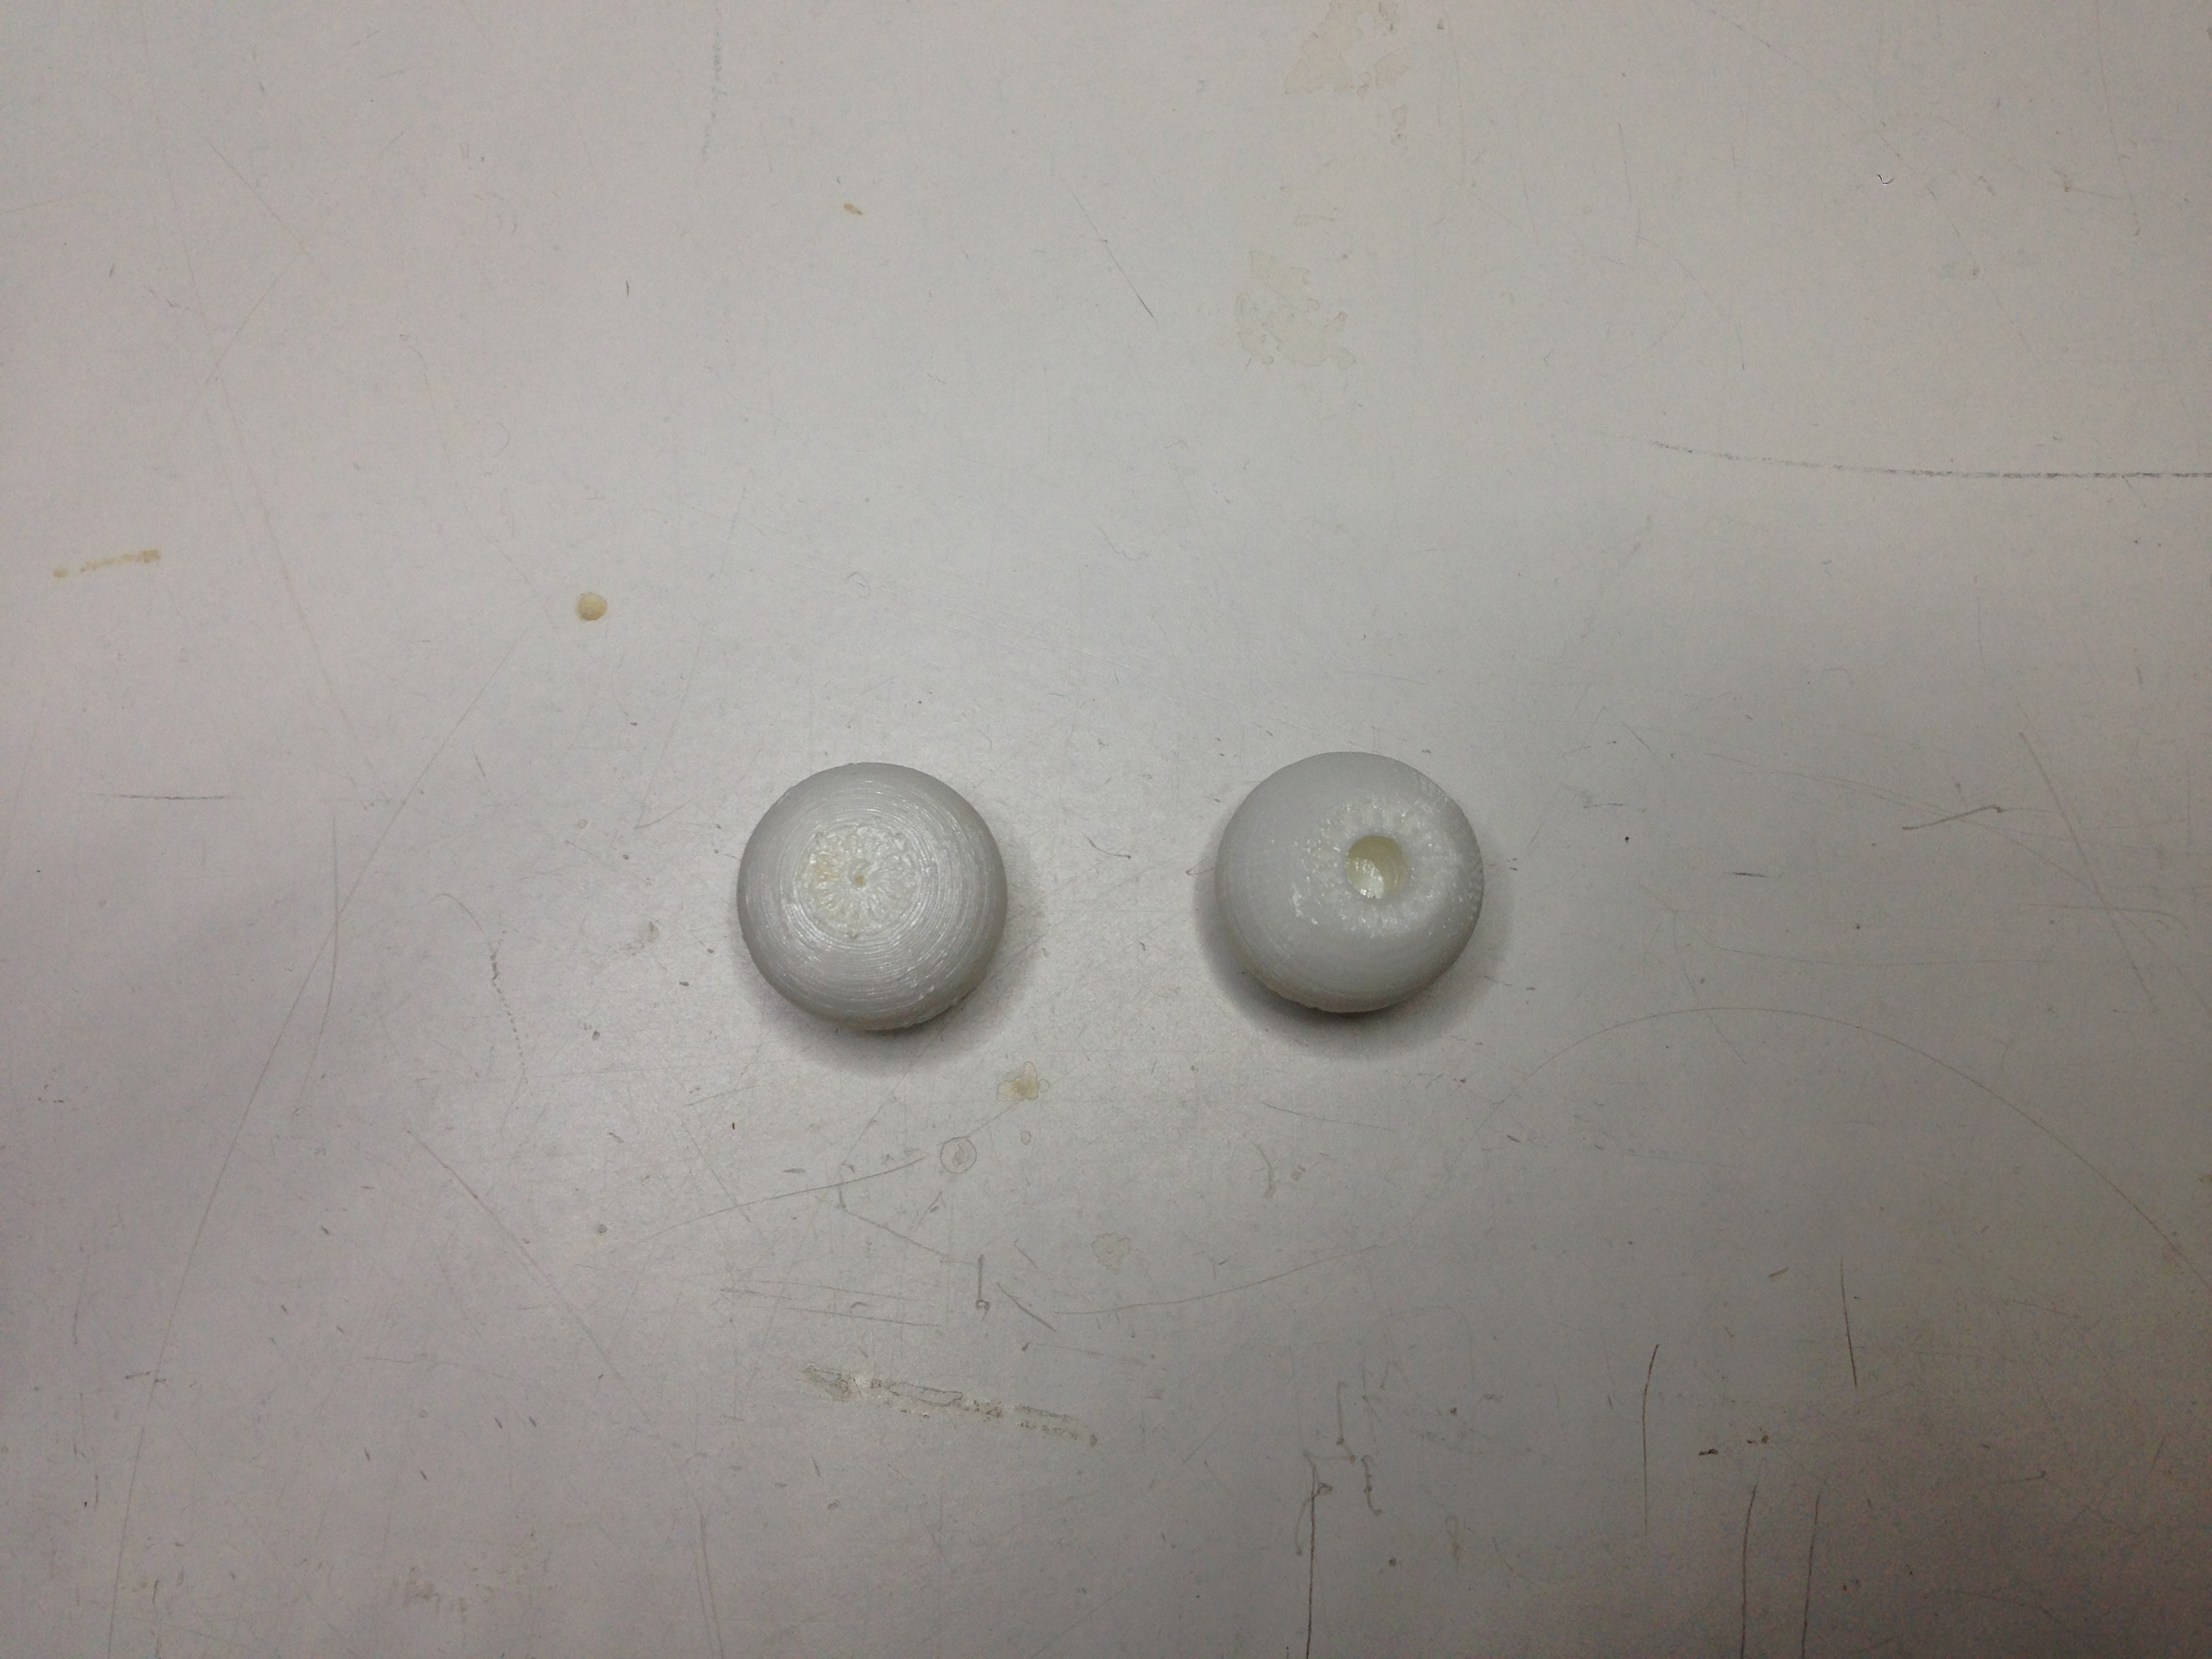
It turned out that the details of iris are too small to print properly and the pupil-hole is being awash by filament. I needed to rework my design and enlarge the important things.
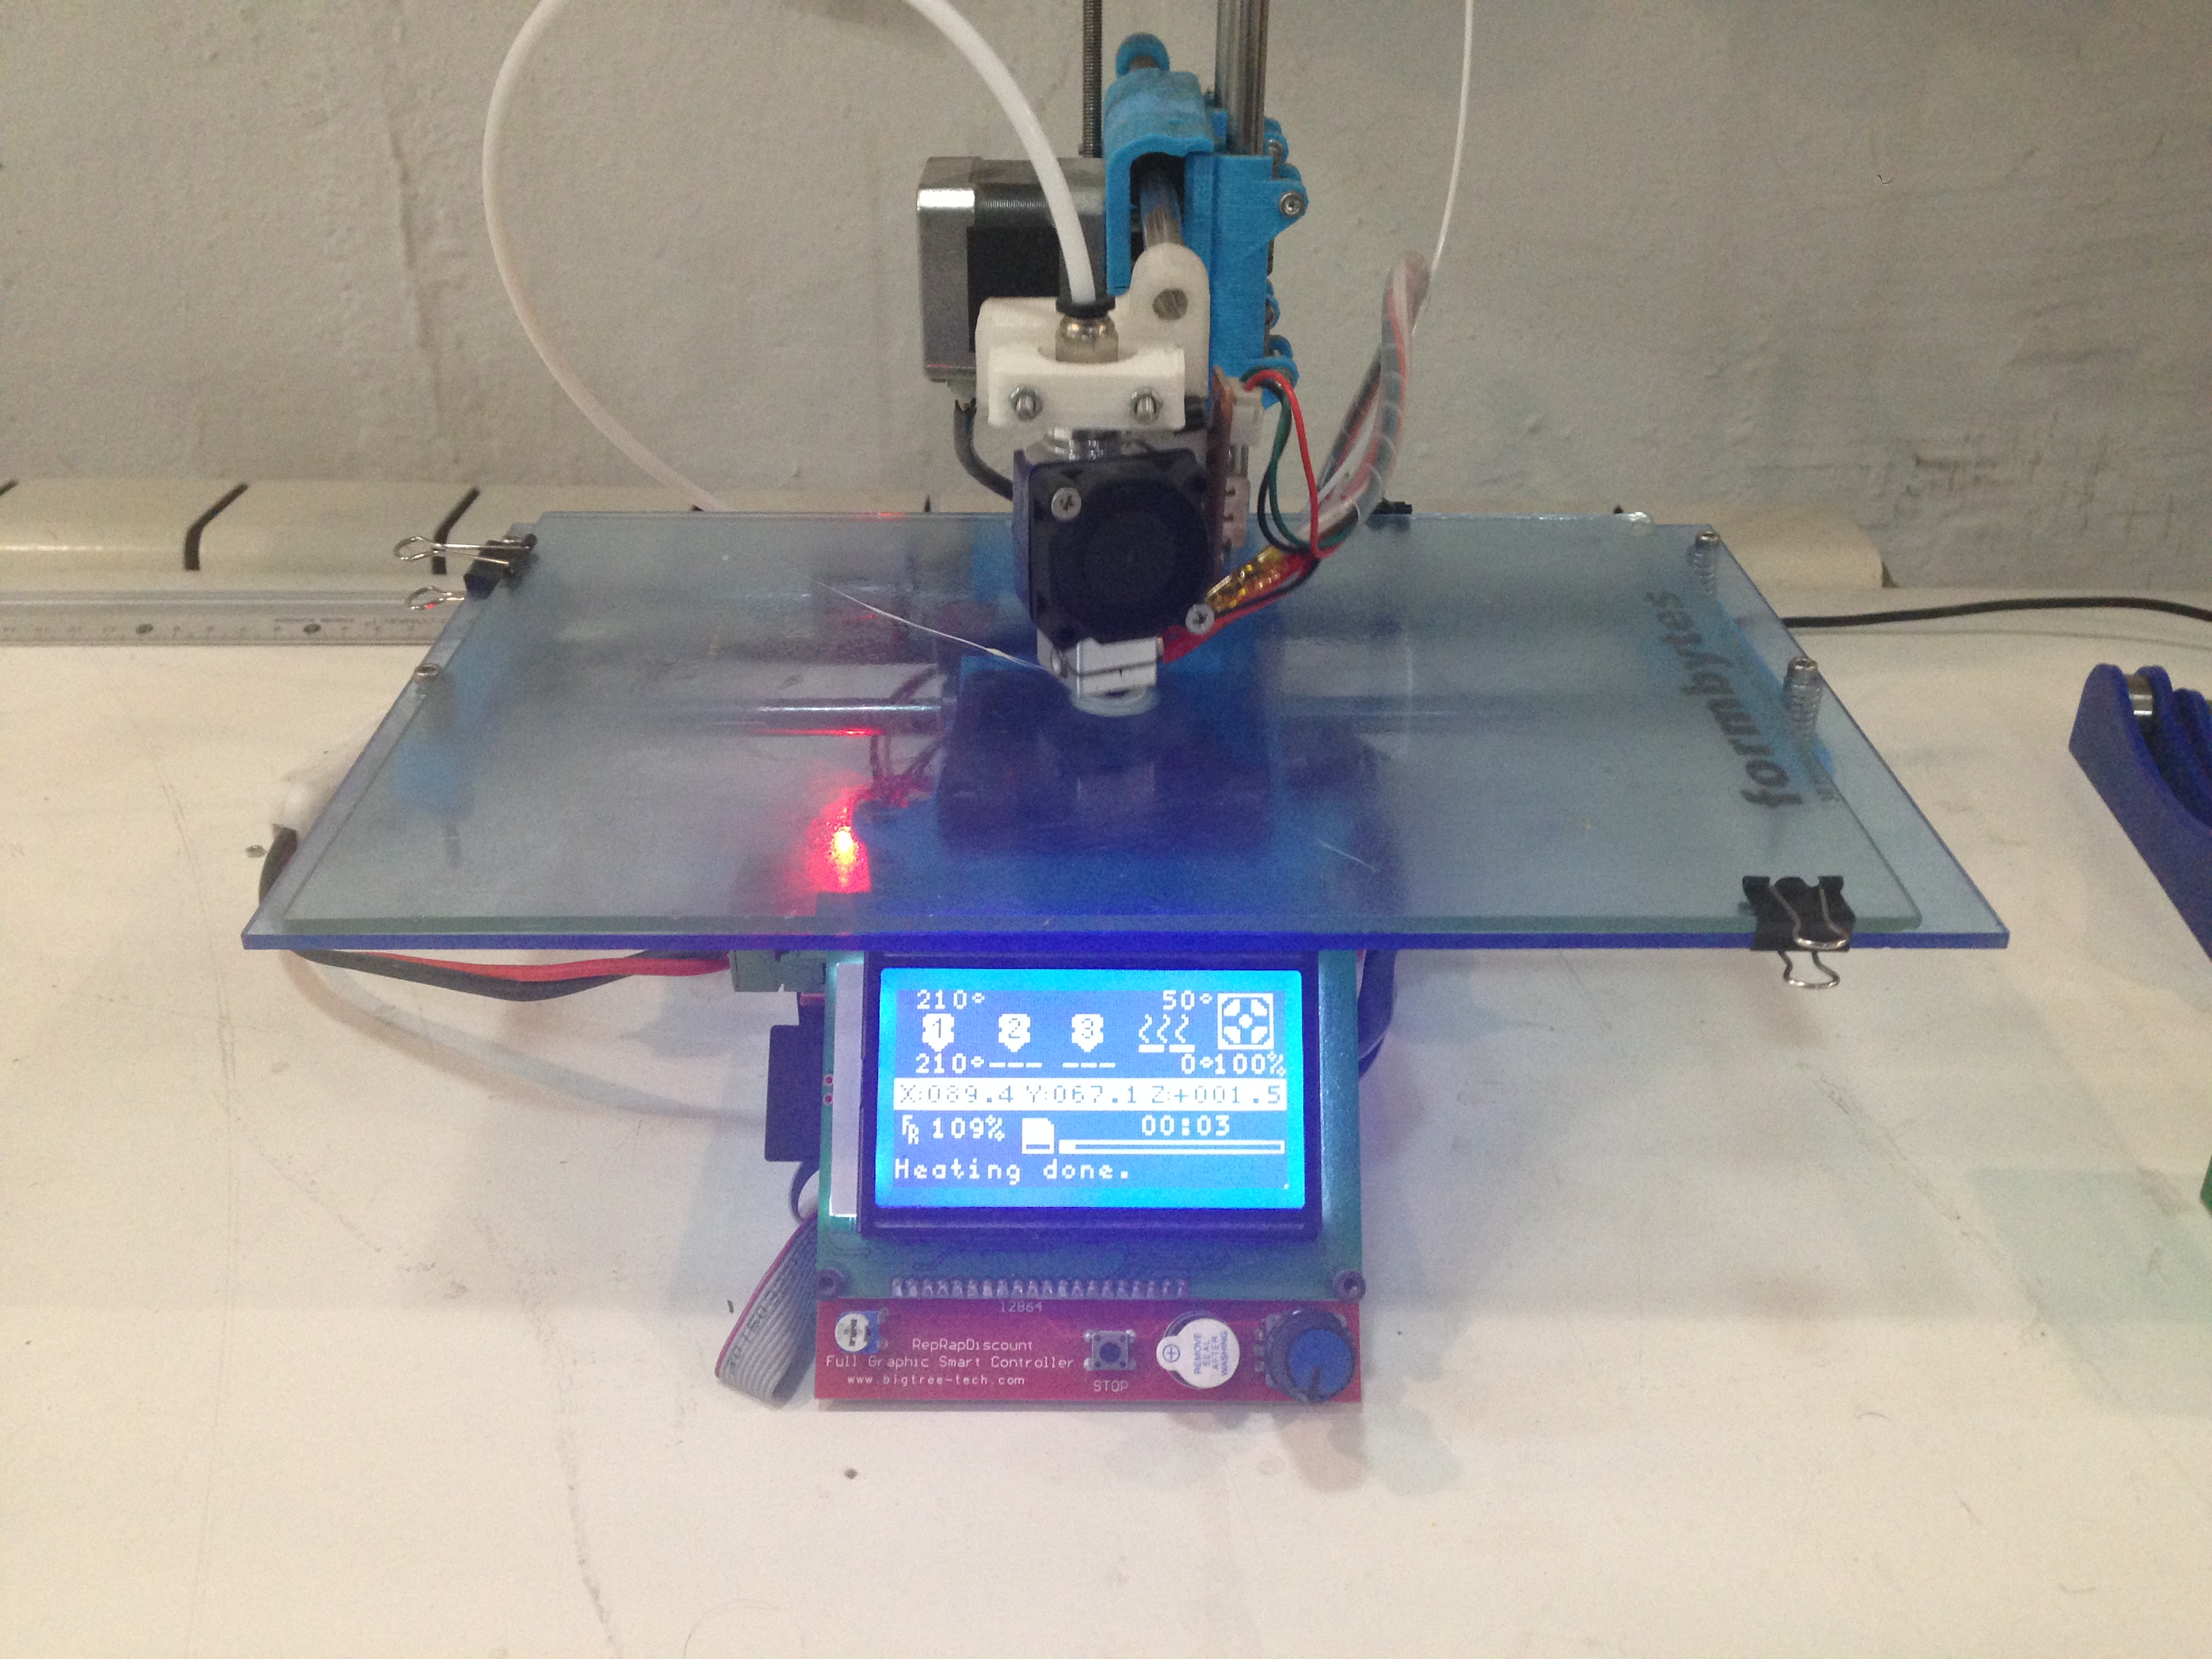
For the next print I’m going to use different printer. It’s Formbytes. This one is a different room and there are no saved settings. One can copy them from local documentation of Fab Lab Barcelona.
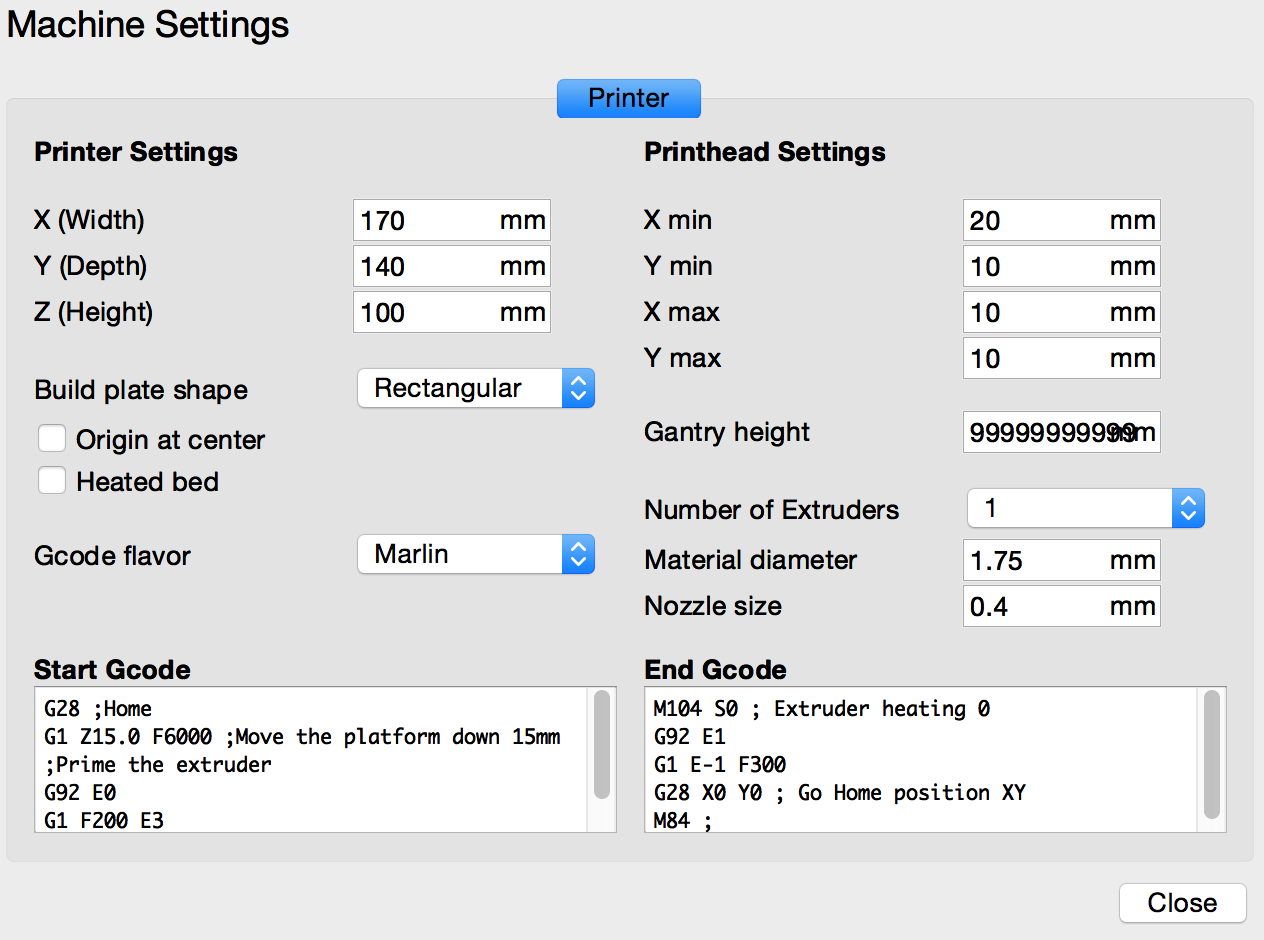
The G-code:
*START CODE*
G28 ;Home
G1 Z15.0 F6000 ;Move the platform down 15mm
;Prime the extruder
G92 E0
G1 F200 E3
G92 E0


*END CODE*
M104 S0 ; Extruder heating 0
G92 E1
G1 E-1 F300
G28 X0 Y0 ; Go Home position XY
M84 ;
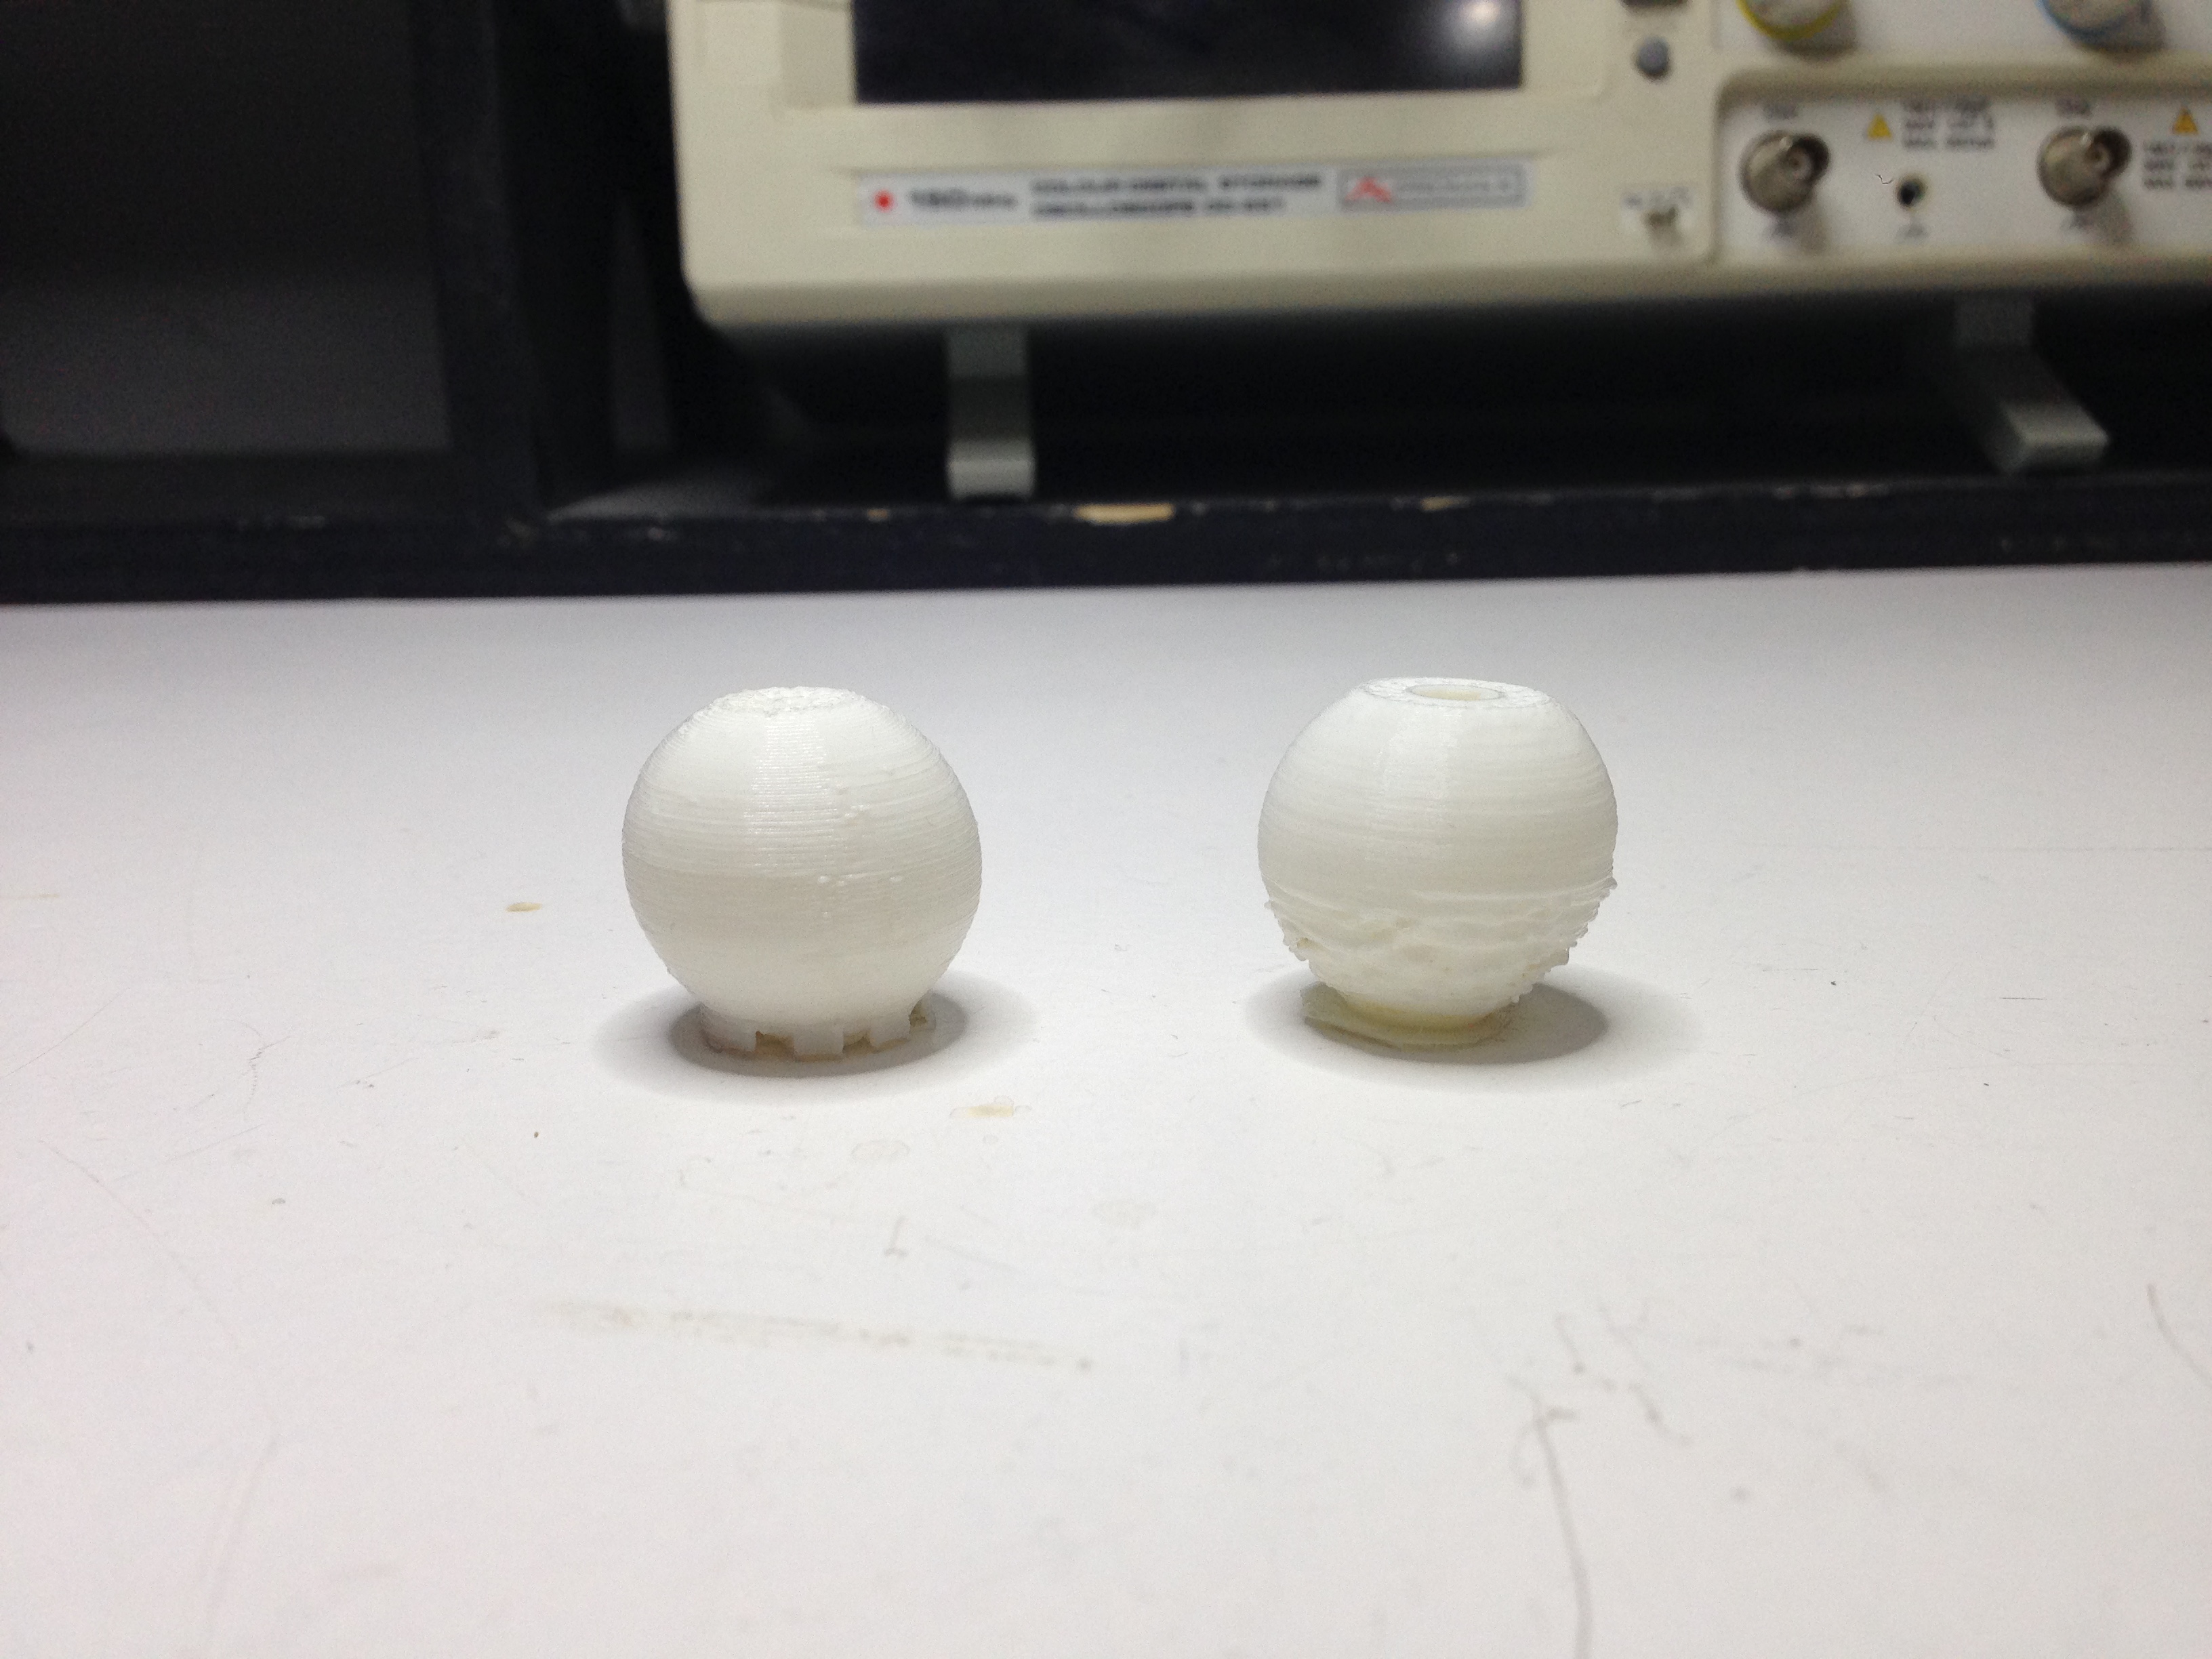
This time I decided to test how the quality of the form and structure will looks like without the support. Didn’t work so well. Here the comparison of two prints. The one with support looks better.
Advantages and limitations of 3D printing
Generally speaking it’s a wonderfull technology and already changed a lot in the industies. It’s fast tool for prototyping and creating realistic models (with a combination with 3Dscanning) e.g for architecture of medicine purposes. It’s relatively cheap and haghly available (RepRap concept).
Though there are some limitations as well. The printing process is very often “glitchy” and one has to repead the jobs many times. On the personal level it can be also time consuming becouse of it’s dependance on the electricity and long duration. For example if I’mprinting something that tooks 5 hours and there is a power going down in electrical line (happening often in fablabs) just 30 mind before finishing…The machines are requiring constant maintainance since parts are being overheated, melted, burnt…etc. z z
Useful tools:
Beetle Blocks editor http://beetleblocks.com/run/
Meshmixer for fixing th mesh e.g. after 3D scanning by Kinect https://www.meshmixer.com/
- blnder fundamentals https://www.youtube.com/watch?v=kes2qmijy7w
Files made during this assignment: