12 - Interface and Application Programming
AN INTRODUCTION TO PROCESSING
This week we were introduced to Processing in order to create an application to interface with a sensor that we made two weeks ago.
PART 1 - THE SENSOR
I made a microphone board that didn't work last week, but was able to get it working this week. More on that here. That was option number 1.
Option number 2 was more attractive - a motion sensor that we had in inventory. (Data Sheet)
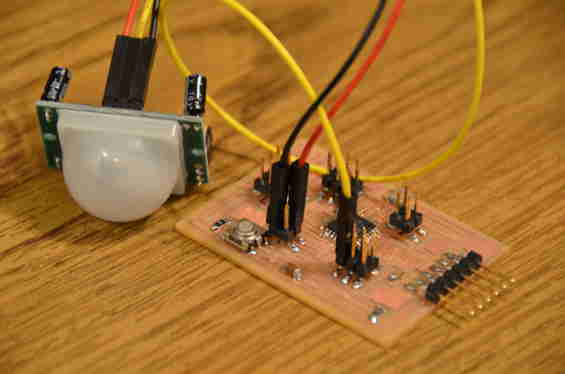
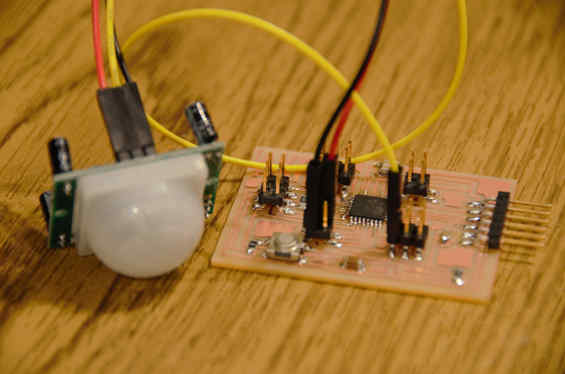
I connected the VCC and ground to my arduino I made back in Week 8. The trigger is hooked up to Analog pin 0 on my Arduino.
PART 2 - PLAYING WITH PROCESSING
I read a couple tutorials on some processing basics and how to draw shapes then wrote a little program...
(Ignore the commented lines - a little experimenting was going on.)
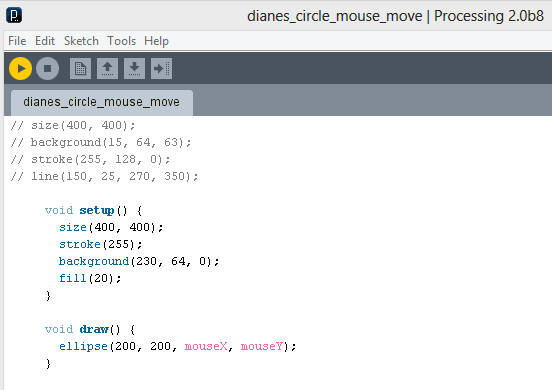
...which did this:
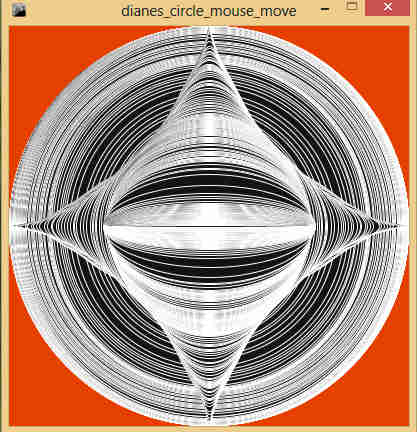
(If you feel like your life would not be complete without the code and are too lazy to re-type what is above, here it is: cool code)
PART 3 - SENSOR + PROCESSING = GAME
Since I got the motion sensor working, I thought that I'd make a little window that would show 'Red Light' or 'Green Light'.
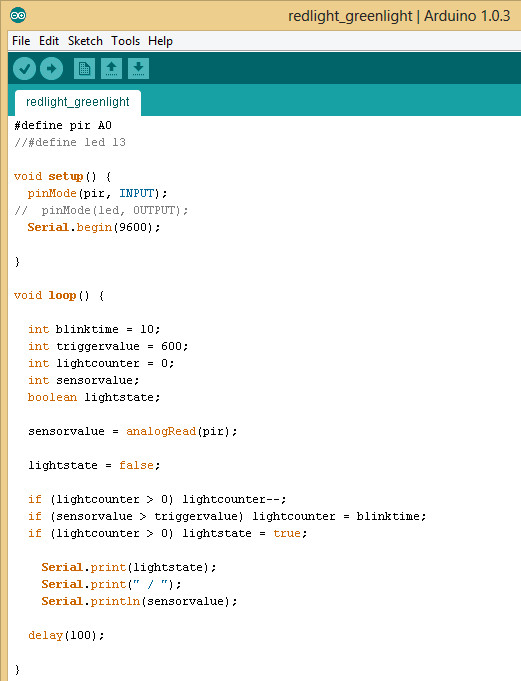
I used this code as a starting point for programming my motion sensor. I was originally going to use this code for the sensor and do the programming in Processing, but the first hurdle I came to was the lack of a delay function or timing in Processing. Since I'm a beginner and after talking about this with a firnd at work, I decided to take his advice and to the bulk of the programming in the Arduino IDE and just leave the visual display portion to Processing. With some suggestions from the aforementioned friend at work, my code evolved into this:
I'll get back to issues that I have with the code in a bit.
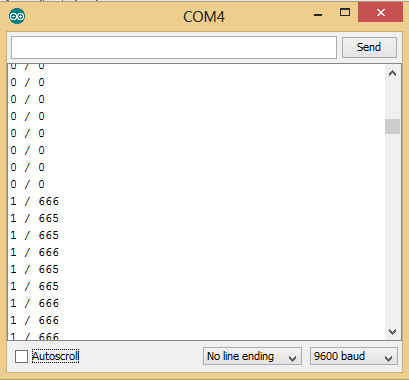
I set the output to show whether it is triggered or not - here called 'lightstate' which is true or false. Here is an example of what shows in the serial monitor when I upload the sketch to the board: