This week assignment: make something big. I have several ideas, but I have some interesting constrains. In Barcelona there is a strong culture of recycling and waste management therefore we are expected to recolect stuff that peoples and factories left in the trash.
In my case, I've collected two boards of wood and one small desk that I've found on the street. But I had one additional constrain, because I havent properly marked it seems that one board and the small desk was trashed.
In the end, Francisco Sanchez gave me the leftovers of a shelf that remains after a home accident (the ceiling of his kitchen went down). And the phrase one man trash is another's man treasure never was so accurately used.
Using a CNC tool (Shopbot) a furniture design was milled. The instructions of how to use the Shopbot are at this link.
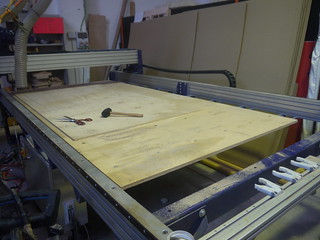
The most important thing before to begin is to secure the material (wood) with some screws in order to be fixed and not generate a potential incident. Also is necesary to wear glasses to protect your eyes.
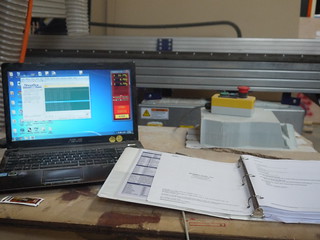
The design can be natively worked at Kokopelli, and exported as a Shopbot part (.sbp) or worked in any file format that PartWorks accept (.pdf, .dwg, .dwf, etc) and then after made the proper adjustments export to .sbp file format that the Shopbot natively understand.
The design was based on the work of Ronen Kadushin and his creative commons licensed Italic shelf, although its version required more wood.
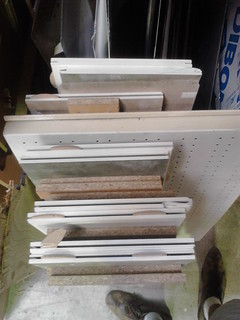
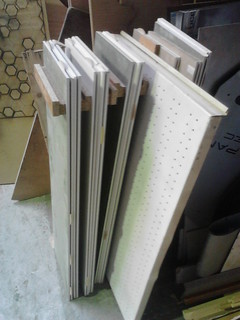
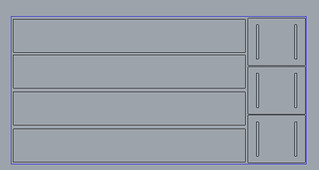
In this neoshelf version, the main constrain was the availability of wood, given that the only material available was one board of (1200 mm x 1800 mm x15 mm) and eleven (11) small boards of (975 mm x 270 mm x 17mm), these last ones were recycled material of a kitchen furniture that survived an accident and were given as a gift by Francisco Sanchez of Barcelona Fab Academy 2013.
Also, given the complexity for the use of the tool it is preferable to read the Manual.
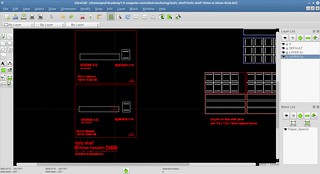
Step 0: Prepare the design using any CAD tool (in this case we are modifying a dfx file importing into LibreCAD)
Step 1: Modify the design using the constrains that you have in relation with material availability (finally Rhinoceros 3D is used). Result: digital 2D model ready
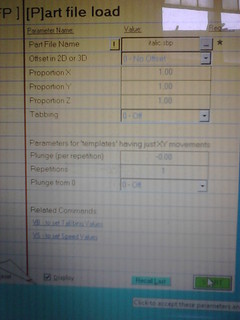
Step 2: Import the file into the Shopbot Partworks (now VCarve Pro ShopBot Edition) and prepare the toolpath. The export as a shopbot file. Result: Design exported into a shopbot file (.sbp)
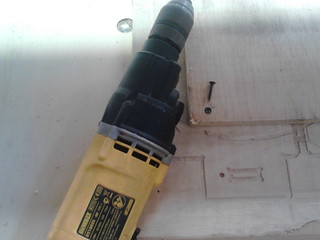
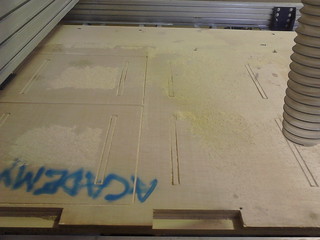
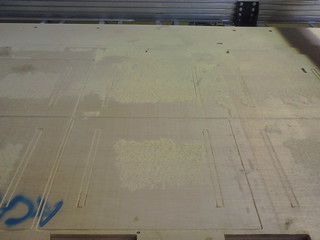
Step 3: In the CNC router workbench, secure the pieces of material with screws. Result: The material is secured
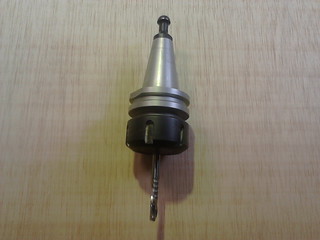
Step 4: Select the apropiate milling bit (in this case 10mm). To put on the toolhead press the green button while press towards it. Result: milling bit selected and secured.
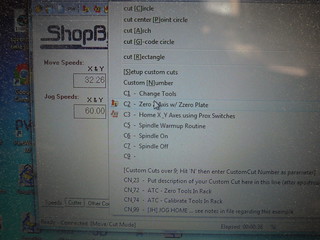
Step 5: Move the toolhead on the X and Y axis, then set zero for both axis. Result: X and Y axis zeroed
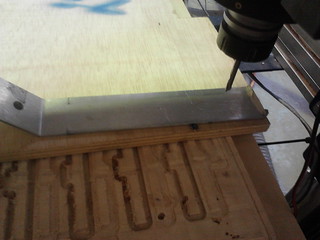
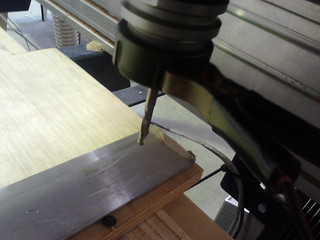
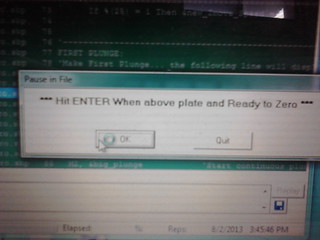
Step 6: Set zero for the Z axis using the metal plate. Remember to remove the plate and the aligator clip from its position. The metal plate should be put below the toolhead. The aligator clip should be put on the milling bit. After the signal from the software remove the plate and the clip and put on its initial position. Result: Z axis zeroed
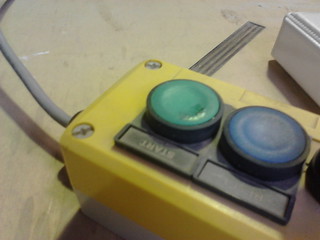
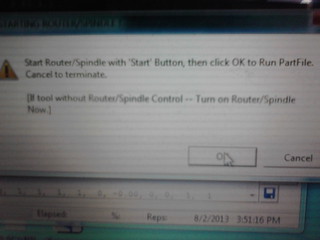
Step 7: Load the shopbot part file previously created in Step 2 into the Shopbot editor. Start the milling process pressing first the green start button at the software and then the green button on the physical control of the spindle. Then in the software again, click the Ok button to run the CNC. Result: CNC and spindle started
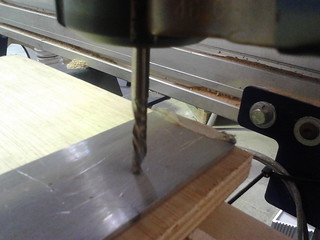
Step 8: Watch the milling process. Never leave the machine unattended because it can happens many things that requires instant attention. Result: Material milled
Step 9: Remove the milled parts from the workbench. Clean the waste and separe the scrap. Result: Scrap separated and workbench cleaned
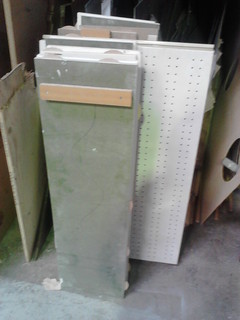
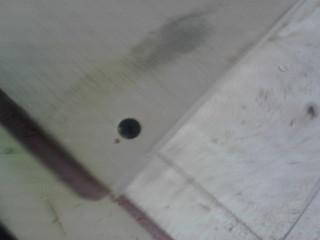
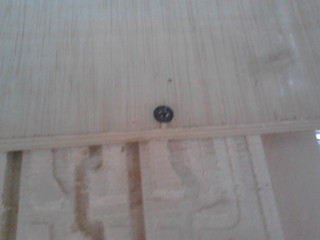
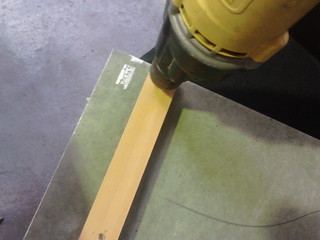
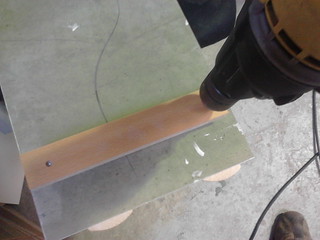
Step 10: [Only for this model] Repair and recycle the parts. In this case given the use of trashed material, the pieces need to be repaired to be reused. Because most of the surface of the shelves are just fine, it is only necesary to remove an extra support that each shelf has. Result: Material repaired
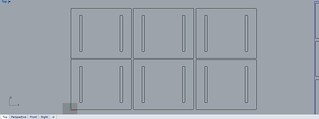
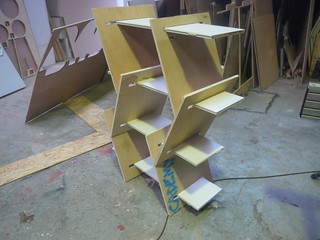
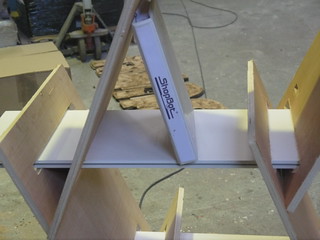
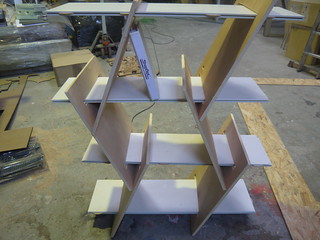
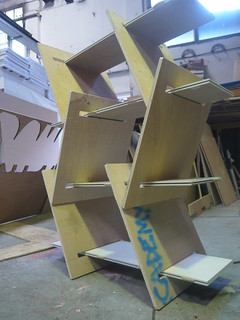
Step 11: Assembly and integration process. Assemble the pieces of the furniture following the design. Using the machined parts (spacers), and the recycled parts (shelves) the assembly process is showed. Each level is comprised of two spacers and one shelf, except the last level that only need a shelf. There are four levels in these design. The structure is self-supported and didnt require additional pieces, but it is required to build on site because to move it has to be disassembled and reassembled again. As long the center of gravity remains inside the base, the structure wont collapse.Result: Something big has been assembled.
Results:
A furniture was produced following simple design rules. A 3D estructure was generated from simple 2D pieces.