March, Tuesday 19th 2013
Assigment:
Read a microcontroller data sheet
Program your board to do something, with as many different programming languages and programming environments as possible
This week was mostly about getting familiar with the microcontroller we soldered to the Echo Hello-World Board we made in Week06
The microcontroller we used is the ATTINY44-SSU Microprocessor.
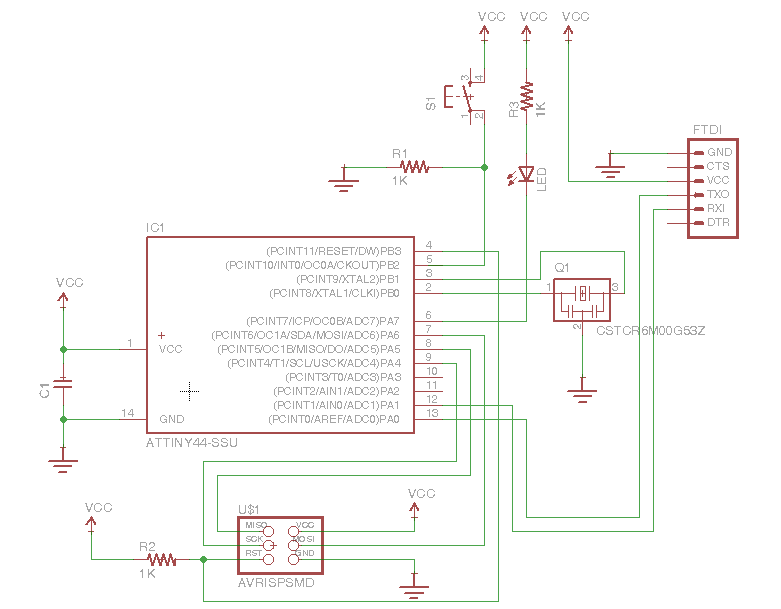
To understand a little better how it works I had to study again the layout of my board.
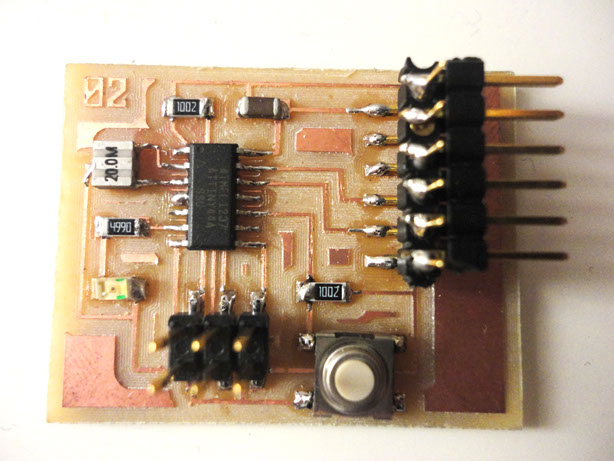
Here is the layout and the board with all the components:

Board layout

My Echo Hello-World Board

ATtiny Microcontroller Pin-Outs
Somehow the challenge was to understand the PINs in the microprocessor and program it to make the LED to turn on with the button.
To make this we were introduced with Arduino language.
You can download Arduino 1.0.4 for Mac here: http://arduino.googlecode.com/files/arduino-1.0.4-macosx.zip
Here is a very good tutorial made by Anna Kaziunas from As220, you can take a look at it here:
http://www.as220.org/fabacademy/tutorials/embedded_programming_arduinoIDE.php
There is another nice and useful tutorial here: http://hlt.media.mit.edu/?p=1695
Following the tutorial, you will notice that this will only work with Arduino 1.0.1 or Arduino 1.0.3, so I downloaded 1.0.3 version, you can download it here: http://arduino.googlecode.com/files/arduino-1.0.3-macosx.zip .
The other thing you will need to program your board with the Arduino client is the ATtINY library and put them inside the arduino Hardware folder inside Arduino's install folder. Find it here: https://github.com/damellis/attiny/archive/master.zip
The cool thing is that we were supposed to program this board with the FabISP we made previously on Week04.
You will also need this cables:
- FTDI cable
- USB to miniUSB
- 6 Pin ISP female cable

FabISP
Echo Hello-World
Arduino 1.0.3
Make sure you have the following configuration inside Arduino. It's basically letting Arduino know wich microcontroller and wich programmer you are using.

Configuring the ATtiny to run at 20 MHz

After you defined those parameters you have to Burn the Bootloader.

Next step is to load a Sketch. In this case I used the same as Anna's tutorial. Checkout for your pin configuration for your LED and Button.
In my case the LED was located in the microcontroller's PIN 7 and the button was located in PIN 3. (marked in red)
/*
LED Off Until Button Pressed
Blinks a light emitting diode(LED) connected to digital
pin 7, when pressing a pushbutton attached to pin 3.
The circuit:
* LED attached from pin 7 to ground
* pushbutton attached to pin 3 from +5V
* 10K resistor attached to pin 3 to +5V
* 10K resistor pulls pin 3 and the button to HIGH by default
created 2005
by DojoDave
modified 30 Aug 2011
by Tom Igoe
modified for Hello Button + LED Board - 19 Mar 2012
by Anna Kaziunas France
*/
// constants won't change.
// They're used here to set pin numbers:
const int buttonPin = 3; // the number of the pushbutton pin
const int ledPin = 7; // the number of the LED pin
// initialize variables:
int buttonState = 0; // variable for reading the pushbutton status
void setup() {
// initialize the LED pin as an output:
pinMode(ledPin, OUTPUT);
// initialize the pushbutton pin as an input:
pinMode(buttonPin, INPUT);
}
void loop(){
// read the state of the pin the pushbutton is connected to:
buttonState = digitalRead(buttonPin);
// is the push button pressed?
// if not pressed - the button state is HIGH
// the pull up resistor the button / pin 3 makes the button state HIGH by default.
if (buttonState == HIGH) {
// turn LED off (LED is off by default)
digitalWrite(ledPin, LOW);
}
//otherwise.....
// button is pressed
else {
// turn LED on:
digitalWrite(ledPin, HIGH);
}
}
Select your Programmer
Arduino Sketch
Next step is to Compile and then Upload the program

Uploading the Sketch
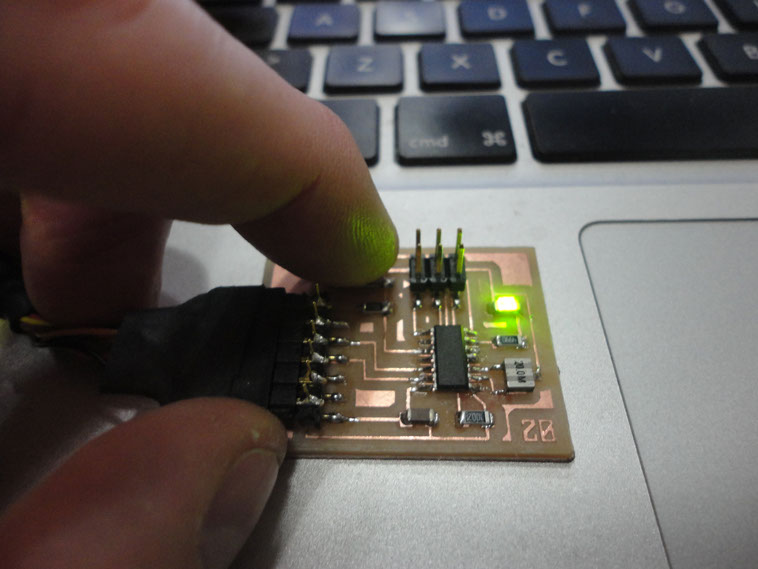
If everything is OK, when you press the button, the LED should turn ON.
Mine didn't.
That was because I made 2 mistakes.
- Have installed Arduino 1.0.2
- My LED was soldered wrong.
After correcting this issues, I re-upload the program and everything went fine.
Here some pictures of the results:


Button turns ON the LED
Here is my FabISP 01 that programmed my Echo Hello-World board 02.

