The disk dispenser
Roadmap
- Requirements definition
- Marker definition
- Mechanism choice
- Components choice
- Design
- Energy budget study
Requirements
We had a brainstorming with Alexia to choose the type of markers to use.
They need to show a chronological separation between sediment layers.
Hence, the main concern is to avoid their migration inside the sediment deposit.
The sediment is basically mud. It means that objects can easily move inside.
We list different possibilities:
- a simple disk
- an "hydrodynamic" disk
- a layer of small beads or colored sand
Simple disk solution
In the literature, solutions with simple disks already exists.
A disk has a large contact surface. It ensures that the pressure on the sediment due to its weight is moderate.
If its diameter is close to the tube's one, the sediment won't have much space to move around the disk.
That'll help prevent the disk to move inside the tube.
Our main concern is about how it will fall inside the tube.
More precisely, it has to fall "horizontally" to land smoothly on the sediment.
If it falls vertically, it loses the advantage described above.
"Hydrodynamic" disk
An improvement for the previous solution is to use a marker that has a large contact surface, but a more hydrodynamic shape.
Our first idea is a flat cone. Flat, because we also have a space constraint: the disk dispenser has to fit inside the funnel.
Beads layer
Another idea we had is to drop a given quantity of small glass bead (or something similar like sand).
The motivation would be that it will create a separation layer between two sediment layers.
One advantage would be that it'll follow the sediment shape (the sediment top surface is usually not flat nor horizontal).
We rejected this solution because we fear that these beads could easily move inside the sediment, if their densities don't match.
Marker choice
We decided to go for a disk-like marker.
As it's easy to 3D-print, we'll try different shapes.
Mechanical design
I'll study two disk dispenser structures.
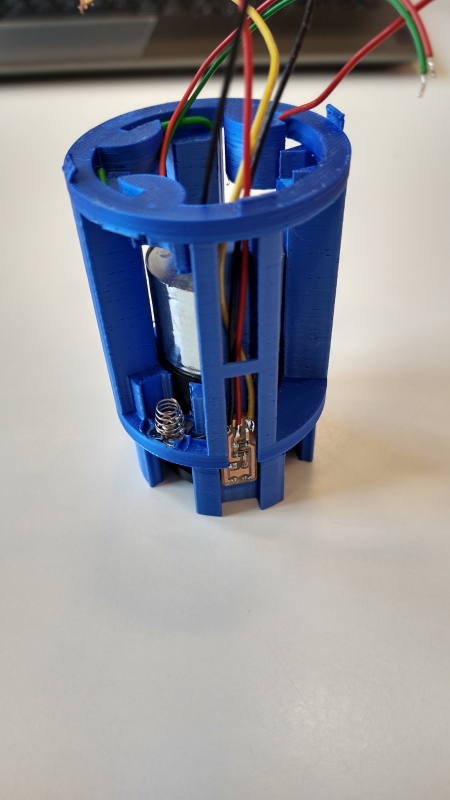
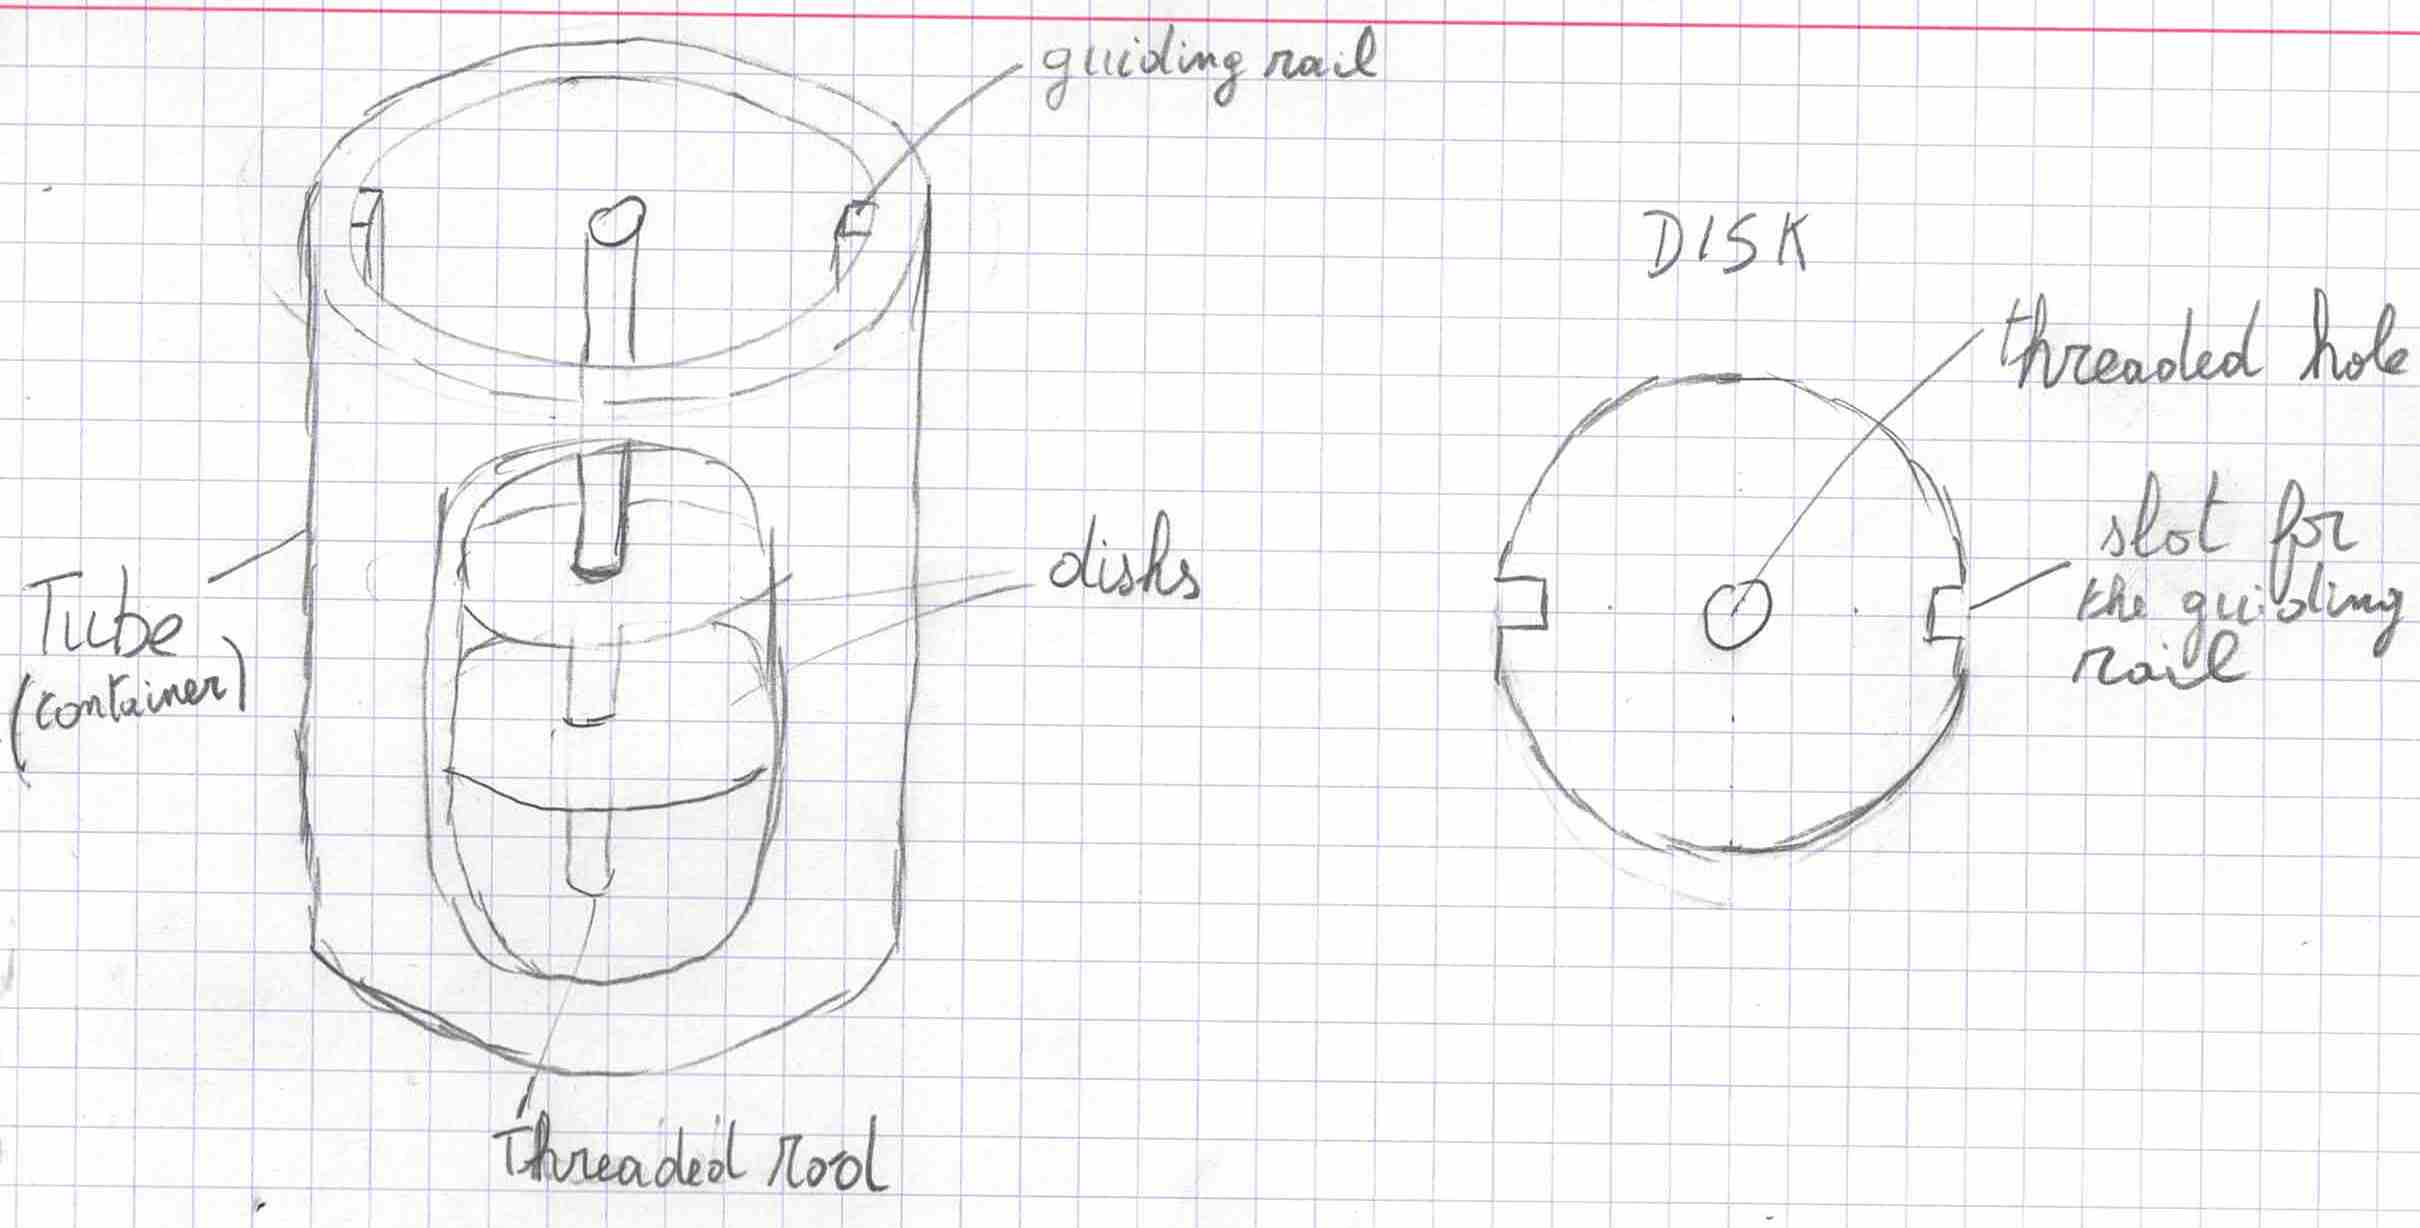
Threaded rod mechanism
Col
The first is inspired by the Archimedes' screw.
- The disks have a threaded hole in their center
- They are mounted on a threaded rod (our screw)
- This assembly is placed in a tube
- A rail on the tube's inside face will prevent the disk to rotate
- Hence, the screw rotation will make the disk go up or down inside the tube
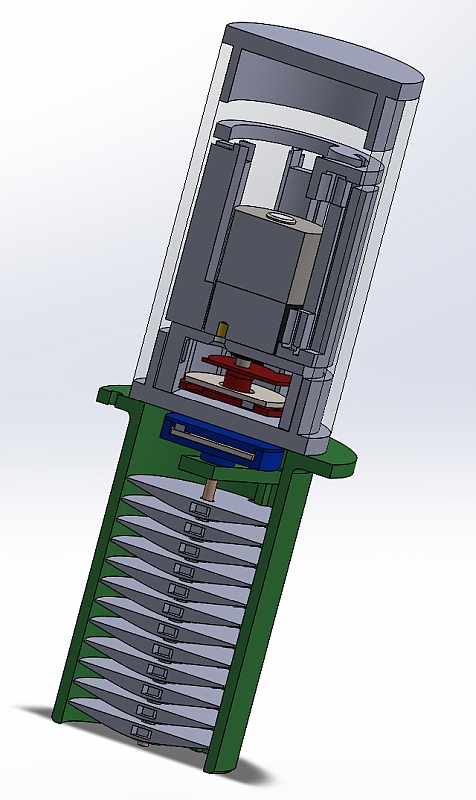
I modelled a first draft of the disk dispenser as part of the Computer-Aided Design assignment.
Col
Rotating slot mechanism
This design concept is used by many distribution mechanism (for example, Corey Rice's final project).
- The object to distribute are placed in a container
- A moving part allows an object to exit the container. Its shape and movement ensures that only one object can exit during its movement. Usually, it keep it in a transfer cavity.
- It transports the object to the mechanism exit.
Col
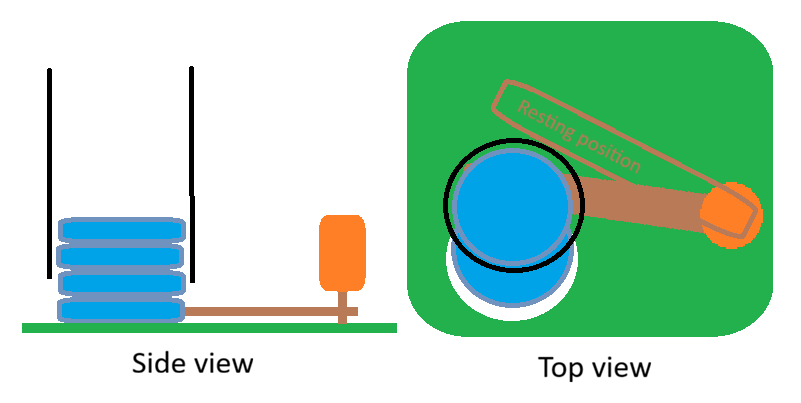
I ended up with this sketch. I made it with Microsoft Paint, as part of the CAD week assignment.
It shows the dispense from the side and from above.
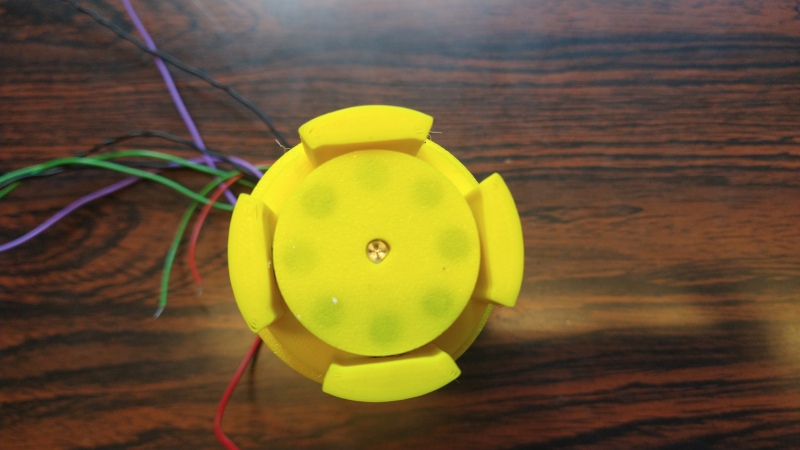
- The disks, in blue, are stacked in a tube.
- The green plate is the bottom of the dispenser. It has an opening from which the disks will be dropped.
- The spacing between the tube bottom and the plate is a bit greater than the disks' thickness.
Hence,the bottom disk prevents the others to move.
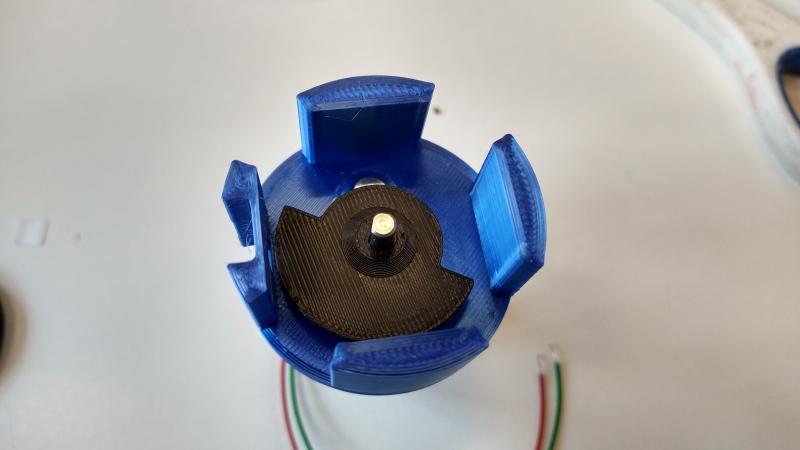
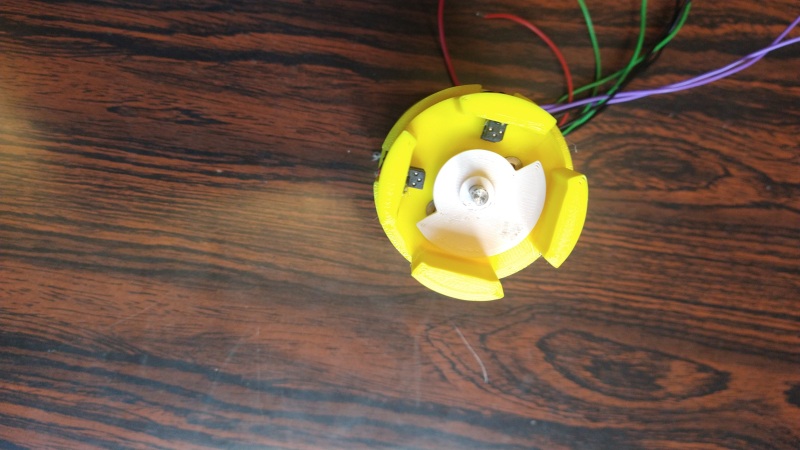
- A "finger", in brown, is actuated by a motor, in orange.
It can push on the side of the bottom disk above the output to be dropped.
During it's movement, it is in the way of the other disks, preventing them to move.
When it comes back to its resting position, a new disk replaced the dropped one.
Hence,the bottom disk prevents the others to move.
It can push on the side of the bottom disk above the output to be dropped.
During it's movement, it is in the way of the other disks, preventing them to move.
When it comes back to its resting position, a new disk replaced the dropped one.
Col
Mechanism choice
We decided to go for the threaded rod mechanism
- The needed torque will be lower as it only need to overcome the frictions on the rod and the rail.
On the other hand, to push the disk, the finger has to overcome its frictions with both the bottom plate and the disk on top. These friction are amplified by the weight of the other disks. - It's higher, as the motor has to be colinear with the rod. It's also thinner, and so, less in the way of the sediment falling.
Mechanism actuation
Another problem to solve is obviously that, while the disks have to be in the water, the motor and its control electronics can't.
The motor, its electronics and the battery can be put in a watertight enclosure, but a mechanical transmission has exist between the motor and the threaded rod.
I found 3 possible solutions:
- Let the output shaft of the motor exit the enclosure trough a stuffing box, used for the boats' propeller.
It's said to be complicated to adjust. It's also prone to leaking, which is not OK in our project. - Apply the principle of the diving (wet) bell: the mechanism has only to be open at its bottom. Hence, it can be filled with air that will stay captive.
It's an elegant solution, but it makes the trap's installation difficult, as the dispenser has to stay vertical at all time during the underwater operations.
Furthermore, the captive air volume will decrease with the water pressure.
At 50 m depth, the pressure is 6 times the atmospheric one. Hence, the air volume'll be reduced by a factor of 6. - Use a magnetic coupling: The motor is directly coupled to a primary disk with magnets mounted on it. It's inside the watertight enclosure.
Another magnetic disk (the secondary disk) is coupled with the threaded rod, outside the enclosure.
The primary disk applies magnetic forces on the secondary disk. if these forces are strong enough, both disks will move together, as if they are mechanically coupled.
Magnetic coupling seems an obvious choice.
It has to be confirmed by checking if the magnetic coupling is strong enough.
Components choice
DC motor: L149-6-21
Discrete H-bridge: no need for speed control, both way rotations, low power
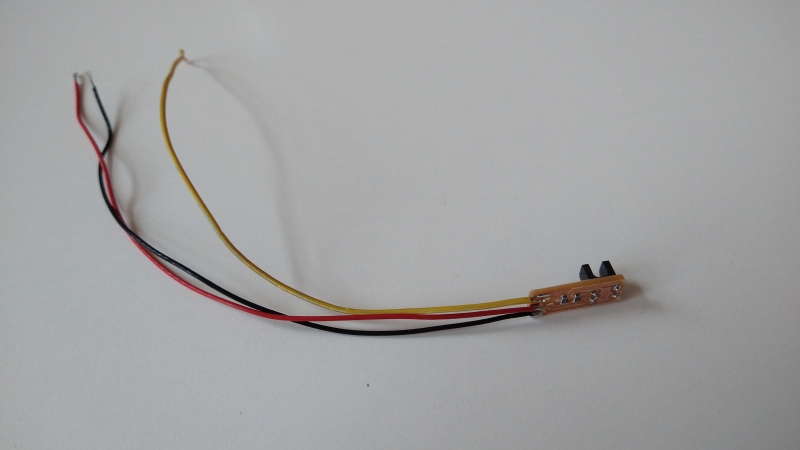
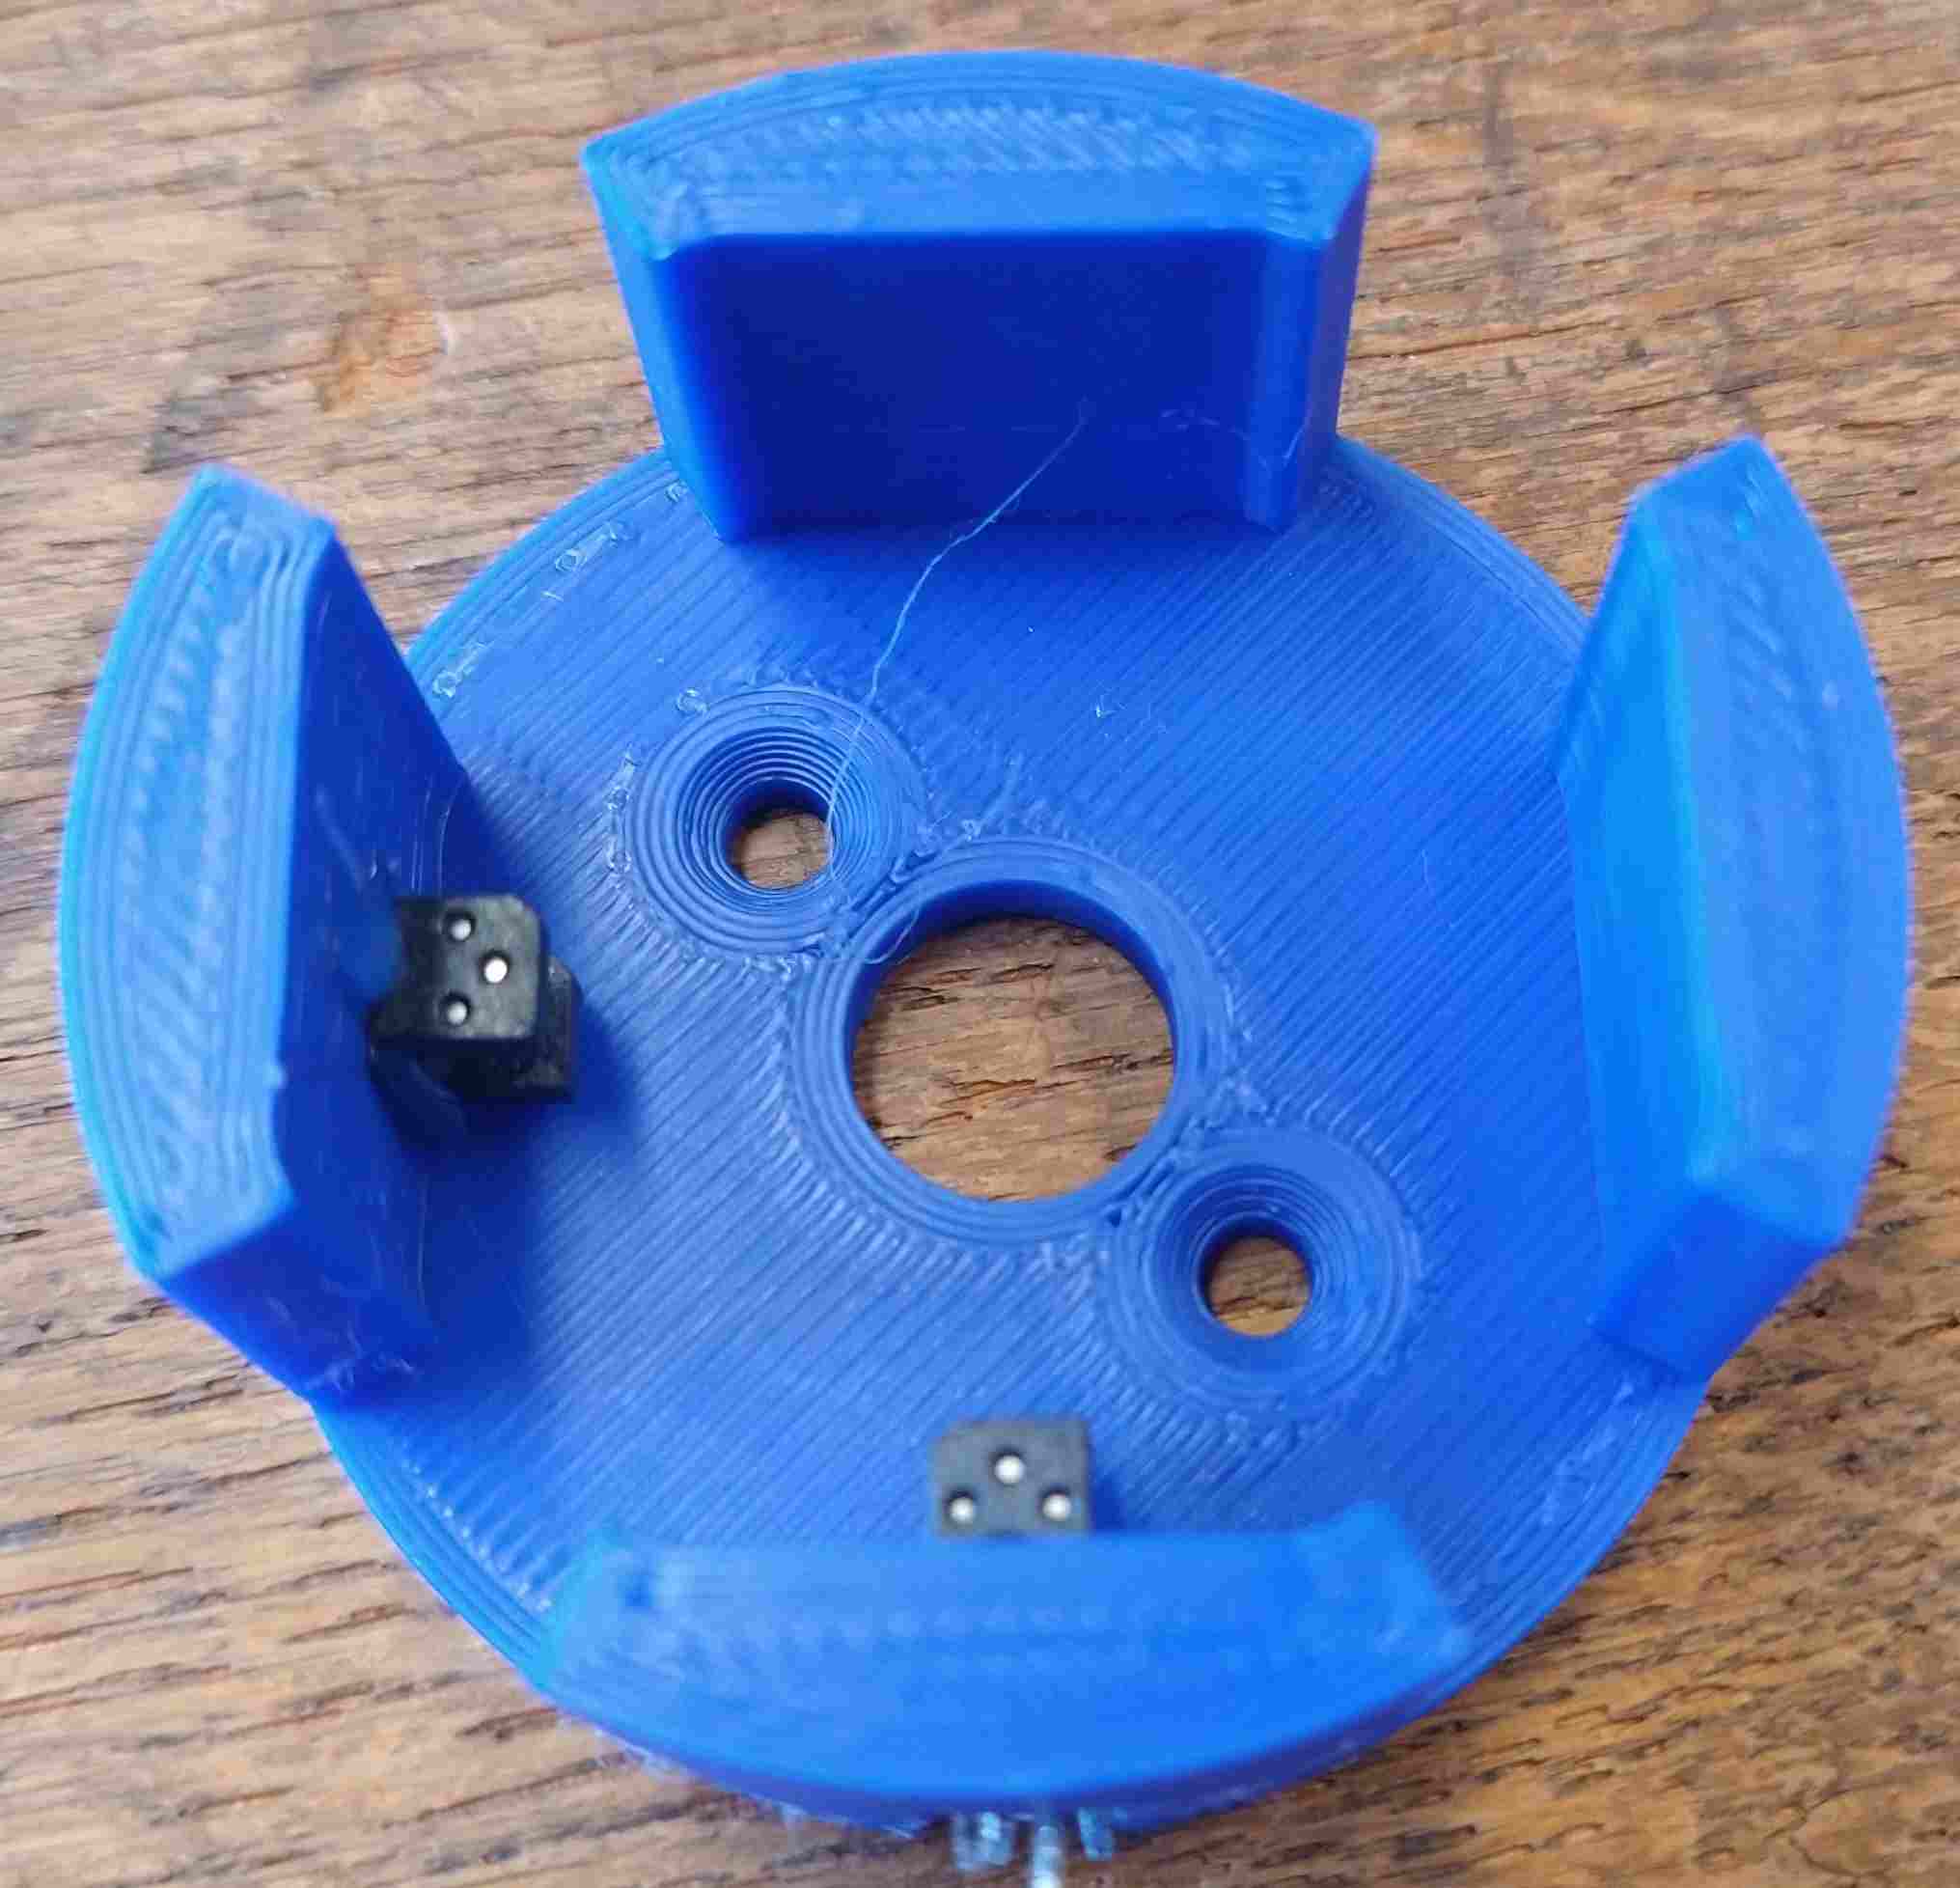
Position sensor: RPI-352. IR sensor. Easy to use, reliable.
Enclosure: Watertight enclosure
Energy budget
| Component | Active current | sleep current | Notes |
|---|---|---|---|
| Motor | 100 mA | 2 µA | Active current is the datasheet maximum, sleep current is the MOS leakage |
| µP | 1 mA | 7 µA | datasheet maximum |
| Sensor | 15mA | 1µA | sleep current is the MOS leakage |
| Total | 116 mA | 10 µA |
- Disc drop duration: 60 rpm * 18 turns = 18 sec, every 30 days
- "Cleaning": 60 rpm * 12 turns = 12 sec, period to be determined
-
Total duration: 12 * 30 days = 360 days = 8640 h
-
Sleep energy: 10 µA * 8640 h = 86.4 mAh
- Disc drop energy: 116 mA * 18 s / 3600 s/h = 0.58 mAh / disc => 6.96 mAh in total
- Cleaning energy: 116 mA * 12 s / 3600 s/h = 0.39 mAh
Cleaning more than once a day is useless=> total cleaning energy = 0.39 mAh * 360 cleanings = 140.4 mAh
Hence, total energy needed is 234 mAh, which fits many batteries.
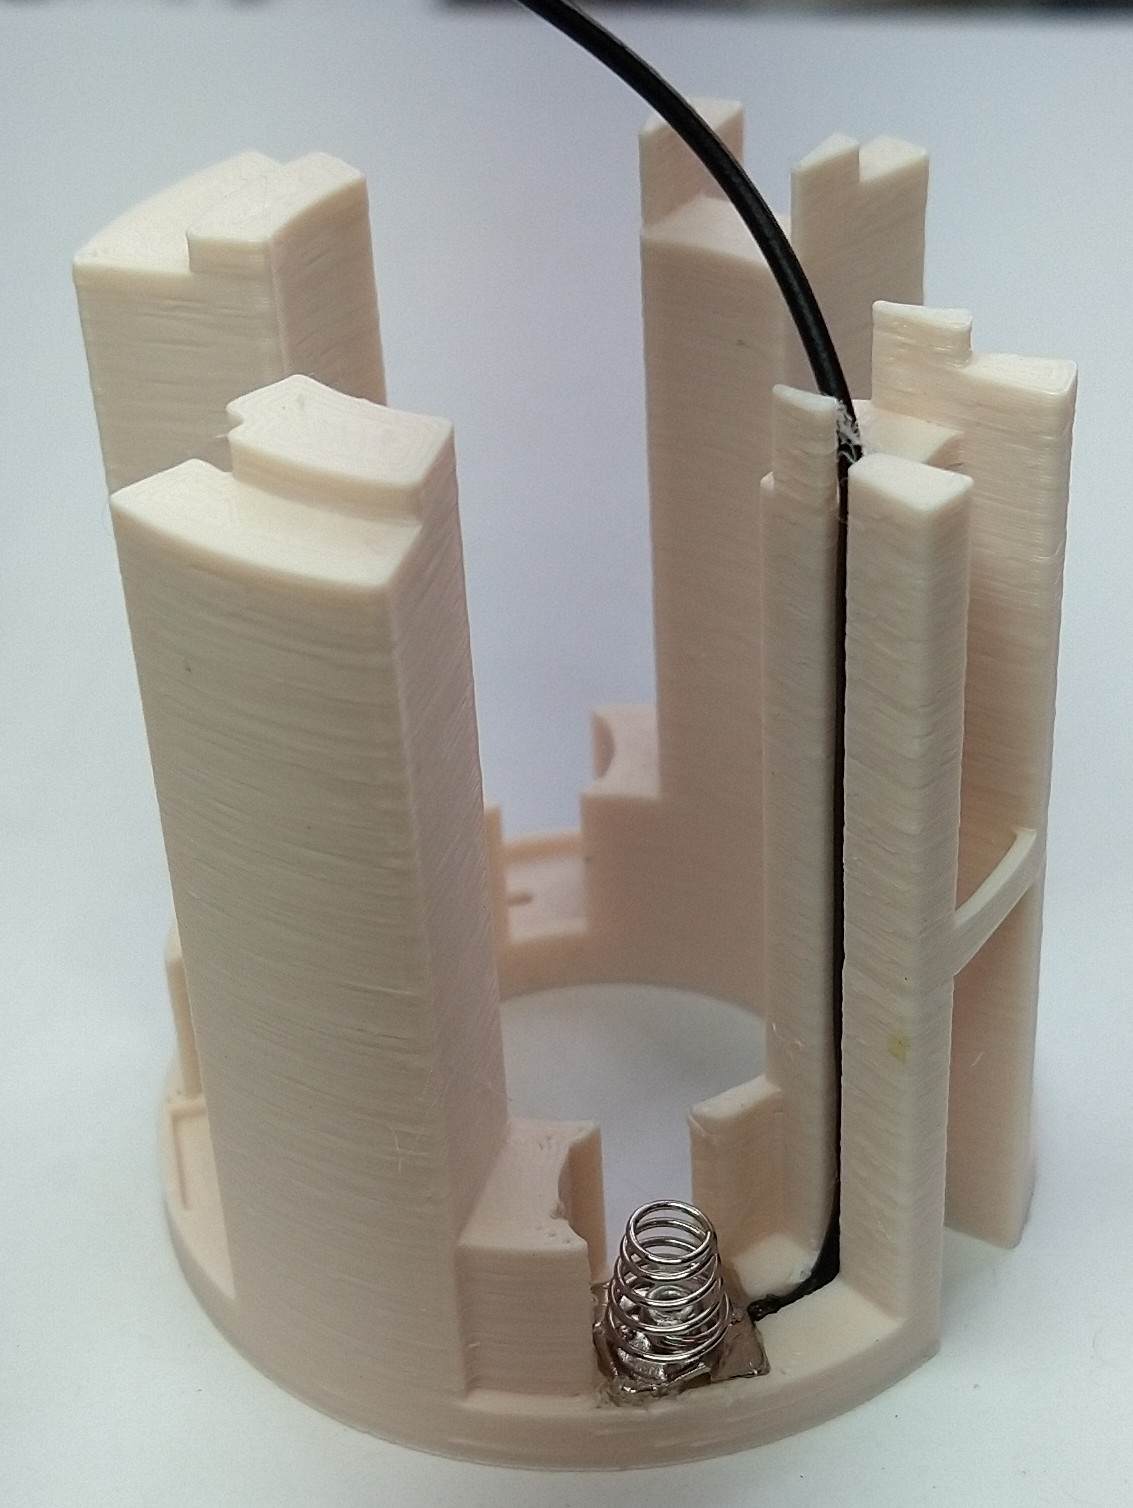
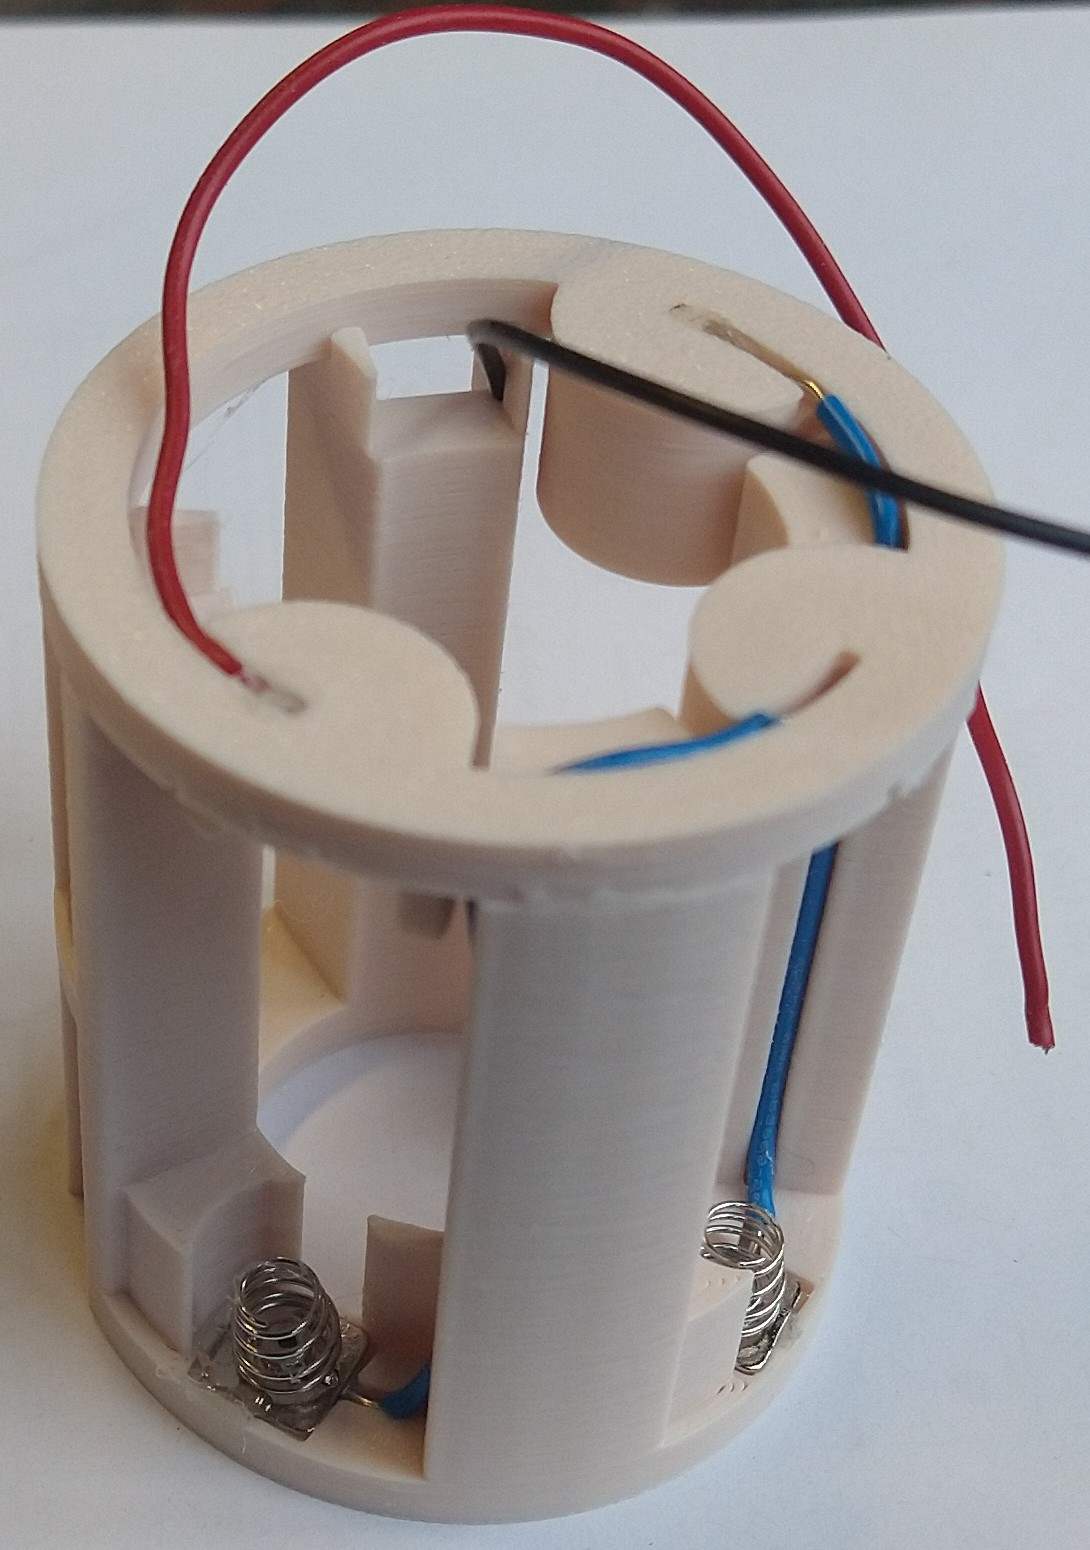
For ease of use, AAA batteries were chosen: they can be found almost anywhere in the world.
Disk dispenser 3D model
Col
Now that the choices are made, I can start to model the dispenser.
It can be divided in two sub-assembly:
- the outer part. It's a tube enclosing the discs. The threaded rod is connected to the outer magnetic coupler. It is held in place by a beam in the top part of the tube.
- the inner part. It's enclosed in a watertight PMMA tube. This tube has two aluminum end-caps.
Col
Next step is an exploded view of the dispenser.
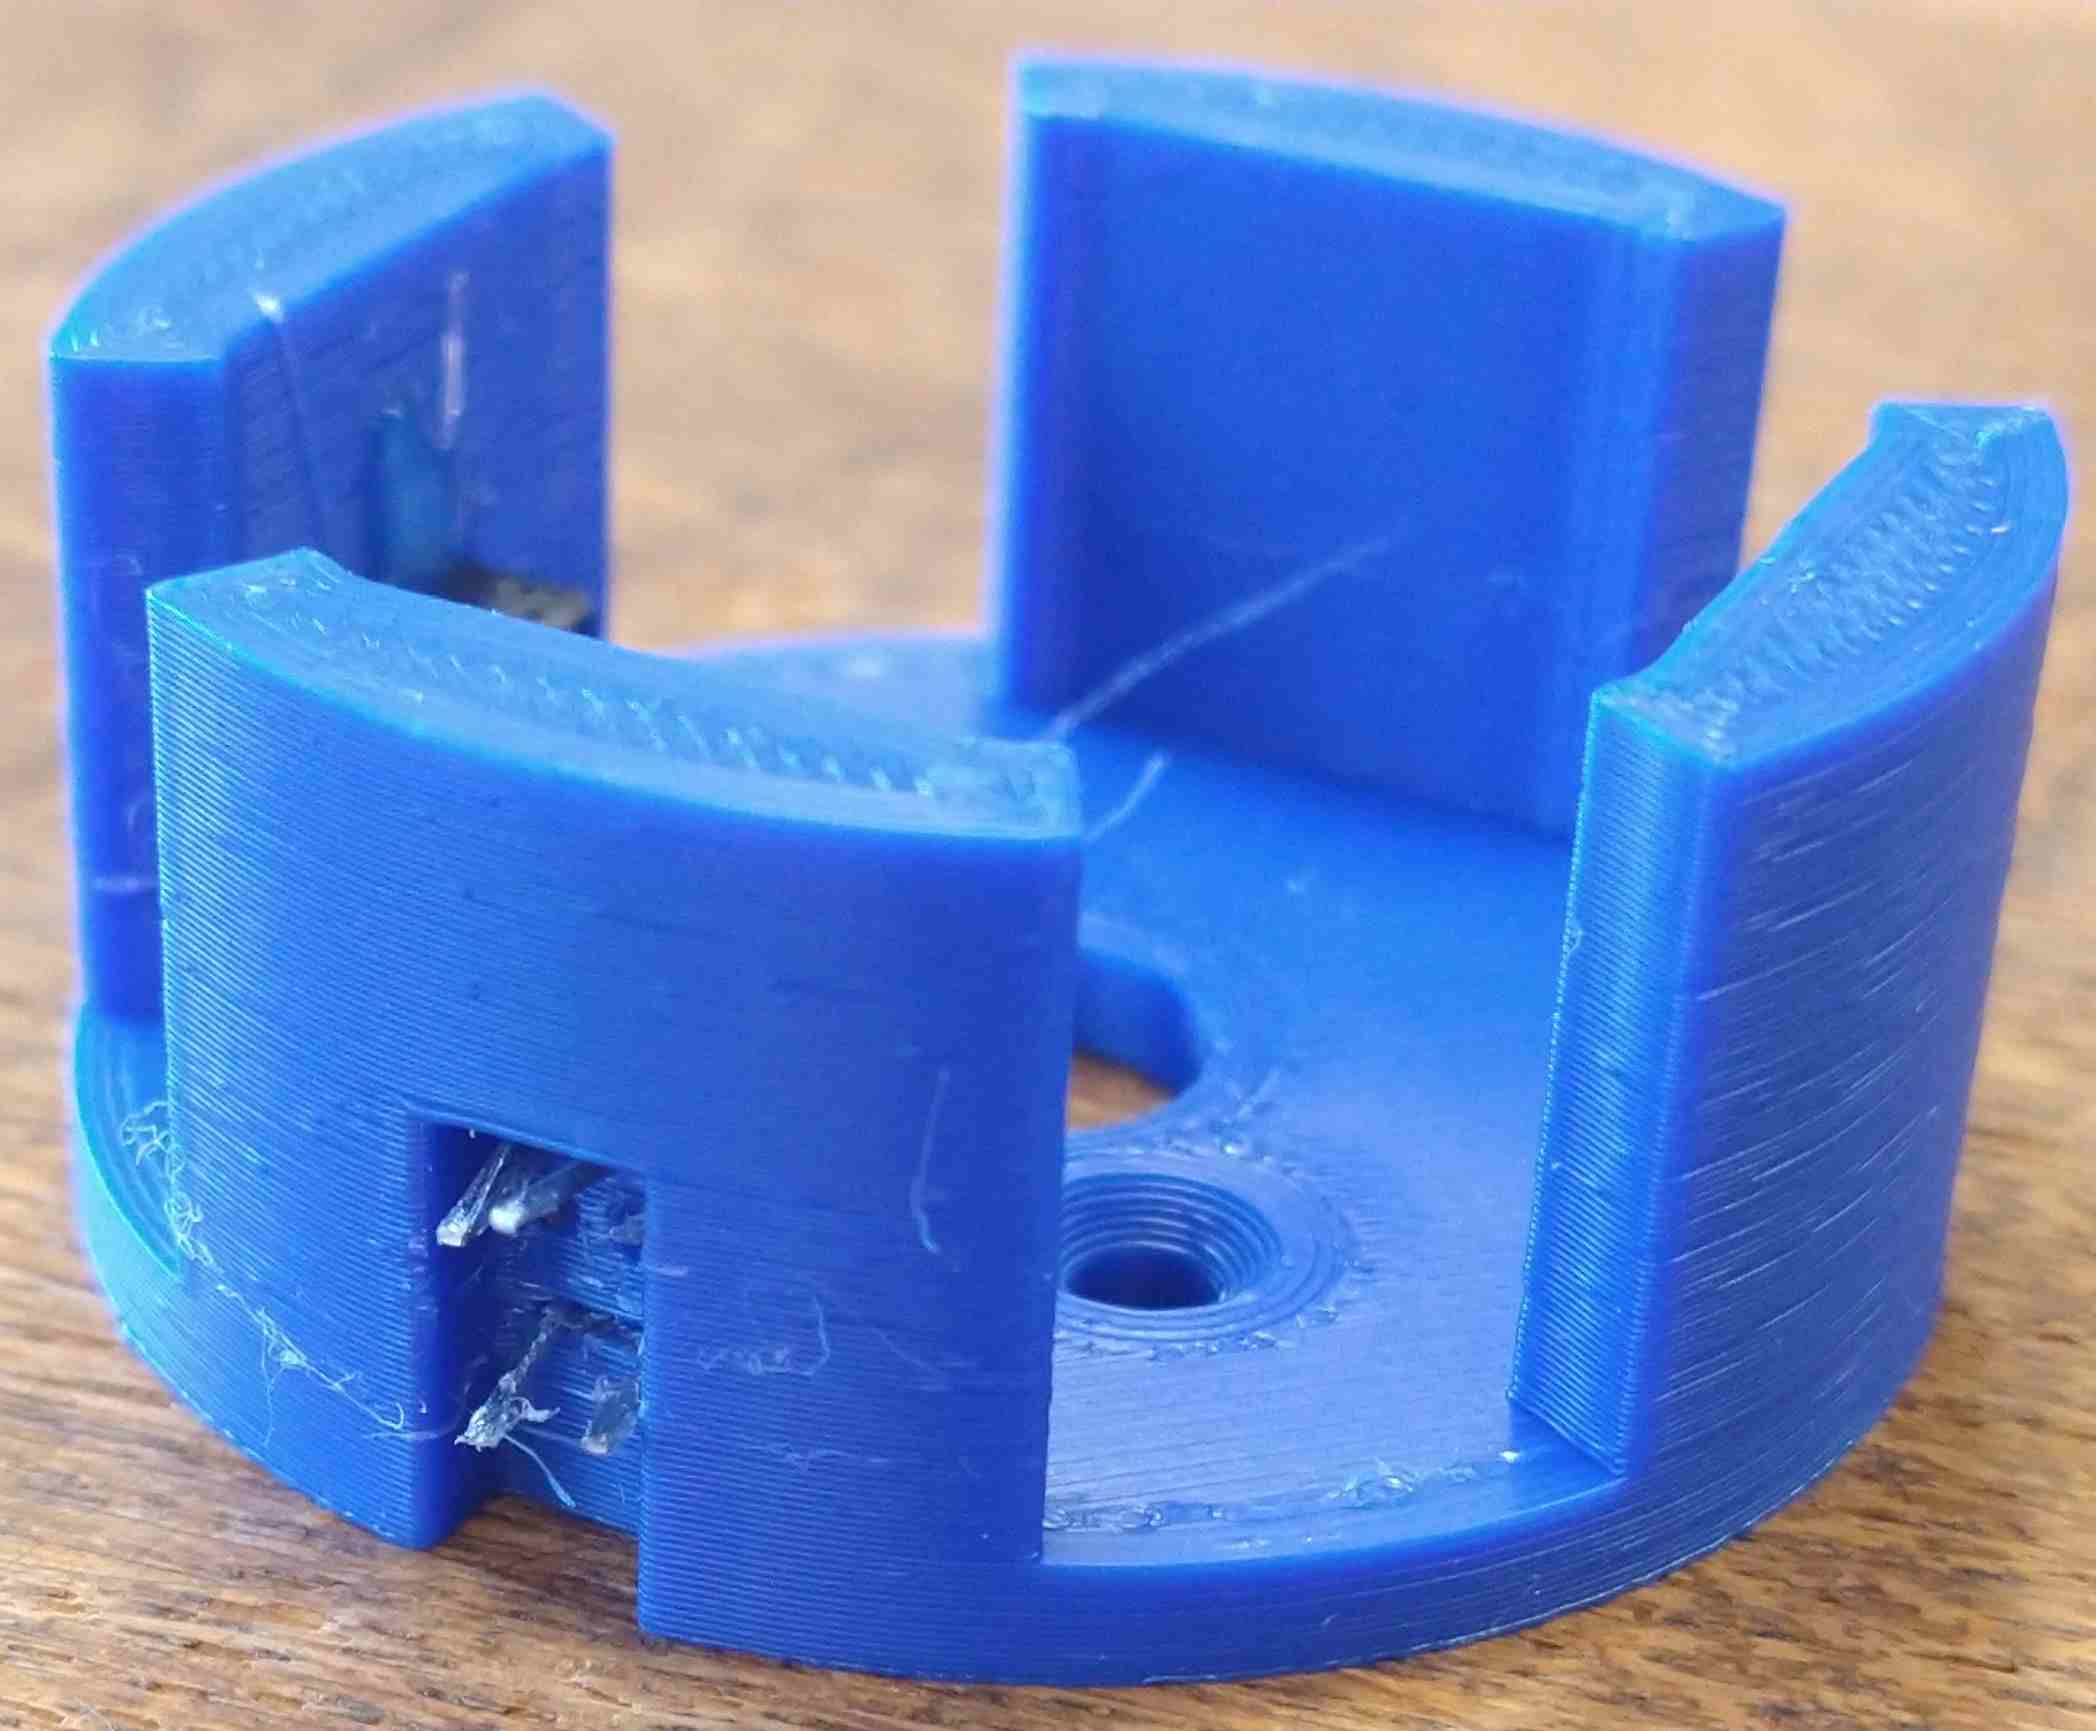
Dispenser construction
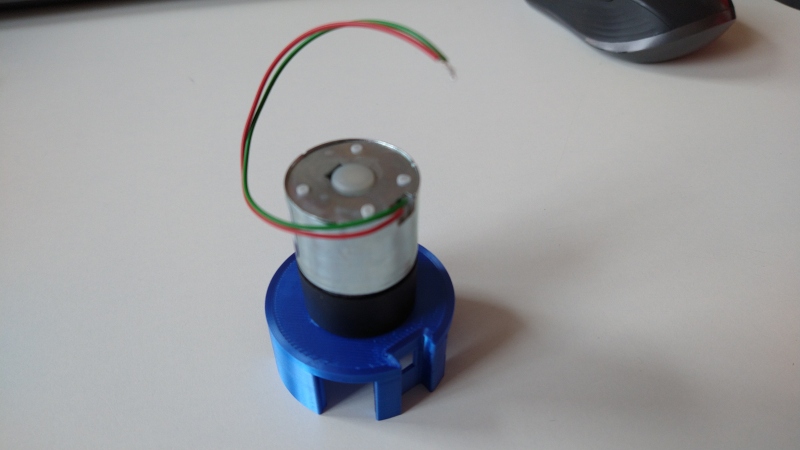
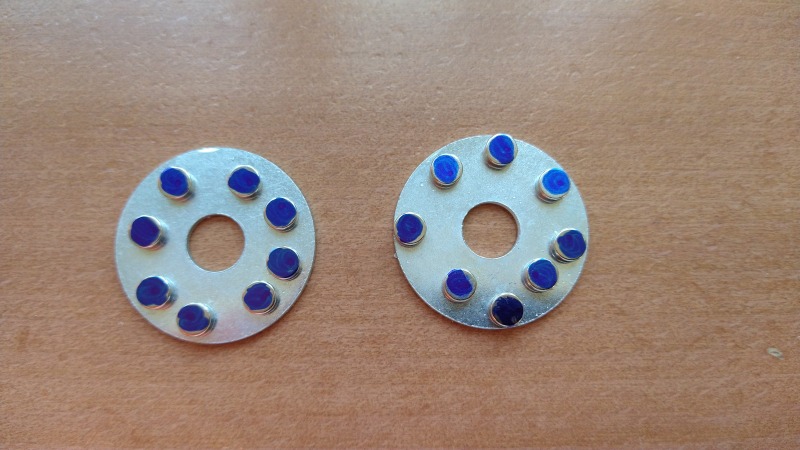
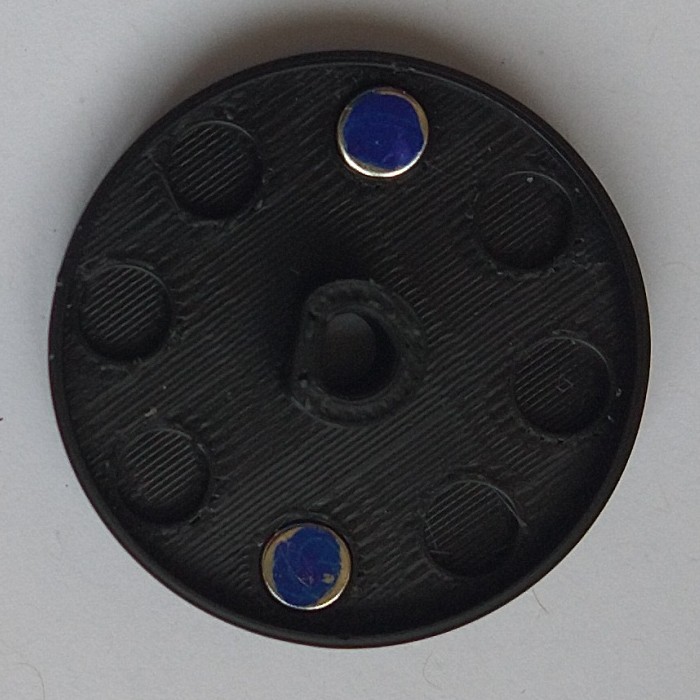
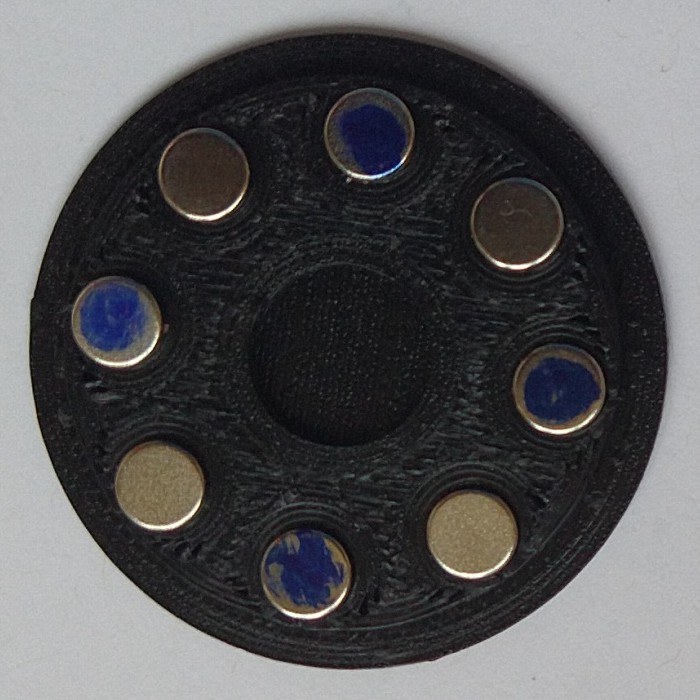
Magnetic couplers
- mark one pole of the magnets
- place (press-fit) the magnet in this order, so that the perturbations are minimal.
- place the steel washer
- cast silicone

Disc holder assembly
- see exploded view animation
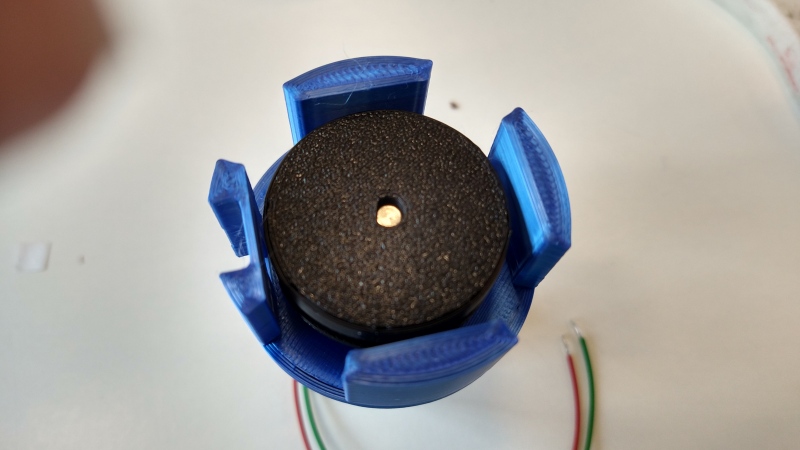
Magnets assembly

- cast silicone to seal both parts
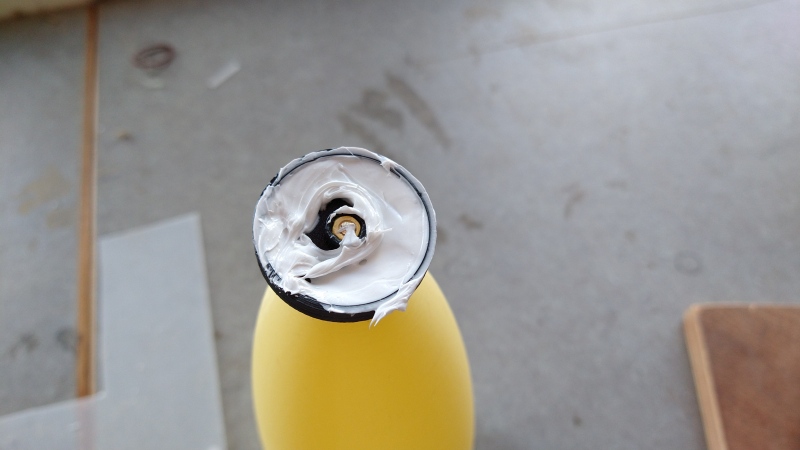
improvement: bury a nut in both parts and include the bearing in the bottom
- place a mark on the top to count turns
- a turn makes the discs move 0.5 mm
- a disc is 5 mm thick => pitch is 11 turns (with 0.5 mm gap between discs)
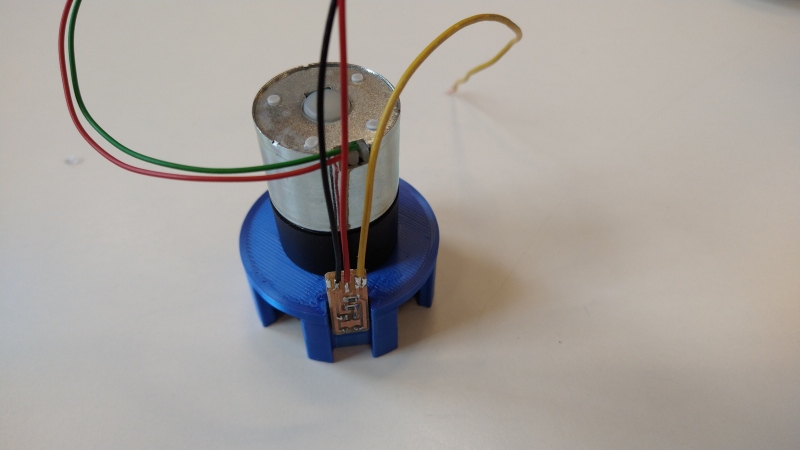
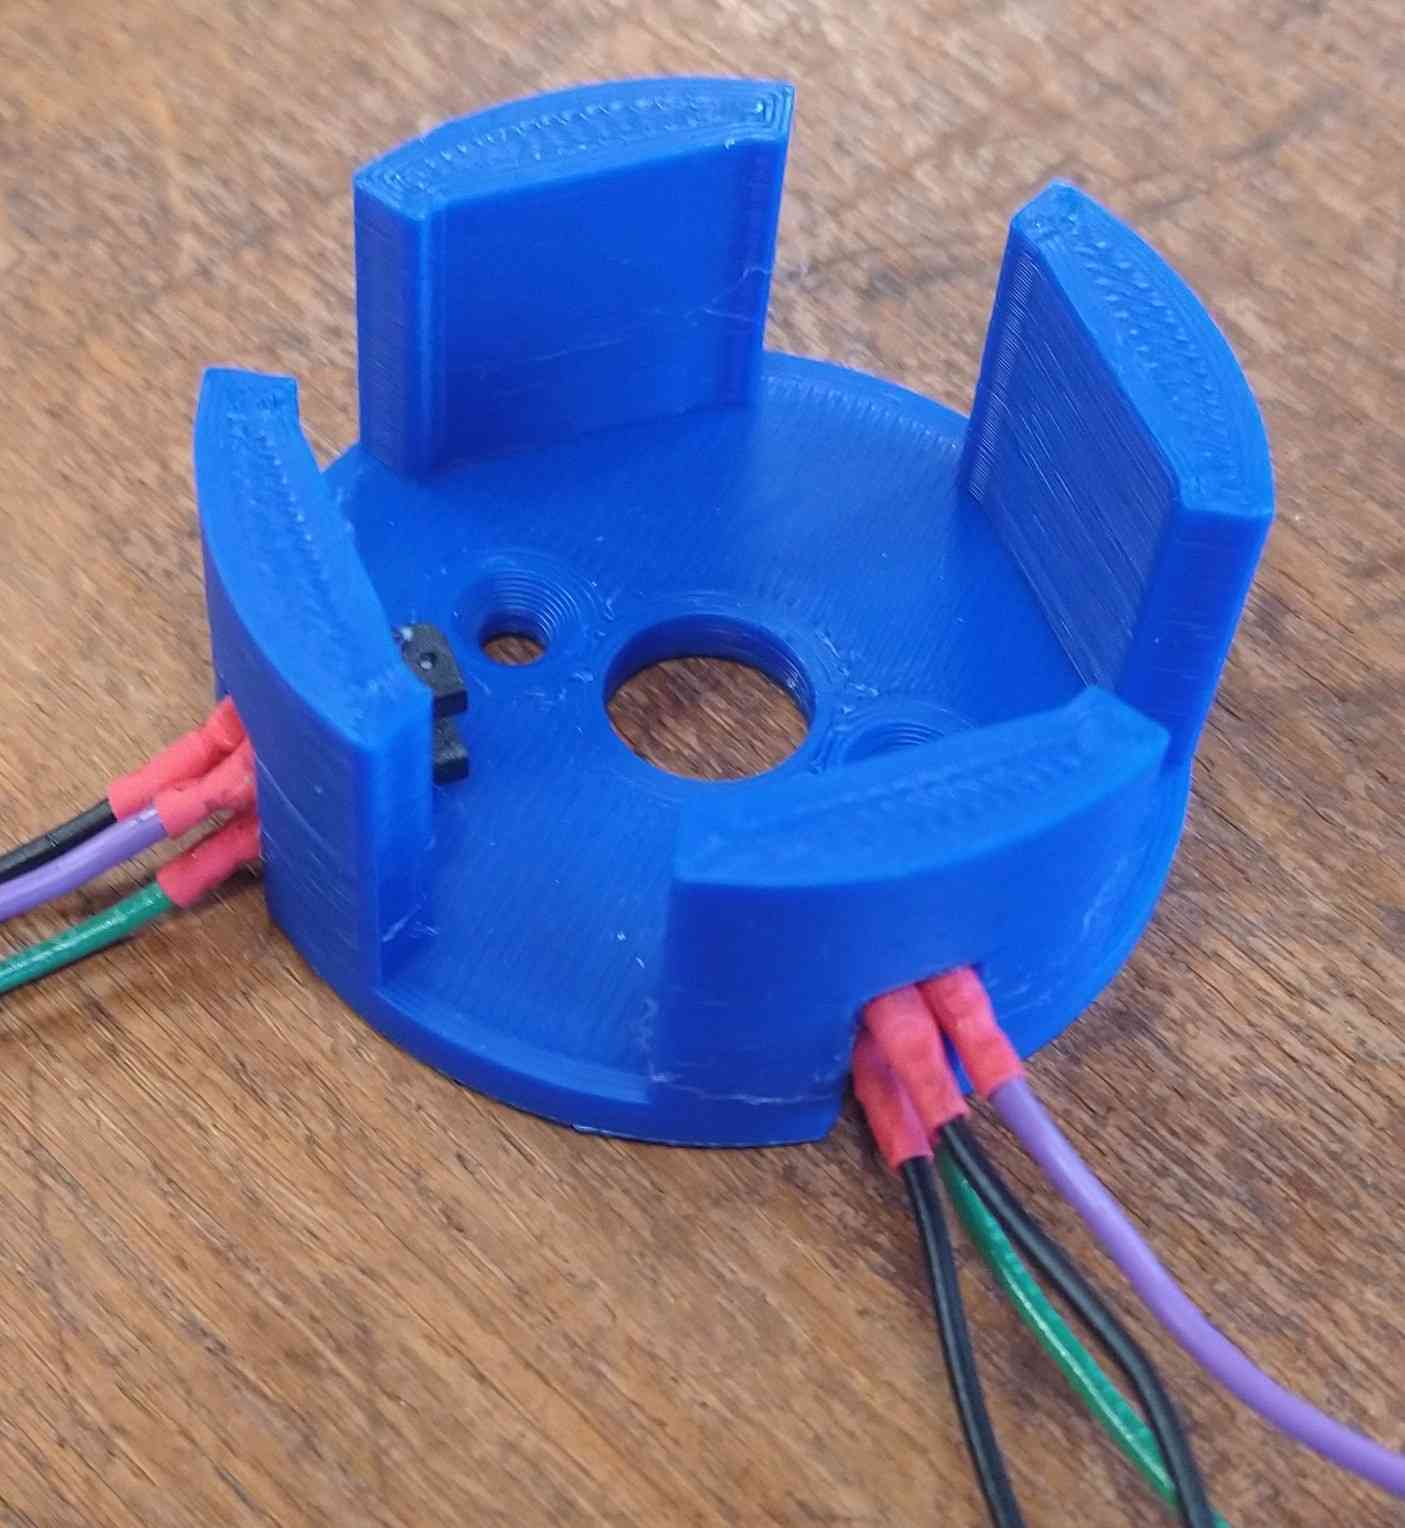
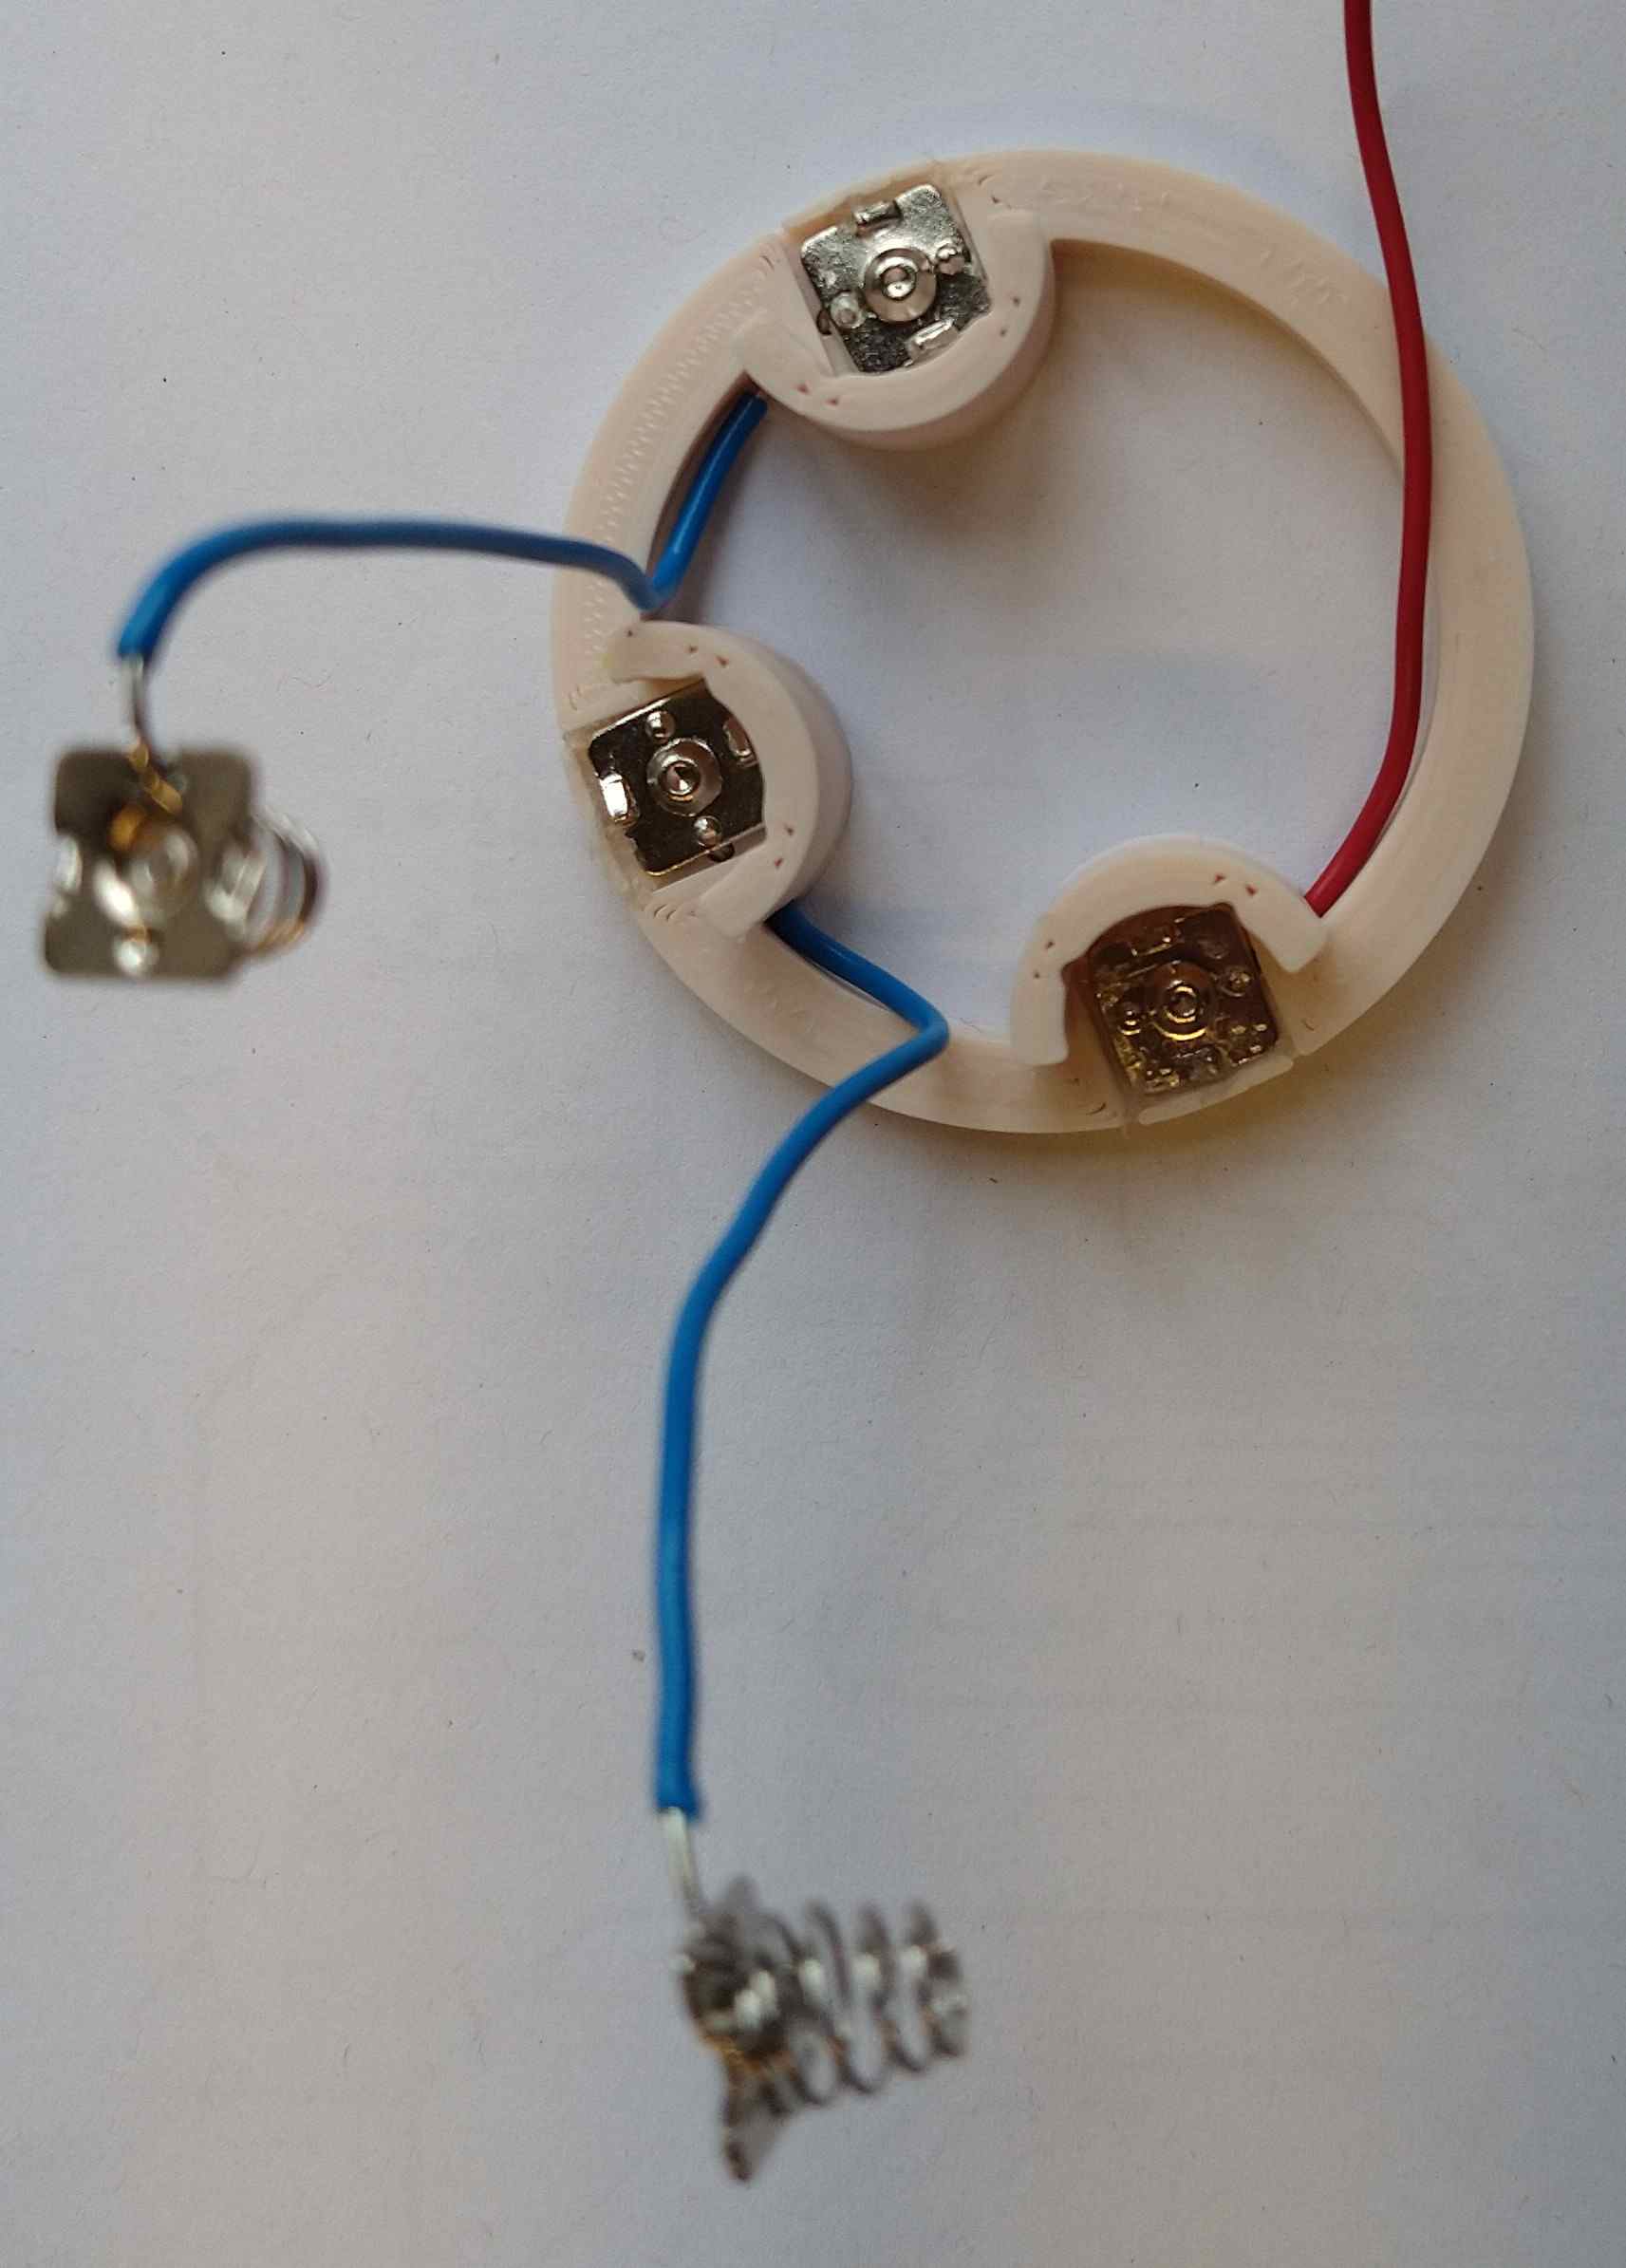
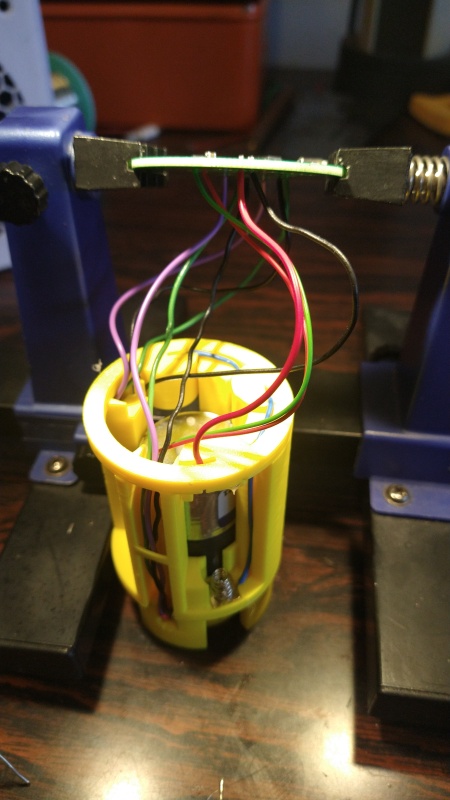
Electronics
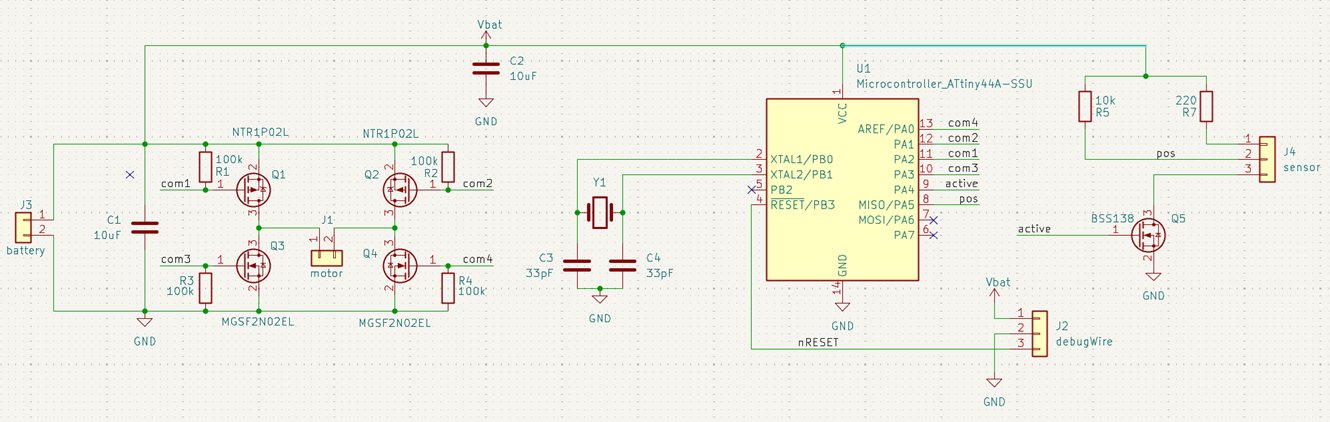
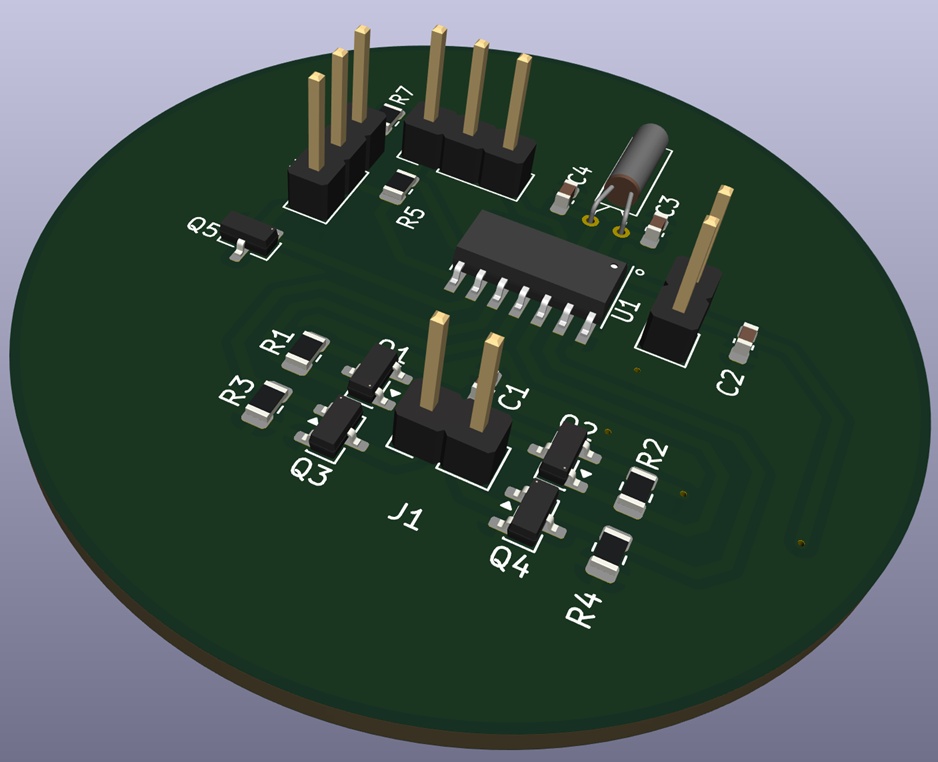
Soldering
No problem
I guessed the motor polarity and got lucky.
The sequence works fine.
I had some malfunction, probably due to a soldering problem.
After some investigation, I found out it was one of the motor's wire that has to be re-soldered.
PCB clips weren't strong enough. I made some holes in the PCB and screw it to the battery holder.
Improvement: add pins for registration
Tests
first test: cleaning sequence, motor only second test: cleaning sequence, with 1 disc third test: cleaning sequence, with all discs
Power measurement
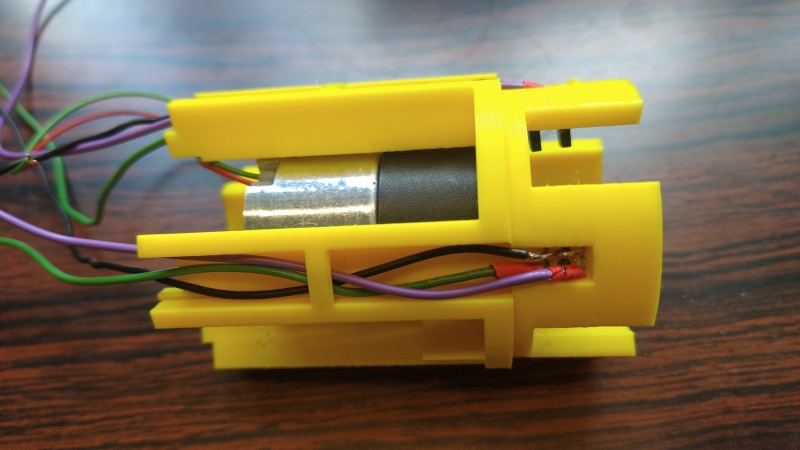
Version 2
Assembly