Week 2 and we are onto CAD, as a product designer,I was fimilar with CAD and softwares and their respective advantages, but i tried to push out of my my usual tech stack
Beofre we dive into my exploration, here's a penny to hear out my concept 🪙
At its essence its a universal remote that can connect with ANY (with certain specifications) remote controlled car. to the play the game of mario kart in real life
Bannana's are a big part of mariokart, I thought why not lean into this element.
. Journey of a sketch⊹ ࣪ ﹏𓊝﹏𓂁﹏⊹ ࣪ ˖ .
I sketched out a few concepts digitally using sketchbook, an app by autodesk for rapid sketches
https://www.sketchbook.com
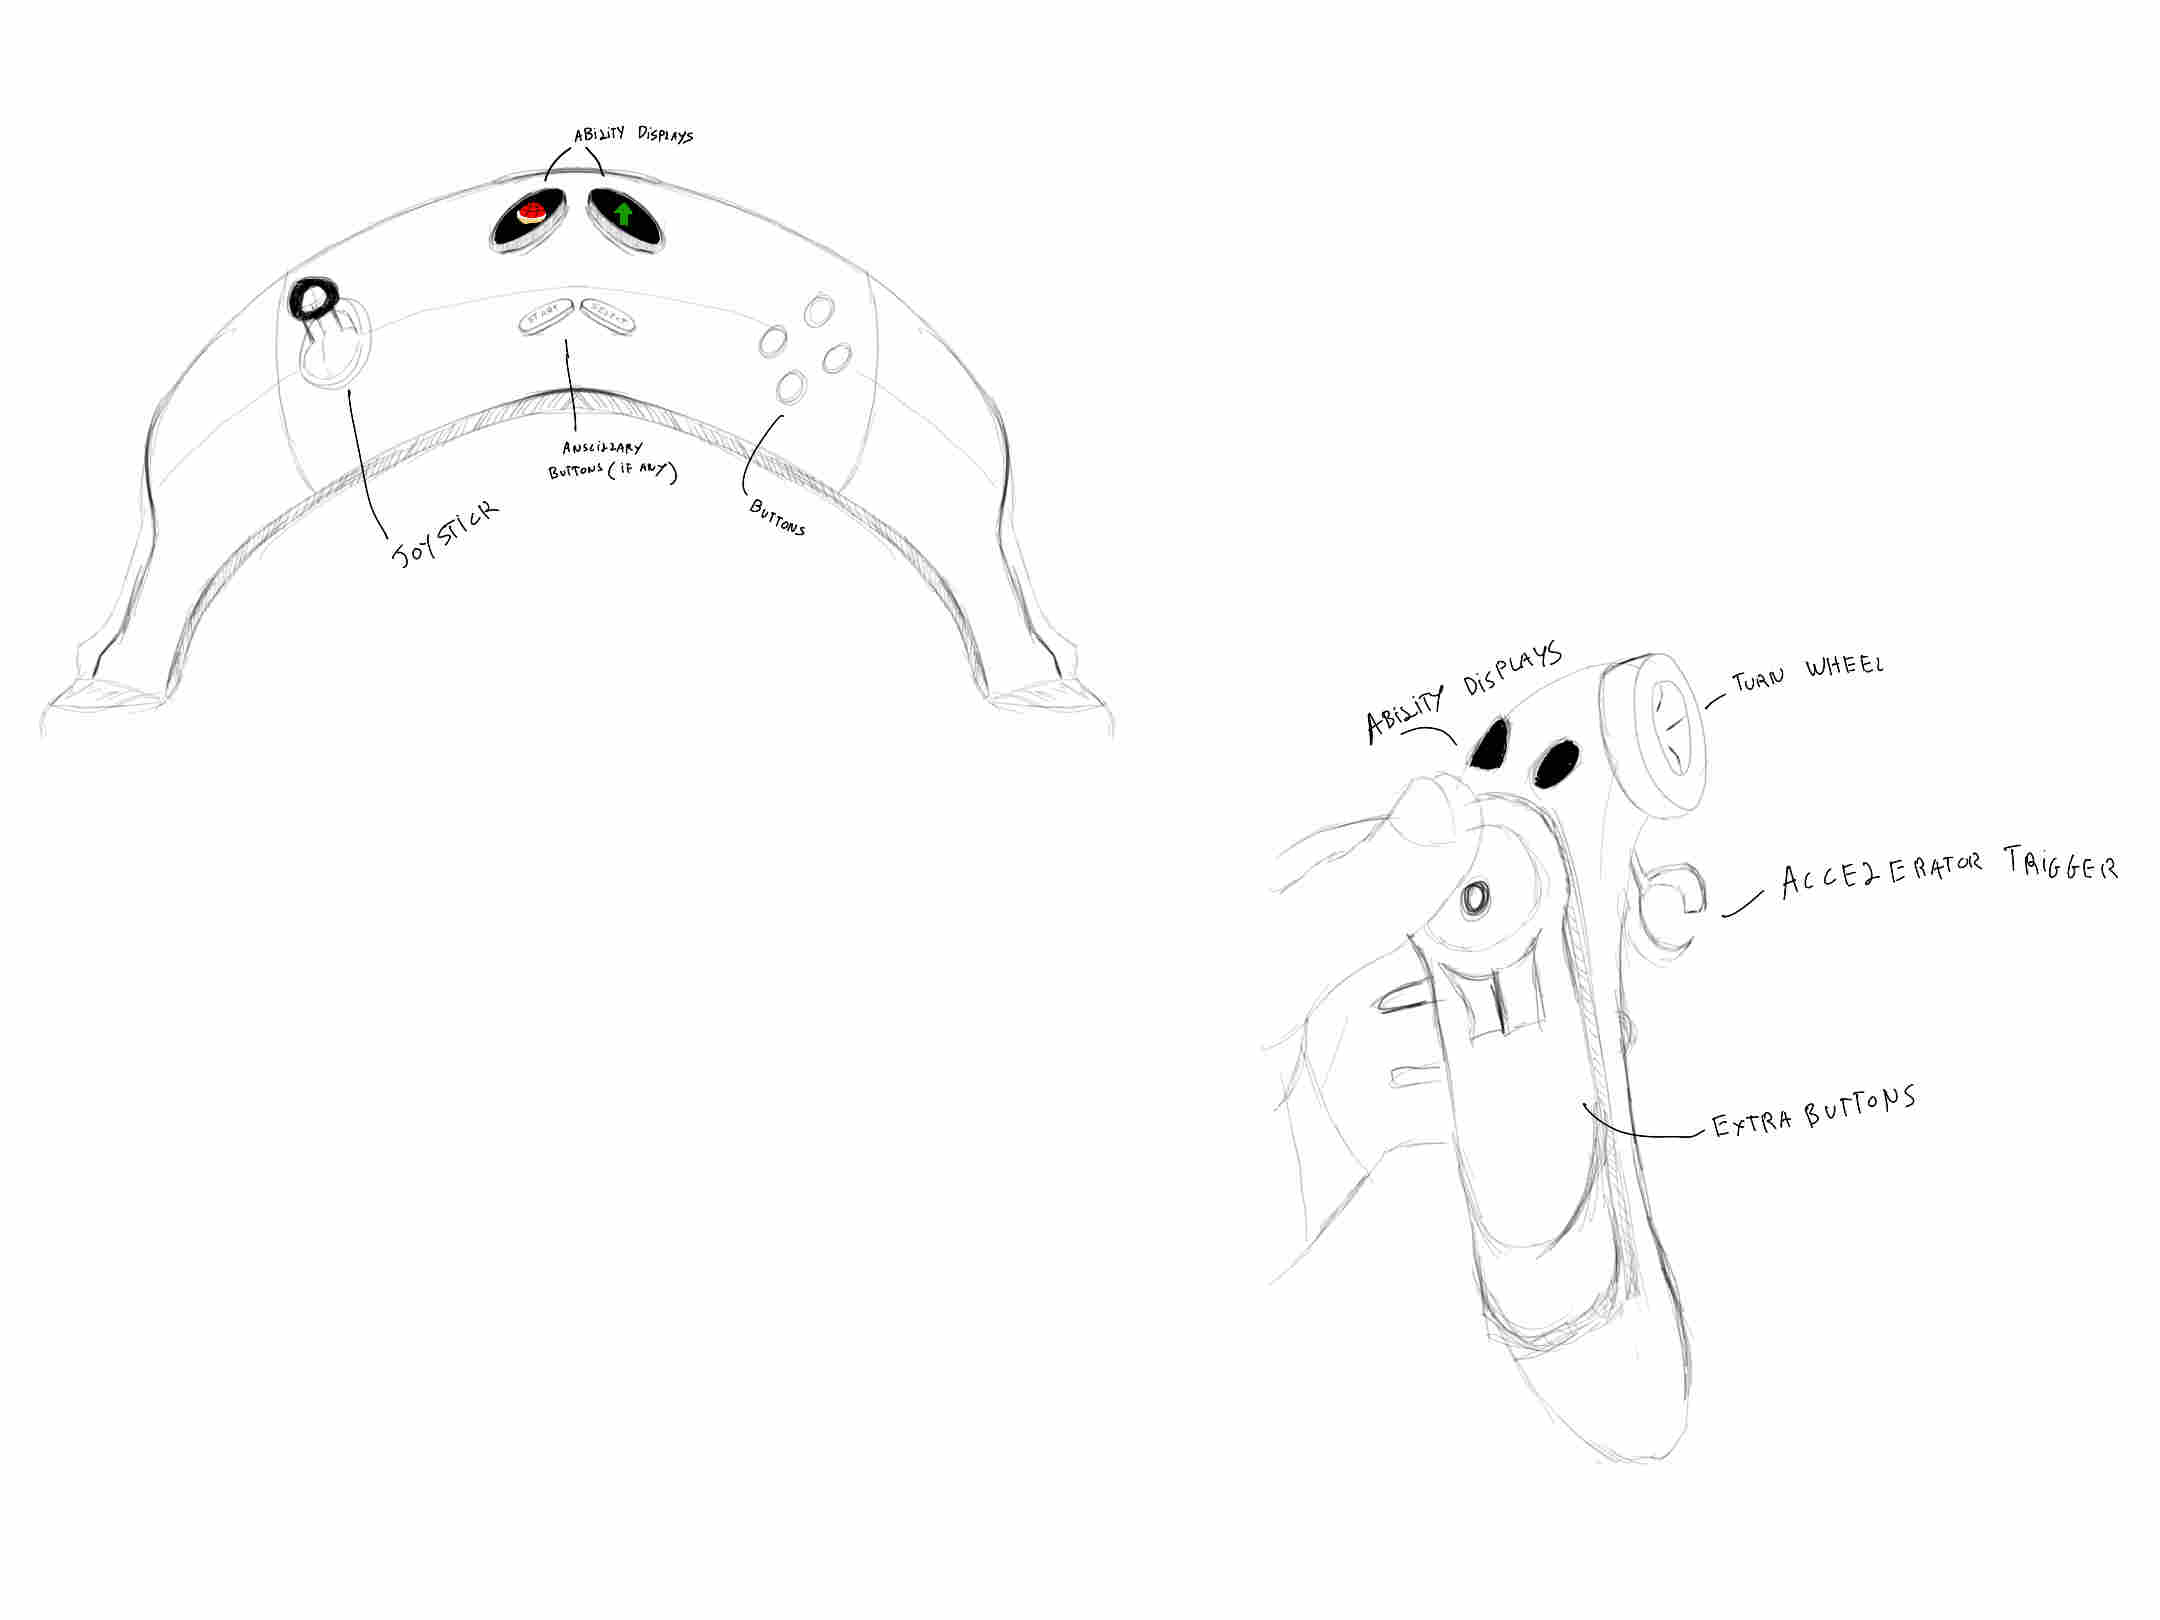
SKetching ideas
sketchbook is great for rapid sketching but i wanted to try a sotware specifically designed for industrial design
✐ᝰ.. Trying morpholio trace.✐ᝰ.
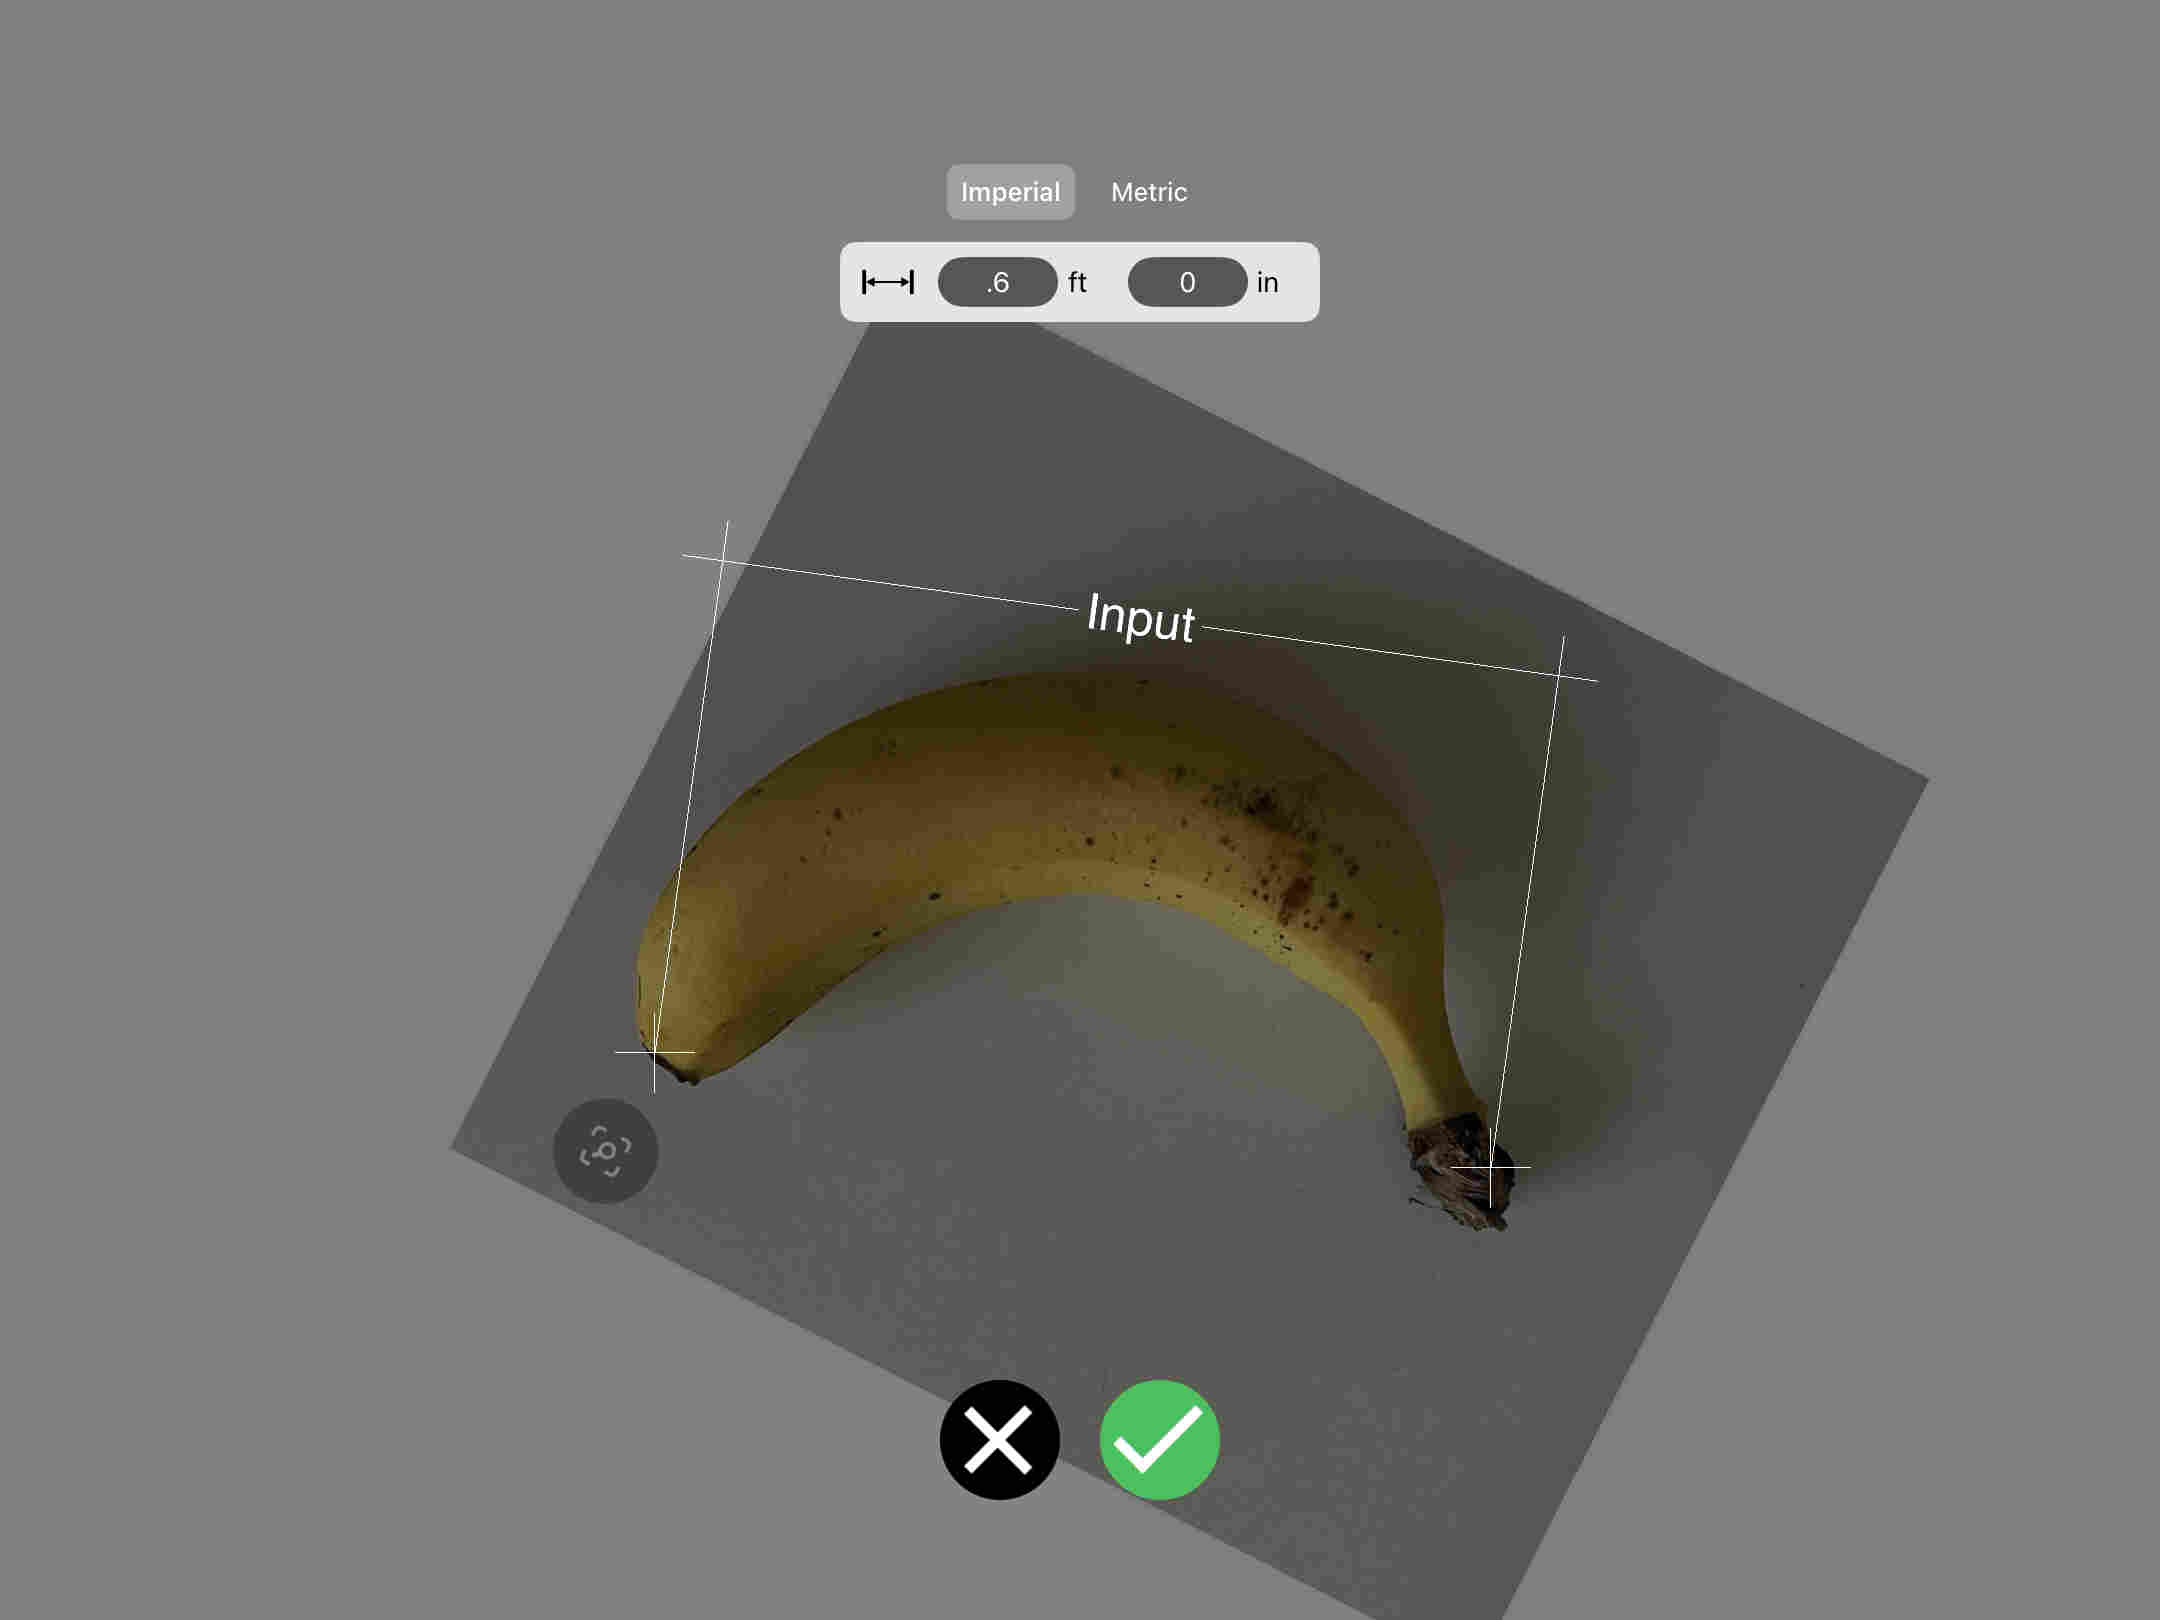
one neat feature of morpholio was sketching to dimension.
Sketchbook
Morpholio
Free
Paid
Handy timelapse option built into the software
No timelapse
Extensive range of pressure-sensitive brushes and pencils
Many options when paid, but still fewer than Sketchbook
Mirror grids available
No mirror grids
Cannot scale images to exact dimensions
Can scale images to required dimensions
Predictive strokes are not very good
Superb predictive strokes, great for circles and freehand work
Rougher, more raw feel (great for brainstorming and blurring)
More refined (better for rendering existing ideas or sketches)
trying a vector software
We tried adobe illustrator as our vector software
Adobe is a paid software but you can get a educational license.
Once installed and setup, you will see this screen.
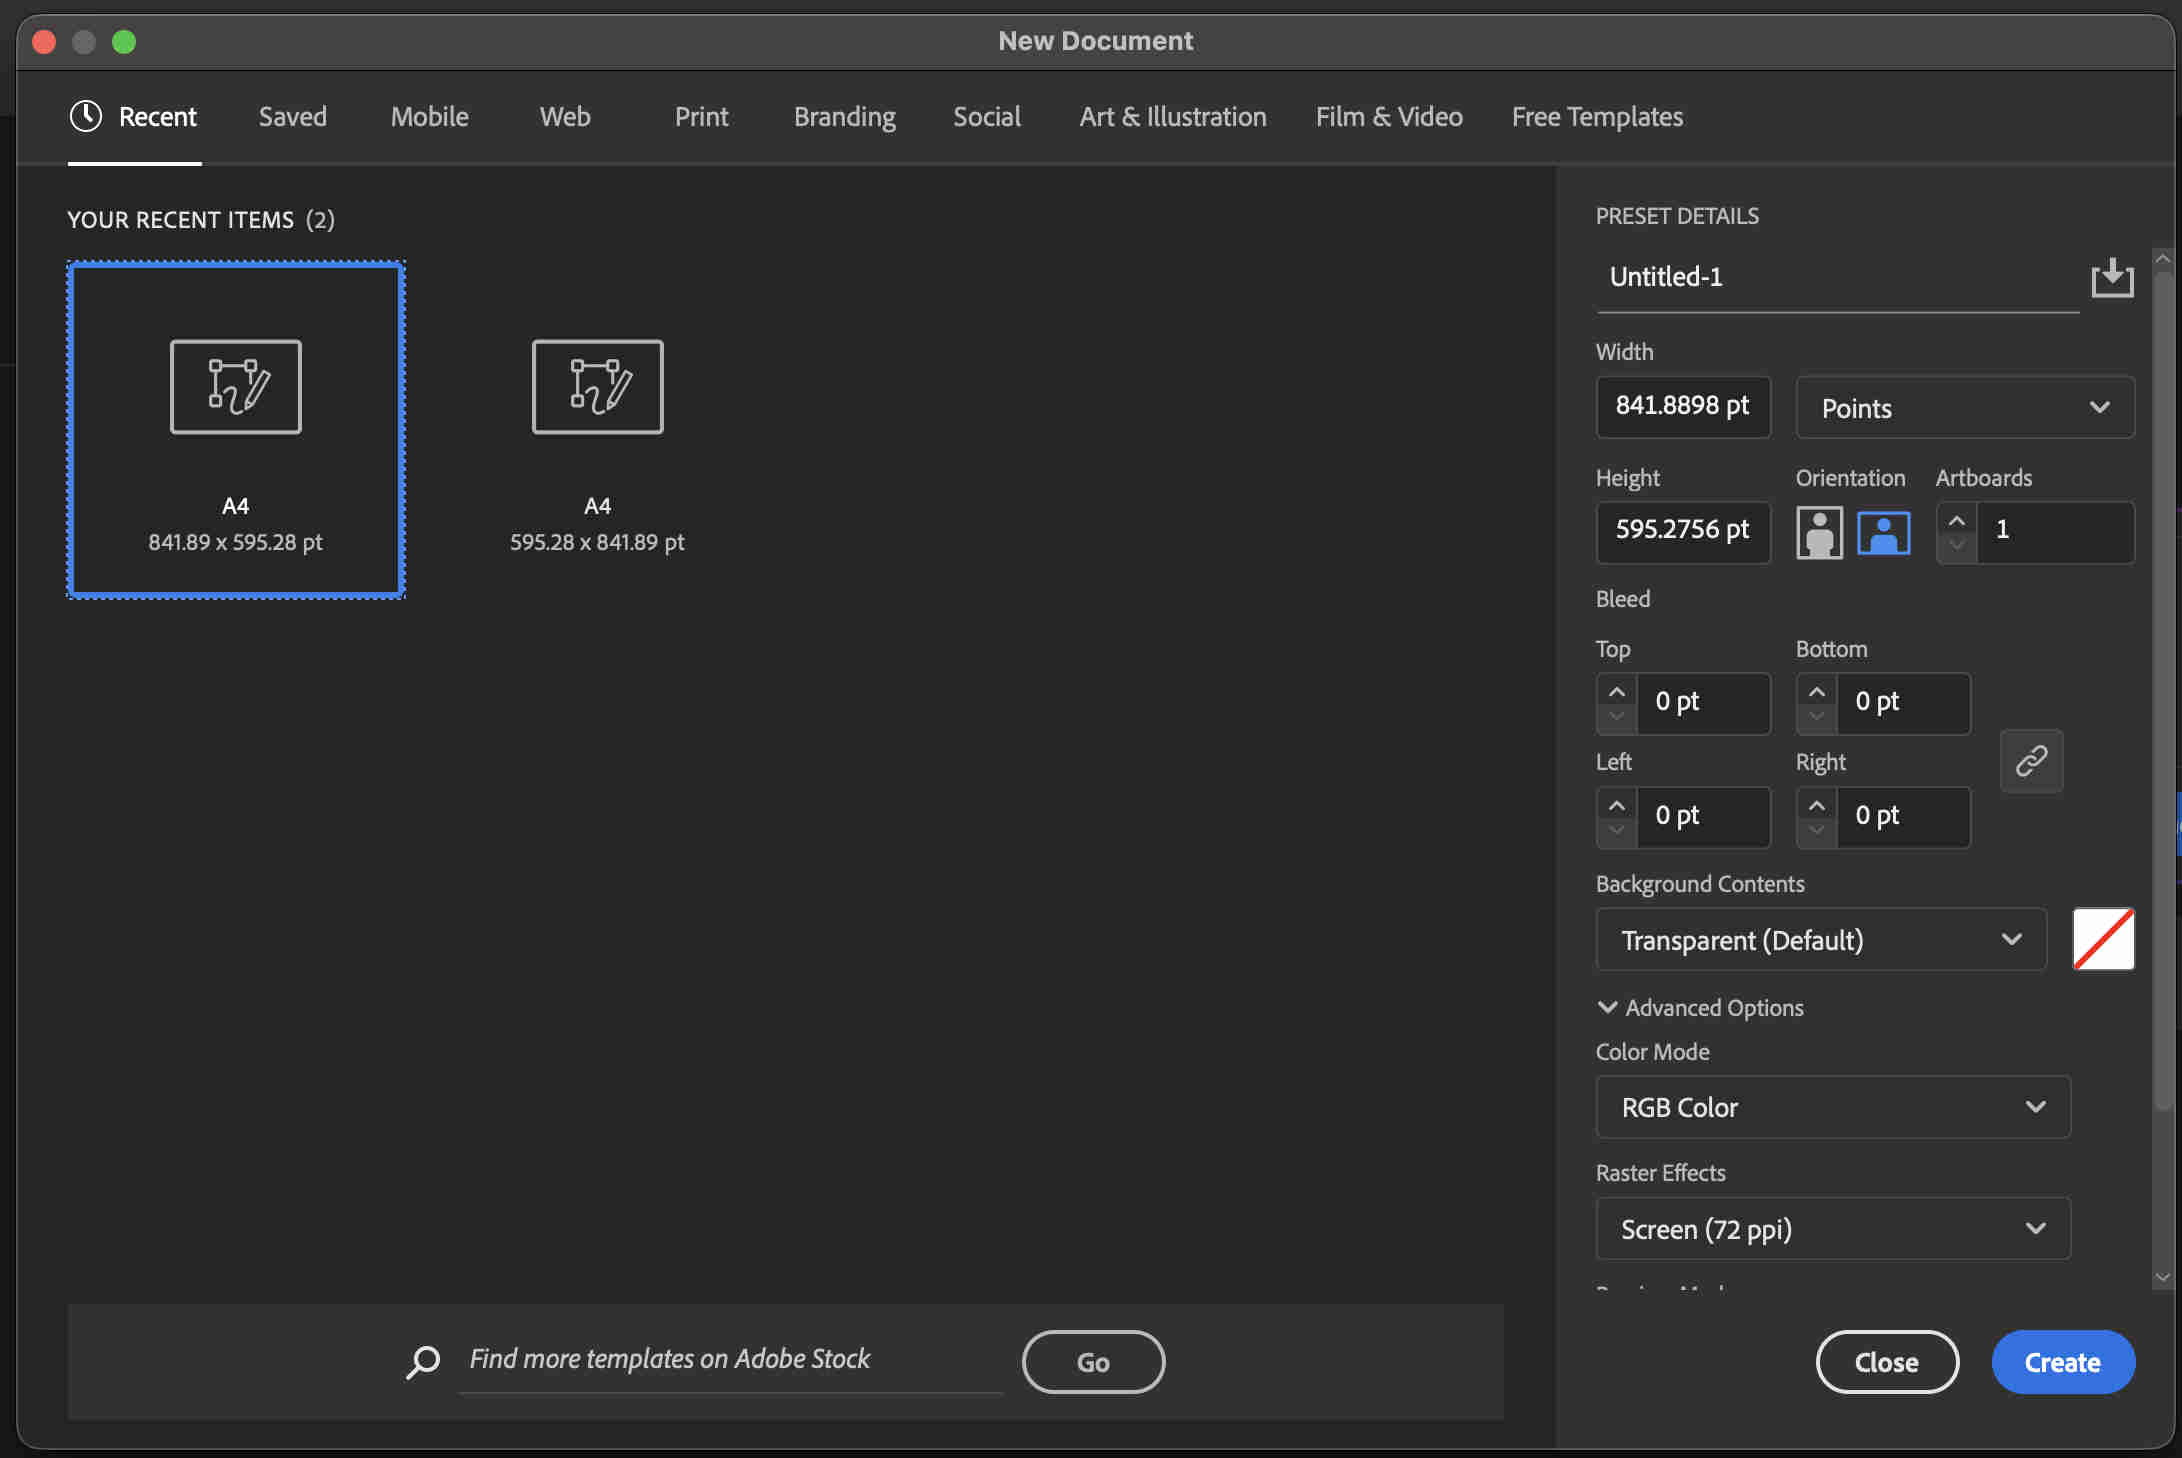
click on new file here
This screen will pop up where you an select-
artboard size
Art board orientation
file units
Colour mode
colour mode is crucial, depending on use case,
If your file has to be printed go ahead with CMYK colour mode as thats how printers interpret colour.
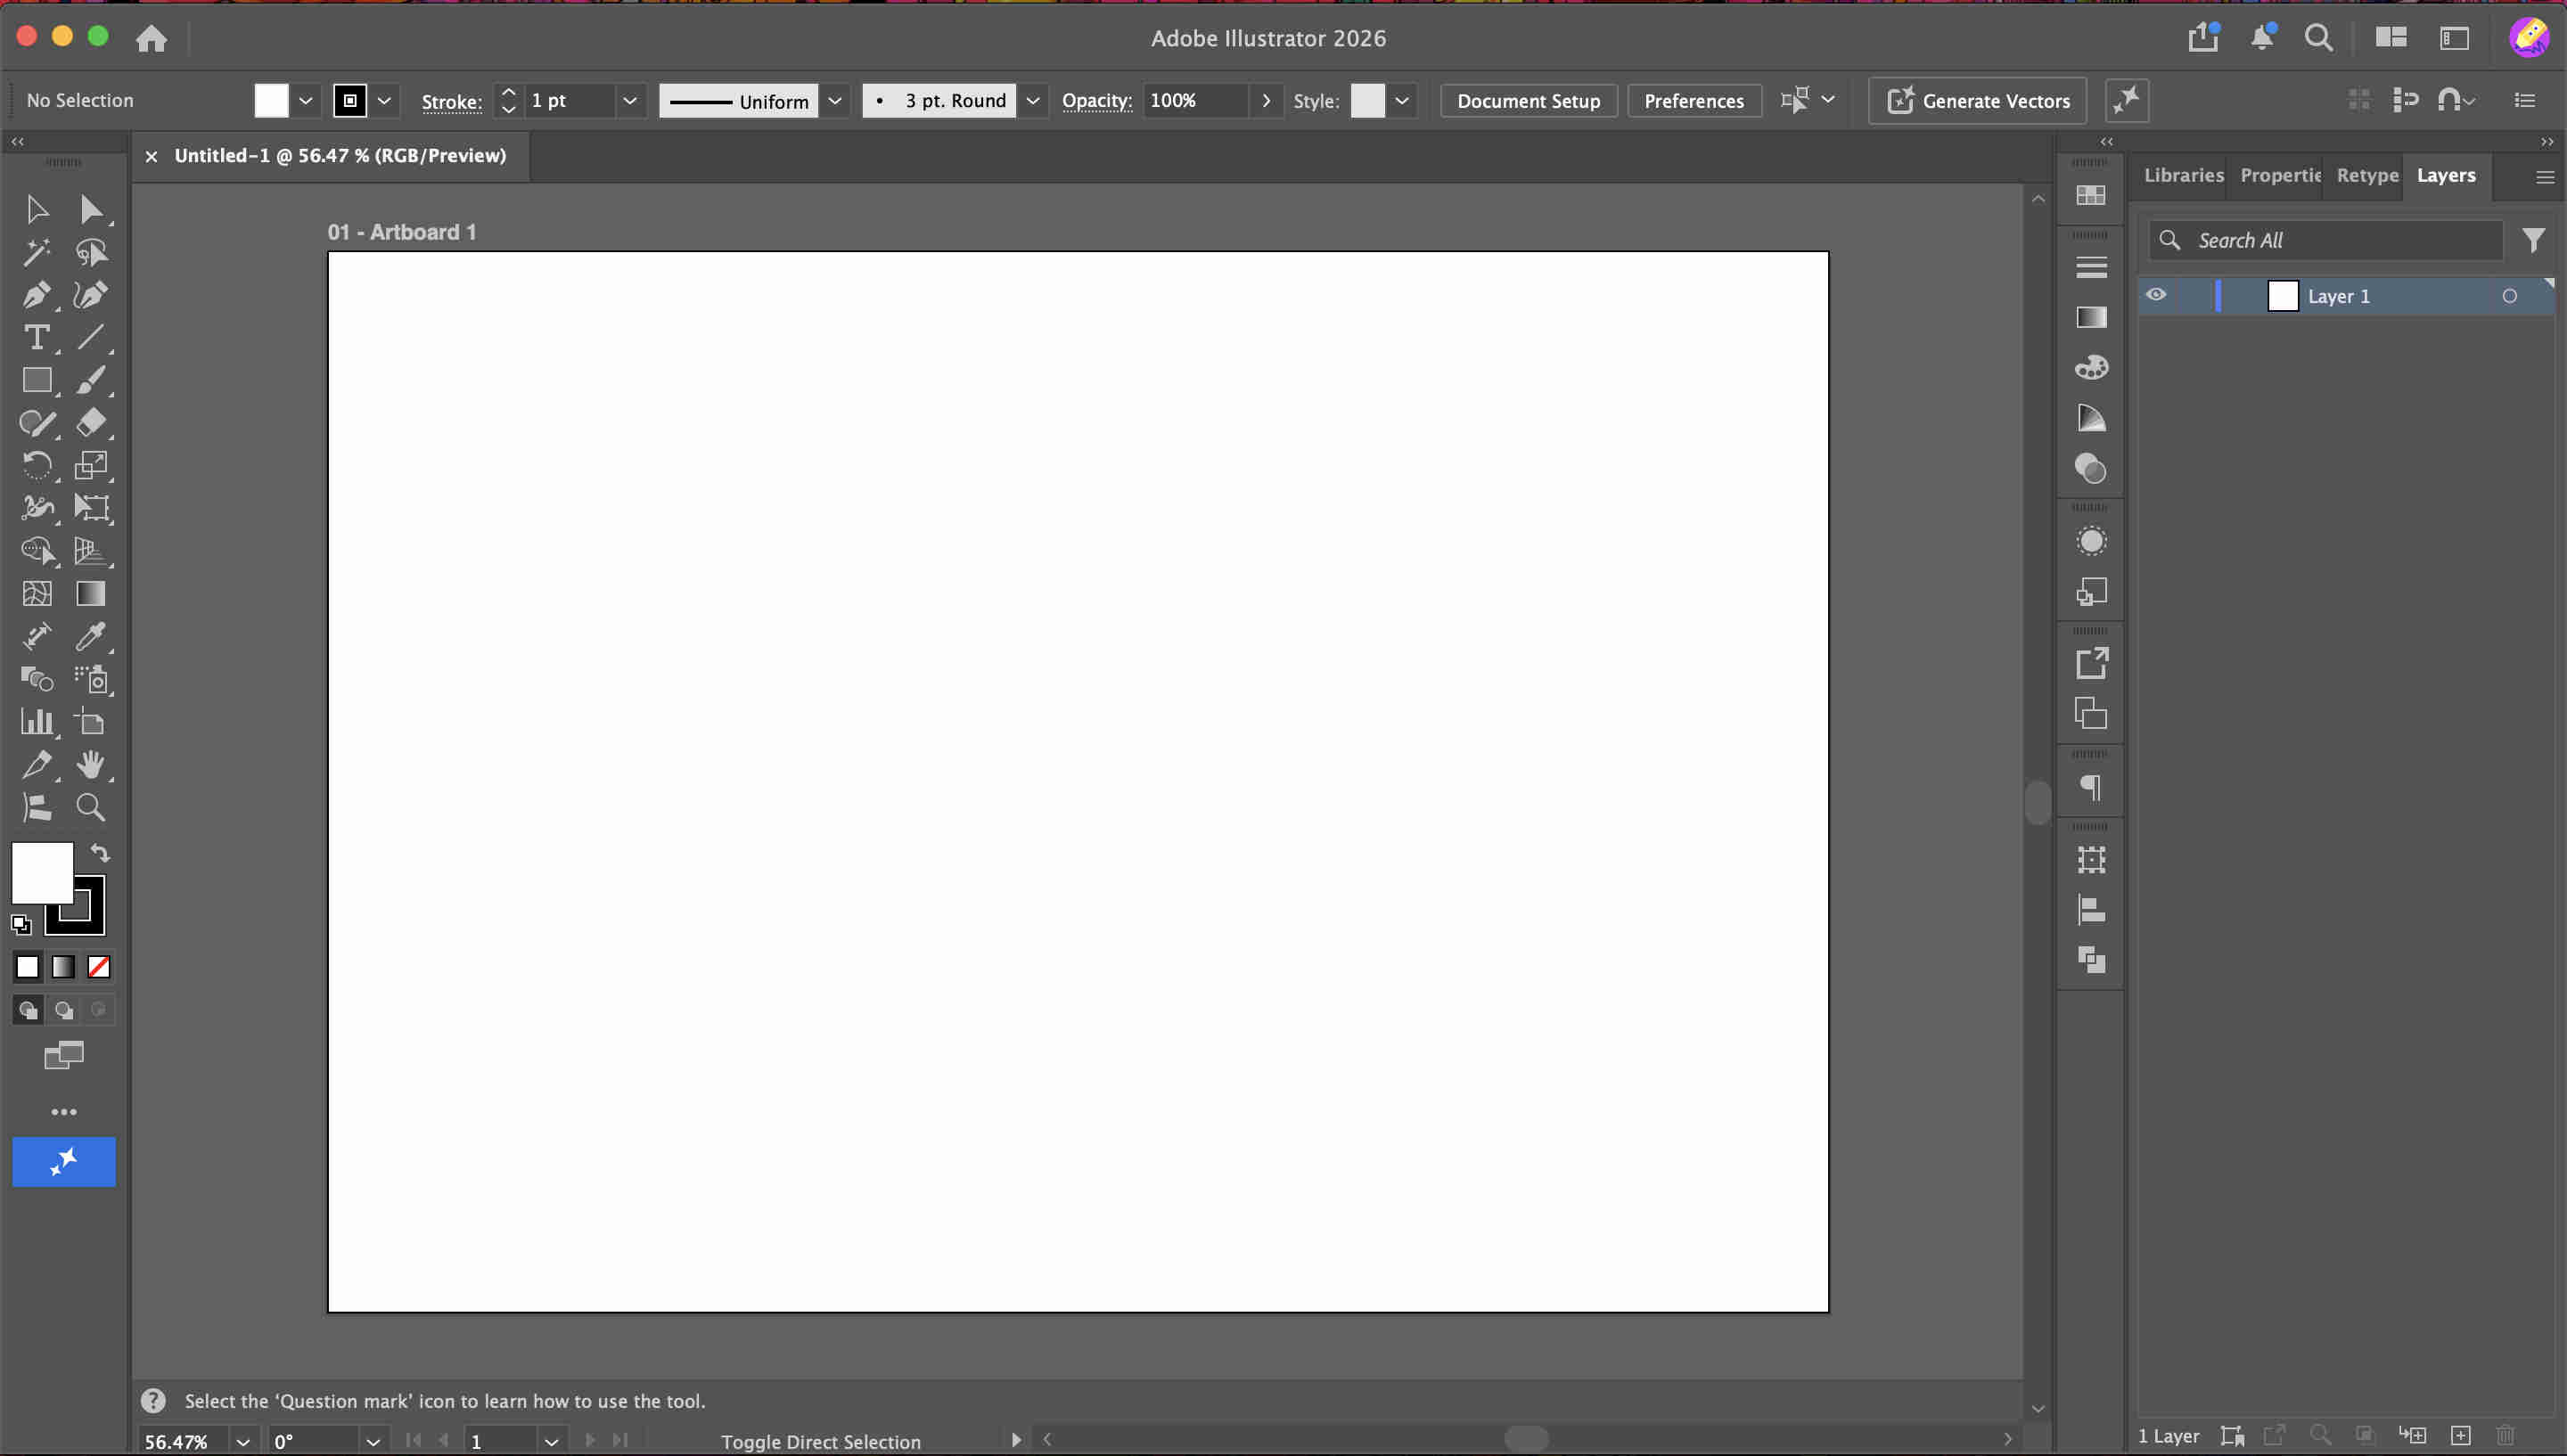
Once you click create this is the home page you will be treated to.
This is the tool bar where you will find all of your tools.
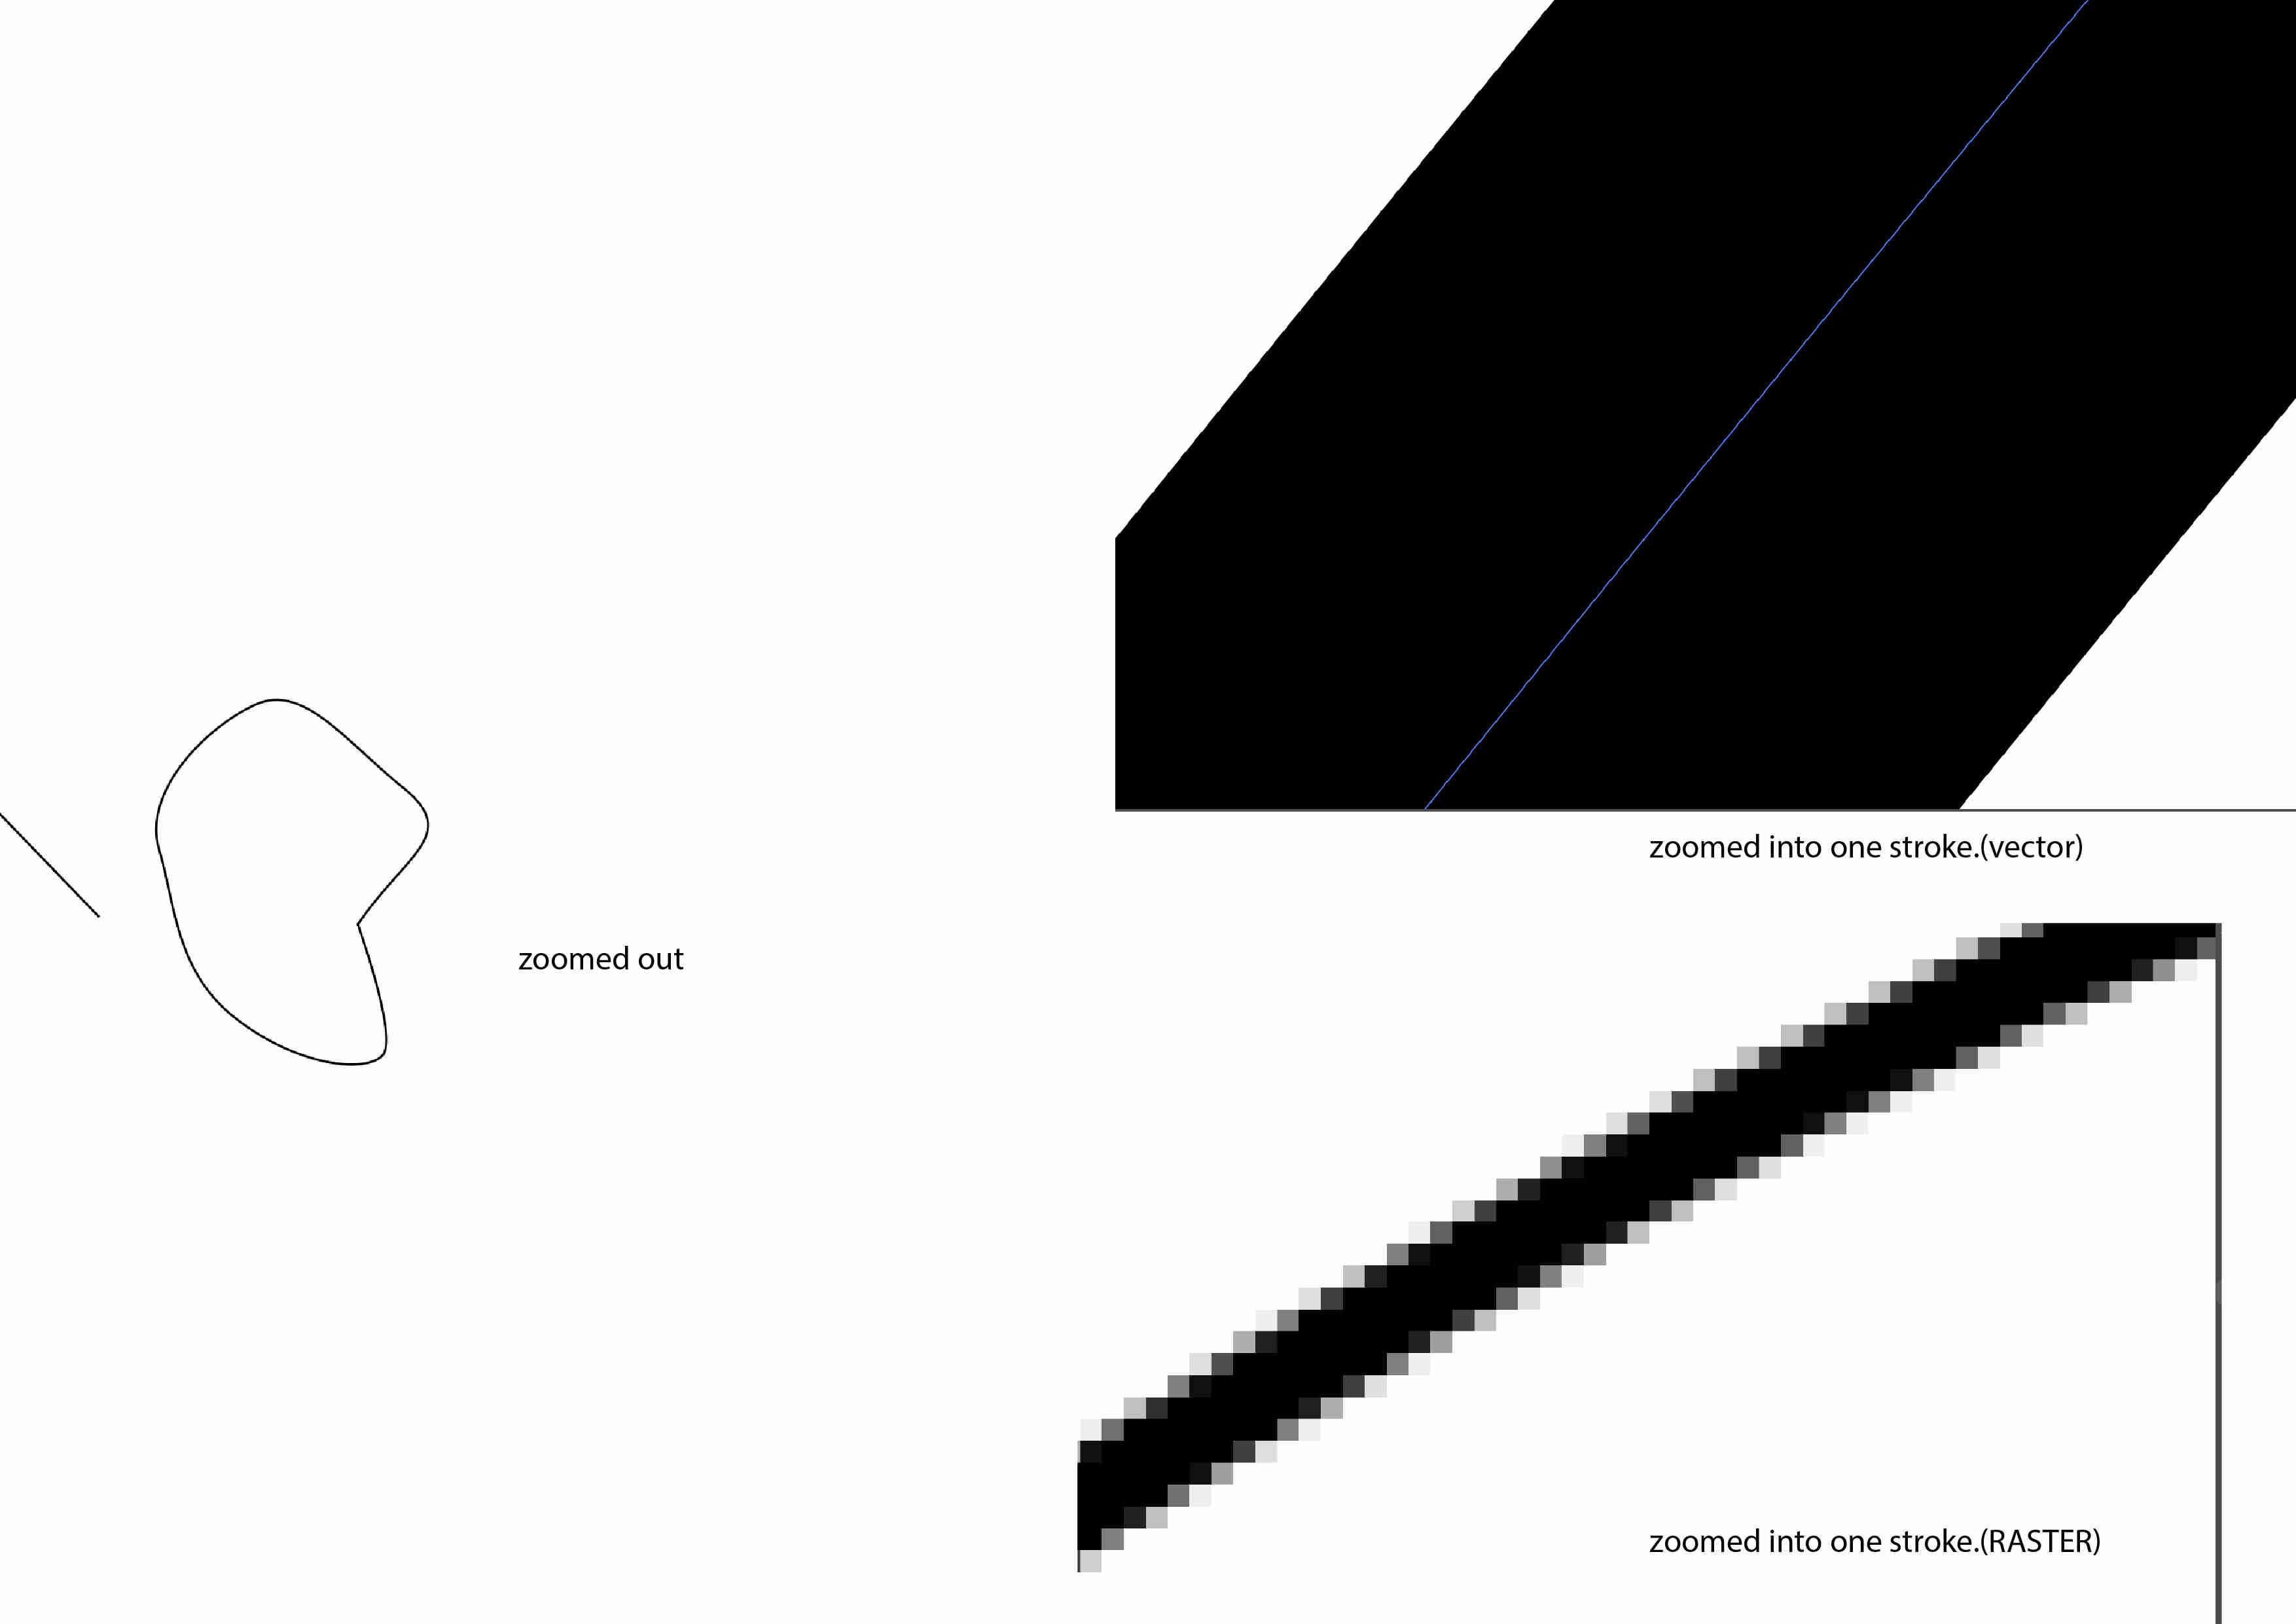
The main benefit of a vector illustration or software is that and line or stroke can be infinitely zoomed into
As you can see, an infinitely zoomed in vector has a crisp EDITABLE stroke where as the raster does not.
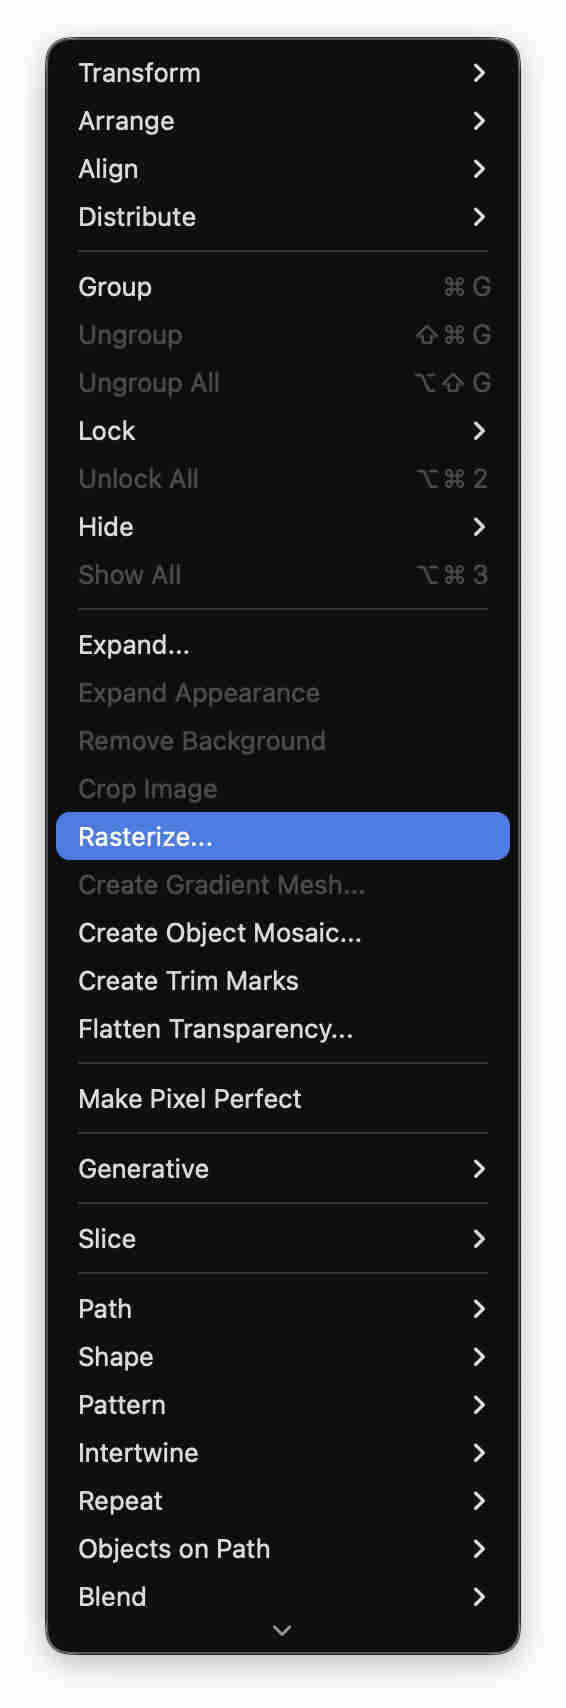
when a file has lots of strokes vector files get heavy,unlike a raster file loike in sketchbook you can keep creating and then making it into rasters to reduce the heaviness of a file.Go to illustrator - object - rasterize.
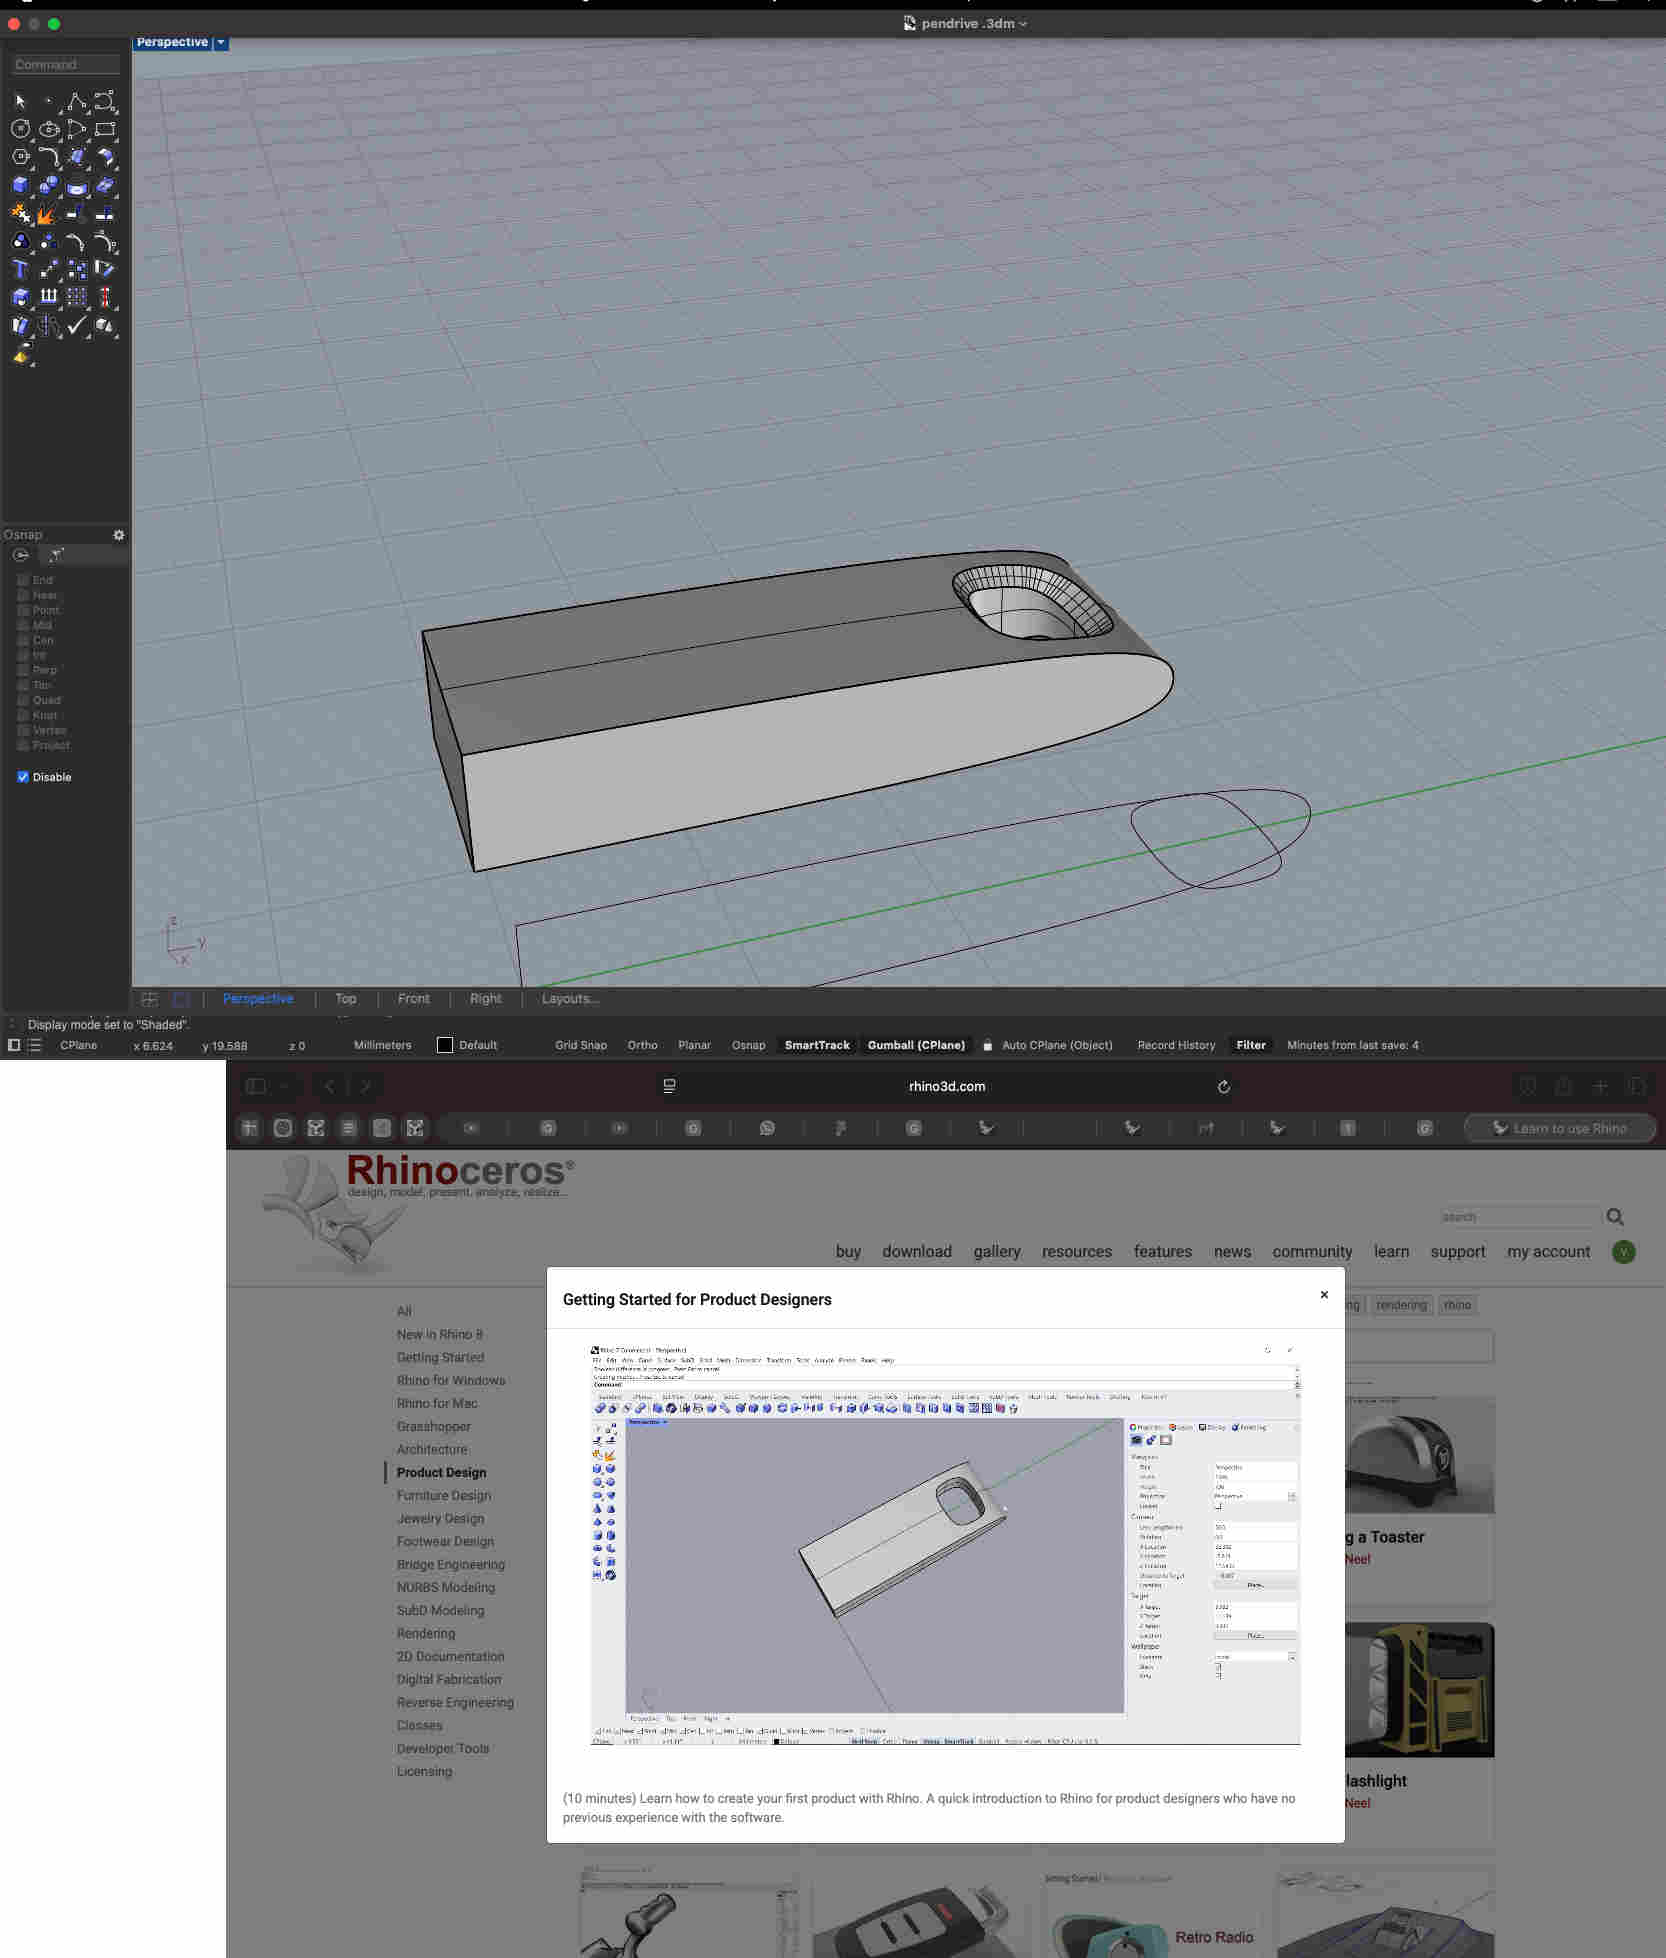
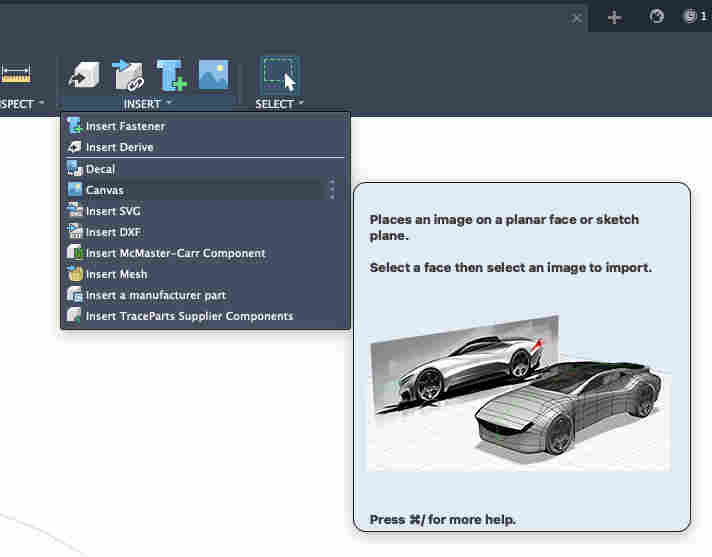
You can click on this link to download autodesk fusion 360, education free license,
However - this version has limited features but enough to get through.
Fill you details here post logging in and await confirmation.
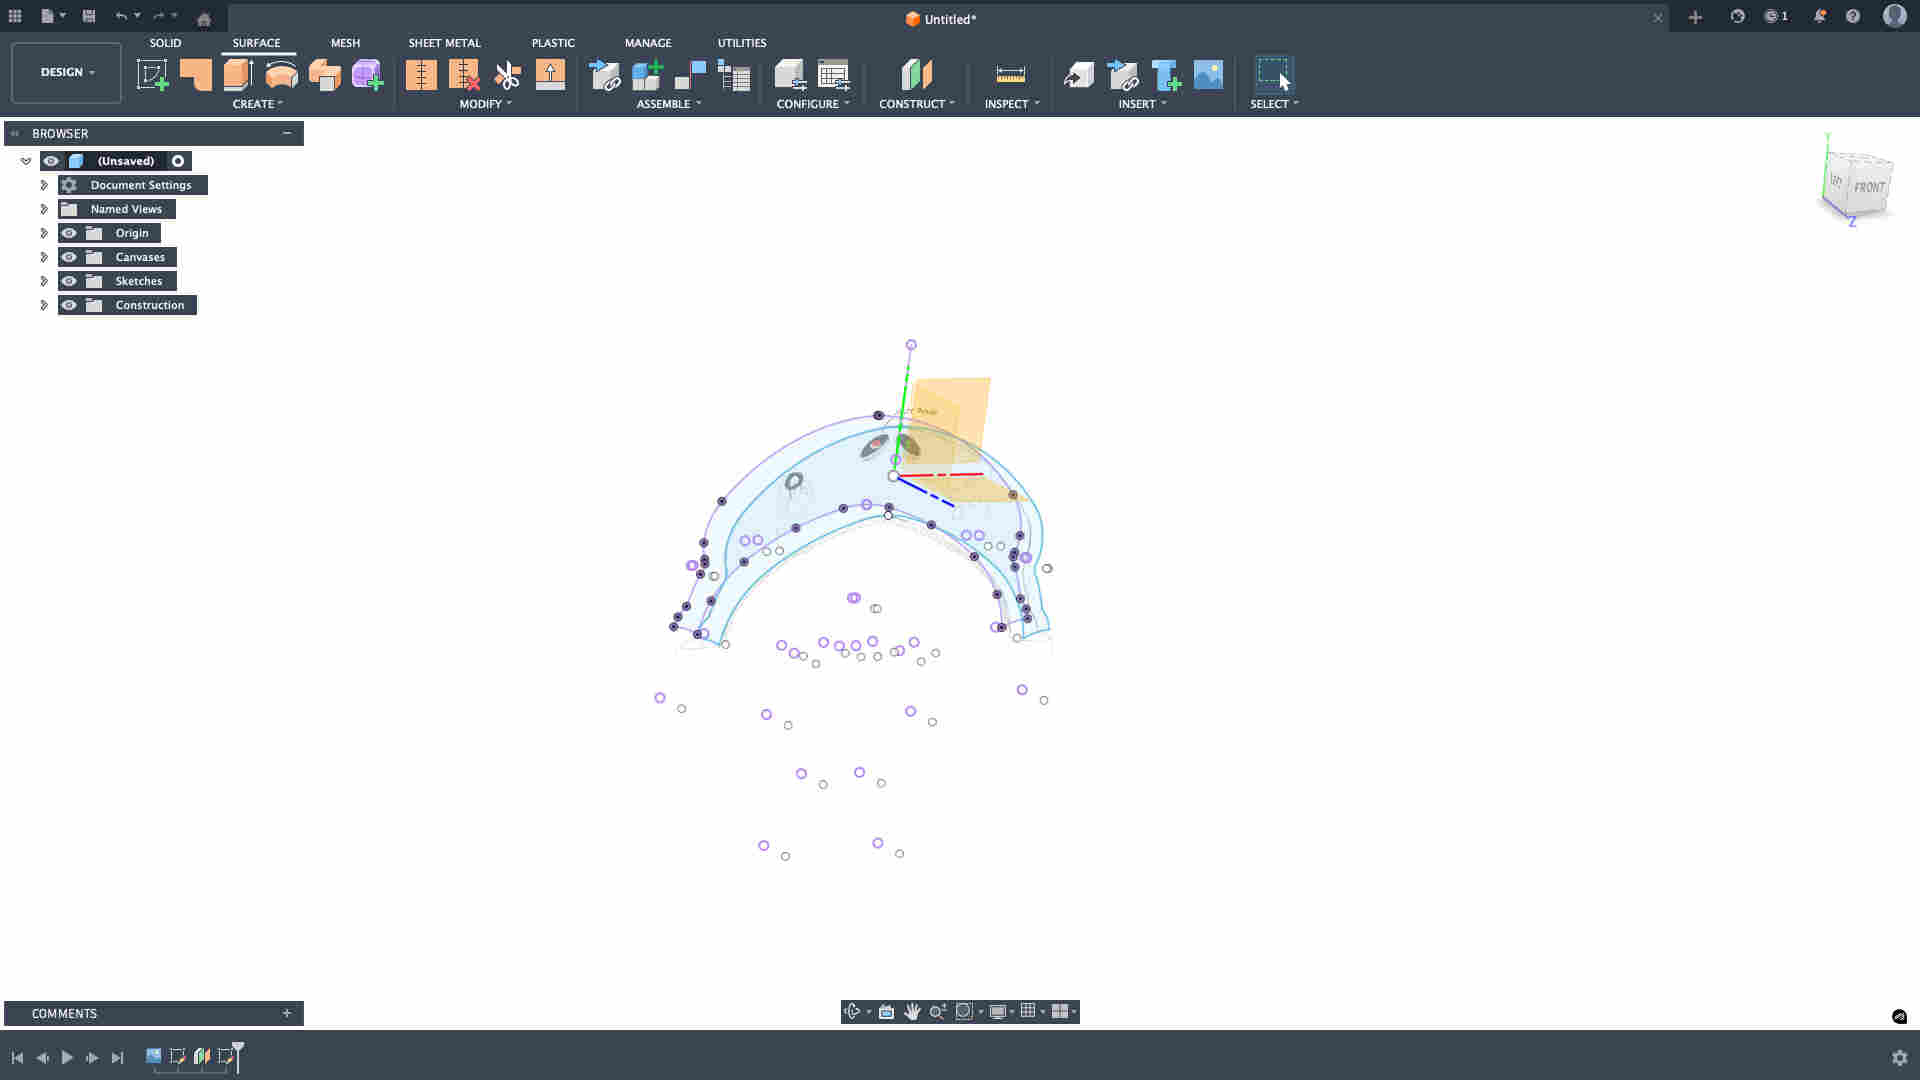
Once i had the rough idea i moved to fusion 360, i added my sketch as a canvas for reference
You can calibrate the sketch size, by right clicking on the canvas option, to have an accurate modelling base
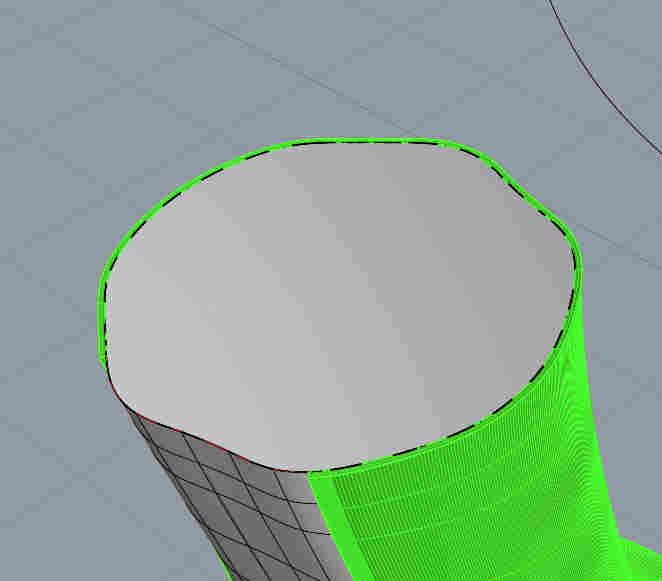
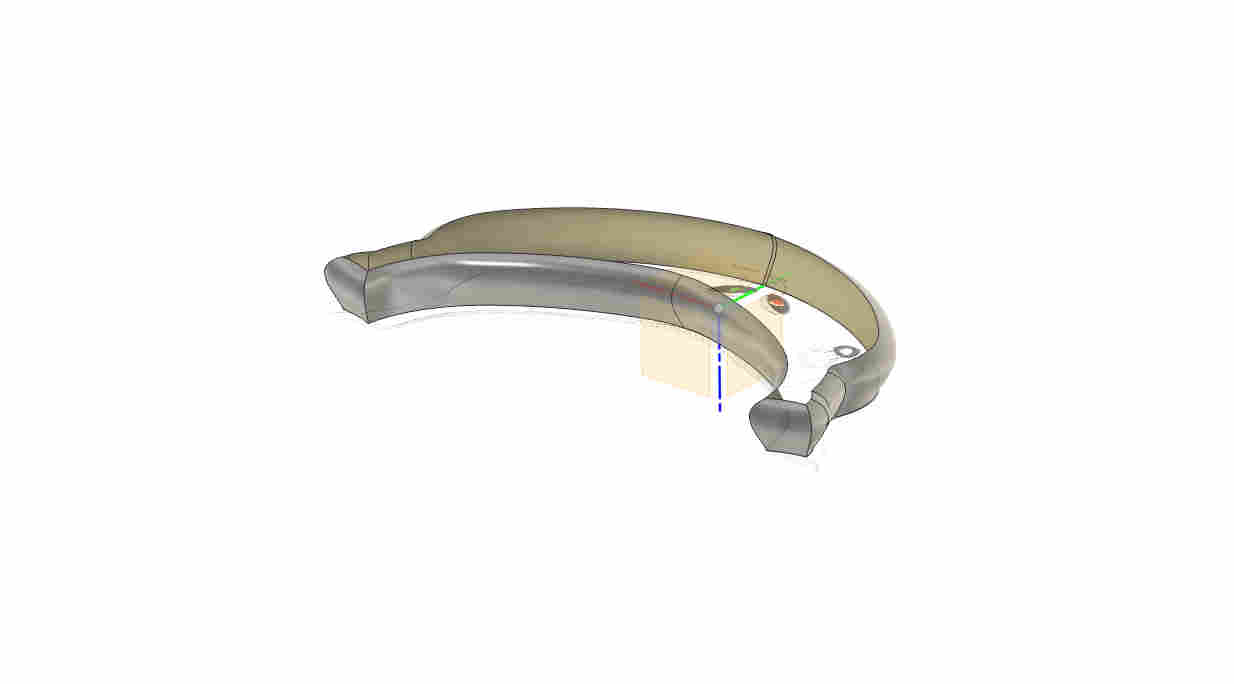
stenciling out the outer to create an offset, which i then loft to create a more organic shape.
directional loft with a directional tangent curve
Thickening the surface to create a solid
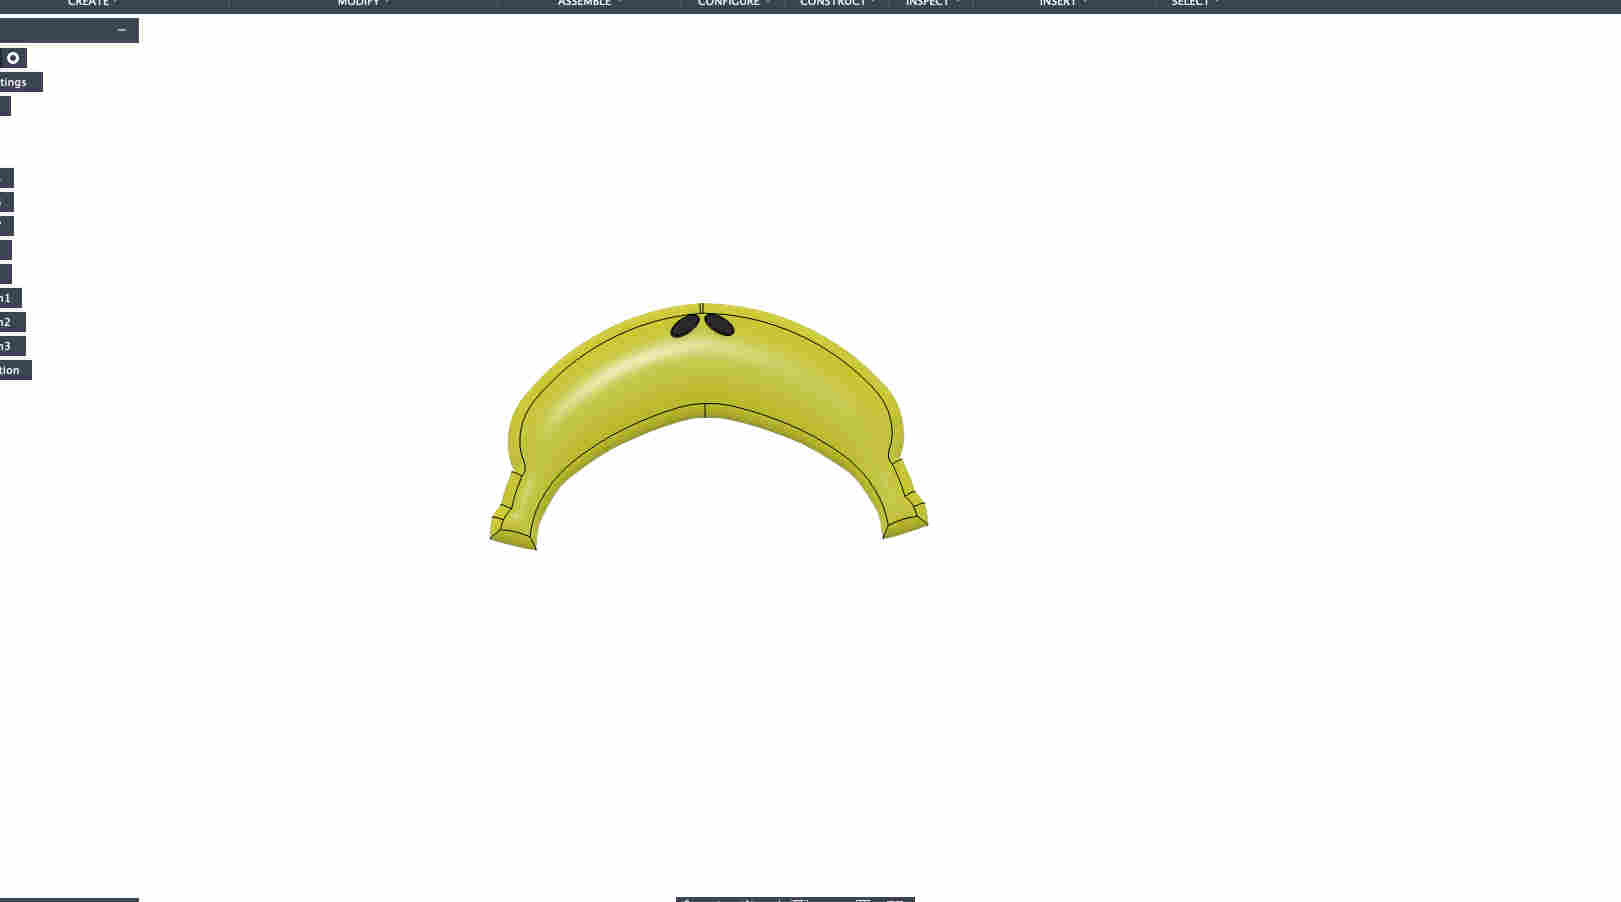
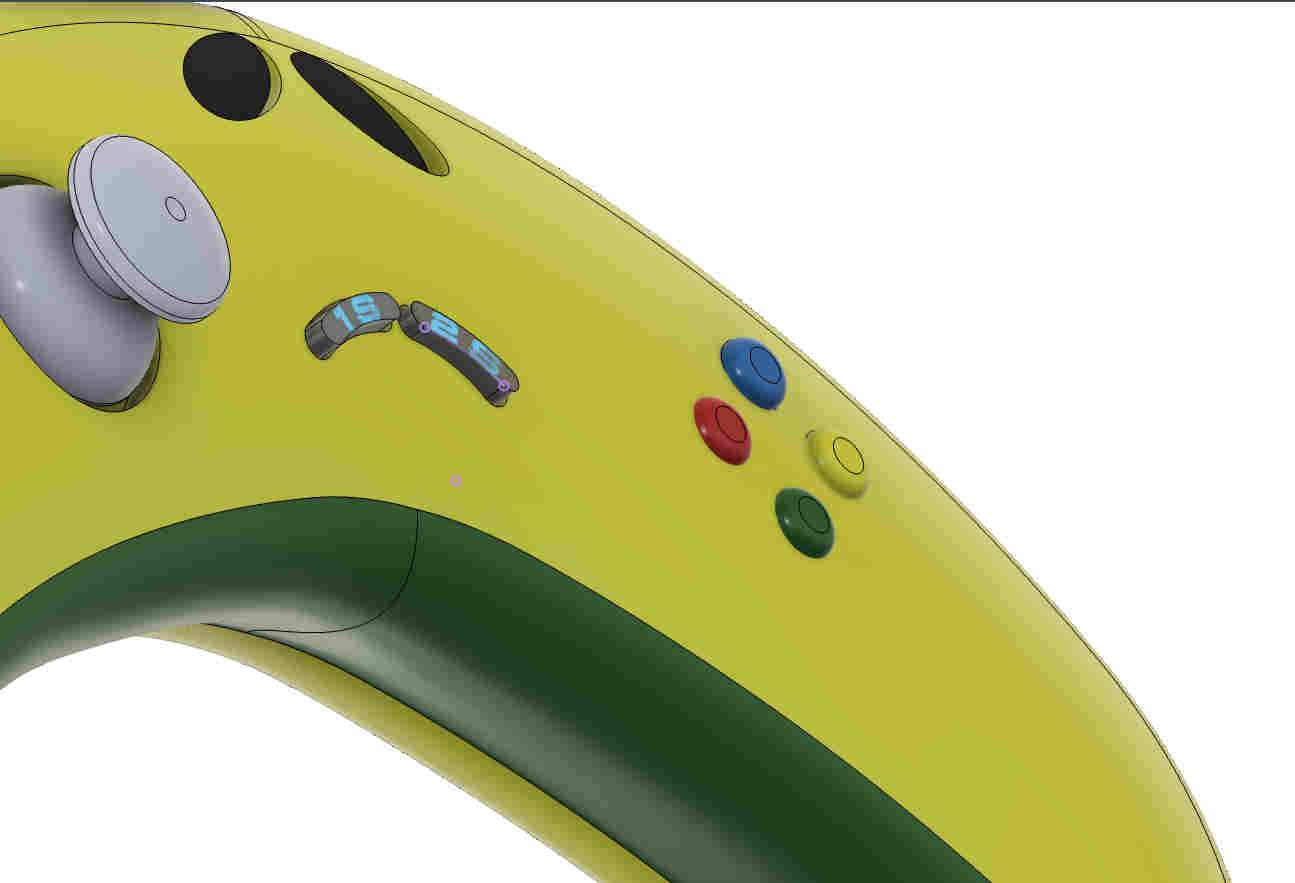
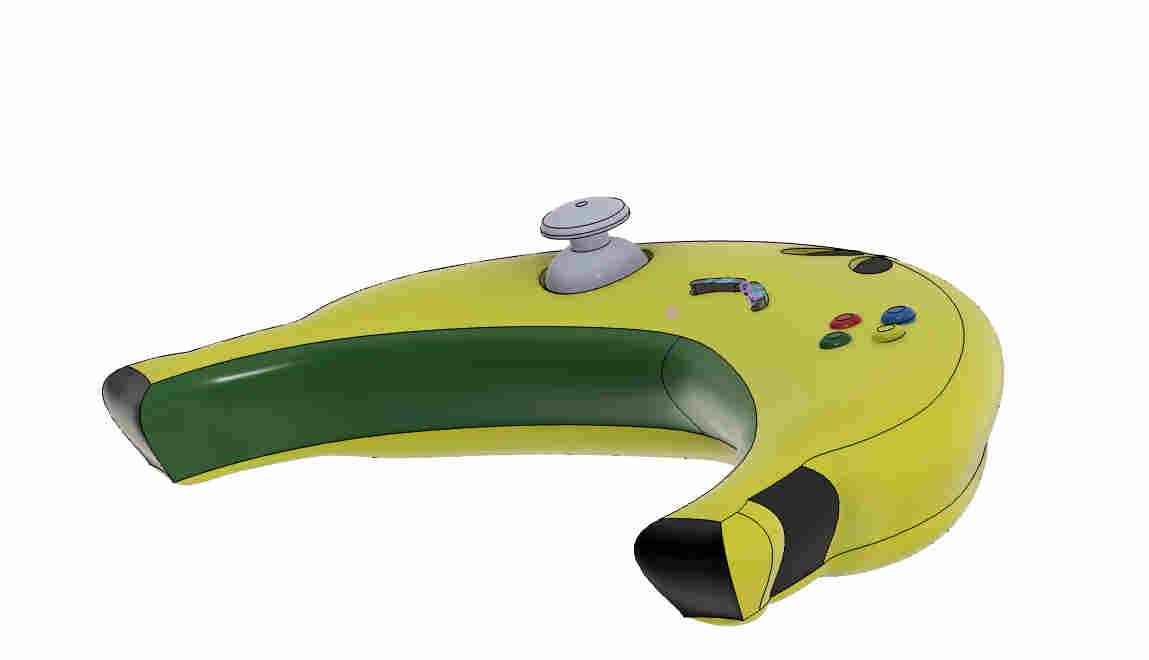
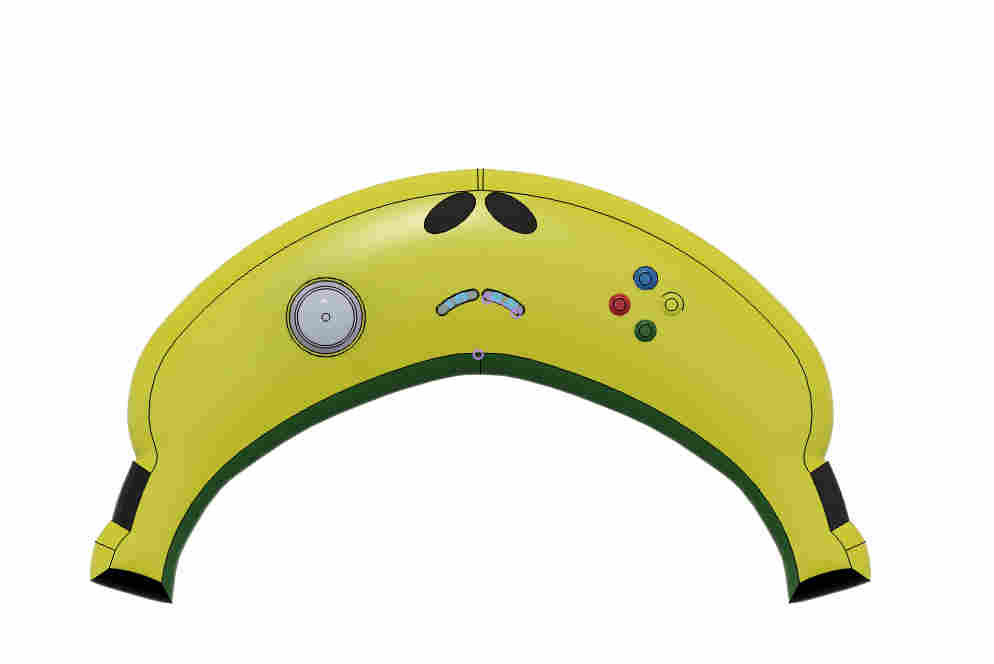
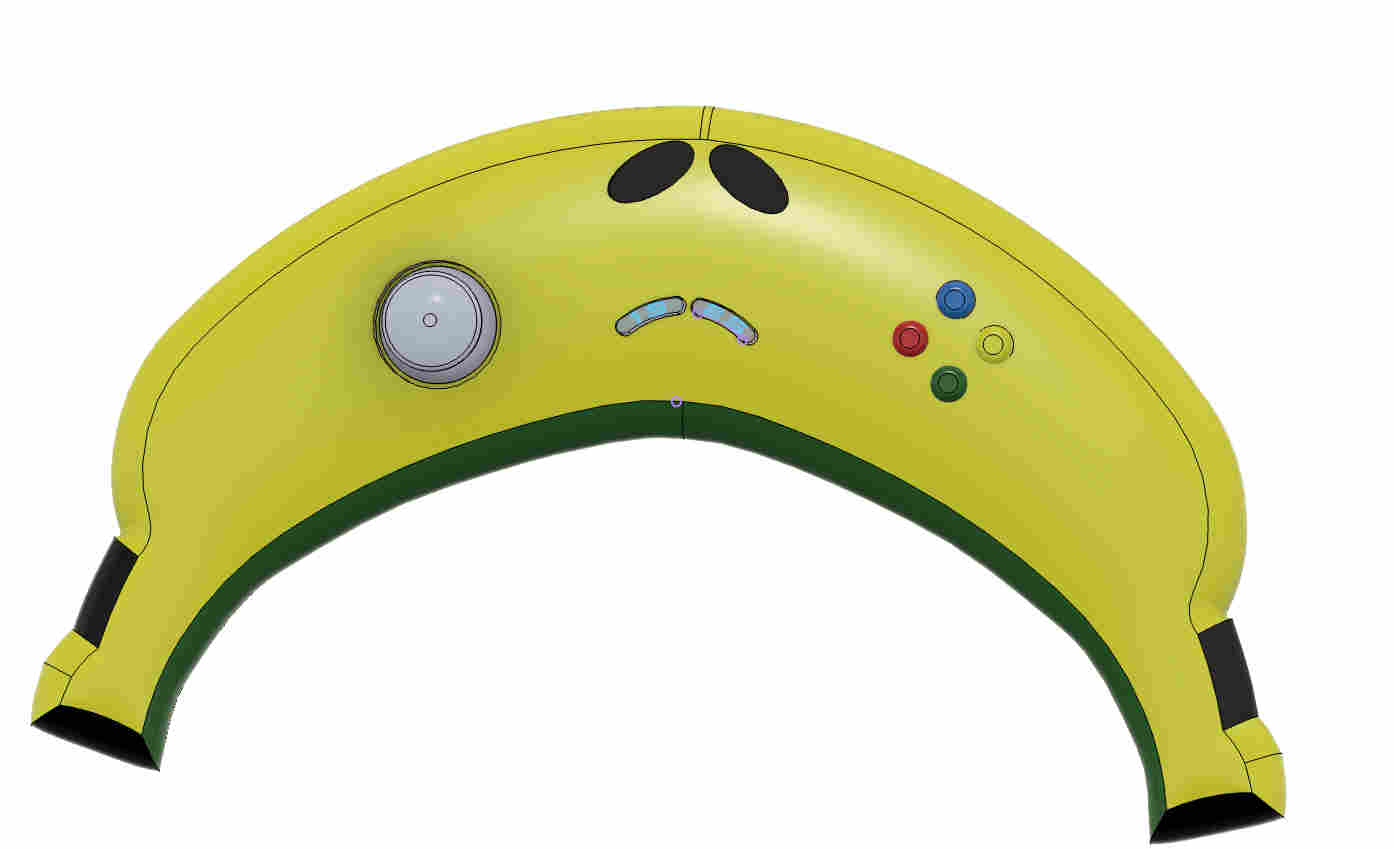
Giving appearence and few details.
Adding buttons making the appearance a little dynamic
shape is interesting but still majorly geometric.
Fusion is great of geometric models, that are then easily manufacturable. this is great for designing for mass production and machining, but a little less optimal when you have the freedom to 3D print undercuts and complex forms.
.Trying out rhino🦏.
Rhino is a paid software but has a 90 day free trial which is what I am using this time
https://www.rhino3d.com/download/
You can get a 90 day free trial here, to try out rhino.
As rhino was a completely new land for me, I started off by learning from the tutorials uploaded by rhino. link fo the tutorial page↴
https://www.rhino3d.com/learn/?query=kind:%20products&modal=null
Once i understood the basic tool locations and search bars and elements of rhino, I moved on to modelling
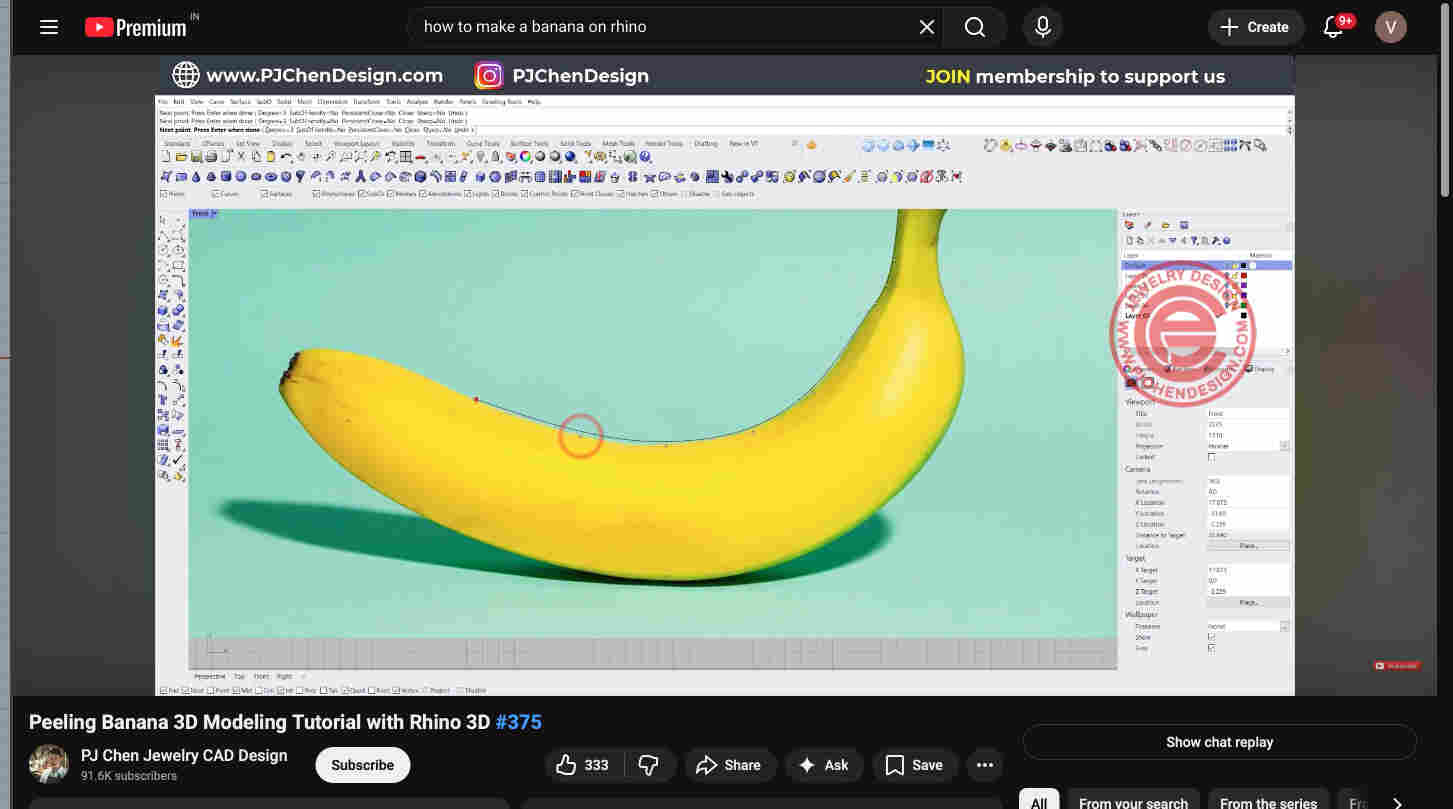
What better than making a Bannana to make a bananna inspired controller. tutorial link↴
https://www.youtube.com/watch?v=s_EKV8U8ZMg&pp=ygUocGVlbGluZyBiYW5hbmEgM2QgbW9kZWxpbmcgd2l0aCByaGlubyAzZA%3D%3D
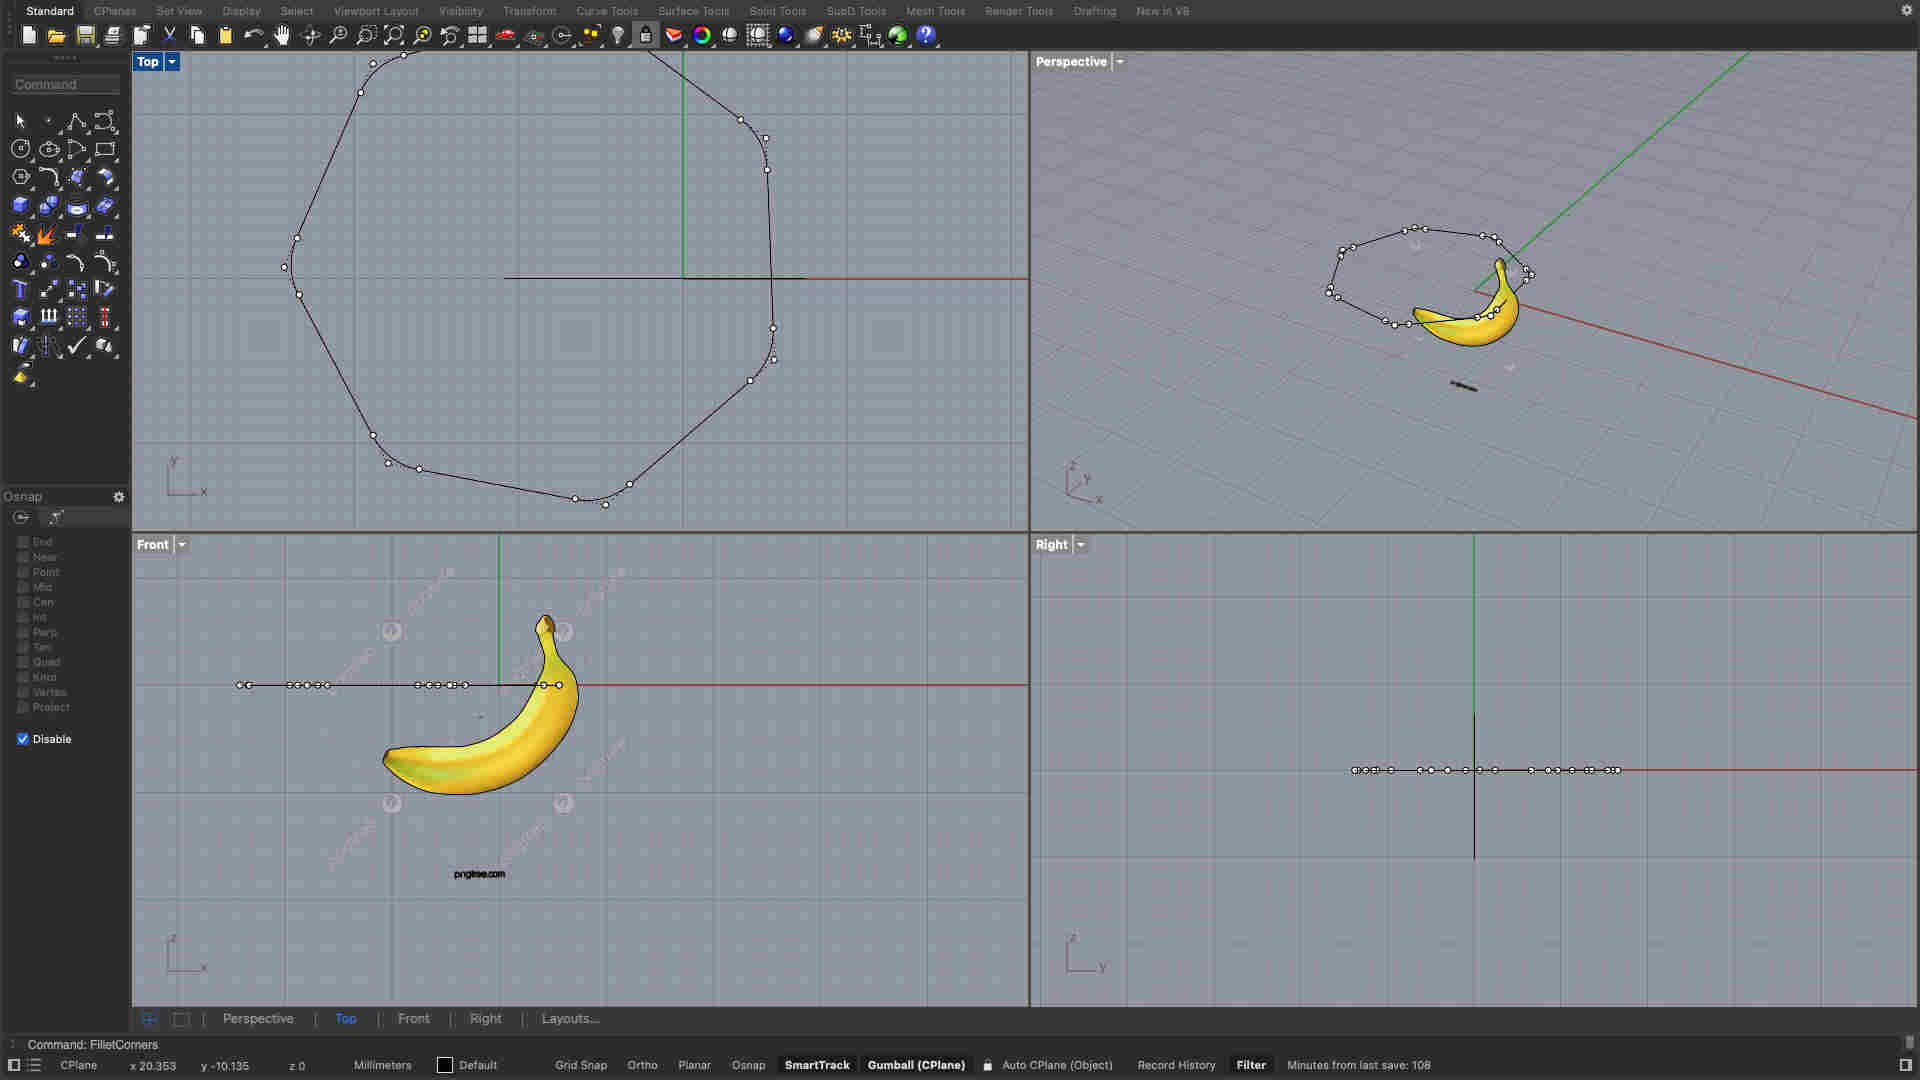
I started by using the picture command to add a canvas so that i can trace an outline.
COMMANDS USED
. Picture- to add canvas
. control point curve- to trace an outline
stenciling the picture
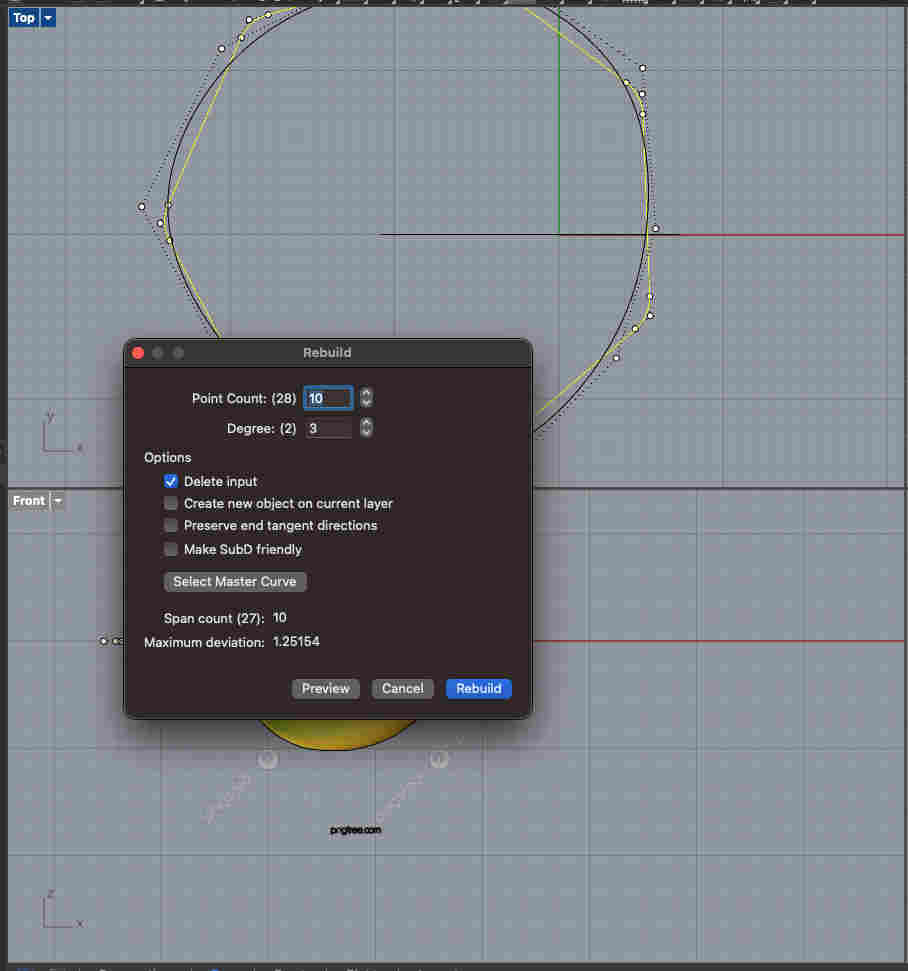
Next, using the polygon tool i made a 7 sided figure. i filleted this figure to make it slightly organic, and then rebuild to make it even more organic.
COMMANDS USED
. polygon- to Make a septagon
. Fillet corner- to round edges of polygon
. Rebuild- to make the shape more organic and curved.
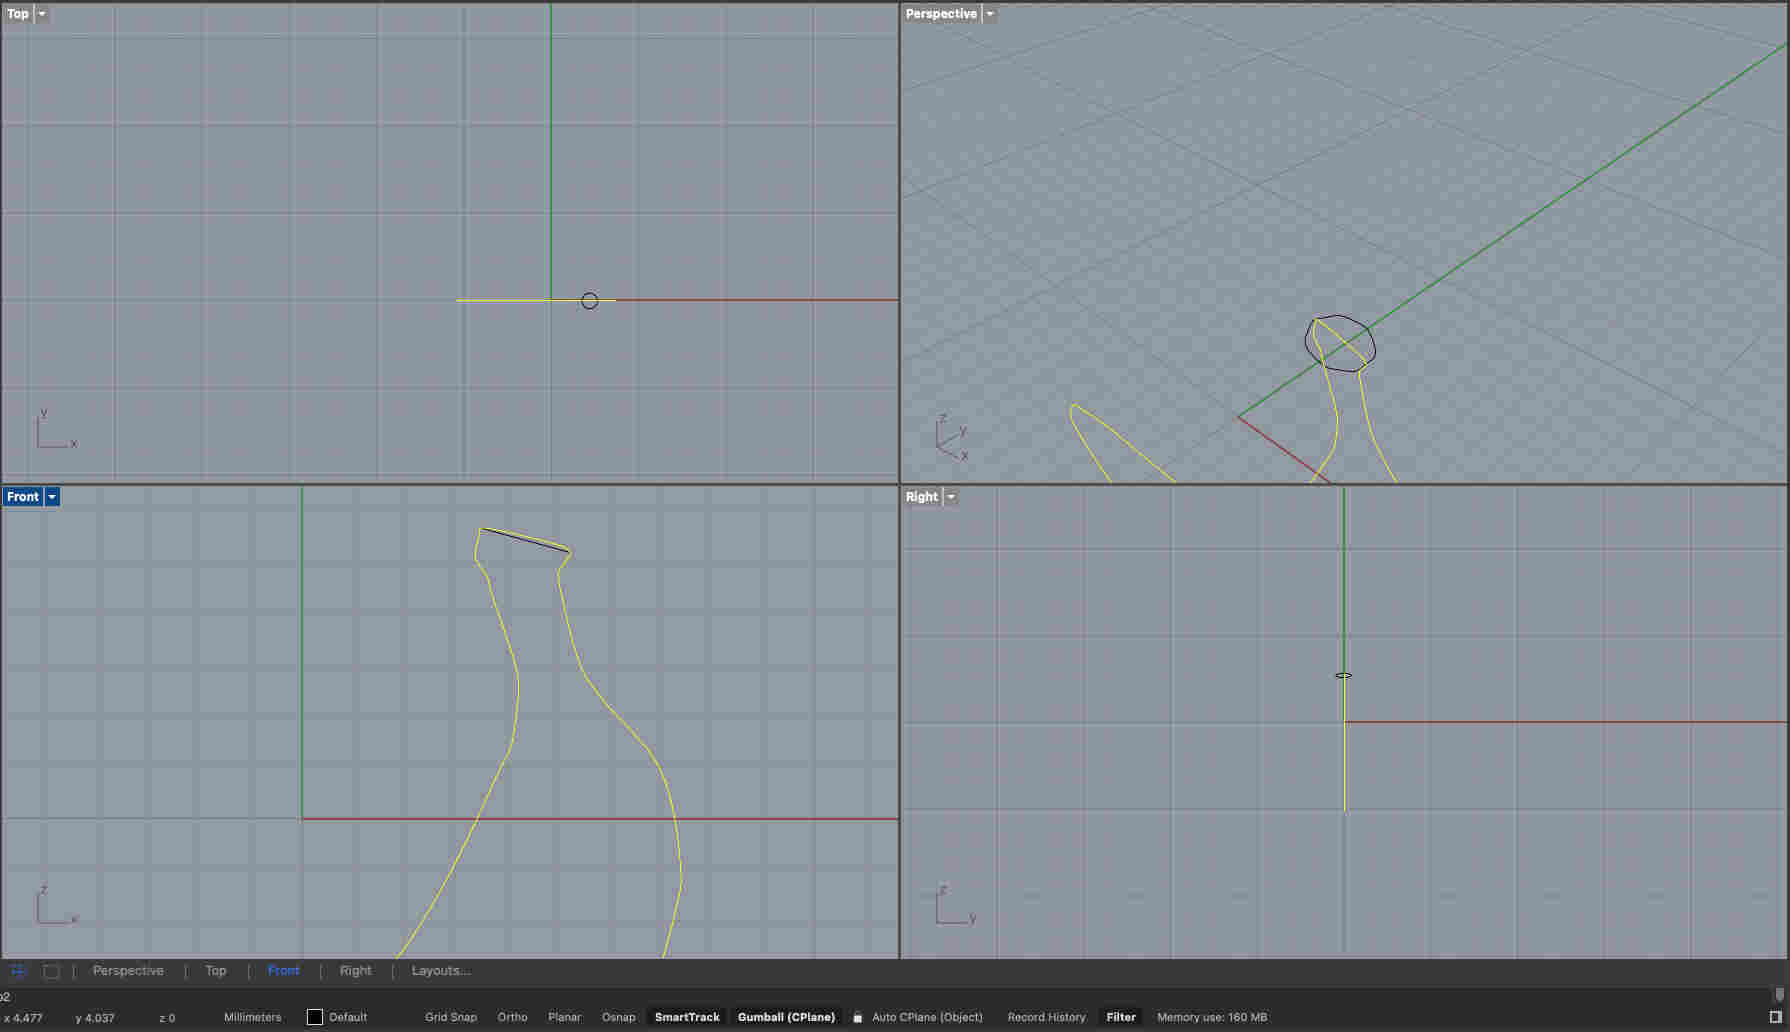
One neat feature that you can do in rhino is ORIENT. a bigger septagon can be relocated resized at a new location(in my case, beytween the outline of my bannana). oriented as seen below
Error made while outlining
While creating an outline, i accindetally made a continuous shape instead of 2 lines. so post orienting i couldnt sweep my shape on 2 rails.
The infamous undo gallore(╥﹏╥)
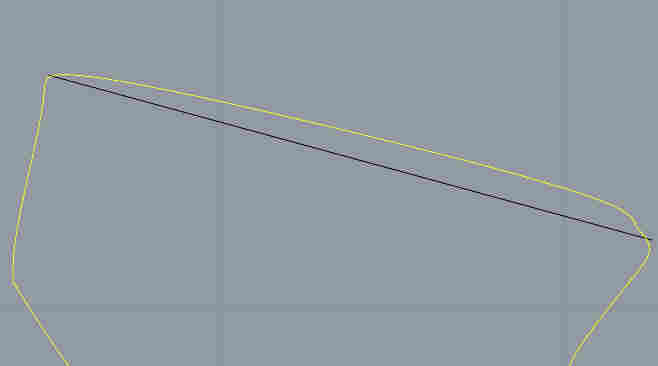
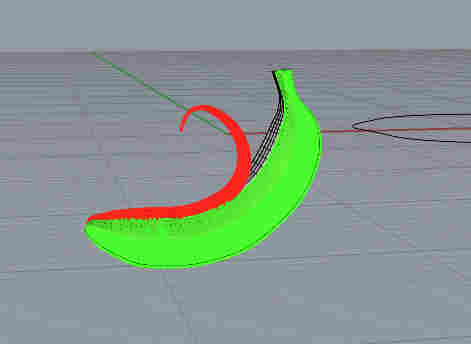
After correcteing and using sweep 2 rails, i got a shape that looks like this. very organic and almost identical to a natural bannana.
COMMANDS USED
. Sweep2rails- sweeping septagon along the rails.
Then i selected part surface and gave it a thickness.
COMMANDS USED
. Offsetsrf- To give certain thickness
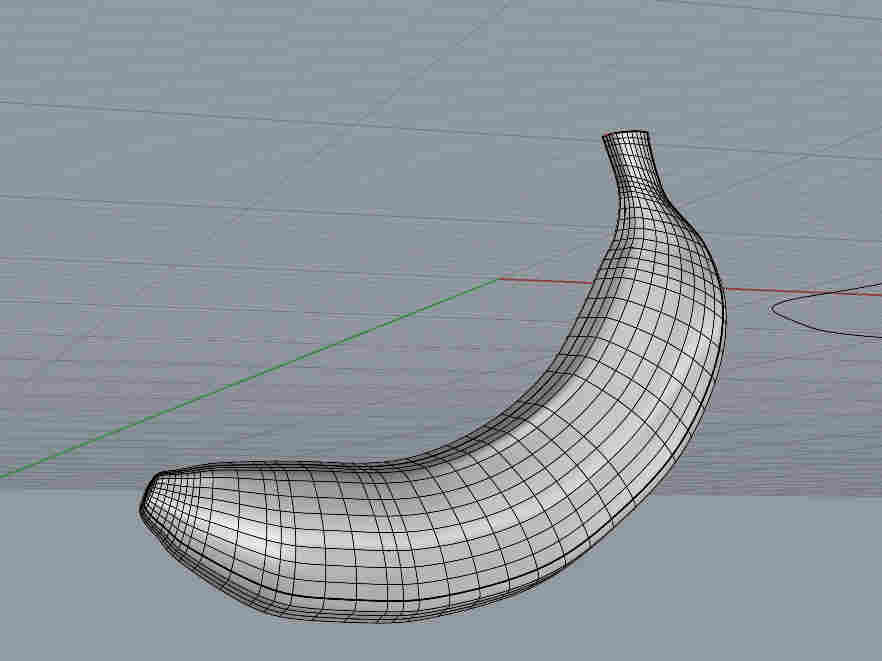
I Thickened the remaining surface(peel). and used the bend command to bend the surface in an organic way.
COMMANDS USED
. Bend- To manipulate surface
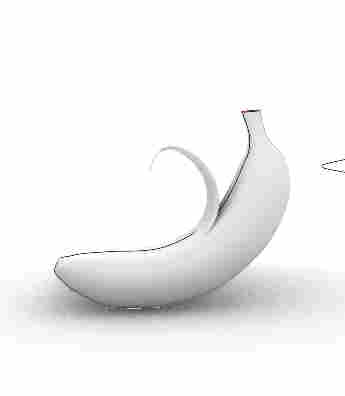
Final result.
Fusion vs Rhino — Quick Comparison
Fusion 360
Rhino
Great for dimension-based modelling
Great for odd shapes or organic modelling
History timeline makes editing designs after mistakes super easy
Super handy search bar in the left tab to find tools easily
Super intuitive UI and iconography
Super extensive toolset for multiple possible operations
Reliable modelling for prints or manufacturing
4-panel view of the object is super handy
Cloud save makes returning to designs and making changes easy
Rhino tutorials available for multiple object workflows
Importing components from other files is very easy
Feels more like Illustrator for 3D modelling
Plane construction and sketching is strong
Not restrictive at all
Super restrictive when it comes to organic shapes and forms
Bad iconography
Some surfaces cannot be evenly thickened or shelled
Not very intuitive for beginners
Limited toolset for free-form operations
Dimension-based modelling is possible but shouldn’t be the priority
No history timeline — undo-heavy workflow for fixing mistakes
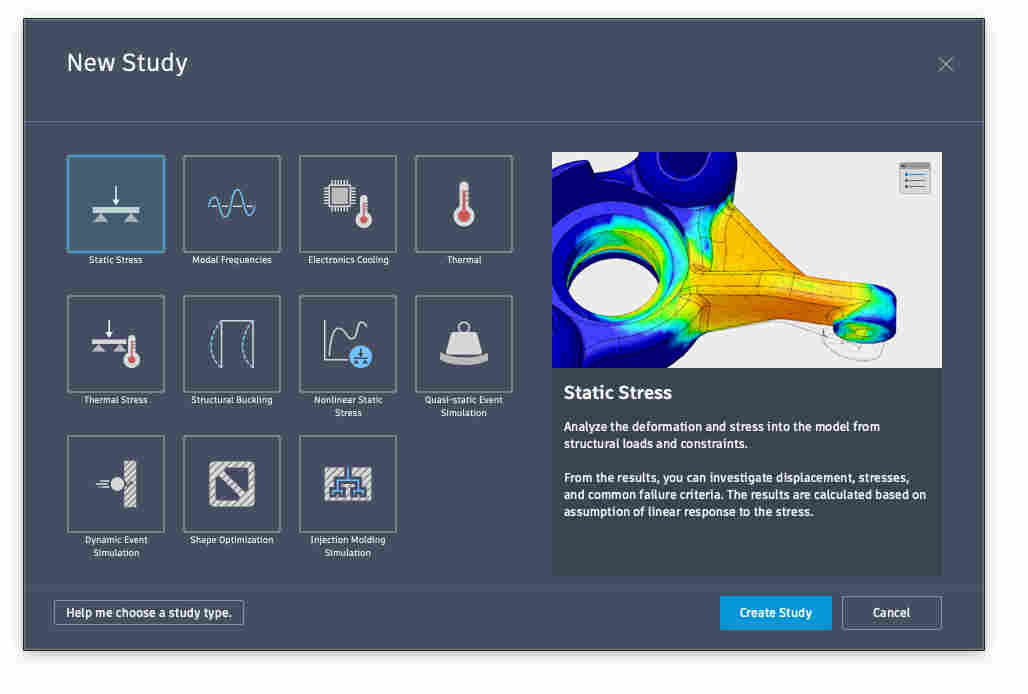
.Trying simulations.👨💻
On the top left of fusion 360 we select simulations to create a new study. Here we are creating a new static stress study. Quick setup tutorial↴
https://youtu.be/IE2aQiEbwjQ
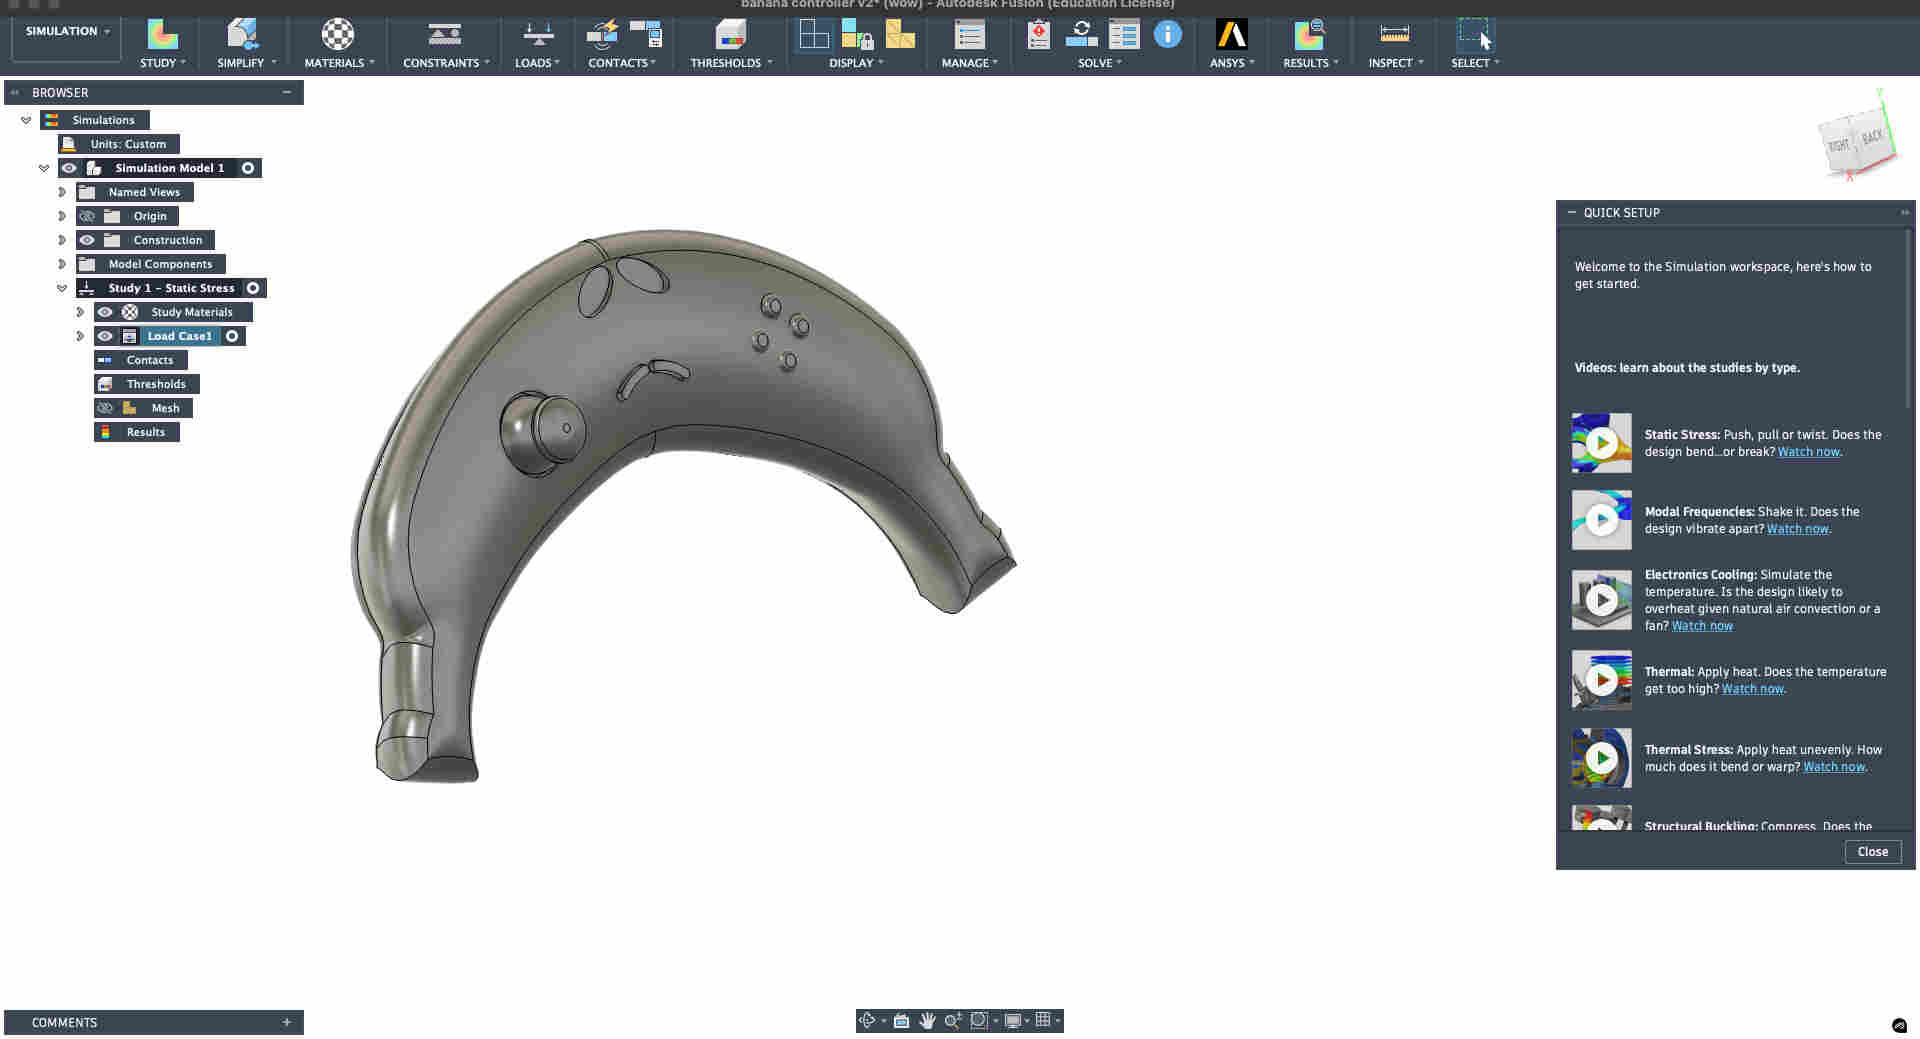
You should see something like this on you screen with your model and information on the left
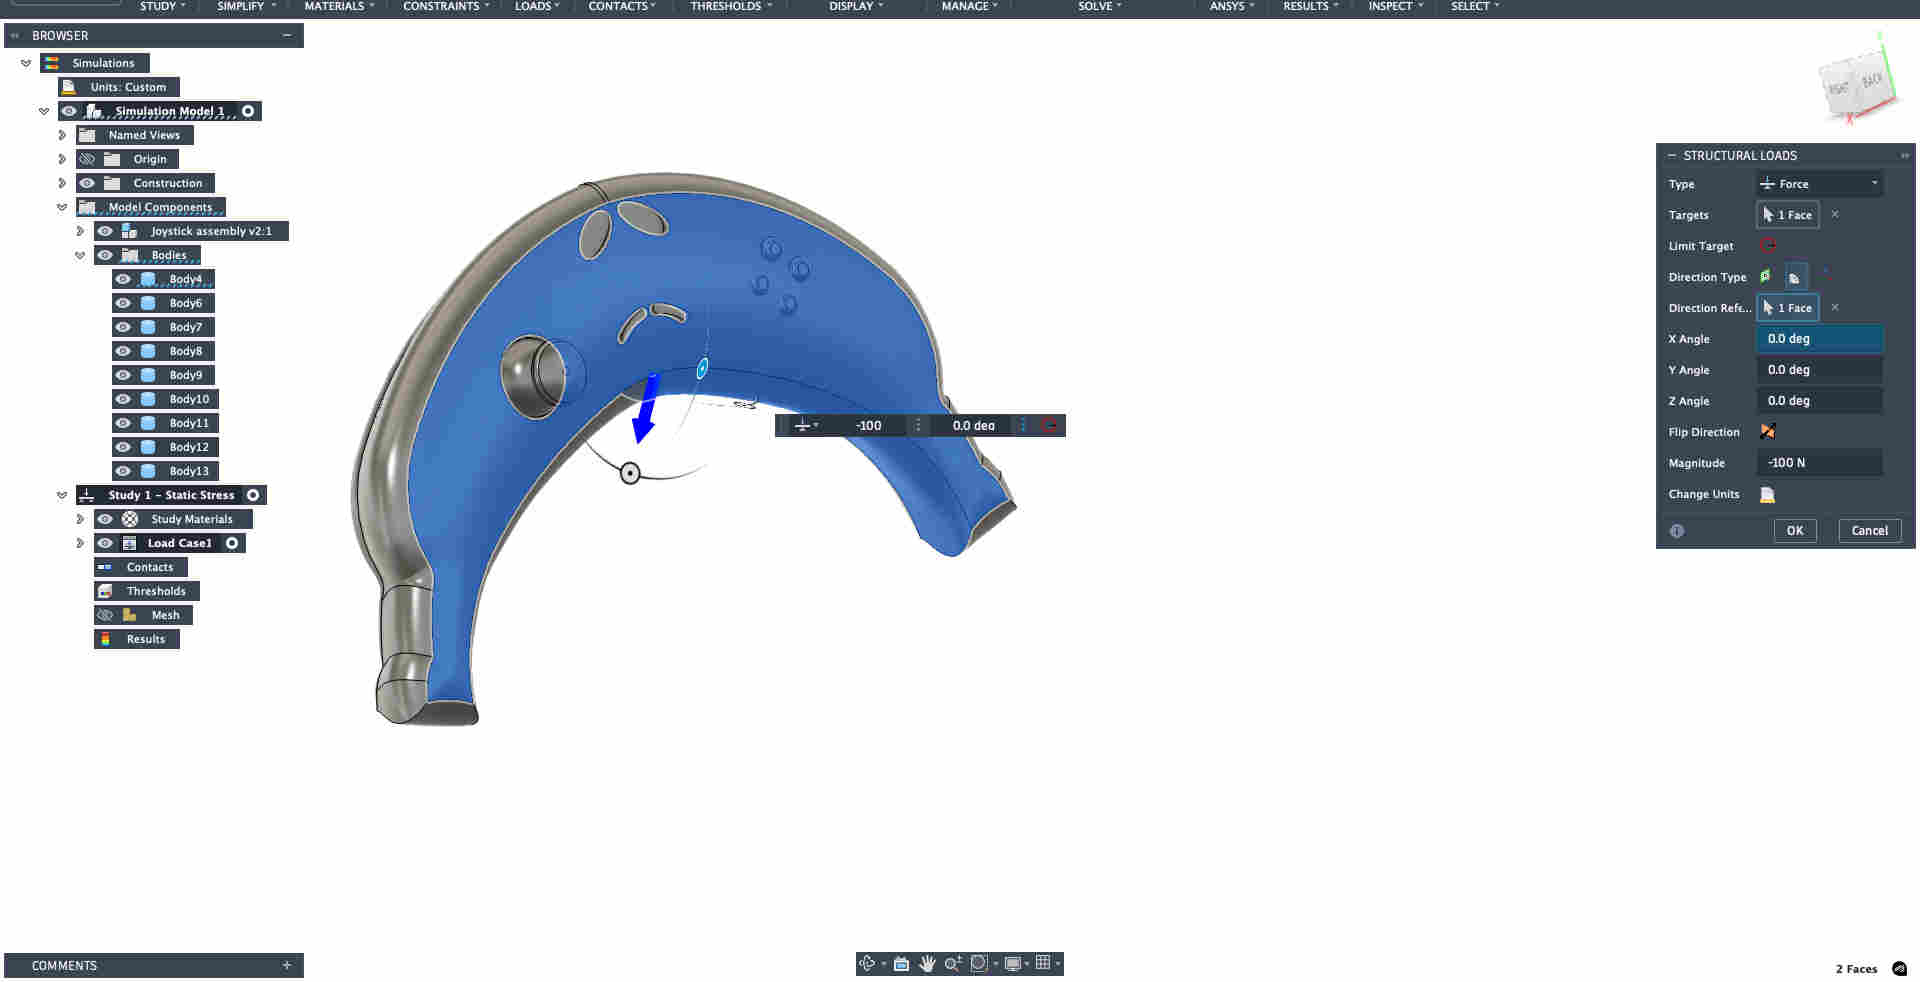
From the top tool bar select loads- then structural loads to setup the face of your object that will face the load.
Remember to make sure the material chosen is correct under study materials drop down on the left.
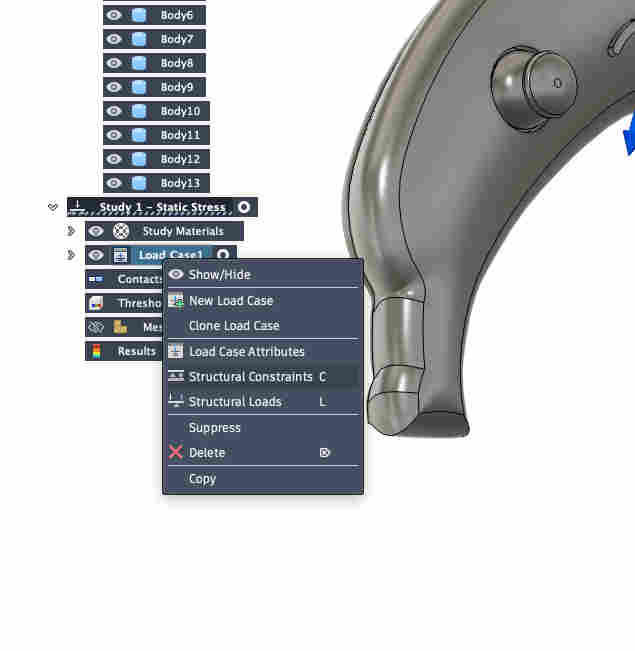
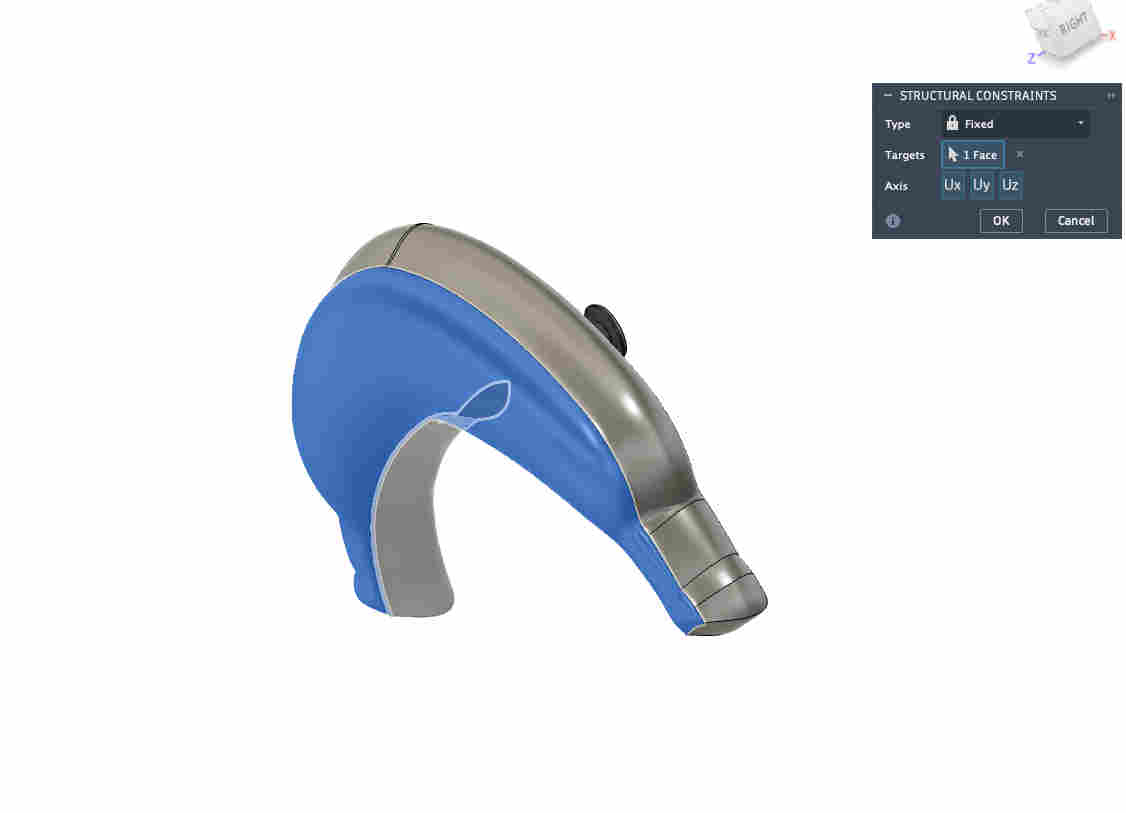
Then we add structural constraints.
With minimal understanding of what to be donw and with the intent of just setting up a simulation for starters i chose a random face.(as suggested by tutorial)
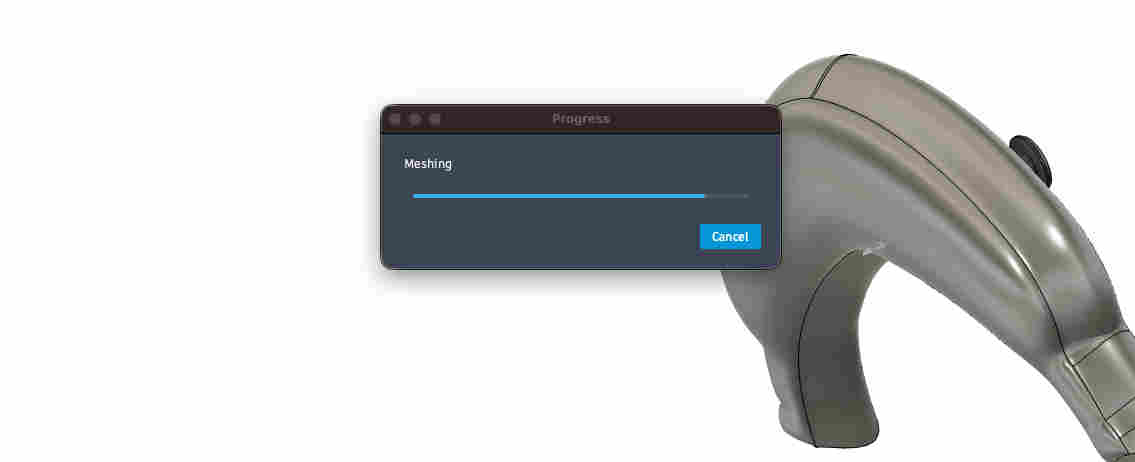
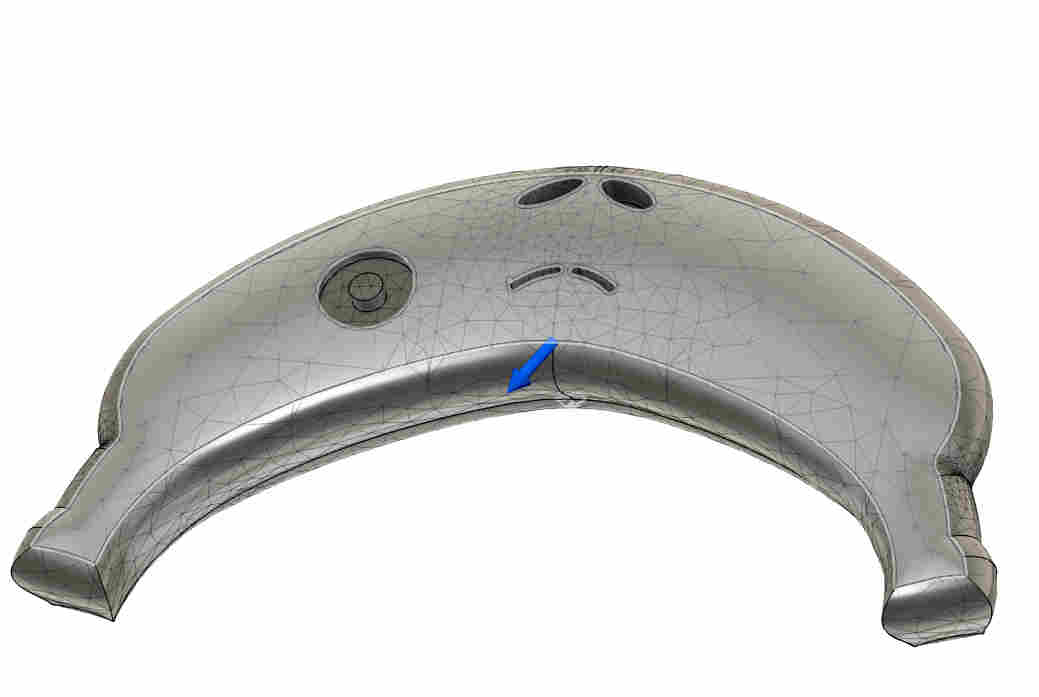
You can create a mesh by clicking on mesh on the keft panel drop down.
STEPS
. view mesh
. generate mesh
Your mesh should look something like this.
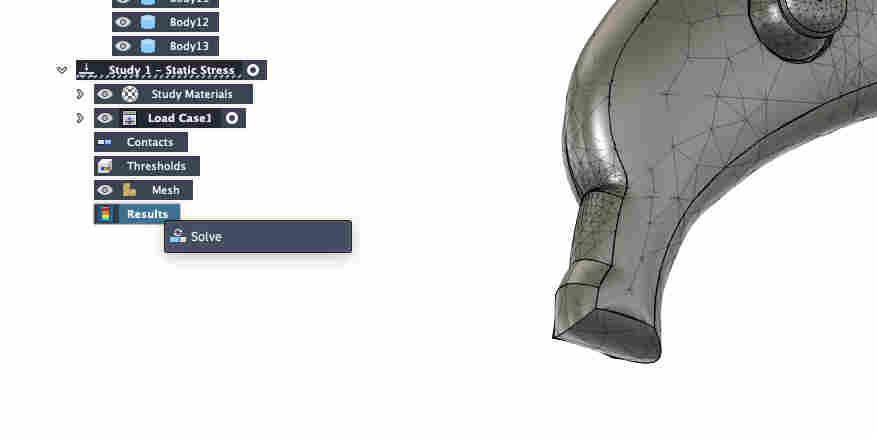
click on results and- solve
error thrown
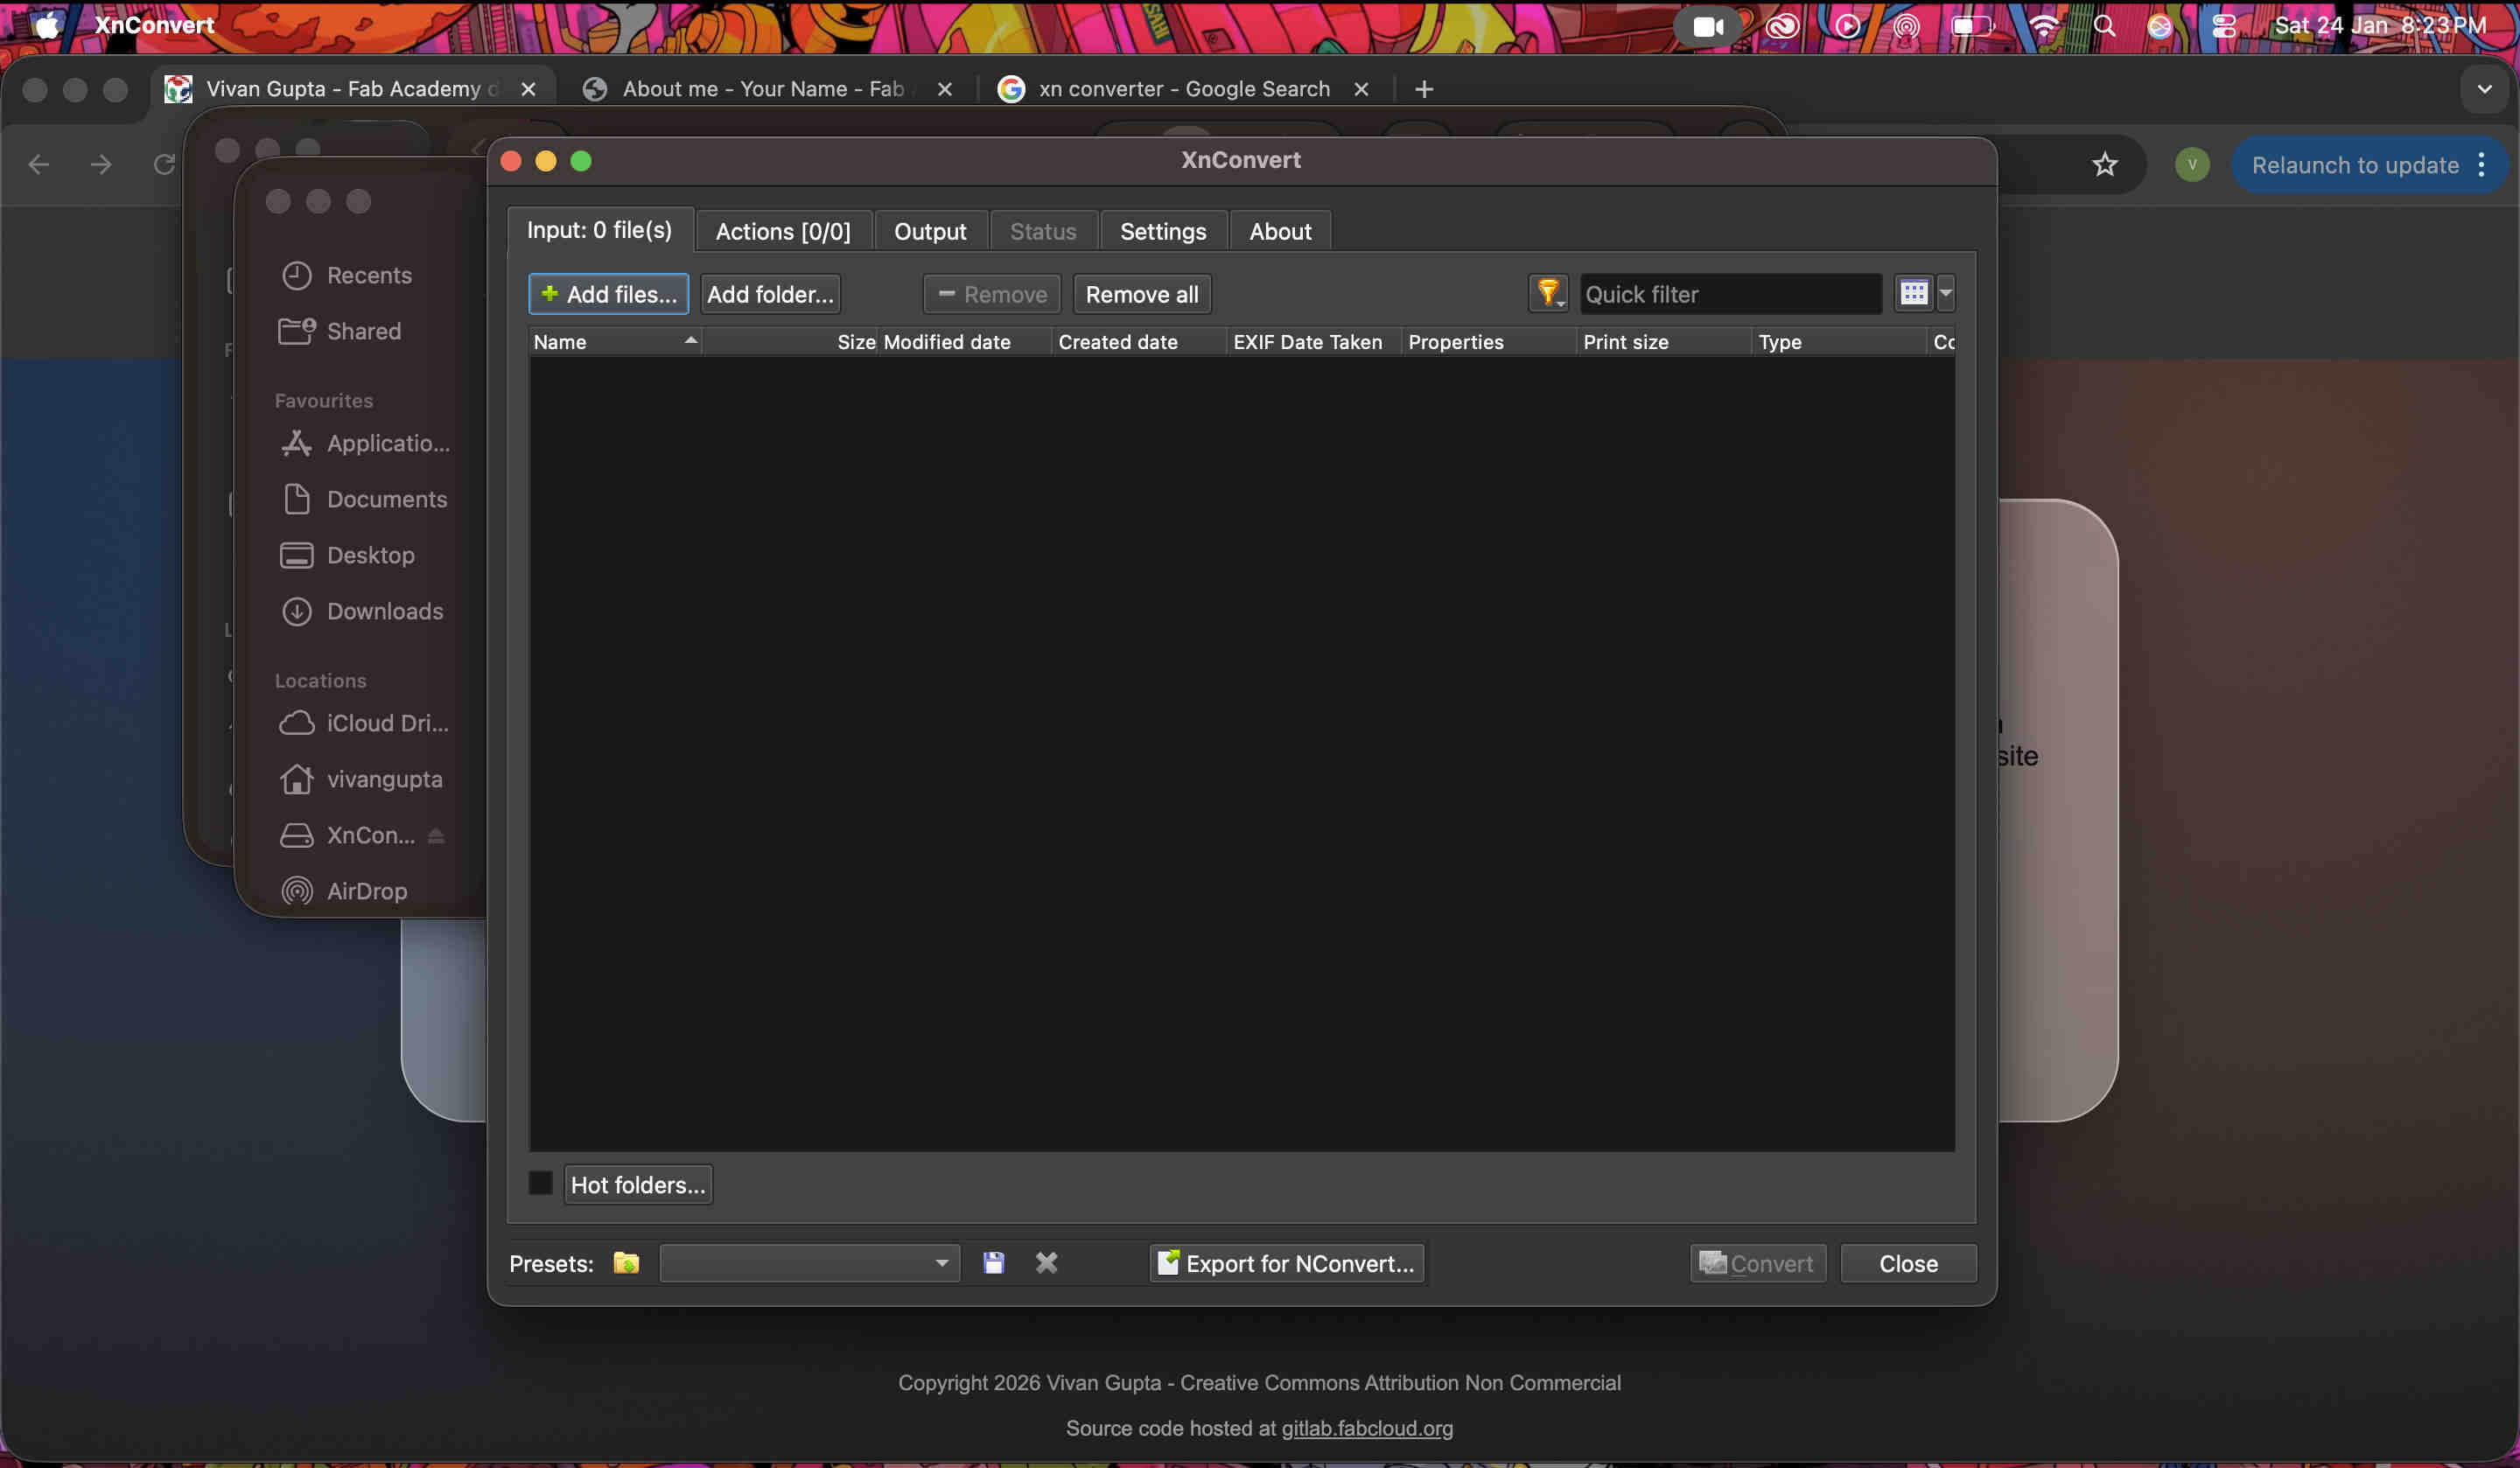
.COMPRESS DEM IMAGES (メ﹏メ).
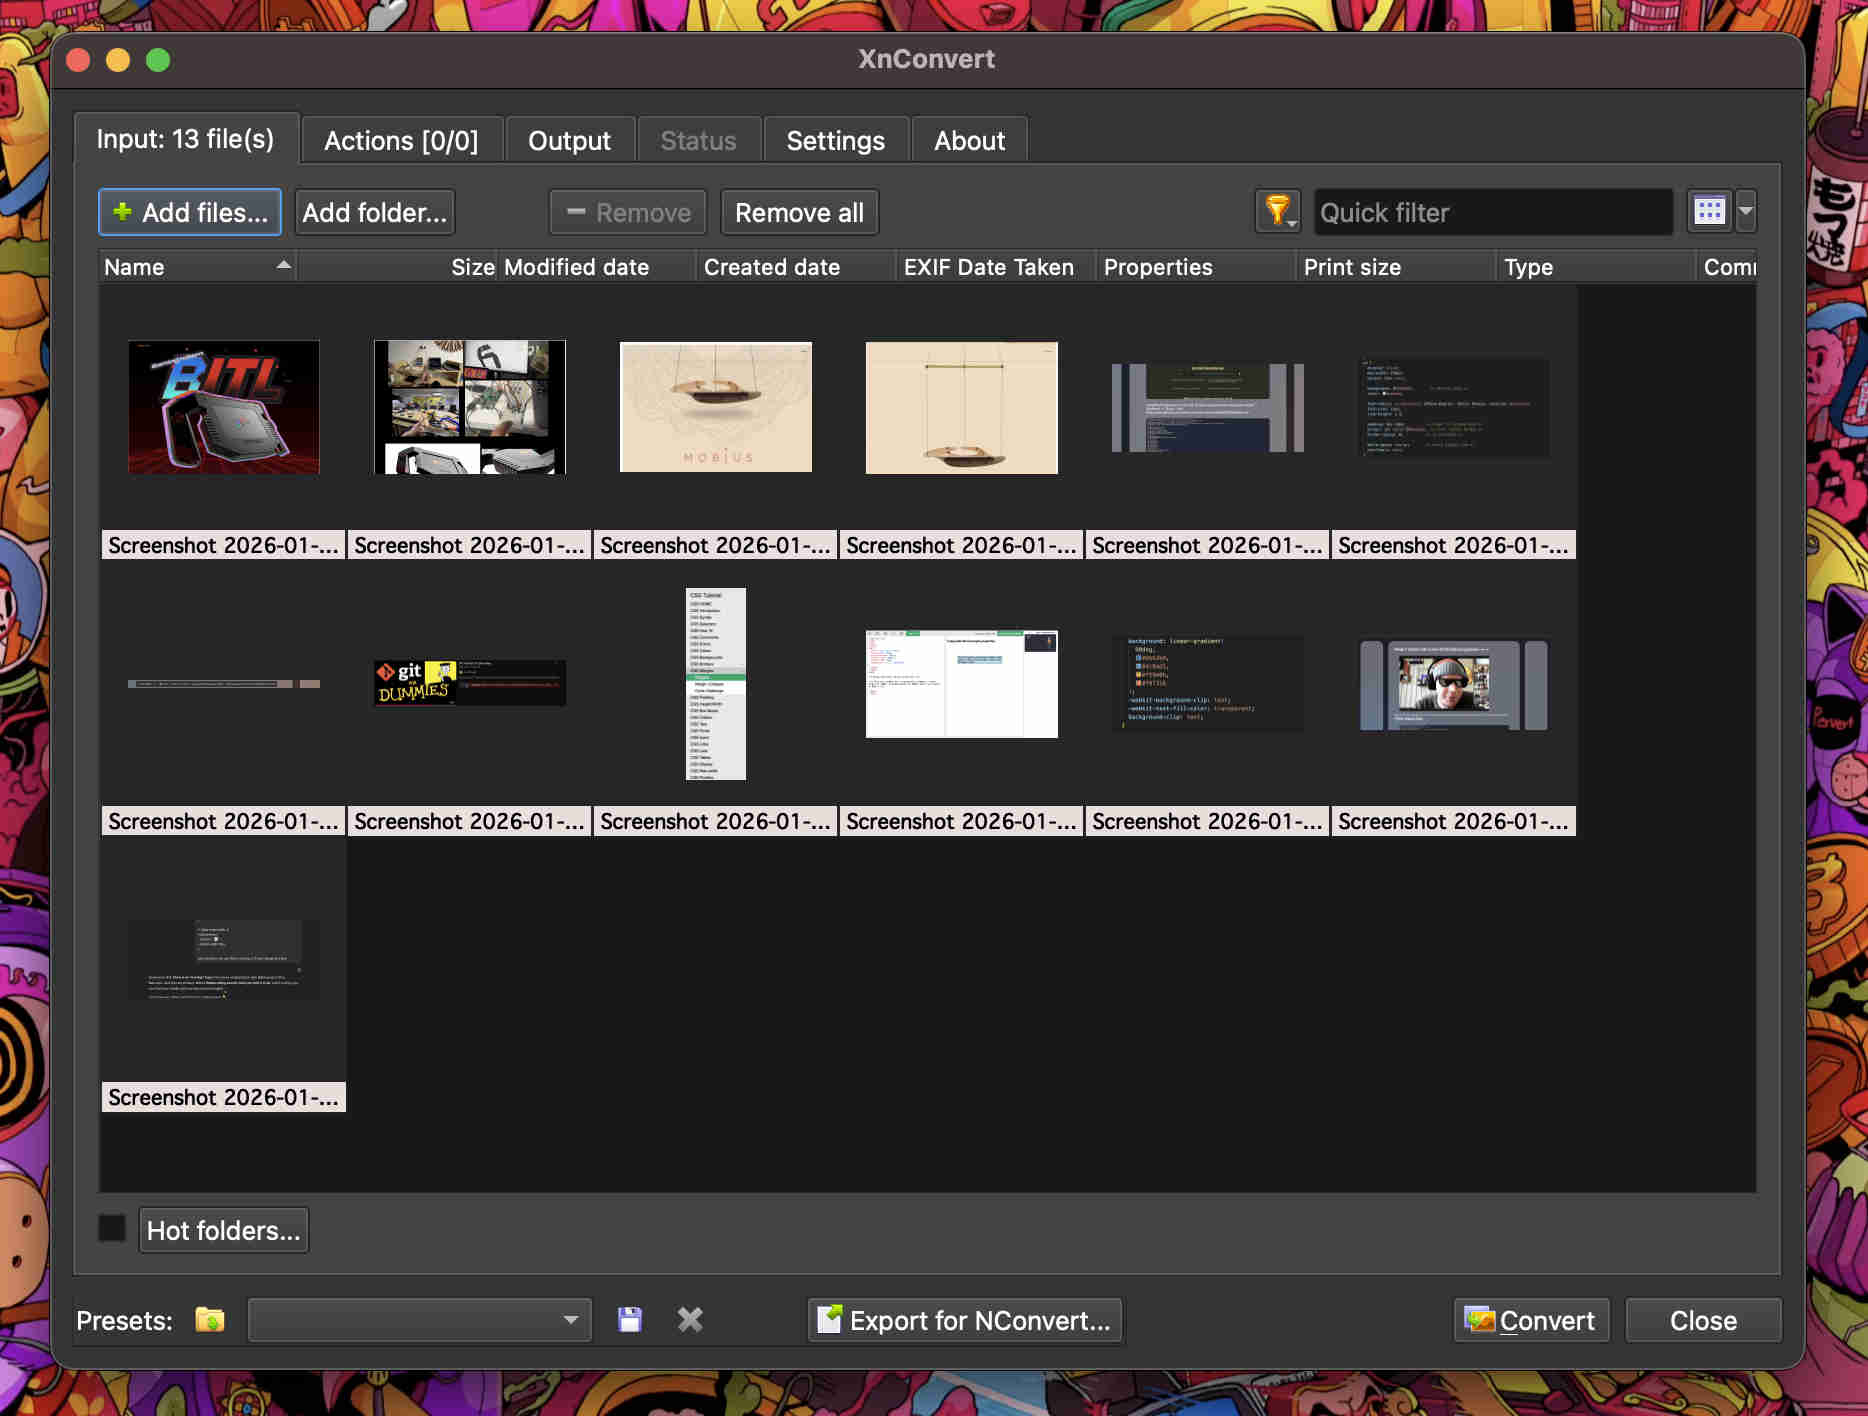
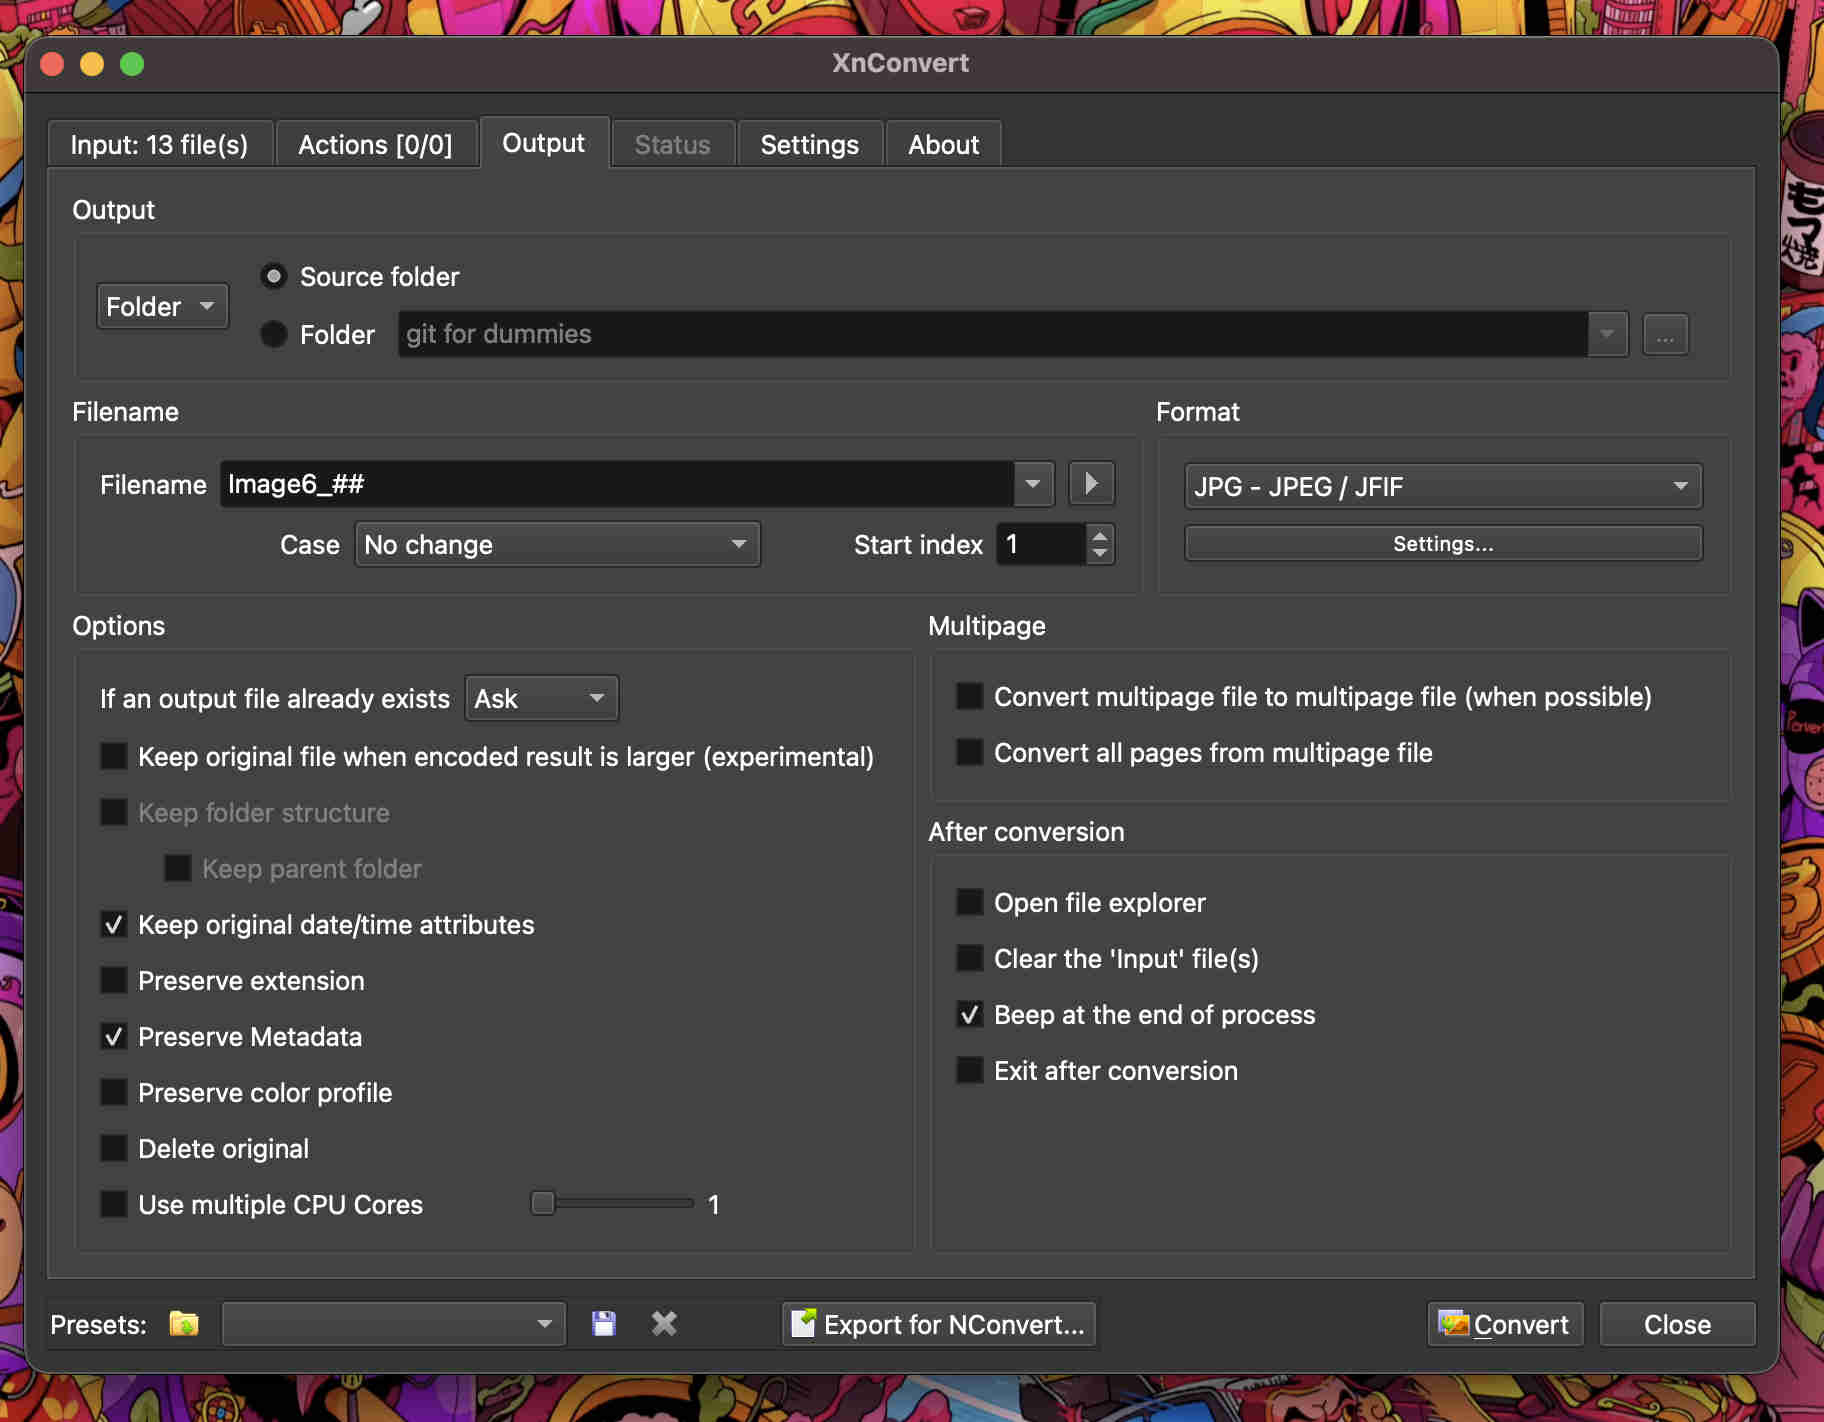
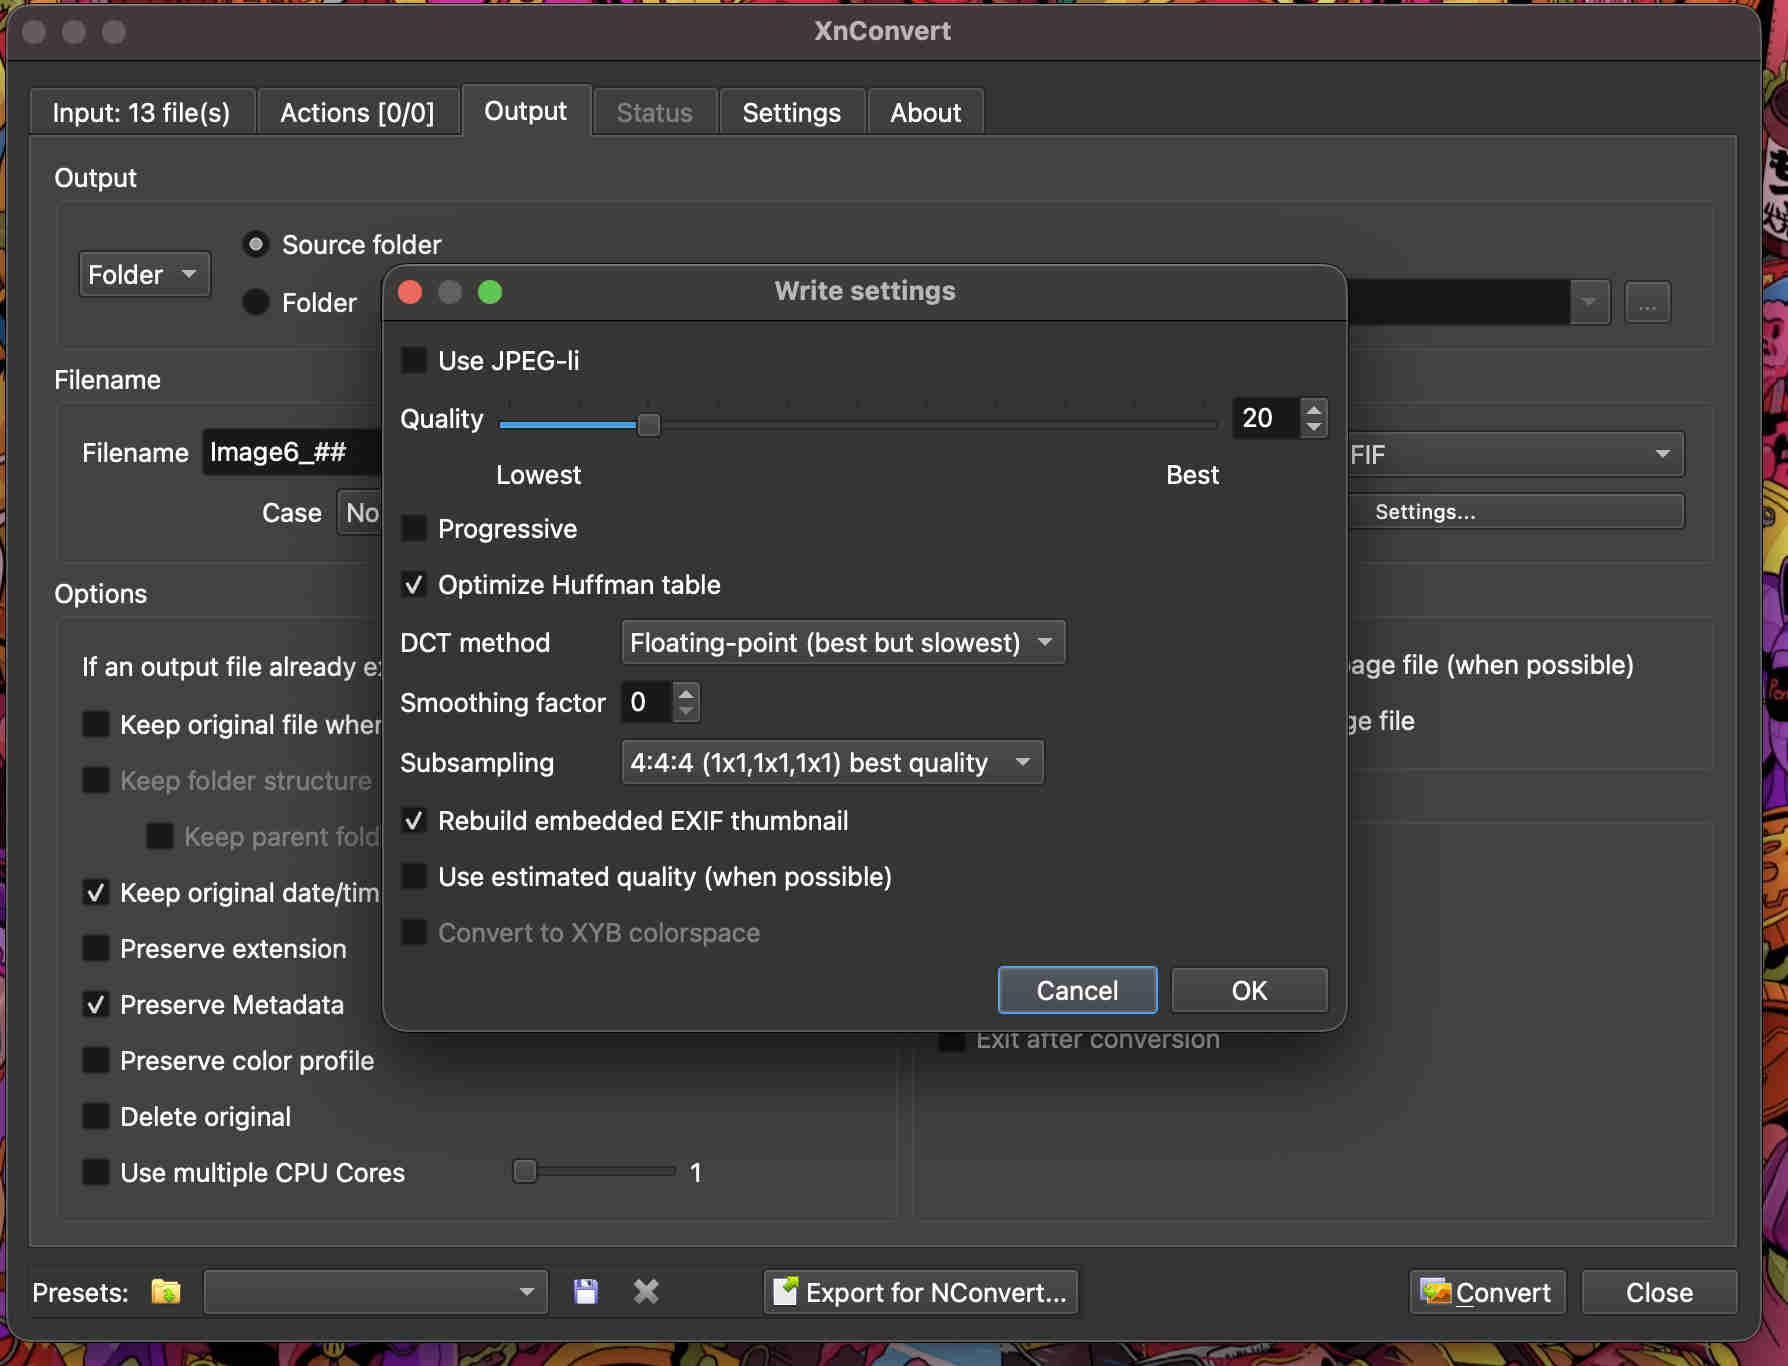
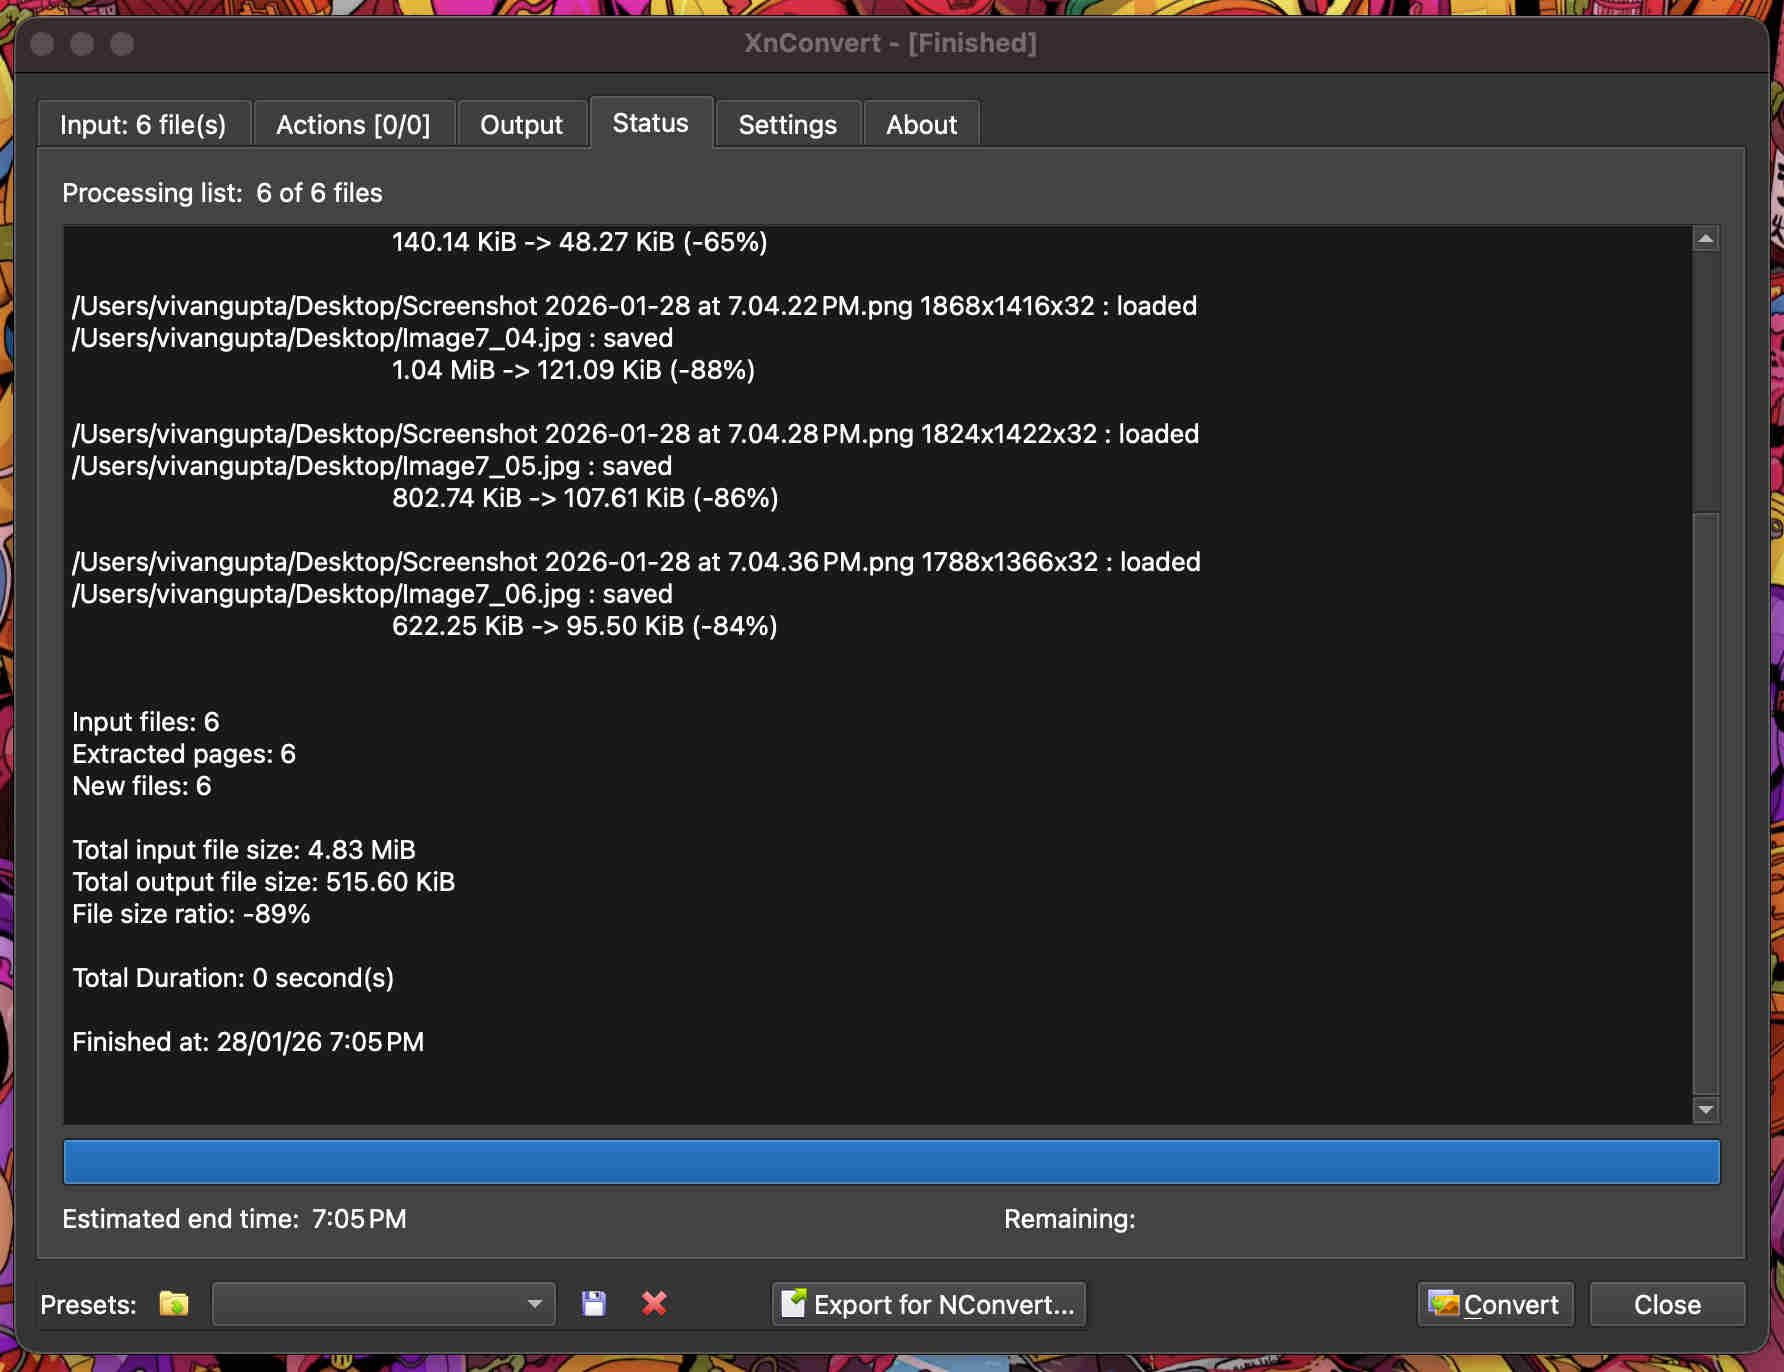
XN convert is a brilliant app to batch convert/compress/name your pics
https://www.xnview.com/en/xnconvert/
Add your filesselect your output location, file type and file nomenclatureGo to settings and tweak quality as per requirement─── ⋆⋅☆⋅⋆ ──VOILA─── ⋆⋅☆⋅⋆ ──


 I sketched out a few concepts digitally using sketchbook, an app by autodesk for rapid sketches

 stenciling out the outer to create an offset, which i then loft to create a more organic shape.
 directional loft with a directional tangent curve
 Thickening the surface to create a solid