Moulding and Casting
Assignments
Group Assignment
- Review the safety data sheets for each of your molding and casting materials, then make and compare test casts with each of them
- Compare mold making processes
Individual Assignment
- Design a mold around the process you'll be using, produce it with a smooth surface finish that does not show the production process toolpath, and use it to cast parts
- Extra credit: use more than two mold parts
- Extra credit: make your own materials
Here is my plan for the week:
Before we start lets recap about Molding and Casting!
What is Molding and Casting?
So before jumping into the actual work, let me quickly explain what molding and casting actually are because I had to look this up myself at the start of the week! 😄
Molding is basically when you create a hollow cavity that matches the shape of the thing you want to make. Think of it like making a container in the exact shape of your object. That cavity is called the mold, and once you have it you can fill it with all kinds of materials like liquid plastic, resin, wax, you name it. When that material hardens it takes on the shape of the mold.
Casting is the next step. It's the actual process of pouring that liquid material into the mold you made. Once it fills up and solidifies you pop it out and you've got a copy of your original object. What's really cool about this is that you can use the same mold over and over again so you can produce multiple identical copies without starting from scratch each time!
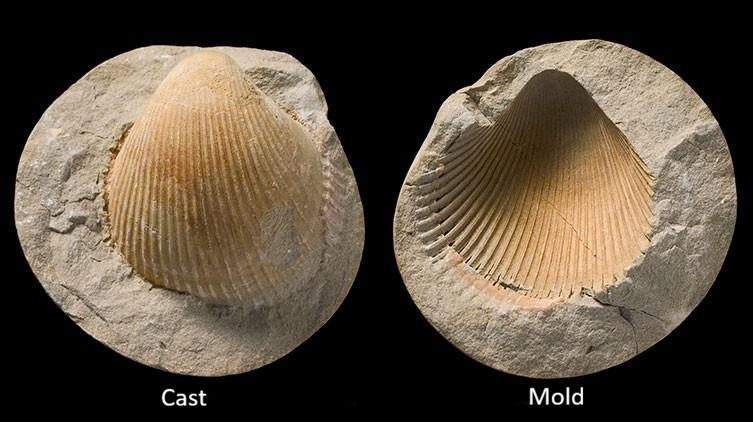
The easiest way to think about the difference between the two is that molding creates the shape of the object's cavity which is the negative space, while casting fills that shape to create the final object which is the positive space!
Group Assignment
For the group assignment this week we had to review the safety data sheets for each of our molding and casting materials, make test casts with each of them and compare the results. We also had to compare different mold making processes.
Materials We Reviewed
Siloczest LSR 220 S (Slow Catalyst)
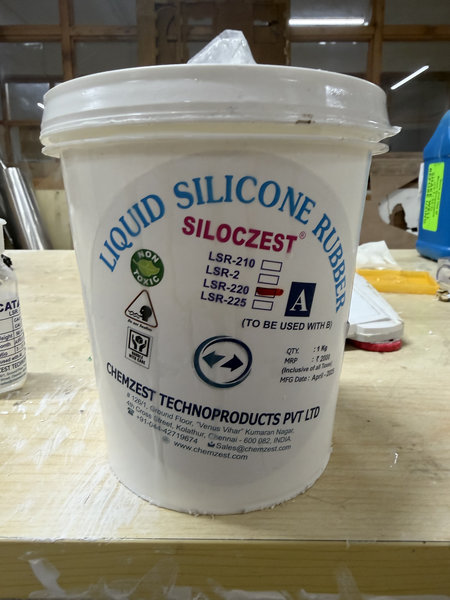
This is a medium soft silicone rubber that cures slowly which gives you more working time for pouring and adjusting your mold. What's great about it is that it does not require degassing so it's pretty beginner friendly! Here are the key details from the datasheet:
| Property | Value |
|---|---|
| Hardness | 20 Shore A |
| Appearance | Milky white |
| Mix Ratio | 100 : 5 (base to catalyst, by weight) |
| Cure Time | 5 to 8 hours |
| Degassing | Not required |
Siloczest LSR 140 S (Slow Catalyst)
This one is a bit firmer than the LSR 220 and is suitable for jewelry and food grade applications. Here are the key details from the same datasheet:
| Property | Value |
|---|---|
| Hardness | 40 Shore A |
| Appearance | Translucent |
| Mix Ratio | 100 : 5 (base to catalyst, by weight) |
| Cure Time | 5 to 8 hours |
Ferris Machinable Blue Wax Block
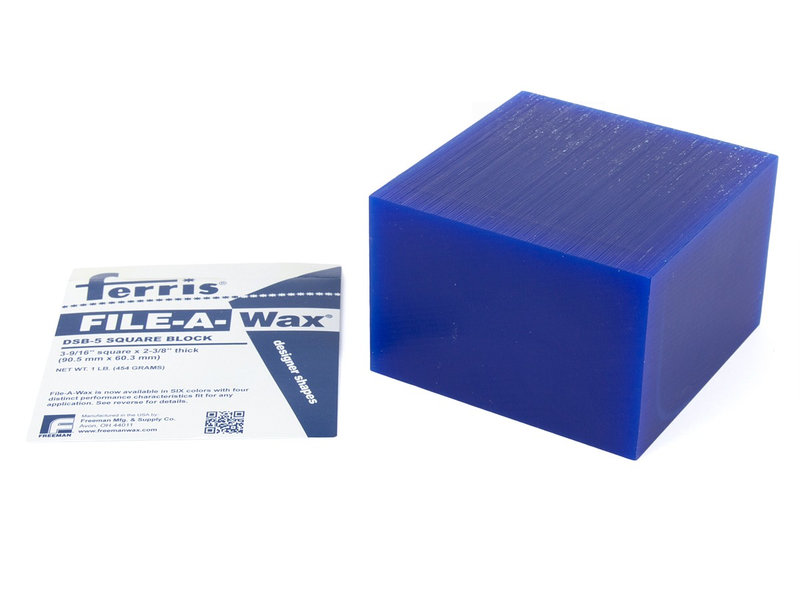
This is the wax material we used for milling the molds on the SRM-20. It's a solid CNC friendly wax that holds its shape really well during cutting and gives a super smooth surface finish after milling. After milling you can use it as a master to create silicone molds. You can check the datasheet for more details.
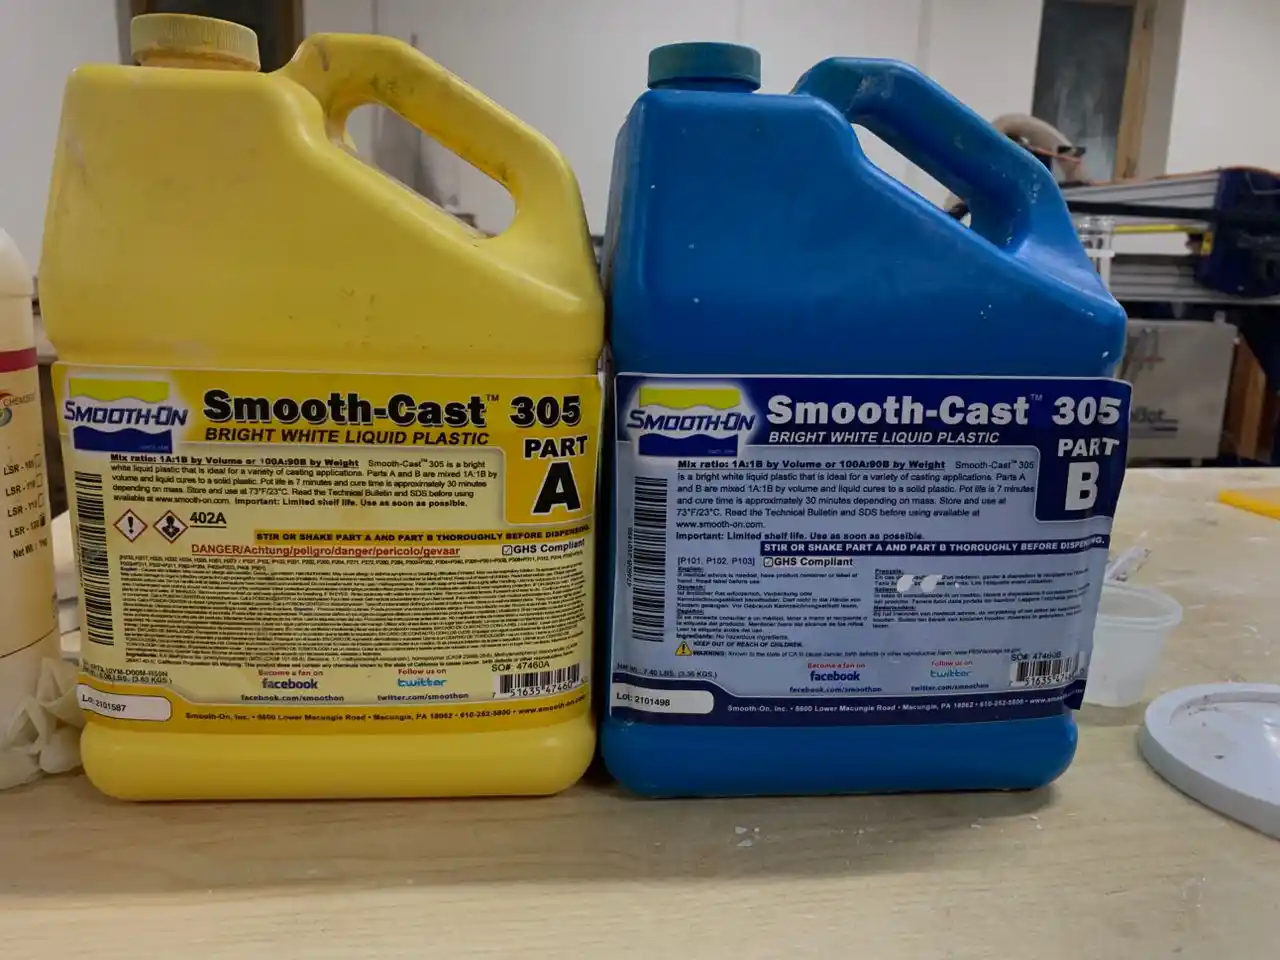
Smooth-Cast 305
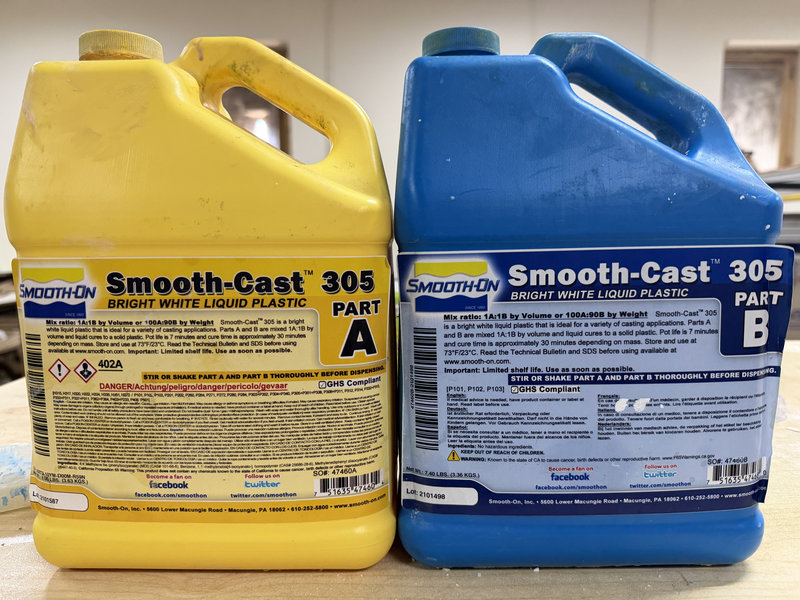
Smooth-Cast 305 is a liquid polyurethane casting resin that produces strong bright white castings. It has a very low viscosity so it flows easily into fine details and you don't need to degas it either. Here are the key details from the datasheet:
| Property | Value |
|---|---|
| Shore Hardness | 70D |
| Appearance | White |
| Mix Ratio | 1A : 1B by volume / 100A : 90B by weight |
| Pot Life | 7 minutes |
| Demold Time | ~30 minutes |
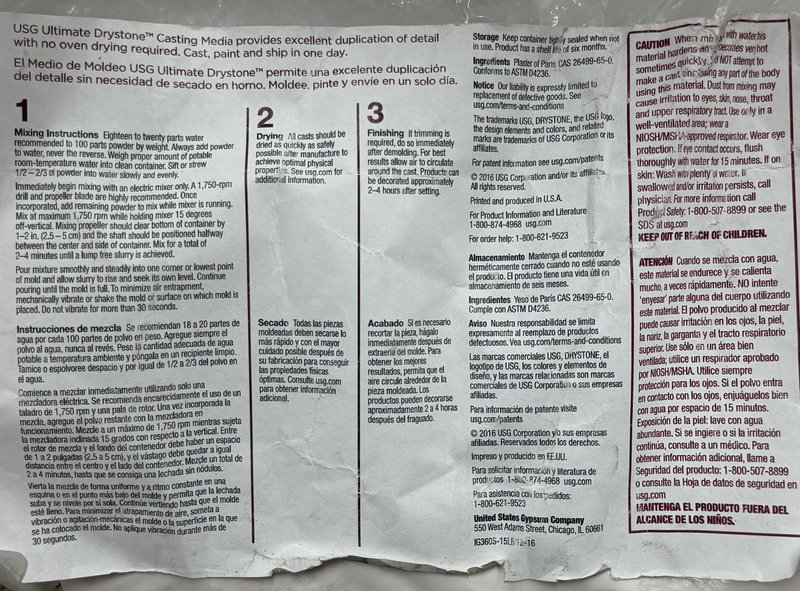
USG Ultimate Drystone
USG Ultimate Drystone is a fast setting gypsum casting powder. It hardens quickly without oven drying and captures fine details really well. Here are the key details from the datasheet:
| Property | Value |
|---|---|
| Mix Ratio | 100 powder : 18 to 20 water (by weight) |
| Mixing Time | 2 to 4 minutes |
Some Important Terms
Before jumping into the test casts I want to quickly go through some important terms that came up a lot this week because I had to learn these myself! 😄
Base is the main material that makes up most of your mixture. By itself it won't harden and it needs something else to trigger the reaction.
Catalyst is the small amount of material you add to the base to start the hardening process. Without the catalyst the base would stay liquid forever.
Pot life is how long you have to work with the mixed material before it starts to harden. Once that time runs out you can't really shape it anymore so you have to work fast!
Cure time is how long it takes for the material to fully harden after mixing.
Mix ratio is the specific amounts of the two parts you need to mix together. Getting this wrong can mess up the pot life, cure time and final strength so always double check the datasheet!
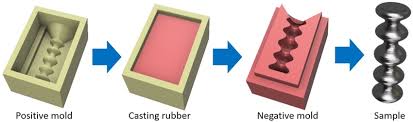
Making and Comparing Test Casts
This picture walks through the whole process of copying an object using positive molds, negative molds and casting which is super helpful to visualize what we are doing!
Test Cast 1 — USG Ultimate Drystone
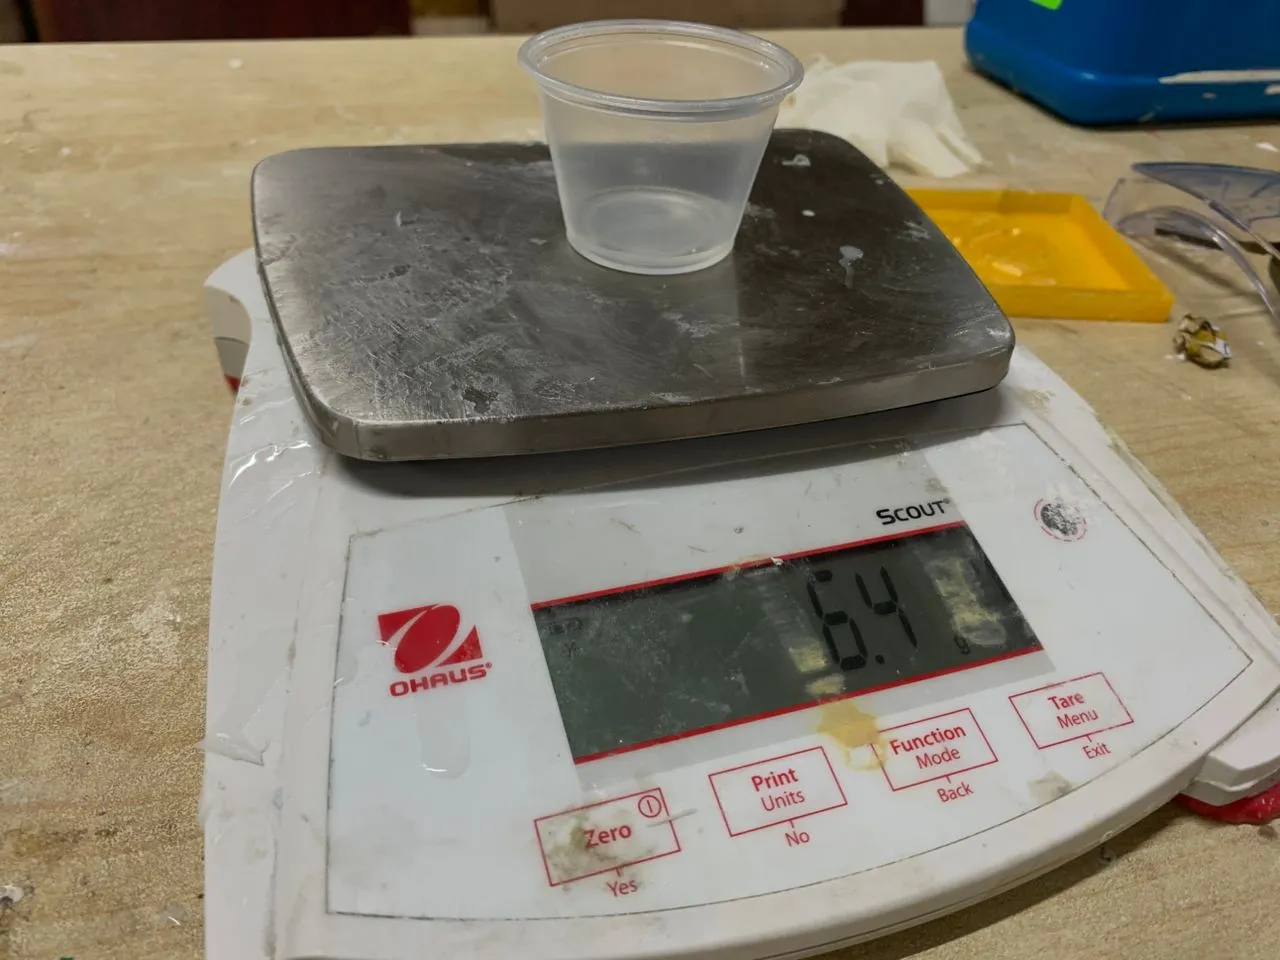
To test the USG Drystone we made a silicone mold from a Green Tara wax mold that was available in our lab. We used the Siloczest LSR 220 Slow and mixed it with the catalyst in a 100:5 ratio by weight which worked out to 420g of LSR and 21g of catalyst.
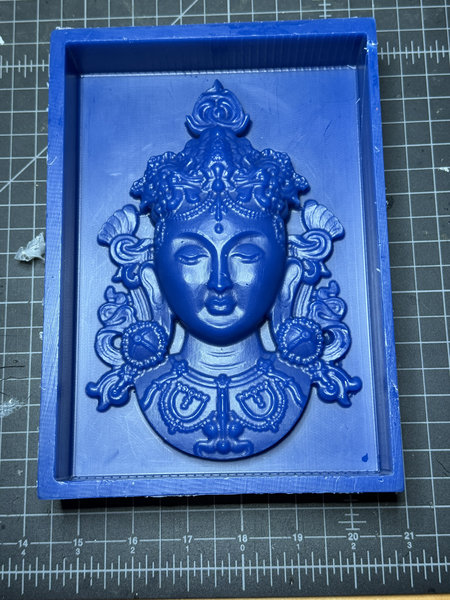
After it fully cured we removed the silicone mold and it came out really nicely!
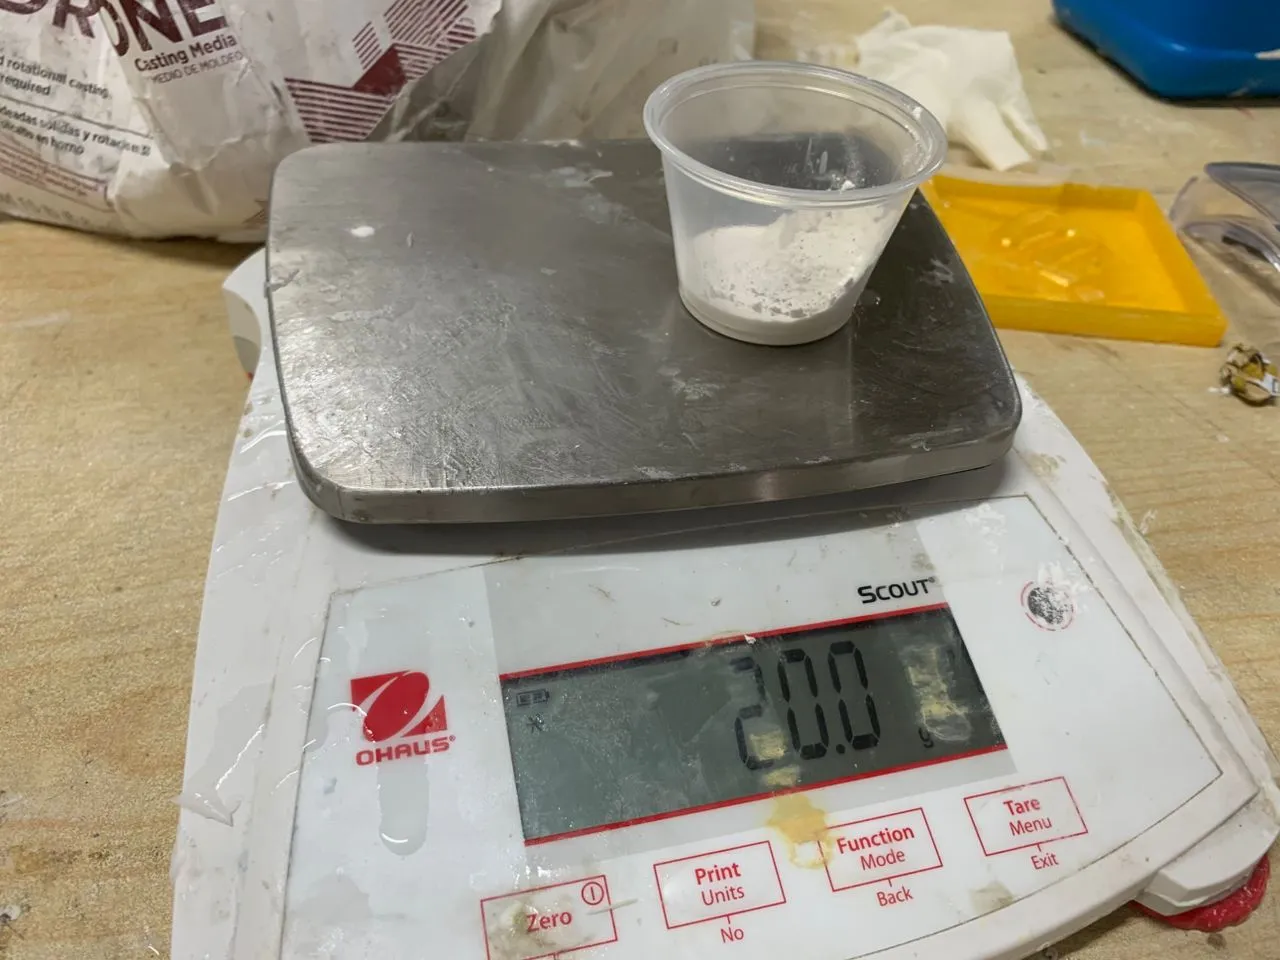
Then we mixed the USG Drystone powder with water. The datasheet says a 100:18 to 20 ratio but when we tried that it came out a bit lumpy so we adjusted it to about 100:32 which worked out much better. We used 300g of USG powder and 96g of water.

The USG cast captured the details really well but it was quite fragile especially in the thinner areas. Small pieces could easily break off so it's better suited for decorative pieces rather than functional parts.
Test Cast 2 — Smooth-Cast 305
For the Smooth-Cast 305 test we used one of the silicone molds from our lab. We measured by weight using the 100A:90B ratio and filled the mold completely. The cure time is about 30 to 40 minutes at room temperature.
After waiting for it to cure this was the result!
Comparing the Two
After testing both materials the difference was pretty clear. The USG Drystone captured fine details really well and looked great but it was quite fragile especially in the thinner areas. Smooth-Cast 305 on the other hand was much stronger and more durable. There were a few small air bubbles on the surface but overall the result was really good. If you need durability go with Smooth-Cast 305 and if you want really sharp fine details for a decorative piece then USG Drystone is the way to go!
For more details you can check out our full Group Assignment Page.
What I Took Away from the Group Assignment
The group assignment was a really great introduction to the whole process before jumping into my individual work. The most useful thing I learned was how important it is to read the datasheet before doing anything because every material has its own mix ratio, pot life and cure time and getting any of those wrong can ruin the whole batch. I also learned that working carefully and slowly when pouring is really important to avoid air bubbles. It was also really interesting to compare the two casting materials and see how differently they behave. The USG Drystone was great for detail but quite fragile while the Smooth-Cast 305 was much more durable. Having that hands on experience before making my own molds made the whole process a lot less scary! ^-^
Individual Assignment
First I started off by designing the model that I wanted to cast. I wanted to make two things, a small horn pendant and a small F15 fighter jet with my name on it. I designed both of these in Fusion 360 and then exported them as STL files.
Designing the Model
Horn Pendant
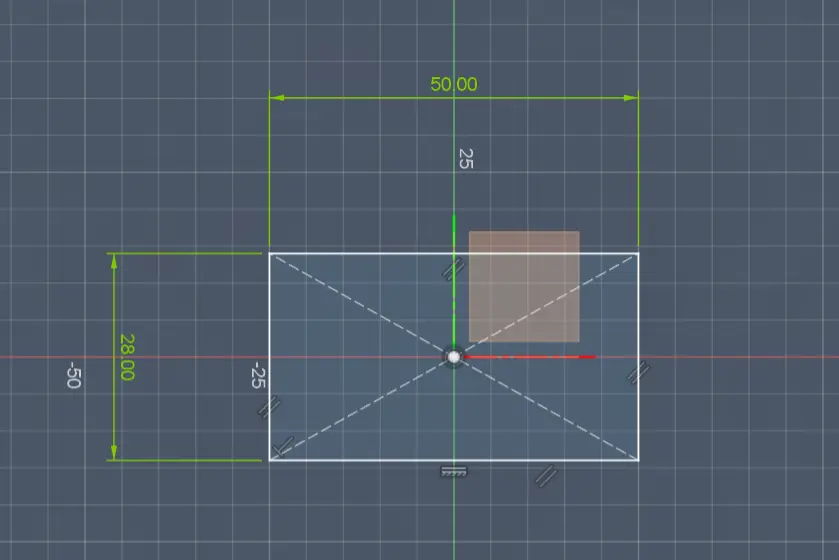
I first made the mold box which is basically a rectangular box that will hold the material for the mold.
I created a sketch and drew a rectangle like below:
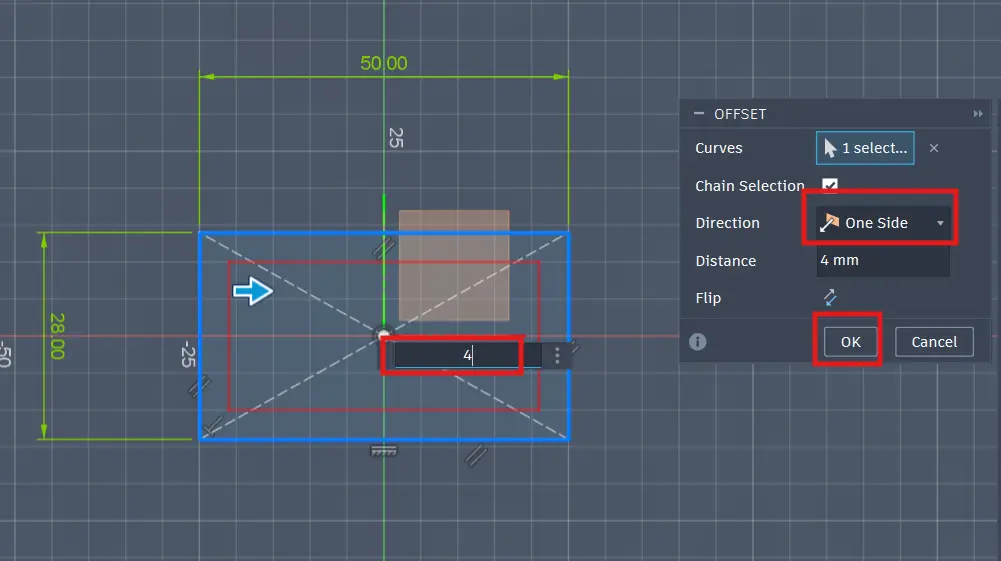
Then using the offset tool I created the inner rectangle which will make the cavity for the mold.
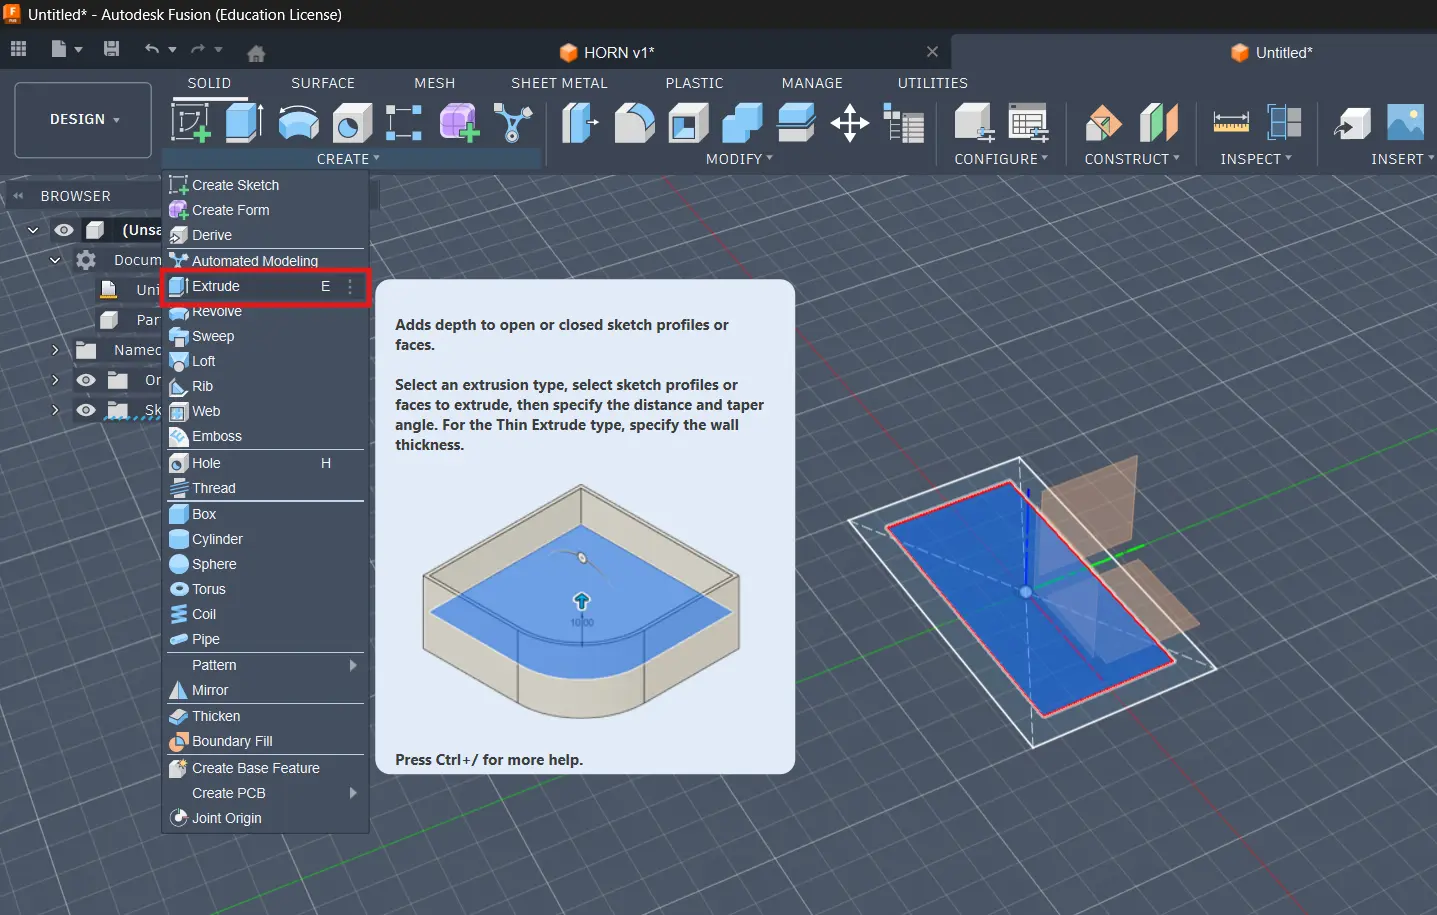
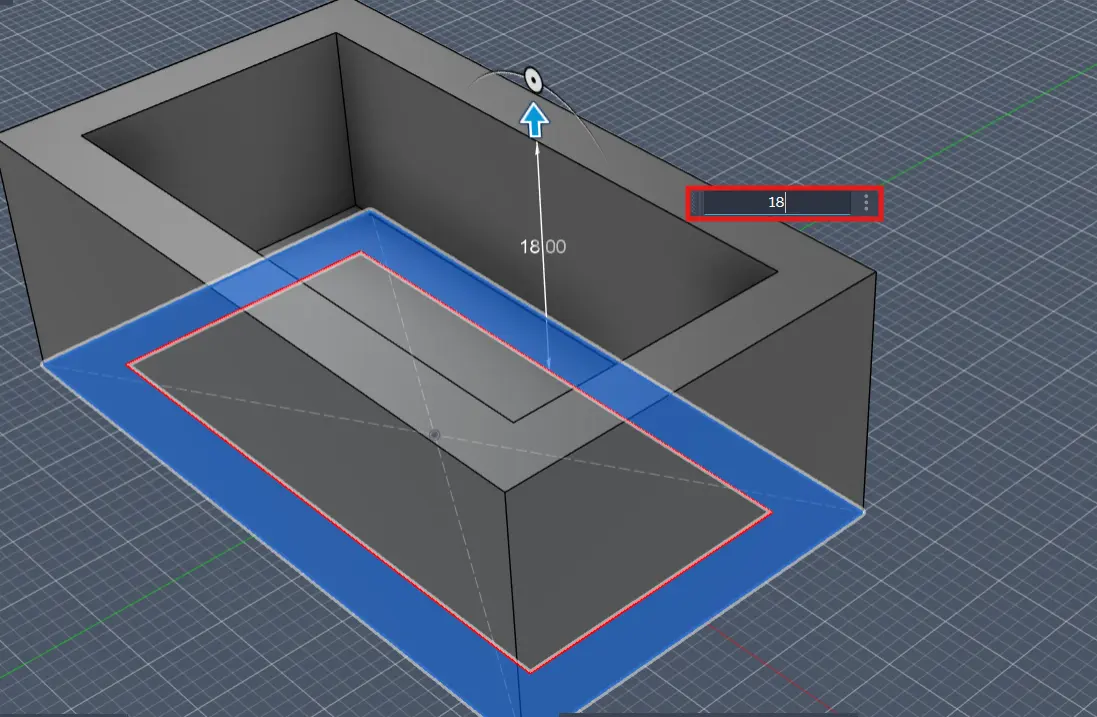
I then used the extrude tool to extrude the base and the border of the box.
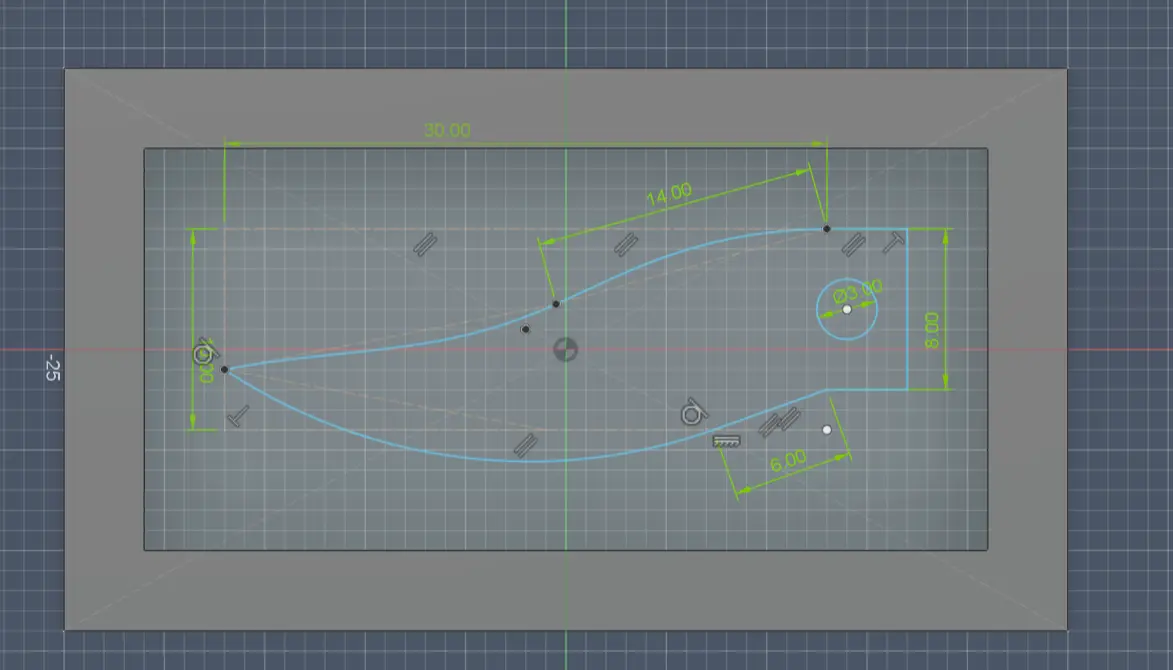
After that I created a sketch on the top face of the box.

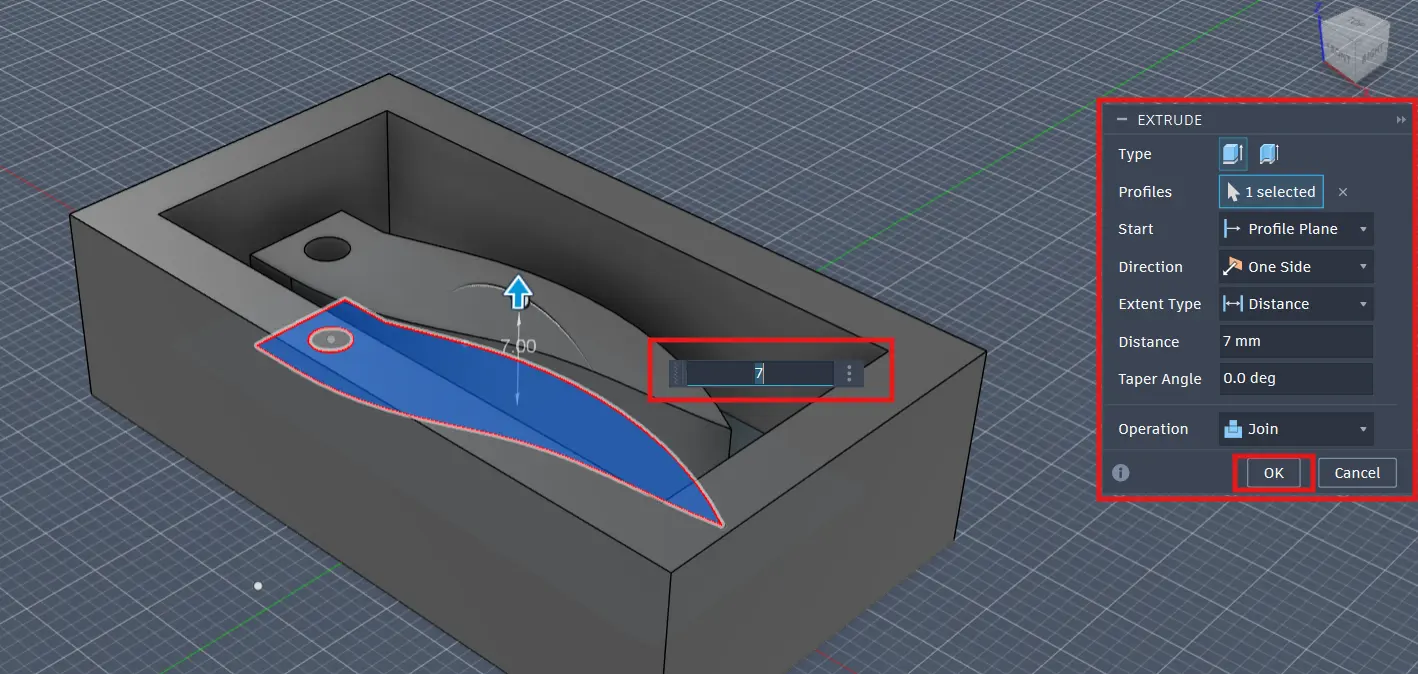
Then I created the horn shape using the spline tool and extruded it to create the 3D shape of the horn.
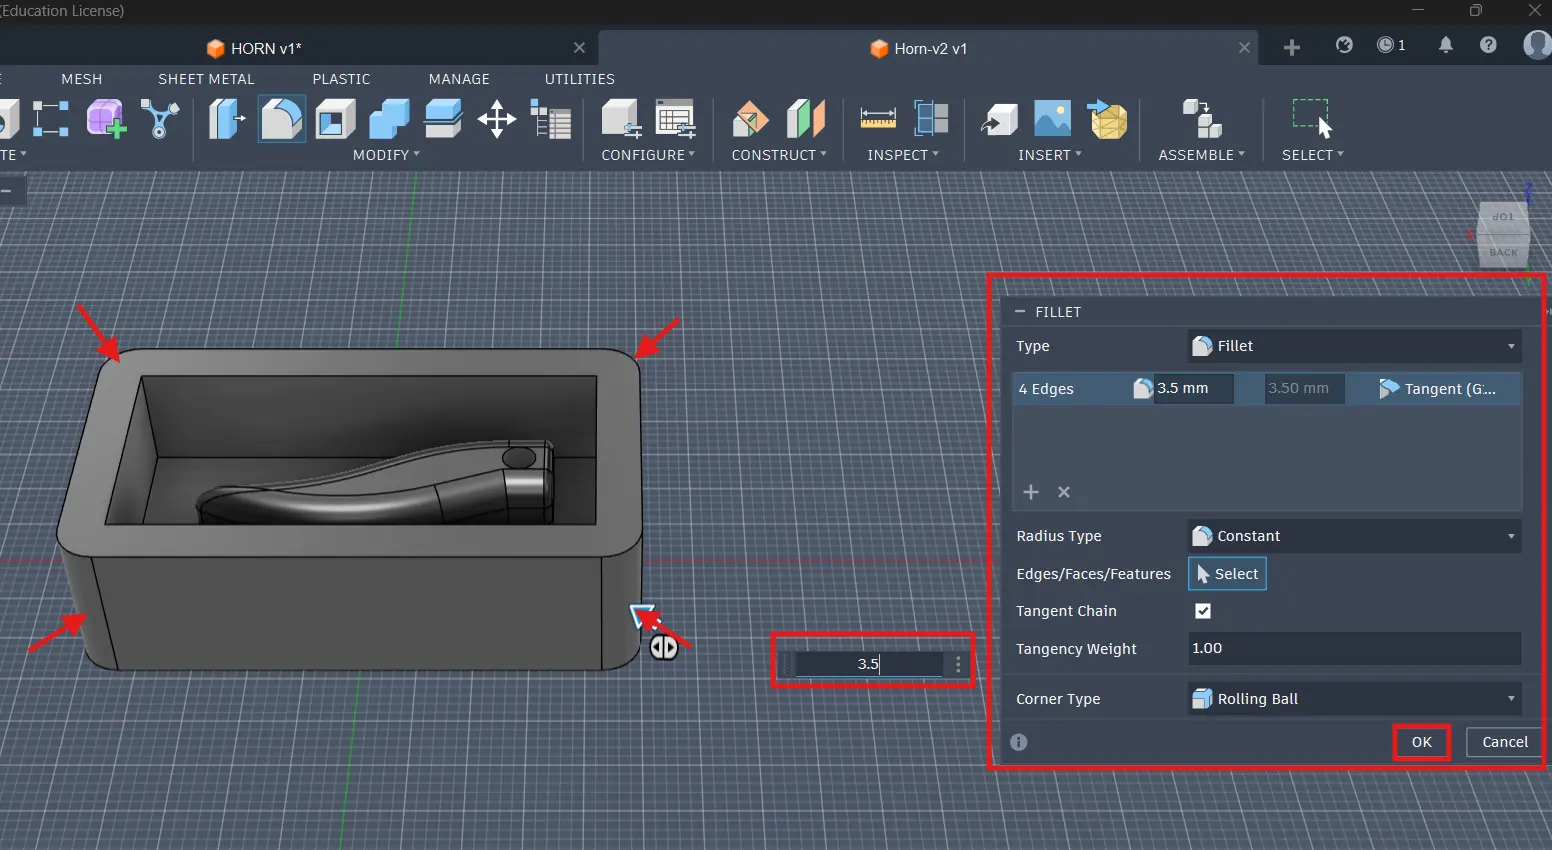
Then using the fillet tool I rounded the edges of the horn to make it look more realistic and also rounded the box edges to make everything look a lot smoother.
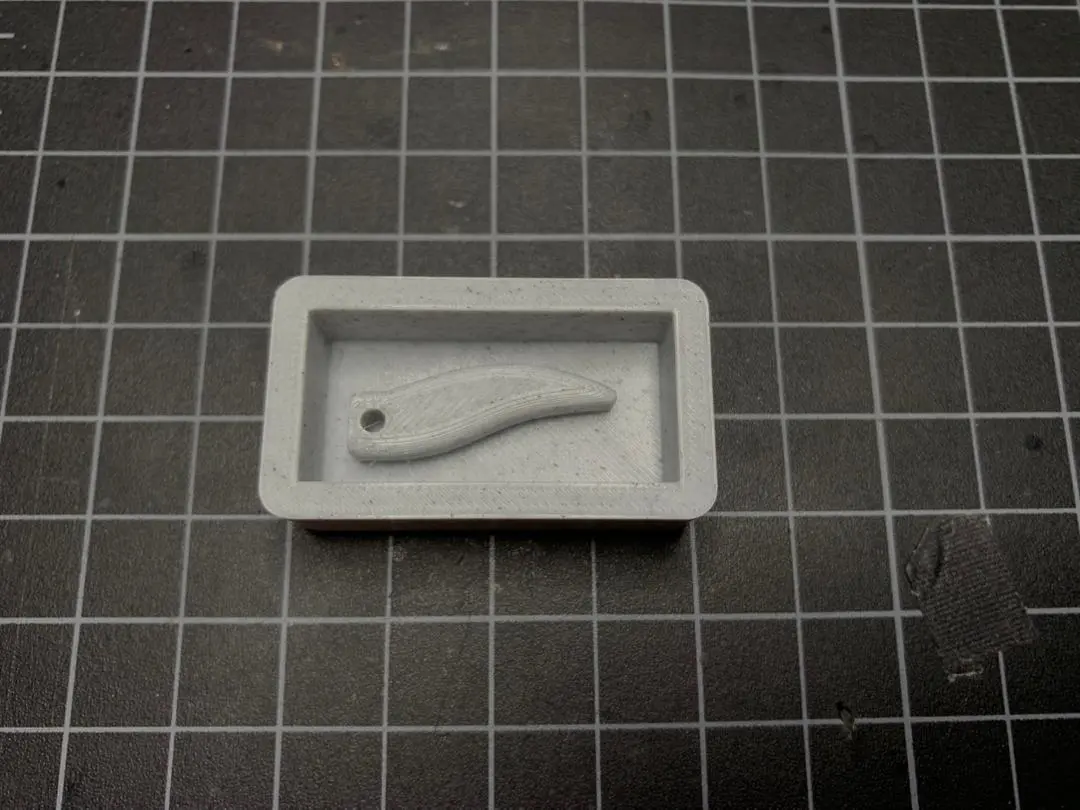
After that I exported the design as an STL file and I was ready to 3D print the positive mold. Yay!!
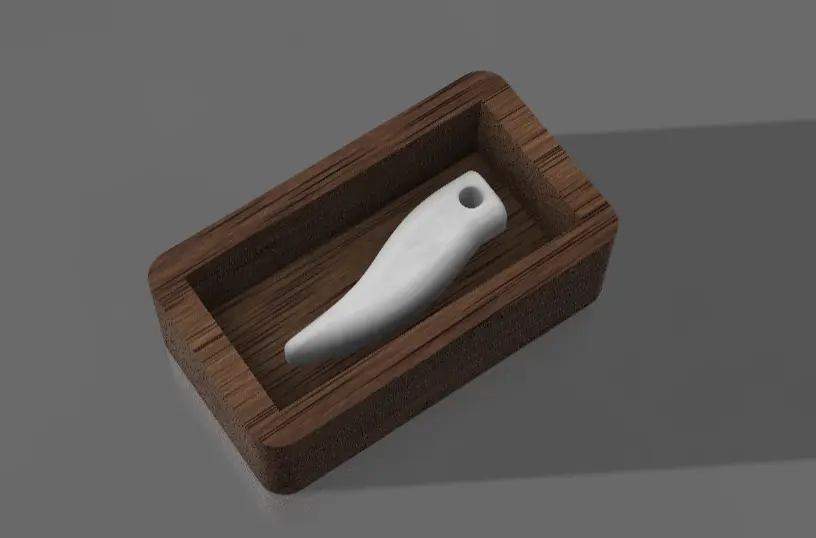
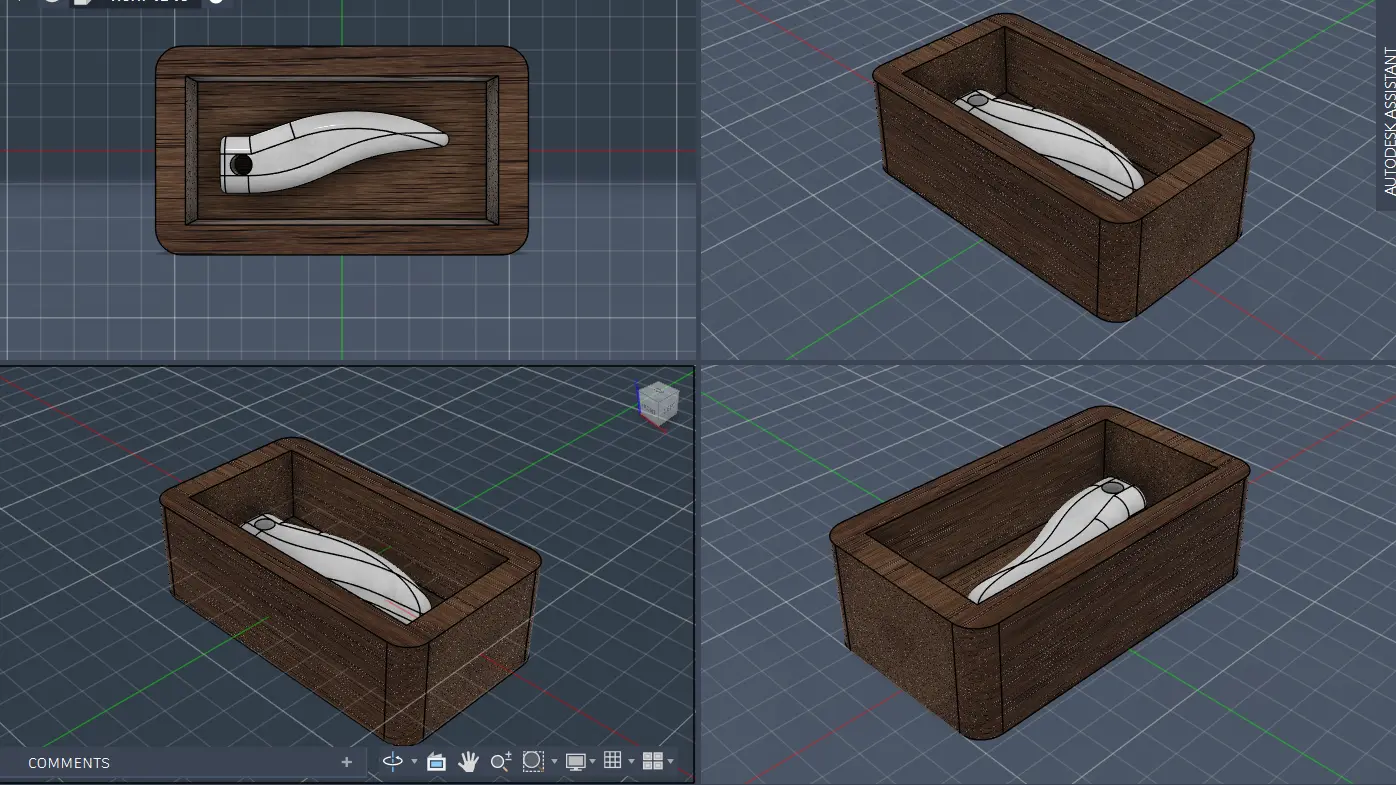
Here is the final design of the horn pendant mold with colors:
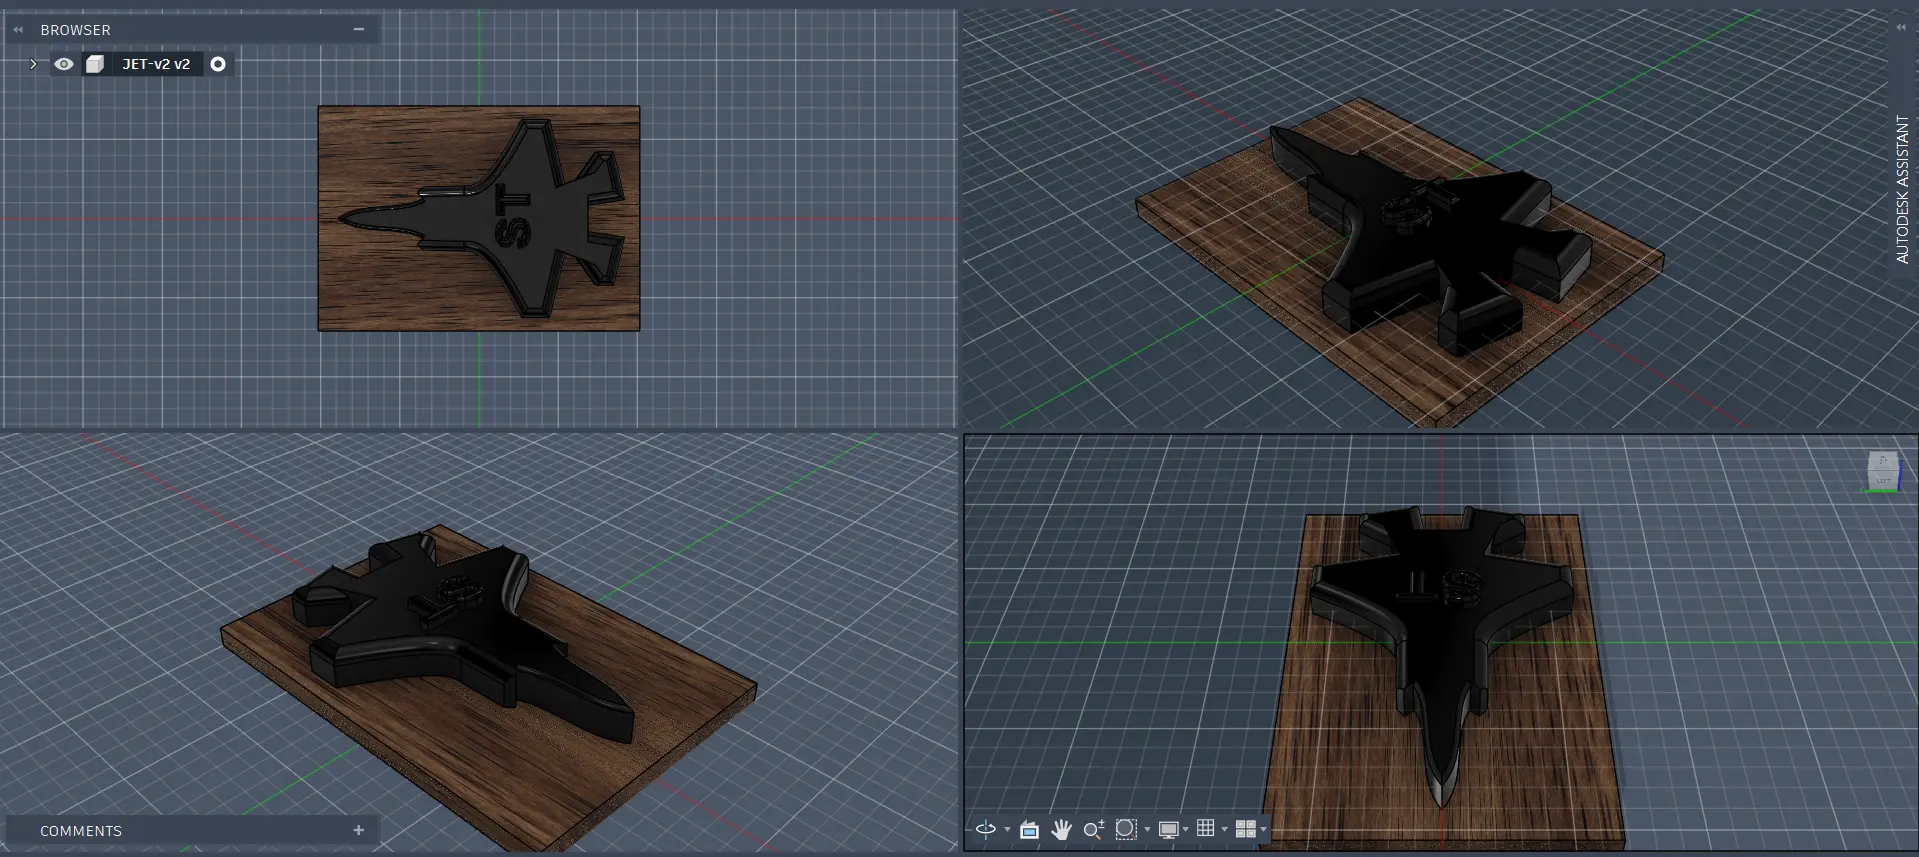
F15 Fighter Jet
For the F15 fighter jet I followed a slightly different process because I wanted to mill the mold instead of 3D printing it.
So I started off by creating a sketch of the base for the jet and extruded it. Note that the base is not necessary if you want the jet to be flat but I wanted mine to have a bit of depth to it so I added it!
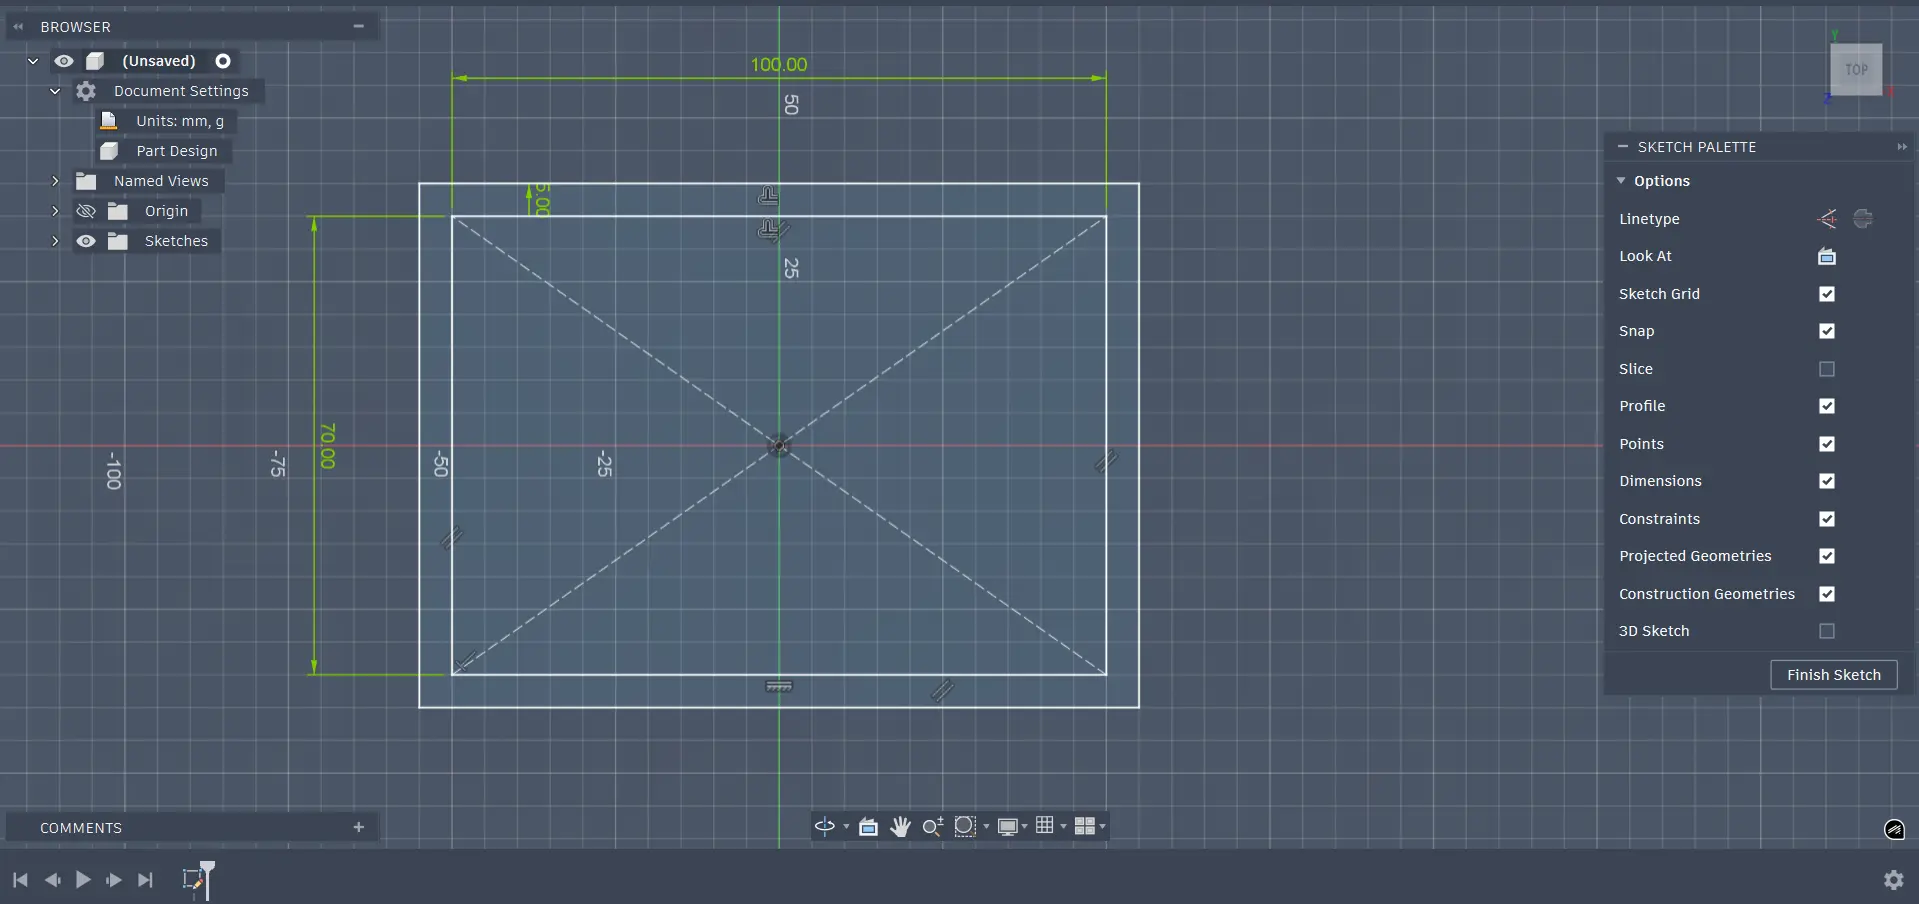

Then I created a sketch on the top face of the base and using the insert tool I imported an image of a F15 fighter jet and drew the outline of the jet using the line and arc tools.
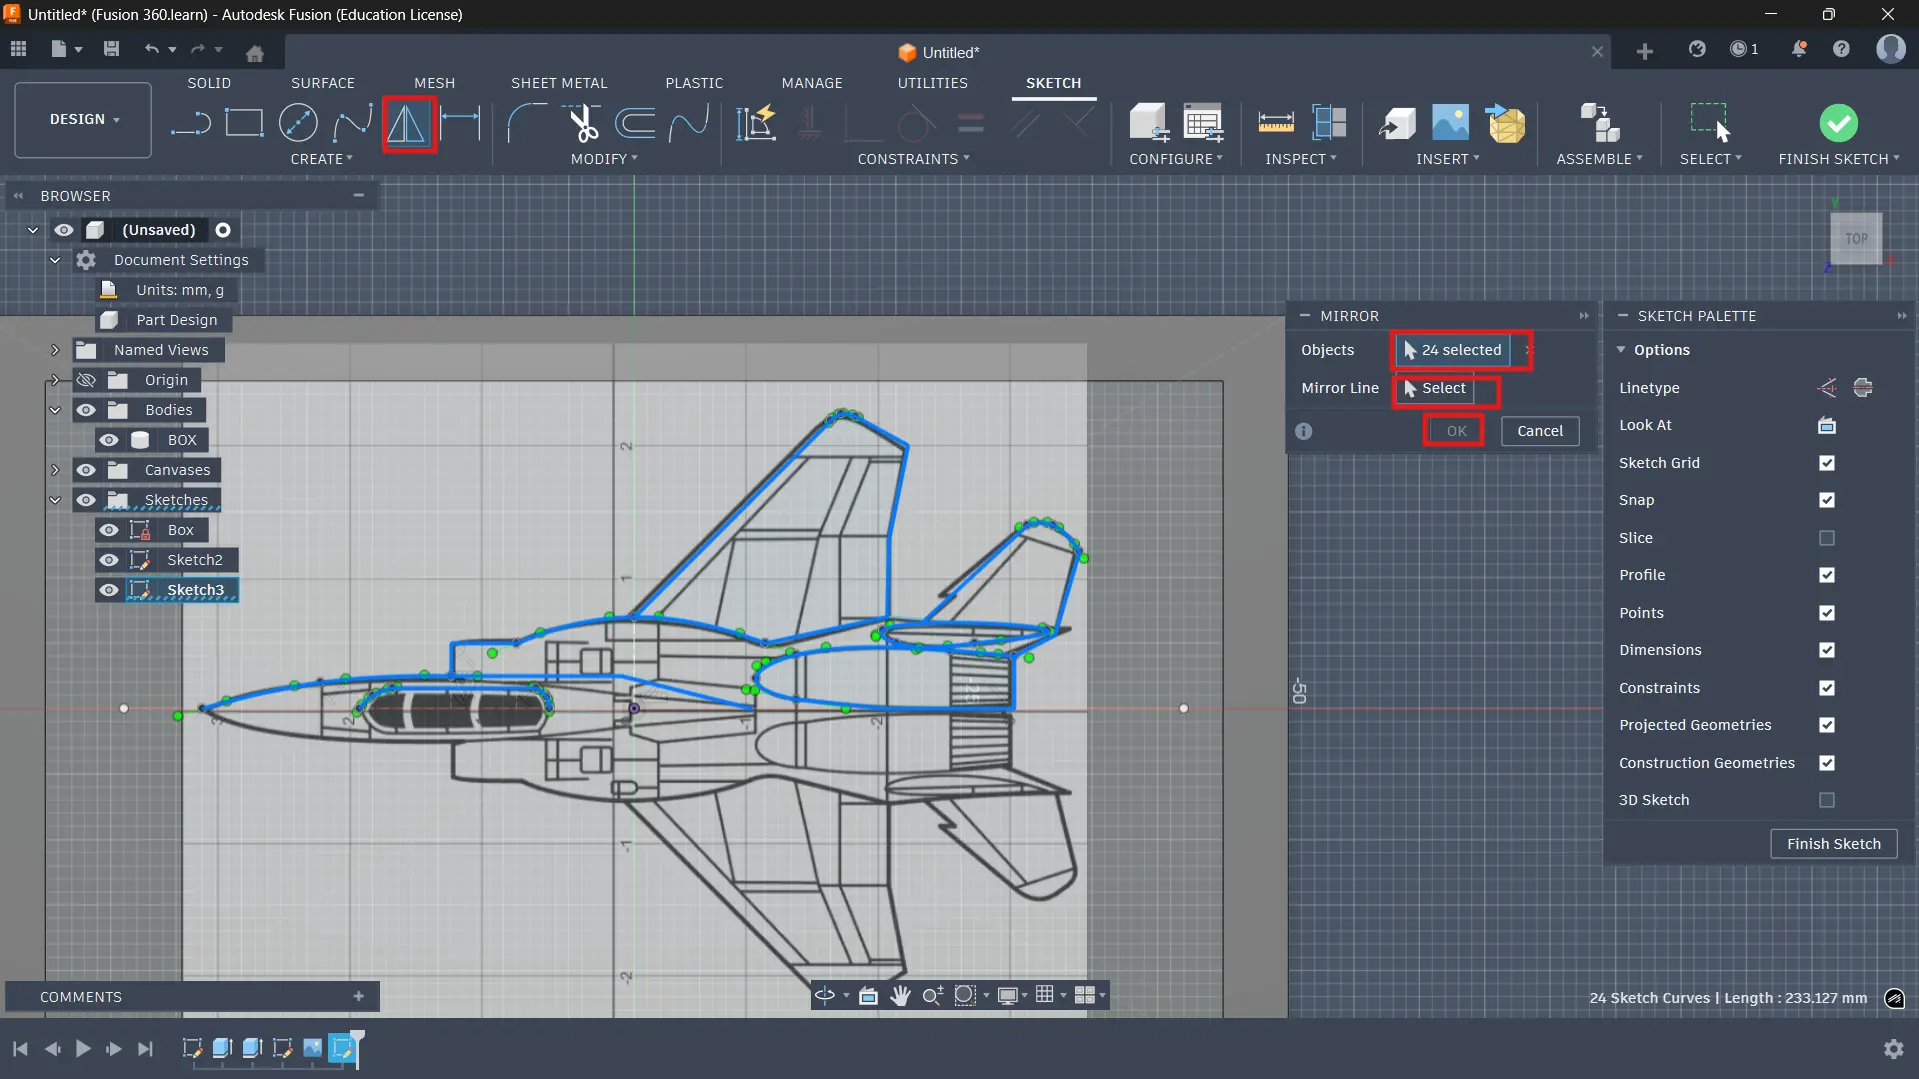
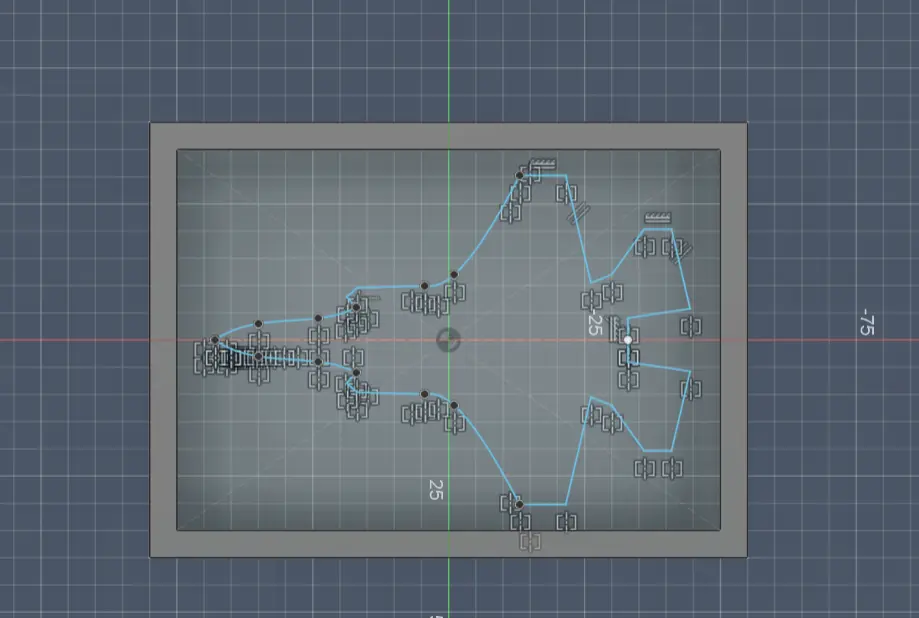
After that I extruded the jet shape to create the 3D shape and used the fillet tool to round the edges to make it look more realistic. I also added my initials on top of the jet using the text tool and extruded it to make it stand out. I really liked how it turned out! 😄
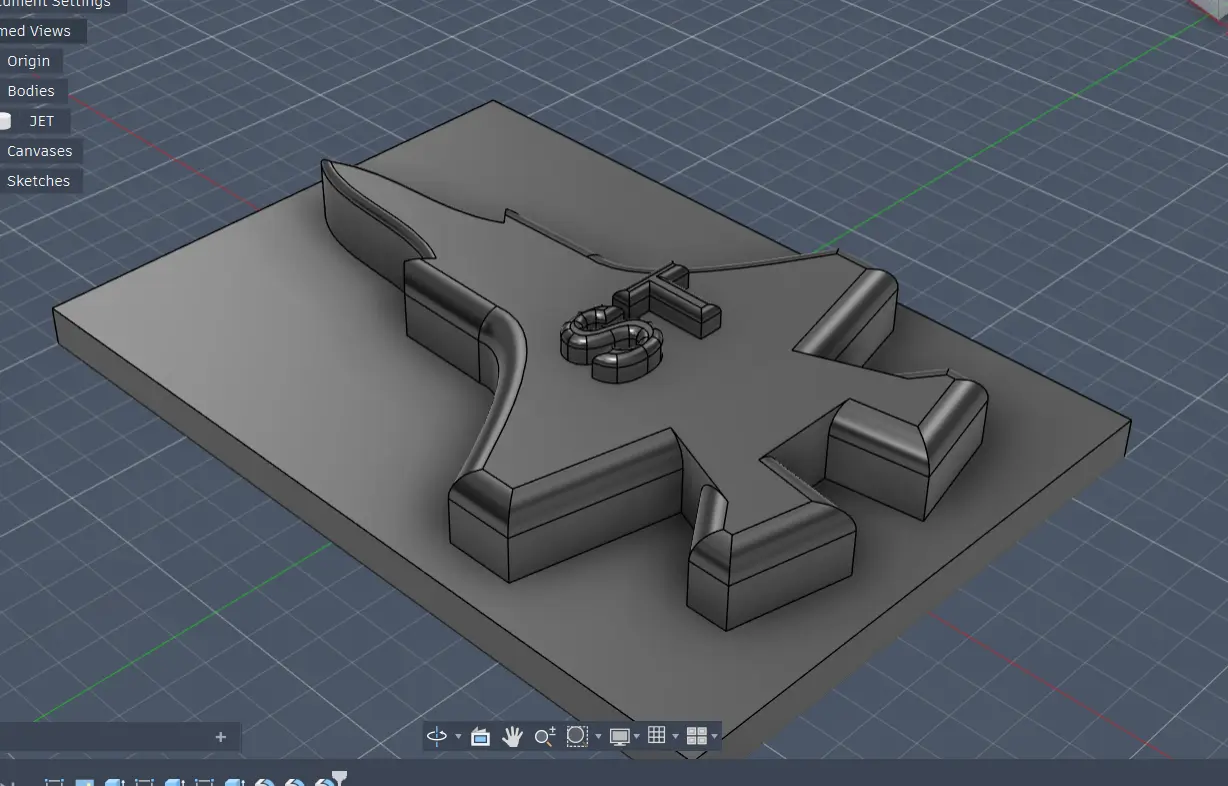
Here is the final design of the F15 fighter jet mold with colors:
Making the Positive Mold
For the horn pendant I 3D printed the positive mold using PLA material. You can check out my Week 5 documentation for more details on how to 3D print a model!
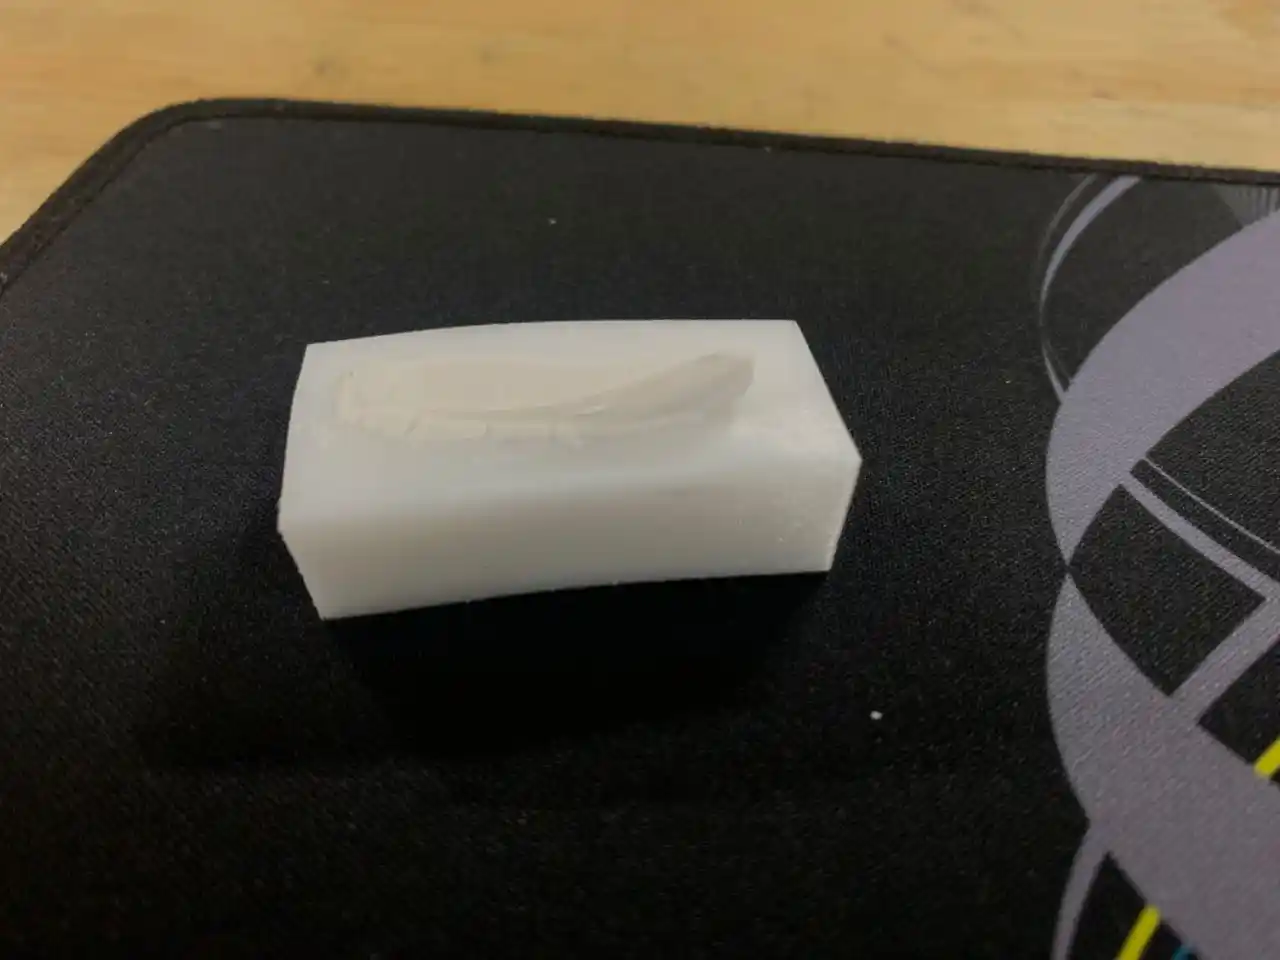
This is the positive mold of the horn pendant after it was 3D printed:
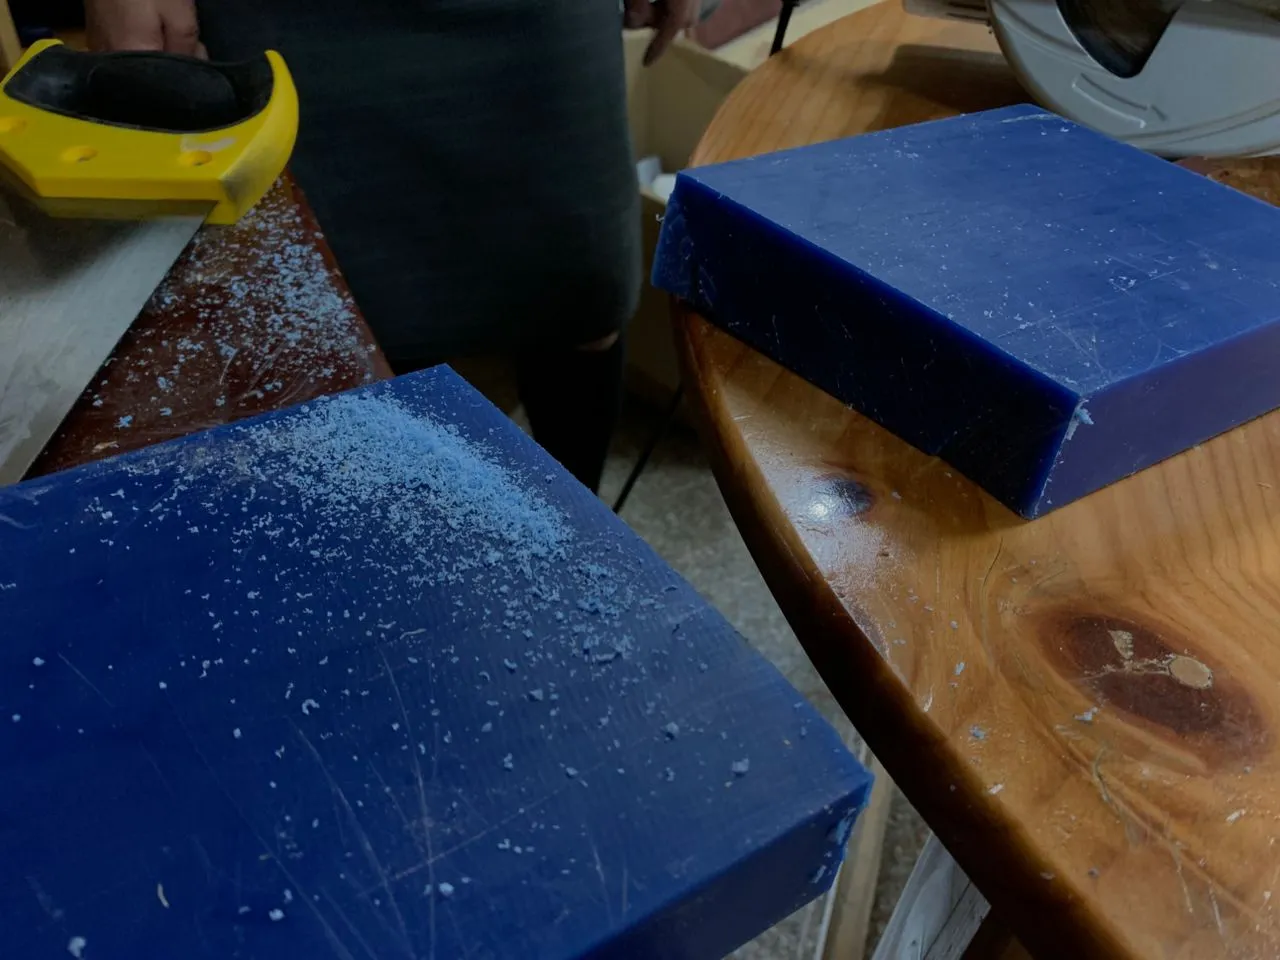
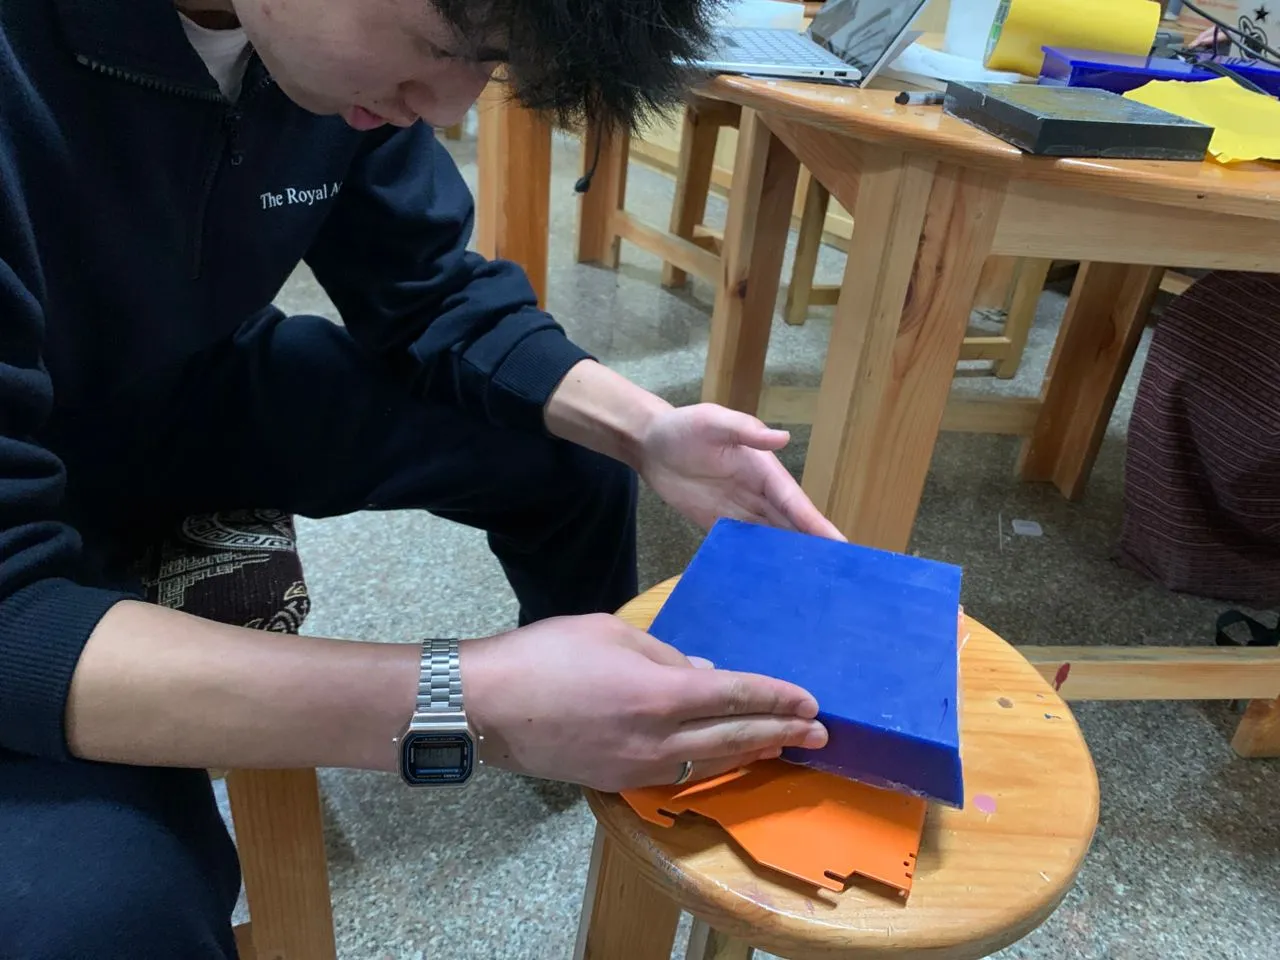
For the F15 fighter jet I milled the positive mold using the Roland SRM-20 milling machine. I used a block of wax as the material for the mold. Here is the whole process below!
First I had to cut the wax block to the right size to fit in the milling machine.
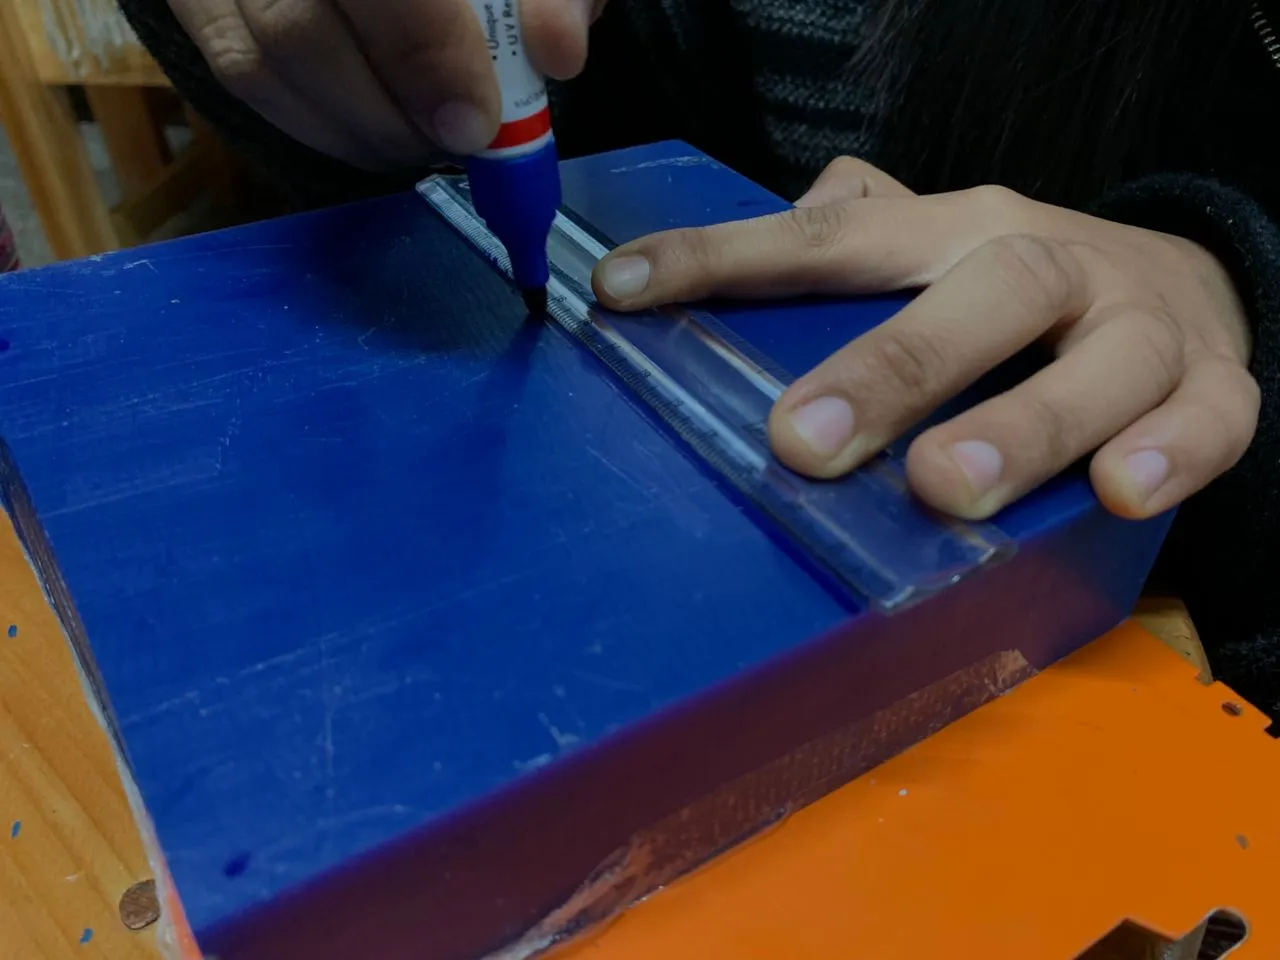
Then I marked the center of the wax block to help me align the Z axis properly in the milling machine.
Then I secured the wax block on the milling machine bed using double sided tape and put it inside the machine.
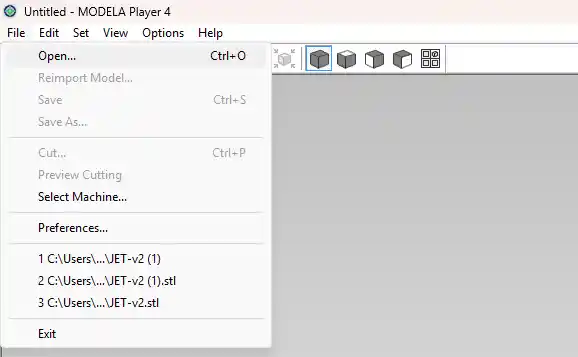
After that I opened up the Modela Player 4 software to generate the toolpath for milling the mold.
To do this follow the steps below:
- Open the software and import your STL file of the positive mold.
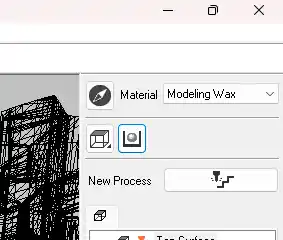
- Set the material type to wax.
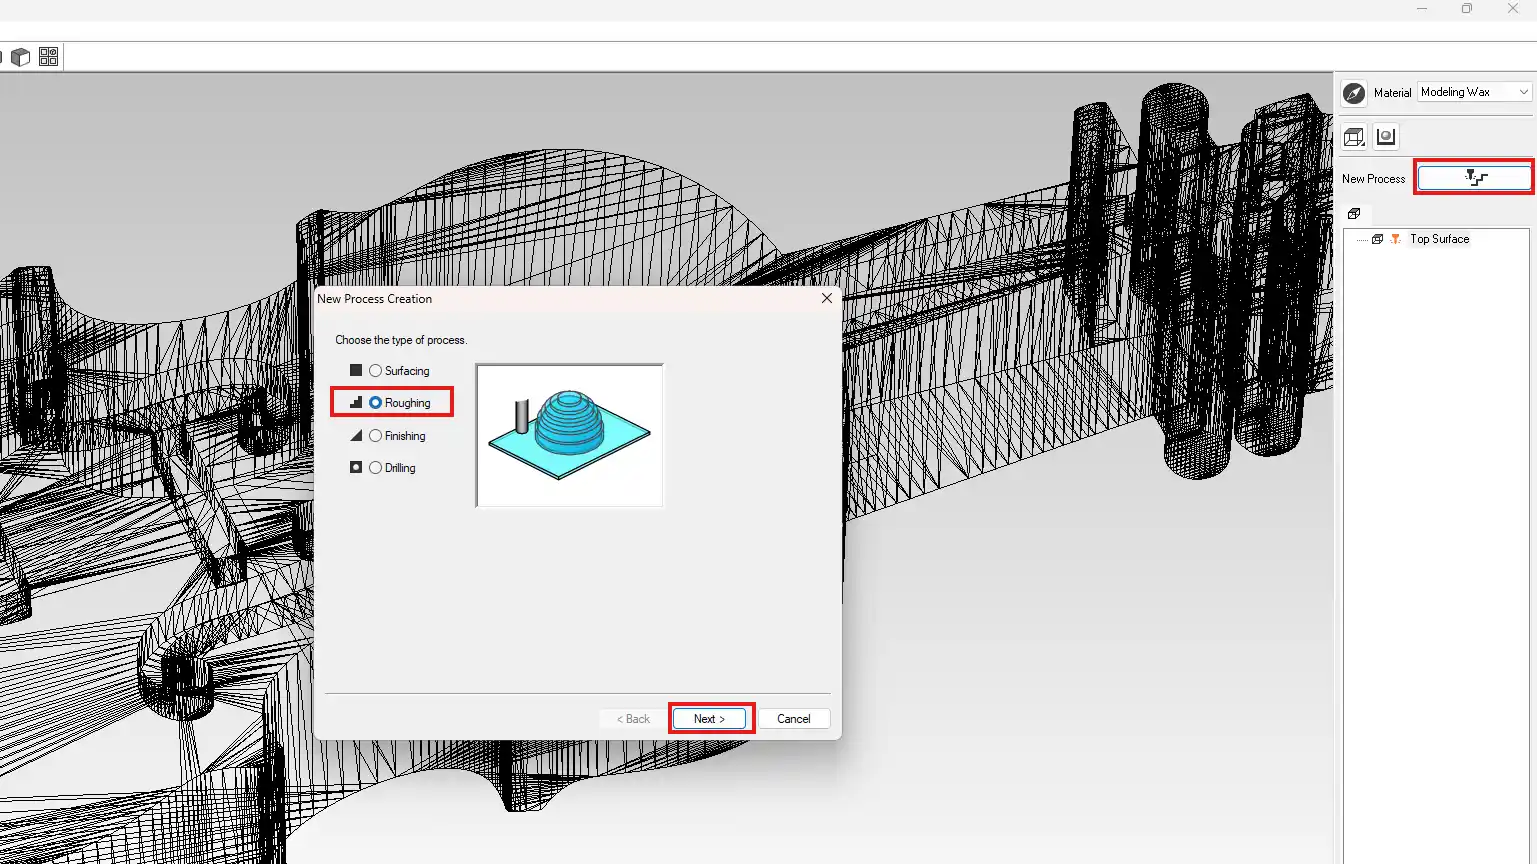
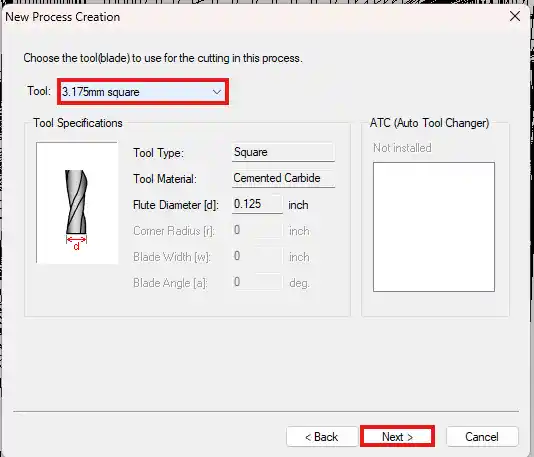
- First you have to make the toolpath for the roughing pass which is the first pass that will remove the majority of the material. For this I used the 3.175mm square end mill. Click New Process then Roughing then Next.
- Click Next.
- Select the 3.175mm square end mill from the list of tools and click Next.
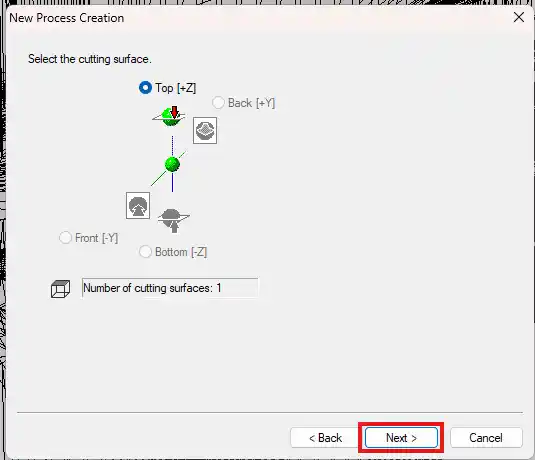
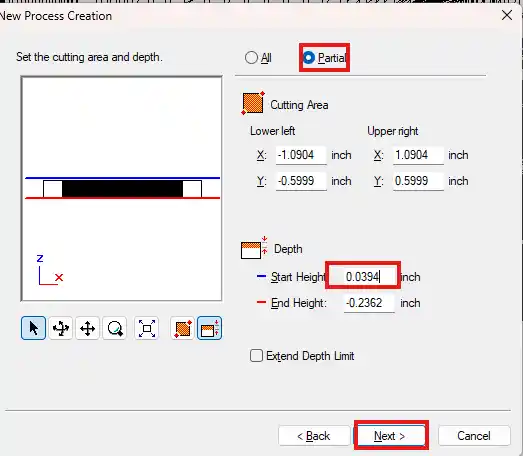
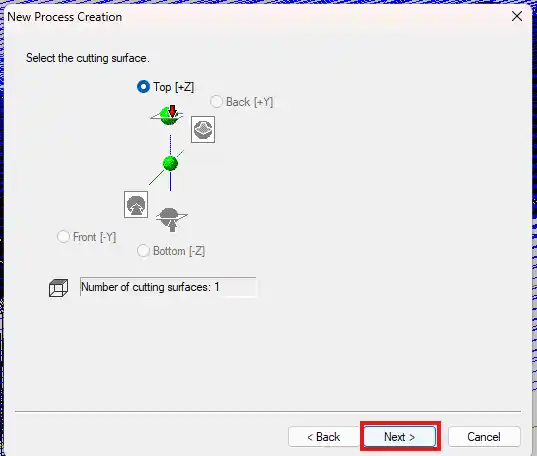
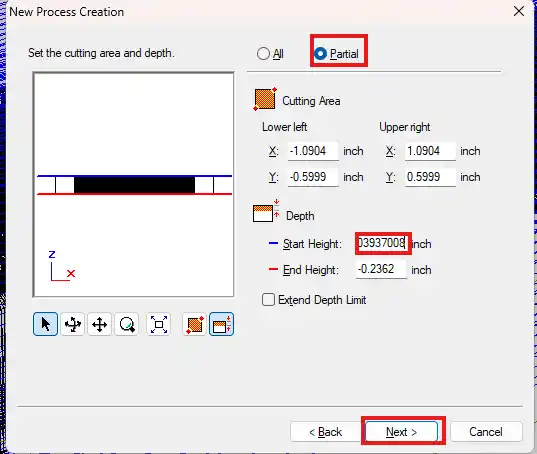
- Click Partial and set the start height to 5-10mm above the highest point of the model to make sure the tool does not crash into the model at the start of the milling process. Then click Next.
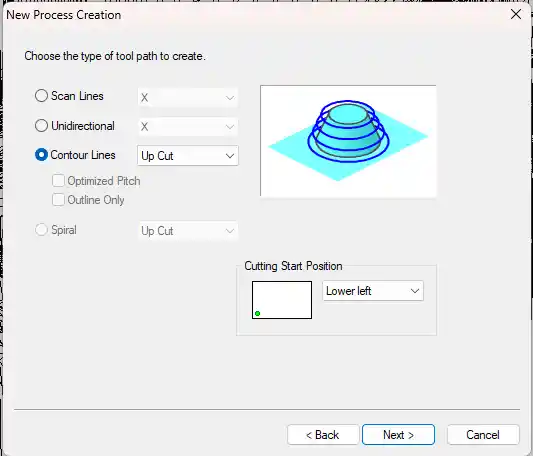
- Click Next.
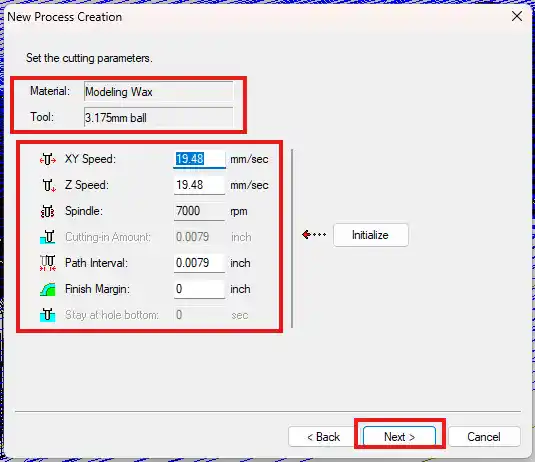
- Check the settings and click Next.
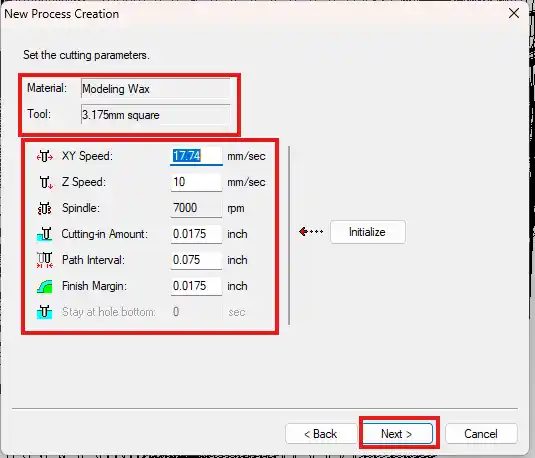
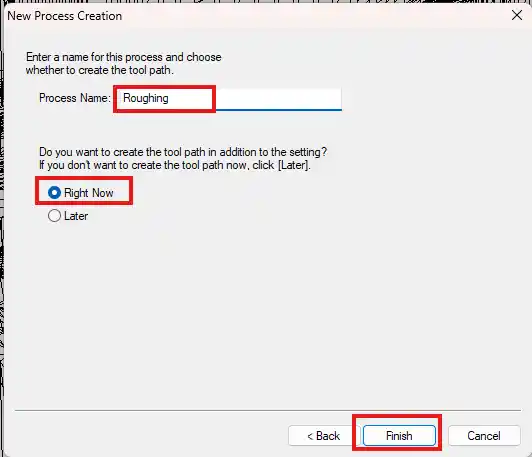
- Set the name and click Next.
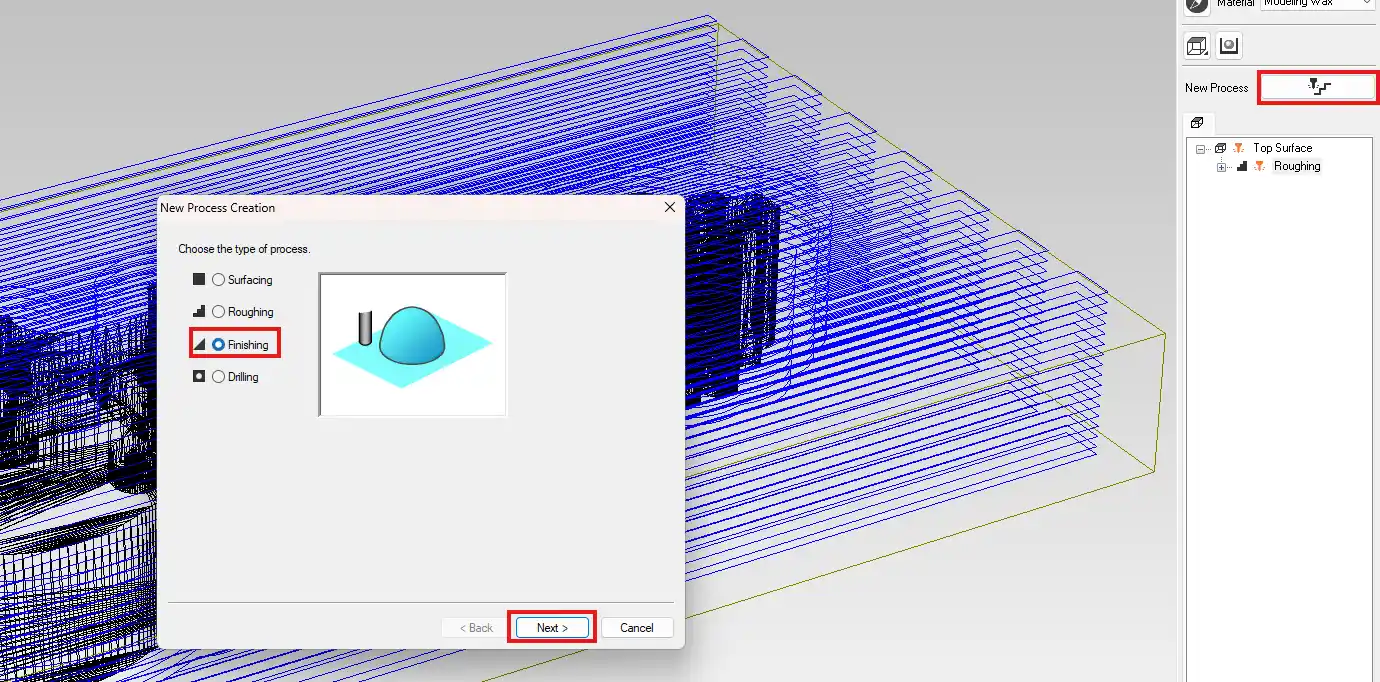
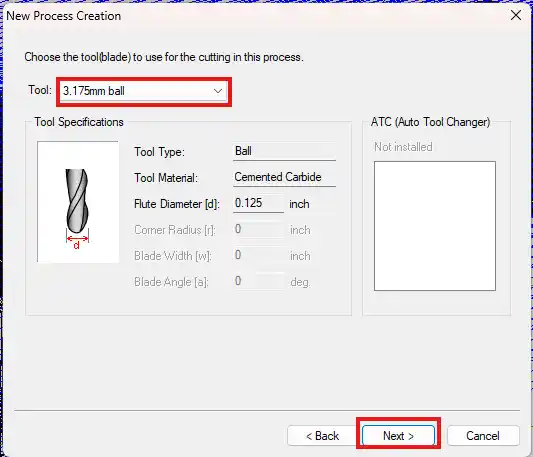
- Now you have to make the toolpath for the finishing pass which is the second pass that will give the mold a smooth surface finish. For this I used the 3.175mm ball end mill. Click New Process then Finishing then Next.
- Click Next.
- Select the 3.175mm ball end mill from the list of tools and click Next.
- Click Partial and set the start height to 5-10mm above the highest point of the model. Then click Next.
- Click Next.
- Check the settings and click Next.
- Set the name and click Next.

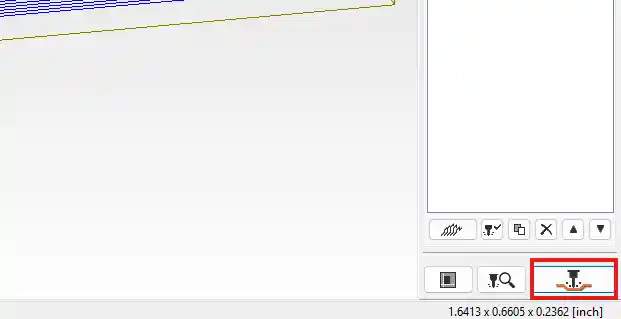
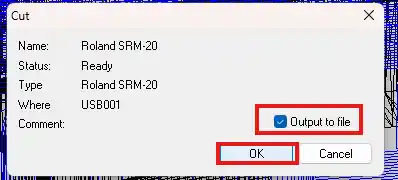
- Now that you have the toolpath you have to export it and import it into the Roland SRM-20 software to start the milling process. Click Cut.
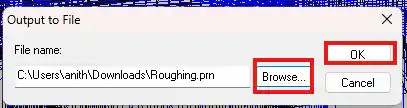
- Check the Output to File option and click OK.
- Select the location to save the file and click OK.
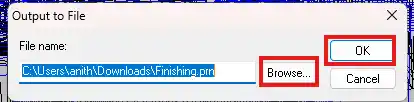
- Save both the roughing and finishing files and click OK.
Now that you have both toolpath files you can import them into the Roland SRM-20 software and start milling! The machine will first do the roughing pass to remove the majority of the material and then do the finishing pass to give the mold a smooth surface finish.
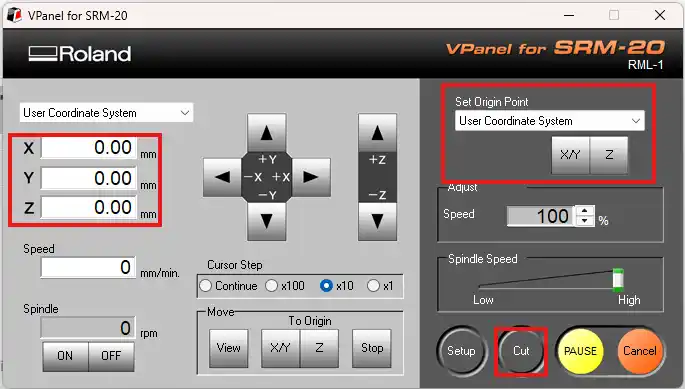
- Open the Roland SRM-20 software and set the XY origin by moving the milling head to the center of the wax block and clicking the Set XY Origin button. Don't forget to set the Z origin as well by moving the milling head to the surface of the wax block and clicking the Set Z Origin button. Make sure to use the correct tool for each pass and change the tool in the machine before starting each pass!
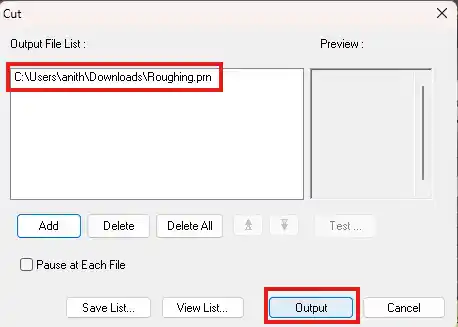
- Click Add.

- Select the roughing pass file and click Open.
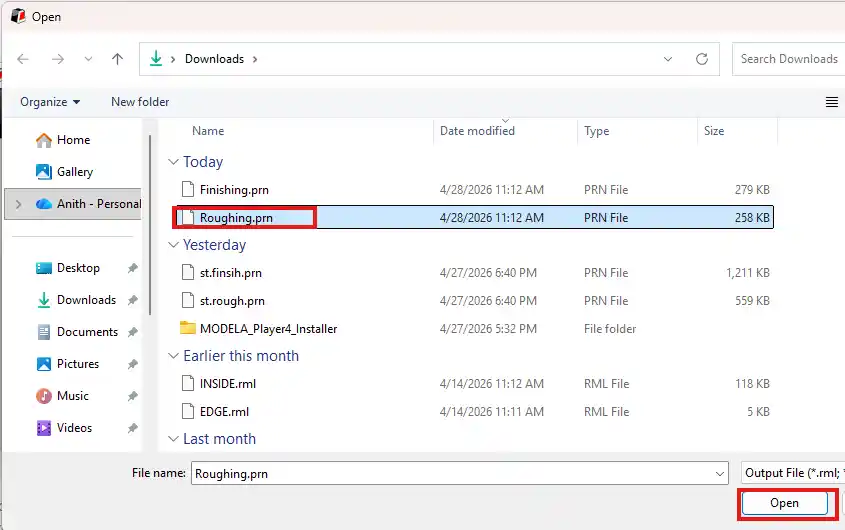
- Click Output to Machine to start the milling process for the roughing pass.
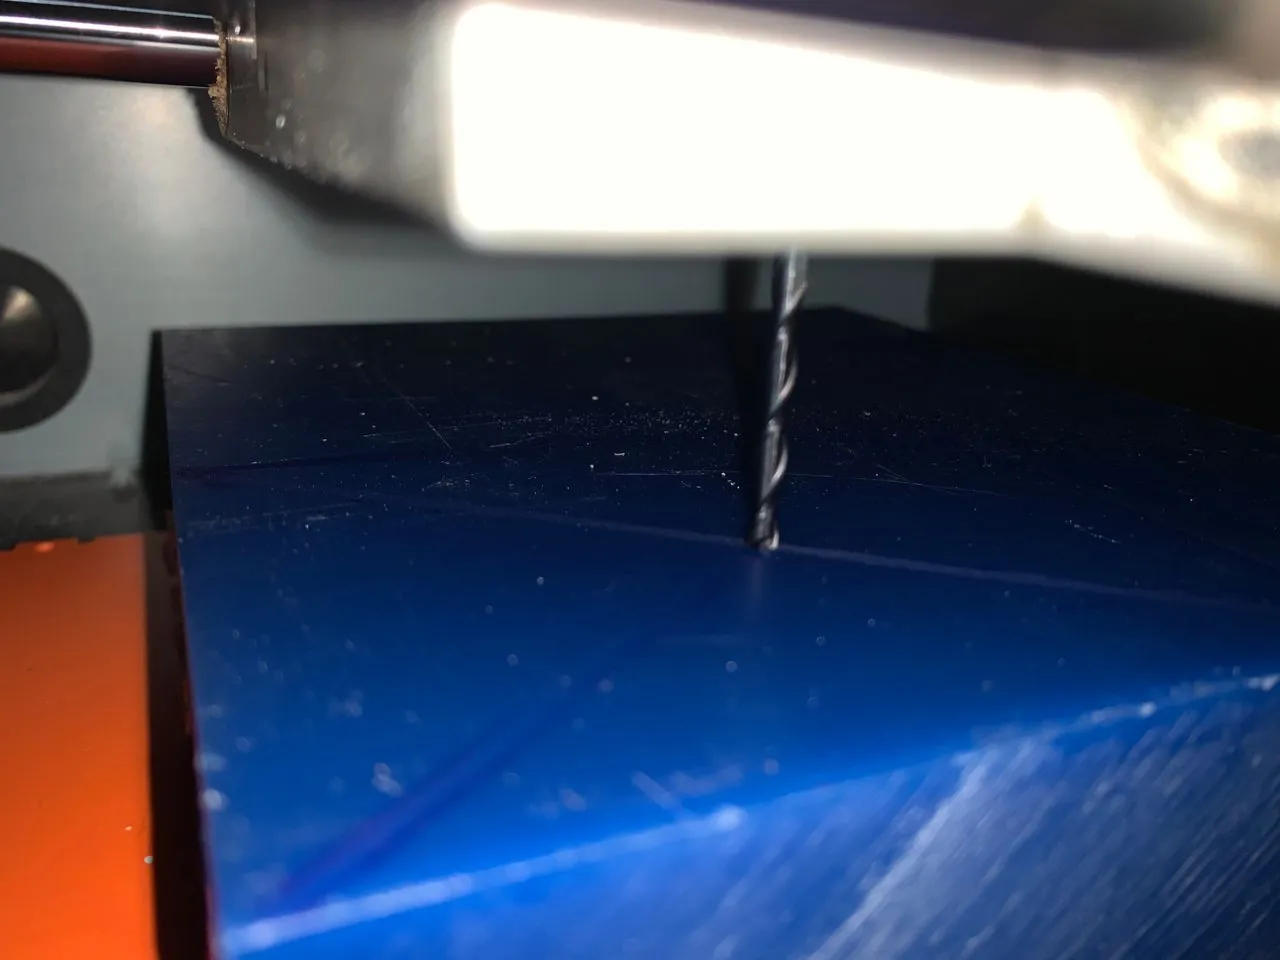
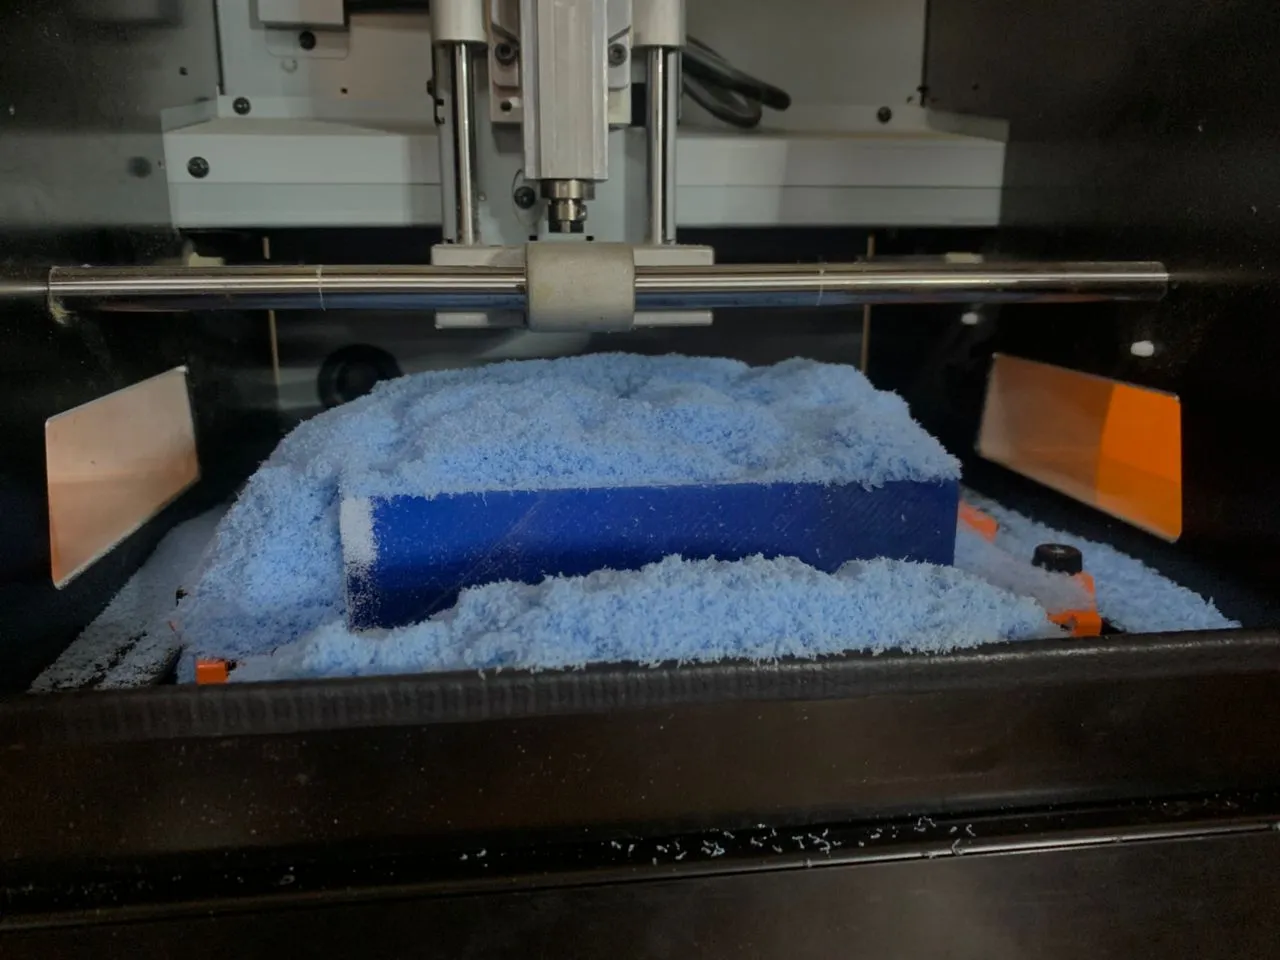
Now the machine will start milling the wax block for the roughing pass. This takes a while since it's removing a lot of material so just let it do its thing! Once the roughing pass is done you can change the tool to the ball end mill and repeat the process for the finishing pass.
This is the wax block after the roughing pass:
After that I changed the tool to the ball end mill and repeated the process for the finishing pass.
To add the finishing pass file click Add again, select the finishing pass file, click Open and then click Output to Machine to start the finishing pass.
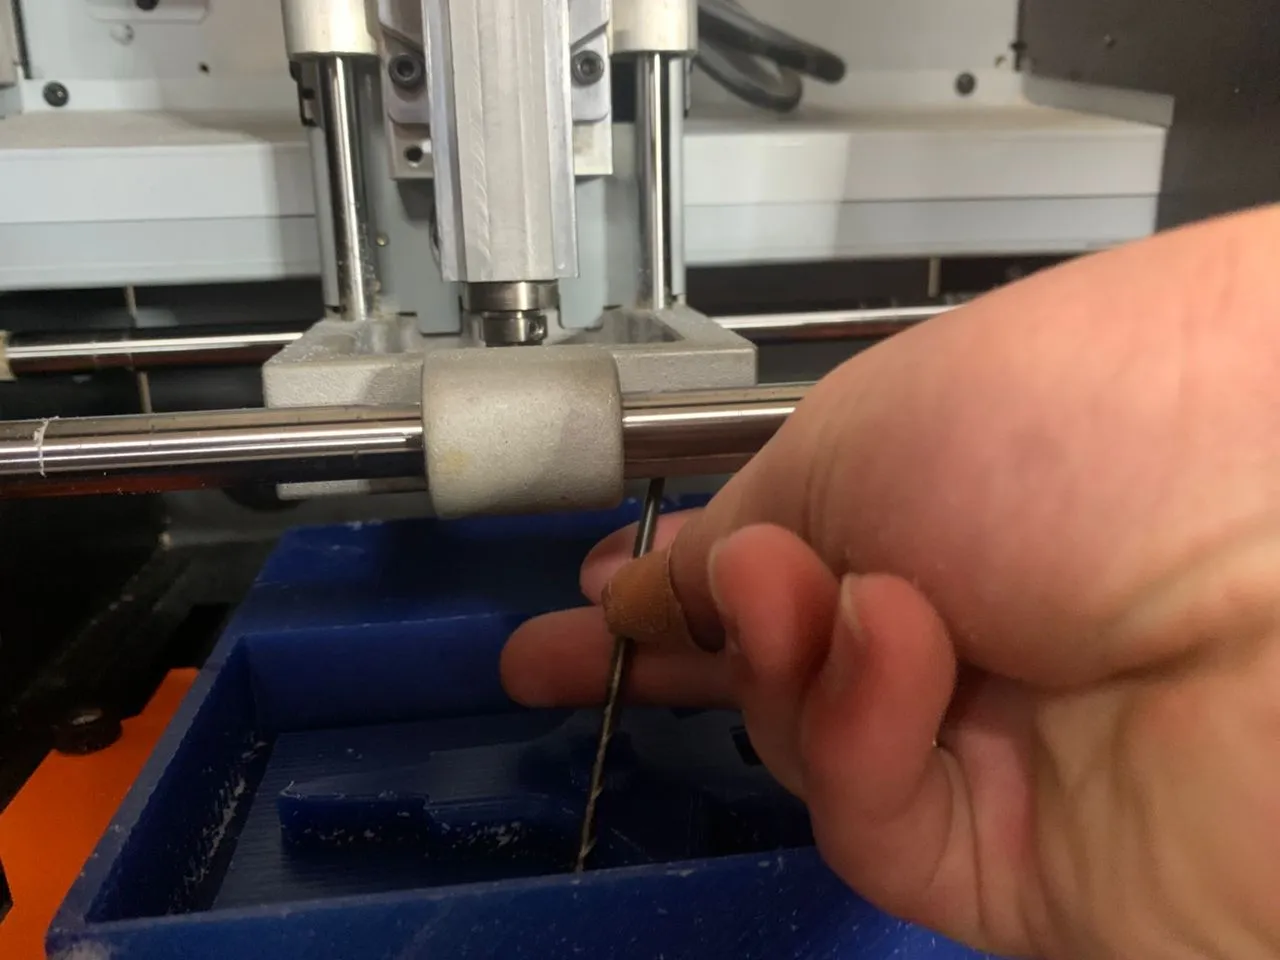
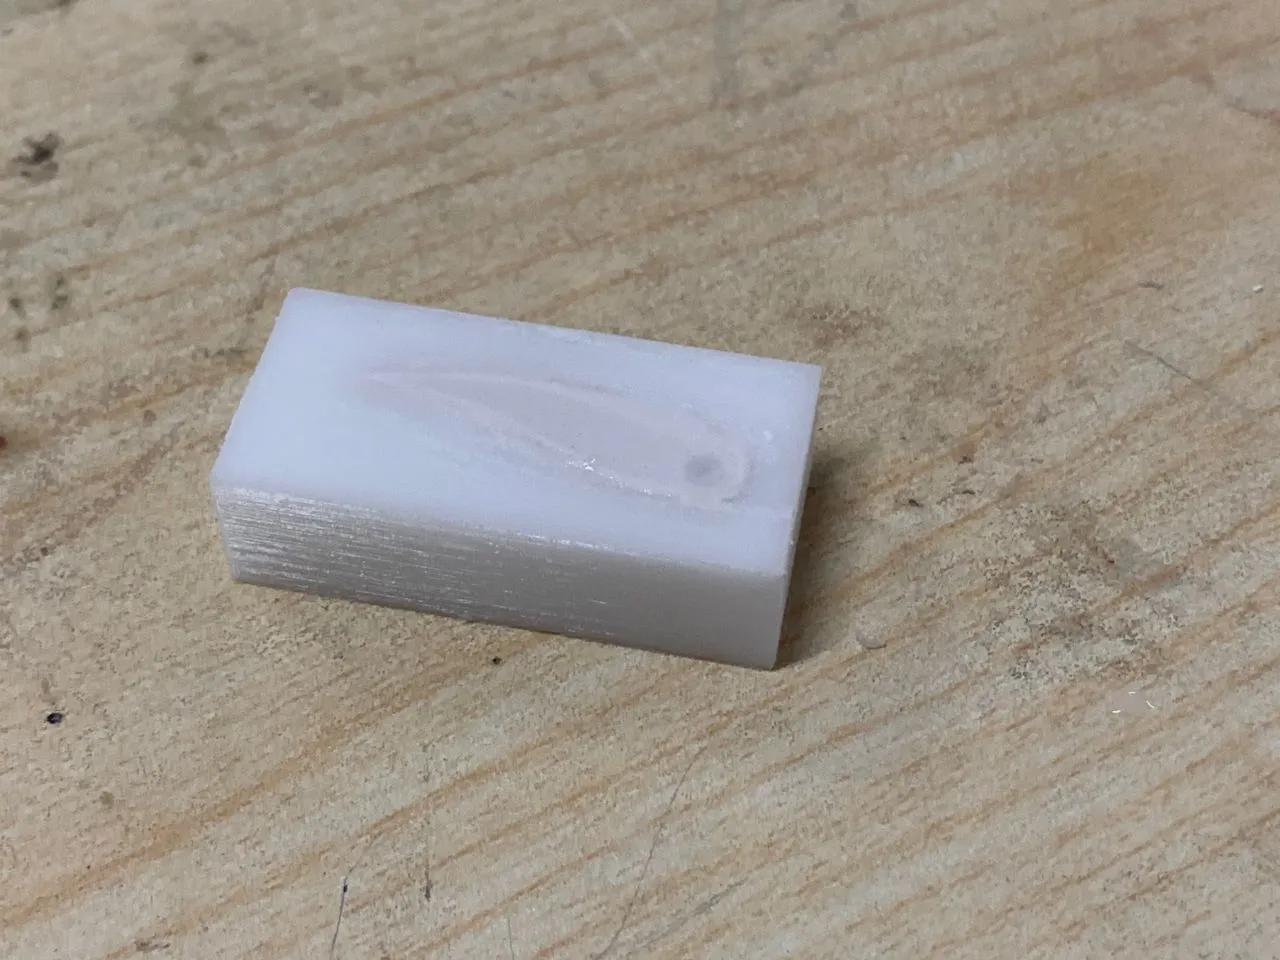
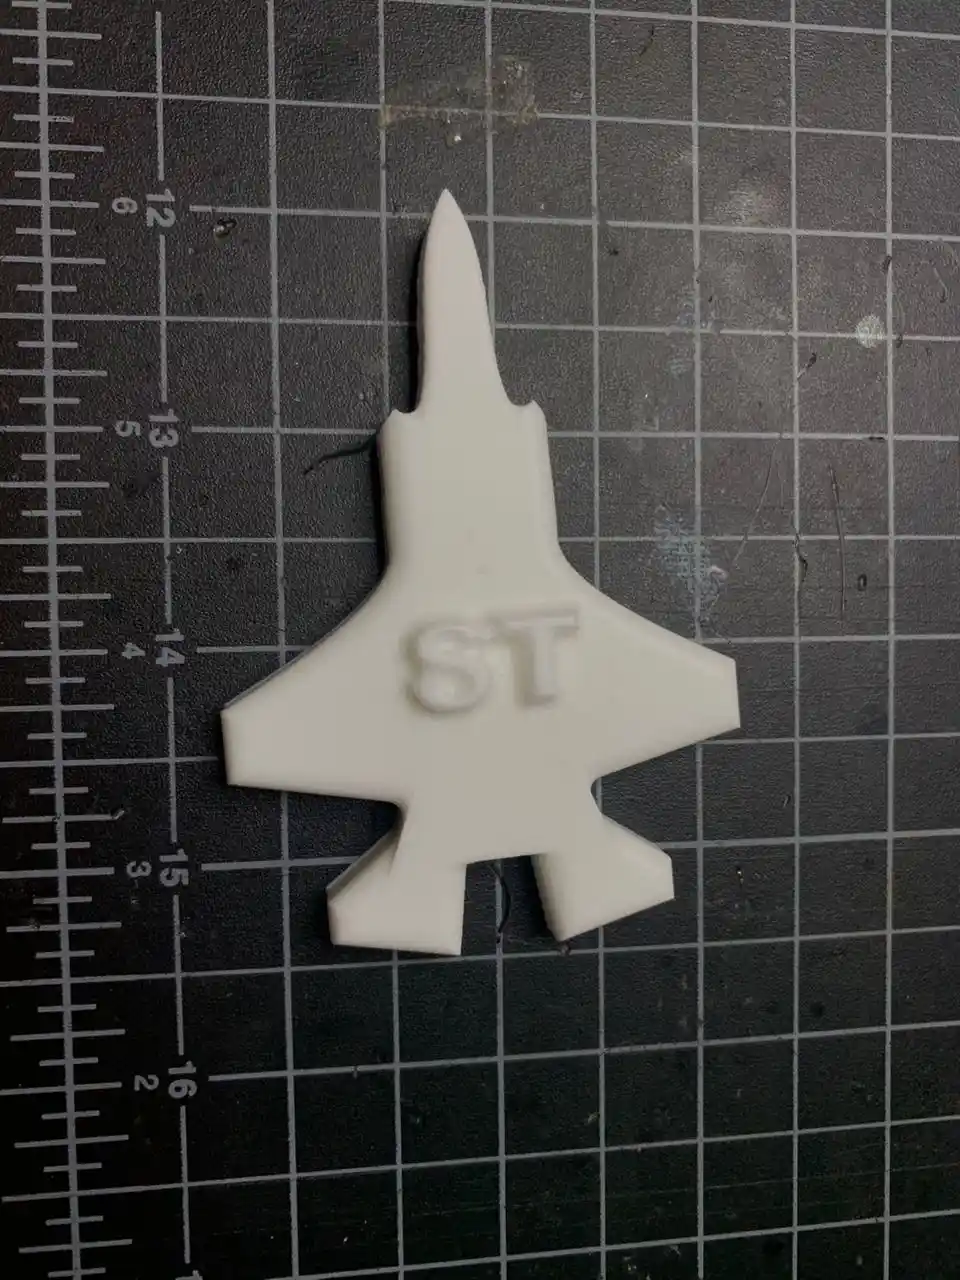
Yayy! My F15 fighter jet positive mold is ready!!
Making the Negative Mold
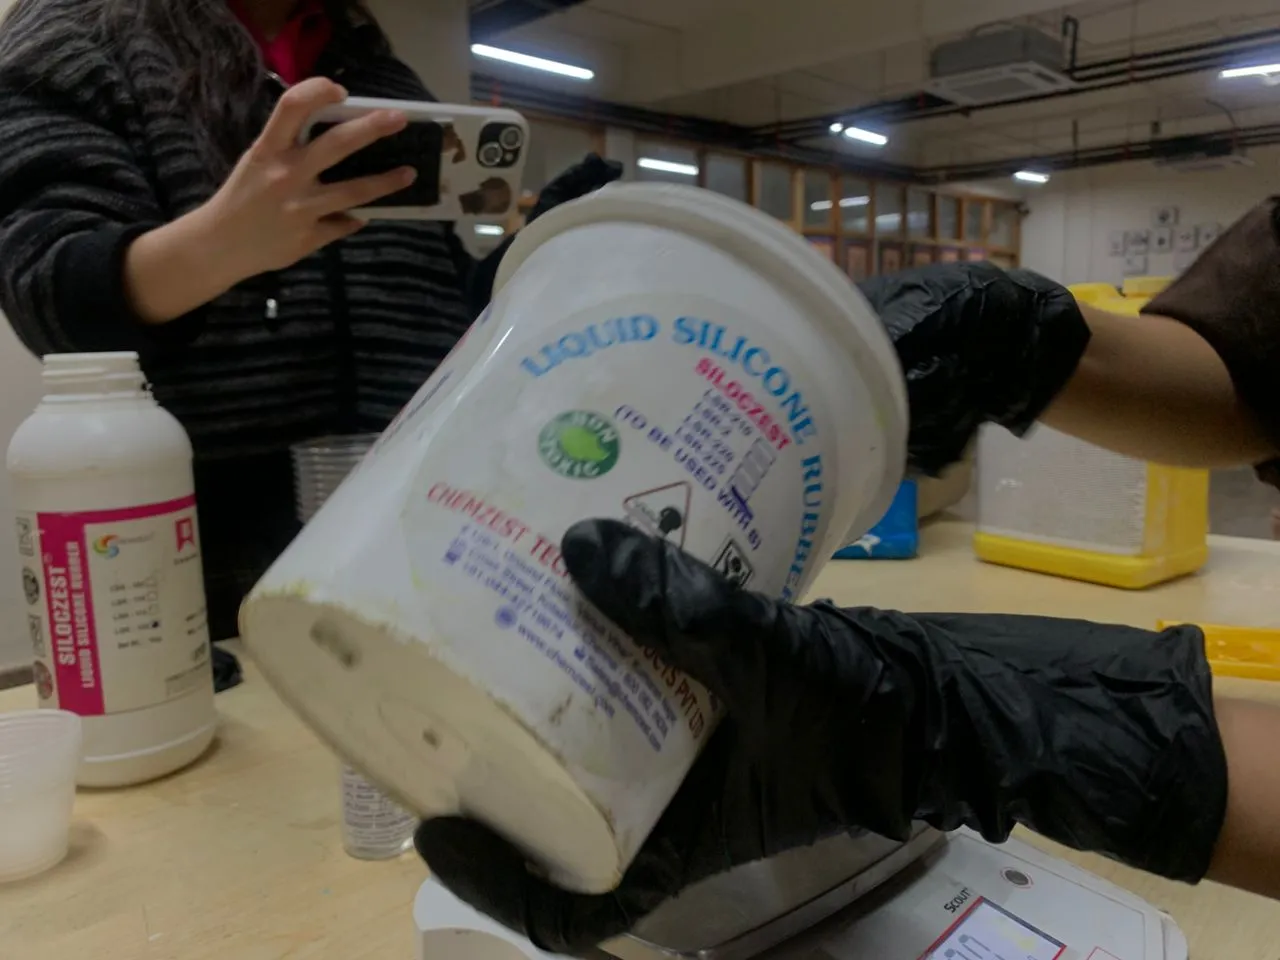
Before I started making the negative mold Dawa and Yangtshel taught us how to make the negative mold using silicon rubber and how to mix it with the catalyst to make it harden. Thank you both for the great demonstration! 😄
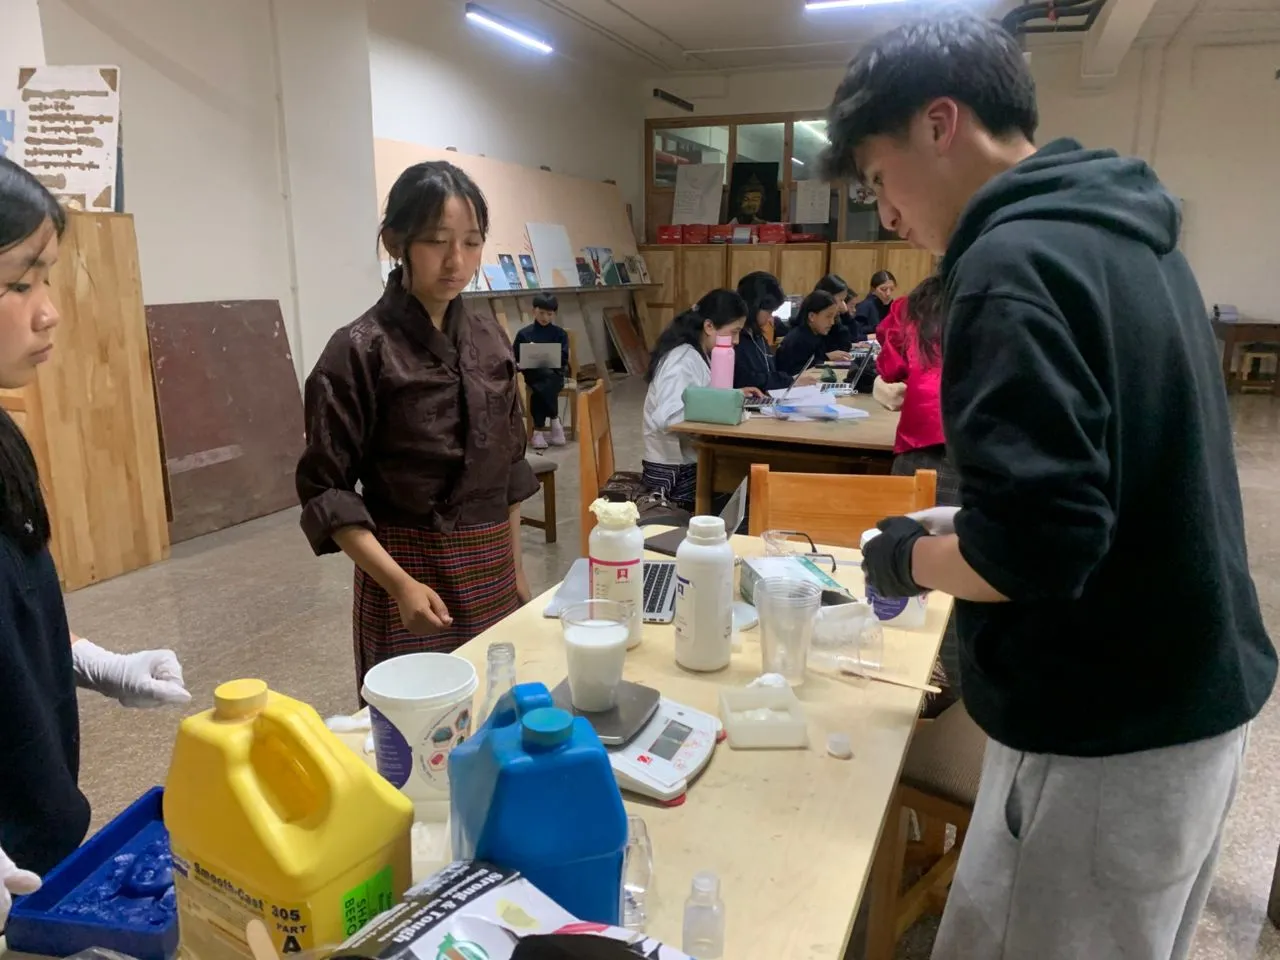
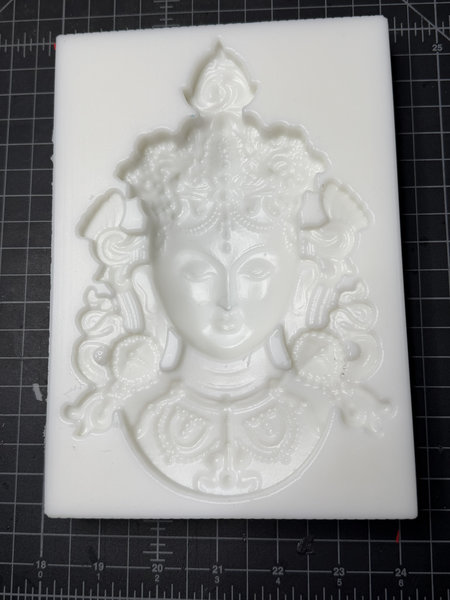
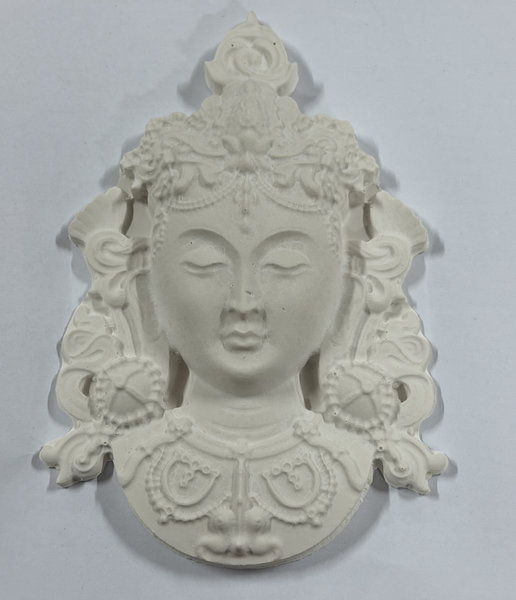
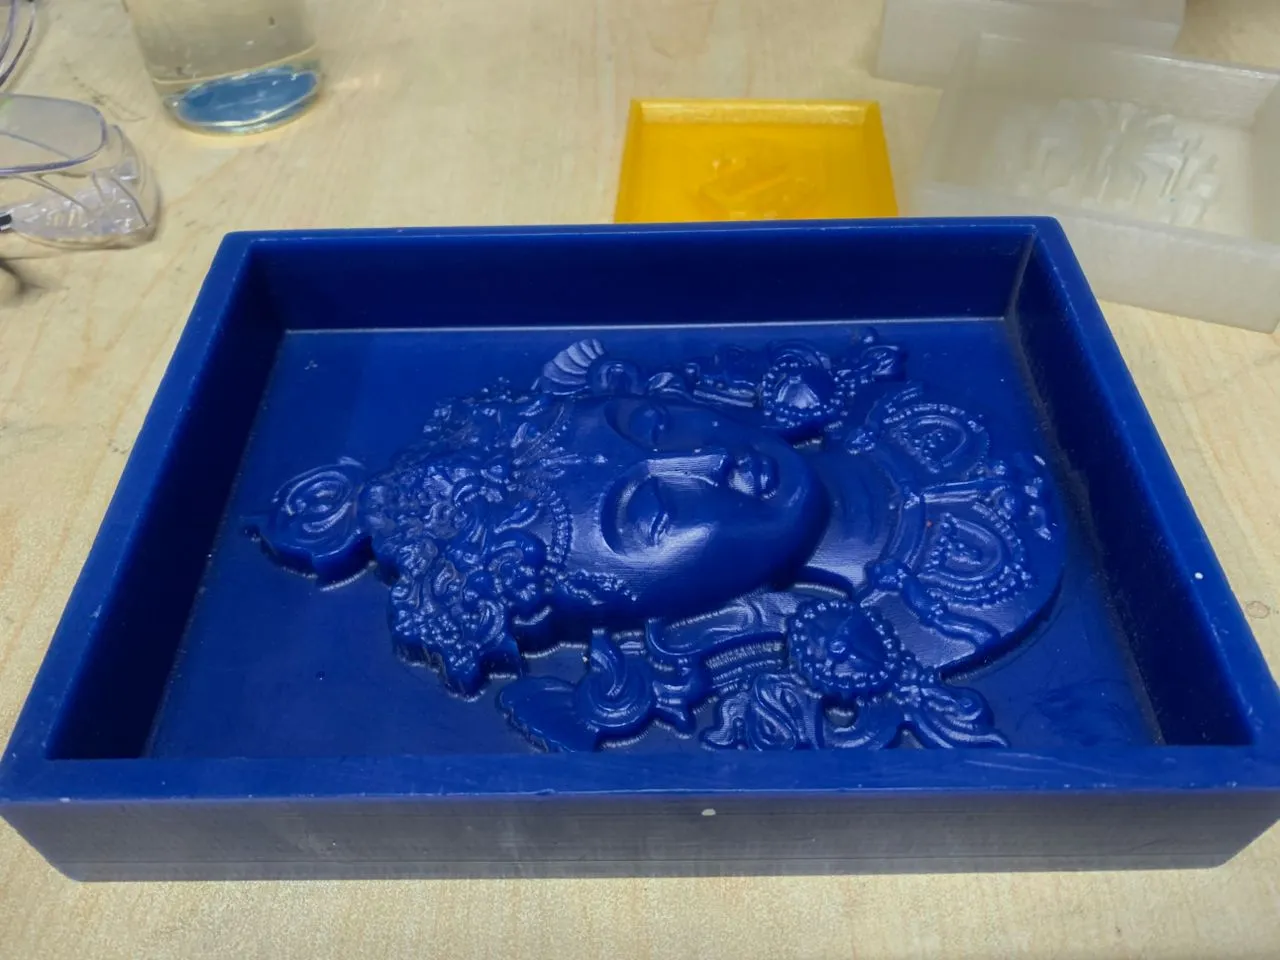
For this we used a mold made by Sir Anith. This mold was really great because it has a lot of different shapes and detailed features that helped us learn how to work with silicon rubber properly.
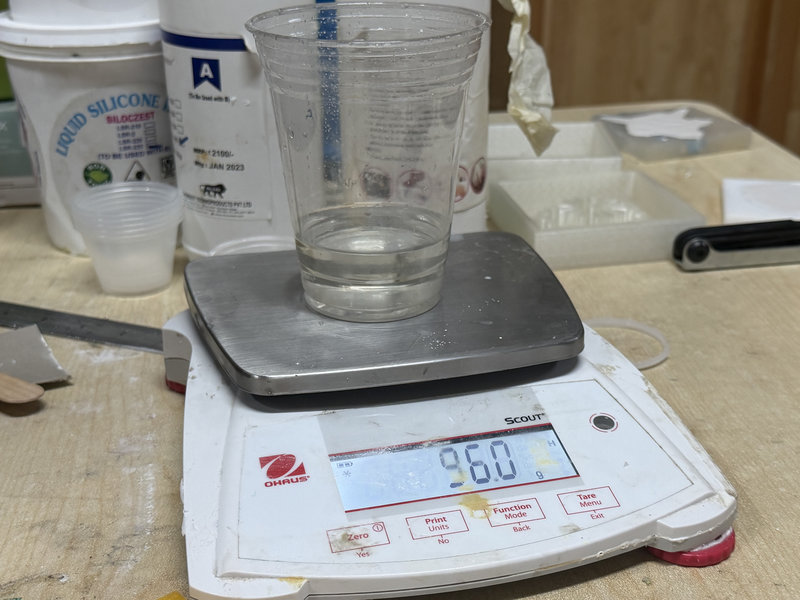
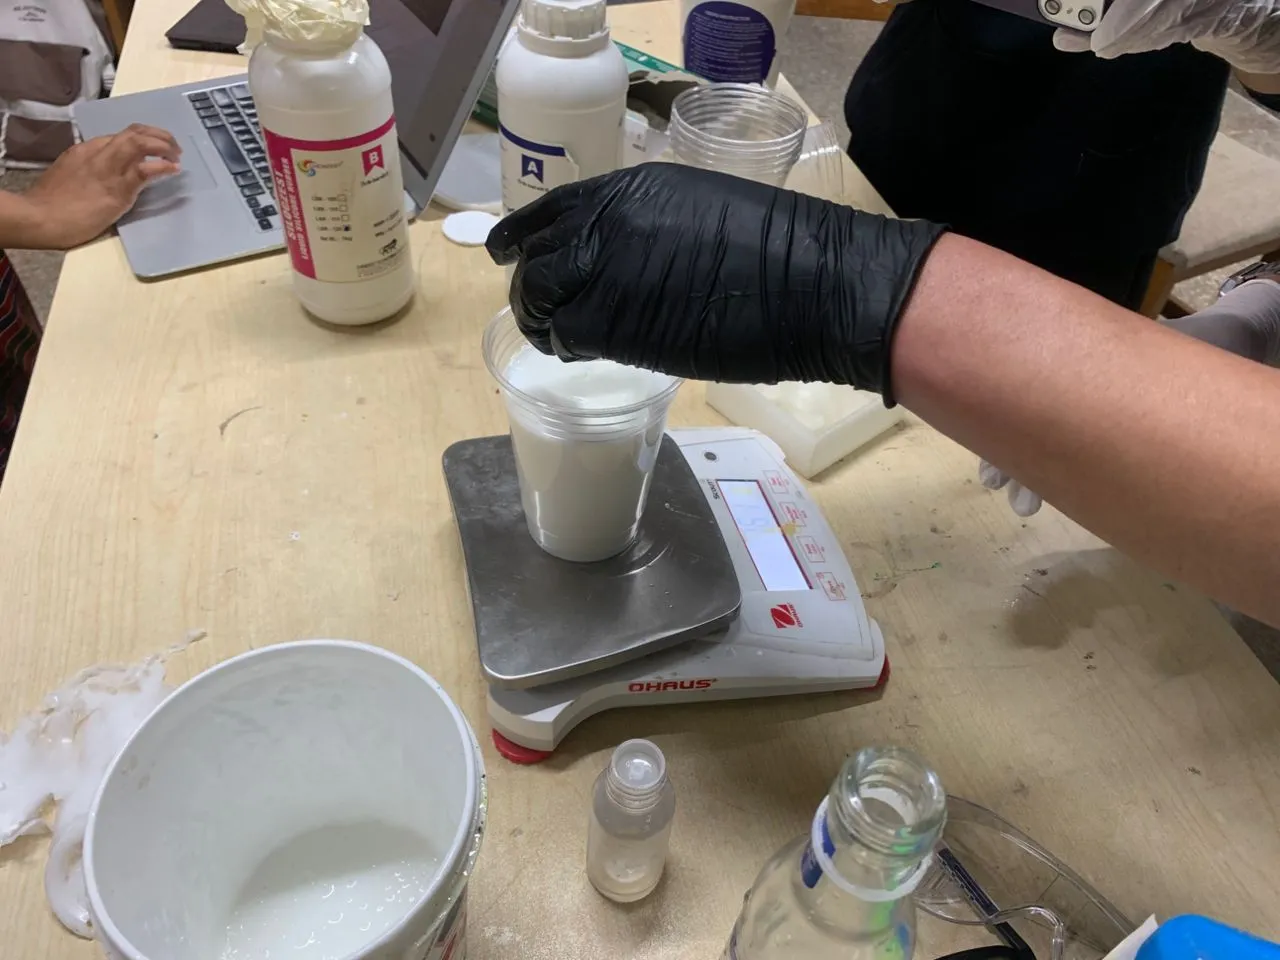
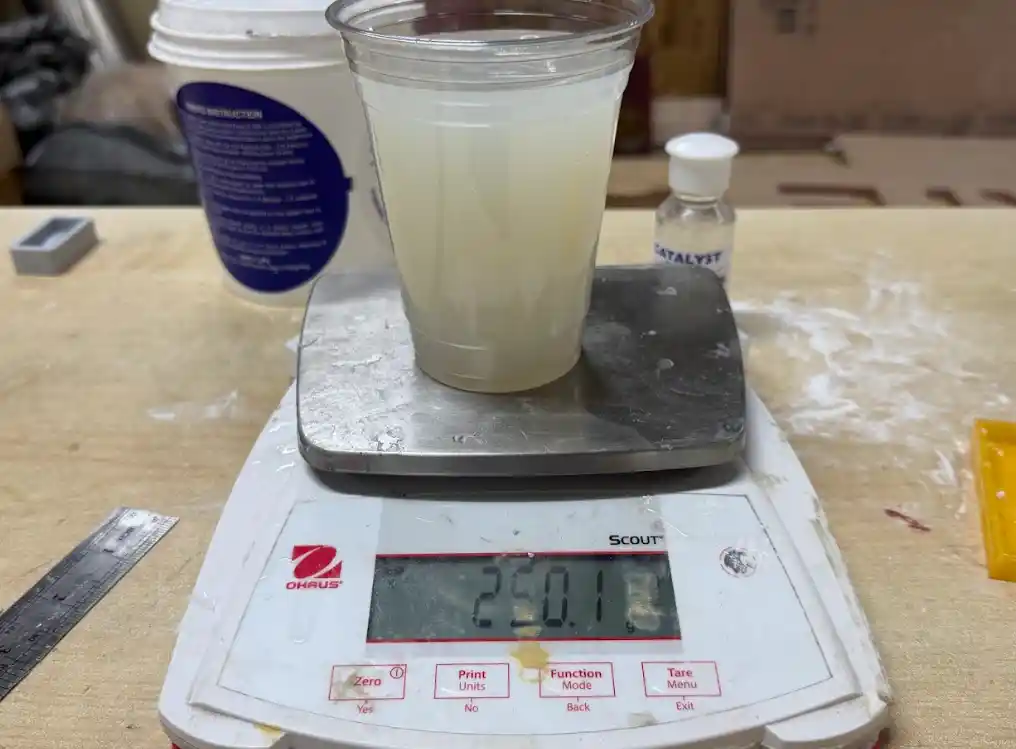
To make the negative mold we first read the safety data sheet for the silicon rubber to understand the safety precautions we needed to take. Then we mixed the silicon rubber with the catalyst in the right ratio using a scale to measure everything accurately.
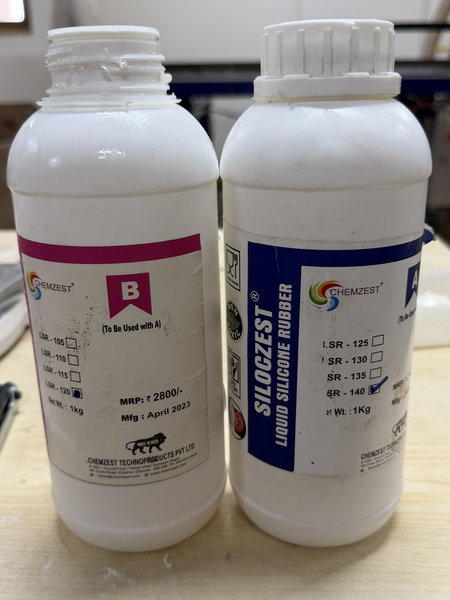
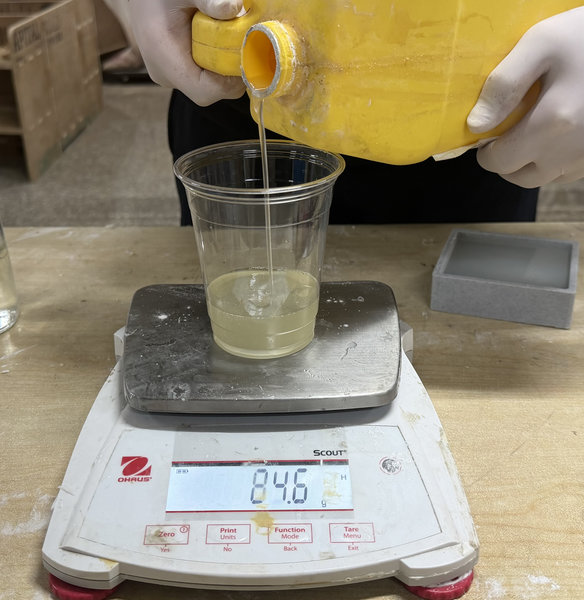
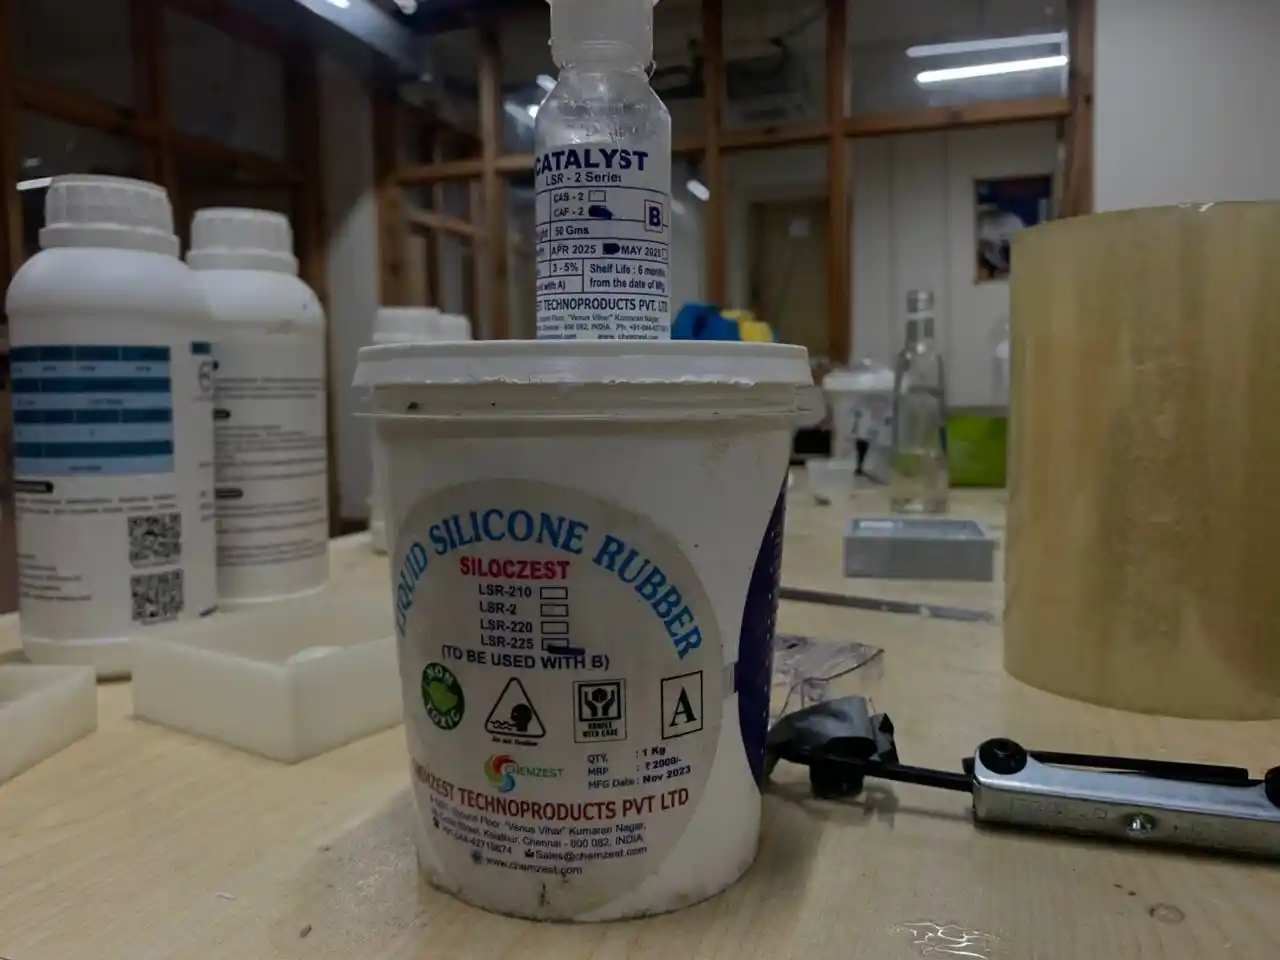
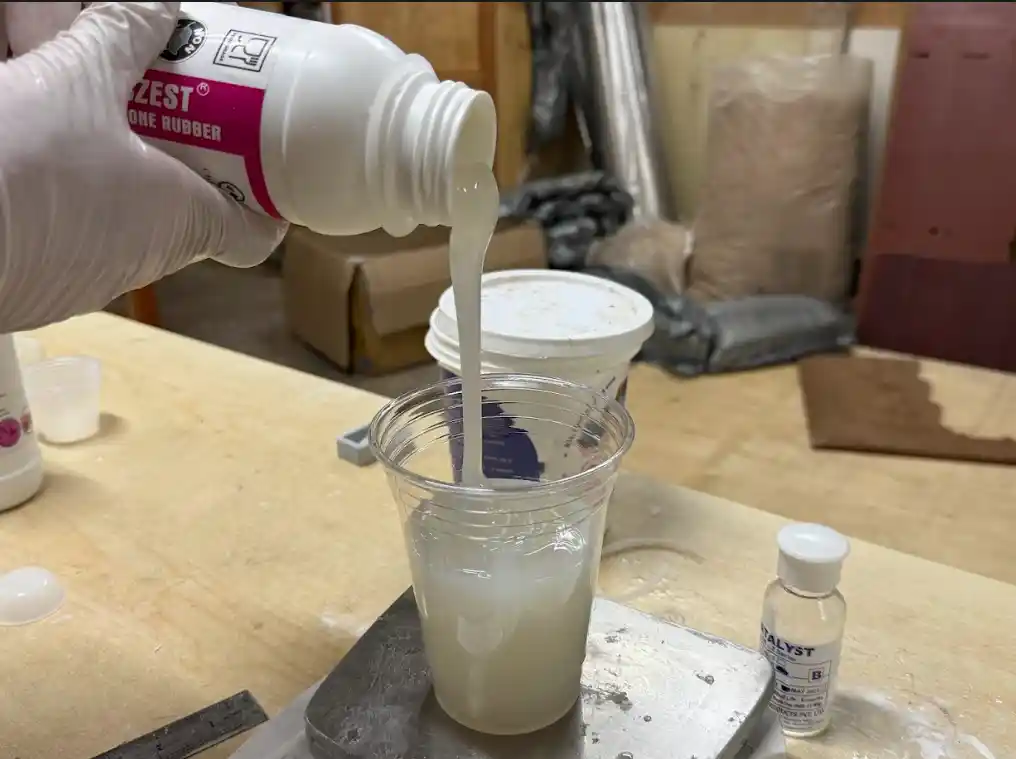
We used the Siloczest Liquid Silicone Rubber LSR 225 and its catalyst. The mixing ratio is 100:5 which means for every 100 parts of silicon rubber you need to add 5 parts of catalyst. Here is the Data Sheet for the silicon rubber we used.
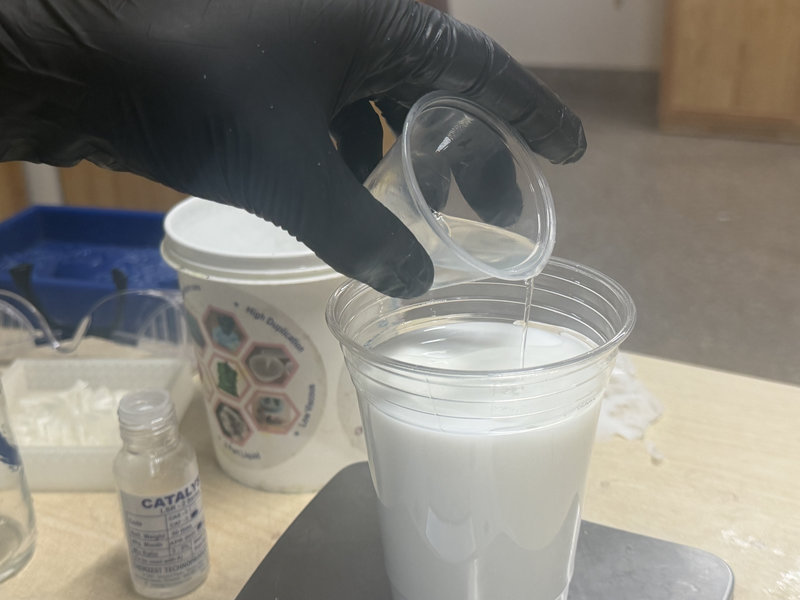
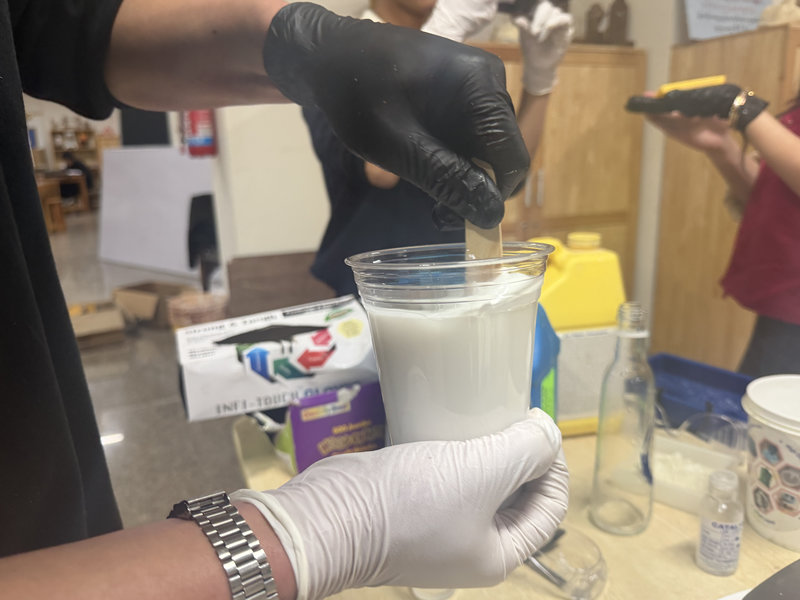
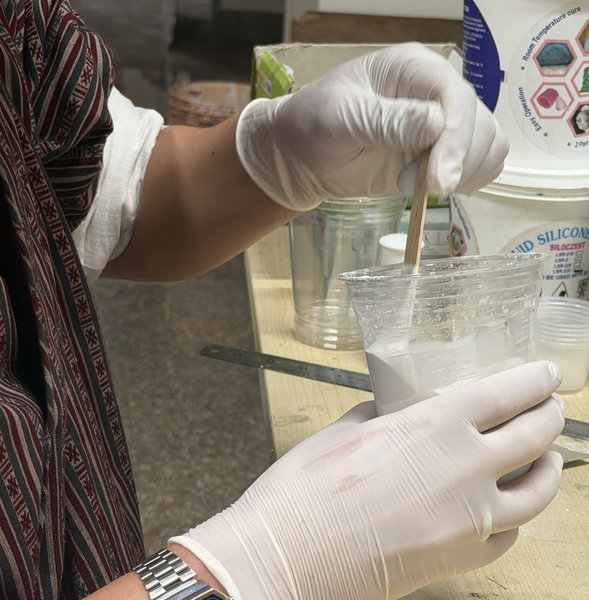
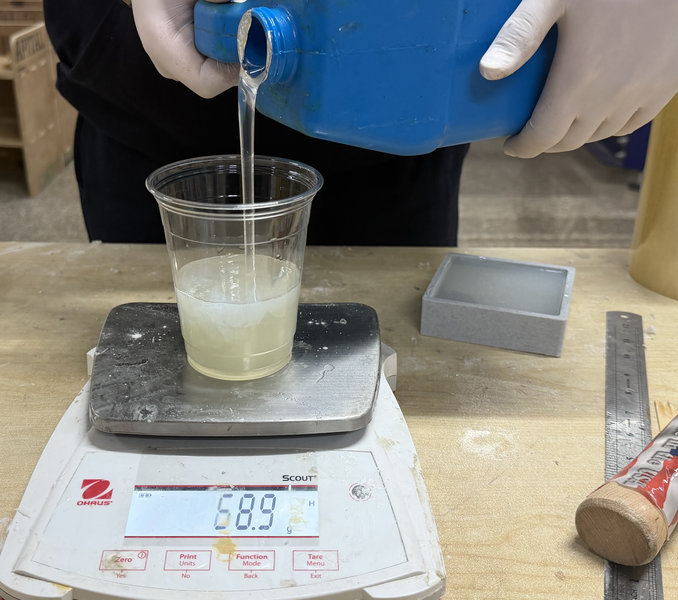
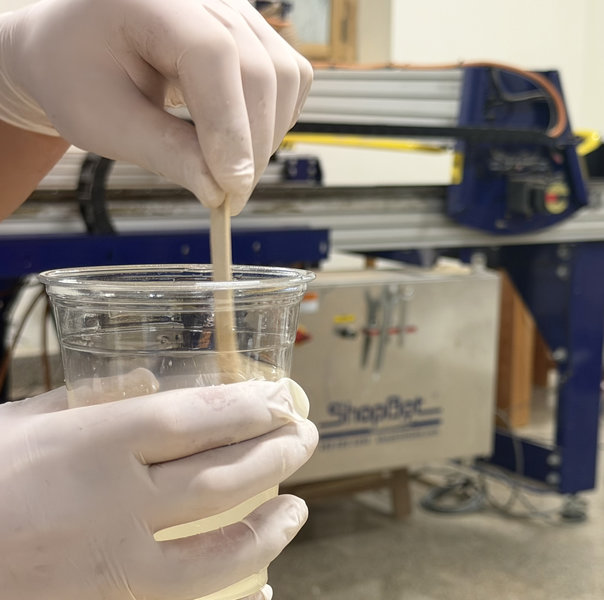
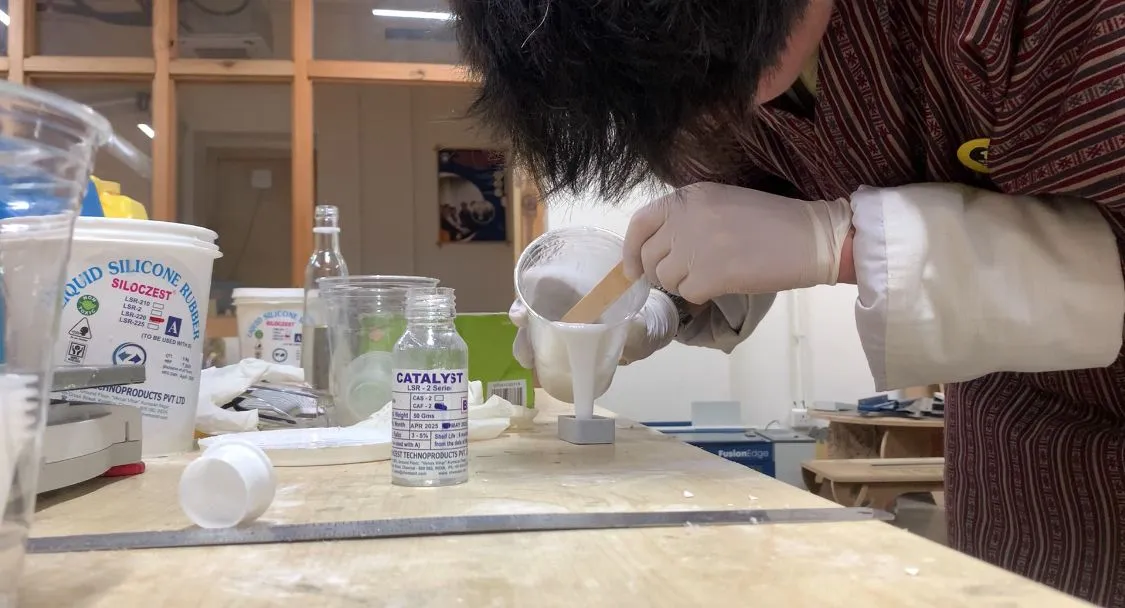
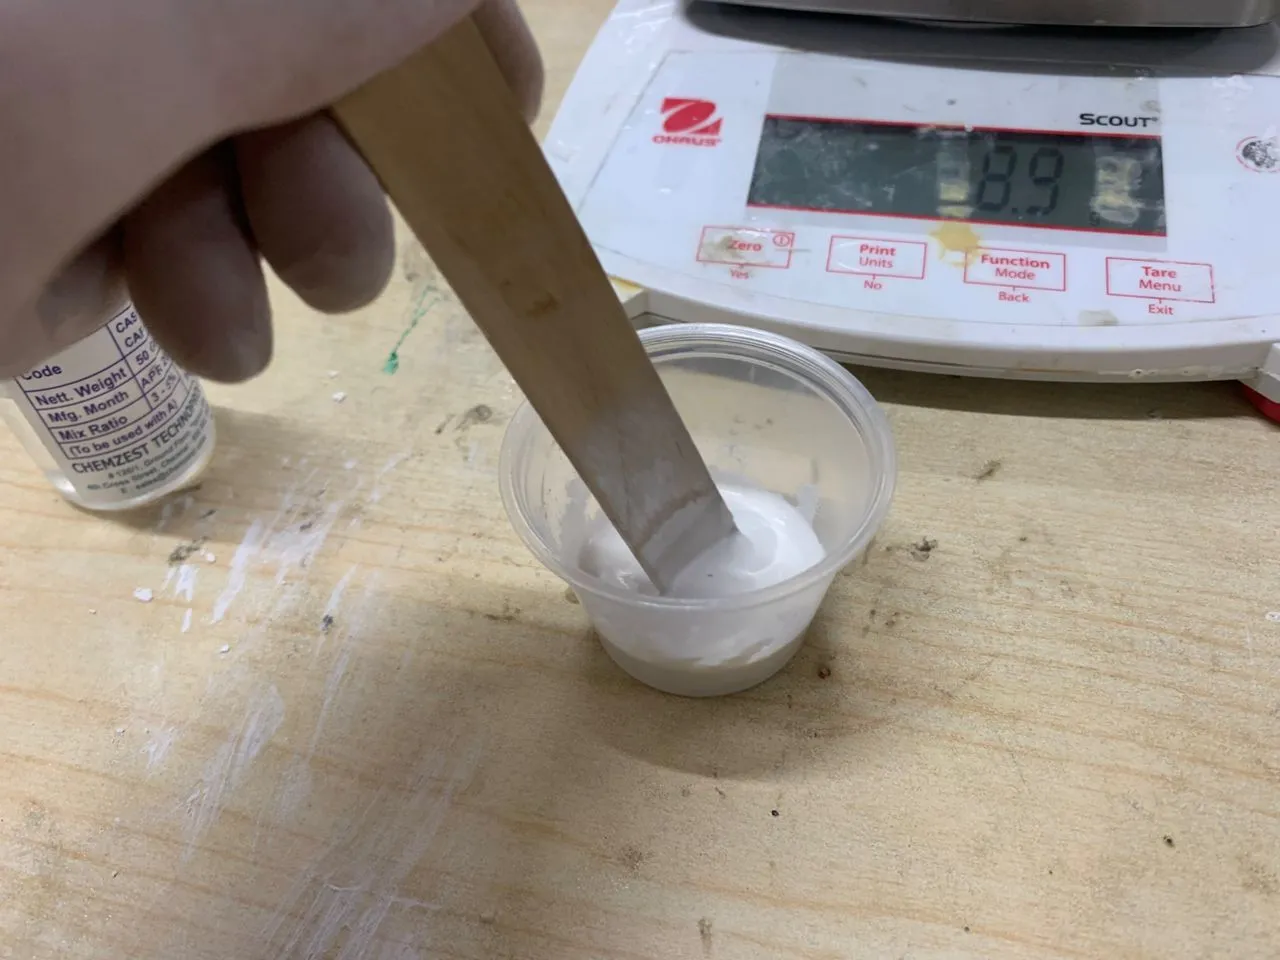
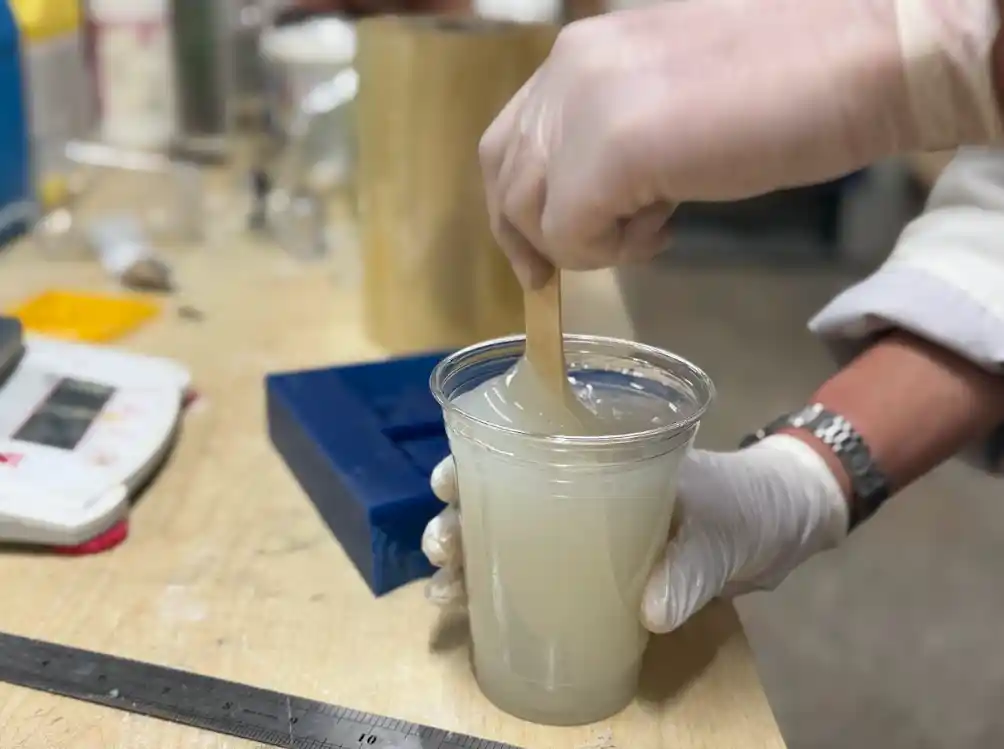
We first added Part A which is the silicon rubber to the mixing container and then added Part B which is the catalyst. We then mixed them together thoroughly to make sure the catalyst was evenly distributed throughout. We mixed for about 3 to 5 minutes to make sure it was well combined.
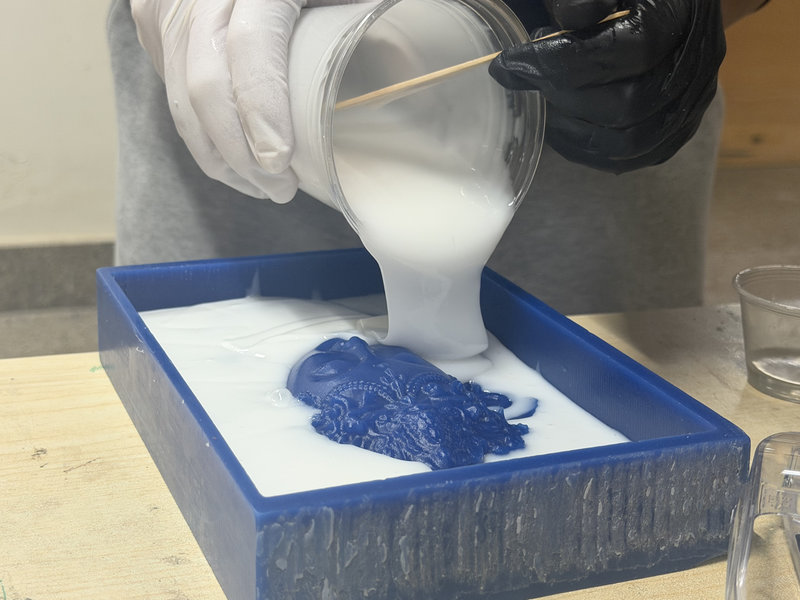
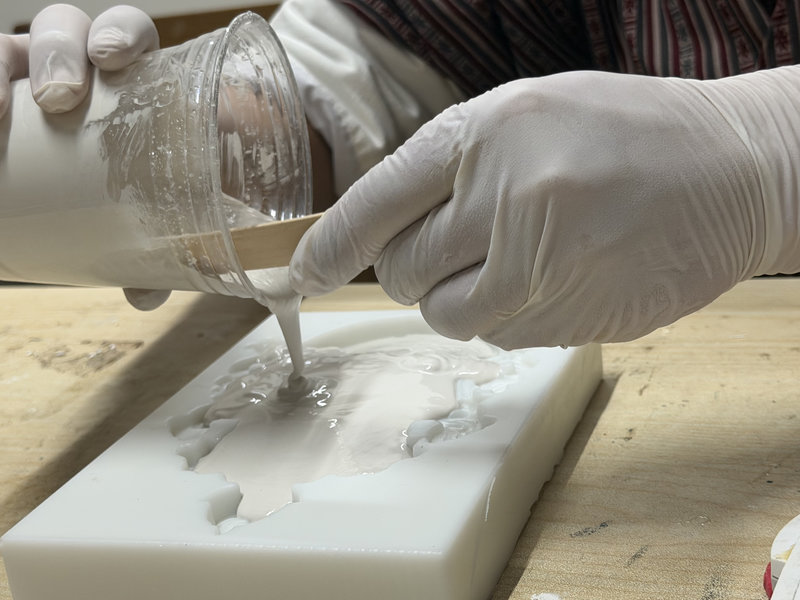
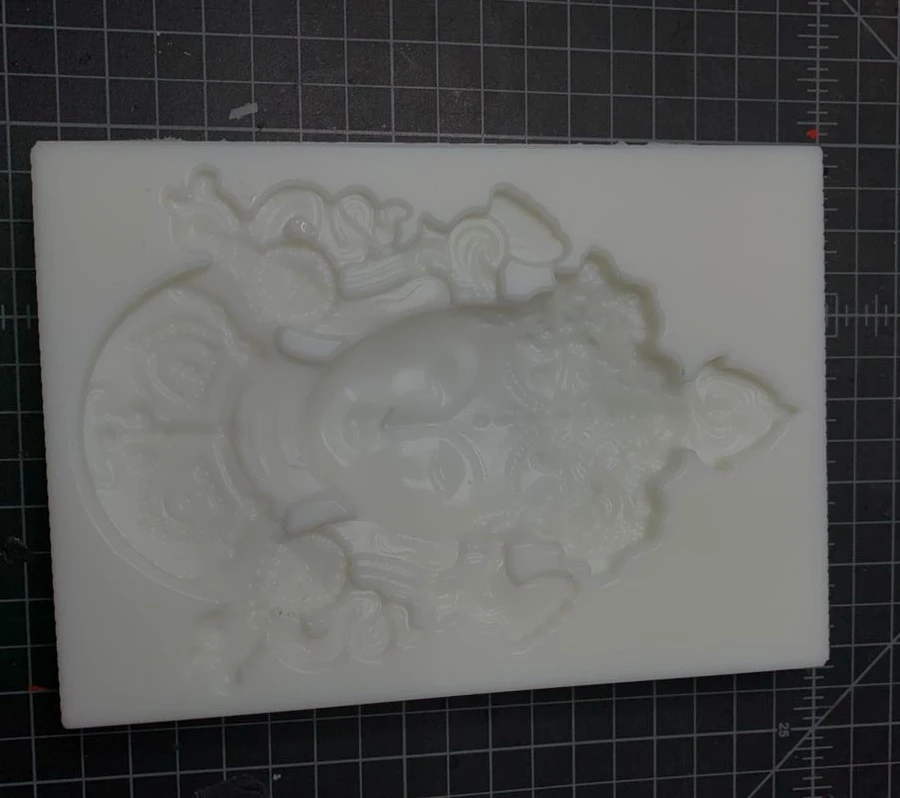
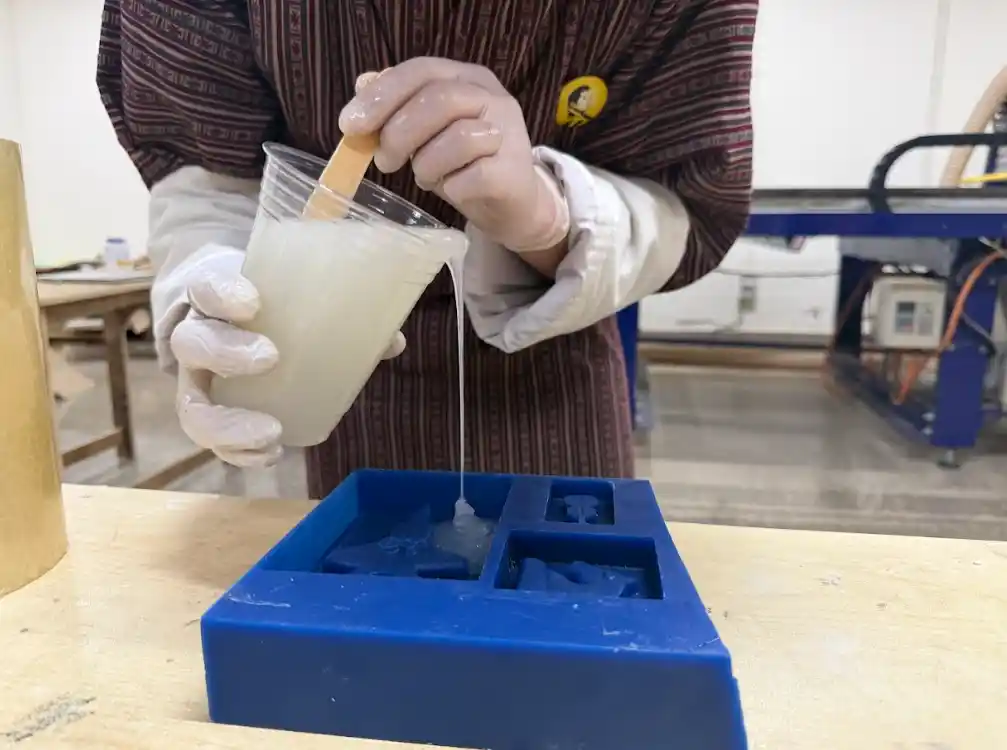
Then we carefully poured the mixture into the mold making sure not to create any air bubbles and filling it up completely to get a good negative mold.
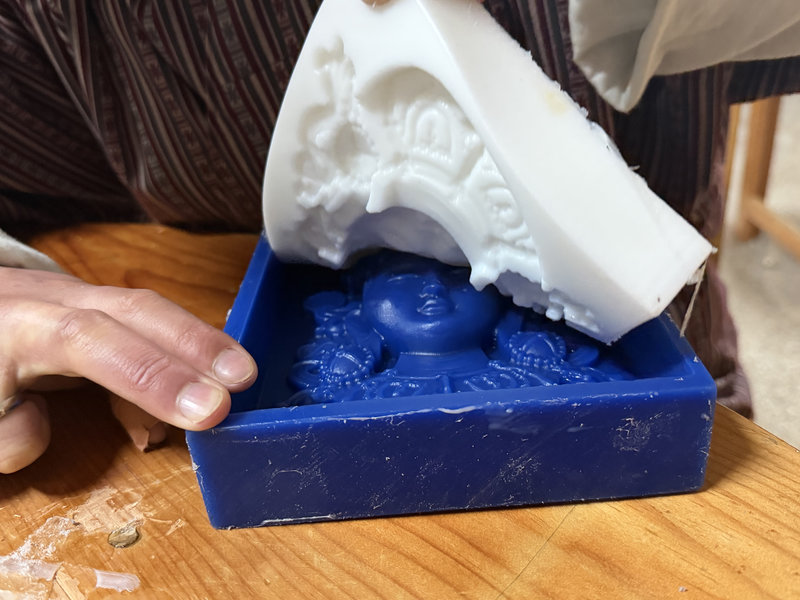
After that we waited for the silicon rubber to harden which took about 24 hours. Once it was hardened we carefully removed the negative mold from the positive mold and we were ready to cast! This is the negative mold we made:
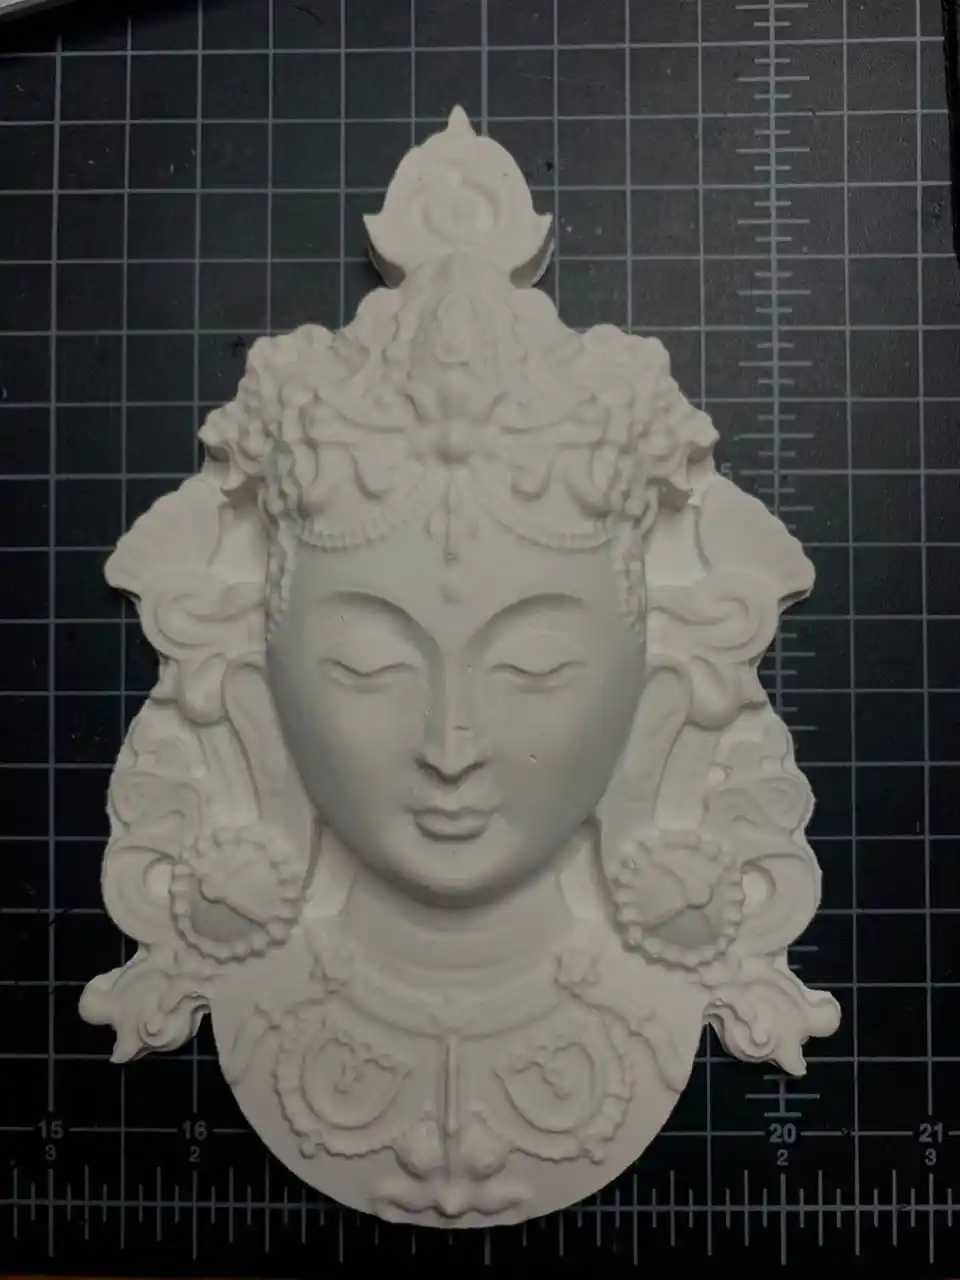
After that we used Hydrostone which is a type of plaster to cast our parts using the negative mold. The mixing ratio for Hydrostone and water is 100:30 which means for every 100 parts of Hydrostone you need to add 30 parts of water.
This is the final casted part using the negative mold:
Now let's make the negative mold for my horn pendant and F15 fighter jet using the same process! ^-^
I added Part A and Part B to the mixing container and mixed them together thoroughly for 3 to 5 minutes to make sure everything was evenly distributed.
Then I carefully poured the mixture into the mold making sure not to create any air bubbles and filling it up completely.
After 8 hours I carefully removed the negative mold from the positive mold and I was ready to cast! This is the negative mold for the horn pendant:
Then I used Hydrostone to cast the horn pendant using the negative mold. I mixed it with water in the right ratio and poured it into the negative mold carefully to avoid any air bubbles.
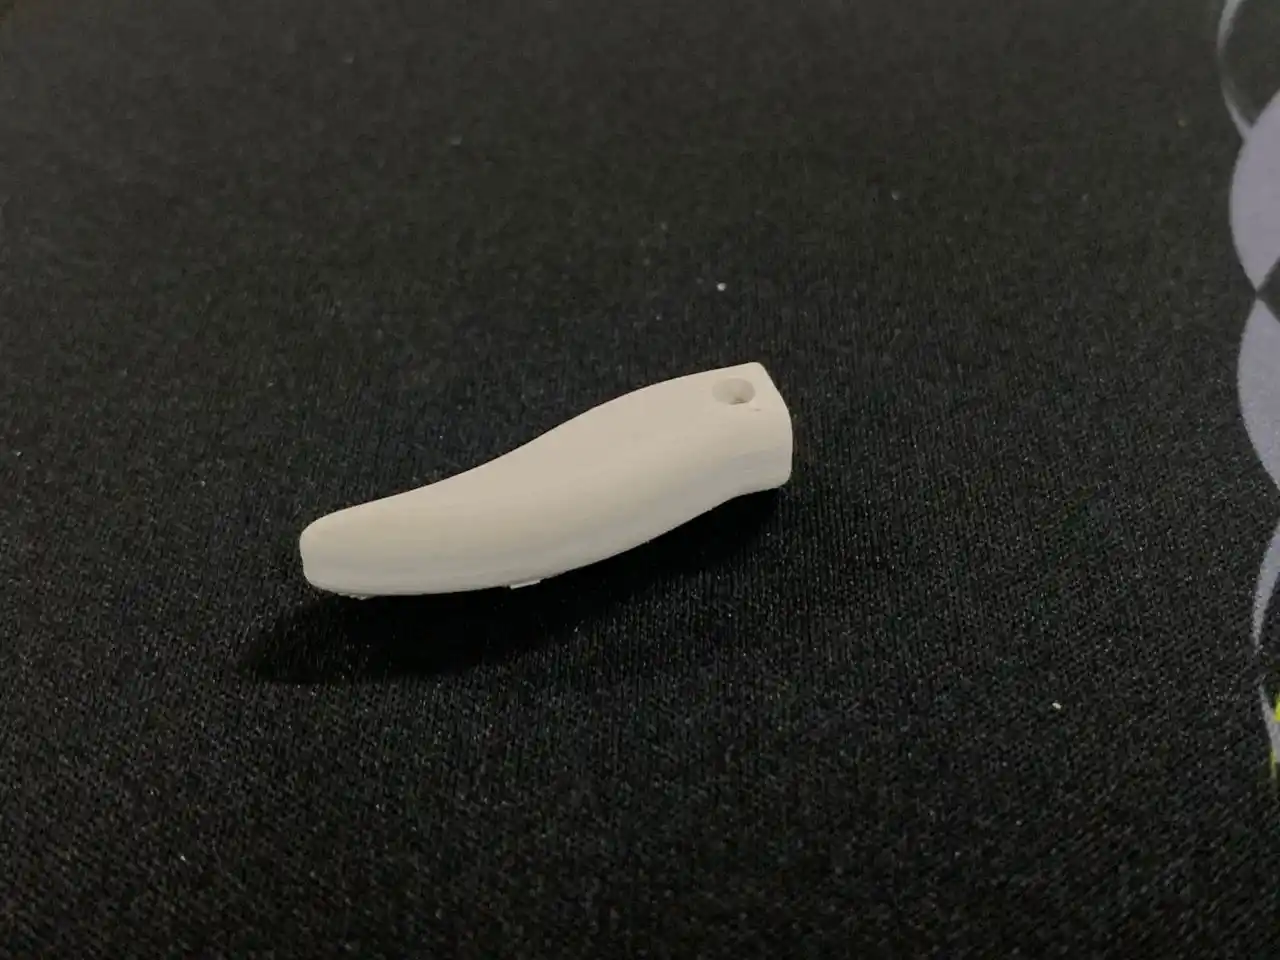
After 24 hours of hardening this is the final casted horn pendant:
For the F15 fighter jet I used a different silicon rubber which is the Siloczest LSR 135.
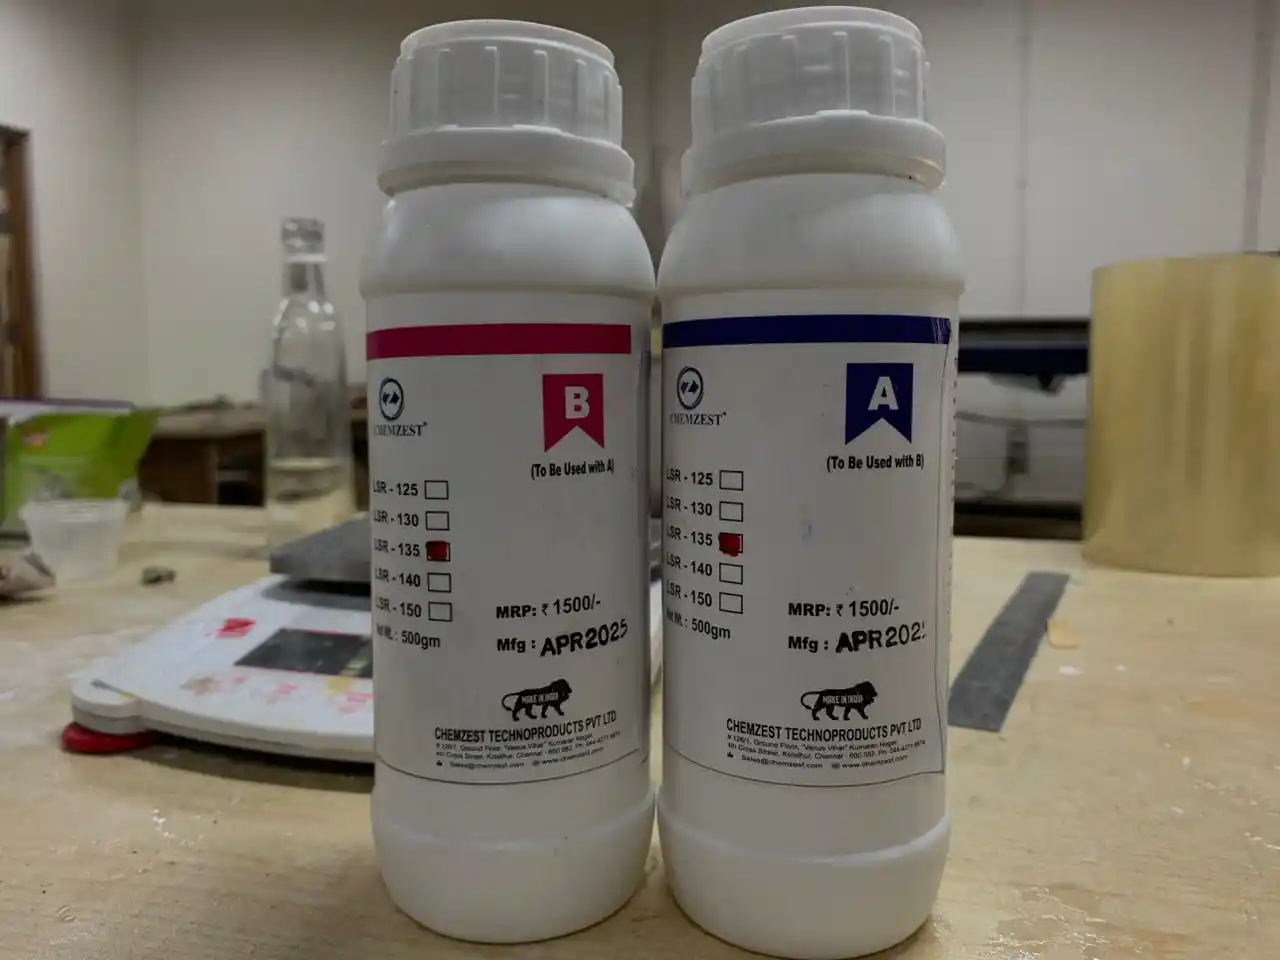
The mixing ratio for this one is 1:1 which means for every 1 part of A you add 1 part of B.
I added Part A and Part B to the mixing container and mixed them together thoroughly for 3 to 5 minutes to make sure everything was evenly distributed.
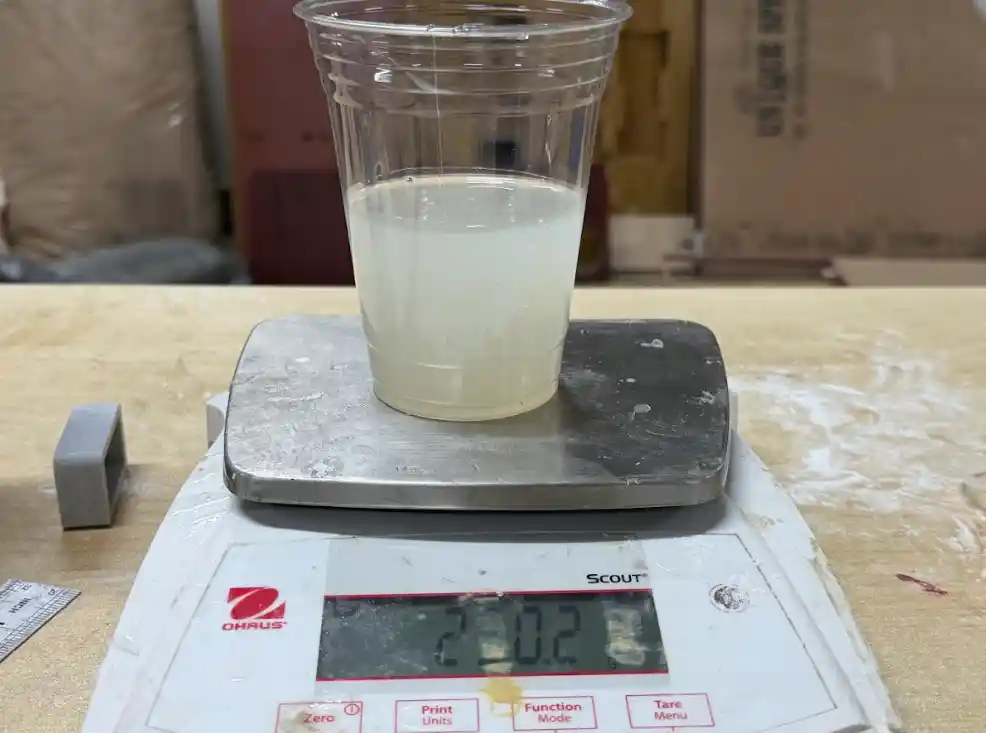
After mixing I carefully poured the silicon rubber into the mold making sure not to create any air bubbles and filling it up completely.
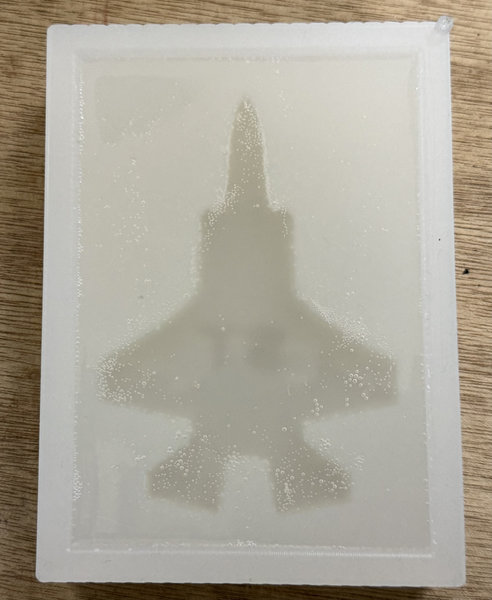
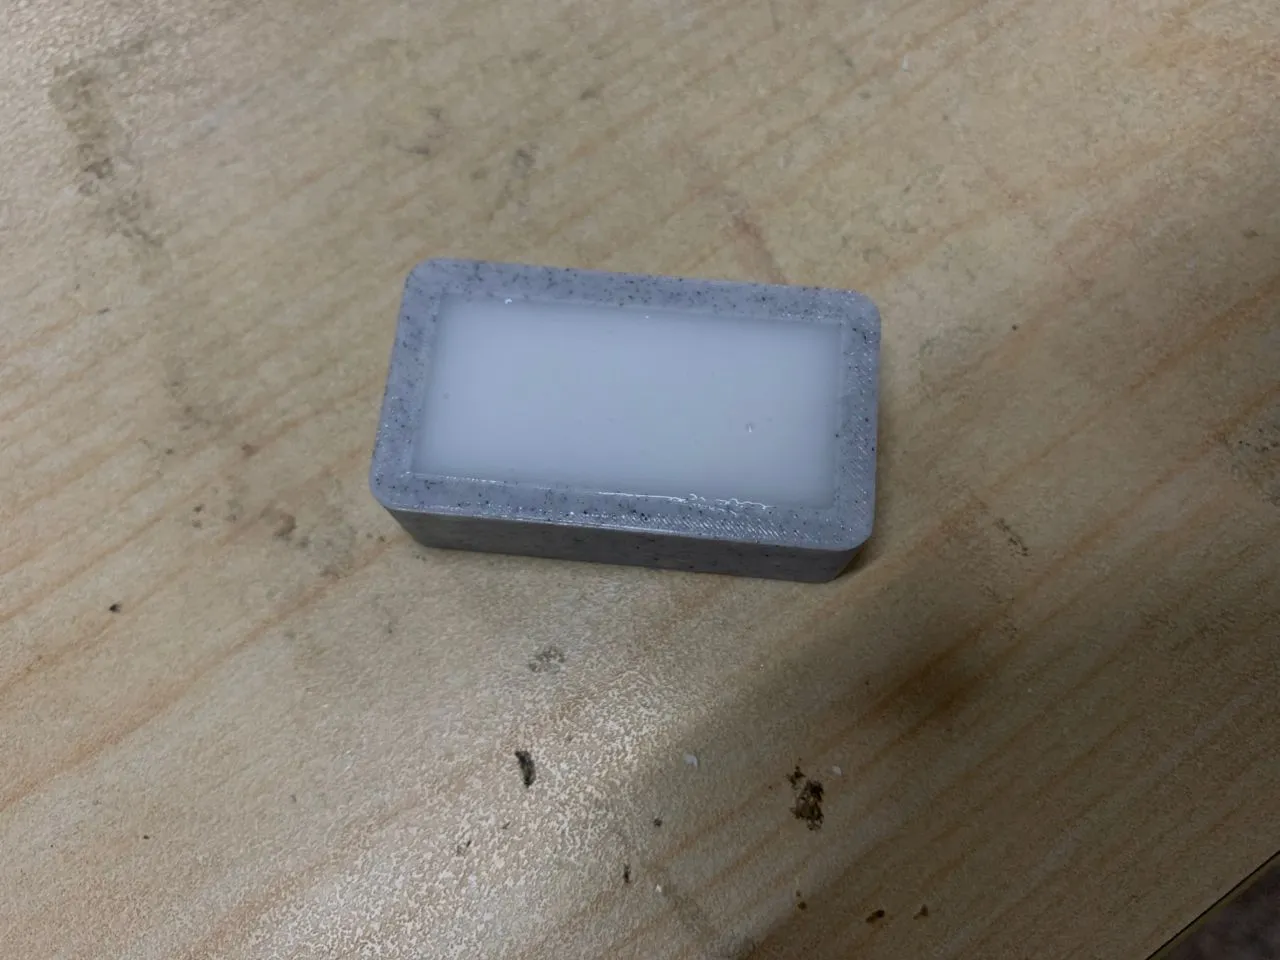
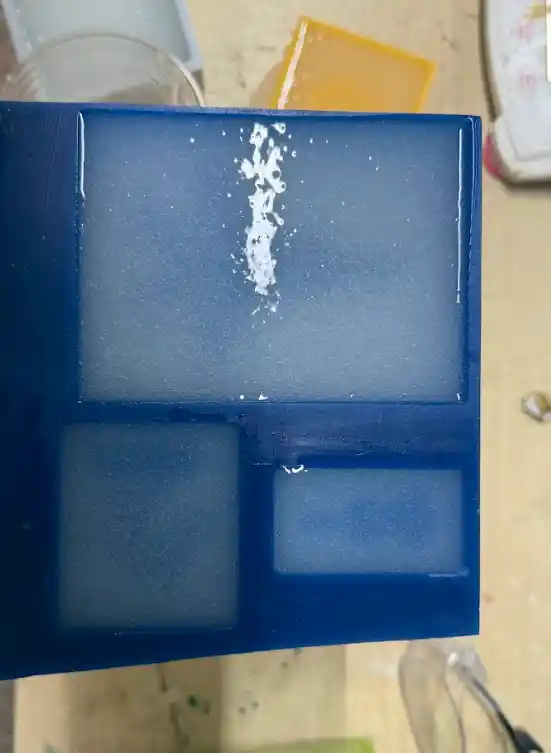
Here is how the mold looked right after pouring:
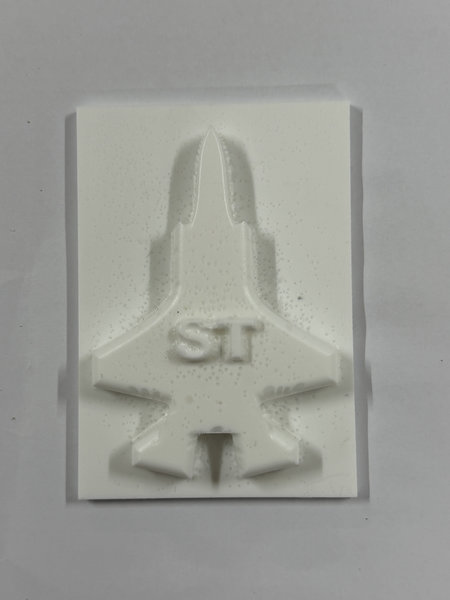
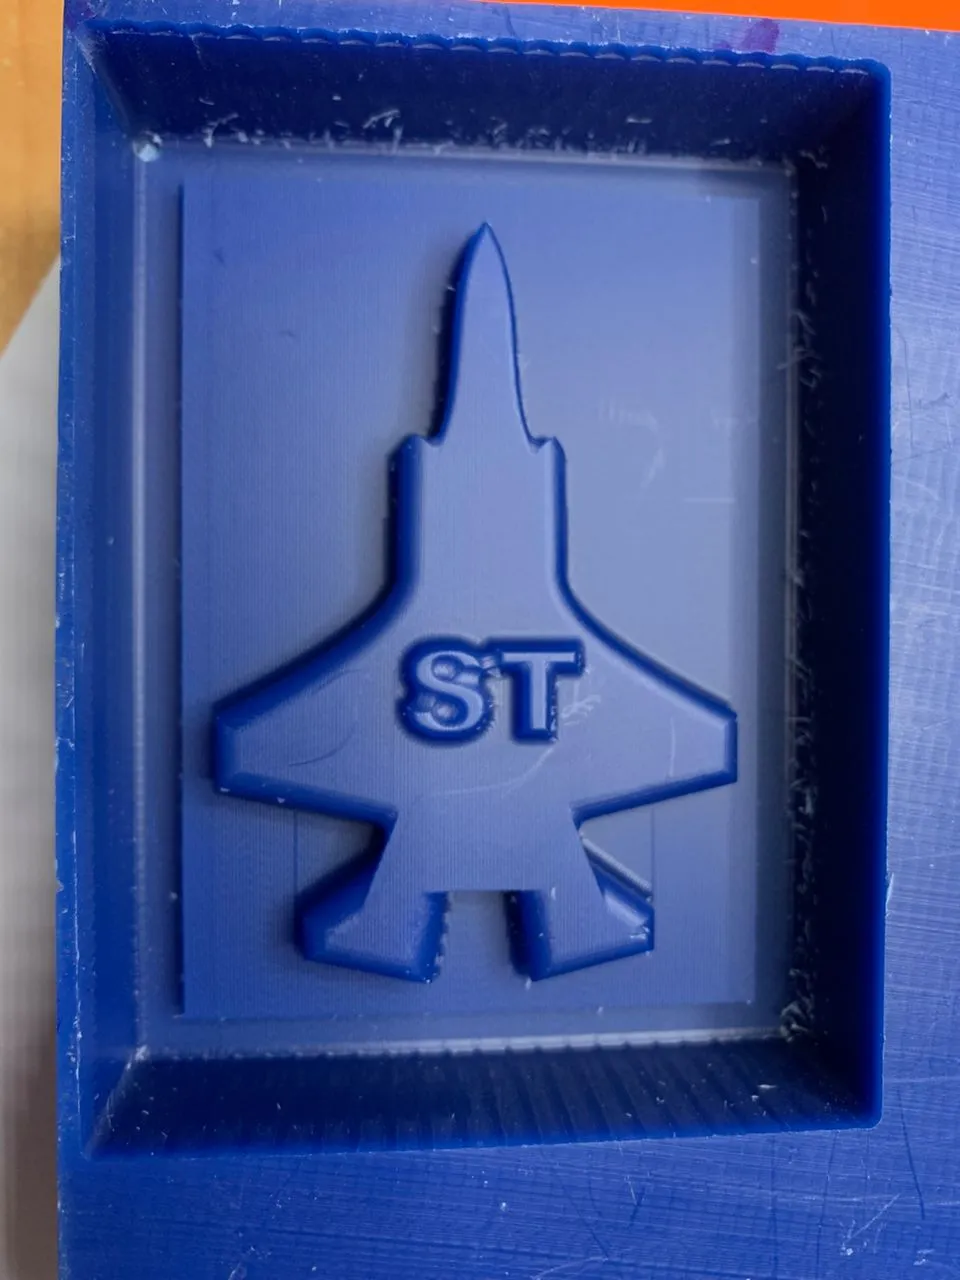
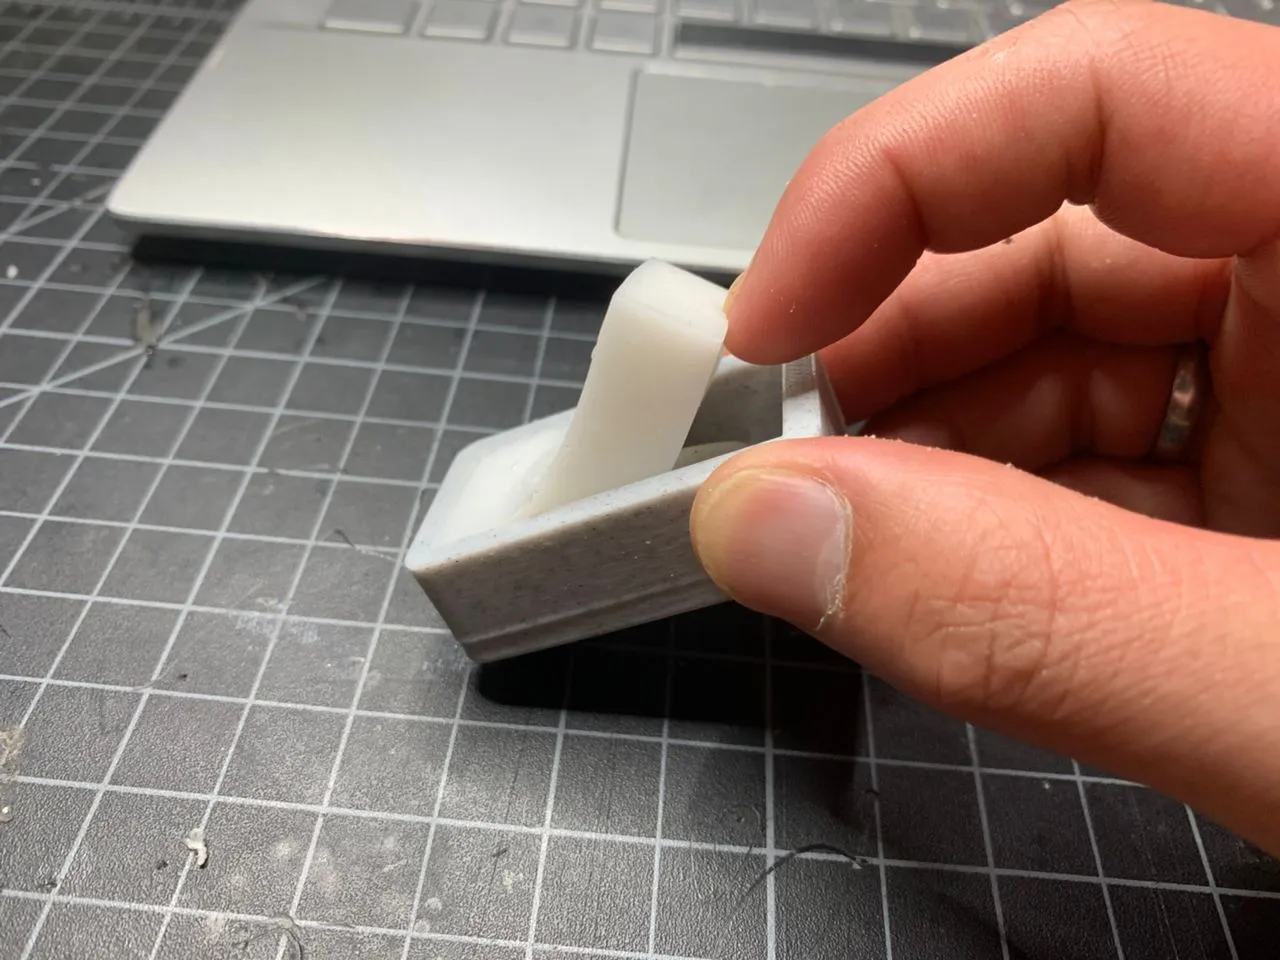
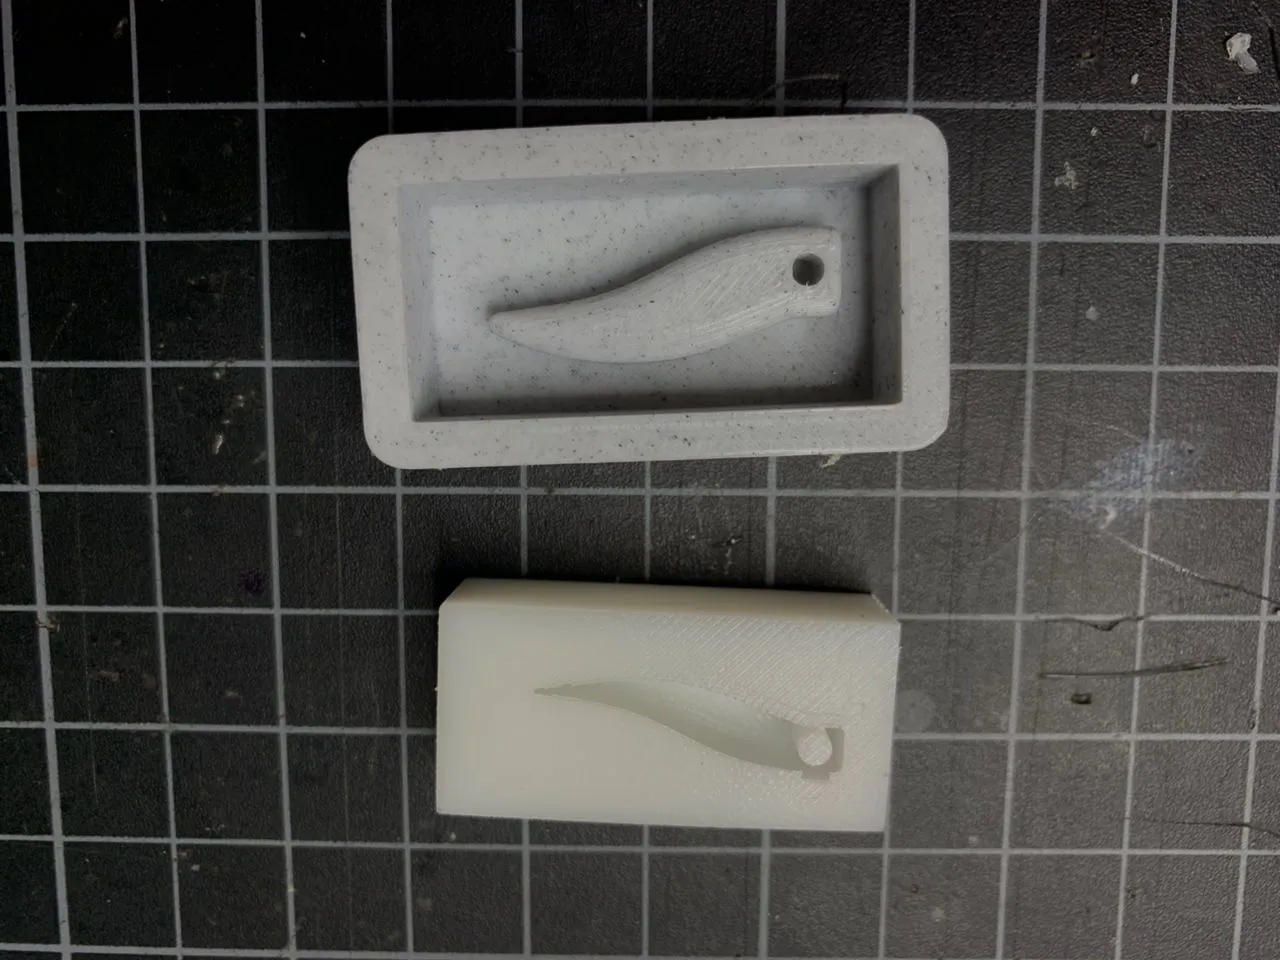
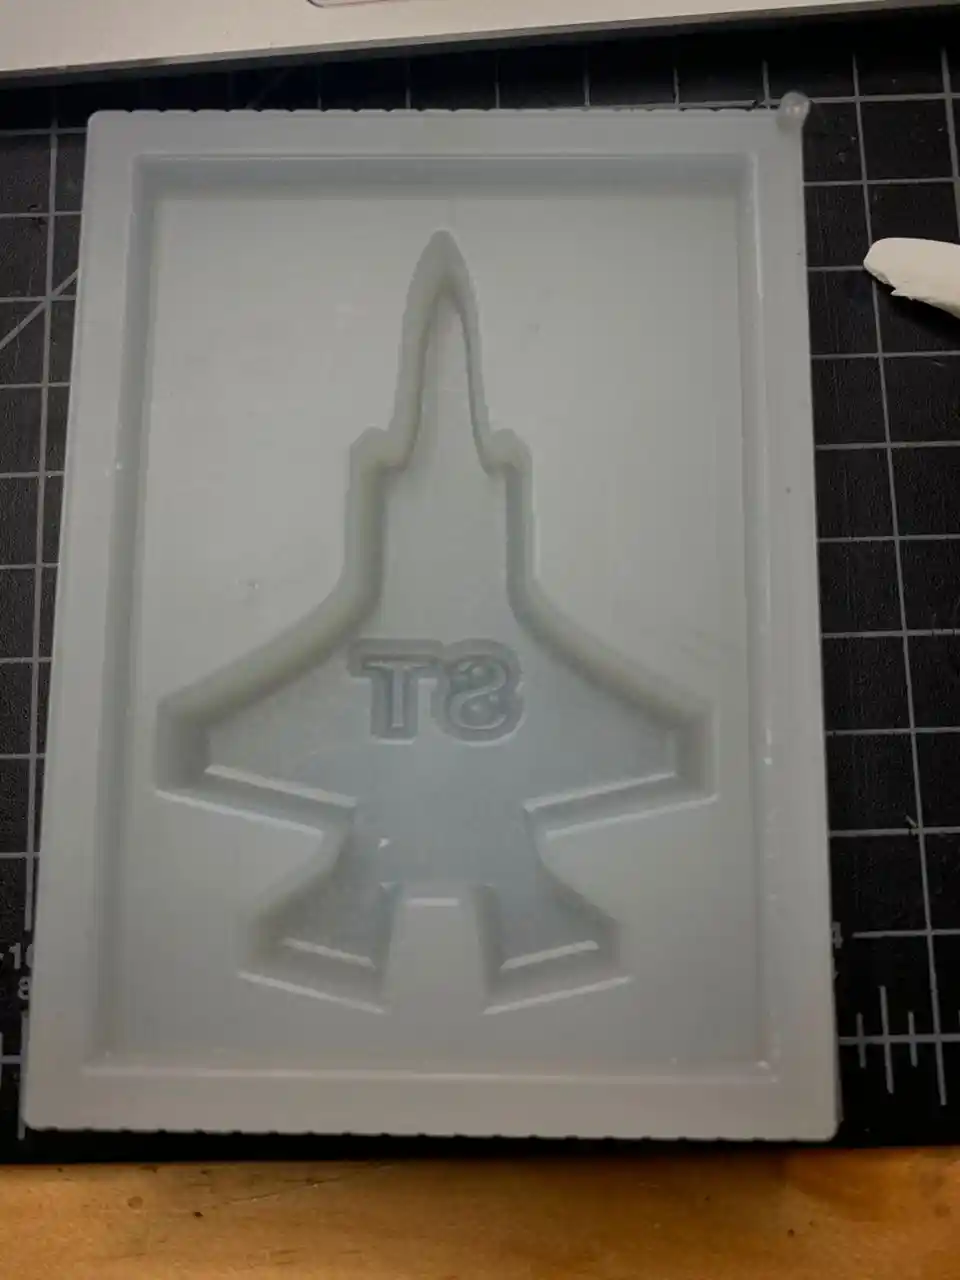
And here is the final negative mold for the F15 fighter jet after hardening:
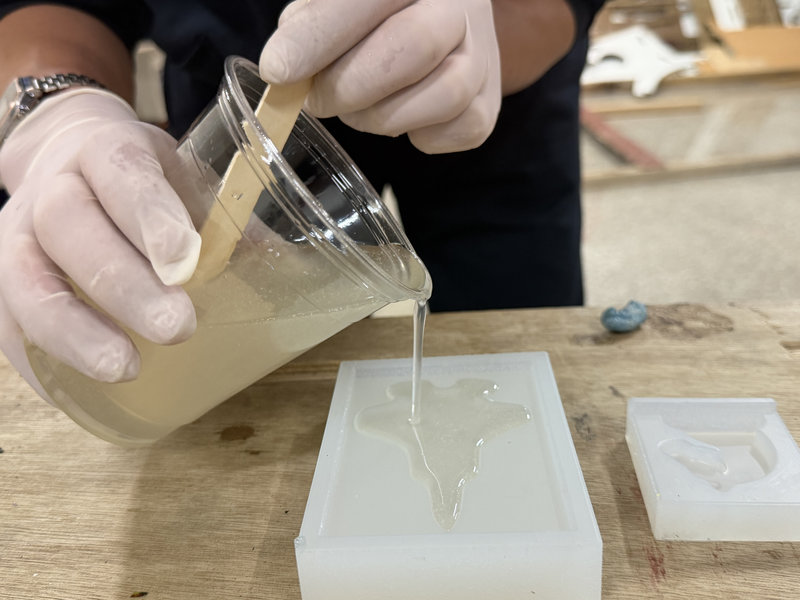
After that I used Smooth-Cast 305 to cast the jet. Here is the Technical Bulletin and the Safety Datasheet for it.
A few important things to keep in mind when using Smooth-Cast 305. Make sure to pre-mix both parts before measuring them. Then measure equal amounts of Part A and Part B, combine them and mix thoroughly for about 3 minutes. After that pour the mixture carefully into the mold making sure there are no air bubbles and that the mold is filled completely.
Here is the final casted F15 fighter jet:
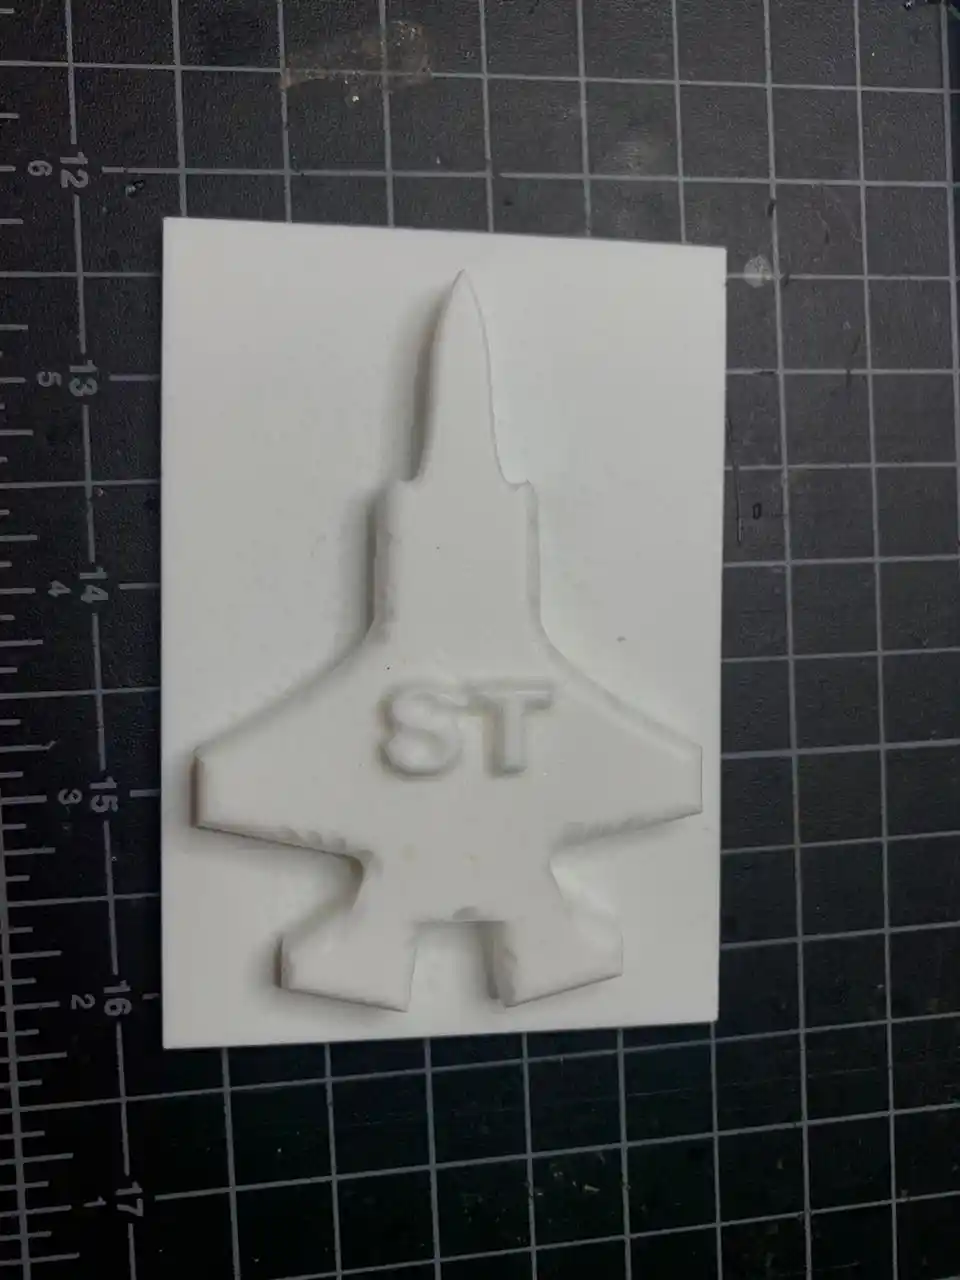
Yayyyy! The F15 fighter jet cast is done! 😄
Comparing 3D Printing vs Milling for Molds
After doing both processes this week I got to experience firsthand how different they actually are. 3D printing is definitely the easier and faster option since you just export your STL and let the printer do all the work. The downside is that FDM prints leave visible layer lines on the surface which can show up on your final cast. Milling on the other hand takes more setup and preparation but the surface finish you get from the wax after the finishing pass is really smooth and clean. I think for detailed or precise molds milling is the better choice but for quick simple shapes 3D printing gets the job done. Overall both processes have their place and it really just depends on what you are making!
Surface Finish
For the horn pendant I used the 3D printed mold straight out of the printer without any sanding or postprocessing. The layer lines were there but since the silicon rubber is flexible it still captured the shape well enough for the cast to come out nicely. If I wanted a really clean smooth finish on the final cast I would probably sand it down next time but for this week it worked out fine!
Problems I Ran Into
The biggest thing I learned the hard way this week was estimating how much material you actually need before you start mixing. The first time I mixed the silicon rubber I ended up with way too little and had to quickly mix another batch to top it up which is not ideal because the two batches can cure at slightly different rates. After that I got better at calculating the rough volume of the mold cavity before mixing so I would not run into the same problem again. It is one of those things that sounds simple but you really only learn it by doing it! 😄
Files
Here are the design files for both molds:
Horn Pendant Mold: Fusion 360 Link
F15 Fighter Jet Mold: Fusion 360 Link
Reflection
This week was really fun and I learned so much about molding and casting. I really enjoyed designing the molds and going through the whole process of actually casting the parts. It was super interesting to work with so many different materials and figure out how each one behaves. The wax milling was probably my favorite part because I had never done that before and seeing the jet shape come out of the wax block was so satisfying. Overall it was a great week and I am definitely going to use these skills again in my final project! ^-^